Lee Burkhill: Award Winning Designer & BBC 1's Garden Rescue Presenters Official Blog
Beginner level
Planting a hedge can bring many benefits to your garden space. They can greatly reduce exposure and wind damage to plants. They also provide an environment for wildlife and beneficial insects whilst giving a more natural boundary to your garden. They add a design feature to your garden helping to define your garden. Planting a hedge can be relatively easy so Garden Ninja is here to show you the easiest and quickest way to lay a hedge.
There are many guides out there on how to plant a hedge, some confusing and others too brief. In true Garden Ninja style, I'm going to take you through the process step by step. Allowing anyone to follow this bulletproof guide to planting a garden hedge. I'll be guiding you through the various methods from bare root hedging to pot-grown hedges, and then cover how to create a dead hedge. So no matter what kind of garden hedge you're looking to plant, this is the one-stop guide for all your hedge planting guidance!
If, like me, you prefer to sit back and watch the guide, check out my YouTube video below. Hedges provide shelter, screening and privacy and are far nicer to look at than wooden fence panels in my opinion.
Before we jump in with spade in hand its important to gather the necessary tools before planting a hedge. Below are the key pieces of hedge laying equipment you will need before you begin.
Sharp garden spade - to remove turf and dig in your plants
Garden Fork - for cultivating the soil and adding aeration to the planting pockets
Wheelbarrow - to transport plants and remove soil/turf
Tape Measure / Trundle Wheel - to work out distances for planting
Canes - to mark out your plants and boundaries
Watering can - to give your new hedge a good drink!
Beth Chatto, the garden legend, has advocated choosing the right plant for the right place, and this couldn't be truer for hedges. In your haste to fit your new hedge, you need to take some time to consider which species best meets your needs.
Are you looking for an evergreen colour? Deciduous hedging that may fruit and then drop its leaves each year. Something that's fast-growing, slow-growing, bushy or upright, thorny or smooth? Deterrent or aesthetic? As you can see, there are loads of criteria.
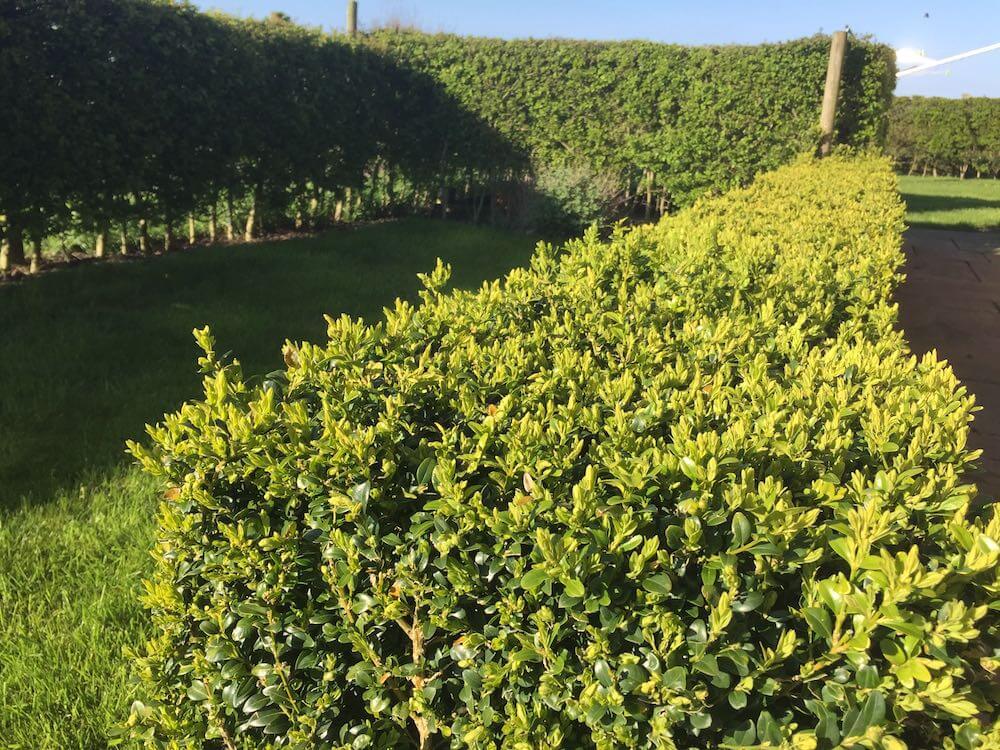
Box (Evergreen) and Hawthorn (deciduous) hedging and their height difference are shown above.
It's also important to decide whether to choose container-grown plants or bare root?
i) Bare roots are much cheaper and require planting when they are dormant during the winter. They require less manual effort as they are smaller but take longer to establish.
ii)Container-grown plants give an instant effect, require more initial cultivation and irrigation and are more expensive. They are preferred if you need a quick boundary or hedge establishment.
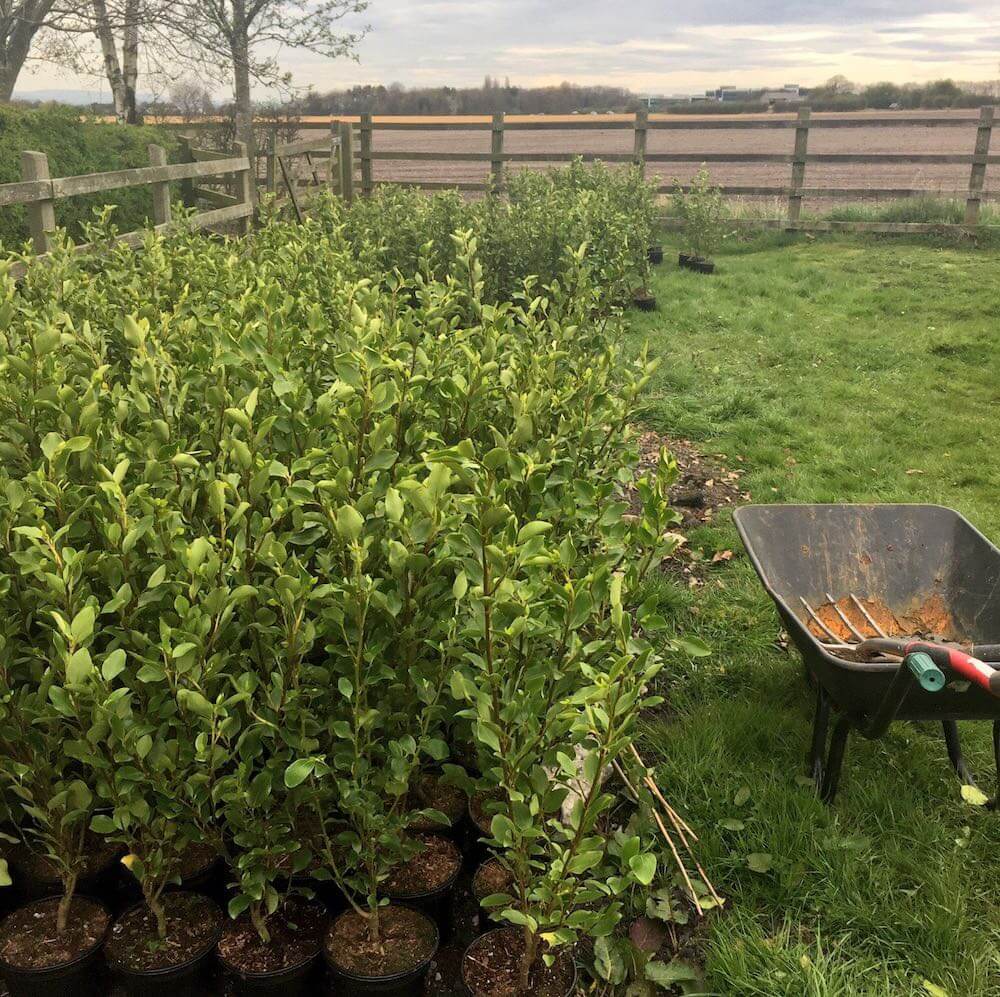
One of the most important is choosing the correct plant for the soil and aspect of the garden. Consider how exposed the site is, the soil type (clay, silt sandy), drainage and how much sun the plants will get. The RHS Plant finder is an excellent resource for more details. Potted hedging plants like the ones below give an instant effect.
Top 10 Hedging Plant Species
Here's a quick list of the top 10 hedging plants and their suitability.
New Zealand broadleaf (Griselinia littoralis) - Fast growth, bushy hedging, evergreen, full-sun, exposed, freed draining, any soil
Leyland cypress (Cuprocyparis leylandii ) - Super fast growing, tall hedging, evergreen, part shade/sun, exposed, clay tolerant, any soil - Plant with caution, they grow incredibly tall and are not suitable for residential areas.
Yew (Taxus baccata ) - Moderate growth, bushy hedging, evergreen, full sun/part shade, protected, free draining, any soil
Barberry (Berberisdarwinii) - Slow growth, bushy hedging, evergreen, full sun/part shade, part shade/sun, exposed, clay tolerant, any soil. Thorns and barbs are deterrents.
Cherry laurel (Prunus laurocerasus) - Moderate growth, bushy hedging, evergreen, full sun/part shade, protected, free draining, any soil
Hornbeam (Carpinus betulus)- Moderate growth, formal hedging, deciduous, full sun/part shade, protected, free-draining, any soil
Beech (Fagus sylvatica)- Fast growing, formal hedging, deciduous, part shade/sun, exposed/sheltered, clay tolerant, any soil
Hawthorn (Crataegus monogyna)- Fast growing, informal hedging, deciduous, part shade/sun, exposed/sheltered, clay tolerant, any soil, deterrent and thorny, good for wildlife and rural areas.
Privet (Ligustrum ovalifolium) - Slow growth, bushy hedging, evergreen, full sun/part shade, part shade/sun, exposed, clay tolerant, any soil. Drought tolerant.
Preparing your soil for planting hedges is vital. Fail to prepare and prepare to fail. The more work you put in at this stage, the higher the chance of planting success. Firstly, you will need to remove any turf that may be in the area, planting through turf leads to grass and weeds growing in between your hedges and can make for a really messy-looking hedge, so avoid it at all costs!
Removing turf
Take up the turf either using a spade or a petrol turf cutter. If using a spade, slice through the turf at a depth of 1-2 inches. Then slice under the turf to remove it.
Alternatively, you could use a petrol-powered turf cutter to take all the hassle out of lifting large areas of turf. It depends on the amount of turf you need to lift.
Cultivating soil
Digging over the soil for your hedges helps break up compaction, aids drainage and adds air to the soil. This enables your newly planted hedges to easily root and establish in the soil. You can do this either with a spade and fork, turning over the soil until it's broken into a suitable tilth (crumbly texture), or with a petrol-powered cultivator.
Ensure you cultivate a 60cm wide trench for your plants, this will create a neat boundary for the hedge and allow you to edge the lawn that may adjoin it. Remove any rocks or debris, and now you're ready for the exciting part: planting the hedges!
Please don't be tempted to add buckets of lovely compost! The reason is that compost degrades quickly, and when planting a hedge, it can lead to the hedge dropping and becoming uneven. If you want to use compost for hedges, then please use it as a mulch afterwards!
4. Digging in & planting hedges
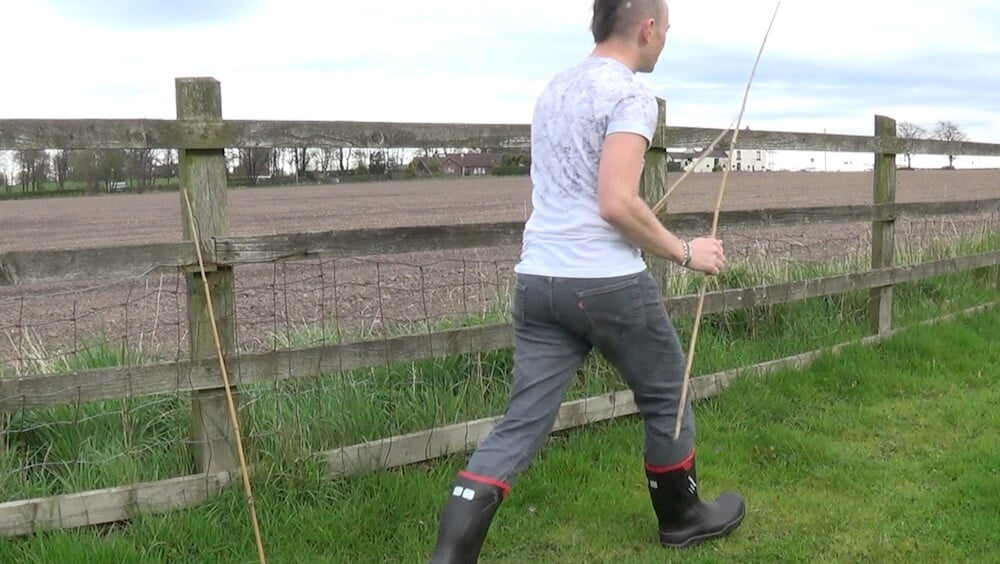
Before you rush straight into planting, make sure you work out the plant spaces; again, the RHS website can help. I tend to use canes to mark out each meter and then work out how many hedges to place within that meter. Use your trundle wheel to measure out the spaces in record time.
Use canes to measure out each meter to then place your hedging plants.
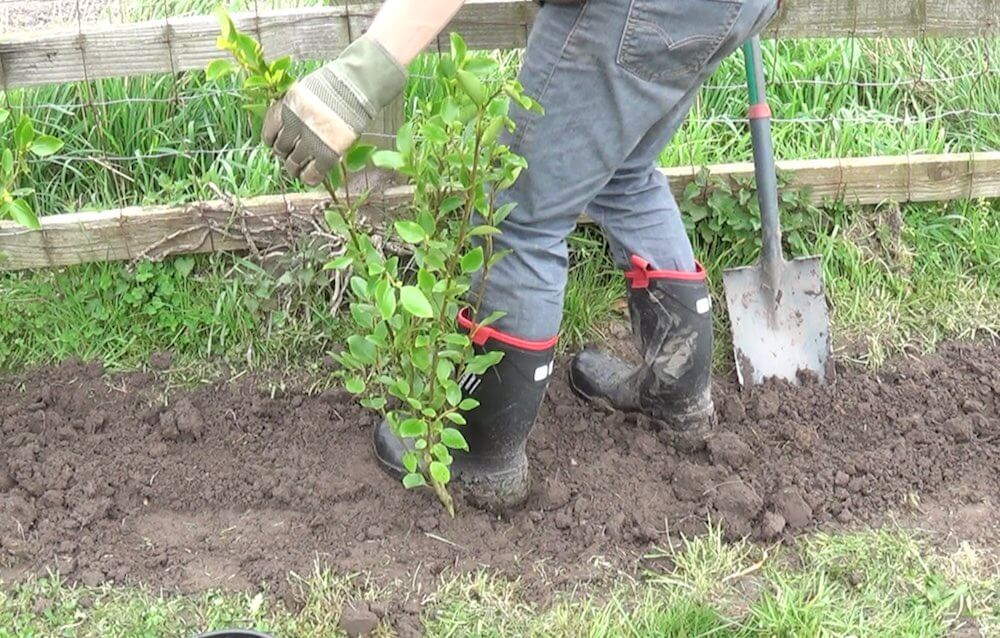
You will need to dig in your hedging plants to the required depth for the plant species you have picked. For the Griselinia littoralis, I've used one and a half depths of the pot in which they arrived in to work out how deep the hole should be. I also dug the holes twice as big as the pot. This allows you to break up the soil, aiding root growth and irrigation.
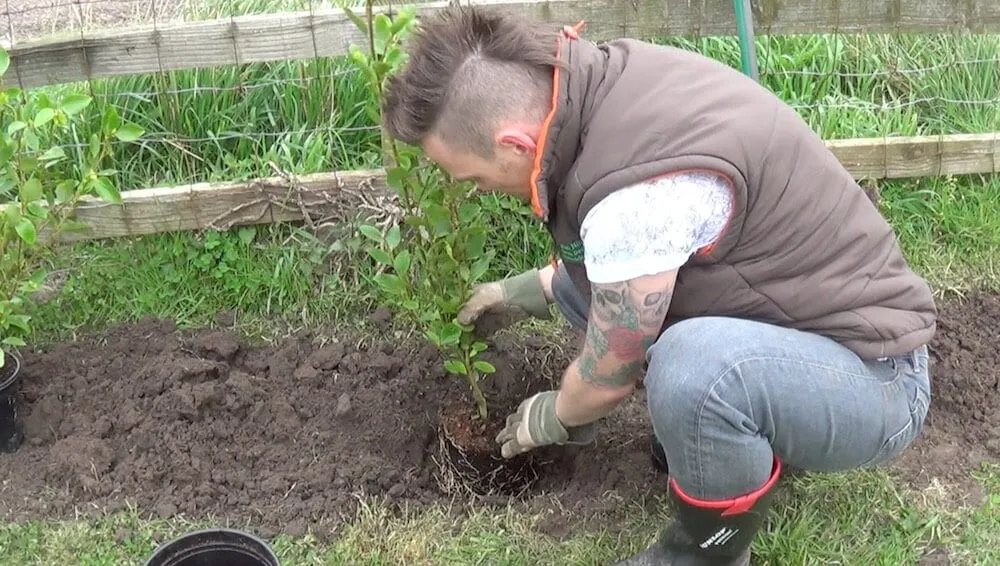
Then, tap the plant out of the pot, tease out the roots, and place it in the planting hole you've just dug. Ensure that the level of the plant is the same as it was in the pot. Don't be tempted to plant it deeper or cover the stem, as this can cause it to rot.
If it's too deep, backfill slightly before placing it in. Then you need to compact the soil firmly around the plant using your hands. Once you have done this, you can then use your heel to carefully 'heel' in the plant to ensure it's stable and well held in the soil. It also helps remove air pockets.
Heeling in your hedging plants is essential so they are secure and can take root quickly.
Then it's a case of doing this for each hedge plant or bare root. It may be best to recruit some friends, and pay them with beer and a BBQ to help you plant. Especially if, like me, you have 300 plants to plant up!
5. Mulching and watering hedges
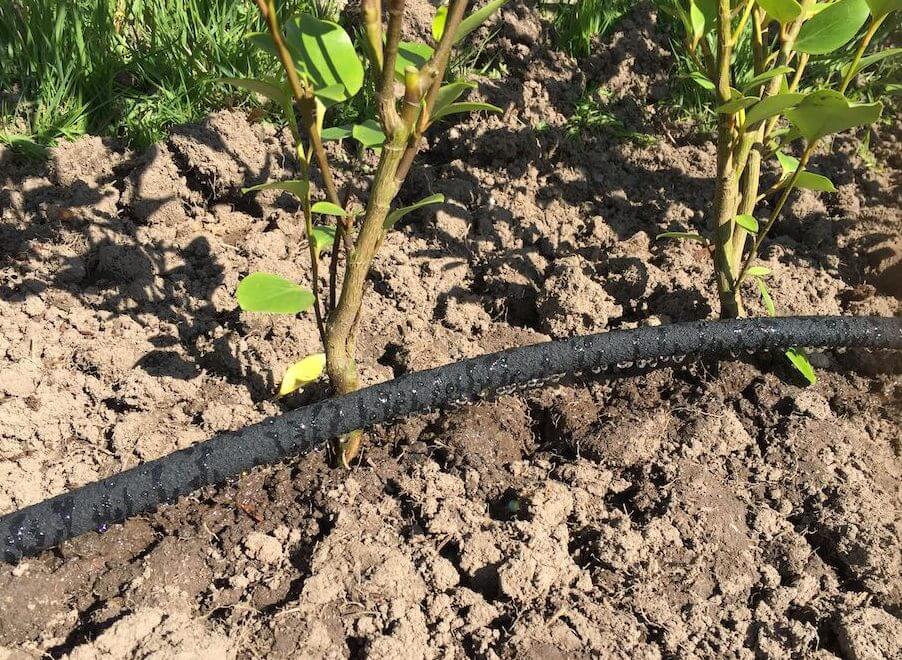
Once planted, you will need to water your hedges thoroughly. Given their lack of root structure in the new soil, it is essential to ensure they have sufficient water to help sustain them and enable them to send out new growth and roots. Laying a seep hose or irrigation can help save time in watering your hedges and can be attached to a timer if needed.
New hedges will need to be watered at least twice a week, or even daily, if the temperature is high.
Top tip: It's better to give a good soaking once or twice a week than a light water every day.
Mulching the hedge can help retain moisture and feed your new hedges. Good-quality compost is an excellent mulch and will help feed your hedge plants slowly over the season.
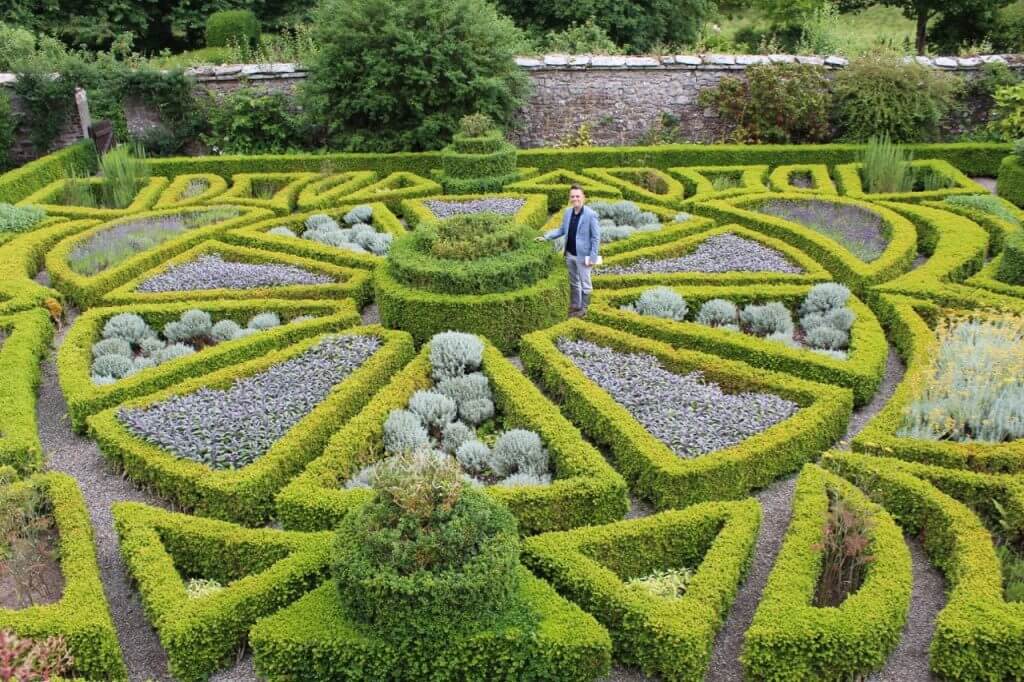
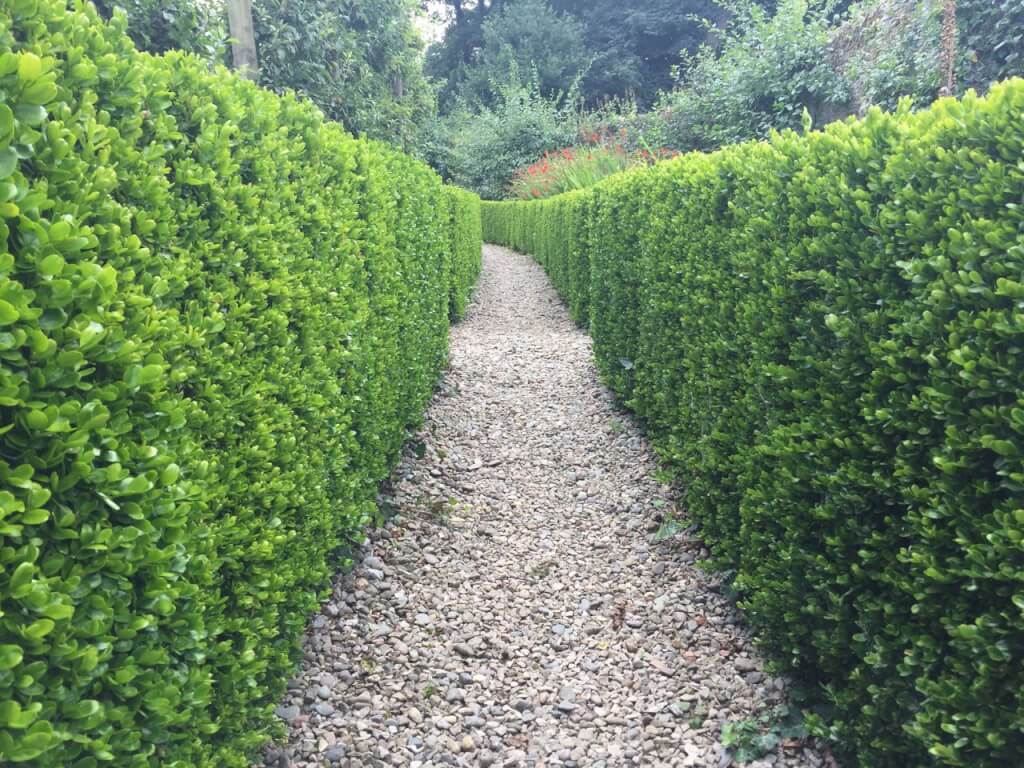
Formal hedging uses clipped straight lines to give a clean, sharp, and symmetrical viewpoint. Clipped box, yew or hornbeam are all classic examples of formal hedging. These are usually considered higher maintenance and can have a dramatic effect on the garden.
Knot gardens often used clipped box as a low hedge to mark out the areas or parterre of the garden design. The key to these styles of hedges is order and symmetry.
Informal garden hedging is far more relaxed and natural. Species such as Prunus spinosa, Cherry Laurel, Fuchsia and Hawthorn are often used as informal hedge species. They are usually less manicured, though not always, and have a softer look on garden design.
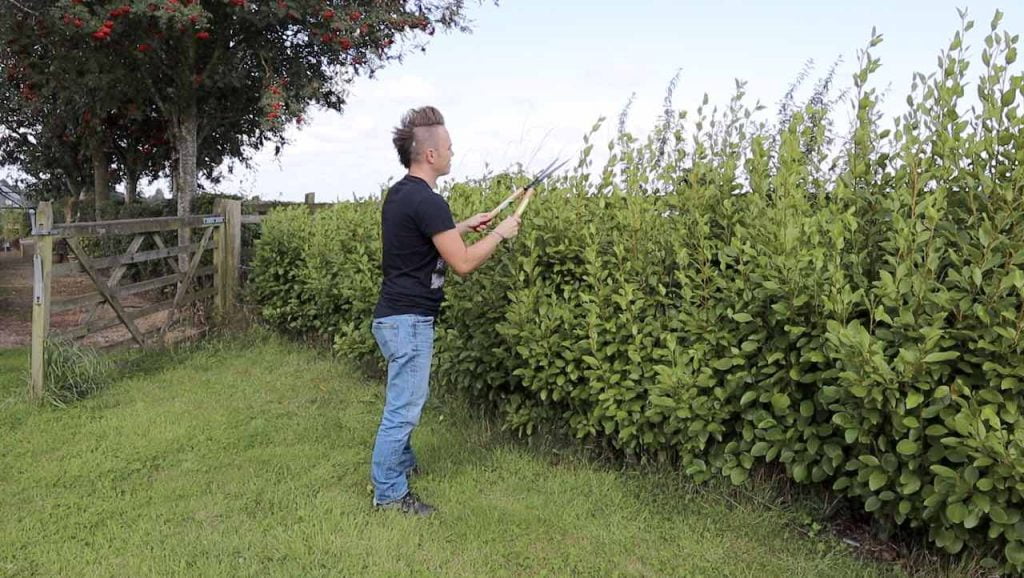
These are usually better for wildlife as they are not as tightly clipped and so can become home to nesting birds and insects. Always take care when clipping that there are no nests or young birds in the hedge at that time!
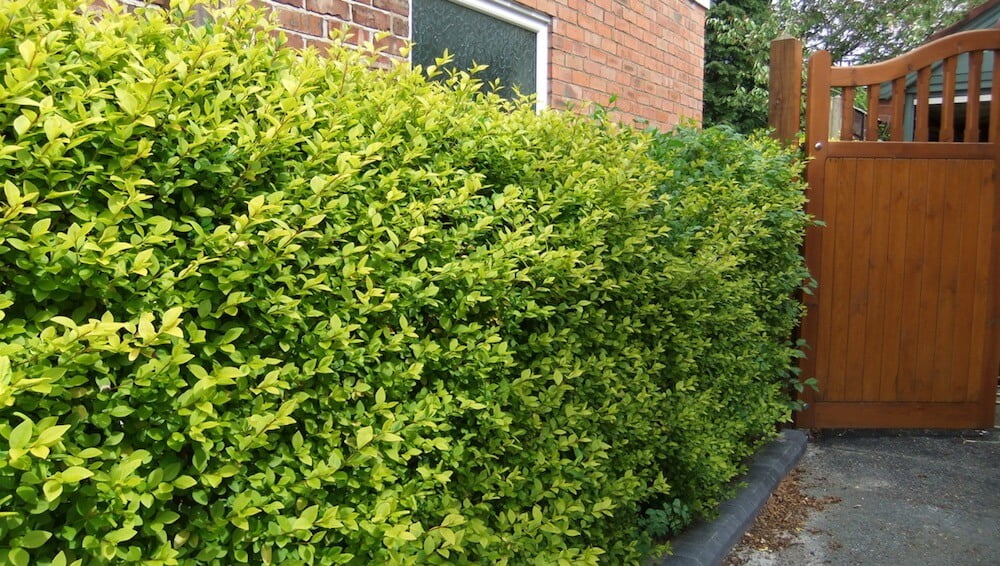
What does the hedge look like now?
So it's two years since I planted the 150 hedge plants at Garden Ninja HQ, which was quite the task. However, in just two short years, look at how well they have established!
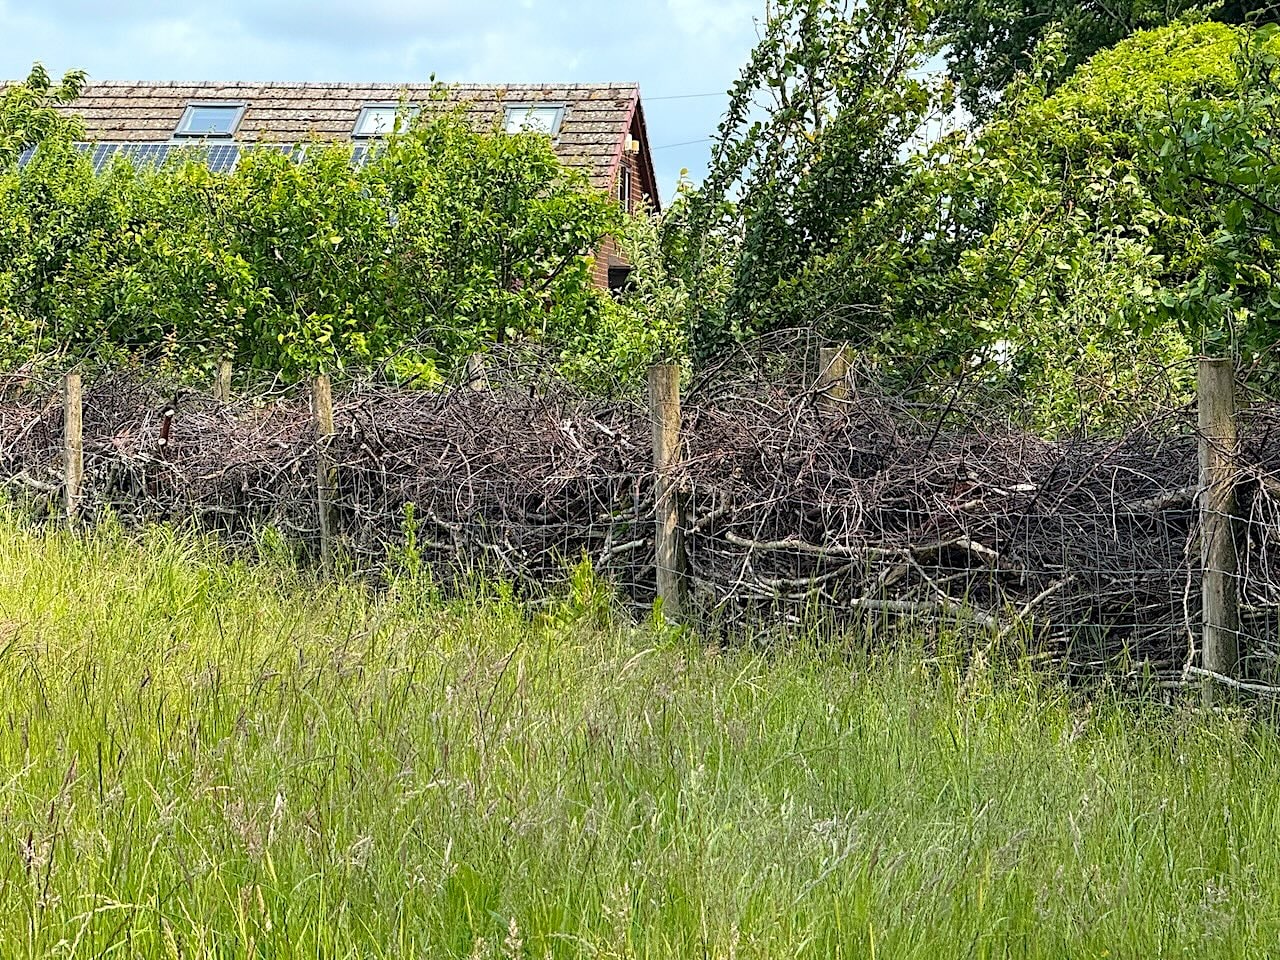
7. How to Make a Dead Hedge
A dead hedge is a sustainable garden feature created by stacking or weaving woody material—such as branches, twigs, hedge clippings and prunings—between upright stakes. Traditionally found in rural and woodland settings, dead hedges are regaining popularity in modern gardens for their ecological value and natural aesthetic. They're a brilliant example of circular gardening: turning garden waste into structure, habitat, and resource.
What Is a Dead Hedge?
A dead hedge is a natural barrier or boundary structure constructed from garden cuttings. By placing upright posts into the ground and infilling them with woody material, you create a dense, screen-like wall. These structures are especially effective in woodland-style, wildlife-friendly, permaculture, and allotment gardens, but can also suit rustic and even contemporary designs when constructed thoughtfully.
You’ll often spot them in traditional cottage gardens or rural landscapes where resourcefulness and biodiversity go hand in hand.
Why Build a Dead Hedge?
I love seeing deadhedges being used in gardens design, they are a great practical wildlife friendly way to deliniate biondaries and create shelter belts. Dead hedges offer an array of practical and environmental benefits so let's take a look at the benefits of choosing a dead hedge over a living hedge.
Dead HedgesReduces waste: Reuses woody material you'd otherwise have to dispose of or burn.
Supports biodiversity: Provides shelter and nesting for birds, mammals, insects, and amphibians.
Improves the garden microclimate: Acts as a windbreak and creates warm, protected pockets for young or delicate plants.
Cost-effective: Uses materials already available in the garden—no need to buy fencing or screening.
Aesthetically natural: Softens the landscape and integrates well into informal or wildlife-rich spaces.
What You’ll Need
There are some key pieces of equipment and materials you will need before you start to lay your dead hedge. It's not just a case of lying dead woody material on the floor, you will need some stakes to weave them through and to keep the hedge in place.
i) Upright stakes or posts: Use untreated wood such as hazel, chestnut, or reclaimed timber. These form the framework and should be strong and rot-resistant.
ii) Woody materials: Gather a mix of branches, hedge trimmings, small logs, holly clippings, brambles and prunings. Hardwoods offer better structure and longevity.
iii) Loppers or a saw: For trimming larger pieces down to size.
iv) Hammer or mallet: To drive the stakes securely into the ground.
If you're sourcing material from arborists or tree surgeons, always check that it's free from disease or contamination or if you see your neighbour cutting back trees or bushes ask them if you can reuse their material, winner winner!
How to Build a Dead Hedge: Step-by-Step
1. Choose the Right Location
Select a spot where a screen, boundary, or windbreak would be useful. Dead hedges work well along garden edges, woodland borders, around compost heaps, or as shelter belts for wildlife zones and vegetable beds.
Avoid placing them where they’ll overly shade sun-loving plants unless that’s your intention.
2. Set the Upright Stakes
Install a double row of stakes in the ground to form the structure's walls.
Space each stake 50–75 cm (20–30 inches) apart.
Ensure they’re driven at least 30–45 cm (12–18 inches) deep for stability.
Position the two rows 40–60 cm (16–24 inches) apart to determine the hedge’s thickness.
If you’re building along an existing hedge or tree line, you can incorporate trunks as part of the structure and add stakes to fill the gaps.
3. Start Filling with Woody Material
Layer your branches and prunings horizontally between the two rows of stakes.
Begin with the thickest material at the base for strength and weight.
Add finer material as you build upward to hold everything tightly in place.
Weave in flexible branches like hazel or bramble for extra interlocking and structure.
Keep the fill firm and compact to reduce gaps and prevent collapse in strong winds.
4. Build Up to Desired Height
Typical heights range between 1 metre and 1.5 metres (3 to 5 feet), depending on your needs—whether it’s a privacy screen, windbreak, or boundary marker.
As you build:
Occasionally, press or firm the material down to compact it.
Use loppers to trim protruding ends for a neater finish if desired.
5. Maintain Over Time
Dead hedges naturally decompose over 3–5 years, enriching the soil below with organic matter. To maintain structure:
Top up with fresh prunings annually, especially after winter or strong wind.
Inspect for signs of collapse and re-stack or firm material as needed.
In no-dig or forest garden systems, the decomposed material is particularly valuable for soil health and biodiversity.
Wildlife Benefits of Dead Hedges
Dead hedges serve as living quarters for a wide variety of garden-friendly creatures:
Birds such as wrens, robins and blackbirds nest and forage in the structure.
Hedgehogs and small mammals find shelter from predators and cold weather.
Beetles, frogs, toads and invertebrates benefit from the humid, sheltered conditions.
Fungi and decomposers begin breaking down the organic material, recycling nutrients back into the garden.
Positioning your dead hedge near a wildflower area, pond or log pile creates an interlinked habitat, boosting the overall ecological value of your garden.
Good Practice and Safety Tips
Avoid diseased material: Don’t include prunings from plants affected by honey fungus, box blight, or other serious pathogens.
Use untreated wood to avoid chemical leaching into the soil.
Mix materials for better structure and diversity – combine thick, structural pieces with finer twigs and foliage for texture.
Work safely: Use gloves and eye protection when handling thorny or bramble-rich material.
If you’re short on woody material, local tree surgeons may be willing to supply offcuts for free or for a small fee—an environmentally sound solution that benefits both parties.
Teach Yourself Garden Design Online
Why not consider expanding your growing and garden design knowledge with one of my online gardening courses? My Garden Design for Beginners Course is here to help you transform your garden with an affordable online course, no matter how little your experience with plants.
This course offers step-by-step guidance from me, Lee Burkhill, the Garden Ninja—award-winning garden designer and presenter on BBC1’s Garden Rescue. In this course, you’ll go from a garden design novice to a confident designer equipped to tackle any green space.
Planting Techniques – Select and arrange plants like a pro.
Design Styles & Layout Options – Explore different styles to suit every garden.
Course Features:
20 Hours of Study Time
Flexible Online Learning
Engaging Video Lessons & Quizzes
Real-World Case Studies
Certification upon Completion
Taught by Award-Winning Designer Lee Burkhill
Enrol now for just £199 and start your journey toward garden design mastery!
29
Garden Design Examples for Small Gardens: 30 Design Templates & Planting Plans
Garden Design Examples for Small Gardens: 30 Design Templates & Planting Plans: In this online gardening course, I'll walk you through 30 fantastic garden designs, explaining the logic behind the layout, the plant choices, and take-home tips for applying them in your own garden.
Weekend Garden Makeover: A Crash Course in Design for Beginners
Learn how to transform and design your own garden with Lee Burkhills crash course in garden design. Over 5 hours Lee will teach you how to design your own dream garden. Featuring practical design examples, planting ideas and video guides. Learn how to design your garden in one weekend!
Garden Design for Beginners: Create Your Dream Garden in Just 4 Weeks
Garden Design for Beginners Online Course: If you want to make the career jump to becoming a garden designer or to learn how to design your own garden, this is the beginner course for you. Join me, Lee Burkhill, an award-winning garden designer, as I train you in the art of beautiful garden design.
Planting a hedge really is quite simple. It does take some consideration and effort, but once you have put the planning in, the chances of success rise significantly. Not only are you providing a screen and windbreak, but you are encouraging wildlife that will feed, take home and shelter in your new beautiful hedge. Whether you choose a living or a dead hedge, in my expert opinion, they offer far more beauty and value than just having fence panels in the garden.
As a final bonus, hedges can add a real design edge to your garden design. There is no excuse for not considering adding a hedge in your garden to replace a fence or a dead area!
If you've liked this article, why not comment or share it to help others? Why not Tweet, Facebook or Instagram me with your garden dramas for help and advice?
Sorry, but this is PLANTING a hedge, not LAYING it.
LAYING a hedge involves taking an existing hedge, part cutting and interweaving the woody parts so as to produce a barrier without gaps. This was traditionally done to fence in stock, but can also be used to sort out a domestic hedge where there is little in the way of foliage near the ground.
Andrew, you are very much correct and its my fault that I’ve misused the terms. I will, however, try and update it to show hedge laying as well when its the right reason. I have a mixed hawthorn hedge that needs laying pretty soon to fill the gaps! Thanks for your feedback, much appreciated. All the best. Lee


 To my YouTube channel
Sorry, but this is PLANTING a hedge, not LAYING it.
LAYING a hedge involves taking an existing hedge, part cutting and interweaving the woody parts so as to produce a barrier without gaps. This was traditionally done to fence in stock, but can also be used to sort out a domestic hedge where there is little in the way of foliage near the ground.
Andrew, you are very much correct and its my fault that I’ve misused the terms. I will, however, try and update it to show hedge laying as well when its the right reason. I have a mixed hawthorn hedge that needs laying pretty soon to fill the gaps! Thanks for your feedback, much appreciated. All the best. Lee