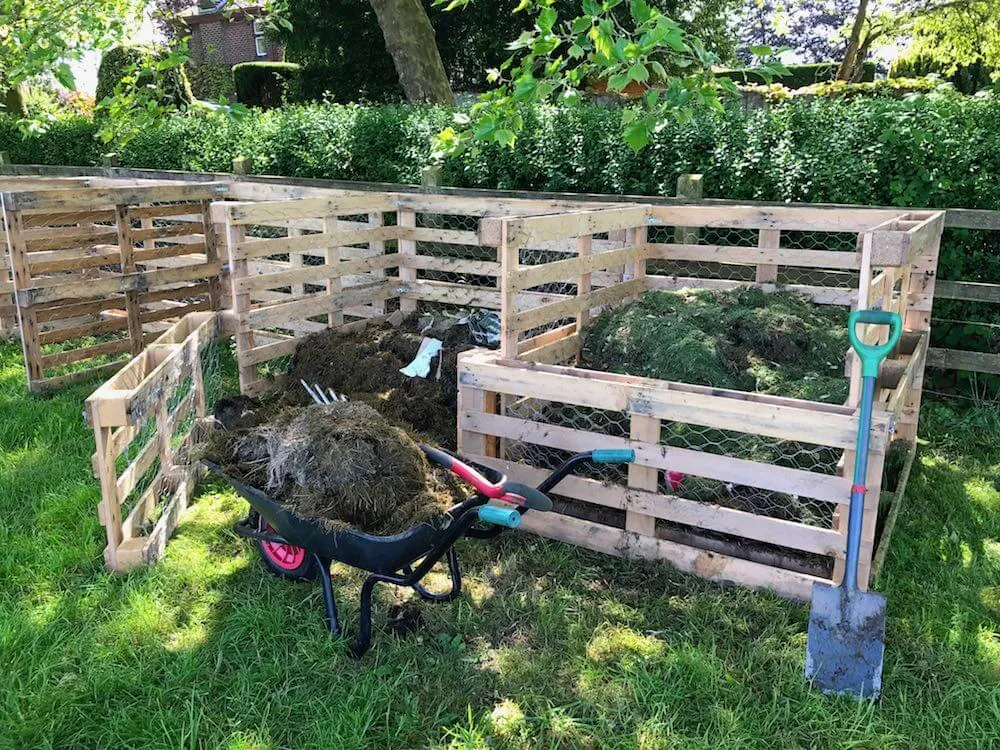
How to make an easy compost bin from wooden pallets
Lee Burkhill: Award Winning Designer & BBC 1's Garden Rescue Presenters Official Blog
Intermediate level
Making your own compost is one of the most satisfying garden activities. It has a multitude of benefits from feeding your plants, improving your soil condition, breaking up clay and mulching your plants to help them survive droughts. One of the easiest and stylish ways to compost is to use pallets to make compost bins. This guide will help you upcycle wooden pallets to add style and substance to your composting!
Quick Answer
To make a compost bin from pallets, stack three matching pallets into a U shape on level, free draining ground, then screw the corners together with decking screws and angle brackets for rigidity. Hinge a fourth pallet to the front to act as a door. Always choose pallets stamped HT rather than MB, and you can have a working compost bin built and filling within an afternoon.
This guide will show you how to make an easy compost bin from wooden pallets that is both cheap and simple to make. This is by far the easiest method I have used over the years. Even with a small garden, if you have enough space for a wooden palette, it’s worthwhile to create a compost bin. You not only save on those dreadful green bin charges I’ve campaigned against, but you also get your own supply of perfect soil improver!
Quick Reference
Build Time
A weekend job, roughly 2 to 4 hours per bin
Pallets Needed
3 to 4 per bin, plus 3 more for each extra bay
Skill Level
Beginner, no carpentry experience needed
Approximate Cost
Free to around £30 with sourced pallets, up to £60 with all new fixings
Best Position
Level, free draining ground in partial shade, never on paving
Expected Lifespan
2 to 4 years before the pallets need replacing
Making your own garden compost is an excellent way to help grow strong, healthy plants and address this balance as best we can. As a bonus, it also prevents excess waste from going to landfills and can save us from spending a small fortune on unnecessary synthetic fertilisers and miracle feeds.
This page contains affiliate links for products I use and love. If you take action (i.e. subscribe, make a purchase) after clicking a link, I may earn some gardening commission which helps me keep the Garden Ninja Blog free for all.
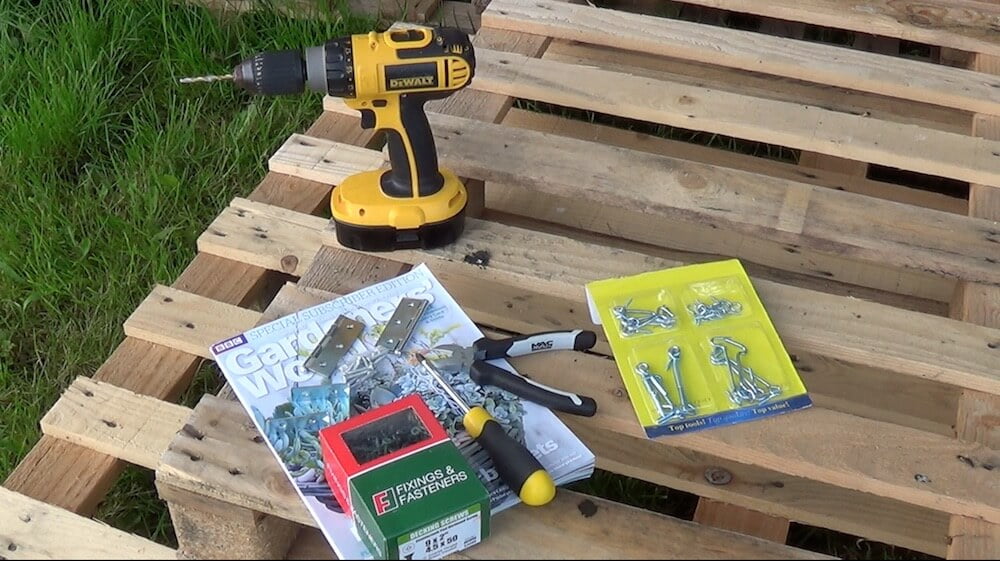
Equipment needed for pallet compost bins
Making a compost bin from wooden pallets couldn’t be easier. With a few key tools and a few hours’ effort, you will end up with a strong compost bin that will last for years to come. Best of all, you don’t need to be a DIY expert!
Here’s everything on my list, with a link to where I’d actually get each one from if you don’t already have it in the shed. The drill is the same one I keep in my van for client jobs, and the gloves are the pair I still reach for now whenever I’m handling old pallets.
Equipment & Tools You’ll Need
Item
Why You Need It
Where To Get It
4 wooden pallets
Equal size for your first bin. Check the stamp for HT, not MB, before you commit to a set
Usually free from timber yards or industrial units
No sling backs or flip flops. Trust me on this one
Already in your wardrobe
Prefer not to build one?
A ready made compost bin is a perfectly sensible shortcut if pallets aren’t for you, though I’d still recommend the pallet method to anyone happy with a screwdriver, since it’s free or close to it
Most pallets are perfectly safe, but not all of them, so it’s worth taking thirty seconds to check before you start building. Every pallet carries a small branded stamp, usually on one of the central blocks, showing how it was treated. What you want to see is HT, which stands for heat treated. This means the timber was heated to a core temperature of at least 56°C for half an hour to kill off any pests, with no chemicals involved at any point.
What you don’t want to see is MB, which stands for methyl bromide. This is a toxic pesticide that was used to fumigate pallets before it was banned in the UK back in 2010. Genuine MB stamped pallets are increasingly rare these days, but they do still turn up occasionally in older stock, so it’s worth a quick look rather than assuming every pallet is fine. I once picked up a stack of pallets from a client’s old builder’s yard for a compost bin build and found two out of six were stamped MB. They went straight in the skip rather than anywhere near the veg beds.
Avoid any pallets that are painted, since coloured pallets are usually part of a rental pooling system and not meant for reuse, and steer clear of anything that looks like it has been used to move chemicals, oils or building materials. If a pallet has no stamp at all it was most likely made for domestic use within the UK and should be fine, but when in doubt, choose a different pallet. There are always more knocking about behind garden centres, builders’ merchants and industrial units, usually free for the asking.
How to make a compost bin from Pallets
If you follow my easy guide below, you should be able to create a compost bin from pallets in a few hours. It’s a really enjoyable, easy gardening project to help boost your recycling and soil quality in the garden.
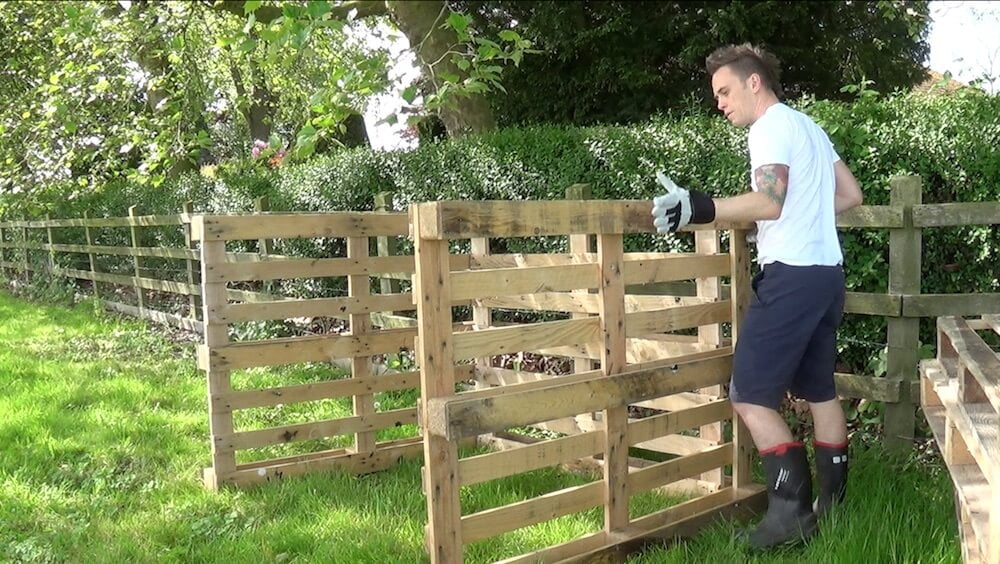
1. Make the compost bin frame
Stack your first three pallets into a box shape on a flat, stable surface. Ensure the pallets are aligned. Make sure that the ground underneath is either earth, turf or porous. If not, your composter won’t work. It needs a free-draining base, or you will end up with a stinking goop!
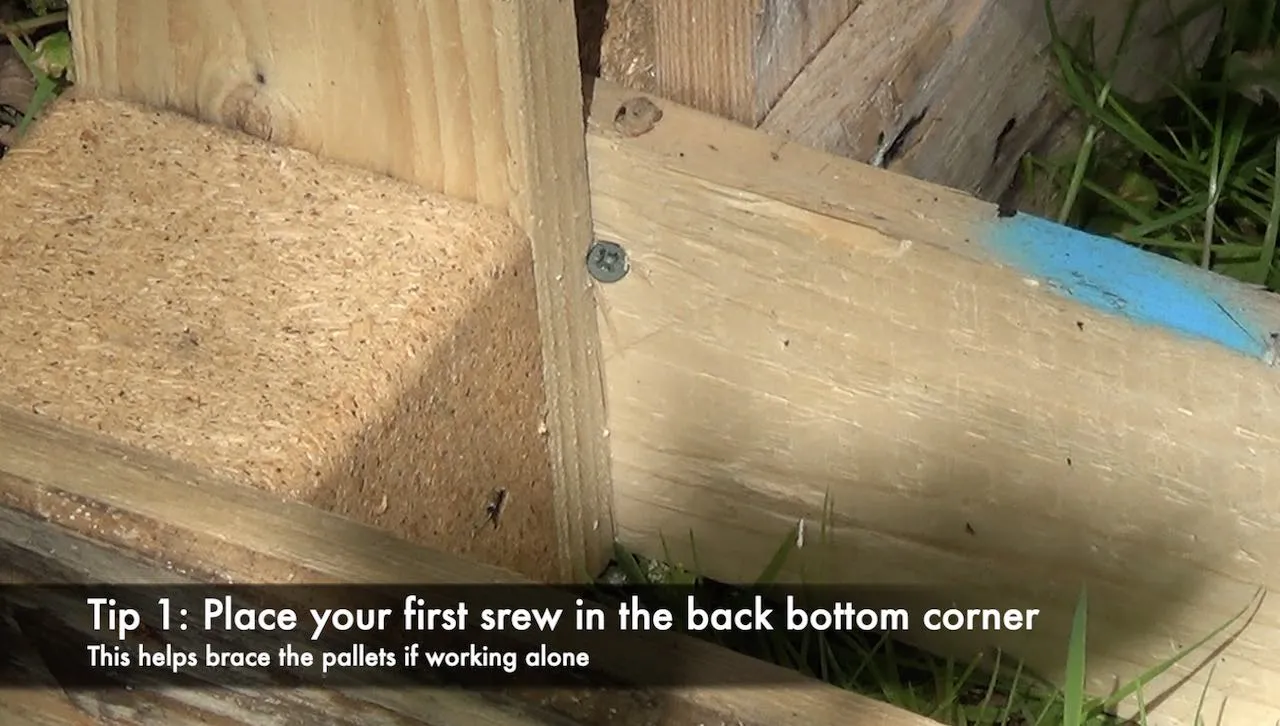
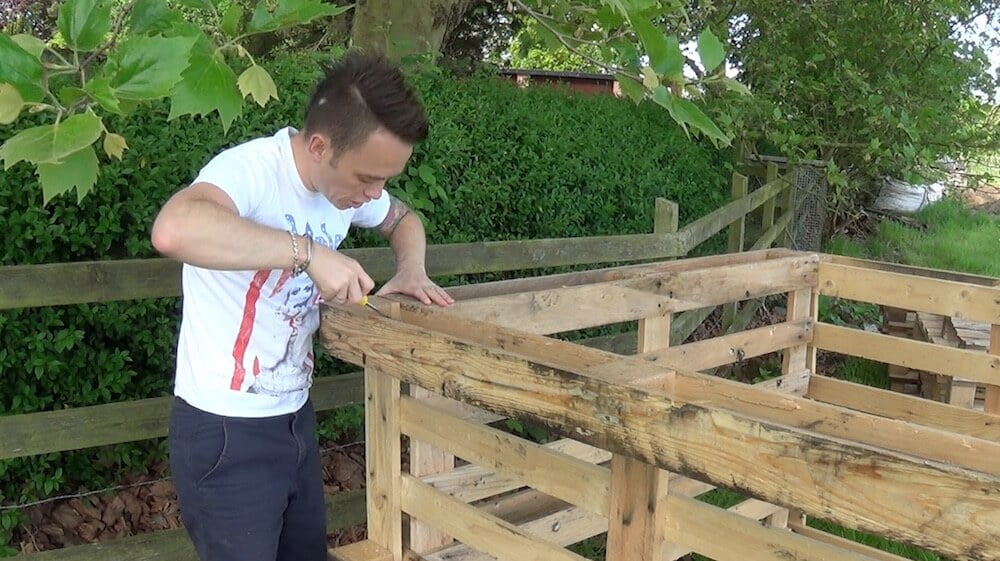
2. Secure the compost frame with decking screws
Drill a pilot hole in one of the bottom corners of each pallet and then screw in a decking screw to anchor them. This means if you’re working alone, you’re not struggling to keep them level. This step saves a lot of fuss later on!
Drill and screw another decking screw into the top corner, using pilot holes before each decking screw. Do this for both corners.
Then proceed to screw decking screws into each of the pallets’ braces from the floor up to the top on each side. This should secure each side to the other. Use as many screws as you have braces, i.e. the square blocks that separate the two sides denote the braces.
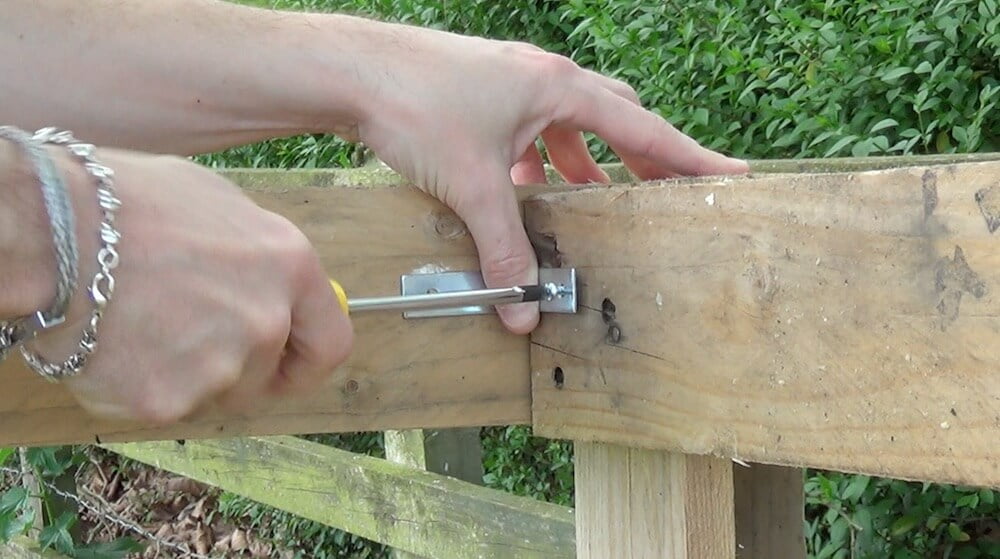
3. Add L-shaped / Angle brackets to the compost bin
Once you have done this, add brackets /angle brackets to the side of the compost bin frame. This helps add rigidity to the frame to hold the weight of the compost contents. Again, predrill holes to avoid splitting the wood. I would advise a minimum of three: top, middle and bottom. The more, the better, though!
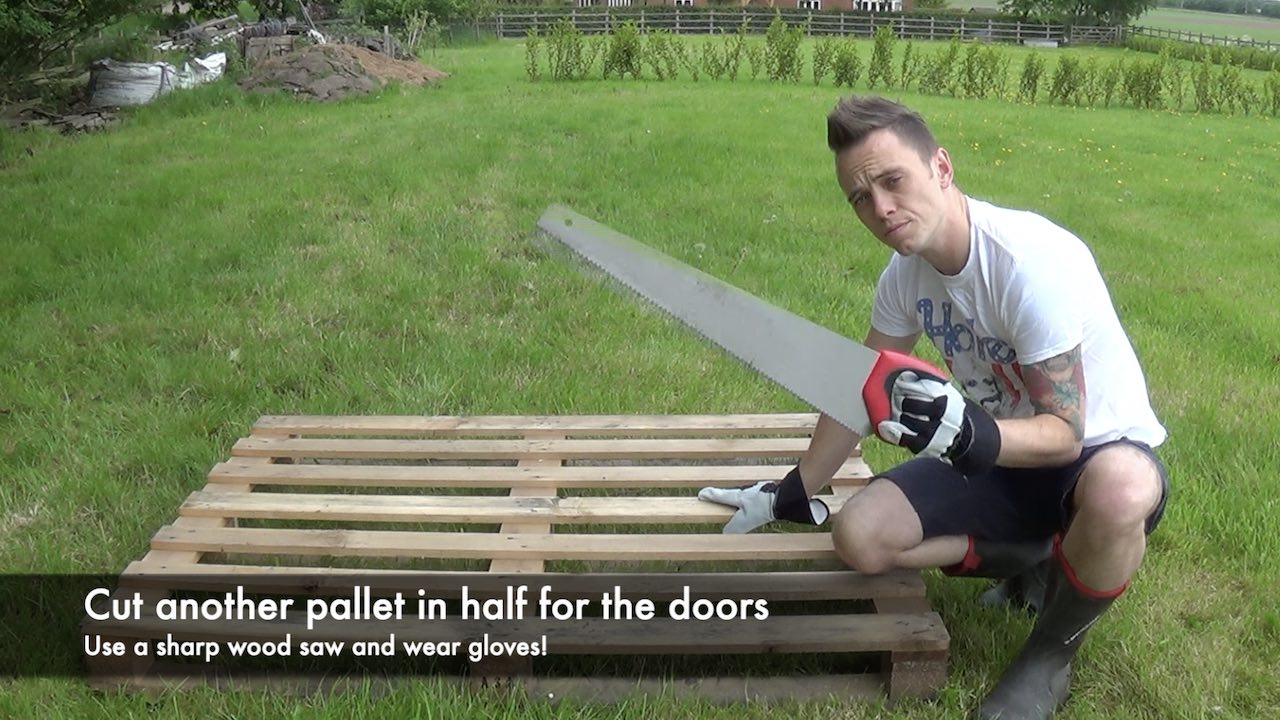
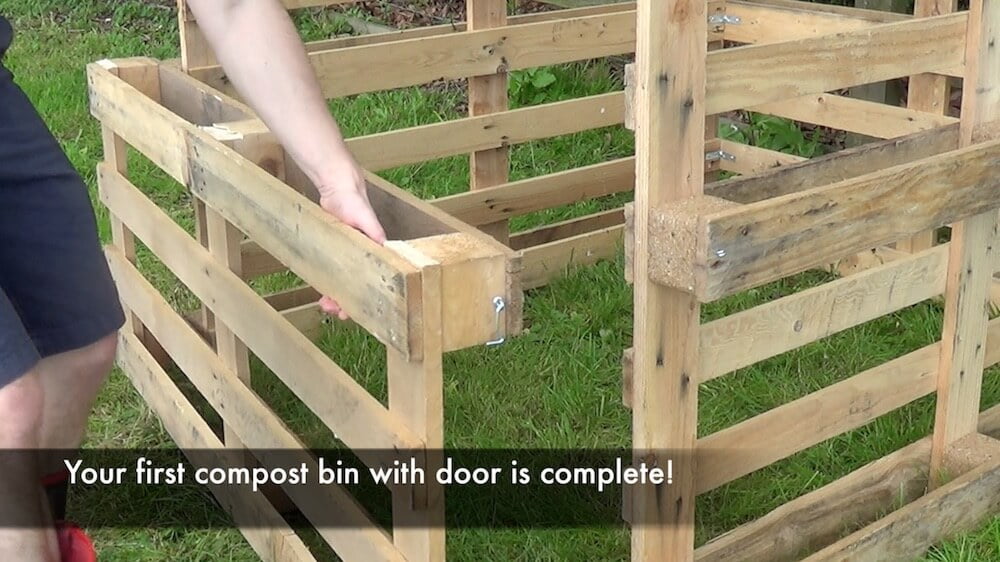
4. Add a door to keep in heat and compost contents
Once you have done this, you can add a door with the final wooden pallet. Taking a pallet of the same size, cut this in half just below a brace with a sharp wood saw. Wear gloves and take your time for a neat cut. Sand off any splinters or snags to neaten the door.
5. Add door hinges to stop compost from falling out
Place the door against your compost bin frame and mark with a pencil where the two hinges need to go. Place them on the outside of the frame so it can swing open. Also, ensure the door is above ground level by an inch or so. This enables it to swing open without catching the ground.
6. Secure the compost bin door
Screw in the hinges and then screw the door frame to the other side of the hinge. Add a latch and eye on the other side to secure the door. This stops wind or contents from opening the door and looks very neat!
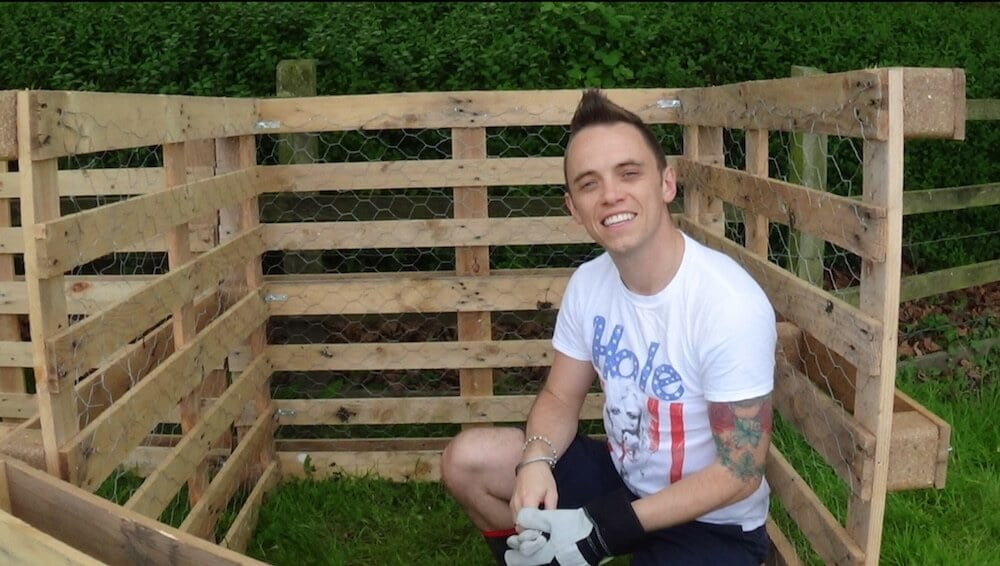
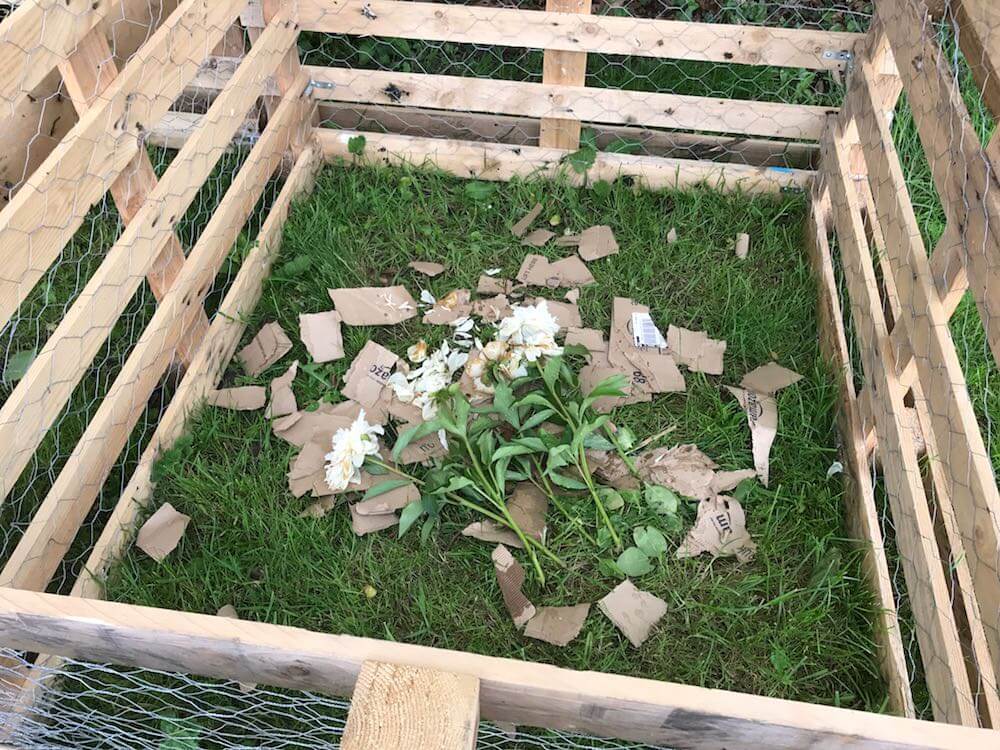
7. Line the compost bin with chicken wire
Then, you can line the inside of the bin with chicken wire, using a staple gun, to help prevent the contents from spilling out. I always advise you to line the inside of the bin, not the outside, like other video guides. This is because it looks neater and stops waste from getting trapped in the void between the side of the pallet.
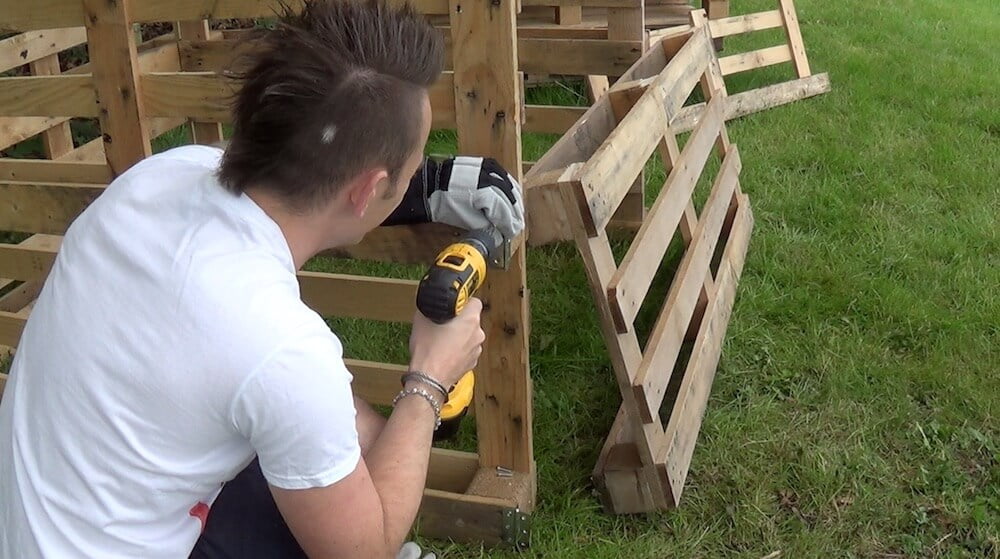
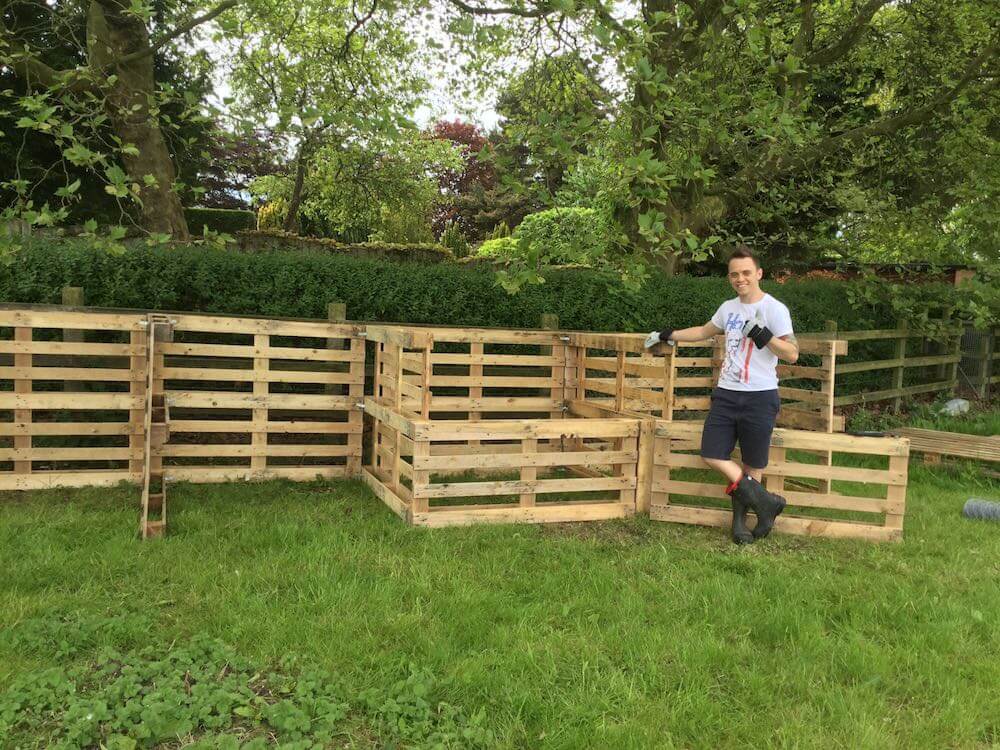
8. Making additional pallet compost bins
These can be made by using the side of the existing bin and repeating the process. Remember you will only need 3 pallets for each additional bin if you’re joining them together. Joining them makes the bins more robust and makes moving the contents of the bins far easier!
9. Add a base layer before you start filling
Before you throw the first barrow load in, lay down a rough layer of twigs, small branches or woody prunings across the base, about 10 to 15cm deep. This is a step I see missed on a lot of pallet bins, and it makes a genuine difference. The gaps between the twigs let air draw up into the heap from underneath and let excess moisture drain away, both of which matter far more than people expect once the bin starts filling with grass clippings and other dense green waste. I keep a small pile of prunings and hedge trimmings to one side through the year specifically for this job. Once that base layer is down, you’re ready to start filling properly, following the mix of greens and browns I cover below.
Compost Methods Explained
There are usually two main methods of composting garden waste.
Cold composting (small-scale)
Hot composting (larger-scale)
There’s the small black compost bin method known as ‘cold’ composting. You’ll recognise this from those plastic bins you can buy in garden centres and online shops. It’s called cold composting because the bin never gets enough critical mass of decomposing matter to create too much heat. This method takes pretty much a full year or so to get to the good stuff.
Then there is hot composting, where a compost heap that’s 1m square and above will start to generate some serious heat and thus break down the waste quickly. It means you can get really rich compost far sooner! You do need enough waste to get the critical mass of heat, but I’m sure most gardeners who pack their gardens with plants could produce this in a season. A three bin pallet system is the easiest way to get this going properly, since you keep a fresh bay for new material, a middle bay quietly rotting down, and a finished bay ready to dig out. I run exactly this setup at home in Liverpool and it means I’ve always got usable compost on hand rather than waiting on one single heap to catch up with itself.
Either method will help you create the lifeforce of the most successful gardens homemade compost. Compost worked into any soil can help create nutrient-rich free-draining soil and has a number of garden uses.
What to put in your compost bin?
You can compost pretty much any green waste or organic matter. A good rule of thumb is that if it grew from the ground, you could compost it! Vegetation, cutback plants, veg peelings, lawn clippings, small twigs, leaves, pondweed, etc., can all be composted. The smaller the items are, the quicker they will compost. I usually mix in some shredded newspaper and cardboard to help prevent the compost from getting too nitrogen-rich and soggy.
Items that you must not compost:
Pet droppings
Meat, fish, eggs or animal products
Plastics
Hair (yuk!)
Liquids
The right mix of carbon and nitrogen-rich greens is essential.
What’s the right mix of greens and browns for a compost bin?
The age-old gardeners’ dilemma about the mix of nitrogen and carbon in your compost bin. Basically, you need to get the right mix of nitrogen (sometimes called greens) and carbon (sometimes called browns). To confuse things, many plants contain both. For example, grass has both carbon and nitrogen in it (20:1).
The RHS recommends a ratio of 30:1, which is 30 parts carbon to 1 part nitrogen. Grass, for example, has 20 parts carbon for every 1 part nitrogen. This ratio used to really confuse me, but I’ve found an easier way to compost.
Garden Ninjas 50/50 fuss-free compost mix
If you’re new to composting, start by adding half greens to half browns. Ignore the ratio and go with your inner Mother Earth. Keep an eye on your compost heap. If it starts to smell, add more brown. If it’s going soggy, more brown; if it is dry and doing nothing, add more green! Soon, you will be the compost king or queen.
How long does it take to make compost at home?
The time it takes to make compost at home can vary depending on several factors, including the composting method, the ingredients used, and environmental conditions. Generally, the composting process can take anywhere from a few weeks to several months to complete. With an active composting method, such as hot composting or vermicomposting, where the pile is regularly turned or aerated, compost can be ready in as little as 1 to 3 months.
On the other hand, passive composting methods, such as cold composting or static pile composting, may take longer, typically 6 months to 2 years, to fully decompose the materials into compost. To expedite the process, it’s essential to maintain the right balance of carbon-rich (browns) and nitrogen-rich (greens) materials, keep the compost pile moist but not waterlogged, and provide adequate aeration by turning or mixing the compost regularly.
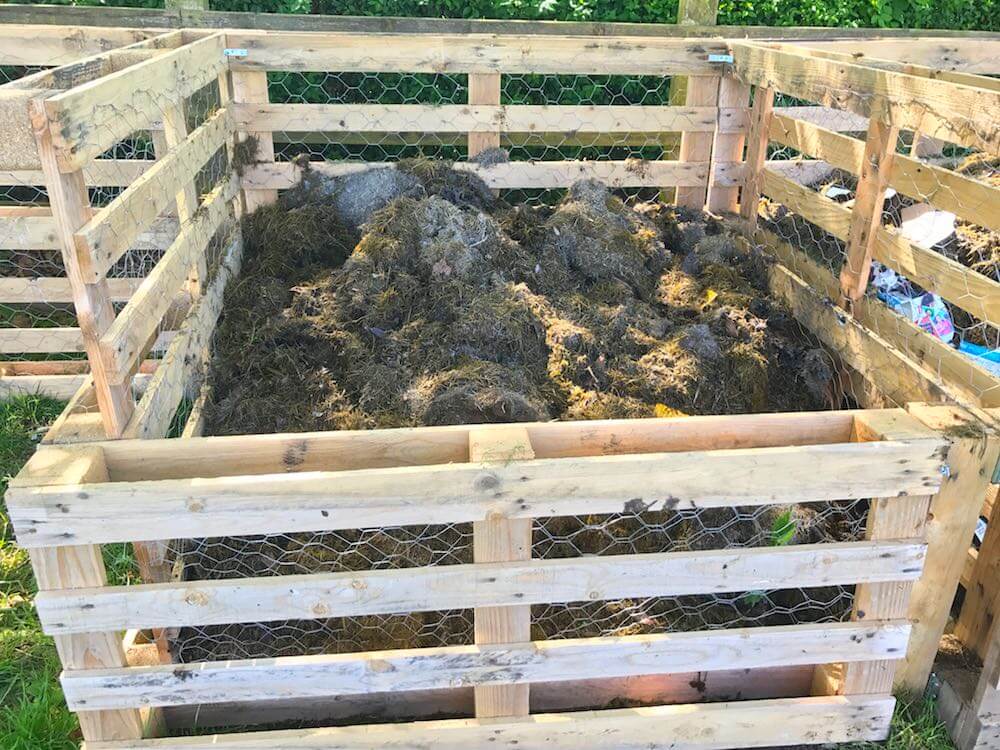
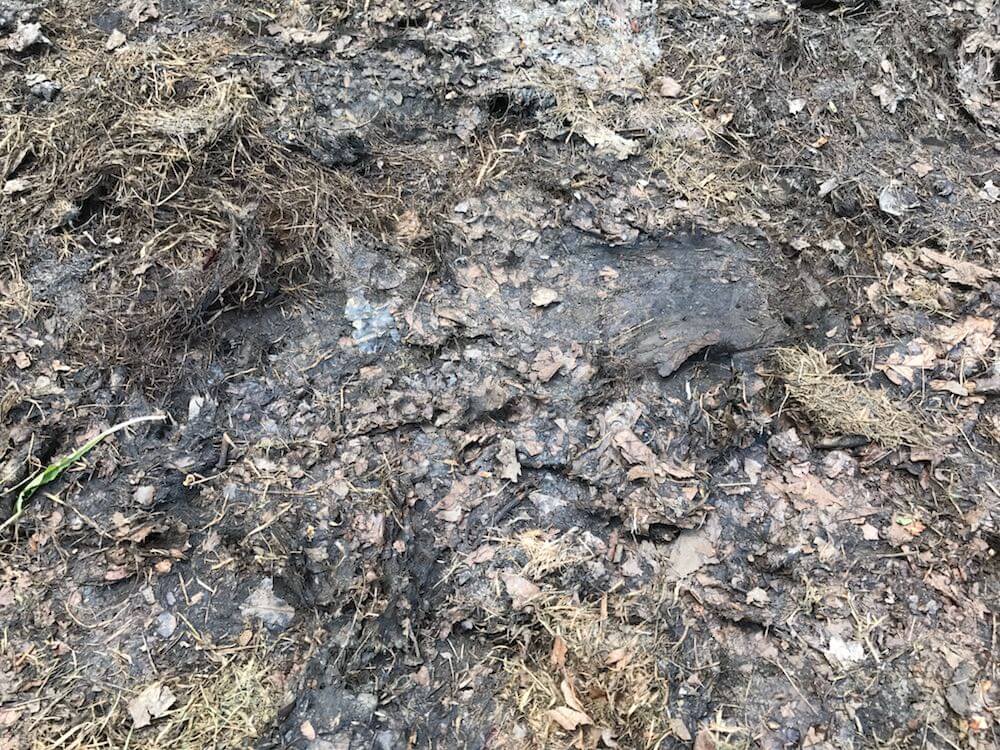
Why is my compost smelly and soggy?
This is a common problem for new composters where their compost heap starts to smell and look worse for wear. 99% of the time, it is because of an overload of moisture-rich greens. The ammonia, which breaks down the green waste super quickly, gives off the smell of rotting eggs, which is horrible. See the example below. This grass-clipping pile had been left without aeration or enough browns.
By adding more brown material and turning the heap over, you can quickly improve the mixture and remove the smell from your compost heap. It’s getting that balance between materials.
By turning your heap, making sure it’s neither totally sodden nor dry and having a mix of browns and greens, you can’t go wrong. A well-balanced compost should smell of earth and nothing more. If it’s really wet and smelly, then I recommend adding shredded newspaper and cardboard to help absorb the moisture and add some carbon quickly.
As a general rule I turn an active pile every four to six weeks with a fork, more often in summer when everything is breaking down quickly, less often over winter when things slow right down. You don’t need to be religious about it, but a regular turn keeps oxygen moving through the heap and is the single easiest thing you can do to stop smells before they start.
What can you use compost for?
Soil improver – dig it in to improve compacted or poor soil
Mulch – to help retain moisture, suppress weeds and provide long-release feed
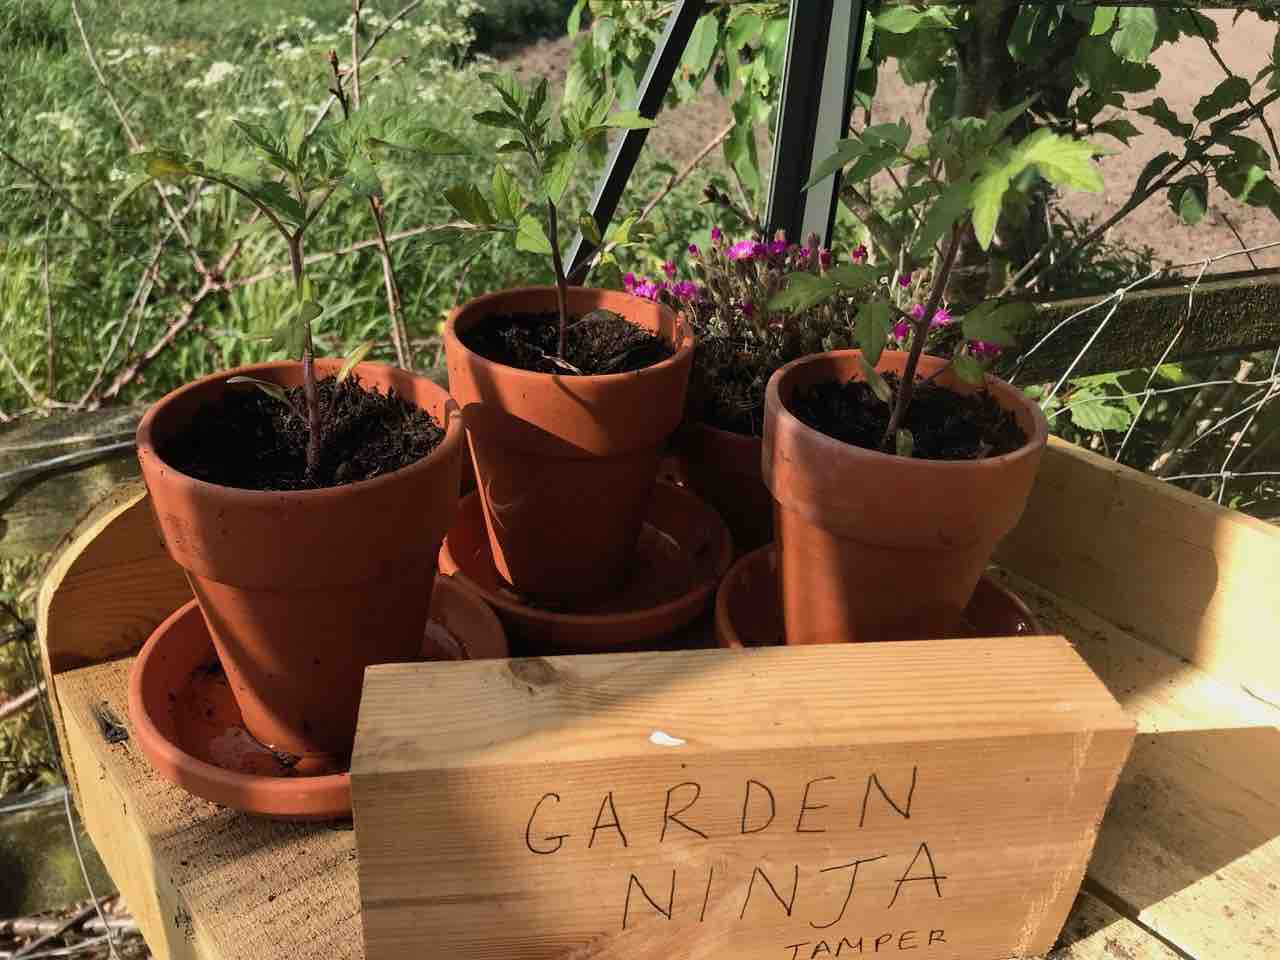
Many people use compost for pots and containers as it’s super nutrient-rich, moisture retentive and helps feel these plants throughout the season. The options with compost are endless.
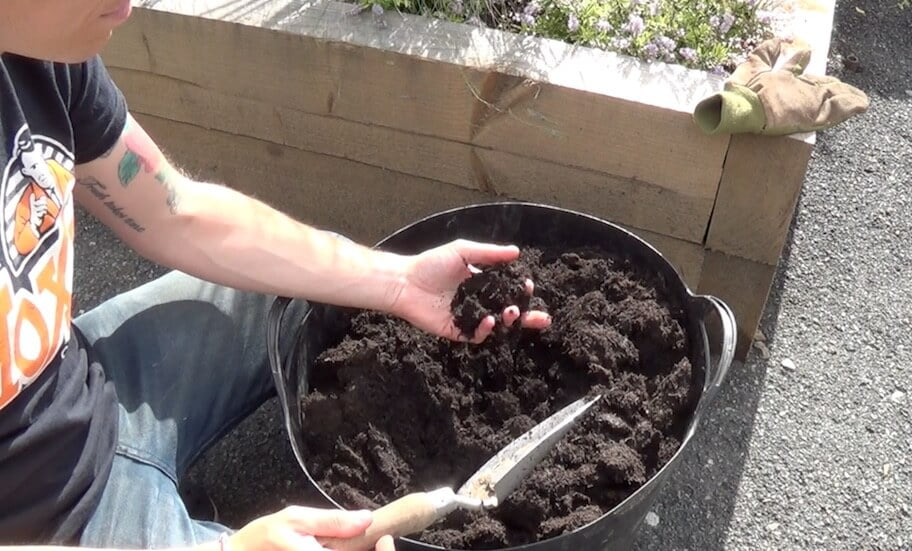
In my opinion, homemade compost is far better than shop-bought compost. It has a richer texture, and you can use it as soon as it’s ready. I’ve already written about why we should avoid buying peat-based compost and choose either peat-free or make our own.
Shop-bought compost may have been in storage for some time and will have degraded by the time you get it. Sometimes you buy it, and it’s really dry, crumbly, and grey-brown. This is usually when it’s past its best. It should be a dark, rich colour that is slightly moist.
Frequently Asked Questions
How many pallet compost bins do I need?
One bin is enough for most gardens and will happily process everyday green waste. If you generate a lot of material, or you want a steady supply of finished compost rather than waiting on one heap, a three bin system is worth the extra pallets. One bay takes fresh material, the middle bay rots down undisturbed, and the third bay holds compost that’s ready to use. It’s the same principle allotment growers have used for generations, and it scales up neatly from the basic single bin build above.
How long will a pallet compost bin last?
Expect somewhere between two and four years from a well built pallet bin, depending on how sturdy the pallets were to start with and how wet the base of your garden is. Timber that’s in constant contact with damp compost or soil will always break down faster than pallet wood used for a fence or shed panelling, since it never gets the chance to dry out. When the base pallets do eventually rot, they’re simple and cheap to swap out for new ones without rebuilding the whole structure.
Where should I position my compost bin?
Level, free draining ground is the main requirement, ideally with a bit of shelter from strong wind and dappled rather than deep shade. Avoid siting it hard up against a fence or under a tree, since roots will happily grow up into a heap full of nutrients, and avoid full baking sun which can dry the heap out too quickly. Never place a compost bin on paving or a hard surface, since it needs contact with bare earth so worms and other organisms can move freely in and out.
In a really wet spell, which is most of a British winter, it’s worth throwing an old piece of carpet, tarpaulin or even a spare pallet over the top. An open pallet bin has no roof, and a waterlogged heap slows right down and can start to smell. It takes thirty seconds and saves weeks of stalled composting.
Do I need to line the bin with chicken wire?
It isn’t strictly necessary, but I always do it on builds for clients as well as my own bins, simply because it keeps the finer material from sifting out through the gaps in the pallet slats and stops the heap looking untidy at the edges. If you’re on ground where rats or other pests are a concern, a chicken wire liner also gives a bit of extra deterrent, though it won’t stop a determined rodent on its own.
Can I compost perennial weeds in a pallet bin?
I’d avoid it. A standard pallet bin doesn’t reliably reach the sustained high temperatures needed to kill off the roots of perennial weeds like bindweed, ground elder or couch grass, so they can regrow once you spread the finished compost. Bag these up separately, dry them out fully first, or use your council’s green waste collection instead, which is processed at much higher temperatures.
How do I know when my compost is ready to use?
Ready compost is dark brown, crumbly and smells of earth rather than anything you put into it. You shouldn’t be able to recognise the original ingredients, no obvious eggshell fragments or twiggy bits, and it should feel light and soil like in your hand rather than wet or clumped together. If you can still make out what went in, give it more time and another turn. I always tell people not to rush this stage, using compost too early can actually rob nitrogen from your soil rather than adding to it.
Join over 100,000 gardeners on YouTube
Free gardening videos from the Garden Ninja, with 8 million views and counting.
When making compost, you’re not just improving soil health but also getting creative with how to recycle garden waste effectively. For those who want to take their gardening skills to the next level, consider learning from the experts!
Lee Burkhill, The Garden Ninja, offers engaging online garden design courses that teach you how to craft your ideal outdoor space from scratch. Through interactive video lessons and quizzes, you’ll gain valuable insights into garden layout, plant selection, and eco-friendly practices, all skills that can elevate your composting methods too. Whether new to gardening or experienced, these courses are designed for all skill levels.
By enrolling, you’ll not only master composting but also discover how to transform your entire garden into a sustainable sanctuary that reflects your personality. With Lee’s expertise in sustainable gardening, you’ll learn how to maximise the benefits of compost, enriching your soil naturally.
29
Garden Design Examples for Small Gardens: 30 Design Templates & Planting Plans
Garden Design Examples for Small Gardens: 30 Design Templates & Planting Plans: In this online gardening course, I’ll walk you through 30 fantastic garden designs, explaining the logic behind the layout, the plant choices, and take-home tips for applying them in your own garden.
Weekend Garden Makeover: A Crash Course in Design for Beginners
Learn how to transform and design your own garden with Lee Burkhills crash course in garden design. Over 5 hours Lee will teach you how to design your own dream garden. Featuring practical design examples, planting ideas and video guides. Learn how to design your garden in one weekend!
Garden Design for Beginners: Create Your Dream Garden in Just 4 Weeks
Garden Design for Beginners Online Course: If you want to make the career jump to becoming a garden designer or to learn how to design your own garden, this is the beginner course for you. Join me, Lee Burkhill, an award-winning garden designer, as I train you in the art of beautiful garden design.
Making homemade compost offers numerous benefits for your garden and the environment. Composting reduces waste by diverting organic materials from landfills, contributing to a more sustainable lifestyle. The compost is a nutrient-rich soil amendment that improves soil structure, fertility, and moisture retention, promoting healthier plant growth.
Homemade compost also reduces the need for synthetic fertilisers, pesticides, and chemical additives, making it an eco-friendly option for gardening. Additionally, composting helps sequester carbon dioxide, mitigating greenhouse gas emissions and supporting overall environmental health. By recycling organic waste into valuable resources, homemade composting aligns with the principles of sustainability and responsible stewardship of the planet.
So nothing is stopping you from starting your own compost heap, reducing landfill waste and improving your garden tenfold with the rich organic matter! Happy composting!
Have you started to compost or got home composting tips? If so, why not Tweet, Facebook or Instagram me with your pictures? You can also follow me on Youtube where I’ve got plenty of garden guide vlogs.
Your subscription could not be saved. Please try again.
Your subscription has been successful.
Lee Burkhill
Lee Burkhill, known as the Garden Ninja, is an award-winning garden designer and horticulturist with over 30 years of gardening experience and 15 years as a professional garden designer. A qualified RHS (Royal Horticultural Society) professional, Lee specialises in sustainable garden design and practical horticultural advice. He designs and presents on BBC1’s Garden Rescue and in leading gardening publications. Lee combines three decades of hands-on gardening knowledge with professional design qualifications to help gardeners create beautiful, functional outdoor spaces.