Lee Burkhill: Award Winning Designer & BBC 1's Garden Rescue Presenters Official Blog
Intermediate level
Designing a child friendly garden that is both fit for children and adults can feel overwhelming. However, with careful planning and some selective zoning, it can be achieved. Even a beginner gardener can help transform their garden space into one thats kid friendly. This article details everything you need to know to design a fabulous child (and inner child) friendly garden.
When it comes to garden design for children, you may have seen gardens turned into playgrounds with wood chips everywhere or worse, fake grass and the obligatory swing set. However, there are many better ways to subtly design a garden that makes it exciting for children without completely removing the attraction for grown-ups!
Usually, people start by buying a massive set of play equipment and then try to shoehorn it into the garden, making it the focal point and looking out of place with the rest of the garden design. However, there are many better ways to create a garden that your children will love without sacrificing their own enjoyment, which I’m going to show you in my guide. After all, I’ve been designing award-winning gardens for decades and have drawn up many for the BBC’s Garden Rescue!
This page contains affiliate links for products I use and love. If you take action (i.e. subscribe, make a purchase) after clicking a link, I may earn some gardening commission, which helps me keep the Garden Ninja Blog free for all.
What is a child-friendly garden?
A child-friendly garden is a space that accommodates and encourages children to get outside and explore the space. Often child-friendly gardens feature play, sensory elements and planting to stimulate younger family members to get out into the garden. A child-friendly garden is not just a lawn or a play set stuffed into the corner of the garden!
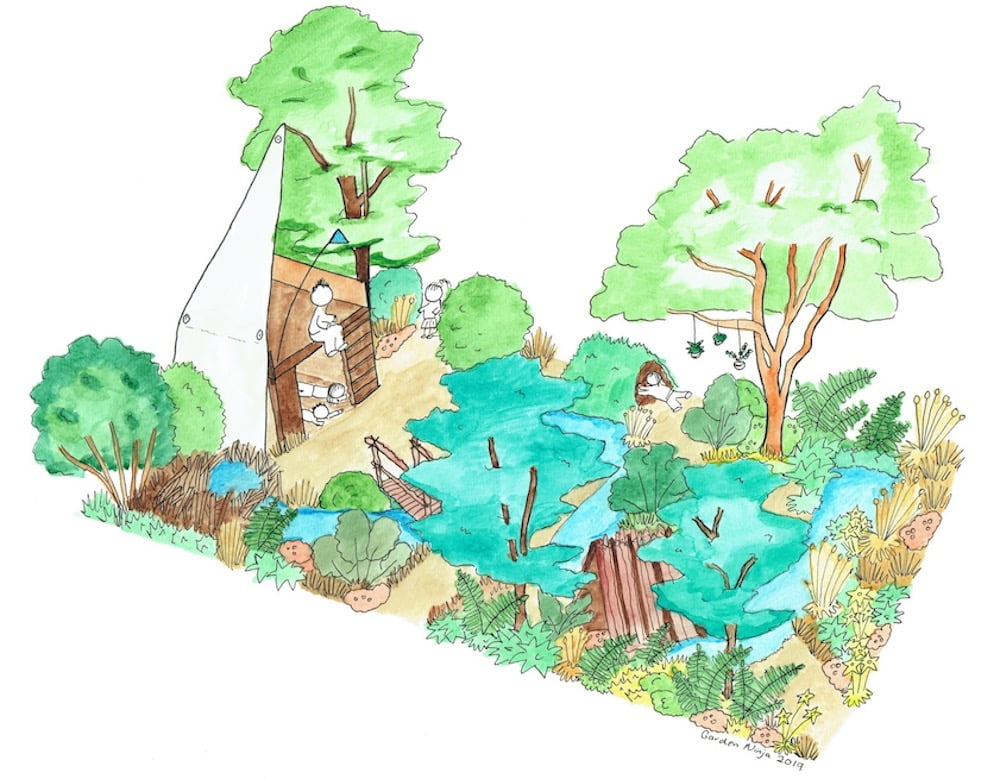
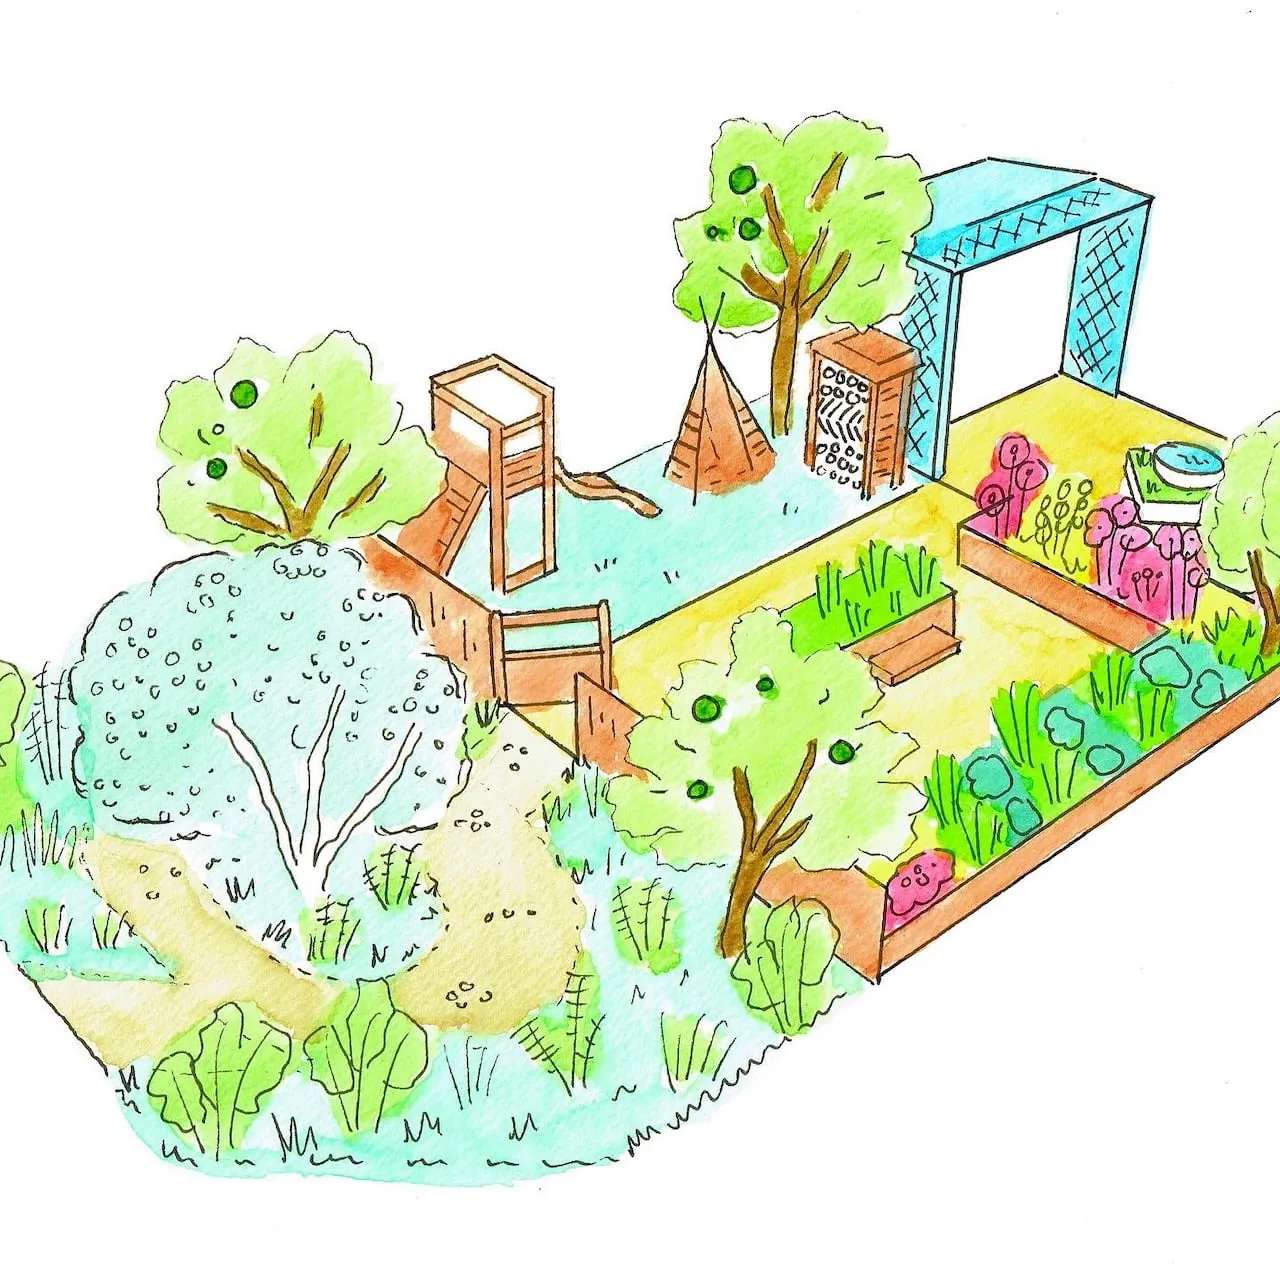
A child-friendly garden is a well-thought-out and multifunctional space which all ages can enjoy. If this type of garden is designed well, it shouldn’t scream ‘playground’ and will look beautiful and be functional for the entire family. The example above shows how a carefully planted and designed garden can accommodate children’s play as a seamless part of the overall design.
Can you spot the slide, mud kitchen and chicken coop above?
Designing from a Child’s Eye View: The Perspective That Changes Everything
One of the biggest mistakes I see when reviewing family garden designs is that they’ve been conceived entirely from adult height and adult priorities. Before you sketch a single zone or order a load of topsoil, get down on your knees and look at your garden from your child’s perspective. That beautiful Miscanthus grass you’ve been eyeing up? From a toddler’s viewpoint, it’s a towering forest of rustling giants. That gap under the rhododendron that looks scruffy to you? That’s a palace, a den, a secret headquarters to a five year old.
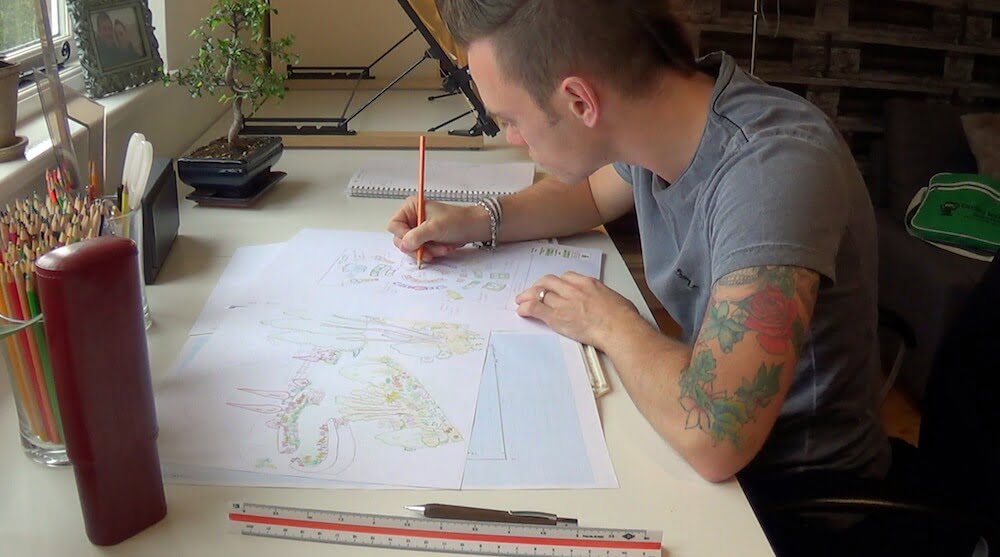
Garden Ninja Hand Drawing
When I’m designing family gardens, I literally get down on the ground and photograph the space from about 60cm high. The view from down there is completely different. You notice the underside of shrub canopies, the way light filters through foliage at different angles, and the sheer scale of what seems ordinary to adults. A standard raised bed wall at two sleepers high creates a proper fortress wall for younger children. That magnolia tree you planted five years ago? The lower branches become monkey bars, and the canopy overhead creates a natural roof for imaginative play.
This perspective shift extends beyond the physical. Children don’t see “dead space” the way adults do. That slightly muddy patch where grass won’t grow? They see a dig zone, a place to make potions, somewhere to examine worms and beetles up close. The challenging damp corner of your garden isn’t a problem to solve but an opportunity to create something mysterious and exciting.
Think about how meadow planting works from child height as well. What might come up to your knees creates an entire landscape for smaller children to navigate through, with tall stems becoming pathways through a miniature wilderness. The same planting that provides seasonal interest and pollinator value also offers your children an ever-changing adventure course. I used this exact approach in a Bristol garden where the clients were worried about losing lawn space. We created flowing drifts of prairie-style planting at varying heights, and their children spent more time exploring those borders than they ever did on the previous lawn.
Your design should accommodate different ages as well. While a toddler needs visible hiding spots where you can still see them, but they feel concealed, teenagers need genuine privacy. A seating area tucked behind a pleached hornbeam screen or within a pergola draped with climbing roses gives older children somewhere to retreat that feels separate from the main adult zones.
How to design a child friendly garden
Now, before you go appointing a landscaper and ordering all your play equipment, it’s time to step back and survey your current garden, then develop a considered design from that survey. Let me walk you through the steps I use for every child-friendly garden I design at Garden Ninja HQ.
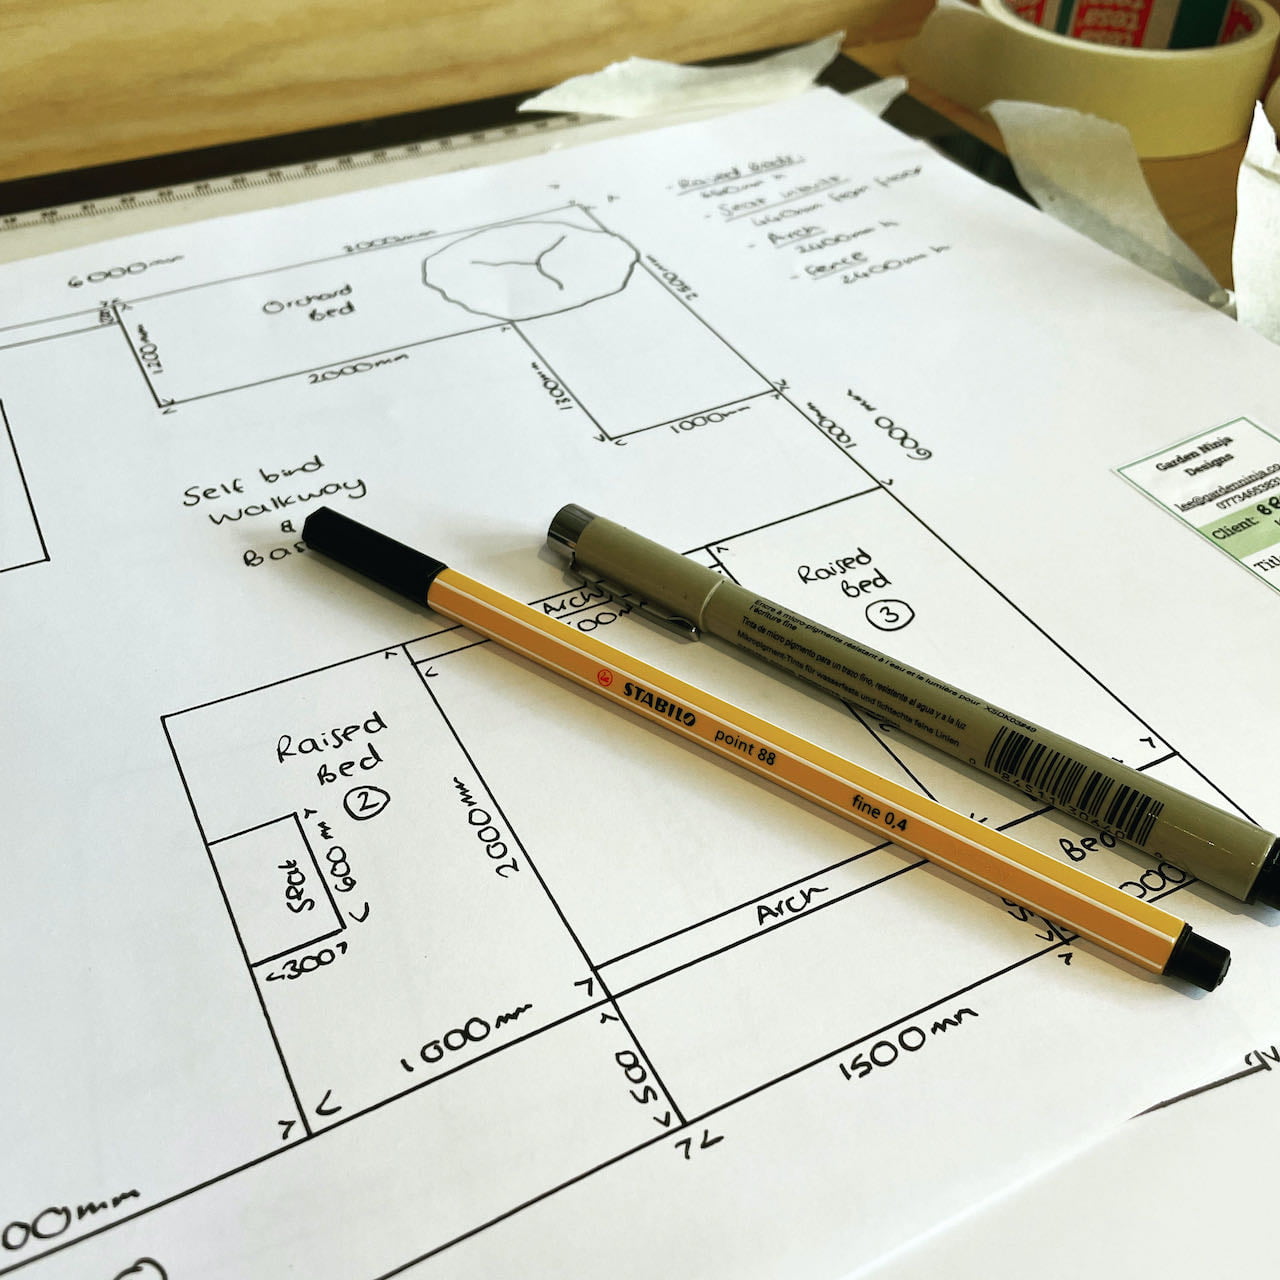
Step 1: Draw up a garden survey
The first thing I do before starting any garden is to draw up a scaled plan or survey of the garden area. This can be as simple as measuring the perimeter and a few measurements across the midpoint of the garden to get an idea of size.
This then enables you to work out what will fit where and plan the layout of the garden
Step 2: Work out how many areas or zones you need
Garden zoning is a really good way to work out which parts of the garden are dedicated to which family members. Through zoning, you can work out which part of the garden gets the most sun for an adult sitting area and which part may be more shaded, perfect for a children’s play area. You can read more on zones in a garden below.
Shaded areas are often better for children as it prevents them from becoming overexposed to the sun and these areas lend themselves better to blending in play equipment. It also adds that feeling of mystery for children, which can really help with active play.
Step 3: Sketch up your plan to scale
The next step is where most people stop, as it involves some drawing. However, this is the most important part of child friendly garden design. By sketching out the zones, areas, and buildings (such as playhouses or sheds), you can start to work out how the different zones work together. You may even find that you have to reduce the zones at this stage as you have too many.
This is the ideal time to spot these design issues rather than when a builder turns up to start landscaping. Thats why this step is so important. It helps prevent mistakes and work out precisely what you and your children need in the garden.
Step 4: Ensure that you have height and transition spaces within the garden
An excellent way to help connect the zones and bring some privacy is to use heights such as small garden trees or screens to provide different areas in the garden. By using these, you can make the garden feel much bigger and private whilst still keeping an eye on your children as they play. Meaning both children and adults feel like they have their own space and privacy.
Step 5: Incorporate suitable play equipment and wild play areas
Now it’s time for the fun bit, adding the play areas to the garden! If you’ve got a specific play zone, it may be that you fill this area with various play obstacles, interactive items, swings or even a den. You could also interweave the play activities throughout the zones meaning the children can explore more. It really is up to you. See below how a teepee, climbing frame, and woodland path are all used for play while complementing the overall design.
One of the best ways of encouraging children to use a garden is to use wild play. Natural materials such as logs, rope swings, and stepping stone paths encourage them to explore and make their own stories and integrate these within the garden design.
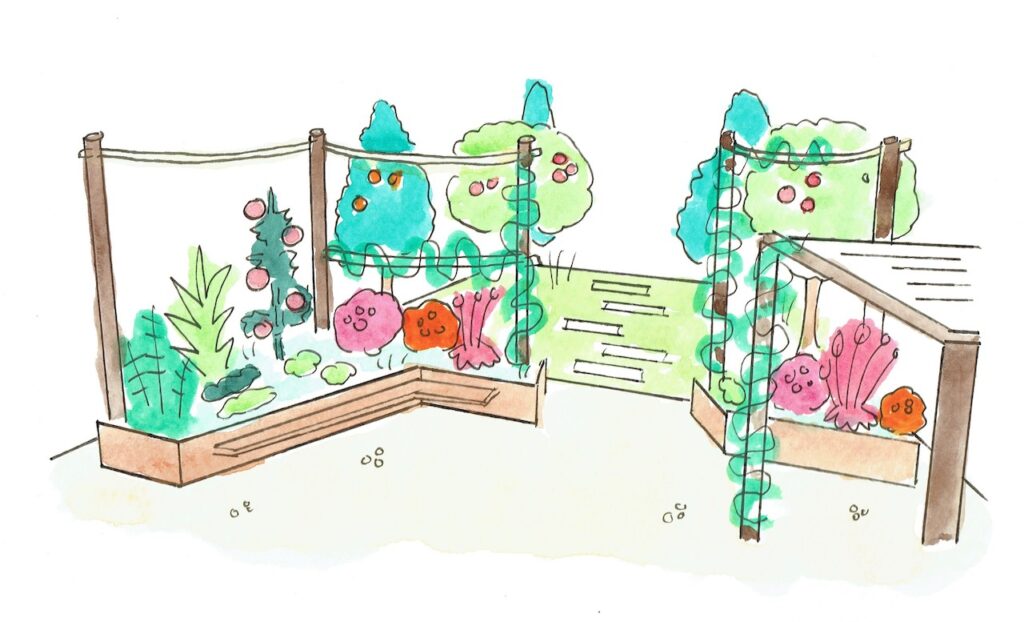
Step 6: Choose child friendly plants, trees and shrubs
No garden is complete without a lush planting plan that really brings the area to life. Don’t just think about lawns but use deep herbaceous borders to add interest, scent and interest for wildlife. Trees can bring height and attract birds, shrubs give winter structure and can help screen off play areas, and a rich herbaceous series of borders helps soften the transition between the zones.
Step 8: Incorporate growing your own plants from seed
If there is one thing that children love to do in the garden, it is to grow plants from seed. Taking a few packets of seeds, whether vegetables or flowers and growing them with your children is a fantastic activity to help teach your children about the life cycle of plants and where their food comes from.
When it comes to design, why not factor in a cold frame, greenhouse or even just a simple potting table area where you and your children can grow your own plants? I guarantee you will both be hooked once you start!
How to create ‘Zones’ in gardens for children
If you’ve seen my other work on family-friendly garden design you will know how I love to zone off gardens. Zoning helps give a purpose to each space, whether it’s the children’s play area, the grow-your-own section or the relaxed adult chill-out area.
Garden zoning will help you easily design a space that has separate needs without it turning into a mishmash of flying footballs, prize flowers getting damaged or having to relax in the middle of a play area!
Examples of garden design zones
Seating areas for adults and children
Play areas
Planting beds
Grow your own zone
The separation between the zones (walls, borders, hedges)
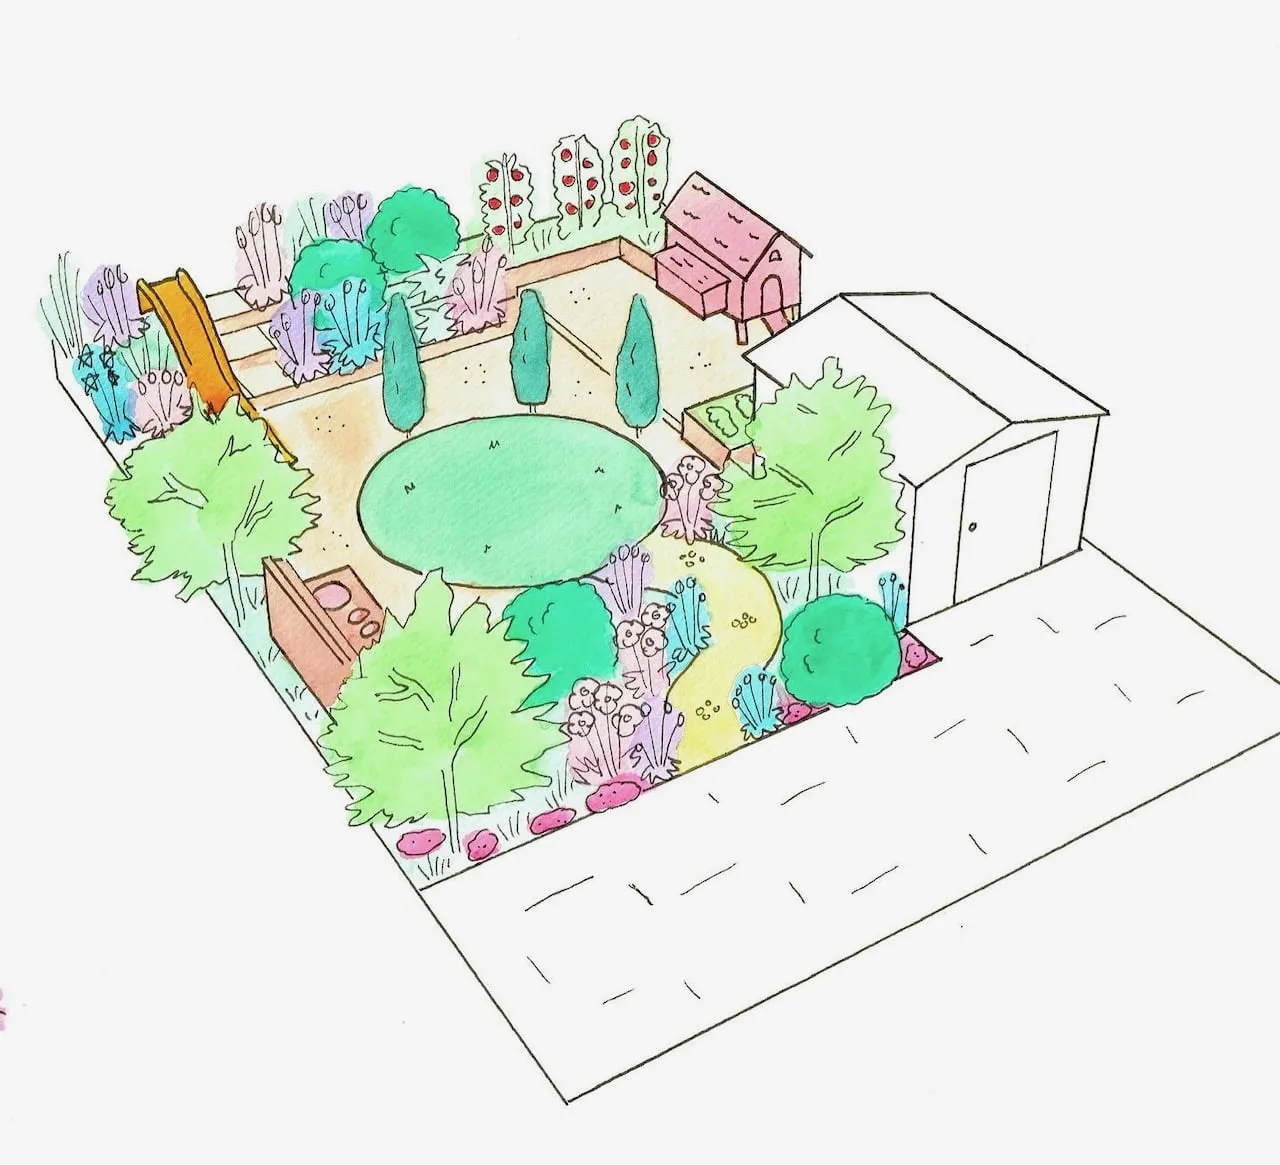
See how a small timber wall above separates the adult area from the main play lawn? Creating a clear marker between the two whilst allowing parents and children to interact. It also means that plants are protected from toys, and the adults sit in an elevated position where they can keep an eye on younger children.
Child Friendly Materials in Garden Design
The first thing I like to do is to plan exactly what type of materials I will use in a child-friendly garden to separate the zones and provide structure. Below is a list of materials often used and those to be avoided.
Materials for a child-friendly garden:
Wood, sleepers and cladding (softer to the touch)
Natural stone paving (porous for rainfall)
Gravel
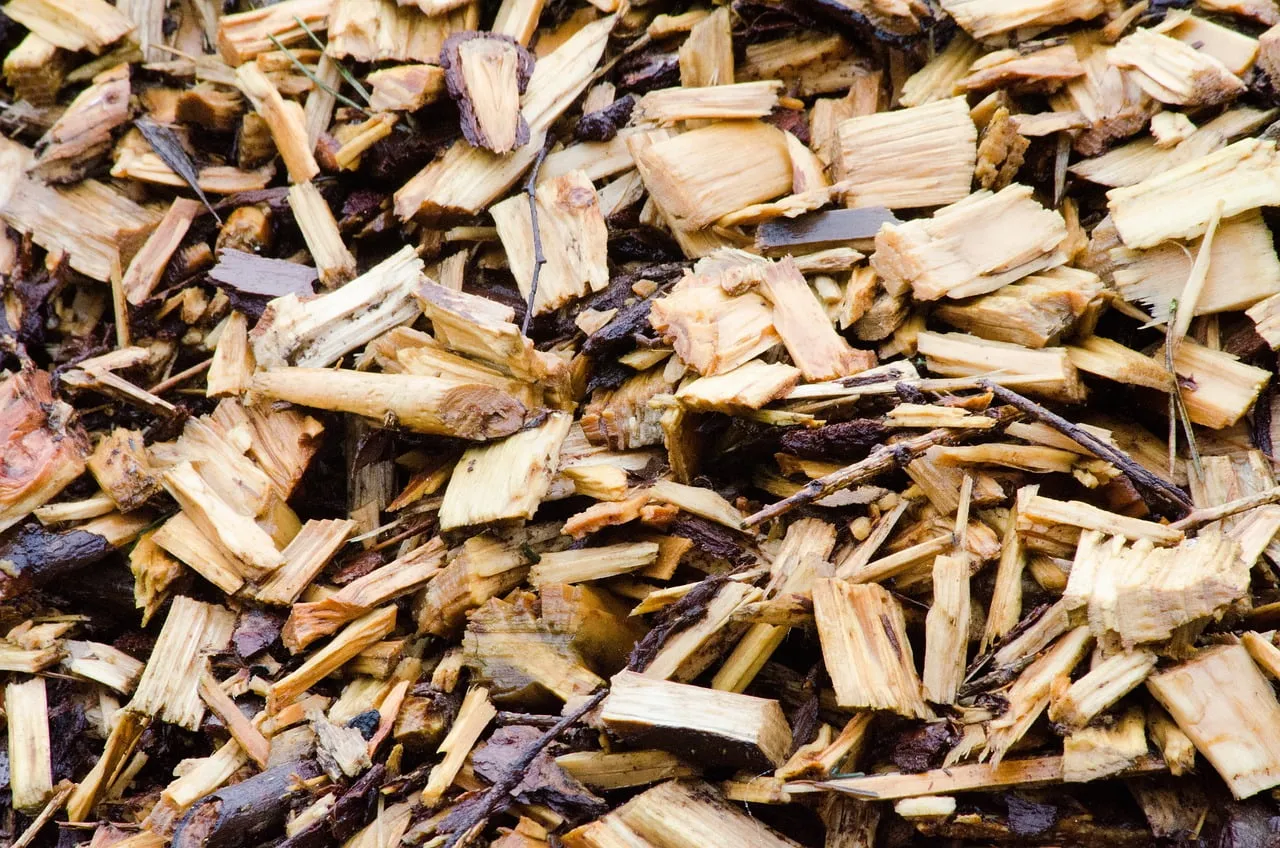
Woodchip
Landscape materials to avoid in child-friendly garden:
Plastic foam or 3G crumb (non-recyclable and carcinogenic links)
I find that timber sleepers are both multifunctional, safe enough and soft enough to blend a number of areas. When stacked two sleepers high, their height is tall enough for a toddler to be protected from the border but tall enough for a seat or perch for growing children and adults.
Walls are also suitable, but harder materials such as stone can provide a risk for children running into them or sharp edges.
Paving materials can be tricky. Often, parents worry that stone will provide a harsh surface for children to play on. Gravel is a much softer surface for any trips and falls but also leads to uneven areas for seating. Also, very young children have a habit of trying to eat small pieces of gravel!
In my experience, paving for paths and seating areas is the best option and turf or woodchip is used in play areas where falls and bumps are more likely. So, pick the material for the zone you’re designing.
Why artificial turf is a nightmare
Artificial turf or plastic grass is often listed as an ideal child friendly garden material. However, I have a real aversion to artificial turf as it’s probably the least child friendly and wildlife-suitable garden groundcover.
If you have pets, their faeces will stick to it and not biodegrade like lawn
It’s slippery when wet
It causes severe friction burns if children skid on it
Artificial turf is not as low-maintenance as it may seem. It’s not really maintenance-free. With artificial turf, you still need to brush it and treat it a bit like an outdoor carpet. It will need sand brushing in at least once a year. It also has a habit of floating up during heavy rain or floods.
Lastly, I find it really unsuitable for children. Falling on turf may leave a grass stain on your knee, but falling on artificial turf leaves one heck of a friction burn at times. Rather than artificial turf, I would always advocate either real turf (it’s barely more maintenance in reality), gravel or wood chip.
Create areas of interest for Children
Most people are used to seeing a swing set or a massive jungle gym in a garden as the only way to keep children entertained. However, a better way to create entertainment is through more subtle approaches.
Why not create a path of cross-sections of logs like in the design below? These logs run through the borders, allowing children to use all garden areas. This way, children can hop and adventure through the garden borders. This doubles up as a route for playing a game of tick or musical statues.
The lawn below is edged so that there’s a mini path around the lawn, so if it’s wet, the children can avoid soggy grass. There are loads of tricks used in this garden to provide children with all sorts of play activities. Even the pergola walkway doubles up as monkey bars for older children!
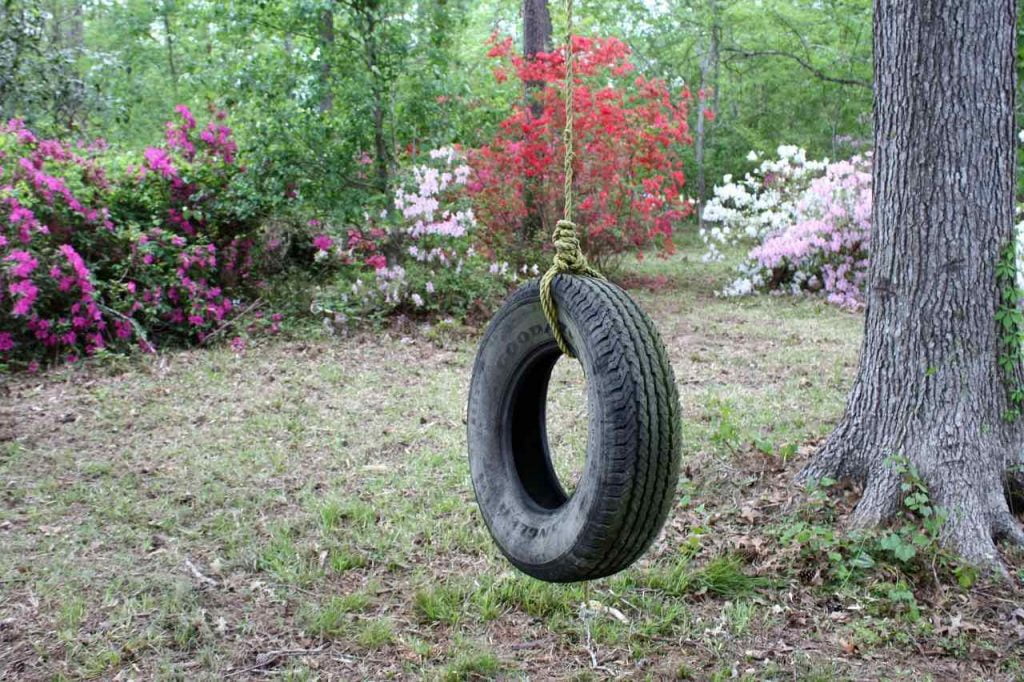
Rather than having a huge swing set, why not hang a rope from an existing tree with a tyre on it or use a rope swing? Then it’s a swing, a seat and a secret spy window all in one!
Instead of a Sandpit, why not have a grow-your-own box where children can plant vegetables and nurture their own plants?
Best play equipment for children
Now that we have discussed the design, layout and zoning of a child-friendly garden, it is time for the fun part. The play equipment! The majority of shop-bought play items are sadly made of plastic, most of which can’t be recycled at the end of their life. I prefer to try to use more natural materials, such as wood or recycled items.
When it comes to outdoor play equipment, children are not bothered by the most expensive shiny toys but by the play items that offer the widest range of fun! If you already have a very obvious play set that sticks out too much, why not use some of the ideas below to help it blend in? Camo nets and climbing plants can help soften large play structures and make them fit into your design far better.
So why not aim for multi-functional play areas such as the ones below?
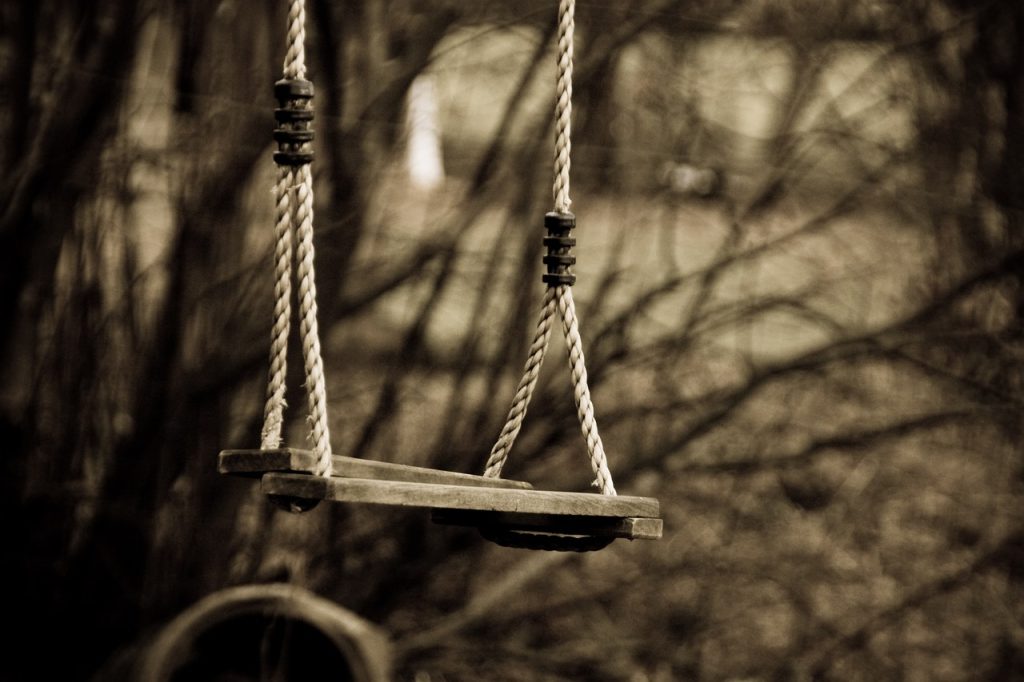
i) Rope Swings
These wooden adjustable swings can be attached to existing established trees or to the side of sturdy garden arches or frameworks. Always check the suitability of frameworks or tree branches that they are secure.
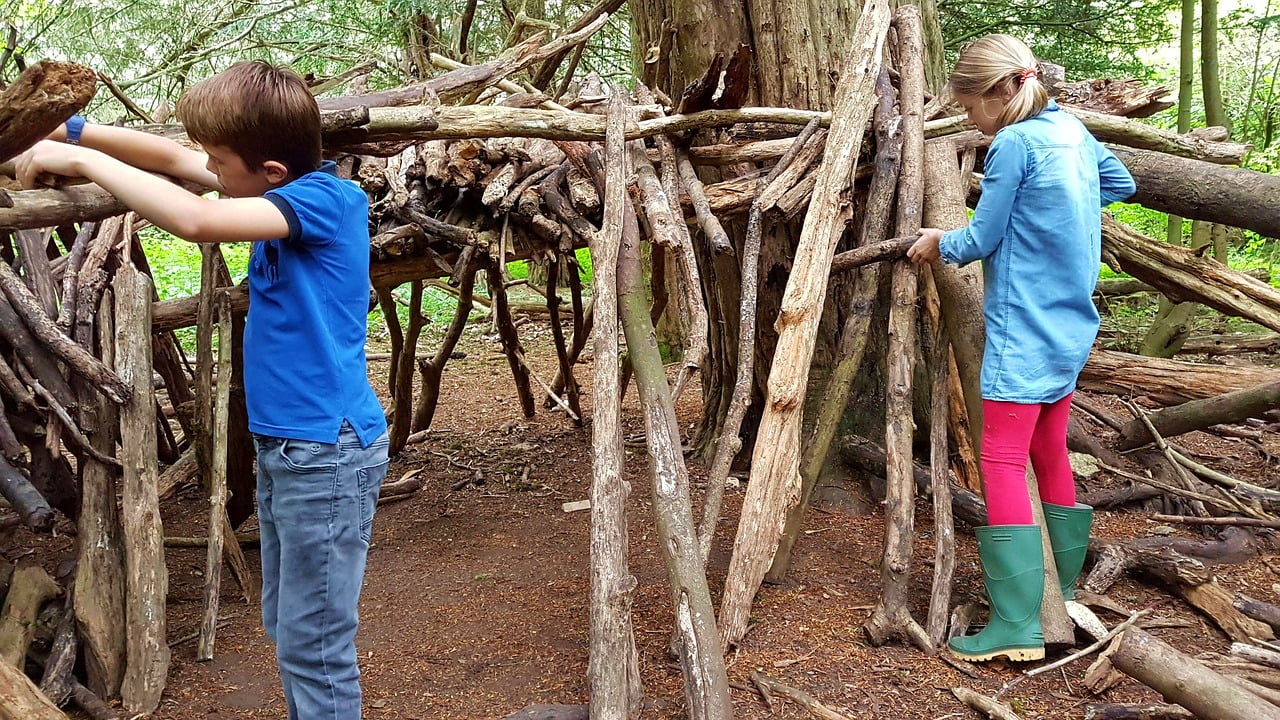
ii) Build a garden Den
Dens are fantastic for children’s wild play and relaxation. A den is a hideaway for children where they can play, read stories or relax away from their parents. All you need to do is create a box or frame that children can sit under or crawl into. You may even already have large trees with low branches that can act as the framework. Always make sure the framework is structurally sound and well-connected as a builder if unsure.
Children love crawling through tunnels in gardens, whether a shop-bought fabric pop-up tunnel or one made from timber. I’ve used them in countless child garden designs. The beauty of a square timber tunnel is the top of it can be used as a makeshift table, and you can plant around it to make it blend in. Win-win!
Can you spot the tunnel in the flower bed above and the bridge over the raised bed before the greenhouse? Well hidden, aren’t they?
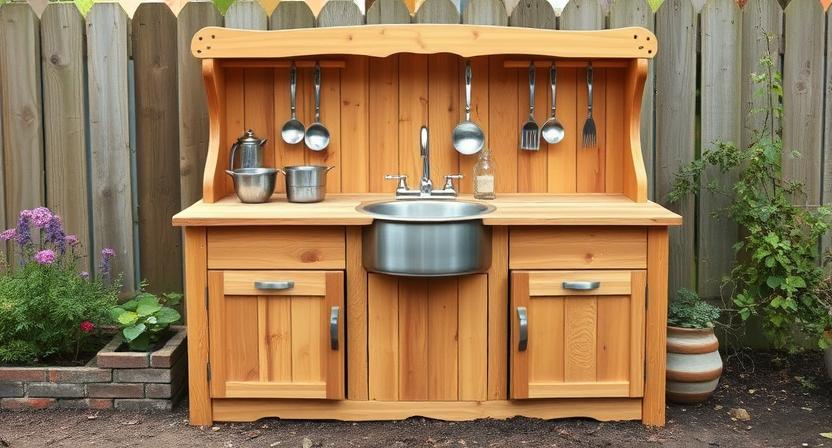
iv) Mud Kitchens
If there’s one feature that transforms how children use a garden, it’s a proper mud kitchen. I’m not talking about a token bucket and spade; I’m talking about a legitimate outdoor kitchen setup where getting absolutely filthy is not just permitted but actively encouraged. This is quite possibly the best return on investment you’ll make in any child-friendly garden.
The beauty of a mud kitchen is that it gives messy play a dedicated zone, which paradoxically makes parents more relaxed about the mess because it’s contained and expected. Children engage in incredibly sophisticated imaginative play when they’ve got pots, pans, utensils, water and access to soil. They’re making potions, cooking mud pies, running restaurants, conducting science experiments and developing fine motor skills whilst having an absolute whale of a time.
Location is critical. You want it close enough to a water source that refilling watering cans isn’t a marathon, but not so close to the house that muddy footprints march straight onto your kitchen floor. Partial shade is ideal because children will spend hours there on hot days, and you don’t want them baking in full sun. I often position mud kitchens near vegetable plots or herb gardens so children can “harvest” ingredients for their mud cuisine.
For construction, you can go down several routes depending on budget and ambition. The simplest approach is to repurpose an old wooden pallet, stand it vertically and add some hooks for utensils and a shelf for pots and pans. Charity shops and car boot sales are goldmines for cheap pots, wooden spoons, whisks and colanders. Add a metal washing-up bowl mortared into a gap between pallets for a “sink”, and you’ve got a functional mud kitchen for under thirty quid.
If you’re more ambitious, build a proper structure from timber. I typically use untreated scaffold boards or timber sleepers to create an L-shaped counter at about 60cm high for younger children, with a proper sink unit cut out to hold a bowl. Include shelving above and below for storage. If you really want to go all out, install a water butt nearby with a tap at child height so they can fill their own containers. Some families even run a cold water supply directly to the mud kitchen, though that’s definitely a luxury rather than a necessity.
The genius upgrade is including a small section of worktop with real tiles, grouted properly, creating a surface that can be “cleaned” with a brush and water. Children absolutely love this because it feels authentically kitchen-like. I’ve seen children spend twenty minutes scrubbing these tiles clean as part of their play, which is hilariously ironic given they’re simultaneously covered head to toe in mud.
Stock your mud kitchen thoughtfully. Include measuring jugs and cups for “recipes”, funnels and sieves for experimenting with water flow, potato mashers and rolling pins for processing mud mixtures, and multiple containers in different sizes. Natural items like pine cones, pebbles, sticks, leaves and seedheads become ingredients. A small blackboard for writing menus completes the setup.
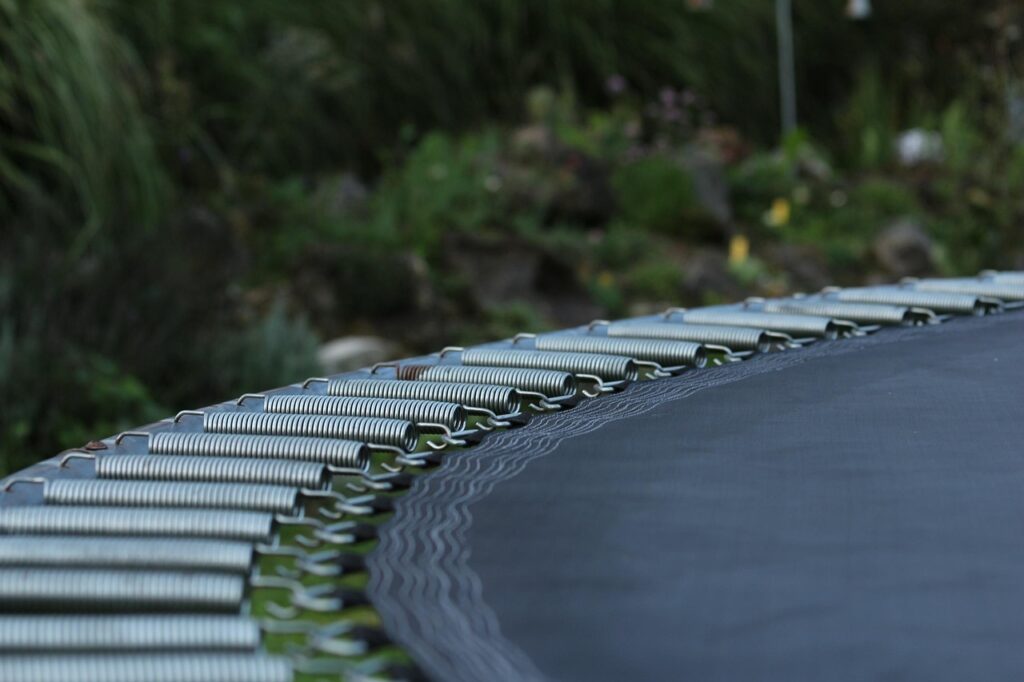
The Sunken Trampoline: Making the Unmissable Invisible
Right, let’s address the elephant in the garden. Trampolines. Children absolutely adore them, they’re fantastic for burning energy and developing coordination, and they’re also enormous visual blights that dominate any garden they’re plonked into. The standard above-ground trampoline on its frame sits there like a giant eyesore, catching wind, creating maintenance headaches and generally announcing “THIS IS A CHILDREN’S GARDEN” to anyone within viewing distance.
The solution? Sink the trampoline.
A sunken or in-ground trampoline solves multiple problems at once. Visually, it becomes part of the garden floor rather than a feature that screams for attention. From a safety perspective, children can’t fall off it because there’s no height to fall from, and you don’t need that ghastly safety net surround that makes them look like backyard prison yards. The jumping mat sits roughly flush with the ground level, surrounded by planting, and suddenly your trampoline has become an integrated feature rather than an intrusion.
Spot the sunken trampoline in the image above, it’s to the left behind the multistem birch and herbaceous planting scheme! Clever eh!
Installation does require more groundwork than simply assembling a frame on the lawn. You’ll need to excavate a pit roughly one metre deep and slightly larger than your trampoline’s diameter. Proper drainage is absolutely critical because you’re essentially creating an underground chamber that could fill with water. I typically specify a drainage system with a soakaway or connection to the main drainage, lined with a geotextile membrane and filled with free-draining aggregate. You’ll also need ventilation gaps around the trampoline edge because the bounce action needs air movement underneath.
There are now specialist in-ground trampoline kits available that make installation significantly easier than it was a few years ago. Companies like BERG and EXIT Toys produce trampolines specifically designed for ground installation with better drainage and ventilation systems. You can either tackle this as a DIY project if you’re reasonably competent with excavation and drainage, or bring in a landscaper. Budget-wise, you’re looking at roughly £800 to £1500 including the trampoline and installation, depending on size and site conditions.
The planting around a sunken trampoline becomes part of its concealment strategy. I use tall, soft, resilient species that can cope with the occasional ball or child landing in them. Hydrangeas work brilliantly because they’re tough as old boots, provide excellent height and volume, and their soft foliage cushions any impact. I’m also a fan of ornamental grasses like Calamagrostis x acutiflora ‘Karl Foerster’, which rustle beautifully in the wind, create natural screening, and bounce back if flattened. Avoid anything spiky or with hard, woody stems close to the trampoline edge.
One of my favourite installations was in a Manchester garden where we created a circular sunken trampoline surrounded by a meadow-style planting. From the house, you could barely tell it was there. The children could bounce to their hearts’ content, and when they were done, it simply looked like a slightly recessed circular garden feature. The clients were thrilled because their garden still looked sophisticated enough to entertain in, whilst giving their two boys exactly what they wanted.
Child-Friendly Planting Ideas
Now, this really is a bone of contention in the gardening world. Some people argue that you should never have any toxic plants in your garden, which makes sense at first. However, when you realise that most plants have some form of toxin or side effect if eaten or ingested, it makes you think again about plant selection. Unless you’re going to fill your garden with lettuce, you need to take a more balanced view of plant selection.
Now it goes without saying that super-toxic plants like Monk’s Hood, Lilly of the Valley and Euphorbia (the sap is highly irritating to the skin) should probably be avoided if children are around. However, even Hydrangeas (granny’s garden favourites) contain cyanide and, if enough is eaten, are highly toxic.
The same is true with Foxgloves and other seemingly safe plants. Even Daffodil bulbs can be toxic if eaten. It’s about being sensible and measured, teaching children about plants, not eating them unless you know they are edible, and treating them with respect. Even the humble Daffodil can be toxic if the bulb is eaten.
My argument here for child-friendly garden design is simple. If your children are likely to eat plants or be left unsupervised in the garden, you need to consider what plants you’re putting in. In my experience, you supervise your children most of the time. Besides, children are more interested in climbing, hiding or collecting leaves than eating plants.
If you provide enough interest in the garden with play areas and activities, it should stop your children from resorting to eating plants and bulbs.
Your subscription could not be saved. Please try again.
Your subscription has been successful.
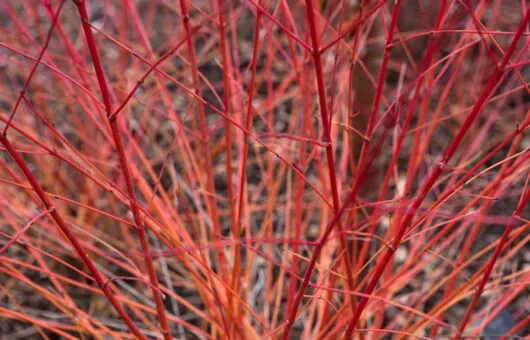
Resilient Planting: Beautiful Borders That Survive Childhood
One of the most common complaints I hear from parents is that their planting looks gorgeous for about three weeks until a football inevitably launches through it or a game of chase tramples half the border. The solution isn’t to give up on planting or resign yourself to indestructible but boring laurel hedges. It’s about selecting species that can take a battering and bounce back, literally.
Bombproof Shrubs
Certain shrubs have evolved to cope with being grazed, bent, and generally mistreated by animals. These same qualities make them perfect for family gardens. Choisya ternata (Mexican orange blossom) is almost indestructible. You can kick it, crash a bike into it, launch balls through it, and it will simply reorganise its branches and carry on. It’s evergreen, has gorgeous scented white flowers, and deer and rabbits won’t touch it, which tells you how robust it is.
Hydrangeas are famously resilient, particularly the mophead and lacecap varieties. They’re deciduous, so children can’t damage them much in winter, and their soft woody stems bend rather than snap. Even if a branch does break, they respond brilliantly to pruning. Hydrangea paniculata varieties like ‘Limelight’ and ‘Vanilla Fraise’ are particularly robust and produce massive flower heads that children find fascinating.
Buddleja davidii (butterfly bush) is borderline indestructible. It copes with poor soil, requires minimal maintenance, and even if you accidentally demolish half of it, you just prune it hard in spring, and it comes back stronger. The bonus is that it attracts butterflies in profusion, giving children something to watch and chase.
For evergreen structure that can take punishment, Viburnum tinus is your friend. It has year-round interest with white flowers in winter, is completely hardy, and shrugs off most abuse. Mahonia x media varieties like ‘Winter Sun’ have an architectural form and fragrant yellow flowers in winter. While their leaves are spiky (which actually protects them from rough play), they’re not as dangerously spiky as holly.
Flexible Perennials
Herbaceous perennials that are naturally floppy and flexible survive better than rigid, brittle species. Alchemilla mollis (lady’s mantle) is the classic bulletproof perennial. Its soft foliage cushions falls, it self-seeds generously, so even if part of it is destroyed, there’s always more, and it looks charming, frothing around path edges.
Geraniums (hardy geraniums, not pelargoniums) in varieties like ‘Rozanne’ or ‘Patricia’ spread generously, flower for months, and if they get flattened, they just pop back up. They’re soft landing zones disguised as pretty plants.
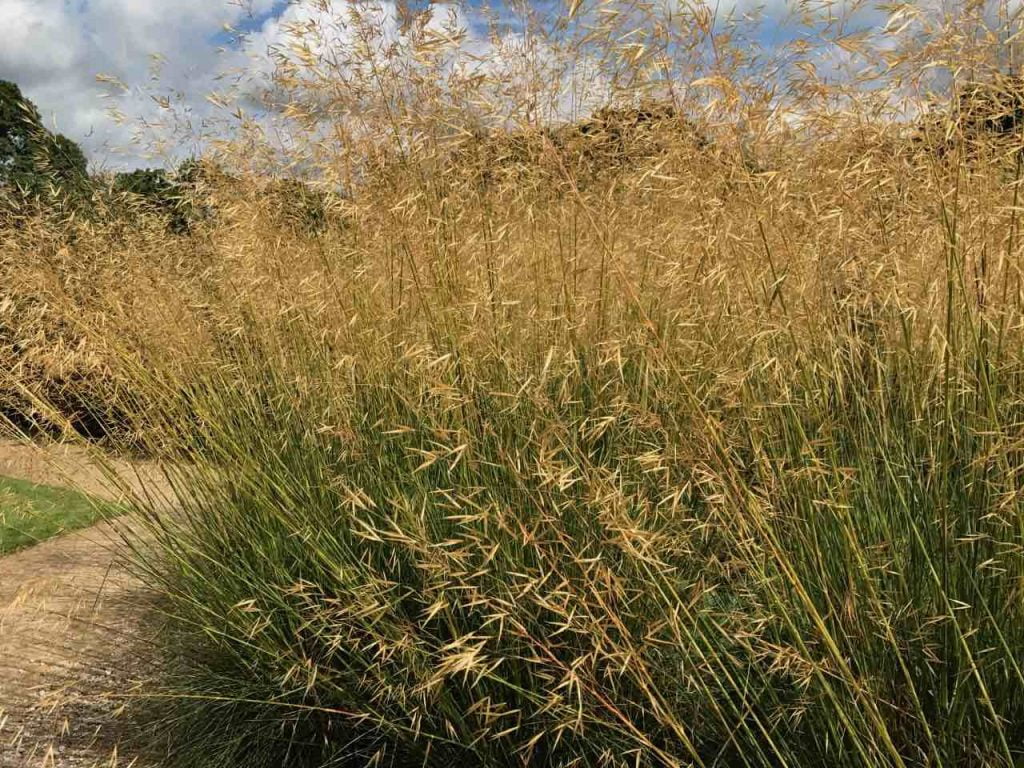
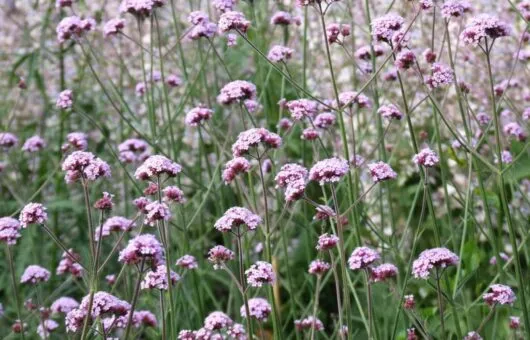
Grasses deserve their own category because they’re naturally designed to bend and flex. Deschampsia cespitosa forms elegant tussocks that children can’t really damage. Miscanthus sinensis varieties provide height and movement, and whilst their stems are fairly rigid when mature, they’re positioned at the back of borders where they’re less likely to be in the firing line. For front-of-border work, Stipa tenuissima and Carex testacea are both gorgeous and resilient.
Rudbeckias and Echinaceas get repeatedly recommended for family gardens because they’re tough as old boots, they flower for months, they seed around creating spontaneous drifts, and even if you flatten them, they’ll recover. Their daisy-like flowers also appeal to children visually.
Strategic Planting Design
Beyond species selection, your planting design structure can build in resilience. Create deep borders rather than narrow ones; this gives plants space to sprawl and means there’s depth to absorb impacts. Use graduated heights so that if taller plants at the back get knocked, they lean into mid-height plants in front rather than flopping onto the lawn.
Plant in drifts and masses rather than single specimens. If you’ve planted twenty Geranium ‘Rozanne’, losing three to a rogue football isn’t a disaster. If you’ve got one treasured specimen, Eryngium, one wayward ball, and it’s gone. Repetition of tough species creates visual impact and built-in redundancy.
Consider using sacrificial planting in high-risk zones. Right next to play areas, use things that you genuinely don’t mind losing. Annuals sown from seed are perfect for this. If they get destroyed, you’ve lost a packet of seeds worth £2 rather than a £15 perennial. Hardy annuals like Calendula, Nigella and cornflowers self-seed so enthusiastically that they effectively become permanent features, but losing a few individual plants doesn’t matter.
The goal is creating borders that look gorgeous and sophisticated but can survive the chaos of family life. I’ve lost count of the number of clients who tell me they’d given up on planting until their designer (me or a colleague) showed them that beautiful and resilient aren’t mutually exclusive.
List of Plants Toxic to Children if eaten
Here’s a list of plants that you might want to avoid in the garden if you are concerned. In particular, Monk’s Hood is the real nasty one in the group.
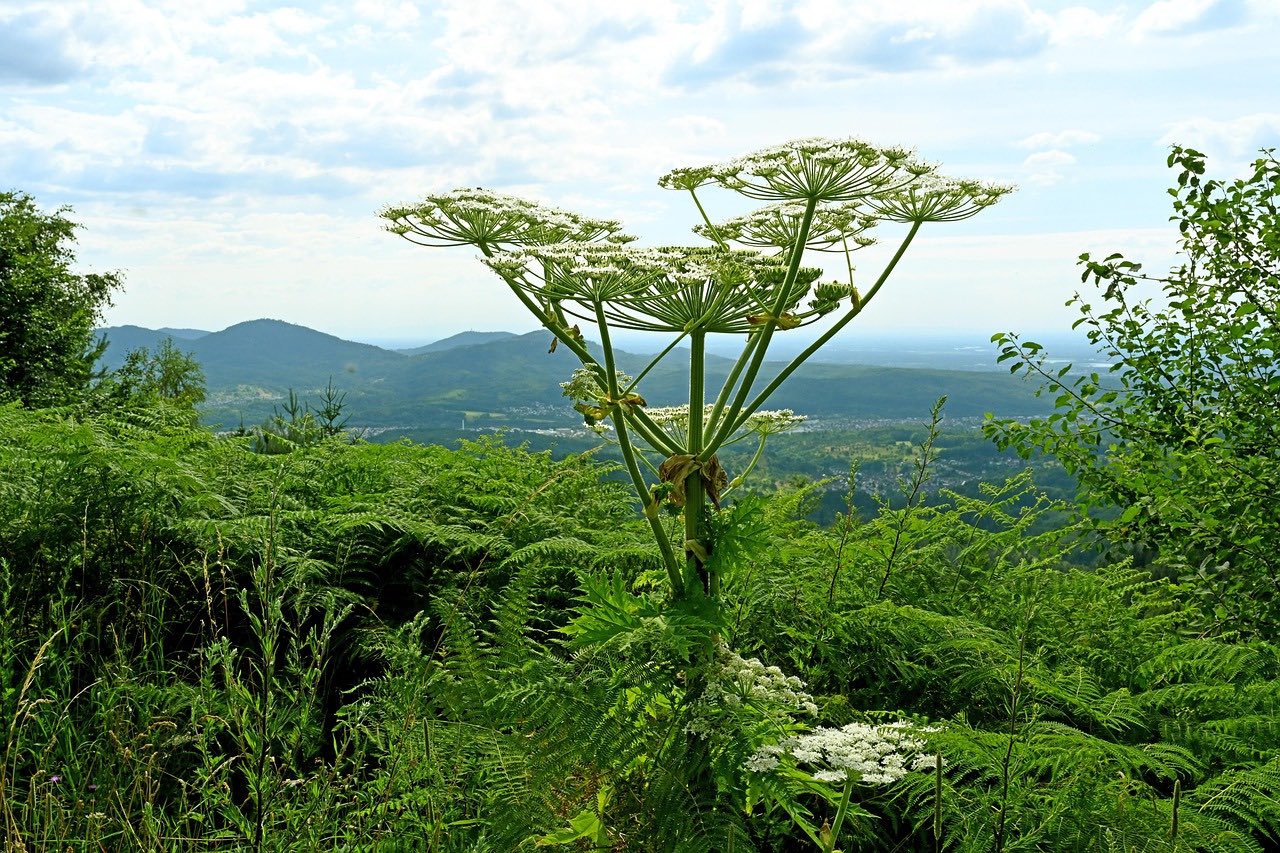
Also, whilst out in the woodland, make sure that you teach your children to avoid Giant Hogweed, often found in verges. An image of it is shown below. It is enormous, at least 7ft, if not taller. It’s sap strips melatonin from the skin, causing blistering and years of damage because the skin can’t protect itself from the sun. If you see it, report it to your council for removal.
Creating a sensory-rich environment in your garden does far more than look pretty. When children can touch, smell, hear, taste and see a diverse range of plants, they’re developing their understanding of the natural world in a way that no amount of screen time can replicate. I’m going to give you specific plant recommendations that I’ve tested in family gardens. These aren’t just theories; they’re plants that children genuinely interact with and remember.
Sight: Beyond Basic Colour
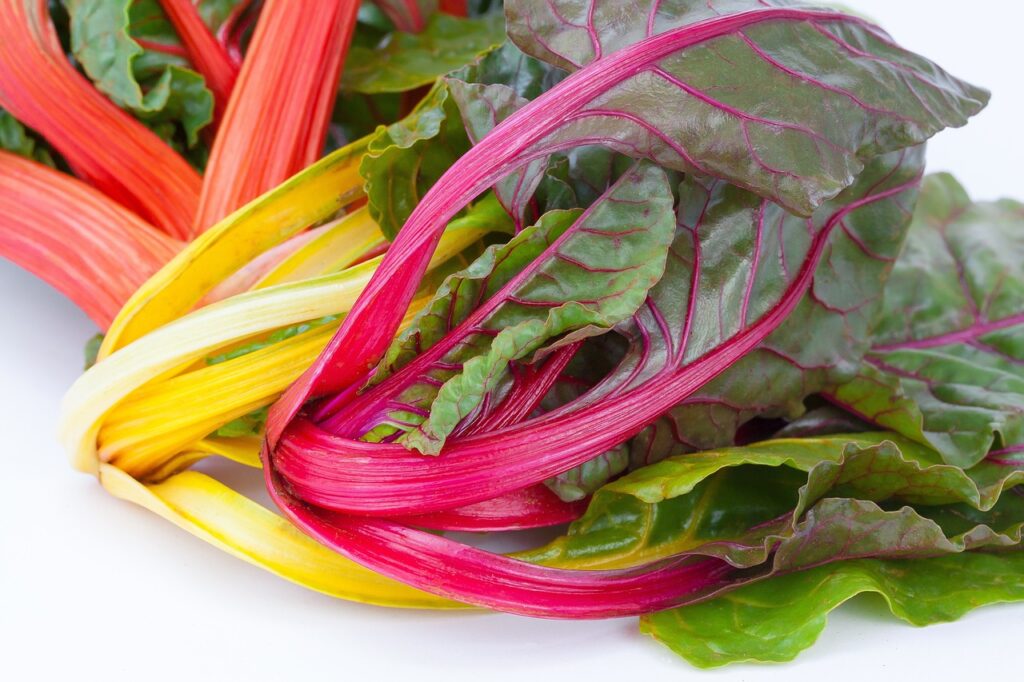
Yes, sunflowers are brilliant, and marigolds are reliably cheerful, but let’s be more adventurous. Swiss chard ‘Bright Lights’ gives you stems in hot pink, orange, yellow and red that children find absolutely mesmerising. They’re also edible, which ticks the taste box as well. Heuchera cultivars come in almost absurd colours, from deep purple ‘Obsidian’ to lime green ‘Lime Marmalade’, and they stay looking good at ground level where children notice them.
For architectural drama, nothing beats Gunnera manicata if you’ve got space and moisture. The leaves grow to over a metre across, creating natural umbrellas that children instinctively want to shelter under. Alternatively, Rodgersia pinnata ‘Superba’ gives you that same primordial jungle feeling in a more manageable package, with huge textured leaves and frothy pink flowers. If you haven’t already read my guide on the colour wheel, please do so, and you can then apply colour theory to your garden!
Touch: Texture Is Everything
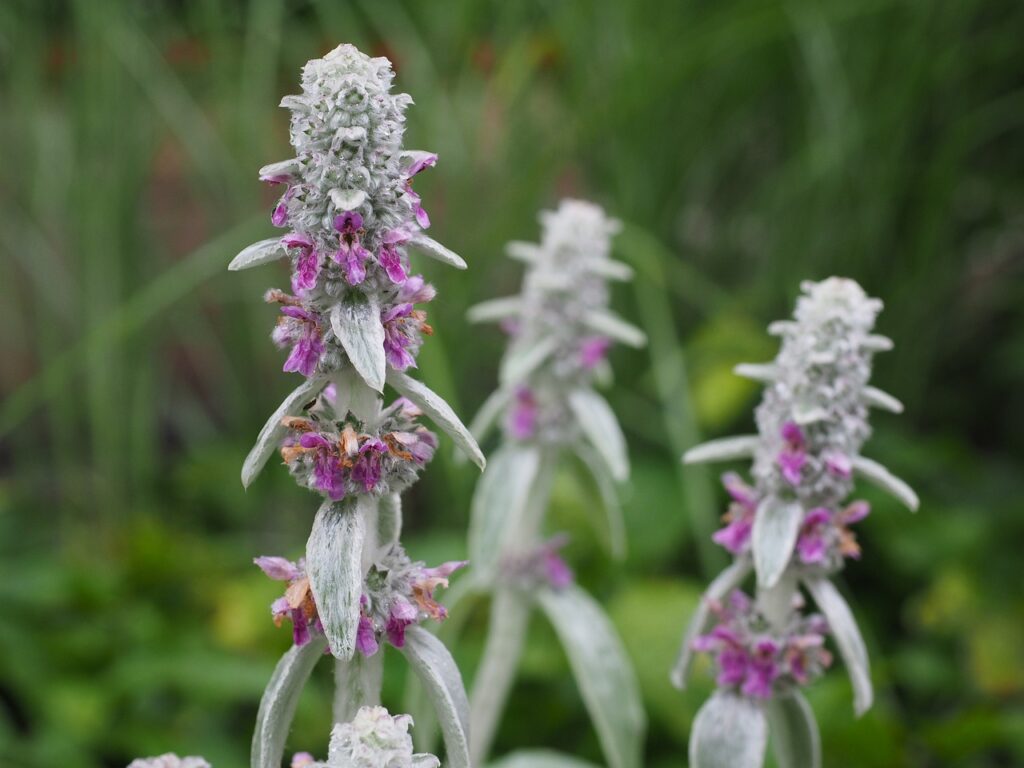
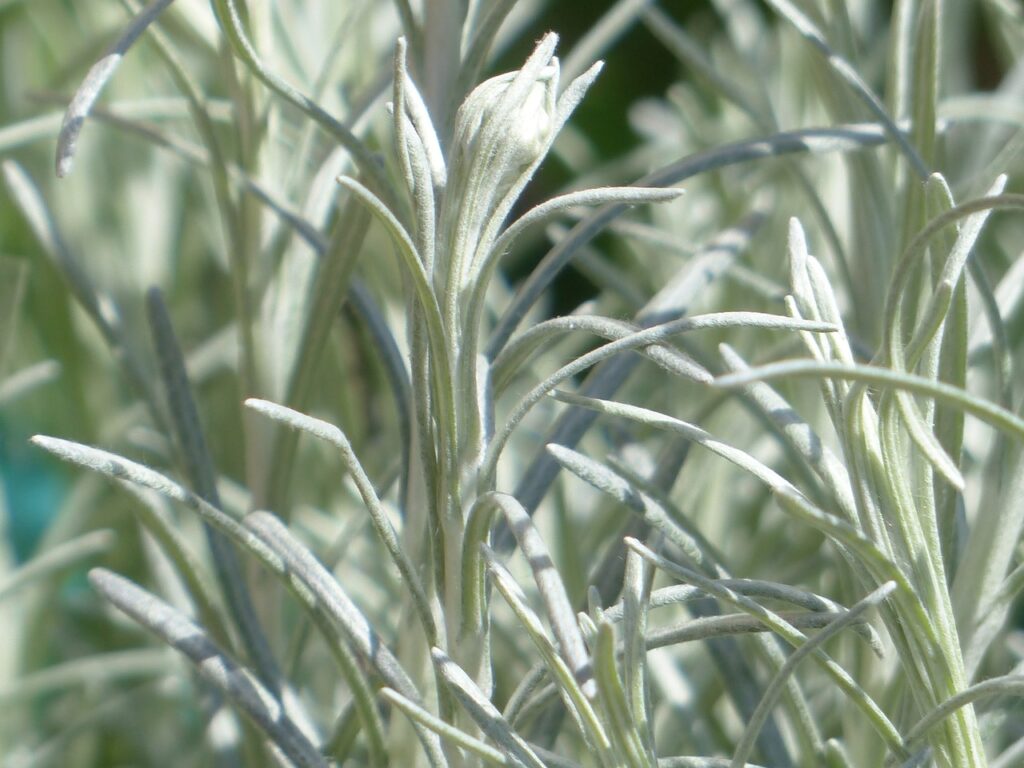
Lamb’s ear seen below (Stachys byzantina) is the gateway drug to sensory gardening. Every child who encounters it wants to stroke the impossibly soft, furry leaves. I’ve never met a child who could walk past it without touching it. Similarly, the downy foliage of Salvia argentea feels like stroking a rabbit.
For contrast, include plants with different textures. The rough, almost sandpapery leaves of Pulmonaria contrast beautifully with the smooth, succulent foliage of Sedum. Grasses like Pennisetum alopecuroides produce soft, fluffy seedheads that children find irresistible. I deliberately plant these where children will brush past them on pathways.
Smell: The Instant Memory Maker
Scent is incredibly powerful for creating garden memories. Chocolate cosmos (Cosmos atrosanguineus) genuinely smells of chocolate and makes children absolutely convinced you’re growing sweets in the garden. The curry plant (Helichrysum italicum) divides opinion but creates brilliant discussions about why something can smell like curry without being edible.
For herbs, you can’t beat the classics. Mint is bombproof and comes in multiple varieties; chocolate mint, apple mint and Moroccan mint all smell distinctly different. Lemon verbena (Aloysia citrodora) releases its scent when touched, creating an interactive element. Rosemary, thyme and lavender should all be positioned where little hands will brush against them regularly.
Sound: The Forgotten Sense
Ornamental grasses create the most beautiful rustling soundtrack to a garden. Stipa tenuissima moves in the slightest breeze, creating a whispering effect that children find quite magical. The seedheads of plants like Lunaria annua (honesty) and Nigella damascena (love-in-a-mist) rattle when shaken, giving children something to listen for and collect.
Taste: The Edible Experience
This deserves its own section really, but within the sensory garden, include plants that children can safely taste. Nasturtiums have edible flowers with a peppery kick that surprises children. Alpine strawberries fruit continuously through summer and are small enough that children can help themselves without decimating your crop. Cherry tomatoes like ‘Sungold’ are so sweet they’re basically fruit, and children who claim to hate tomatoes will often eat them straight from the plant.
Create a dedicated snacking border where everything is edible and children have permission to graze. Include pea plants, which give them the satisfaction of podding, sugar snap peas that can be eaten whole, and dwarf beans that hang at perfect picking height. Throw in some chives (edible flowers), calendula (edible petals for salads) and borage (flowers taste of cucumber).
I designed a sensory garden in Liverpool for a family with three children under eight. We created a circular path through raised beds planted with every texture, scent and edible we could fit in. Two years later, the mother told me it was still the most-used part of the garden, and her youngest could identify plants by smell with his eyes closed. That’s the power of engaging multiple senses simultaneously.
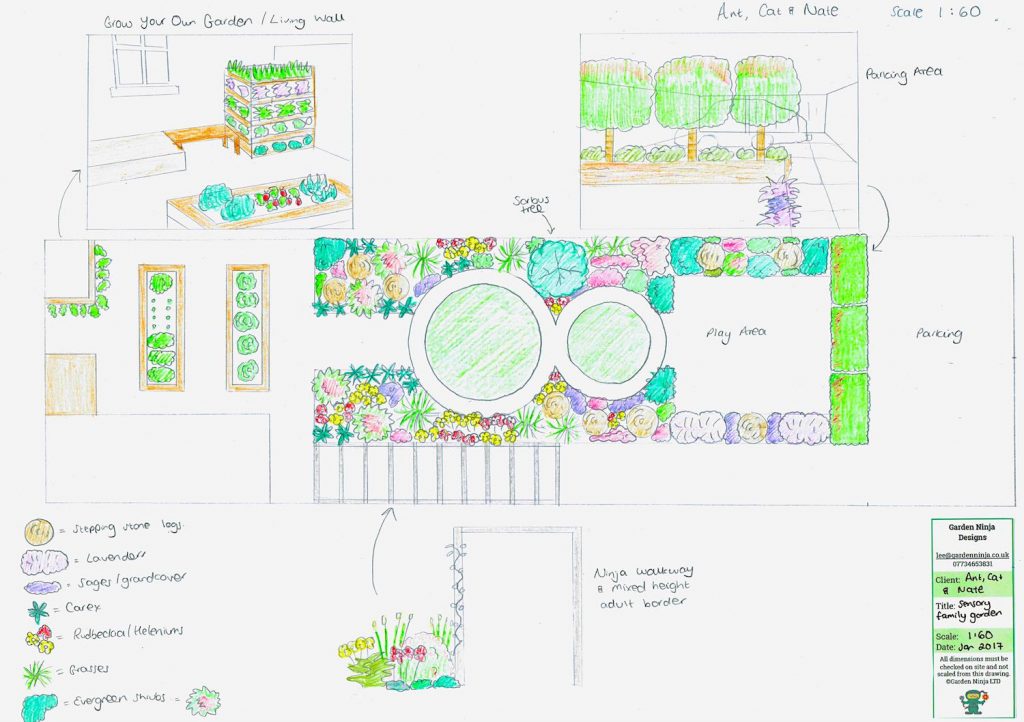
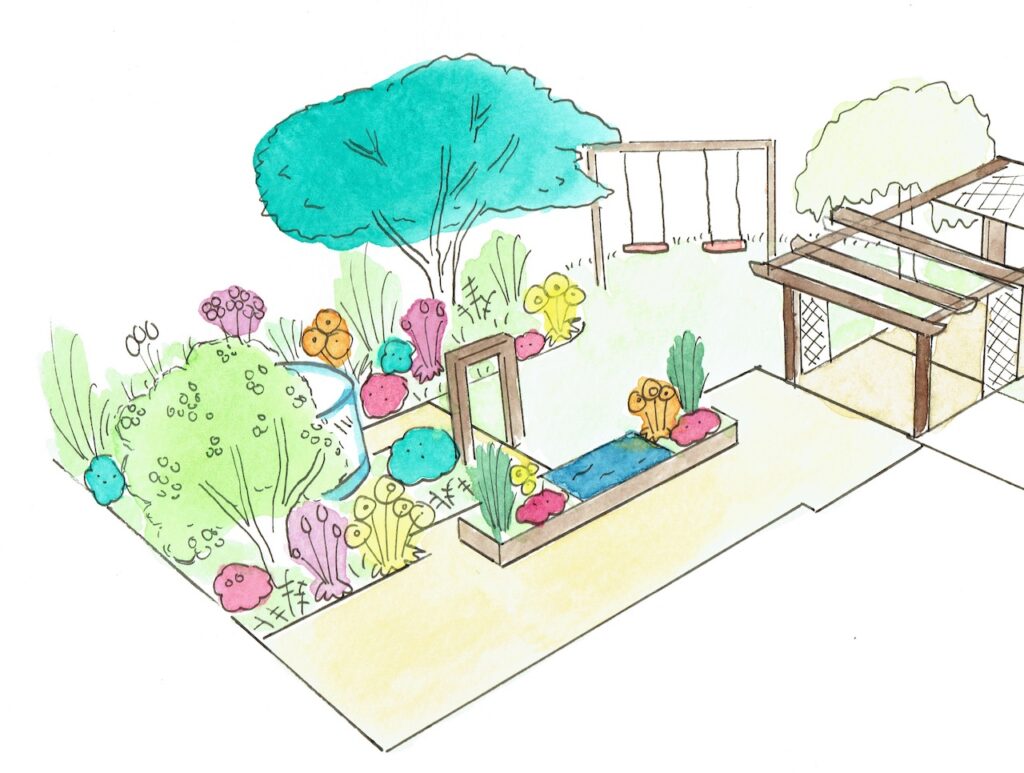
Case Study: Child-Friendly Design Example
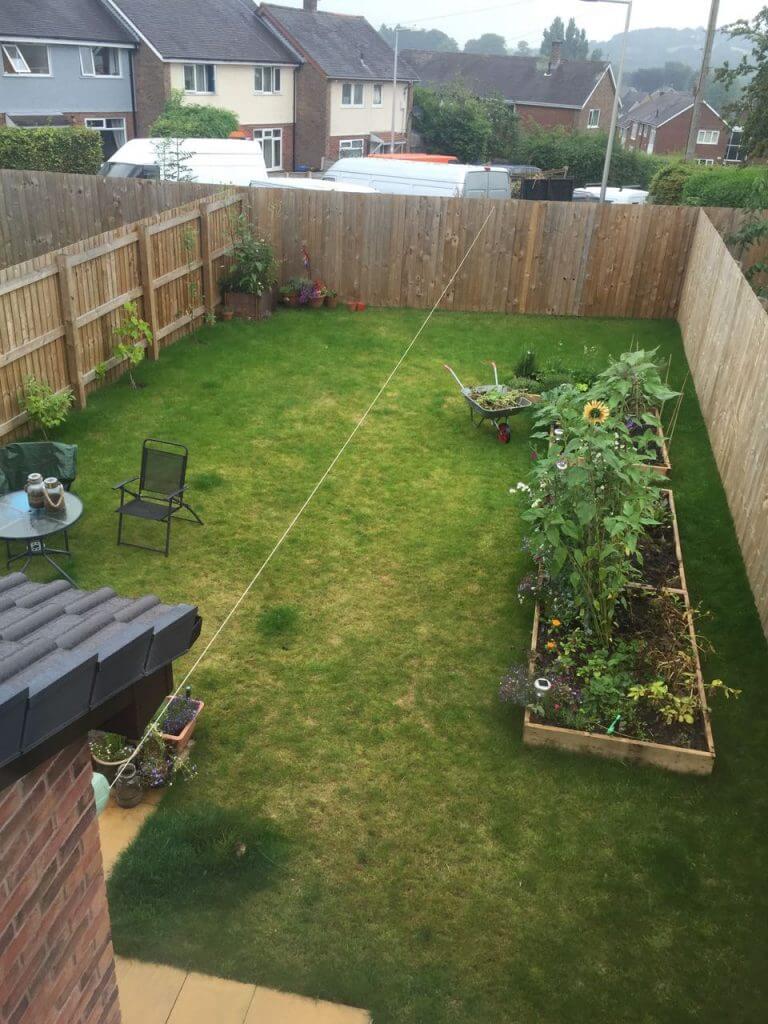
I have written extensively about the issues with new build gardens. Whether it be random grids, oddly shaped boundaries, wasted pockets of space or the fact you can’t dig down further than an inch before hitting rubble, this garden was no exception. It was not a child-friendly garden at all.
The couple wanted to create a child-friendly garden that was also suitable for entertaining adults in. Space where children would be safe, but adults could feel relaxed with some privacy from neighbours. The garden’s soil quality was terrible; they were overlooked and wanted a separate area away from the main garden to produce their own vegetables. I also had a challenge with a horribly damp corner, which I promised I would make into a feature for the children. Me and my big mouth!
The garden before the redesign was overlooked and awkward
Solution
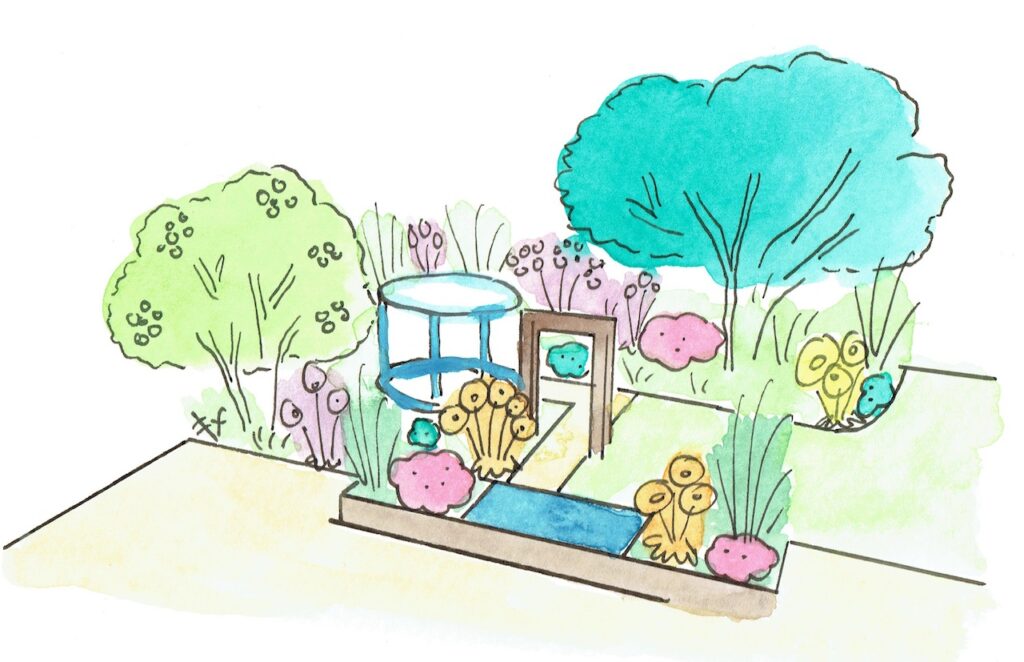
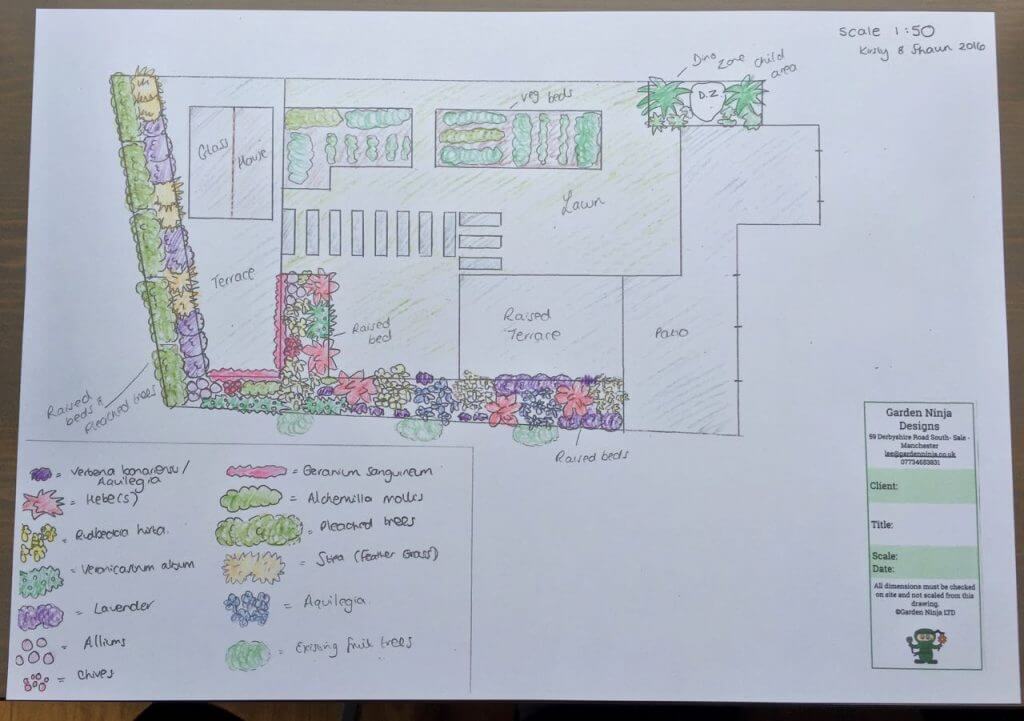
The first part of the design was to take the long garden and divide it into zones. Starting at the back of the garden, where the sun hits first, was perfect for the adult good life zone of the garden. The couple wanted a greenhouse, so I incorporated this into the plans in the adult zone.
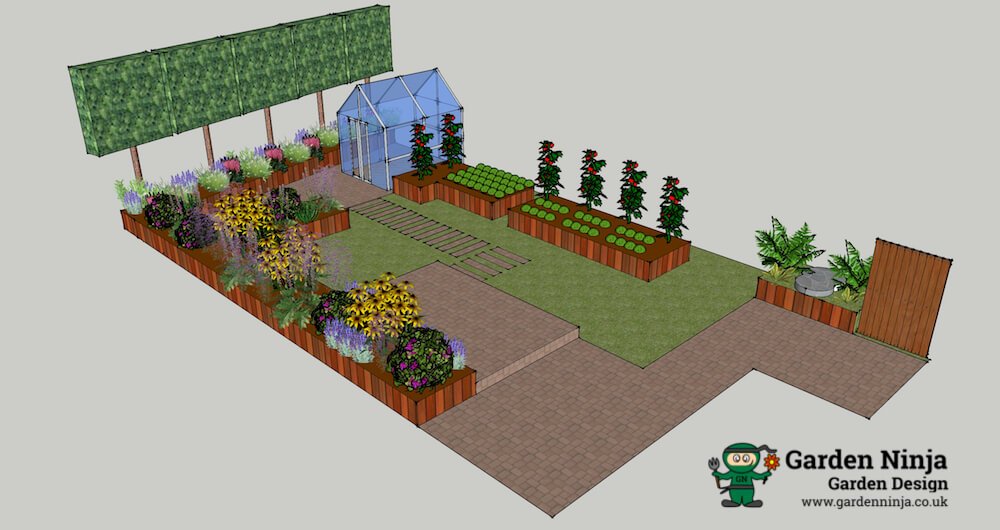
The finished hand-drawn plan
i) Adult Zone
Using raised beds meant we could avoid mass excavation of the awful soil and bring in far better organic matter for the beds. The raised beds also help to screen off the zone from the rest of the garden. The clever use of pleached trees gives a contemporary screen to the back fence and some much-needed height to the child-friendly garden. They also wanted somewhere to sit in the garden.
ii) Children’s Zone
The majority of the main garden was designed with child-friendly and edible plants. The raised beds gave a clear line between the borders so they could play safely. I kept this part relatively simple so children could kick a ball about it or put a slide there if they wished. When designing, it’s important not to over-stylise a garden when children use it, as you risk making it too exclusive for adults. I chose the planting scheme full of tough and colourful child-friendly plants and could take the odd flying dinosaur or Barbie doll strop!
CAD plan of the child-friendly garden
iii) Entertaining Raised Terrace
This area extended the current terrace, lifting it up a step that could be home to an outdoor dining space. Mirroring the width of the patio doors helped connect this area to the house and keep it scaled. I connected this to the adult zone via some stylised paving slabs that gave a contemporary stepping-stone look to the garden.
iv) Dino-zone
In the bottom right was a shady border that was quite damp; the design extended the path around the house to remove the now-dead turf. I also added another raised bed filled with ferns and shade-loving plants. It featured a giant flat rock that can be used as a children’s play area to play with their toys.
Given that the couple’s young child loved dinosaurs, I themed this as the Dino-zone! Even as the children grow up, this area will look good in its own right, with lush shade-loving plants full of texture and interest, but it makes for a really fun play feature, too.
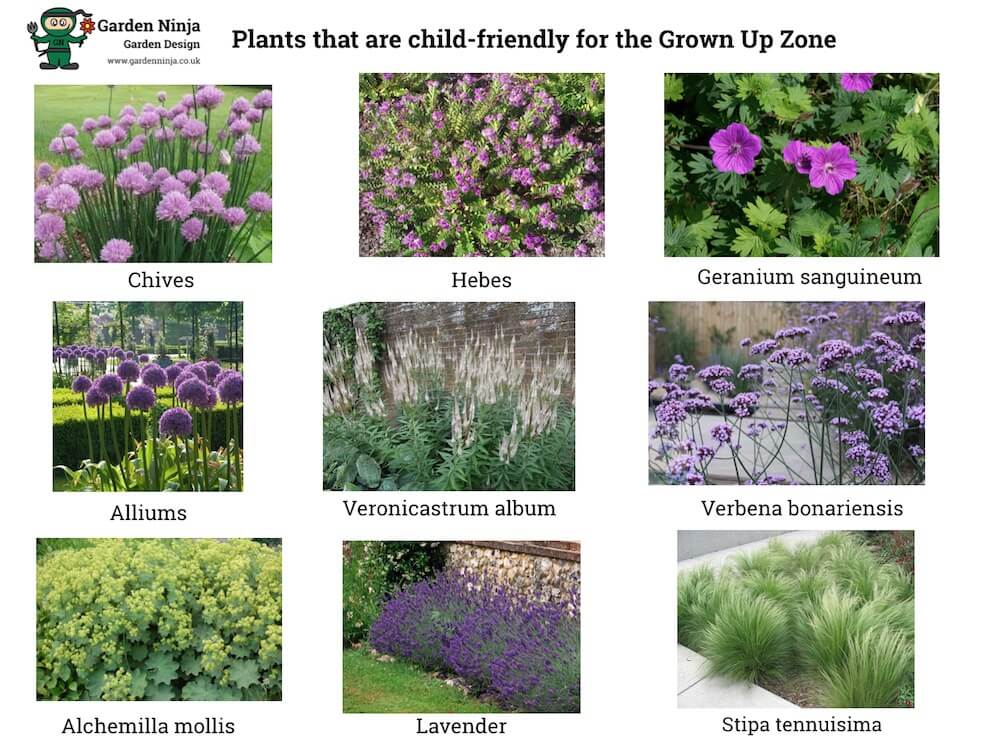
Example plant groups suggested to the couple.
This design was a pleasure to work on. It was a real challenge given the limited space, the poor soil quality and the family’s requirements, so it worked for adults and children. By using straight lines and zones and splitting the garden sensitively, I think the design really works for the couple. Even as the children grow up, the garden is ‘adult’ enough to morph into the next stage of their life.
Learn How to Design Your Own Garden
Now you know what’s involved in creating a child-friendly garden, why not consider taking your skills to the next level with some online design training? My Garden Design for Beginners Course is here to help take your garden from average to amazing with an affordable online course, no matter how little your experience with plants.
This course offers step-by-step guidance from me, Lee Burkhill, award-winning garden designer and presenter on BBC1’s Garden Rescue. In this course, you’ll go from a garden design novice to a confident designer equipped to tackle any green space.
Planting Techniques – Select and arrange plants like a pro.
Design Styles & Layout Options – Explore different styles to suit every garden.
Course Features:
20 Hours of Study Time
Flexible Online Learning
Engaging Video Lessons & Quizzes
Real-World Case Studies
Certification upon Completion
Taught by Award-Winning Designer Lee Burkhill
Enrol now for just £199 and start your journey toward garden design mastery!
29
Garden Design Examples for Small Gardens: 30 Design Templates & Planting Plans
Garden Design Examples for Small Gardens: 30 Design Templates & Planting Plans: In this online gardening course, I’ll walk you through 30 fantastic garden designs, explaining the logic behind the layout, the plant choices, and take-home tips for applying them in your own garden.
Weekend Garden Makeover: A Crash Course in Design for Beginners
Learn how to transform and design your own garden with Lee Burkhills crash course in garden design. Over 5 hours Lee will teach you how to design your own dream garden. Featuring practical design examples, planting ideas and video guides. Learn how to design your garden in one weekend!
Garden Design for Beginners: Create Your Dream Garden in Just 4 Weeks
Garden Design for Beginners Online Course: If you want to make the career jump to becoming a garden designer or to learn how to design your own garden, this is the beginner course for you. Join me, Lee Burkhill, an award-winning garden designer, as I train you in the art of beautiful garden design.
Designing a child-friendly garden is relatively simple when you know how to! After reading this guide, you will understand how to use zones in child-friendly gardens and carefully consider the purpose of each area in your garden. Yes, you can have a garden that is suitable for both children and adults and is still gorgeous once the children grow up! With careful consideration, you can create a child-friendly garden that has space for playtime and relaxing without compromising.
Why not check out the other guides and vlogs on my YouTube channel? You can also check out my Tweet, Facebook or Instagram for more garden guides and tips. I’d love to hear about your own experiences of seed sowing and gardening without plastic, including the types of herbaceous plants you’ve grown from seed, so why not get in touch?
Your subscription could not be saved. Please try again.
Your subscription has been successful.
Lee Burkhill
Lee Burkhill, known as the Garden Ninja, is an award-winning garden designer and horticulturist with over 30 years of gardening experience and 15 years as a professional garden designer. A qualified RHS (Royal Horticultural Society) professional, Lee specialises in sustainable garden design and practical horticultural advice. He designs and presents on BBC1’s Garden Rescue and in leading gardening publications. Lee combines three decades of hands-on gardening knowledge with professional design qualifications to help gardeners create beautiful, functional outdoor spaces.
Thanks for sharing, I really enjoyed your post here. We also have a new built and are looking to design our garden suitable for us and our little 16 month toddler. Do you have a picture of the finalised garden? I would love to see it.
Hi Peter, Unfortunately I don’t have any after pics of this garden. The owners wanted to build it themselves in stages. Have a look at my Family Garden redesign though for a similar style.


Hello Ninja!
Thanks for sharing, I really enjoyed your post here. We also have a new built and are looking to design our garden suitable for us and our little 16 month toddler. Do you have a picture of the finalised garden? I would love to see it.
Cheers
Peter
Hi Peter, Unfortunately I don’t have any after pics of this garden. The owners wanted to build it themselves in stages. Have a look at my Family Garden redesign though for a similar style.
Thanks Lee!