How & when to prune Hydrangeas: Beginners guide to beautiful blooms
Lee Burkhill: Award Winning Designer & BBC 1's Garden Rescue Presenters Official Blog
Beginner level
Knowing how to prune hydrangeas is essential to get the most out of them in your garden. Hydrangeas are a classic garden shrub with ribbed green leaves and classic blowsy flowers throughout the summer. Hydrangeas are both iconic and surprisingly easy to look after with some careful pruning to get the best out of them. This guide will show you how and when to prune Hydrangeas for the maximum floral display each year!
Quick Answer
Prune most hydrangeas in late winter to early spring, ideally March in the UK, once the worst frosts have passed and you can see fresh buds emerging. Remove spent flower heads, cut back a quarter of the oldest stems to the ground, and trim remaining stems to an outward-facing bud. Climbing hydrangeas are the exception. Prune these after flowering in summer.
Understanding how to prune hydrangeas is key to ensuring fantastic flowers on your hydrangea shrubs. Hydrangeas give a real show of huge flowers for months during the summer. Their flowers can then be left in situ, fading from their vibrant early summer colours into translucent winter flower heads. The hydrangea is the true workhorse of the garden shrubs and is very easy to look through pruning.
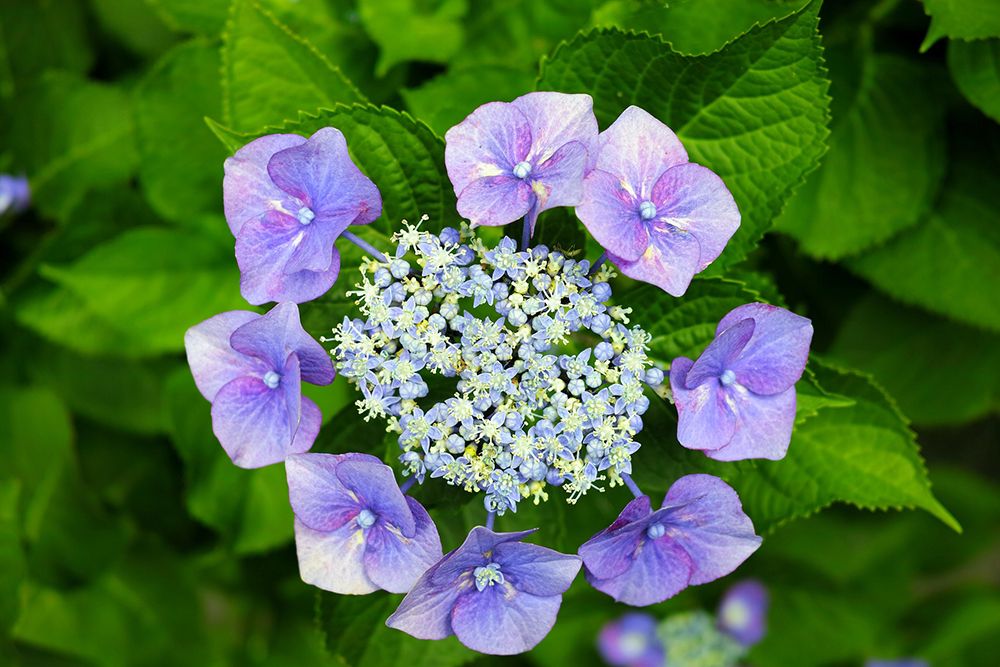
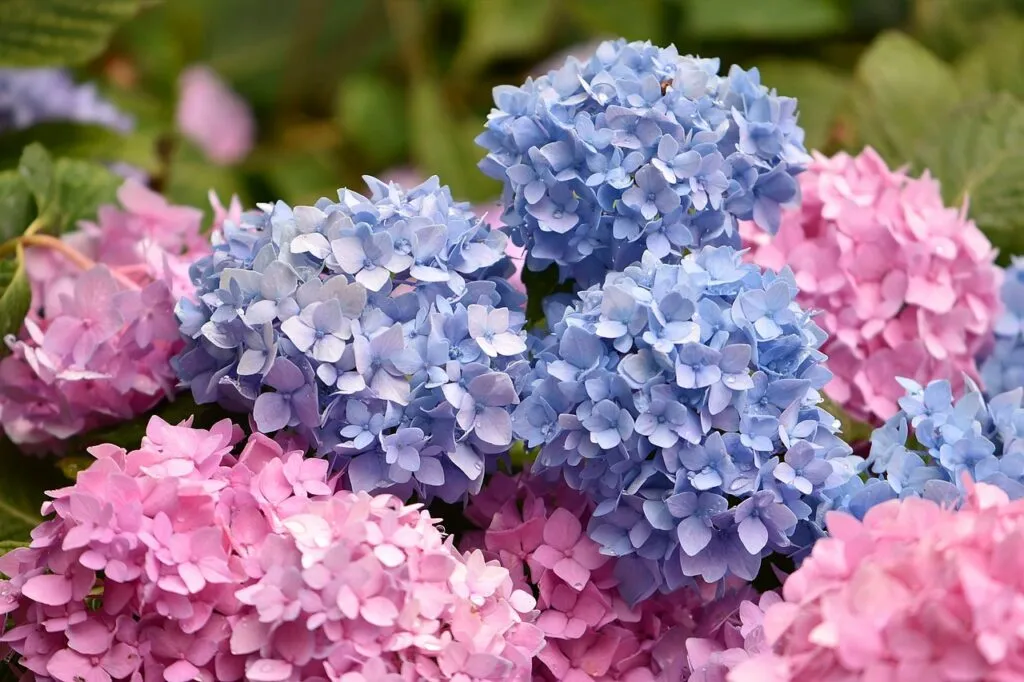
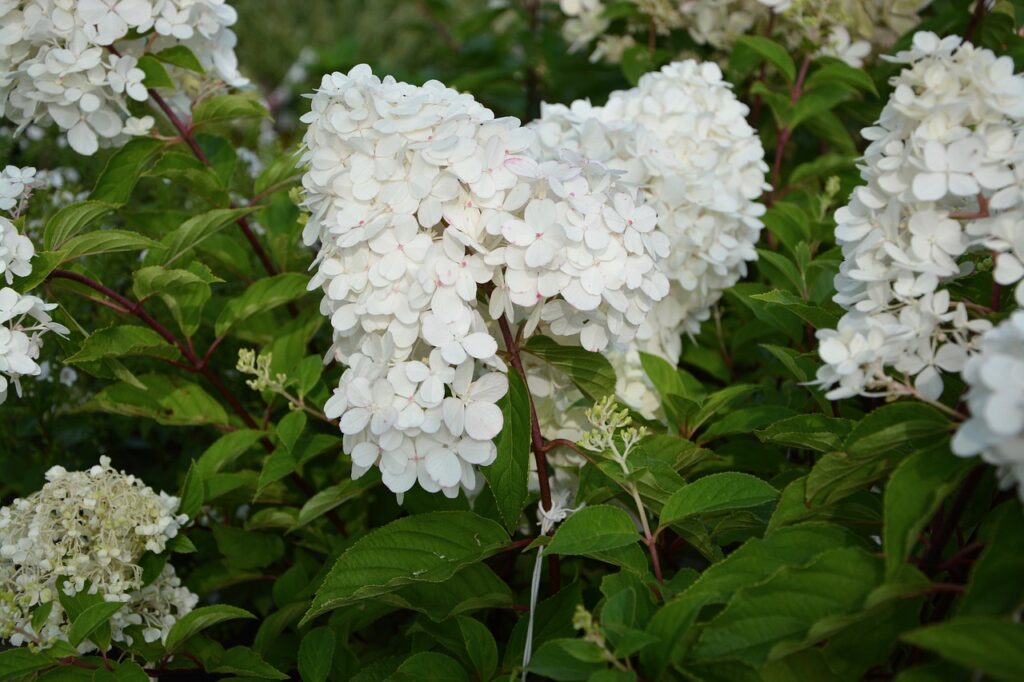
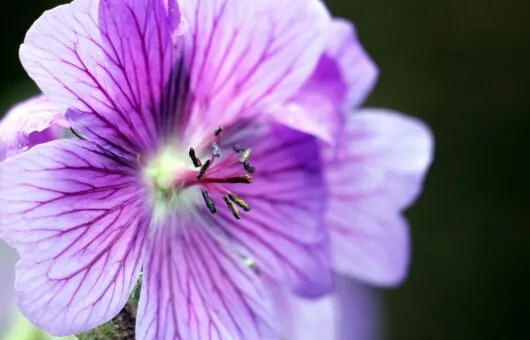
Most gardeners would be hard-pressed not to recognise a Hydrangea. Hydrangeas are the classic ‘Granny’s garden’ shrub with textured leaves and massive blue, pink, white, or mauve flower heads.
Hydrangeas are best suited to dappled or part shade and, once established, will provide a robust shrub with both detailed foliage and some wonderfully diverse flower heads. These can be left on the plant for months of interest or used as cut flowers or dried for various decorative uses.
This page contains affiliate links for products I use and love. If you take action (i.e., subscribe or make a purchase) after clicking a link, I may earn some gardening commission, which will help me keep the Garden Ninja Blog free for all.
1. Types of Hydrangea Explained
Before we jump into pruning our hydrangeas with secateurs in hand, it’s important to understand the types of hydrangea you may be dealing with to work out when and how to prune them.
Group 1: Hydrangeas that bloom on old wood or last year’s growth. These should be pruned in late summer, usually by just deadheading them and a light tidy up:
Climbing hydrangeas (Hydrangea petiolaris)
Oakleaf hydrangeas (Hydrangea quercifolia)
Bigleaf hydrangeas (Hydrangea macrophylla)
Mountain hydrangeas (Hydrangea serrata)
Group 2: Those that bloom on new growth/wood and should be pruned in late winter to early spring by cutting back to outward-facing buds and removing older growth each year:
Smooth hydrangeas (Hydrangea arborescens)
Panicle hydrangeas (Hydrangea paniculata)
💡 Top Tip
Not sure which hydrangea you have? Don’t panic. Leave it for a season and observe when it flowers. If flowers appear on stems that grew this year, it’s a Group 2 type and can be pruned harder. If flowers appear on older, darker stems from last year, treat it as Group 1 and prune lightly. You cannot ruin a hydrangea by being cautious, so a season without pruning will not kill it.
2. When to Prune Common Types of Hydrangea
Each area will differ slightly, but I prune my Hydrangeas in early March here in the UK.
This guide will help you prune the most common types of Hydrangea, such as mopheads, lacecaps and paniculatas. For most Hydrangeas, late winter and early spring are the best times to prune and remove their old seed heads and cut back to an outward-facing bud.
While most gardeners prune hydrangeas in late winter or early spring, there are a few exceptions, notably climbing hydrangeas and oakleaf hydrangeas from Group 1.
Oakleaf hydrangeas are usually evergreen shrubs that require little shaping beyond removing dead branches. Snip off the flower heads in late summer when they are finished, but then leave the shrub. You don’t need to spring-prune these types of Hydrangeas unless they need a tidy-up.
Below is a regional timing guide to help you tailor your pruning to where you live in the UK. Timing is not set in stone, and the key cue is when you can see fresh green buds beginning to swell on the stems, which tells you the plant is ready to get going.
Prune immediately after flowering in summer, not in spring
Below is a list of when to prune different types of hydrangea. The pruning technique is very similar for all three except for the climbing hydrangea, where you just remove the spent flowers and do a light tidy-up.
Hydrangea macrophylla (Mophead or Lacecap late winter prune)
Hydrangea paniculata (Prune late winter)
Hydrangea petiolaris (Climbing, prune directly after flowering in summer)
Hydrangea quercifolia (Oakleaf Hydrangeas only need their flowers removed in late summer)
Pruning Hydrangeas couldn’t be simpler. This guide will help you avoid common Hydrangea pruning mistakes and rookie errors, so you can get the most out of these lovely shrubs and enjoy maximum interest throughout the year!
If you have species not listed above, a mid-spring prune is the safest bet, or seek more specialist advice based on your plant type. This guide will help you get your Hydrangeas in top shape!
3. Do I need to prune my hydrangea?
The quick answer is yes. You will need to prune your hydrangeaeach year to help keep it in a neat and tidy shape. If you don’t prune your hydrangeas each year, then the old flowers can get tangled with new growth.
What you will also find is that over time, the hydrangea gets taller and ‘leggier’ as the years go on. Hydrangeas that are left unpruned result in spindly or leggy shrubs with flowers on the top of the hydrangea plant and then exposed woody bare stems below.
Below is an example of a well-pruned bushy Hydrangea.
Yearly pruning will keep your hydrangea bursting with flowers like this one above. Without pruning, they get congested and can start to look bare and leafless at the bottom.
Hydrangeas tend to flower better on newer wood. So, by keeping your hydrangeas pruned each year, you’re encouraging fresh growth, which will bring you vibrant, healthy flowers each year.
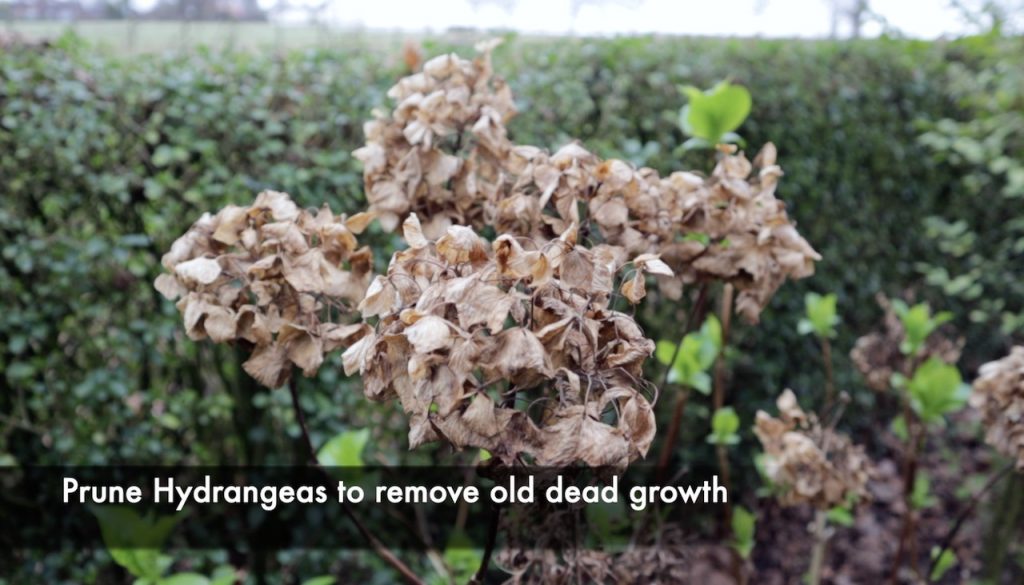
It is easy to tell if your hydrangea needs a prune; the spent flowers will be brown and crispy. Also, the leaves usually fall off during the winter, leading to buds in the spring. When these buds have emerged, you know it is time to prune your hydrangeas.
4. How to prune a Hydrangea
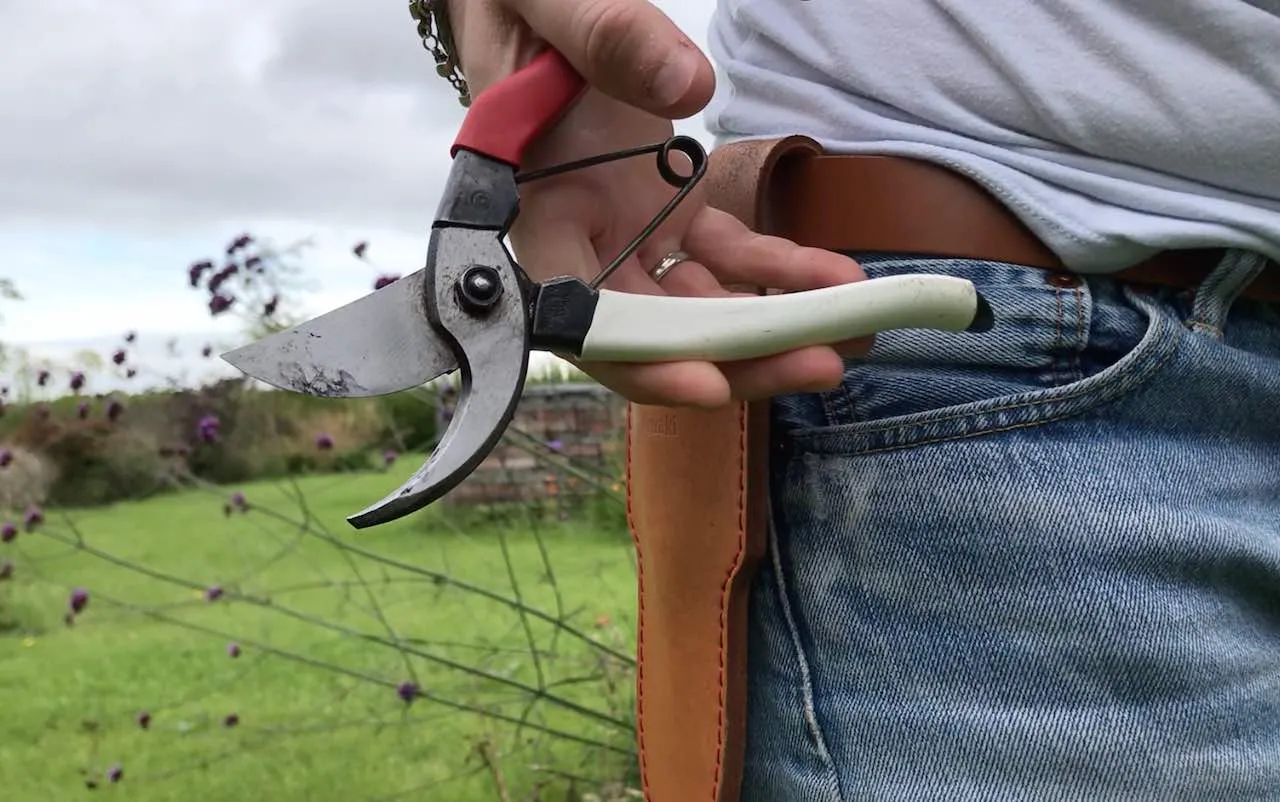
Pruning a Hydrangea couldn’t be simpler and requires very little in the way of pruning. All you need is a sharp pair of secateurs, and you’re ready to prune.
Grab a sharp pair of clean secateurs before you start. Clean, sharp secateurs are essential, and pruning and tidying up hydrangeas are no exception. The cleaner the cut, the faster the hydrangea will heal and also less disease or potential damage from snagged secateurs.
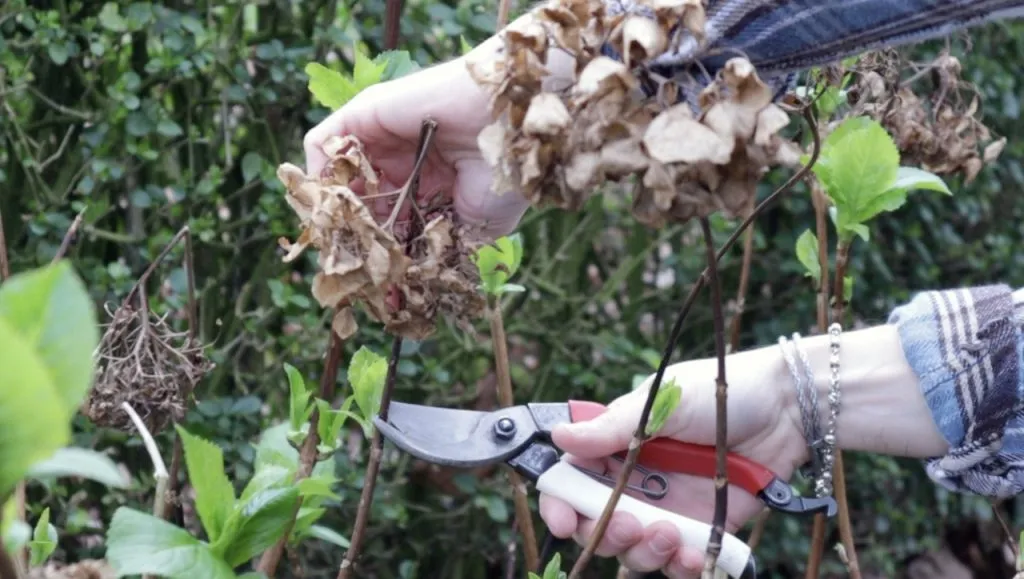
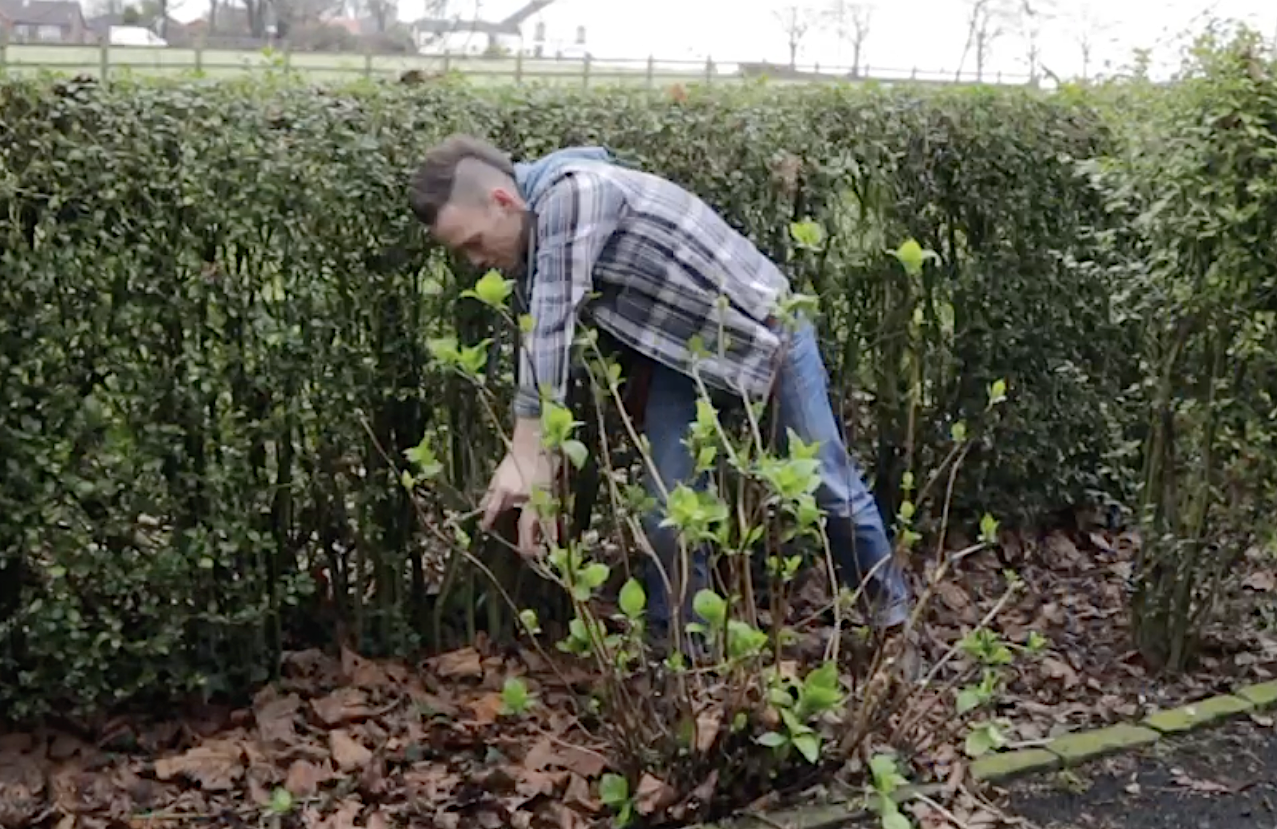
The first step is removing the previous year’s dried brown seed heads. I take these back just above the next set of green buds, which are emerging. I do this first before thinning or reducing the height of the shrub as it gives me a better view of the overall shrub size and shape.
This, in turn, will allow you to make better pruning decisions for the next few steps. This means less fuss or concern about what to cut back as you have a clearer view.
The dried seed heads of the hydrangea are now spent. Remove them for a cleaner, neater-looking hydrangea shrub. You can use them in flower arranging, or compost these hydrangea flowers to recycle them.
Step 2: Remove 1/4 of the oldest stems
The second step in Hydrangea pruning is to remove 1/4 of the oldest growth, cutting it back to the ground.
By removing around 1/4 of the oldest wood/stems, you can help keep your Hydrangea productive, as energy will then be sent into new, fresh growth. Over time, older stems will grow longer and become less productive, leading to potential bare patches and reduced displays.
Take these older stems right back to the ground in a clean, sharp cut. This will encourage fresh new growth and keep the Hydrangea on its toes to perform!
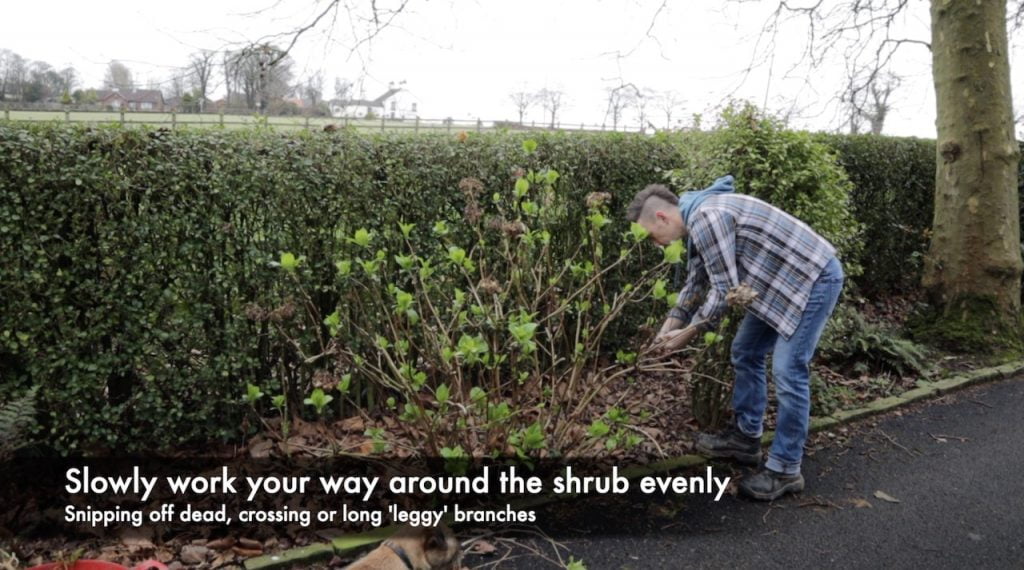
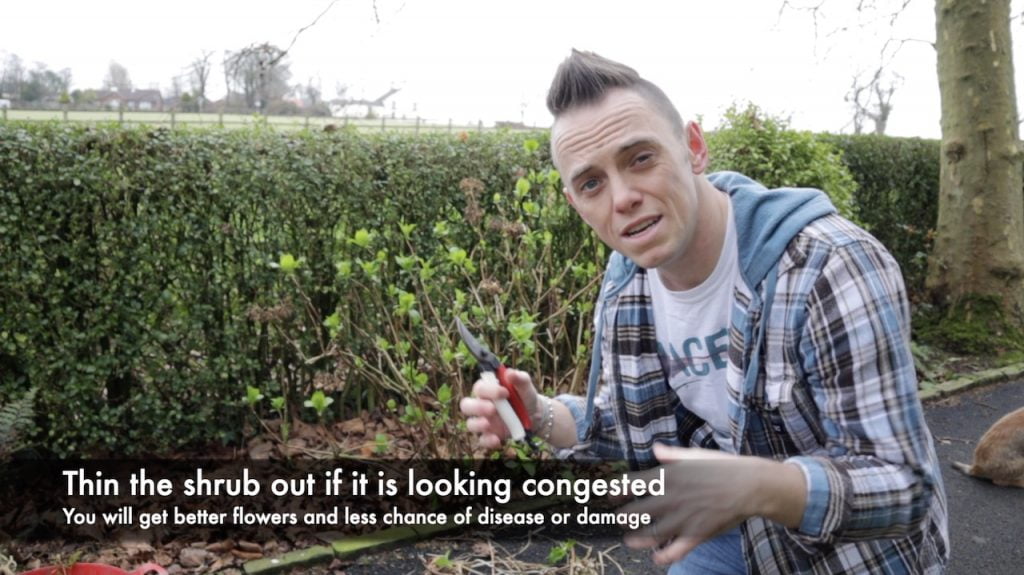
If your hydrangea shrub is looking congested or very ‘busy’ in the centre, it’s best to thin it out. Congested hydrangeas are more prone to branches rubbing each other, causing damage or getting infected by mildew due to a lack of airflow.
Step 3. Remove any congested, diseased or damaged stems
Once you’ve removed the flower heads and cleared some of the older stems, the next step is to thin out any congested growth or crossing branches. These will tend to rub and are at a higher risk of damage. Also, flowers sent out in these tangled areas may get crushed or damaged.
So it’s best to be brave and remove these branches, opting for the stronger of the two when crossing.
Damaged stems may be snapped or show signs of black dieback; both need to be removed. Either cut back to the next healthy bud down or remove to the ground if needed. Don’t panic if you take off too much during the pruning process.
Plants are incredibly tough and will always bounce back. A hard prune always gives your plants an added boost during the next growing season! If you don’t prune back damaged wood, it can get infected and take valuable resources from the plant in trying to heal it, leading to fewer hydrangea flowers and a lacklustre shrub.
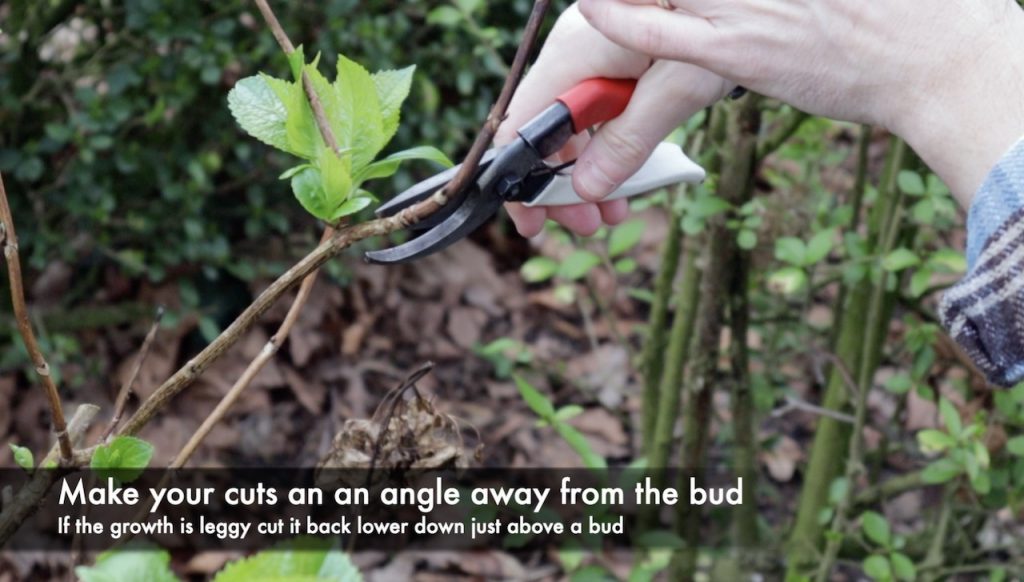
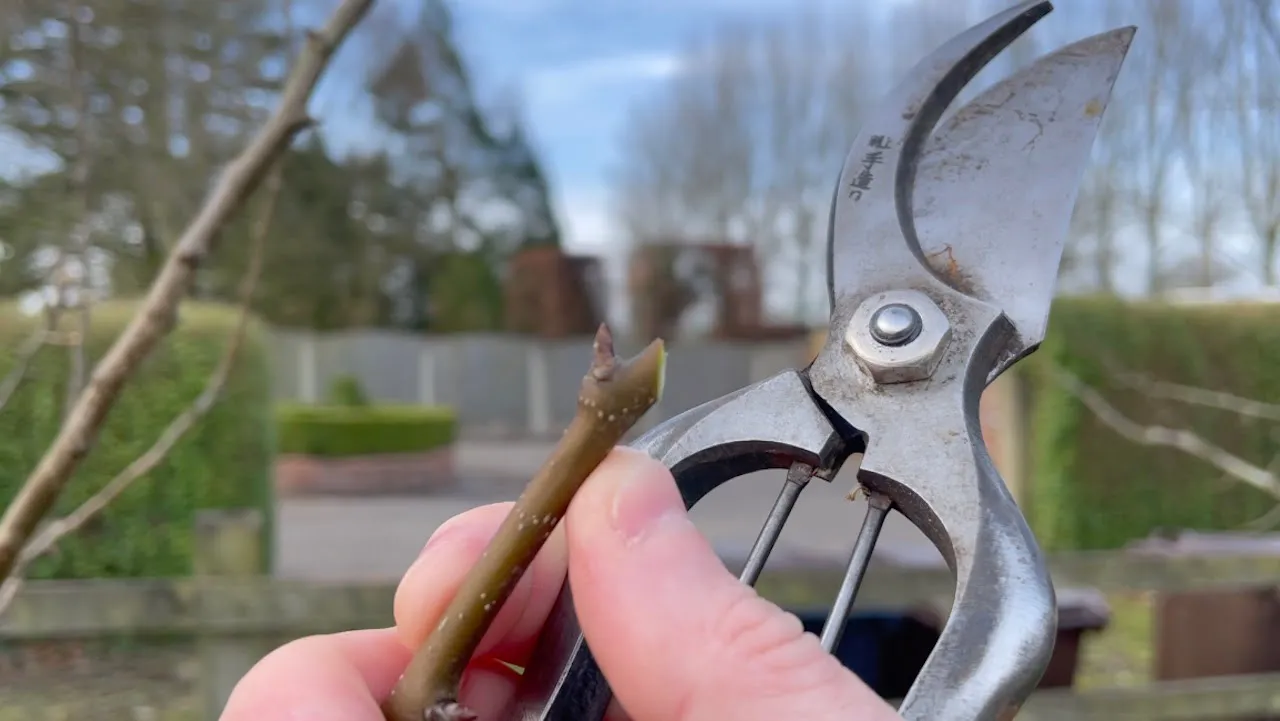
Step 4: Trim back the remaining branches to a bud
Once you’ve removed the three Ds: damaged, diseased or dead wood, and you’ve taken out 1/4 of the oldest stems, it’s time to prune for flowers!
Remove the top 1/3 of the hydrangea growth back to a fresh bud or leaf node. The picture below shows where we are about to prune, removing the previous year’s stem, with the dried flower heads already cut off.
By pruning just above the bud, you’re helping keep the hydrangea compact and robust. If you leave it as is, although it may flower, it often becomes top-heavy and looks bare further down. Cutting it above a bud 1/3 of the way down gives a full-looking shrub come flowering time.
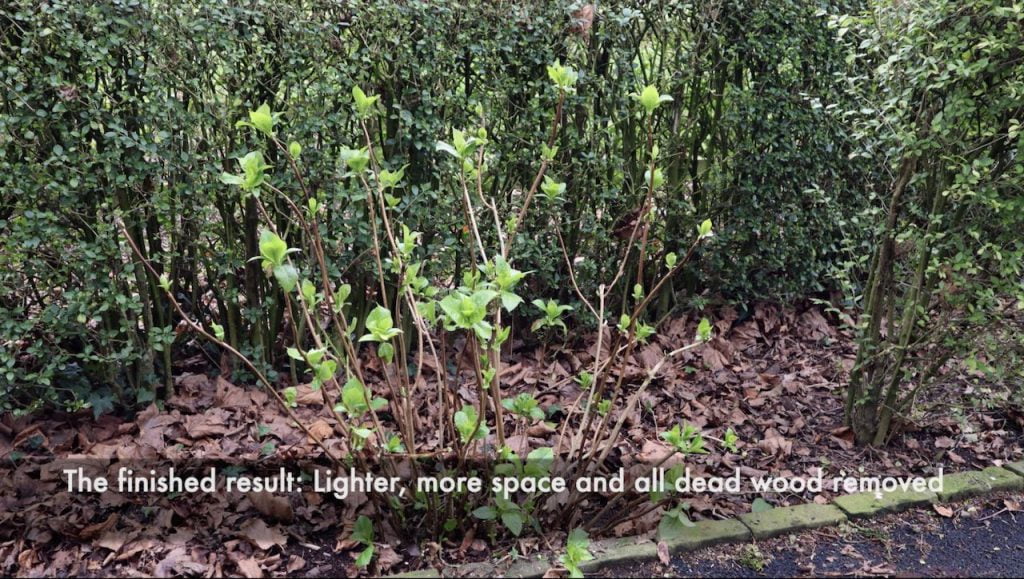
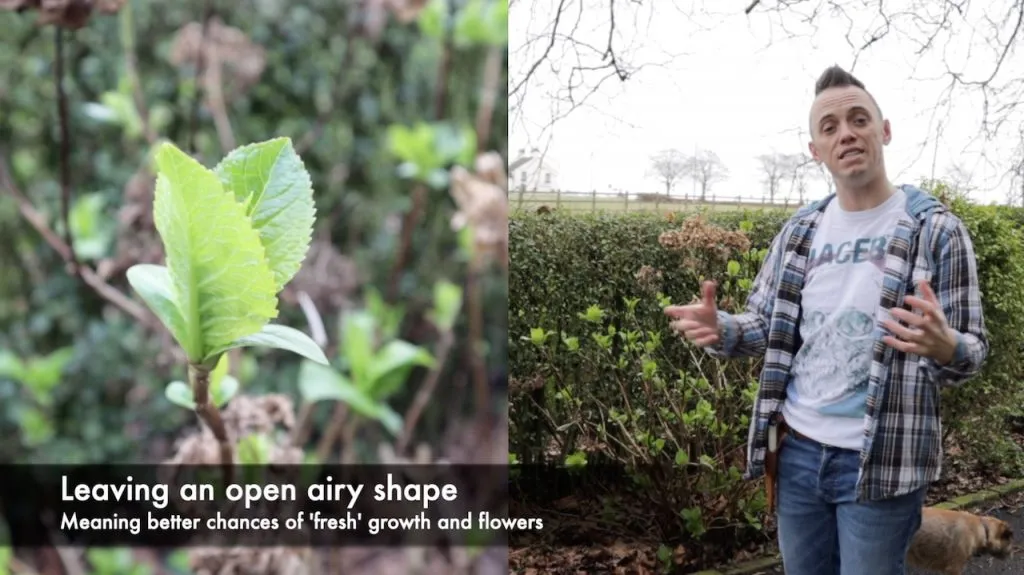
Step 5: Check for a balanced, open, airy hydrangea shape
Once you’ve finished, you should be left with an open, airy shrub with plenty of airflow and no crossing stems. Usually, these shapes are more rounded than square, as this follows the natural form of your hydrangea. I prefer not to clip or prune things into boxes unless it’s a formal garden. Hydrangeas don’t suit this type of formal pruning.
Once you’ve finished pruning, your Hydrangea clippings can be composted, and your Hydrangea is now in a perfect position to put on gorgeous flowers all summer long!
5. Common Hydrangea Pruning Mistakes (and How to Avoid Them)
Over the years, I’ve visited hundreds of client gardens and seen the same hydrangea pruning errors come up again and again. The good news is that these shrubs are very forgiving, but knowing what to avoid will save you a season of poor flowers and unnecessary frustration.
Pruning at the wrong time of year
This is by far the most common mistake I see. Pruning mophead and lacecap hydrangeas in autumn removes the very flower buds they’ve been forming all summer. Those old stems hold next year’s potential, which is exactly why we leave the faded flower heads on through winter. If you’ve done this and your hydrangea doesn’t flower for a season, don’t despair. It will recover and you’ll know to wait until late winter next time.
Cutting all stems back to the ground
Hydrangea paniculata and arborescens types can take a hard prune right back to a low framework each year and will flower beautifully. But apply the same treatment to a mophead or lacecap and you’ll end up with a bush full of lovely leaves and absolutely no flowers. Know your hydrangea before you reach for the secateurs.
Not removing enough old wood
On the flip side, being too gentle and never removing any of the oldest stems leads to a congested, woody centre over time. Older stems are less productive and crowd out the new growth that carries the best flowers. That annual removal of roughly a quarter of the oldest stems keeps the whole shrub rejuvenating itself naturally.
Pruning too early in a cold snap
The dried flower heads left on through winter are doing a job, creating a small pocket of slightly warmer air around the emerging buds below. Prune too early in a cold spell and those buds are exposed to a hard frost with no protection, so I always wait until I can see the buds beginning to swell and there’s no prolonged frost forecast. A few days patience makes a real difference in colder parts of the UK.
Using blunt or dirty secateurs
This one applies to all pruning, but it’s worth repeating. Blunt blades crush and tear rather than cut cleanly, leaving ragged wounds that take longer to heal and invite disease in. Wipe your secateurs with a cloth dipped in diluted disinfectant between plants, and sharpen them properly at the start of each season. It takes five minutes and makes a genuine difference to the health of your shrubs.
💡 Top Tip
If you’re genuinely not sure which hydrangea type you have, the absolute safest approach is to deadhead only. Remove spent flowers just above a pair of fat, healthy buds and leave everything else. You’ll get a slightly untidy shrub for a year, but you won’t risk losing your flowers. Then observe how and where new growth emerges and use that knowledge to prune more confidently the following spring.
6. What to Do After Pruning Your Hydrangea
Pruning is only half the job. What you do in the days and weeks after pruning your hydrangeas has a real impact on how well they perform come flowering time. Having designed gardens for well over two decades, I’ve seen firsthand how a bit of post-pruning attention pays back in spectacular fashion by midsummer.
Feed your hydrangea after pruning
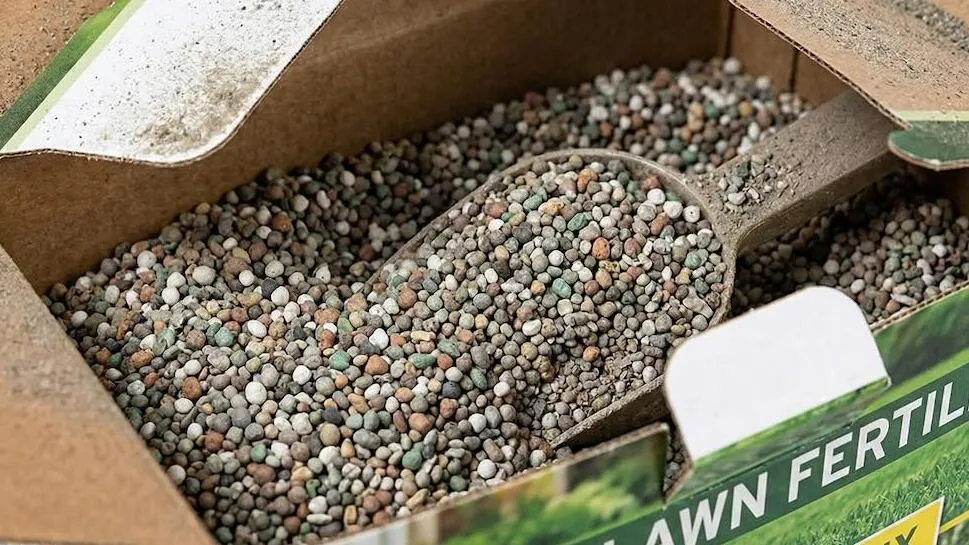
Once you’ve finished pruning, this is the ideal moment to feed. A balanced, slow-release fertiliser applied around the base of the shrub in spring provides your hydrangea with the nutrients it needs to produce strong new growth. I prefer a granular general-purpose feed scattered around the root zone and then watered in, rather than a liquid feed at this stage, because the slow release suits the steady pace of spring growth better.
Avoid high-nitrogen feeds at this point. Nitrogen is brilliant for lush green growth, but too much of it in spring will push your hydrangea into producing masses of leaves at the expense of flowers. A balanced NPK feed is what you want.
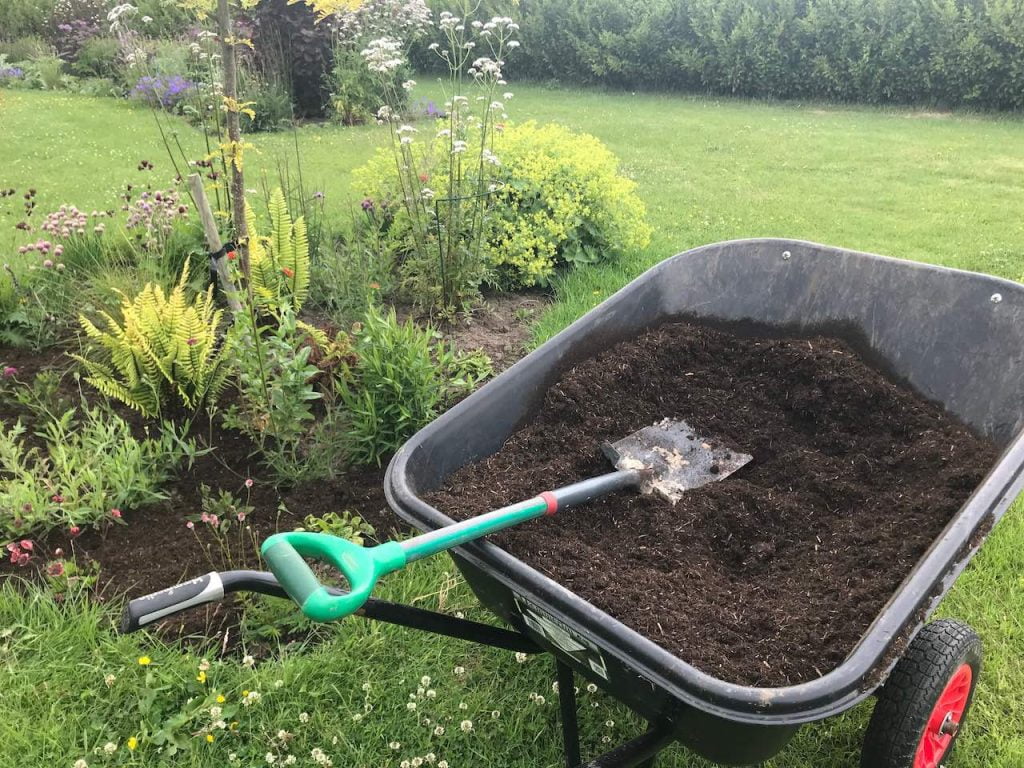
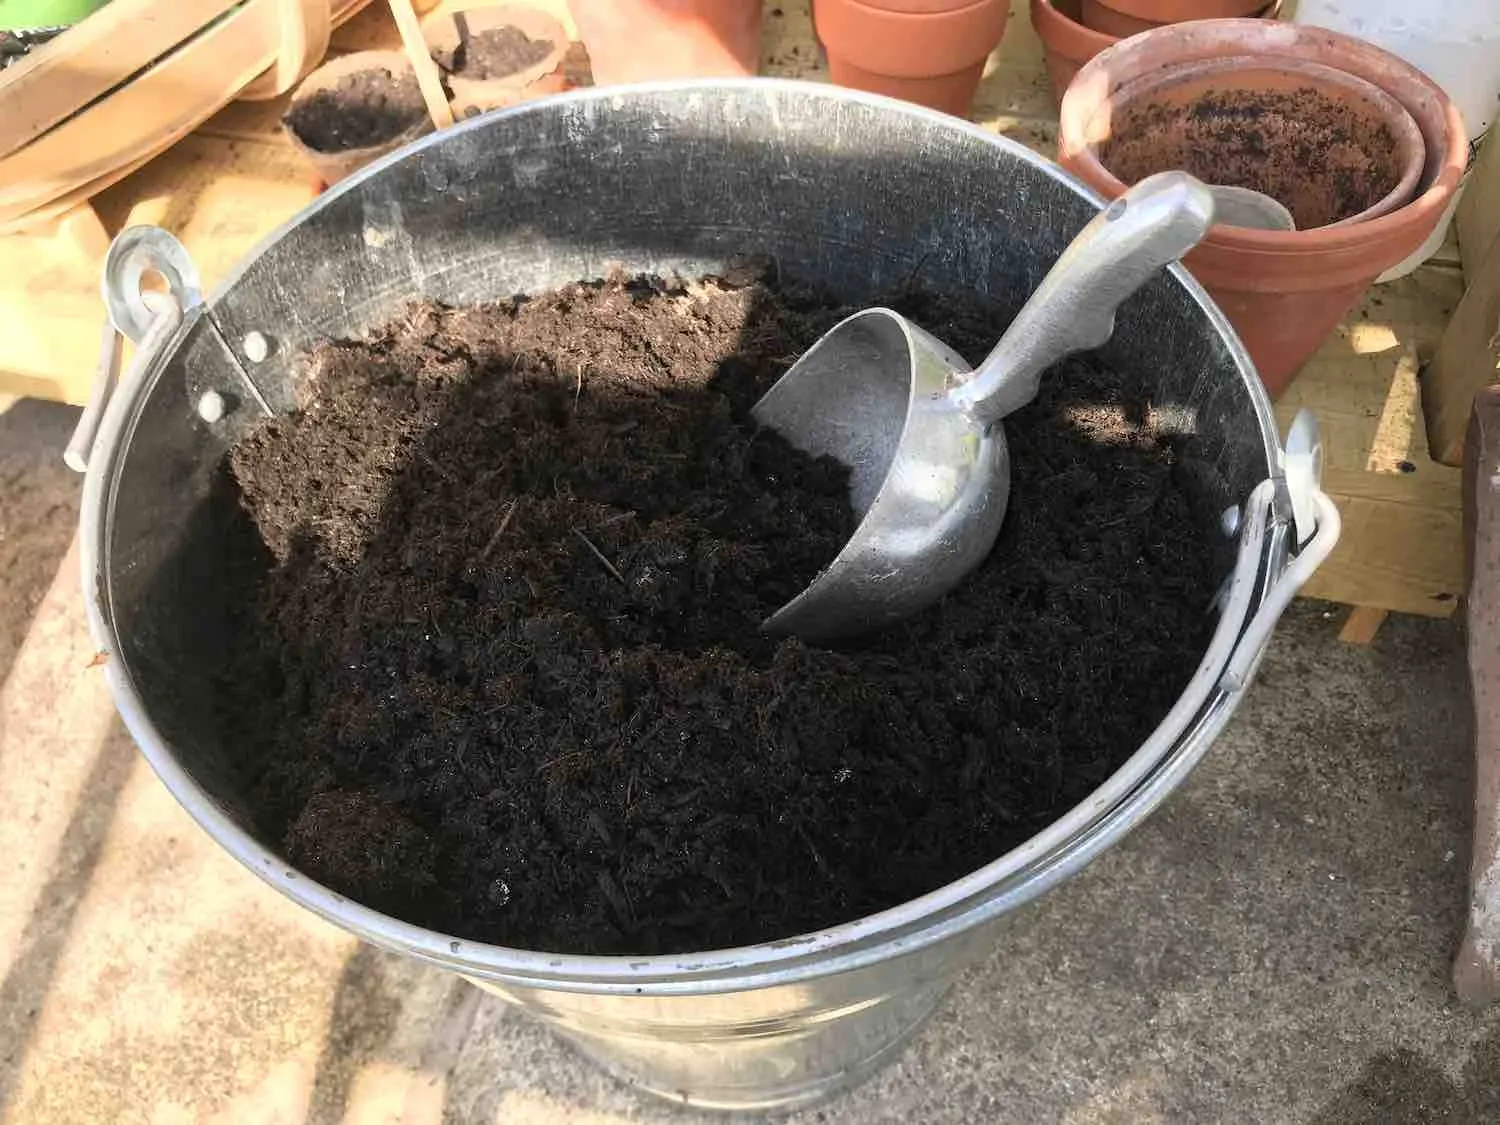
After feeding, apply a generous layer of mulch around the base of your hydrangea, keeping it a few centimetres away from the main stems. A 5 to 8cm layer of peat-free compost or well-rotted garden compost works brilliantly. Mulching after pruning locks in moisture, suppresses weeds, and feeds the soil slowly as it breaks down, supporting that support the strong regrowth you’ve just encouraged by pruning. For hydrangeas, I prefer ericaceous compost, as it maintains the slightly acidic conditions these plants prefer.
Water well in dry spells
Hydrangeas have one real weakness: they hate dry roots. After pruning in spring, if we get a dry spell (and British springs can surprise you), make sure to water deeply at the base rather than giving a light daily sprinkle. Deep, infrequent watering encourages roots to chase moisture downward, building drought resilience. A light daily sprinkle just wets the surface and can actually make the plant lazier about sending roots deeper.
Keep an eye on late frosts
Once you’ve pruned and the new buds are exposed, late frosts become the enemy. If a frost is forecast after you’ve pruned, cover the shrub overnight with a double layer of horticultural fleece. It takes two minutes and can save a full season of flowers. Remove the fleece during the day to allow airflow and prevent fungal issues.
What to do with the prunings
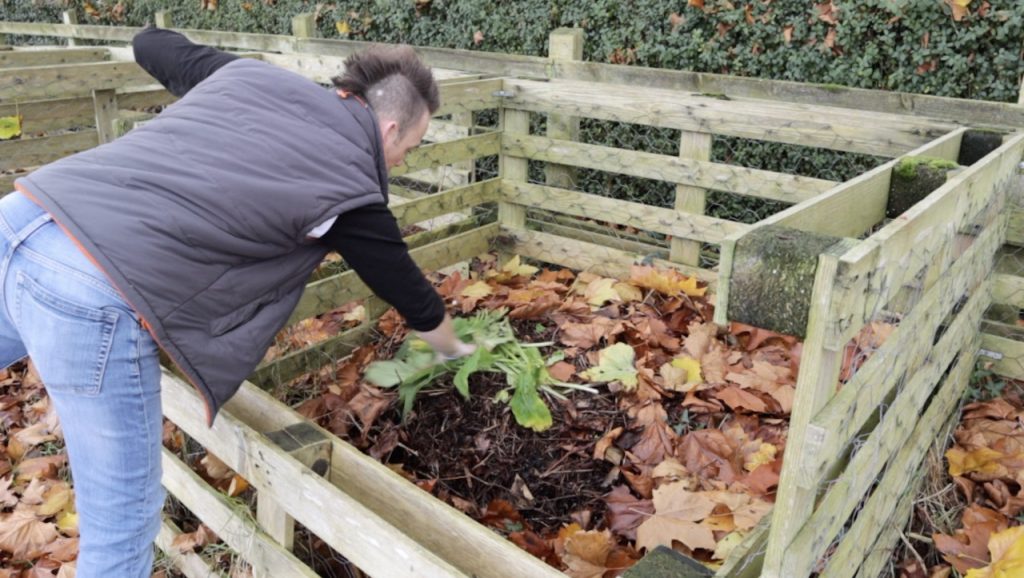
Don’t bin your prunings. Hydrangea stems compost well and can go straight onto the compost heap. The dried flower heads are also wonderful in dried flower arrangements. I’ve seen them look stunning in vases through autumn and into winter. If you’re propagating cuttings (covered later in this guide), your fresh spring prunings are ideal material for softwood cuttings, which root well in late spring with minimal effort.
7. Benefits of Pruning a Hydrangea
Because you’ve opened up airflow by pruning your hydrangea, you will find it less susceptible to disease and damage throughout the year. This means that your hydrangea will flower more profusely and not have to waste energy on repairing damaged wood. So it does pay to prune your hydrangeas each year for maximum flowers in your garden each year!
Here are the key benefits of pruning a hydrangea:
A) Encourages New Growth and Blooms
Pruning can stimulate the growth of new stems and encourage more flowers on your shrub. For many hydrangea varieties, the best flowers appear on new wood.
B) Controls Size and Shape
Pruning allows you to manage the size and shape of your hydrangea bush. This is particularly useful if your hydrangea has outgrown its space or if you want to maintain a specific shape or height.
C) Removes Dead or Diseased Wood
Pruning helps to eliminate dead, damaged, or diseased branches, which not only improves the shrub’s appearance but also prevents the spread of disease and enhances its overall health.
D) Enhances Air Circulation
Thinning out the interior of the shrub through pruning promotes better air circulation. This reduces the risk of diseases like powdery mildew and allows sunlight to reach all parts of the plant, supporting better growth.
E) Increases Flower Size & Shapes Hydrangea
By reducing the number of flower clusters, you can direct more energy to the remaining blooms, resulting in larger, more robust flowers. Pruning can help create a more visually pleasing and well-proportioned hydrangea bush. You can achieve a balanced shape and remove leggy or overgrown branches.
F) Renew Ageing Shrubs
Hydrangeas that have become overgrown or have stopped producing robust blooms can benefit from rejuvenation pruning. This involves severely cutting back the entire shrub to encourage fresh, vigorous growth.
G) Supports Stronger Stems
Pruning can help hydrangeas develop sturdier stems that can support the weight of their large, showy flowers. This can reduce the risk of stems bending or breaking under the weight of the blossoms.
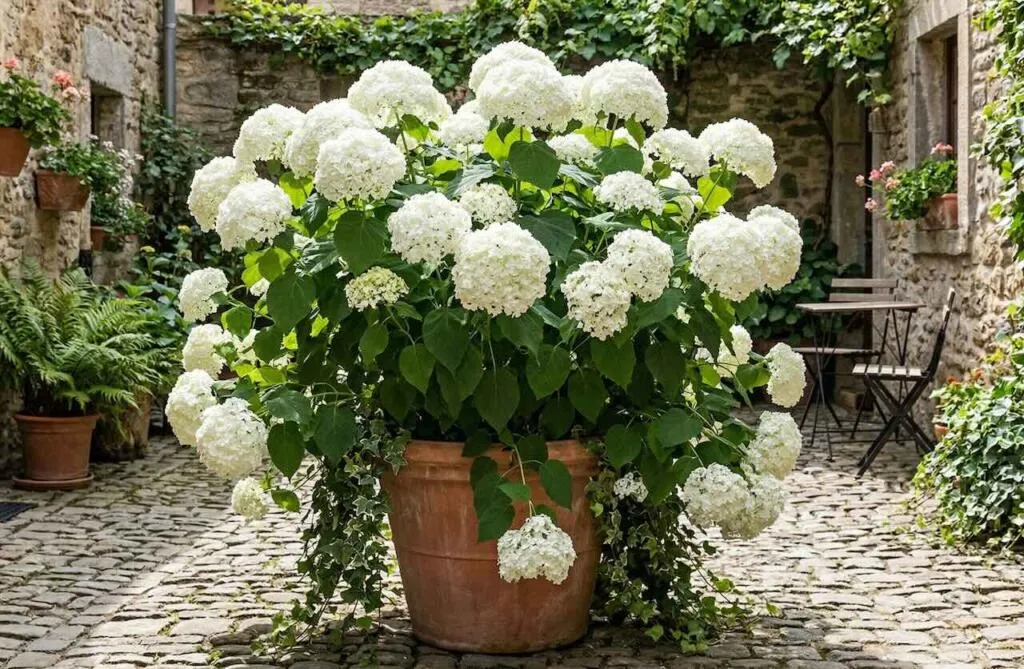
H) Manages Size in Containers
For hydrangeas grown in containers or pots, regular pruning is essential to keep the plant at a manageable size and prevent it from outgrowing its container. Pruning and mulching it help keep it healthy and floriferous!
8. Tool Sharpening & Cleaning for Pruning Hydrangeas
The key to successful Hydrangea pruning is clean, sharp tools, which makes the task of keeping hydrangeas in top form super easy. With the wrong tools, pruning hydrangeas becomes a pain, and you can cause more harm than good.
Clean and sharp pruning tools are essential for effective and healthy pruning for several reasons:
i) Clean Pruning Cuts
Sharp tools make clean cuts that heal faster and reduce the risk of disease entry. Ragged or jagged cuts can provide entry points for pests and pathogens, potentially harming the plant.
ii) Minimal Plant Stress
Sharp tools require less force to make cuts, reducing stress on both the pruner and the plant. Less effort means you’re less likely to damage the plant or strain your muscles.
iii) Healthy Healing
Clean cuts made with sharp tools heal quickly, minimising the time that wounds are open and vulnerable to infections. This promotes overall plant health and recovery.
iv) Precise Pruning
Sharp tools allow for precise and accurate pruning, helping you achieve your desired results without damaging nearby branches or the plant’s structure.
v) Reduced Damage
Dull tools can crush and tear plant tissue, causing unnecessary damage. Clean, sharp cuts reduce the risk of injury to the plant and ensure a tidier appearance.
vi) Efficiency
Pruning with sharp tools is more efficient, saving you time and effort during the pruning process. You can accomplish more tasks with less fatigue.
vii) Longevity
Regular maintenance and sharpening of your pruning tools extend their lifespan, providing better value for your investment.
Clean and sharp pruning tools make the pruning process easier and more efficient, and contribute to your plant’s overall health and well-being. Properly maintained tools ensure that pruning is a precise, effective, and less stressful endeavour for both you and your garden.
9. What soil type do Hydrangeas like?
Hydrangeas are acidic soil-loving plants that prefer a soil pH of 5.5 or lower.
This means they need this pH to access the full range of macro- and micronutrients in the soil. Planting in alkaline soil reduces their access to certain micronutrients, such as iron and calcium, causing them to show signs of illness.
Hydrangeas are probably the least fussy of all the calcifuges (acid-loving plants that hate alkaline conditions). So if your soil is neutral pH 7, then you should be fine. A soil testing kit can help you assess the conditions of your soil.
The next big question is about mulching Hydrangea. Mulching is the practice of adding a layer of organic material, such as peat-free compost or well-rotted manure, on the soil around the base of your shrubs.
Mulching feeds your plants slowly over the course of a year, helps retain moisture, and reduces weeds. It’s a really beneficial way to keep your plants healthy. Mulching also keeps weeds down and can prevent extreme heat waves from damaging your hydrangeas, so it’s always worthwhile to give them a good top-dressing of compost each spring and autumn.
The best compost to mulch hydrangeas with is ericaceous compost. This has a lower PH, enabling the hydrangea to access the nutrients it needs. Whilst normal compost will suffice, ericaceous (acidic) compost will help your hydrangeas grow more quickly and stronger.
11. Can I change the colour of my Hydrangea?
There is some debate about whether lowering the pH of your soil with pine needle or peat mulch can help turn Hydrangea flowers blue. I see this all the time on social media. People add loads of ericaceous compost, plant fertilizers and such. The quick answer is no, not easily.
However, this is not an exact science, and in my experience, I would enjoy the colour of the hydrangeas you have now. It can often be frustrating and expensive trying to change them, leading to disappointment. After all, keeping non-acidic soil acidic will take a lot of mulch and a lot of messing around.
Most hydrangeas will give you the colour that the soil and their conditions allow. So I wouldn’t try to change it!
12. How to take cuttings from Hydrangeas
Propagating hydrangeas from cuttings is an excellent way to expand your garden with new plants that are genetically identical to your existing hydrangeas. This method is cost-effective and allows you to replicate your favourite hydrangea varieties. You can propagate hydrangeas from your pruning cuttings, too, so there is no waste when pruning your hydrangeas each year.
Here’s a step-by-step guide on how to propagate hydrangeas from cuttings:
Materials You’ll Need to Take Hydrangea Cuttings
1. Healthy Hydrangea Plant: Choose a healthy, well-established hydrangea plant from which to take cuttings. Ideally, select a non-flowering shoot or branch, as it’s best to propagate from non-blooming growth.
2. Sharp Pruning Shears or Knife: You’ll need a clean and sharp tool to take cuttings without causing excessive damage to the parent plant.
3. Rooting Hormone: This is an optional but helpful addition to encourage root development in the cuttings. Rooting hormone can be found at your local garden centre.
4. Potting Mix: A well-draining potting mix, such as a mixture of perlite and peat moss, is suitable for rooting hydrangea cuttings.
5. Pots or Containers: Small pots or containers that are at least 3-4 inches deep are ideal for planting the cuttings.
6. Clear Plastic Bag or Plastic Dome: This is used to create a humid environment to encourage root development.
Step-by-Step Hydrangea Propagation Guide
Follow the steps below to easily take cuttings from Hydrangeas for free. Help bulk up your garden or provide hydrangeas to give to your friends!
1. Select the Right Time
The best time to take hydrangea cuttings is during the late spring or early summer when the plant is actively growing. Choose a healthy, non-flowering shoot or branch.
2. Prepare the Cuttings
Using your sharp pruning shears or knife, take cuttings that are around 4-6 inches long. Each cutting should have at least one leaf node, which is where new roots will form. Remove any flowers or flower buds from the cutting.
3. Remove Lower Leaves
Trim the cutting so that you have a clean stem with a leaf node at the top and no leaves on the lower part of the stem. This will prevent excess moisture loss and encourage root development.
4. Apply Rooting Hormone (Optional)
Dip the cut end of each cutting in rooting hormone if you have it. This can help stimulate root growth, although it’s not strictly necessary for hydrangeas.
5. Prepare the Potting Mix
Fill your pots or containers with the potting mix. Make a small hole in the mix for each cutting using a pencil or stick.
6. Plant the Cuttings
Insert the cuttings into the holes you’ve made in the potting mix. Firmly press the mix around the cuttings to ensure good contact.
7. Create a Mini Greenhouse
To create a humid environment for the cuttings, cover them with a clear plastic bag or place a plastic dome over the pots. This helps maintain high humidity, which is essential for root development.
8. Place in a Shaded Location
Keep the cuttings in a location with indirect light or dappled shade. Avoid direct sunlight, as it can dry out the cuttings. Ensure the soil remains consistently moist but not waterlogged.
9. Monitor and Wait
Check the cuttings regularly for signs of growth, such as new leaves. This can take several weeks to a few months, so be patient. Another top tip is when roots emerge from the bottom of the pot and then are ready to transplant.
10. Transplanting
Once the cuttings have established roots and show healthy growth, typically after a few months, they can be transplanted into larger pots or directly into your garden.
Remember that not all hydrangea cuttings will successfully root, so it’s a good idea to take several cuttings to increase your chances of success. Propagating hydrangeas from cuttings is a rewarding way to expand your garden and share these beautiful plants with others.
You pruned at the wrong time. This is the number one reason. If you pruned your mophead or lacecap hydrangea in autumn or late winter before the buds had a chance to develop, you removed next season’s flowers along with the old stems. It’s a painful lesson but one that teaches the correct timing very effectively.
A late frost caught the new buds. After pruning in spring, the exposed buds are vulnerable. A sharp late frost can blacken and kill those buds in a single night. If your hydrangea put out healthy green growth but then stopped and looks a bit sorry for itself, frost damage is a strong candidate. The plant will usually recover and push out new growth, but flowers may be delayed or absent that season.
Too much shade or the wrong position. Hydrangeas like dappled or part shade, but too deep a shade over many years reduces flowering. If your hydrangea is being increasingly shaded by a neighbouring tree or shrub that’s grown substantially, this could be the cause. Similarly, a position that gets cold, drying winds can damage buds before they open.
Over-feeding with nitrogen. Too much high-nitrogen fertiliser pushes lush, leafy growth at the expense of flowers. If your hydrangea is a deep, healthy green with abundant foliage but no flowers, this is worth investigating. Switch to a balanced or potassium-rich feed to encourage flowering.
The plant is too young or was recently moved. A young hydrangea or one that was recently transplanted will sometimes skip a flowering year while it puts energy into establishing its root system. This is entirely normal, so give it time. A well-fed, well-watered hydrangea will reward your patience.
If you’ve just pruned your Hydrangea, why not move on to other plants, trees and shrubs with my other beginner pruning guides? Ensuring that your entire garden is full of healthy, floriferous plants. I guarantee that once you see the benefits of pruning, there will be no stopping you!
14. Frequently Asked Questions About Pruning Hydrangeas
When is the best time to prune hydrangeas in the UK?
For most hydrangeas grown in UK gardens, including mopheads, lacecaps and paniculatas, late winter to early spring is ideal, typically February to April depending on where you live. I prune mine in early March here in the Midlands, and the cue to start is when you can see the buds beginning to swell on the stems. Climbing hydrangeas are the exception and should be pruned immediately after flowering in summer.
Can I prune hydrangeas in autumn?
Autumn pruning of mophead and lacecap hydrangeas is one of the most common mistakes in UK gardens. These types flower on the previous year’s growth, meaning the buds that will carry next summer’s flowers are already present on the stems by autumn. Removing them in autumn means no flowers the following year. Leave the faded heads on through winter because they protect the buds below and look beautiful in their own right as they fade.
How much should I cut back a hydrangea?
This depends on the type. For mopheads and lacecaps, remove the spent flower heads down to the first pair of healthy buds, take out around a quarter of the oldest stems to the ground, and trim the remaining stems back by about a third. For paniculata and arborescens types, you can cut back more aggressively to a low framework of stems each spring. They’ll grow vigorously from that framework and flower on the new growth produced throughout summer.
Why does my hydrangea have lots of leaves but no flowers?
The most likely causes are pruning at the wrong time (removing flower buds by accident), frost damage to newly exposed buds after spring pruning, over-feeding with a high-nitrogen fertiliser, or the plant being in too much shade. My full flowering guide covers every possible cause in detail.
Should I deadhead hydrangeas in summer?
For Group 2 types like paniculata and arborescens, yes, deadheading faded summer flowers can encourage a second flush of growth. For mopheads and lacecaps I encourage you to leave the faded flower heads on through winter. They genuinely look lovely as they fade through cream and parchment tones and they protect the new buds below from frost. You can always remove them in late winter when you prune.
Can I hard prune an overgrown hydrangea?
Yes, but do it gradually rather than all at once. If you have a very overgrown, leggy hydrangea, cut back around a third of the oldest stems to the ground each spring over three years. This rejuvenates the whole shrub without the shock of a sudden hard cut. For paniculata types, a full hard prune to a low framework each spring is perfectly fine and actually recommended for the best flowers.
Do I need to feed my hydrangea after pruning?
Feeding straight after pruning is excellent timing. A balanced slow-release granular feed scattered around the root zone and watered in will support the strong new growth you’ve just encouraged. Avoid high-nitrogen feeds which promote leafy growth at the expense of flowers. I also follow up with a mulch of ericaceous compost to retain moisture and keep the soil slightly acidic.
What tools do I need to prune hydrangeas?
A good pair of sharp bypass secateurs is all you need for most hydrangea pruning. Bypass secateurs make a clean slicing cut, unlike anvil types, which can crush stems. For older, thicker stems on established shrubs, you may want a pair of long-handled loppers to get more leverage. Always clean and sharpen your tools before and during pruning to prevent spreading any disease between plants.
Transform Your Garden Knowledge with Garden Ninja’s Expert Resources
Ready to elevate your gardening beyond basic tasks? My comprehensive online courses provide the expertise to transform you from enthusiastic beginner to confident garden creator.
With courses starting from just £29, you gain access to award-winning design knowledge.
29
Garden Design Examples for Small Gardens: 30 Design Templates & Planting Plans
Garden Design Examples for Small Gardens: 30 Design Templates & Planting Plans: In this online gardening course, I’ll walk you through 30 fantastic garden designs, explaining the logic behind the layout, the plant choices, and take-home tips for applying them in your own garden.
Weekend Garden Makeover: A Crash Course in Design for Beginners
Learn how to transform and design your own garden with Lee Burkhills crash course in garden design. Over 5 hours Lee will teach you how to design your own dream garden. Featuring practical design examples, planting ideas and video guides. Learn how to design your garden in one weekend!
Garden Design for Beginners: Create Your Dream Garden in Just 4 Weeks
Garden Design for Beginners Online Course: If you want to make the career jump to becoming a garden designer or to learn how to design your own garden, this is the beginner course for you. Join me, Lee Burkhill, an award-winning garden designer, as I train you in the art of beautiful garden design.
Pruning hydrangeas is a crucial practice that offers numerous benefits for these beloved flowering shrubs. First, it stimulates the growth of new stems and encourages more vibrant blooms, particularly since many hydrangea varieties produce their flowers on new wood.
It also allows you, gardeners, to control the size and shape of your Hydrangea bushes, ensuring they remain balanced and flower profusely each year.m Which is what we really want, right?
Regular pruning also plays a pivotal role in the overall health of these shrubs. It removes dead, damaged, or diseased branches, thereby reducing the risk of disease spread and enhancing the plant’s vitality. Additionally, it improves air circulation within the shrub, reducing disease risk and ensuring all parts receive sufficient sunlight for growth.
Your subscription could not be saved. Please try again.
Your subscription has been successful.
Lee Burkhill
Lee Burkhill, known as the Garden Ninja, is an award-winning garden designer and horticulturist with over 30 years of gardening experience and 15 years as a professional garden designer. A qualified RHS (Royal Horticultural Society) professional, Lee specialises in sustainable garden design and practical horticultural advice. He designs and presents on BBC1’s Garden Rescue and in leading gardening publications. Lee combines three decades of hands-on gardening knowledge with professional design qualifications to help gardeners create beautiful, functional outdoor spaces.
I limit my trimming on my hydrangeas as the deer eat the lower branches. So, most of the flowering is at the tops of the bushes. How do I determine what to trim out at the base of the plant?
Hydrangeas are recognizable for their vibrant flower heads. They’re easy to care for, ideal for partial shade, and offer diverse blooms. Pruning tips for common types are shared, helping gardeners maintain their beauty and shape. Proper pruning ensures a tidy look and encourages healthy growth.
Great tips! I’ve always been unsure about when and how to prune my hydrangeas, but this guide made it really clear. I can’t wait to try these techniques in my garden this spring! Thank you for sharing!


I limit my trimming on my hydrangeas as the deer eat the lower branches. So, most of the flowering is at the tops of the bushes. How do I determine what to trim out at the base of the plant?
I love reading your gardening blog! Thank you for sharing your knowledge and expertise. This article was very helpful.
Hydrangeas are recognizable for their vibrant flower heads. They’re easy to care for, ideal for partial shade, and offer diverse blooms. Pruning tips for common types are shared, helping gardeners maintain their beauty and shape. Proper pruning ensures a tidy look and encourages healthy growth.
Great tips! I’ve always been unsure about when and how to prune my hydrangeas, but this guide made it really clear. I can’t wait to try these techniques in my garden this spring! Thank you for sharing!