How to Plant a Flower Bed: Design Tips, Planting Plans and Plant Lists for UK Gardens
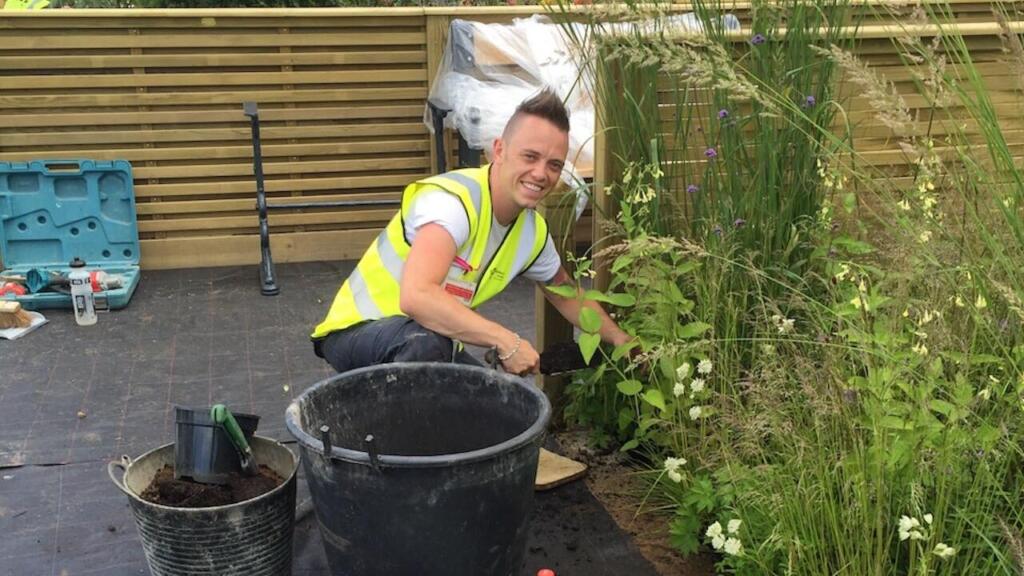
Lee Burkhill: Award Winning Designer & BBC 1's Garden Rescue Presenters Official Blog
Beginner level
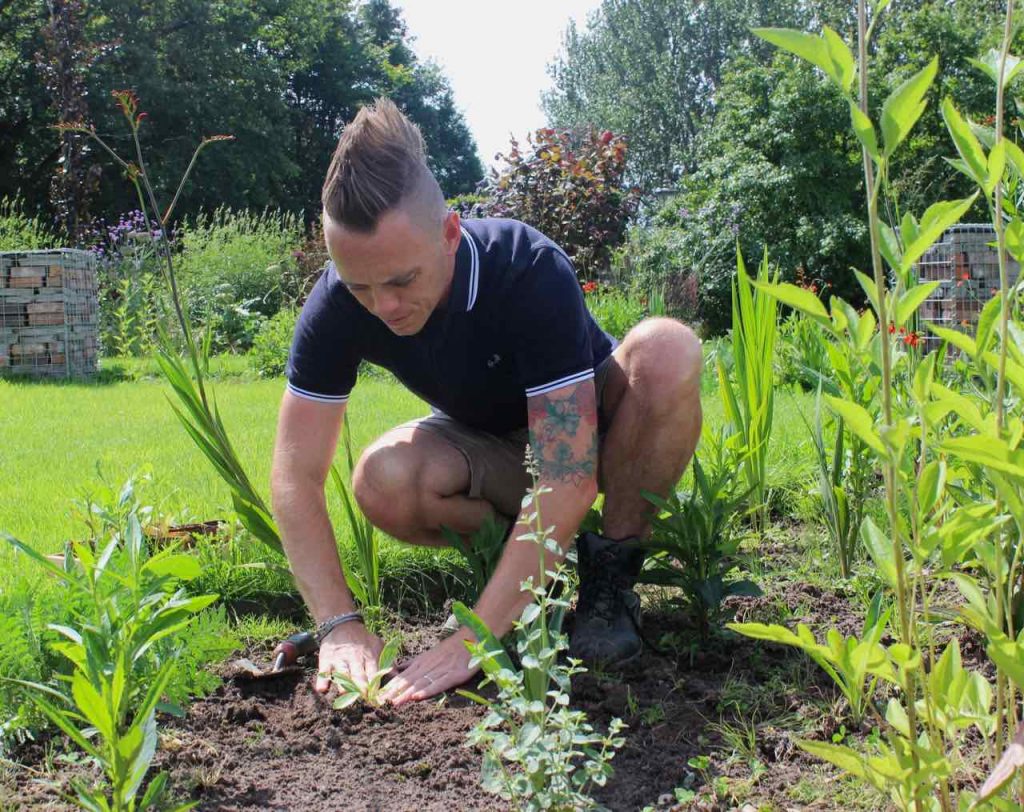
Knowing how to plant a flower bed can be daunting for new gardeners. Especially if you don't know where to start when designing a flower bed. This guide is going to give you my 3 top tips which will apply no matter what kind of flower border you are designing. I'm going to show you my secret 3 tricks for success. Let's get planting!
Quick Answer
To plant a successful flower bed, first choose your site and test your soil, then prepare the ground by removing weeds and adding organic matter. Design using three plant layers (ground cover, mid-layer, and tall), pick a unified colour scheme, and use repetition of plants in groups of three or five. The whole process from blank soil to finished planting can realistically be completed in a weekend.
Flower beds and borders are the staples of any garden, and they come in all shapes and sizes! I get asked all the time for help when it comes to garden design and planting flower beds. Given the endless opportunities, it can seem overwhelming to decide where to start. Most new gardeners simply don’t know how to plant a flower bed, but this guide is going to show you.
My top tips on flower bed design apply to any style or size of flower bed you may be working with. So whether you have a tiny garden or huge acreage to play with, this how-to-plant-a-flower-bed guide can take your average flower beds and make them awesome. Over the years, I have designed hundreds of garden borders professionally, and the same principles apply whether you are working with a one-metre strip against a fence or a sweeping country border. The fundamentals never change.
Before a single plant goes in the ground, the most important thing you can do is observe your garden properly. Spend a day watching where the sun falls and for how long. A spot that looks sunny at 8 am can be deep in shadow by noon, depending on the orientation of your house and any neighbouring fences or trees. Most flowering perennials and shrubs need at least four to six hours of direct sunlight to perform well, so this observation step is not something you can skip.
Your garden’s aspect, the direction it faces, is the single biggest influence on what will grow there. South-facing gardens get the most sun and give you the widest plant choice. North-facing gardens are cooler and shadier, but far from a write-off. I have designed some beautiful north-facing borders using shade tolerant plants that outperform anything you would attempt to grow in full sun in that position.
East and west-facing beds each have their own personality, and once you understand yours, choosing plants becomes straightforward. If you are unsure how to assess your garden’s aspect, my garden aspects guide explains it clearly.
💡 Top Tip
Before marking out any bed, take a photograph of the area every two hours on a clear day. This gives you a clear record of the sun’s movement across the space and stops you making an expensive mistake by planting sun lovers in what turns out to be a shaded spot.
2. How to prepare your soil for a flower bed
Soil preparation is the most underrated step in creating a flower bed. I see it time and again: gardeners spend considerable money on plants and then place them in ground that is compacted, waterlogged, or stripped of nutrients. The plants struggle, the gardener loses confidence, and the whole project stalls. Invest thirty minutes in your soil before you invest a penny in plants, and you will have better results than most gardens I visit.
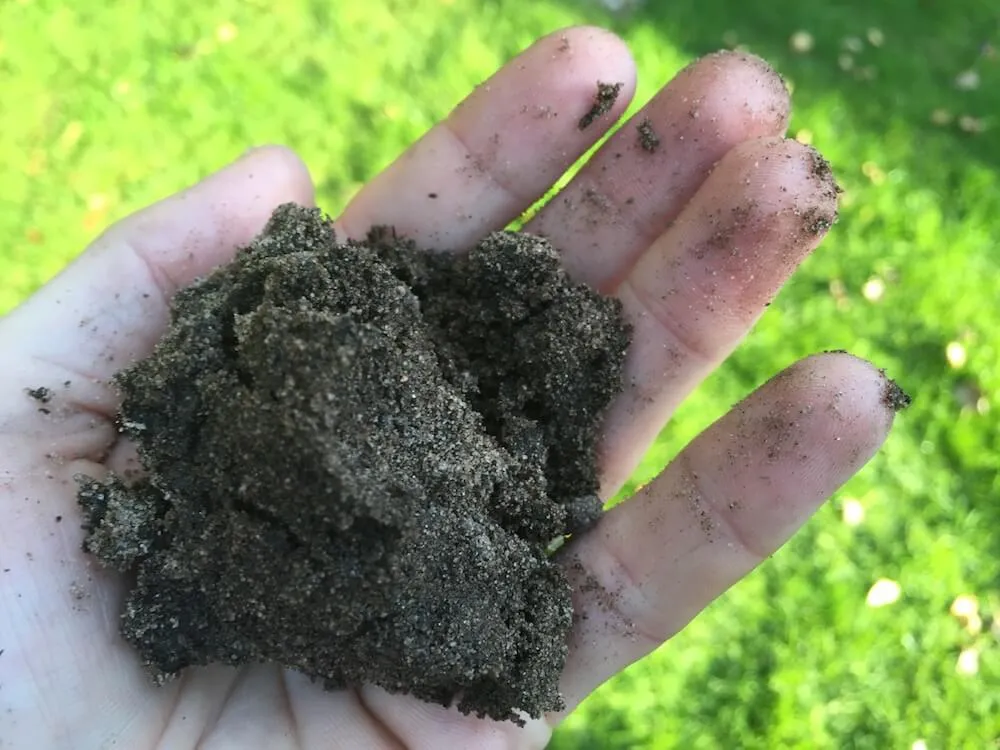
The squeeze test: identify your soil in 30 seconds
Grab a handful of moist soil from your planned bed area and squeeze it firmly. If it holds its shape and feels slick or sticky, you have clay. If it falls apart immediately and feels gritty, you have sandy soil. If it holds its shape briefly, then crumbles when you poke it, you have the ideal loam. Most UK gardens have something in between, leaning towards clay in the Midlands, North, and West, and towards sandy in parts of East Anglia and the South East. Knowing your soil type changes everything about what plants you choose and how you prepare the ground.
How to prepare clay soil for a flower bed
Clay soil is nutrient-rich but slow to drain and slow to warm in spring. In summer, it cracks; in winter, it turns to a sticky, compacted mass. The good news is that with the right treatment it becomes one of the most productive soils in the garden. Never work clay soil when it is wet, as this destroys the structure and creates a compacted, airless layer that roots cannot penetrate. Wait until the surface crumbles slightly when you walk on it before digging.
Dig in generous quantities of organic matter, ideally composted bark or well-rotted manure rather than fine compost, as the coarser texture creates air pockets and improves drainage. Add horticultural grit (not builder’s sand, which sets like concrete when mixed with clay) at a ratio of roughly one part grit to four parts soil in problem areas.
Work this into at least a spade’s depth. Repeat this process annually for two or three years, and you will transform even the heaviest clay into workable, productive planting ground. A garden fork is your best friend on clay, as it lifts and opens the structure without smearing as a spade can.
Sandy soil warms quickly in spring, which is a genuine advantage, but it drains so fast that nutrients wash straight through it. Plants in sandy ground tend to look green and promising in April, then start to struggle by July as moisture and fertility run out. The fix is organic matter, and lots of it.
Dig in at least a full wheelbarrow of well-rotted manure or garden compost per square metre before planting, and repeat every autumn as a surface mulch. Unlike clay, sandy soil actually benefits from the finest compost you can lay your hands on, as it helps retain moisture and bind the particles together.
Silty soil is the middle child of soil types. Richer than sandy soil, better-draining than clay, but with a tendency to compact on the surface and form a crust that sheds water rather than absorbing it. You can identify it by the silky, smooth feel when moist. The same prescription applies as with all soils: organic matter, incorporated deeply.
For silt, the addition of coarse grit helps break up the tendency to compact, while regular mulching prevents the surface crust from forming. Avoid walking on silty beds after rain as the damage to the structure is rapid and lasting.
Whatever your soil type, the single most universally beneficial thing you can do before planting is apply a soil pH test. Most flowering perennials prefer a slightly acidic to neutral pH of 6.0 to 7.0. If your soil is significantly outside this range, your plants will struggle to absorb nutrients no matter how well you feed them. Lime raises pH in acidic soil; sulphur or ericaceous compost lowers it in alkaline soil. 🛒 Buy a soil pH test kit on Amazon UK
3. Getting the size and shape right
One of the most practical rules in garden design that rarely gets mentioned is the reach rule: never make a border border wider than you can comfortably reach into from either side without stepping onto the planting. For a border against a wall or fence, that means a maximum depth of around 1.2 to 1.5 metres. The moment you start walking on a flower bed to tend it, you compact the soil and undo everything you worked to achieve in the preparation stage.
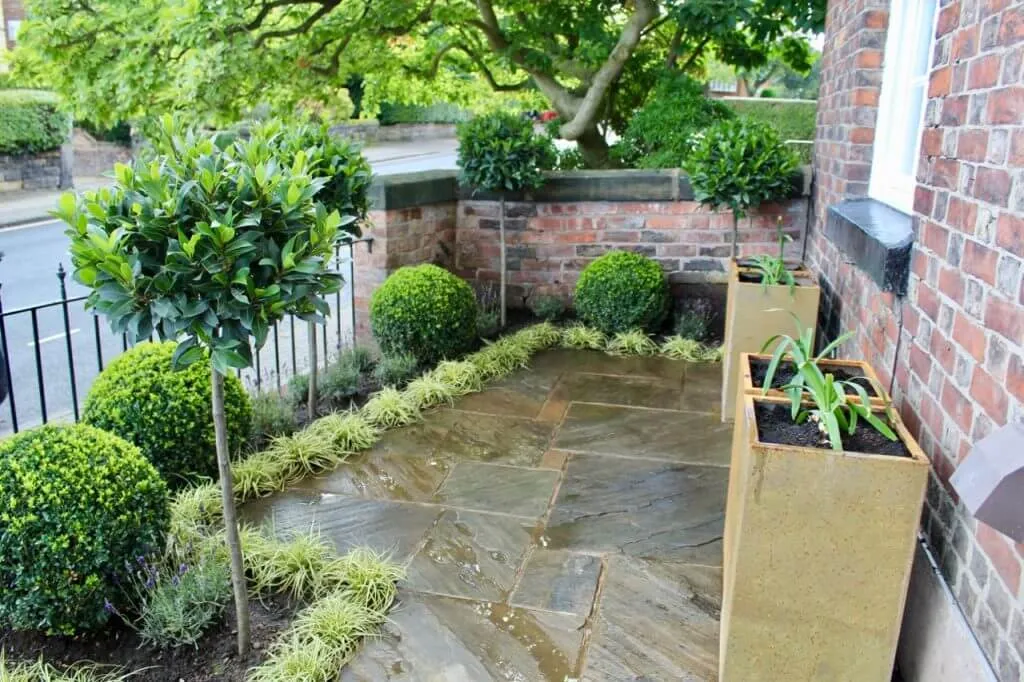
For the shape, use a garden hose to experiment with the outline before committing to it with a spade or edging iron. Gently curving borders with graceful, sweeping lines almost always look better than straight-edged geometric shapes in informal gardens. Formal gardens are the exception, where crisp right angles and geometric beds work precisely because everything else in the design is equally structured. If you are unsure which style suits your garden, my Garden Design for Beginners online course walks you through how to assess your garden’s style and make confident design decisions.
Once you have decided on the shape, cut a clean edge before you plant anything. Use a half-moon edger or a sharp spade to slice vertically into the soil along your marked line, removing a small channel of turf as you go. A crisp, defined edge is one of the quickest ways to make a flower bed look intentional and cared-for, even when the plants inside it are still establishing. It also stops grass creeping back into the bed and gives you a clear boundary to work to when mulching. Re-cut the edge every spring and after heavy autumn rain when the soil has settled and the edge tends to soften.
The first tip to successfully planting flower beds is to layer your plants. Time and time again, I see people lining up plants in neat rows. All the plants and flowers are the same height, below the knee. They are planted at equal spacing and left to grow awkwardly, in isolation from each other.
If you have planted this way, you may be familiar with the lacklustre, uninspired result you get. Then you cram in more plants, but it still looks the same. This is where most frustrated gardeners sadly give up.
What is plant layering?
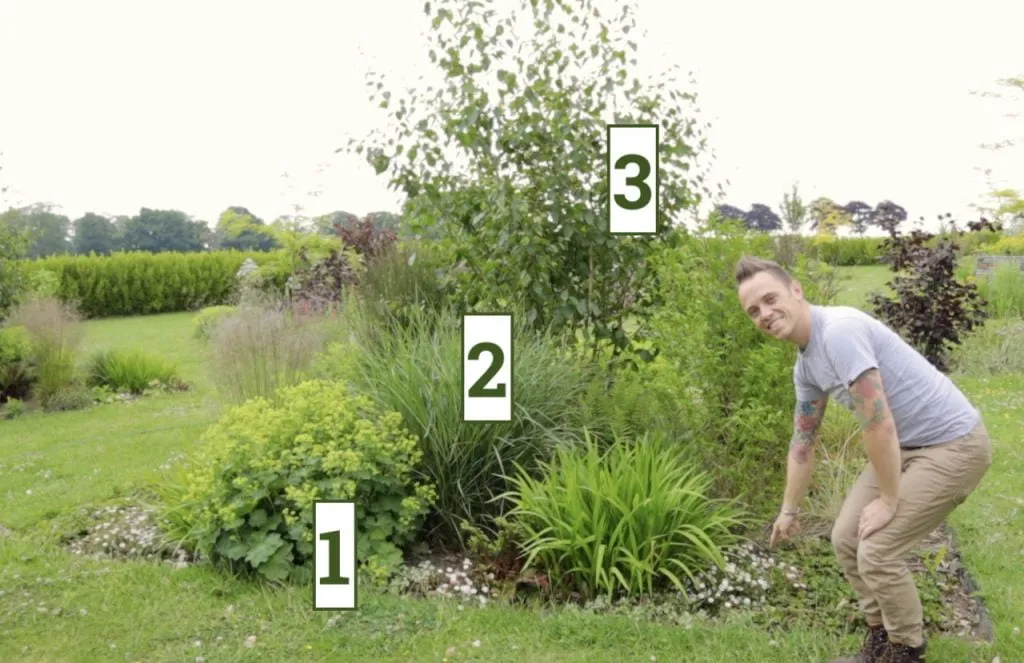
Layering is your secret weapon for flower-border success! When we talk about layering plants, we are referring to using plants of varying heights in the planting scheme. So you work your way up from low-growing plants to mid-height plants, then to taller ones. These layers slow your eye as you look around the flower bed.
Layering garden plants in a flower bed also works because it draws your eye from the ground up and through the flower bed. It guides you on a journey through the planting rather than letting the eye skip and jump. Rather than jumping from low ground-cover plants all the way up to a shrub or a tree, use plants in incremental heights to soften the bed so there are no surprises or gaps.
Ground Cover Layer 1
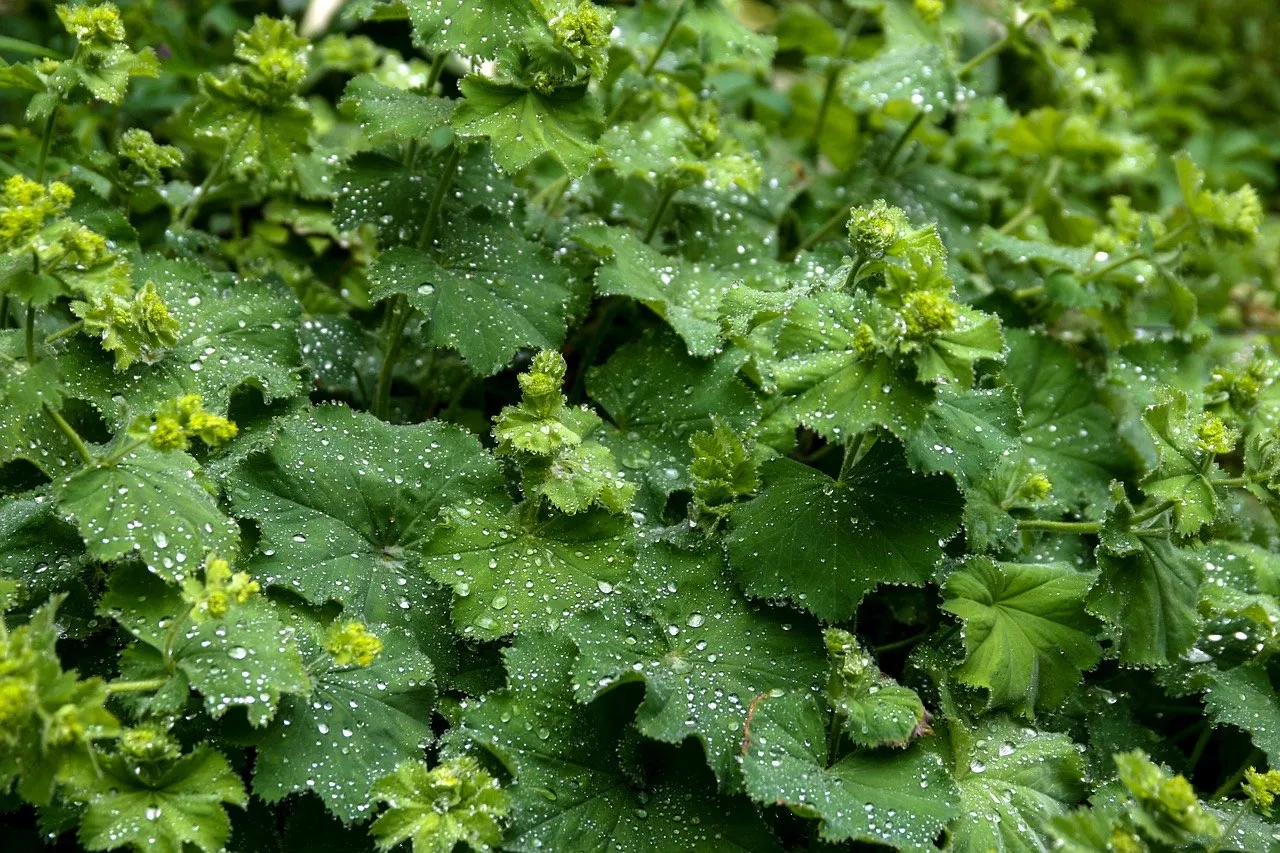
These are your low-to-the-ground specimens, also known as ground cover plants. Examples include Erigeron, Alchemilla mollis, Stachys byzantina (lamb’s ears), Pachysandra, Alpines, and bedding plants. They are the warm-up to the flower bed and should cover the soil between taller plants, suppressing weeds and giving the planting a finished, complete look from the very front edge.
Herbaceous Flowering Mid Layer 2
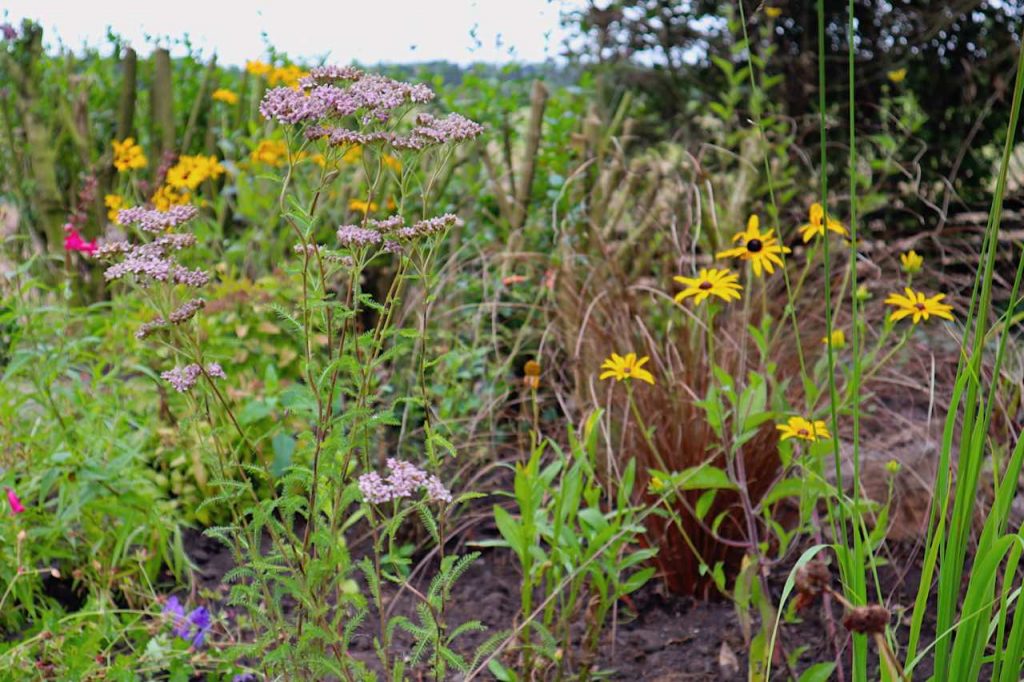
This is where you start to bring the eye up into the mid-layer. Think knee-high to waist-high plants such as Geraniums, Salvias, Heleniums, Dahlias, Achillea, Rudbeckia, and Asters. The mid-layer is the real flowering sweet spot of the border, where most of the colour and pollinator action happens from midsummer through to autumn.
Shrubs, Grasses and Trees Top Layer 3
This is where most people fall short. It is where all the drama and action happen. This layer is for taller plants, maybe one to two metres tall. Think tall grasses like Miscanthus or Calamagrostis, shrubs like Hydrangeas or Shrub Roses, Echinops, Persicaria, or tall ornamental grasses. You should be almost grinning with anticipation when you get to this layer because it provides the structure and drama that gives the whole border its backbone.
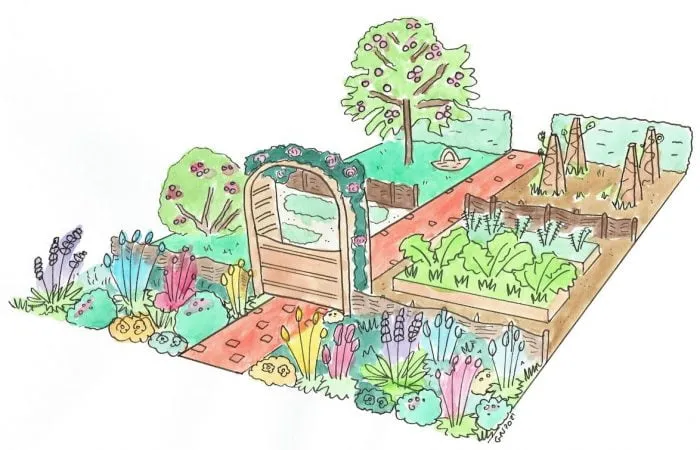
Here is an example of the three layers in a small flower bed. Look how detailed and exciting it looks compared to everything at a similar height. We move from ground cover at layer one, to the taller herbaceous perennial layer at layer two, and finally, trees or tall shrubs as the dramatic final layer.
5. Colour Choice in Flower Bed Design
Colour is one of the most important parts of all garden design. It can change a garden’s mood from excitement to calm, drama to tranquillity. One of the major hurdles that new gardeners face is falling into the trap of pick-and-mix planting. In the midst of eager excitement at a garden centre, you end up with every colour under the sun.
There is nothing wrong with a riot of colour, but it must be controlled or have some thought behind it. Clashing mish-mashes of colour are harder to pull off than you think, and an unplanned flower bed tends to look busy and unsettling rather than exuberant.
Three colour combinations that always work in a flower bed
There are three main colour combinations that work reliably in garden planting.
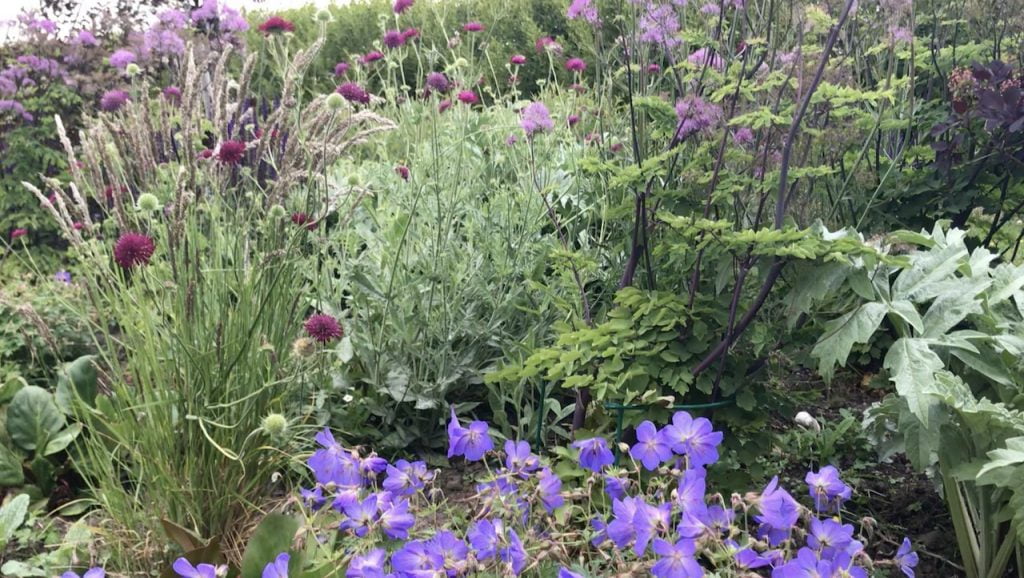
1)Monochromatic: using shades and tones of one single colour hue, for example an all-white garden or an all-blue border. This is the most sophisticated approach and always looks intentional.
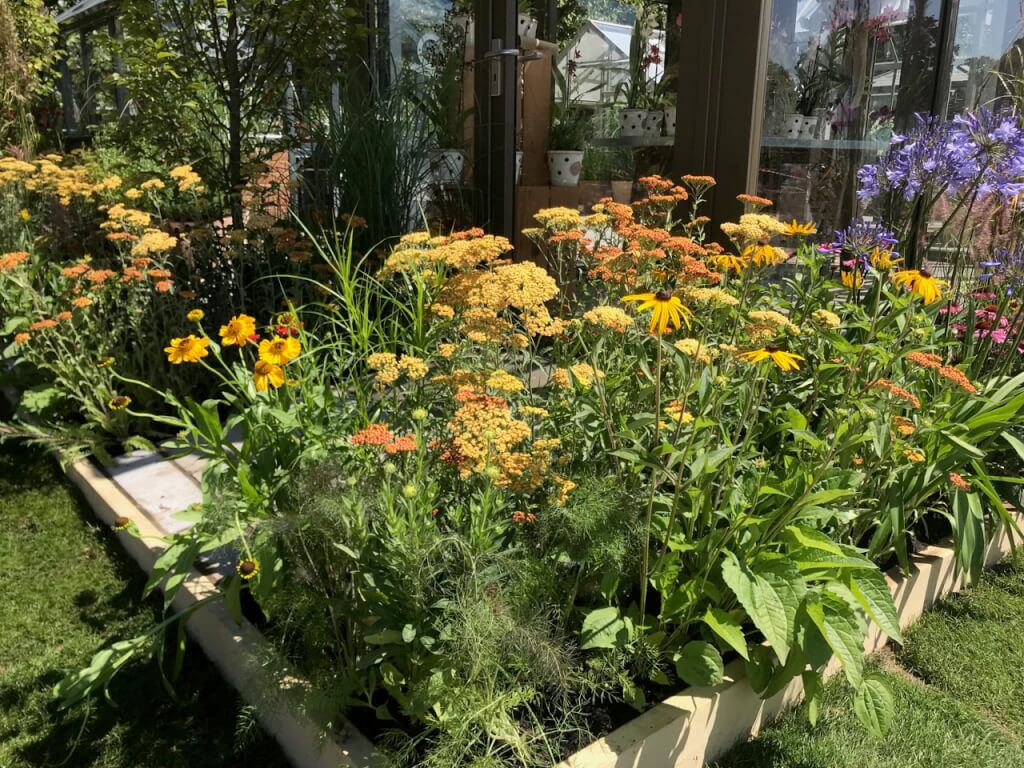
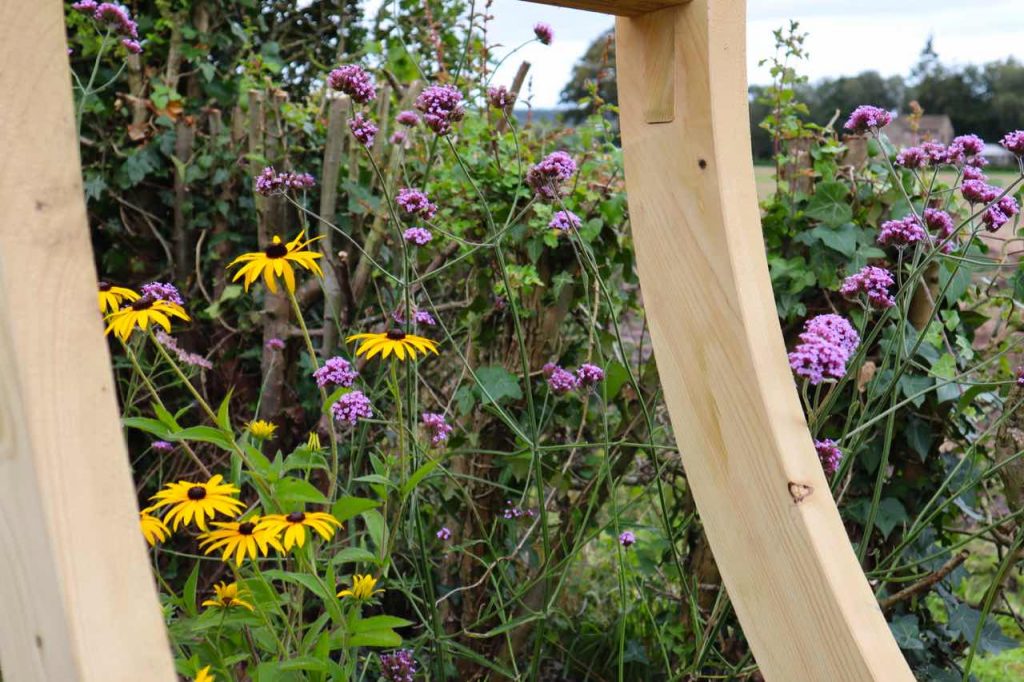
2)Contrasting: picking colours that sit on opposite sides of the colour wheel, such as purple and yellow, or orange and blue. These combinations are dramatic and full of energy.
3)Analogous: using colours that sit next to each other on the colour wheel, such as pink, purple, and mauve together, or yellow, orange, and red. This creates a warm, harmonious effect that is easy to achieve and rarely goes wrong.
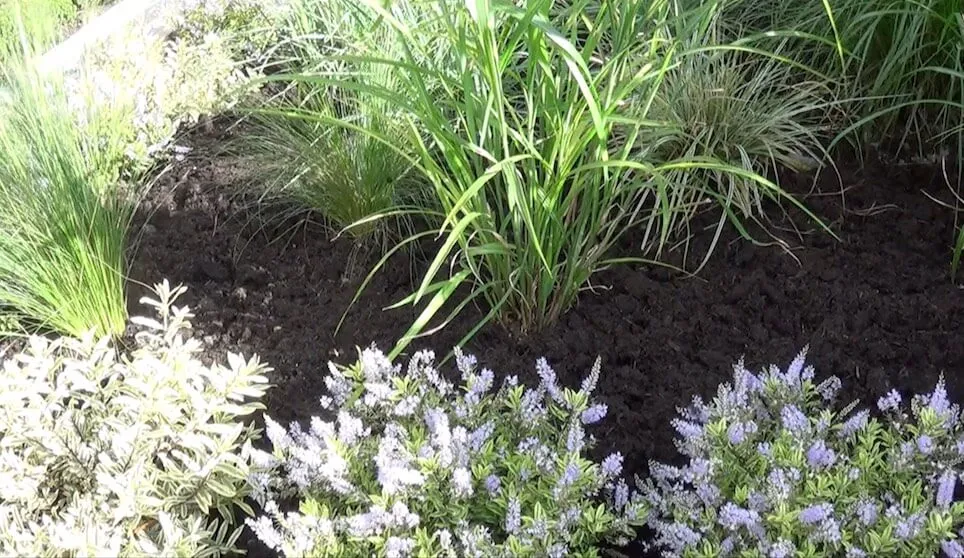
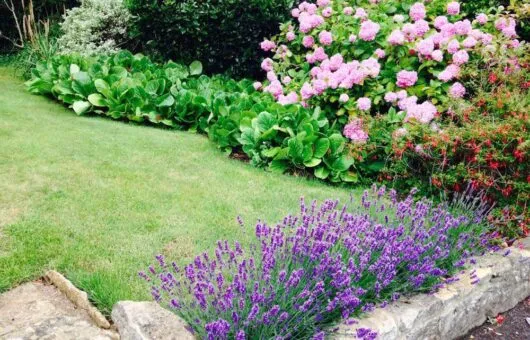
Above is a monochromatic flower bed, all within the purple hue on the colour wheel. The main tip is to make sure there is some rhyme or reason to your colour choices before you buy a single plant. By having a unified colour scheme, you immediately bring a sense of intent and professionalism to your garden borders.
The yellow and purple above create a contrast in this border, making each other appear brighter and more vivid when combined. These are contrasting colours from opposite sides of the colour wheel, and they are among the most reliably successful combinations in garden planting.
6. Repetition in the Garden
Repetition is your best friend when it comes to designing flower beds. A bit like colour, having plants repeat throughout the flower bed provides rhythm and consistency. It is essential to have multiples of most plants in the garden, particularly with herbaceous perennials and ground cover, because a single plant disappears and makes no impact, whereas three or five of the same plant create a strong statement.
The only exception to repetition in smaller gardens is trees and shrubs. You can get away with having one species of tree or different species of shrubs as long as the supporting planting all uses repetition. Having one of something in the garden draws the eye as a focal point, so save this for a beautiful tree or shrub.
If you pick and mix plants without repetition, your border will look disjointed and unsatisfying no matter how good the individual plants are. You do not necessarily have to use the exact same species throughout, but if you are using Geraniums as ground cover, use five or seven of them, even different cultivars, to build visual weight. Lay plants out in triangles and drifts of three or five before planting and you will immediately see the difference in cohesion.
You can also repeat colours or patterns within flower beds to improve their impact. A more relaxed pattern of plants in triangles and drifts works beautifully when combined with the three-layer approach. Save ruler-straight lines of plants for very formal designs where geometric precision is the point.
After designing gardens professionally for fifteen years, these are the plants I reach for time and again when creating a flower bed for someone who wants reliable results with manageable care. They are all RHS Award of Garden Merit holders, available at most UK garden centres, and genuinely forgiving of beginner mistakes.
Ground cover plants for the front of the flower bed
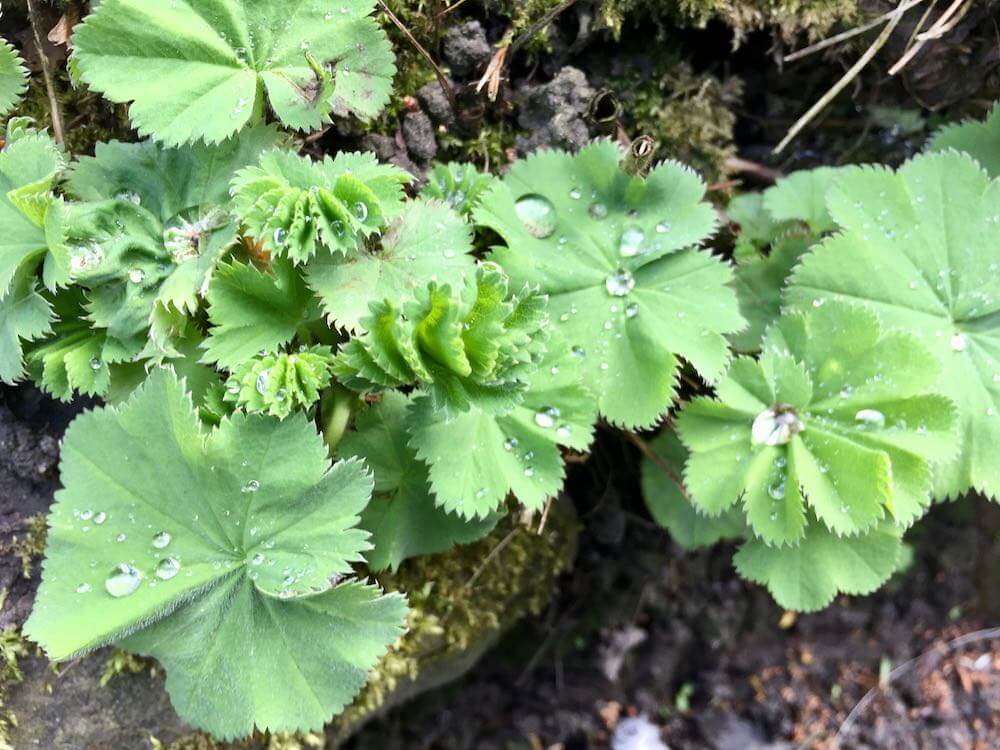
Alchemilla mollis (Lady’s Mantle) is perhaps the most useful front-of-border plant in British gardening. Its scalloped, water-repelling leaves are beautiful in their own right, and the froth of acid-yellow flowers from June to July works with almost every colour palette. It self-seeds gently to fill gaps and tolerates partial shade and clay soil.
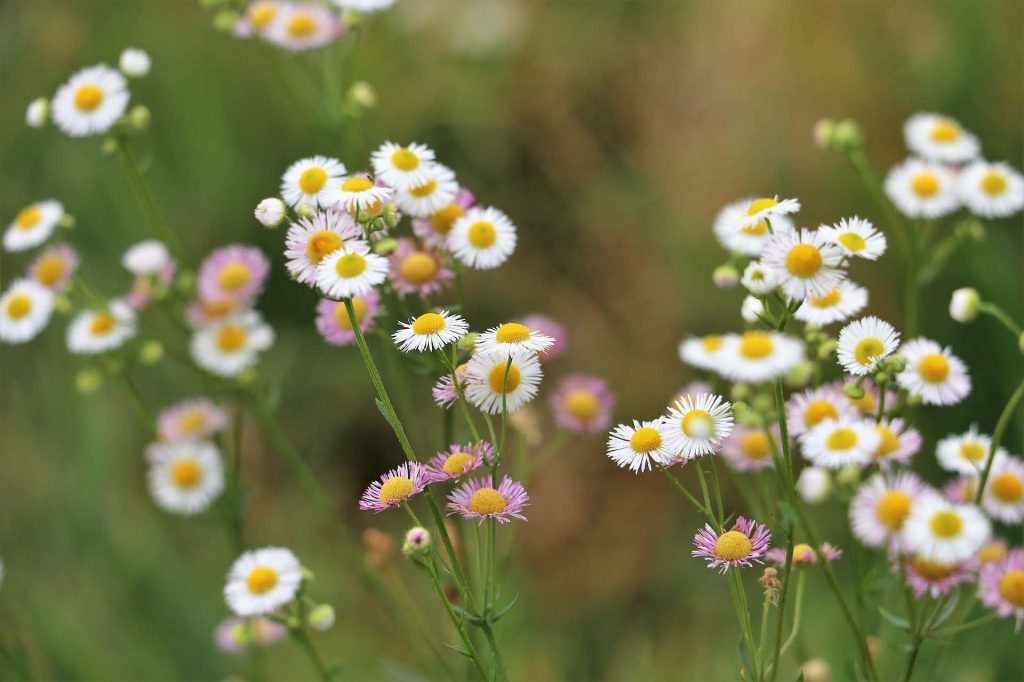
Erigeron karvinskianus (Mexican Fleabane) produces a continuous cloud of small daisy flowers from June through to October. It is remarkably drought-tolerant and grows beautifully in wall crevices and between paving as well as at the front of a border. The flowers open white and age to pink and purple simultaneously, giving a perpetually multi-coloured effect from a single plant.
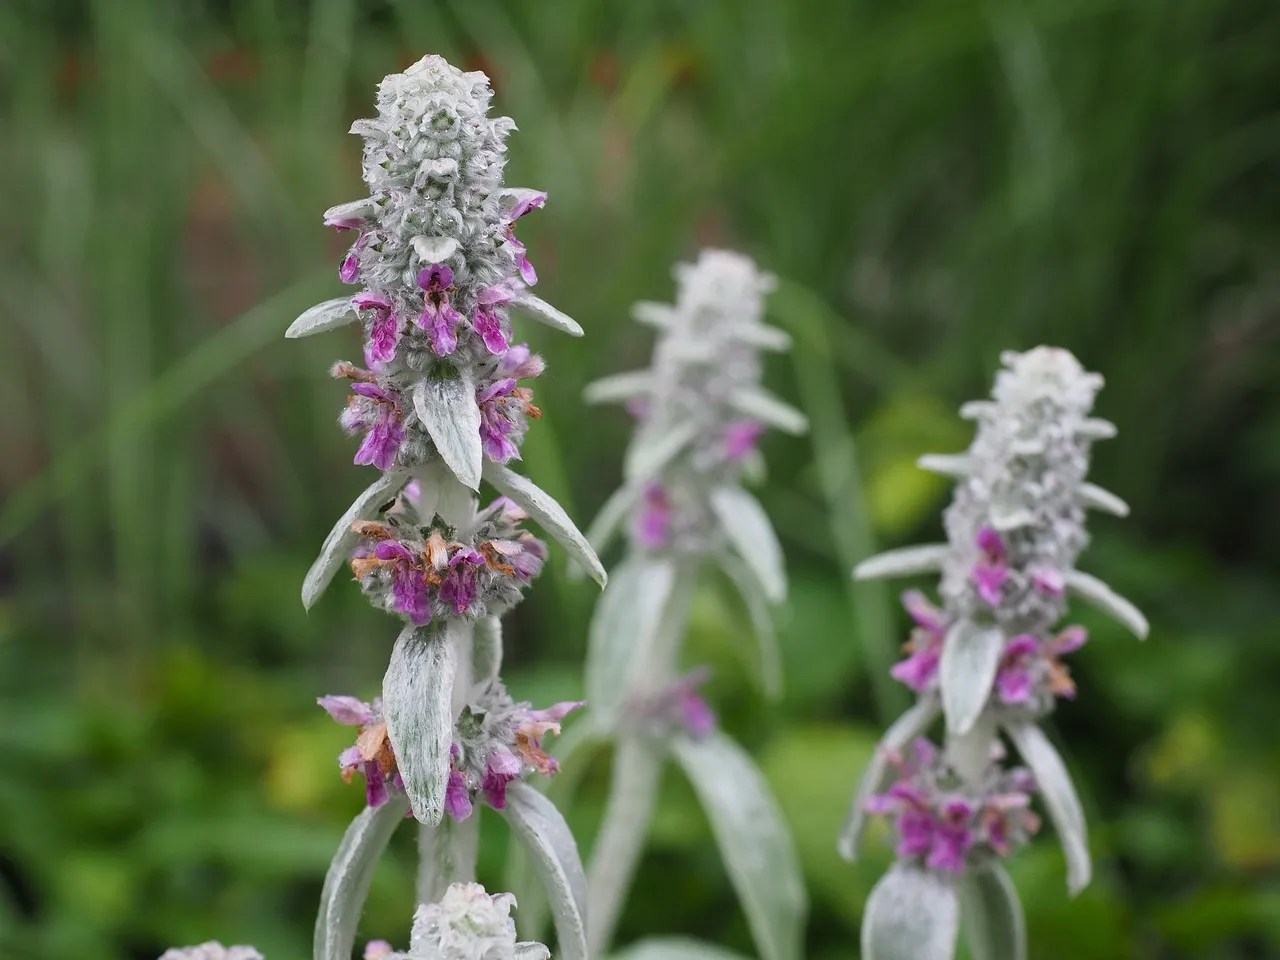
Stachys byzantina (Lambs Ears) is grown primarily for its extraordinary silver, furry foliage which provides contrast, texture, and ground coverage in one plant. It is almost completely indestructible, performing in dry conditions where most plants sulk, and it looks stunning alongside purple, pink, or deep red flowering perennials.
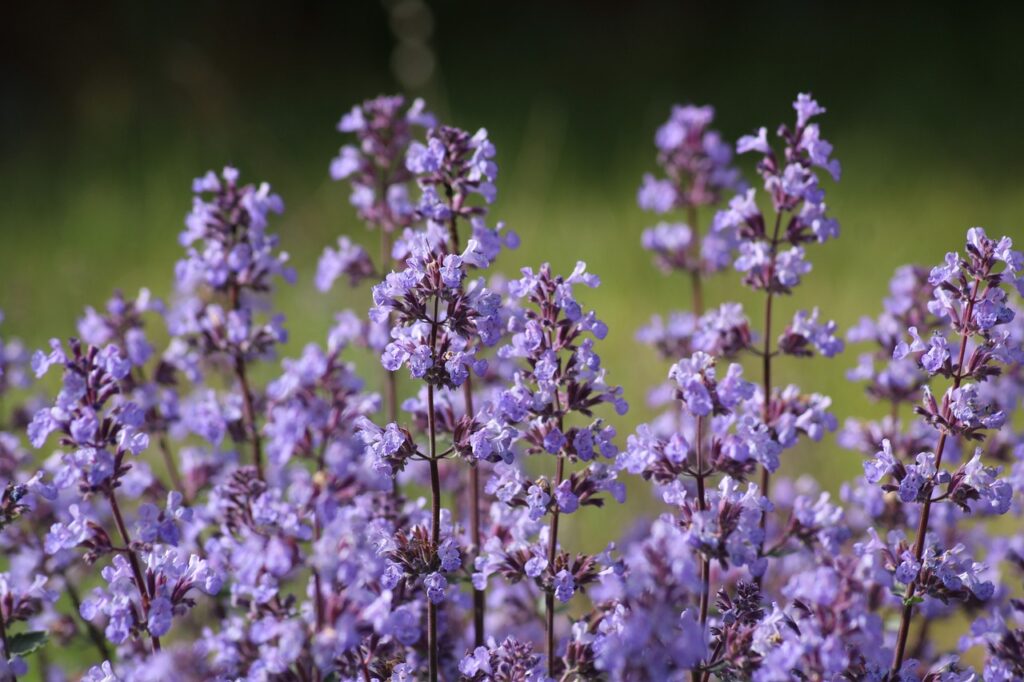
Nepeta (Catmint) is one of the most reliable edging plants in British gardening, producing long spires of lavender-blue flowers from May through to September. It is beloved by bumblebees, tolerates dry conditions, and has a wonderfully soft, billowing habit that softens hard edges. Cut it back by half in July and it will flower again in late summer.
Salvia nemorosa ‘Caradonna’ is one of the finest border plants available. The deep purple flowers on near-black stems combine extraordinary beauty with extraordinary usefulness: it is drought-tolerant, slug-resistant, beloved by bees, and flowers prolifically from May through August with a cut-back. If I could only plant one mid-layer perennial in every garden, this would be it.
Helenium (Sneezeweed) is the engine room of any summer border. From July through to October, it produces a seemingly endless succession of daisy flowers in warm shades of amber, orange, red, and bronze. It is genuinely easy to grow, tolerates clay, and multiplies reliably. Divide clumps every three years to keep the plants vigorous and prevent them from flopping.
Achillea (Yarrow) offers flat-topped flower heads in shades from white through yellow, pink, and deep red, flowering from June to August. It is extremely drought-tolerant, handles sandy and silty soils brilliantly, and provides a horizontal counterpoint to the vertical forms of Salvias and grasses. The dried seedheads are beautiful through winter too.
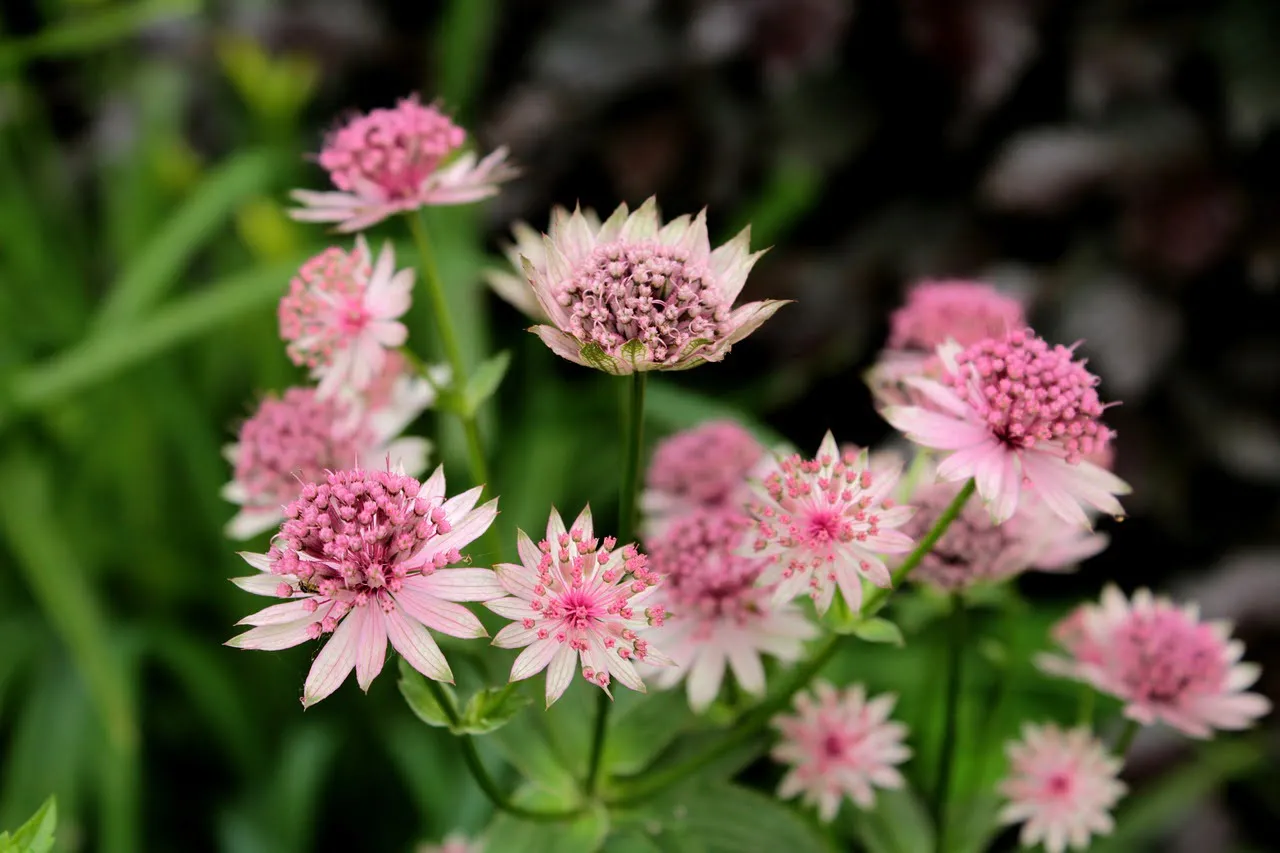
Astrantia (Masterwort) is the quiet star of the shaded or partially shaded border. The distinctive pincushion flowers on wiry stems are like nothing else in the garden, and they produce reliably from June through to September with regular deadheading. Astrantia thrives in clay soil and dappled shade, making it invaluable for difficult spots.
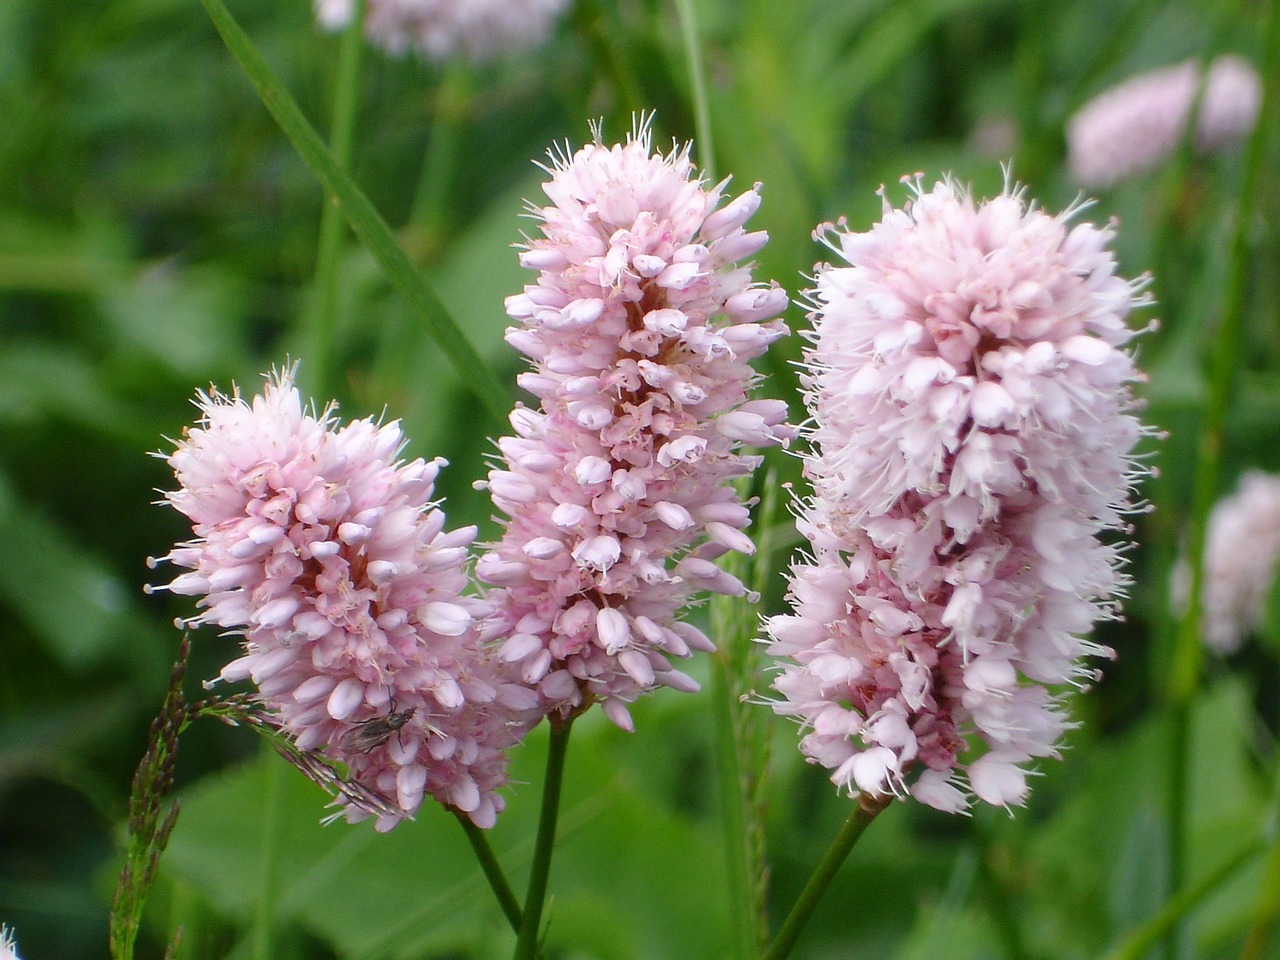
Persicaria amplexicaulis (Red Bistort) is one of the workhorses of the modern herbaceous border. From July through to October it sends up dense, poker-like flower spikes in deep crimson, salmon, or white depending on the variety. It is a big plant, reaching 90 to 120 cm, it tolerates clay and partial shade, and it never needs staking. An absolute workhorse that earns its space from the moment it establishes.
Echinops ritro (Globe Thistle) provides a structural, architectural presence that no other plant can replicate. The perfect spherical blue flower heads on silver-grey stems reach 90 to 120 cm and provide extraordinary mid to late summer interest from July to September. Bees and goldfinches adore it. It thrives in poor, dry soils where richer plants would simply produce too much foliage.
Rudbeckia (Black-Eyed Susan) is one of the most cheerful and reliable plants in any late summer border. The bright golden-yellow daisy flowers with dark chocolate centres appear from August through to October and shine brilliantly in lower autumn light. It is easy to grow from seed, tolerates clay, and spreads gently to form good clumps.
Once you have your plants and your prepared bed, the planting itself is straightforward, but a few steps make a significant difference to how well your plants establish. Start by giving every plant a thorough soak in its pot before it goes anywhere near the ground. A dry rootball placed into even moist soil will not draw water in effectively, and the plant will struggle for its first few weeks. Set the pots out on the surface of the bed first, spacing them according to their eventual spread rather than their current size, and stand back to check the layout before you commit.
Dig each hole to roughly the same depth as the pot and about one and a half times as wide. Tip the plant out gently, tease the roots slightly if they are tightly bound, and place it so the top of the rootball sits level with the surrounding soil surface. Planting too deep is one of the most common causes of poor establishment and rot at the crown. Backfill with the excavated soil, firm in gently with your hands (not your boot, which compacts too hard), and water thoroughly immediately after planting even if rain is forecast.
Watering in settles the soil around the roots and removes air pockets that would otherwise dry out the fine root hairs. Apply your mulch the same day, keeping it away from the immediate crown of each plant, and the bed is done.
8. Three ready-made UK flower bed planting plans by soil type
These are not generic planting lists. They are plans designed around your actual soil conditions, using plants I have specified and seen perform in UK gardens across twenty years of professional practice. Each plan uses the three-layer approach and a coherent colour palette.
Planting Plan 1: Clay Soil Flower Bed (Blue and Purple palette)
💡 Top Tip
Clay soils are some of the most naturally fertile in the UK. Improve drainage with grit and organic matter, then choose plants that actually relish the moisture-retentive conditions. Do not spend money trying to recreate a Mediterranean garden on heavy clay. Lean into what clay does brilliantly instead.
📋 Clay Soil Planting Plan: Blue and Purple Palette
Flowering season: June to October | Aspect: Sun or part shade | Maintenance: Low
Planting Plan 2: Sandy Soil Flower Bed (Warm Yellow and Blue palette)
💡 Top Tip
Sandy soil gardeners should choose plants that originate from dry, Mediterranean or prairie climates. These plants have evolved to handle drought and nutrient-poor conditions. Trying to grow moisture-loving plants in sandy soil without constant watering and feeding is a recipe for disappointment.
📋 Sandy Soil Planting Plan: Warm Yellow and Blue Palette
Flowering season: May to October | Aspect: Full sun | Maintenance: Very low
Planting Plan 3: Silty Soil Flower Bed (Pink, Purple and White palette)
💡 Top Tip
Silty soil benefits enormously from a no-dig approach. Rather than digging and compacting the soil, simply lay a thick mulch of compost or well-rotted manure on the surface each autumn and let the worms incorporate it. This improves structure without the surface compaction that digging can cause on silt.
📋 Silty Soil Planting Plan: Pink, Purple and White Palette
Flowering season: May to November | Aspect: Sun or part shade | Maintenance: Low
If you would like a personalised planting plan designed around your exact conditions, my Garden Design for Beginners online course walks you through the entire process of creating your own planting plan from scratch. You will learn how to assess your soil, choose plants for your specific aspect and conditions, and draw up a plan you can actually build in the real world.
9. When to plant a flower bed in the UK
Timing matters significantly when planting a flower bed, and getting it wrong is one of the most common reasons newly planted borders struggle in the first season. Autumn and spring are both excellent times to plant perennials and shrubs, with autumn planting giving a genuine head start because the soil is still warm and roots can establish before winter dormancy kicks in. By the time spring arrives, autumn-planted perennials are already rooted and ready to put their energy into growth rather than establishment.
Spring planting works well too, but the establishment period coincides with the beginning of the growing season, which means the plants are doing two things at once. Water more frequently in the first spring after planting until the roots are settled. Summer planting is possible but genuinely hard work. The combination of heat, water stress, and the shock of transplanting can set plants back significantly. If you must plant in summer, do it in the evening, water thoroughly, and mulch generously the next morning to retain moisture. Winter planting of bare-root perennials and shrubs is another excellent option that is underused by beginners.
10. Mulching and aftercare: the step most people skip
Once your plants are in the ground, mulching is the single most valuable thing you can do for the long-term health of the border. A layer of organic mulch, ideally composted bark, well-rotted manure, or garden compost, applied five to eight centimetres deep across the entire bed surface, will suppress weeds, retain soil moisture, regulate soil temperature, and feed the soil biology as it breaks down. A well-mulched border needs significantly less watering, fewer weedings, and produces healthier, more floriferous plants than an unmulched one.
Apply mulch in spring, once the soil has warmed, or in autumn, once the plants have died back. Keep it away from the crowns of plants and the stems of shrubs, where it can encourage rotting. A garden fork is useful for working it in gently between plants without damaging surface roots.
Beyond mulching, a flower bed needs very little intervention if the plants have been chosen well for the conditions. In spring, once new growth is visible, apply a balanced granular fertiliser across the bed surface and water in to give plants the boost they need for the season ahead. Cut back the dead stems and seedheads of herbaceous perennials in late winter or early spring rather than in autumn, as the structure they provide through winter is valuable for wildlife and gives the garden a degree of presence even in the coldest months.
Divide congested clumps of perennials every three to four years in autumn or early spring. Most herbaceous perennials benefit from being lifted, split into sections with a spade or two garden forks back to back, and replanted with fresh organic matter worked into the hole. Division keeps plants vigorous, prevents the dead centre that forms in older clumps, and gives you free plants to extend the bed or share with other gardeners. Plants like Helenium, Rudbeckia, Nepeta, Geranium, and Aster all divide readily and reliably.
From fifteen years of visiting and redesigning gardens professionally, these are the mistakes I see most often in flower beds, and the ones that are easiest to avoid once you know about them.
Planting too close together. The temptation to fill every gap immediately is understandable, but most perennials need more space than their pot size suggests. Overcrowded plants compete for water, nutrients, and light, resulting in smaller flowers and increased disease susceptibility. Use the eventual spread listed on the plant label, not the plant’s current size in the pot.
Ignoring aspect and soil before choosing plants. This is the most expensive mistake in gardening. A lavender planted in clay shade will fail. A fern planted in sandy full sun will fail. Ten minutes researching your conditions before you visit the garden centre saves you from months of disappointment.
Skipping the mulch. A bed planted without mulching is a bed full of bare soil waiting to be colonised by weeds. Within a month of planting, the real work becomes weeding rather than enjoying the border. Mulch immediately after planting and repeat annually.
Buying one of everything. This is the pick-and-mix trap. Twenty species, one plant of each, looks like a plant fair rather than a border. Buy three of a few things, not one of everything. Your border will look designed rather than assembled.
Planting in straight lines. Unless you are designing a formal garden, rows of plants in straight lines always look stiff and unnatural. Plant in drifts and triangles, offset the rows, and let the plants grow into each other rather than standing in formation. The most naturalistic and successful borders look like the plants chose their own positions, even though they were placed with great care.
Your subscription could not be saved. Please try again.
Your subscription has been successful.
Frequently asked questions about planting flower beds
How deep should I dig a flower bed?
For most herbaceous perennials, one spade’s depth (around 25 to 30 cm) is sufficient, with organic matter incorporated as you go. For shrubs or if you are dealing with compacted or very heavy clay soil, double digging to around 50 to 60 cm gives roots the best possible start. For a brand new bed being converted from lawn, remove the turf first and add it to your compost heap.
How many plants do I need for a flower bed?
A useful rule of thumb is three to five plants per square metre for ground cover and mid-layer perennials, and one plant per square metre for taller structural plants. A three-metre-wide border planted at this density will look full within two growing seasons. Always buy in odd numbers: three, five, or seven of the same plant creates a natural drift that looks intentional.
How do I stop weeds in a flower bed?
The most effective long-term weed prevention is a combination of thorough ground preparation (removing all perennial weed roots before planting), generous planting density so plants cover the soil, and a five to eight centimetre layer of mulch applied annually. Avoid weed membrane under mulch as it degrades over time, becomes difficult to plant through, and eventually creates more problems than it solves.
Can I create a flower bed on a budget?
Absolutely. The most cost-effective approach is to buy a small number of fast-multiplying perennials in autumn when garden centres discount them, plant them correctly with good soil preparation, and divide them the following autumn to double or triple your stock for free. Plants like Helenium, Rudbeckia, Salvia nemorosa, Nepeta, and Geranium all divide readily and reliably. Within three seasons you can fill a large border from a modest initial investment.
When is the best time to plant a flower bed in the UK?
Autumn (September to November) is the best time for planting most perennials and shrubs in the UK. The soil is still warm from summer, which encourages root establishment before winter, and rainfall usually reduces the need for supplementary watering. Spring (March to May) is the second-best option. Avoid planting in the height of summer unless you can commit to daily watering during the establishment period.
🌱 Summary: How to Plant and Design a Flower Bed
Choose your site and observe the sun. Test and prepare your soil for your specific soil type. Keep borders no wider than arm’s reach. Use three layers of planting (ground cover, mid layer, and top layer). Stick to a unified colour palette and plant in repetitive drifts of three or five. Mulch after planting and repeat annually. The three planting plans above give you a ready-made starting point for clay, sandy, or silty soil. Follow these principles and you will have a border that looks designed, flowers for months, and improves year on year.
Want to design your garden with confidence?
If this guide has given you a taste for garden design and you want to go further, my Garden Design for Beginners online course walks you through the entire design process from assessing your garden through to creating a professional planting plan. It covers soil types, plant layering, colour scheming, border design, and much more, all taught by me from my own design experience on BBC Garden Rescue and in client gardens across the UK.
29
Garden Design Examples for Small Gardens: 30 Design Templates & Planting Plans
Garden Design Examples for Small Gardens: 30 Design Templates & Planting Plans: In this online gardening course, I’ll walk you through 30 fantastic garden designs, explaining the logic behind the layout, the plant choices, and take-home tips for applying them in your own garden.
Weekend Garden Makeover: A Crash Course in Design for Beginners
Learn how to transform and design your own garden with Lee Burkhills crash course in garden design. Over 5 hours Lee will teach you how to design your own dream garden. Featuring practical design examples, planting ideas and video guides. Learn how to design your garden in one weekend!
Garden Design for Beginners: Create Your Dream Garden in Just 4 Weeks
Garden Design for Beginners Online Course: If you want to make the career jump to becoming a garden designer or to learn how to design your own garden, this is the beginner course for you. Join me, Lee Burkhill, an award-winning garden designer, as I train you in the art of beautiful garden design.
I’d love to hear from you about your flower bed dramas and success stories. Once you’ve tried the above guide, it would be great to see your before and afters. So, let’s get cracking with our flower bed redesigns!
Your subscription could not be saved. Please try again.
Your subscription has been successful.
Lee Burkhill
Lee Burkhill, known as the Garden Ninja, is an award-winning garden designer and horticulturist with over 30 years of gardening experience and 15 years as a professional garden designer. A qualified RHS (Royal Horticultural Society) professional, Lee specialises in sustainable garden design and practical horticultural advice. He designs and presents on BBC1’s Garden Rescue and in leading gardening publications. Lee combines three decades of hands-on gardening knowledge with professional design qualifications to help gardeners create beautiful, functional outdoor spaces.