-
Exploding Atom Garden Part 4 Planting Shrubs & Edging
 Lee Burkhill: Award Winning Designer & BBC 1's Garden Rescue Presenters Official Blog
After the long hard graft of marking out, digging out the borders and lugging heavy trees around in sub-zero temperatures last winter; it's a welcome change to start adding some of the finer touches to the garden. After 8 long months the fun part begins. It's now time to add the shrubs and garden edging to the exploding atom garden!
It’s easy to become disheartened when you’re halfway through a project. The beginning seems a long time ago and the end seems too far off. You’re right in the thick of it, the messy bit where everything is up in the air. It’s the classic symptom of any project, the middle bit is often where motivation wanes and energy levels decrease. The great thing with garden design is that this middle bit is usually a great point to take stock of the design, the outline and structures. It can be the part in a garden transformation that reinvigorates the gardener to move into the final stages; planting!
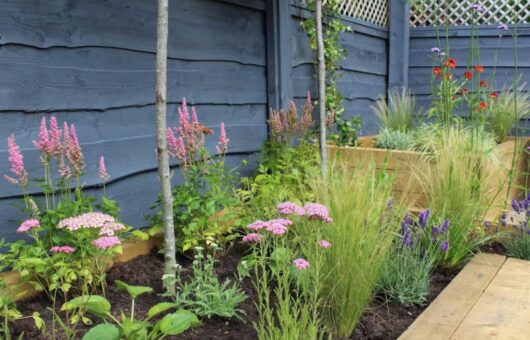
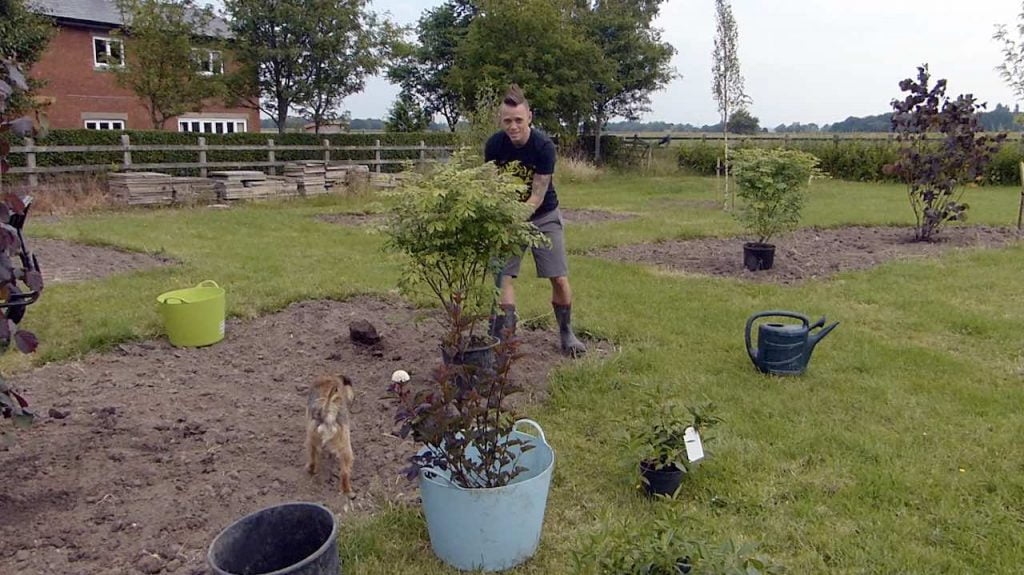
The Exploding Atom Garden has been transformed from a blank patch to the outline of a real garden. The borders are in. The trees give definition and height to the once flat area. The next stage is to start to introduce some of the shrubs to the garden and then edge the beautifully symmetrical borders to the turf doesn’t start to cannibalise the precision of the garden.
With any garden design, the planting can make or break a garden. Which is why it is always so important to have a planting plan. That way you can consider what forms, colours and types of plants that may work in your new garden. It goes without saying that soil condition, aspect and exposure are all conditions that must be considered when choosing plants.
- Top tips for a planting plan
- Shrubs for garden design
- What plant size should I buy?
- Where should I plant shrubs?
Top tips for a garden planting plan
A planting plan is a really useful tool for any garden redesign. Basically, you draw out to scale the garden and then overlay the plants, again to scale. Which allows you to view the borders from a plan (top-down) perspective. A garden planting plan is essential as it aids you in
- See how plants will fit together, especially colour palettes and spaces
- Working out the number of plants required (I use the average mature plant size to work out spacing and quantities)
- Plan the position in relation to each other
- See the different heights and forms together making sure they blend well (you don’t want massive jumps in height as this distracts the eye eg. Sedum style low ground cover jumping up to Bamboo 12 ft high plants!)
- Estimate the cost for your planting

Shrubs for Garden Design
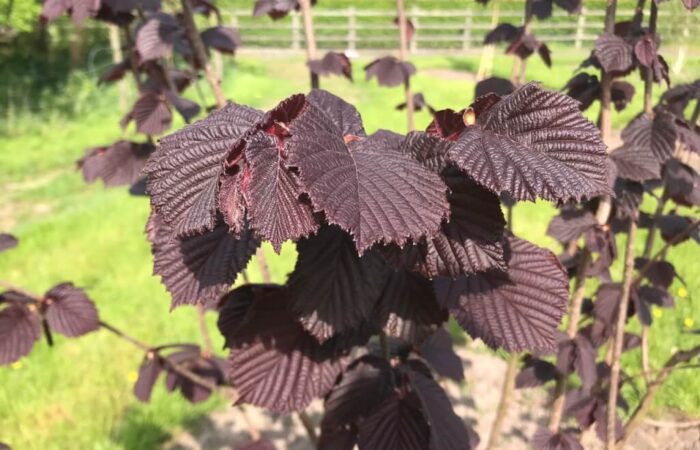
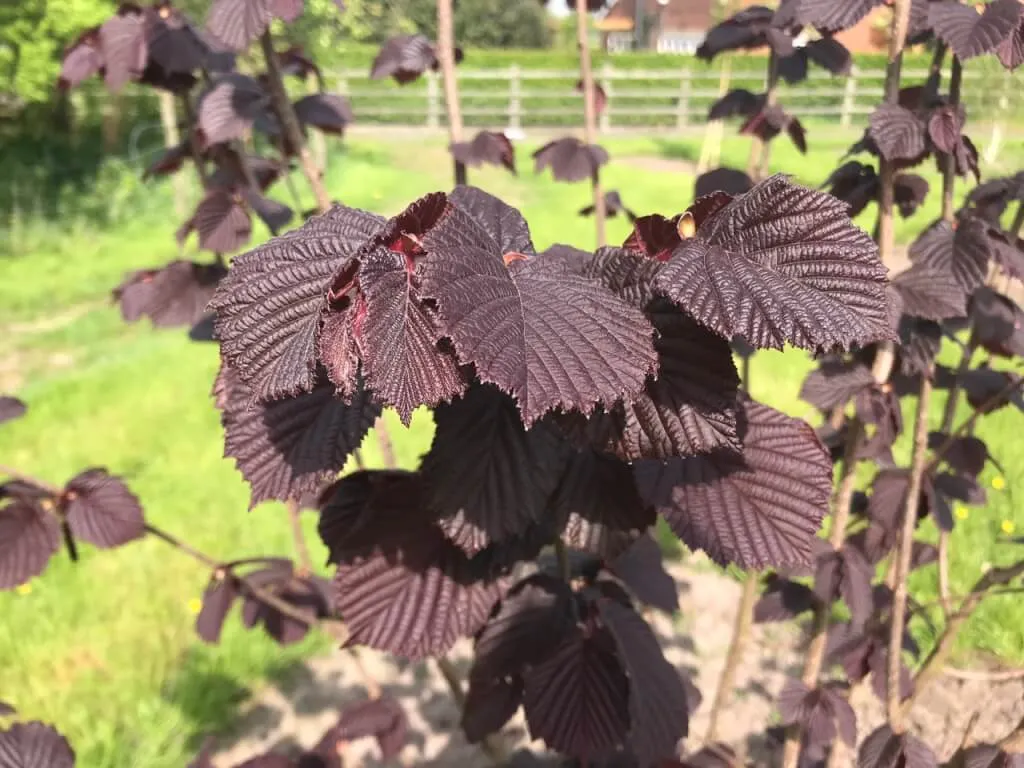
In the Exploding Atom Garden, I’ve chosen a mix of different shrubs to give weight to the garden. The shrubs will provide winter structure and a bridge between the height of the trees and the herbaceous planting. Essential to avoid that neck whip as you go from one to the other! I’ve also chosen a mix of evergreen and deciduous plants to bring winter colour and interest throughout the year. This helps provide birds with something to feed off in the winter and helps prevent the dreaded ‘bare garden’ in midwinter.
- Corylus avellana (Hazel)
- Euonymous alatus
- Viburnum tinus
- Cotinus coggygria (Smoke bush)
- Physocarpus red baron
- Ligustrum ovalifolium (Privet left in bush format)

Shrubs will form the back bone of your garden and will help give structure throughout the year so it’s really important that you consider your plant choices.
What size plant should I choose?
Now if you’ve seen a TV Garden Makeover show you will know just how huge the shrubs and fully formed trees are. Thousands of pounds are spent to get that ‘instant’ look with the plants. The same with show gardens, huge perfect specimens are chosen at great cost for the immediate impact. However, have you ever thought about just how much water and maintenance those sized plants will need not to mention the expense?
My take on choosing the correct plant size is to go for a mix. Buy a few larger specimens to give some instant impact, but only a few. Then choose smaller specimens for the remaining shrubs.
The Benefits of choosing smaller plant sizes
- The plants are far cheaper and easier to transport
- Smaller plants take less watering
- They will establish far quicker as there is less stress on their root system
- If they fail to grow its less painful to replace or edit the garden in the first year
- If you get them in and they don’t look right you can easily remove them
- They are much lighter and easier to move
Where should I put shrubs in my garden?
Now, this may sound like an odd question, but you wouldn’t believe just how many people place shrubs in the wrong location. Usually, due to the flurry of excitement of your lovely neat 5lt pot sized shrubs you’ve just acquired, gardeners then put them pride of place at the front of borders. Which for the first 6 months to a year is fine. Then they grow and grow some more eclipsing the rest of the border.

A better way when placing shrubs it to place them near the back, whereas they grow over time, they provide support for the rest of the planting scheme.
Shrubs can soften fences and provide a great foil for other plantings. If you have borders you can walk around then the middle of the borders are usually best unless you want a front and back at which point the back of the border. There are no hard and fast rules and there are obviously exceptions to this. However, if you’re new to planting arrangements then the above guidance will set you off on the right path!
Should I edge my garden borders and lawn?
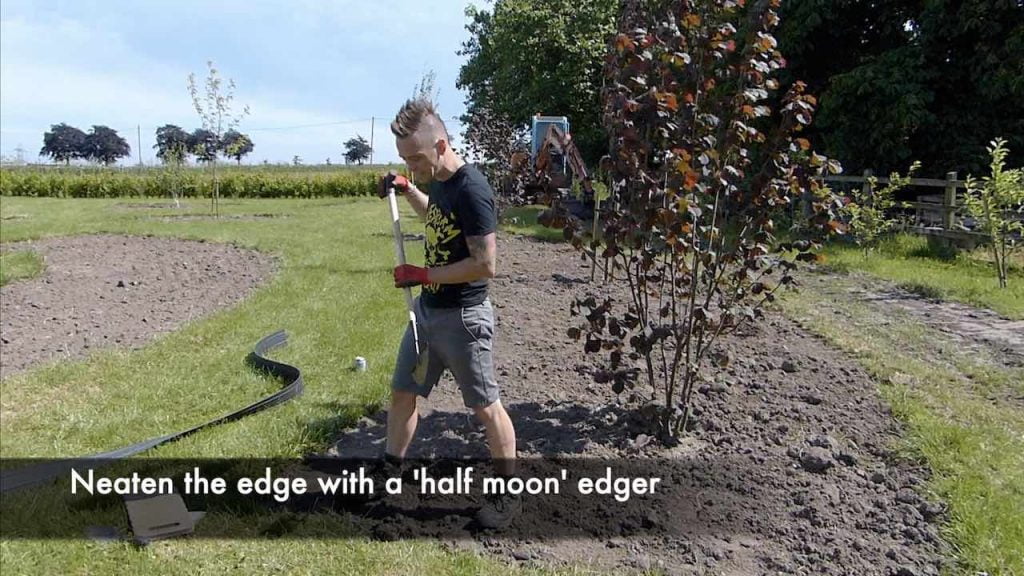
My quick answer would be yes. That is unless you like spending hours each year diligently using a half-moon edger to stop grass from growing into your borders. Given the huge lengths of edges I have in the Exploding Atom Garden; edging the garden will be essential to avoid hours of mundane lawn edging each year!
You have a few options when it comes to garden lawn edging:
- Metal strip lawn edging (Expensive but neat)
- Plastic corrugated edging (Cheap but not very nice to look at)
- Bricks or other paving edgers (long-lasting but expensive)
- Heavy-Duty Recycled Plastic Edging strips (long-lasting and mid-price range).
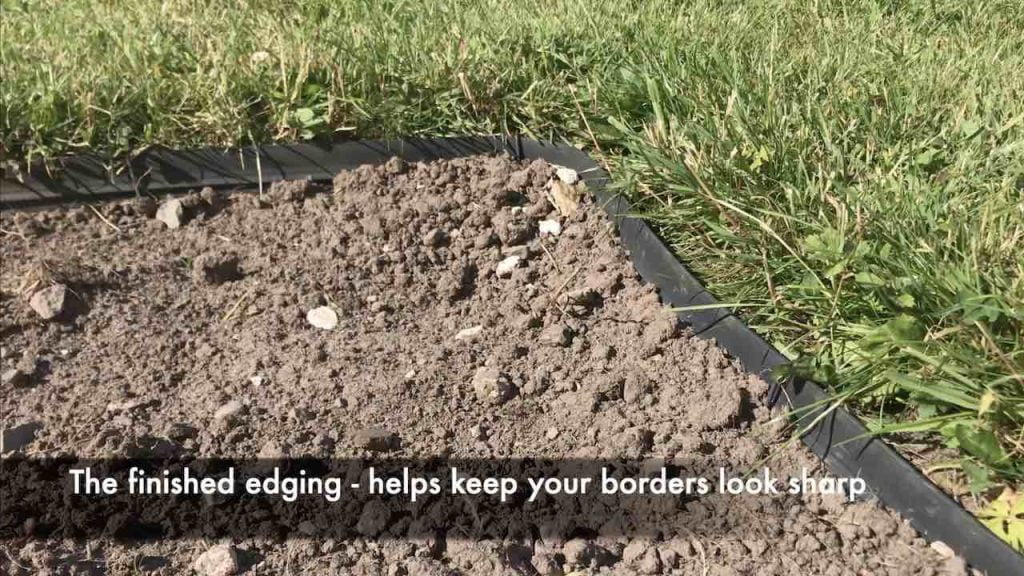
I’ve decided to use some German manufactured recycled heavy-duty lawn edging in the Exploding Atom Garden. Mainly because it can cope with the curved nature of the garden beds and secondly because it is recycled. The edging I’ve used comes in 50m sections and has a shelf life of about 50 years.
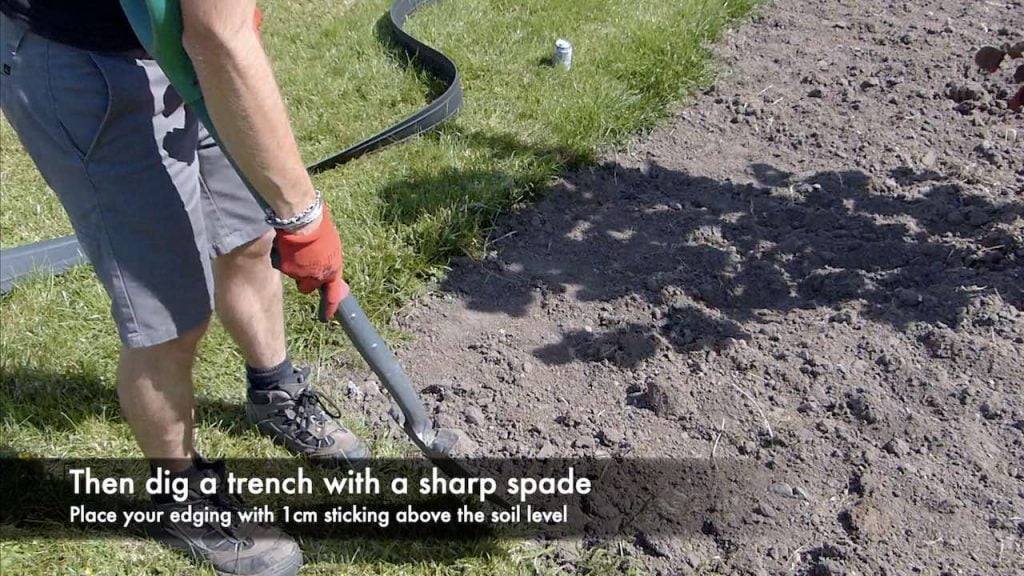
I’ve fitted the edging just below the grass level so a mower can glide over it and give a neat finish. Fitting the ending is a time-consuming process but well worth it for the time it will save in the long run.
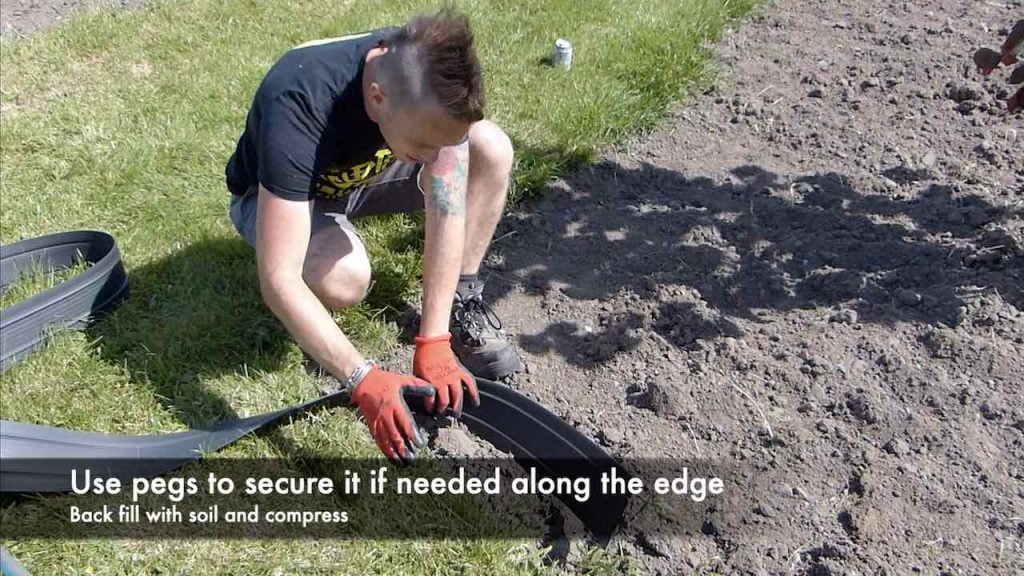
You fit this style of edging, along with metal edge options but digging a trench around the flower bed and lawn with a sharp spade. You then lay the edging into this trench and backfill. You don’t need to dig a huge trench. I’ve found digging a thin slice next to the lawn was sufficient. I then use pegs to keep the edging in place. Over time as the lawn meshes into the edging these pegs become redundant. They’re just used for the initial settling in period.
What’s next for the Exploding Atom Garden?
So next us will be the planting of herbaceous plants in the Exploding Atom Garden. We have the red hot core of the atom moving into the moody purples border and then the wilderness outer ring. How exciting! These varied borders will provide the colour whilst bridging the gaps between the earth and shrubs. I’ll be further detailing the planting plan of the borders in my next Vlog and Blog.

You can also check out my Youtube channel for more garden design hints tips and hacks. Why not message me on social media for more tips and tricks?
New to the Exploding Atom Garden?
Catch up by going back to the beginning or other design diaries you may have missed!
- Exploding Garden Design Diary 1
- Marking out the Exploding Atom Garden Design Diary 2
- Planting the Trees in the Exploding Atom Garde Design Diary 3
- Shrubs and edging in the Exploding Atom Garden Design Diary 4


Lee Burkhill
Lee Burkhill, known as the Garden Ninja, is an award-winning garden designer and horticulturist with over 30 years of gardening experience and 15 years as a professional garden designer. A qualified RHS (Royal Horticultural Society) professional, Lee specialises in sustainable garden design and practical horticultural advice. He designs and presents on BBC1’s Garden Rescue and in leading gardening publications. Lee combines three decades of hands-on gardening knowledge with professional design qualifications to help gardeners create beautiful, functional outdoor spaces.
View all posts by Lee Burkhill


Categories
Other posts
-

Start here: to begin your gardening journey! Read more
-
How to Plant Spring Bulbs in Autumn: A Step-by-Step Guide Read more
-
The Best Raised Beds to Buy 2026: That You Can Build at Home Read more
-
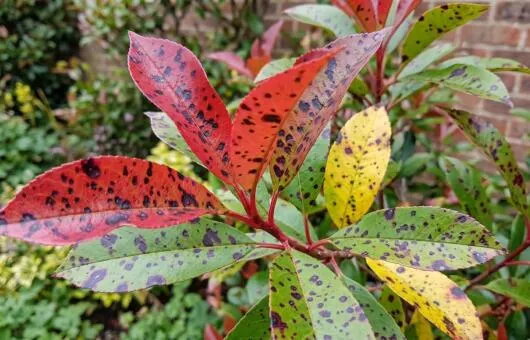
Why Is My Photinia Going Brown? Complete UK Diagnosis Guide Read more
-
Should I Water My Lawn in a Heatwave and Why Is My Lawn Brown? Read more
-
Plants that love Sandy Free Draining Soil: 30 Easy to Grow Plants Read more