-
Expoding Atom Garden Part 2 Marking out the Garden
 Lee Burkhill: Award Winning Designer & BBC 1's Garden Rescue Presenters Official Blog
In the first part of this blog series, I explained the design story about the exploding atom garden. A concept garden using the process of an exploding atom to create a dynamic garden. From its red-hot core to the wilder outer edges, this garden is going to be one wild experiment in design and planting. In this instalment, I detail how I marked out the garden taking the design to the ground.
Marking out the Garden Design on the ground
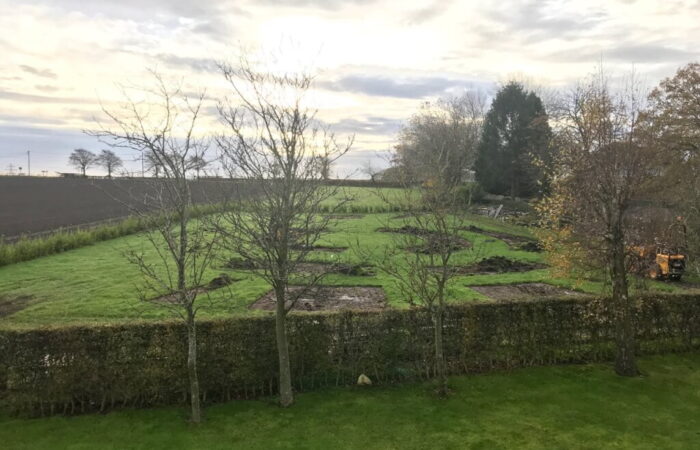
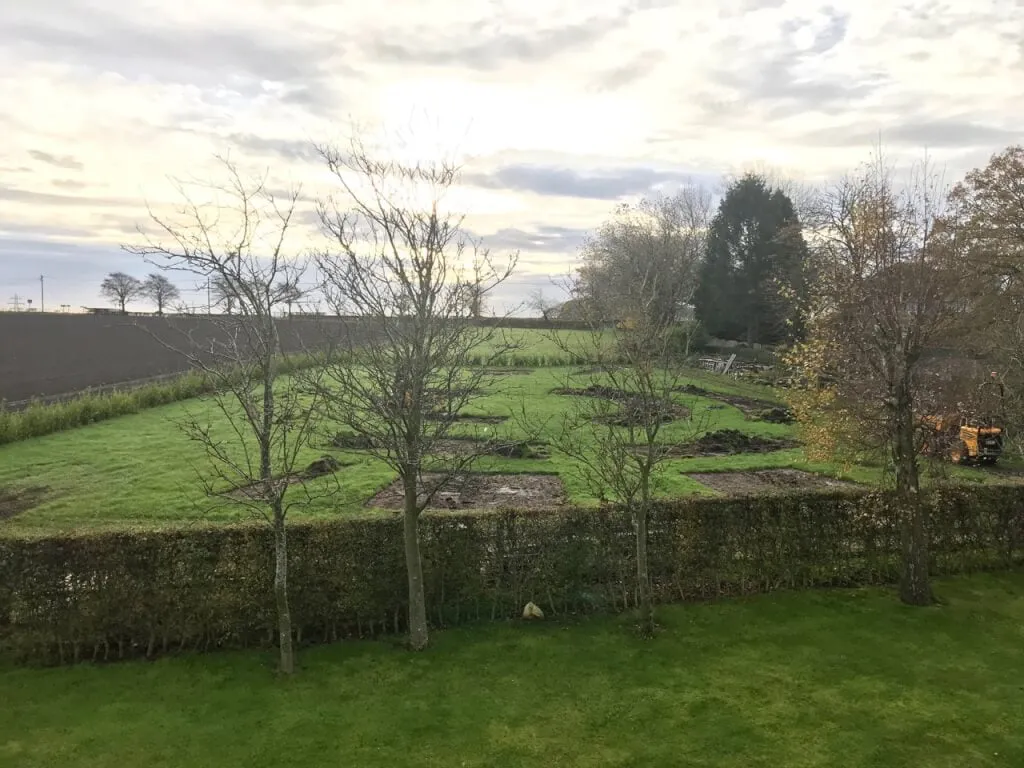
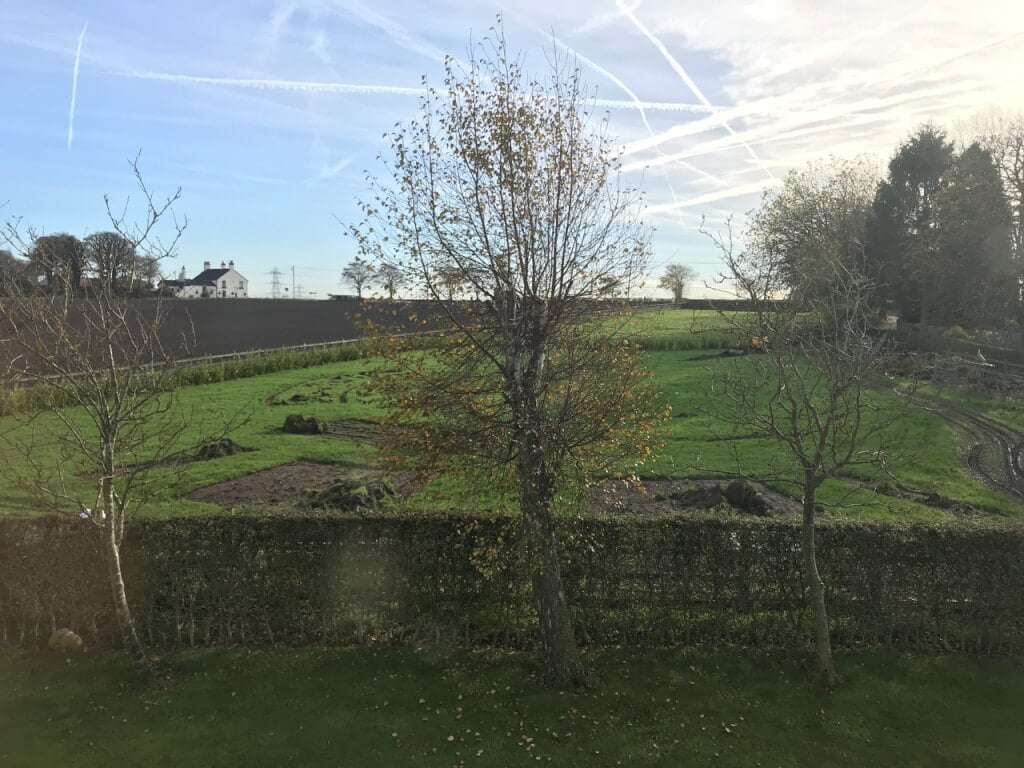
The next phase is probably the hardest in terms of skill and accuracy with such a geometric design. Marking it on the slightly sloping lumpy field surface. I won’t lie, the marking out of any garden always starts out with bags of enthusiasm and excitement before slight brain melt and frustration.
Designing on paper is one thing, then mapping it out to any ground space is where the errors, oversights or ground issues emerge. Six hours passed and amendments where made whilst I spray lined the plan onto the area. Circular angles easily get confusing!
Standing on the top of a ladder to see the overall view and walking through the grass path network was essential. I checked the layout from every angle before committing my trusty tent pegs to the ground and joining them with string! With any garden mark up, the change will happen and amendments are more than likely to be made. However, don’t despair this is all part of the iterative approach to successful garden design.
Lifting the turf for the plant beds
Now, regular viewers of my Youtube channel will know I’m a dab hand with a turf cutter. So I’d estimated it would take me a full 2 days to cut the turf from the garden design and a further 3 days to manually lift the turf. What I hadn’t factored in was the horrendous weather that would cause significant delays to this plan. The rain and wind meant to try to lift the wet sodden turf almost impossible without injuring myself or ruining the rest of the garden.
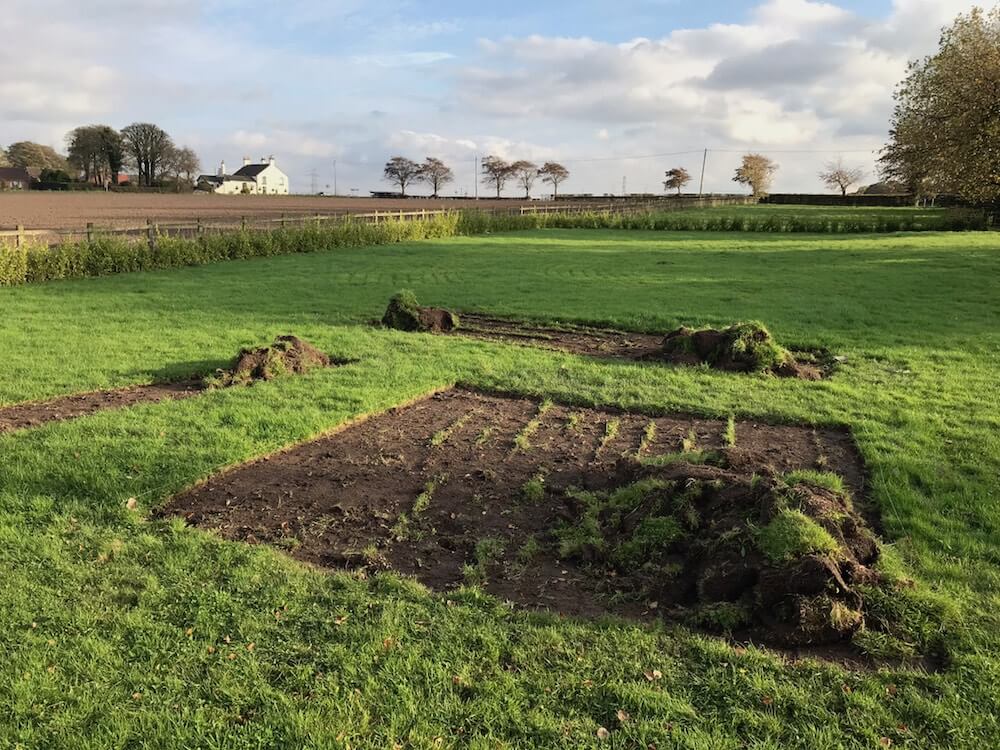
The delay in lifting the turf resulted in it started to matt back to the original soil. This meant rather than simply rolling and moving I was having to recut with a spade the turf as I went along. After 2 days of hard graft, I submitted to ask for help from my mate. The lesson learnt was this; if you’re cutting large areas of turf try and lift the grass immediately. If you wait for a big reveal like me, the weather or other delays may result in making the job harder than it needs to be!
So it’s November 2017 now and the turf is finally up meaning I can move onto the next phase. Ordering my bare root trees ready for December. Planting trees in winter you say! Well yes, it’s the ideal time, but more on that next time.
Check back soon for more updates on this the Exploding Atom Garden. Why don’t you check out my youtube channel for more guides or let me know your thoughts on my Social Media accounts?
Happy Gardening!
Missed some of the Exploding Atom Design Diaries?
Catch up by going back to the beginning or other design diaries you may have missed!
- Exploding Garden Design Diary 1
- Marking out the Exploding Atom Garden Design Diary 2
- Planting the Trees in the Exploding Atom Garden Design Diary 3
- Shrubs and edging in the Exploding Atom Garden Design Diary 4


Lee Burkhill
Lee Burkhill, known as the Garden Ninja, is an award-winning garden designer and horticulturist with over 30 years of gardening experience and 15 years as a professional garden designer. A qualified RHS (Royal Horticultural Society) professional, Lee specialises in sustainable garden design and practical horticultural advice. He designs and presents on BBC1’s Garden Rescue and in leading gardening publications. Lee combines three decades of hands-on gardening knowledge with professional design qualifications to help gardeners create beautiful, functional outdoor spaces.
View all posts by Lee Burkhill


Categories
Other posts
-

Start here: to begin your gardening journey! Read more
-
How to Improve Your Garden Soil Organically Read more
-

Plants for Exposed & Windy Gardens UK: 15 Tough Picks Read more
-
How to prune Ornamental grasses the easy way Read more
-
Plants for South Facing Gardens Read more