For the garden you’ve already got, not the one you’re starting from scratch. Seven checklists and video lessons from BBC Garden Rescue’s Lee Burkhill, built to help you work out what’s worth keeping before you spend a penny.
69


Quick Answer
Bulbs in the green are spring bulbs, most often snowdrops, lifted and sold with their foliage still attached rather than as dry, dormant bulbs. Planted straight into the ground between February and March, just after flowering, they establish far more reliably than dry autumn planted bulbs, often putting on a proper display within a single year.
I’d say a good third of the clients I design gardens for have never heard of buying bulbs “in the green” until I mention it to them. I was talking to a design client about planting bulbs in late spring, she seemed so confused. Stating this is an autumn task, but when I explained bulbs in the green she seemed quite shocked that it was possible! She’d been buying dry bulbs from the garden centre every autumn for years, with results ranging from disappointing to nothing at all, and had never once come across this alternative way of buying and planting them.
Spring flowers give us the first proper sign that winter is loosening its grip. There’s nothing quite like getting through the darker months and then seeing a scatter of spring bulbs emerging in the garden. Winter Aconites (Eranthis) and Snowdrops (Galanthus) are usually the earliest to appear, brightening up the tail end of the winter months before anything else has properly got going.
The trouble is, these spring plants can take a good while to establish if you plant them as dry, semi-dormant bulbs in autumn, which is how most people buy Daffodils (Narcissus) and Snowdrops alike. That slow start leads to real gardening disappointment, waiting two or three years for something that never quite shows up the way you hoped. Bulbs in the green are a different proposition entirely, and once you know they exist, you’ll wonder why nobody mentioned them sooner.
This guide will explain exactly what “bulbs in the green” means, which bulbs you’ll find sold this way, and how to plant them properly so they establish quickly and go on to naturalise for decades. I’ve been recommending this method to my design clients for years, and it’s one of the simplest ways to transform a dull late winter garden without spending a fortune.
Jump To
This page contains affiliate links for products I use and love. If you take action (i.e. subscribe, make a purchase) after clicking a link, I may earn some gardening commission which helps me keep the Garden Ninja Blog free for all.
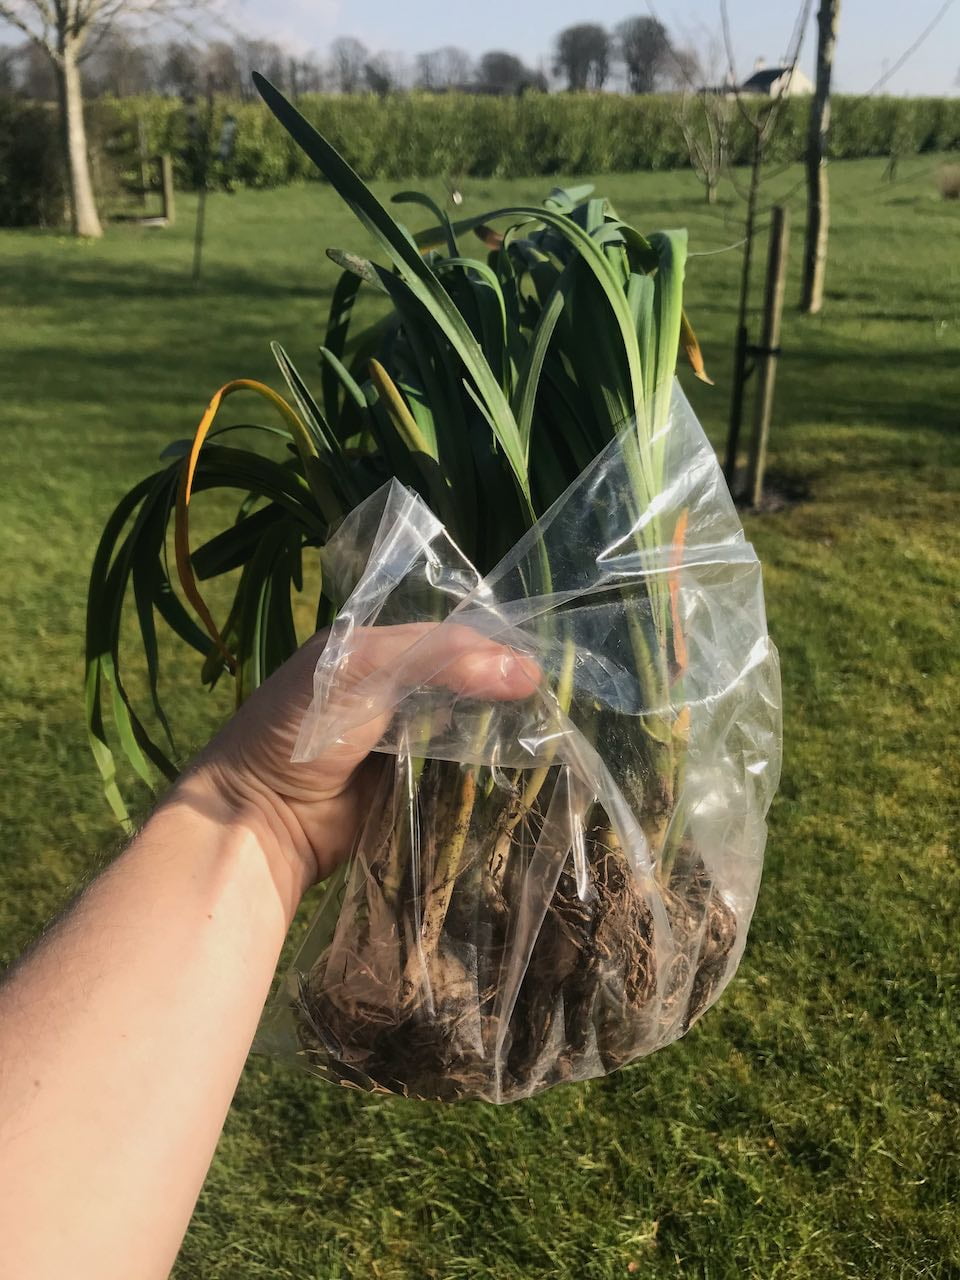
Bulbs “in the green” are flowering bulbs that are lifted, sold and then replanted whilst their green stems are still intact. Because they haven’t been dried out, they carry a much higher water content, which makes them far less stressed by the whole process of being lifted, transported and replanted.
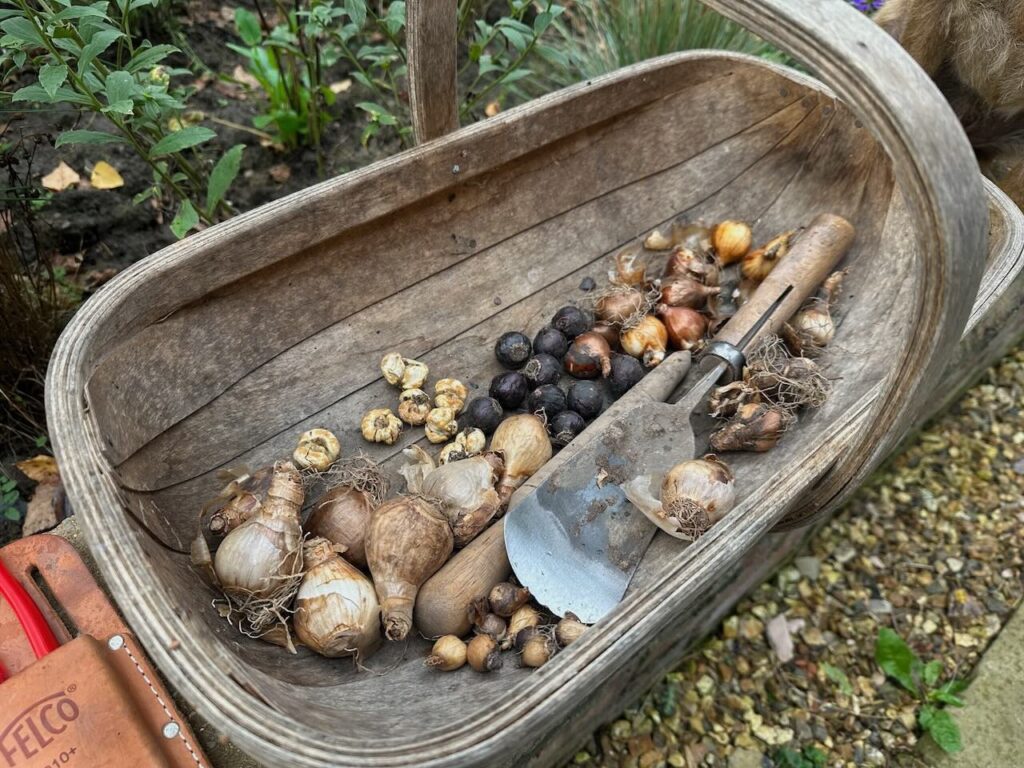
They differ from dry or semi-dried bulbs, which are lifted and sold whilst dormant. These dried bulbs, such as Daffodils, Tulips or Snowdrops, are then planted in autumn, ready for the following spring. It’s the same plant, just harvested and sold at a different point in its annual cycle, and that difference matters far more than most gardeners realise.
By buying your spring bulbs “in the green” just after they’ve finished flowering, you can be fairly confident of a decent display the following year, rather than crossing your fingers and waiting to see what turns up. I’ve had far more consistent results with client gardens using this method, particularly with Snowdrops, which can be properly temperamental as dry bulbs.
You’ll actually come across bulbs sold in three different ways, and it’s worth knowing where each one fits before you order.
Dry bulbs are the cheapest and most widely available, sold in autumn, and best suited to easier-going types like Daffodils and Tulips.
Bulbs in the green sit in the middle, sold for a short window in late winter with their foliage intact, and are the option I reach for with anything temperamental like Snowdrops or Winter Aconites.
Then there’s “in growth”, bulbs already flowering in a pot, which garden centres sell for instant colour on a patio or windowsill. In growth costs the most for the least amount of plant, since you’re paying for a pot and compost as well as the bulb, and it doesn’t naturalise or establish in the ground nearly as reliably as buying in the green. I only reach for in-growth bulbs if I want flowers that same week and have completely missed the in-the-green ordering window.
Planting bulbs in the green has a number of benefits for the gardener, and it’s worth understanding why before you decide it’s just a more expensive way of buying the same thing. Yes, they are more expensive, but for certain bulbs, it’s worth it. I’m looking at you rare Snowdrops!
The first is that bulbs in the green are lifted with their foliage still attached. Once planted, that foliage dies back naturally, and all the moisture and stored energy go straight back into the bulb, ready to fuel next year’s flowering. This puts far less stress on the bulb than lifting it, drying it out completely and then planting it dormant months later.
Second, it’s far easier to see exactly where your bulbs will flower by planting them in the ground. There’s no more digging holes, dropping bulbs in and then completely forgetting where they are come autumn. This makes planning your garden borders much simpler, and it means you can judge the spacing and grouping properly as you go, rather than guessing at what’s underground.

I had a call with a client on a video consultation last spring who thought “in the green” referred to some kind of eco-friendly or organic bulb, rather than a description of the growing stage at which it’s sold. It’s a completely understandable mix-up given how the phrase reads, but once she understood it was about timing rather than production method, the penny dropped, and she went on to order a hundred and fifty snowdrops for a large shaded corner of her garden that had never had anything worth looking at in it before in spring.
Lastly, certain plants, such as Winter Aconites and Snowdrops, can be quite fussy about emerging when planted as dry bulbs. Sometimes they come straight up, other times they sulk dormant for years. By planting them in the green, they go straight into warmer soil with active roots already growing, which gives them a real head start over anything trying to wake up from a dry, dormant state.
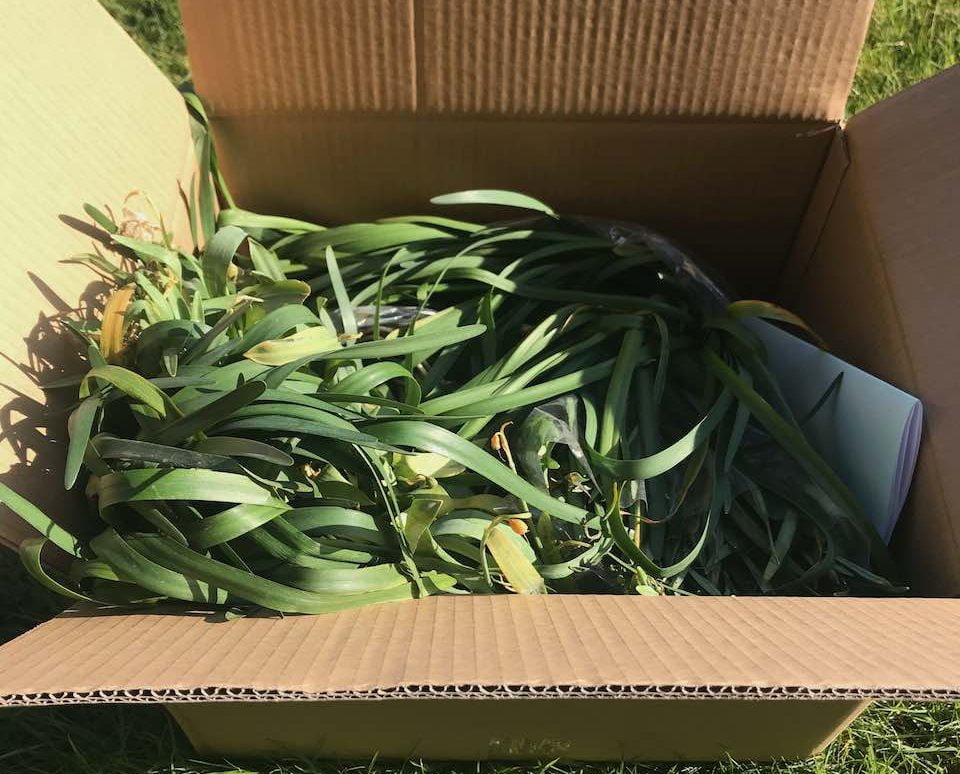
It also means the leaves stay above the soil where they can carry on photosynthesising, converting sunlight into energy that’s stored in the bulb. Come the year after, there’s a far better chance of a strong flowering display, rather than a handful of half-hearted flowers scattered thinly across a border.
You won’t find every bulb available in the green, since it’s a fairly labour-intensive way of growing and lifting plants compared to harvesting dry bulbs once a year. There’s also a short shelf life between lifting and planting, so suppliers can only offer it for a handful of properly temperamental species where the extra effort is worth it.
Here are the bulbs I most commonly recommend buying in green, based on what I’ve successfully planted in client gardens over the years.
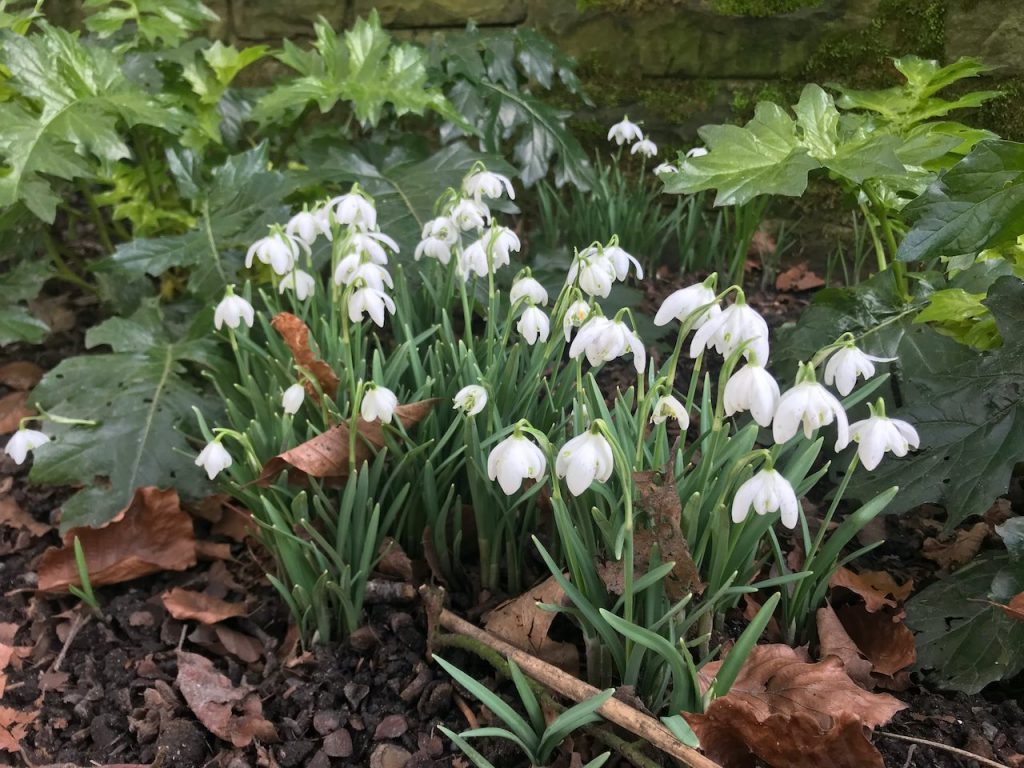
Snowdrops are by far the most commonly sold bulb in the green, and honestly, they’re the whole reason this method exists in most gardeners’ minds. Dry snowdrop bulbs are notoriously unreliable, drying out to the point of no return long before they ever reach a garden centre shelf, which is why so many people tell me they’ve “never had any luck” with them. Buy them in the green instead and the difference in reliability is night and day.
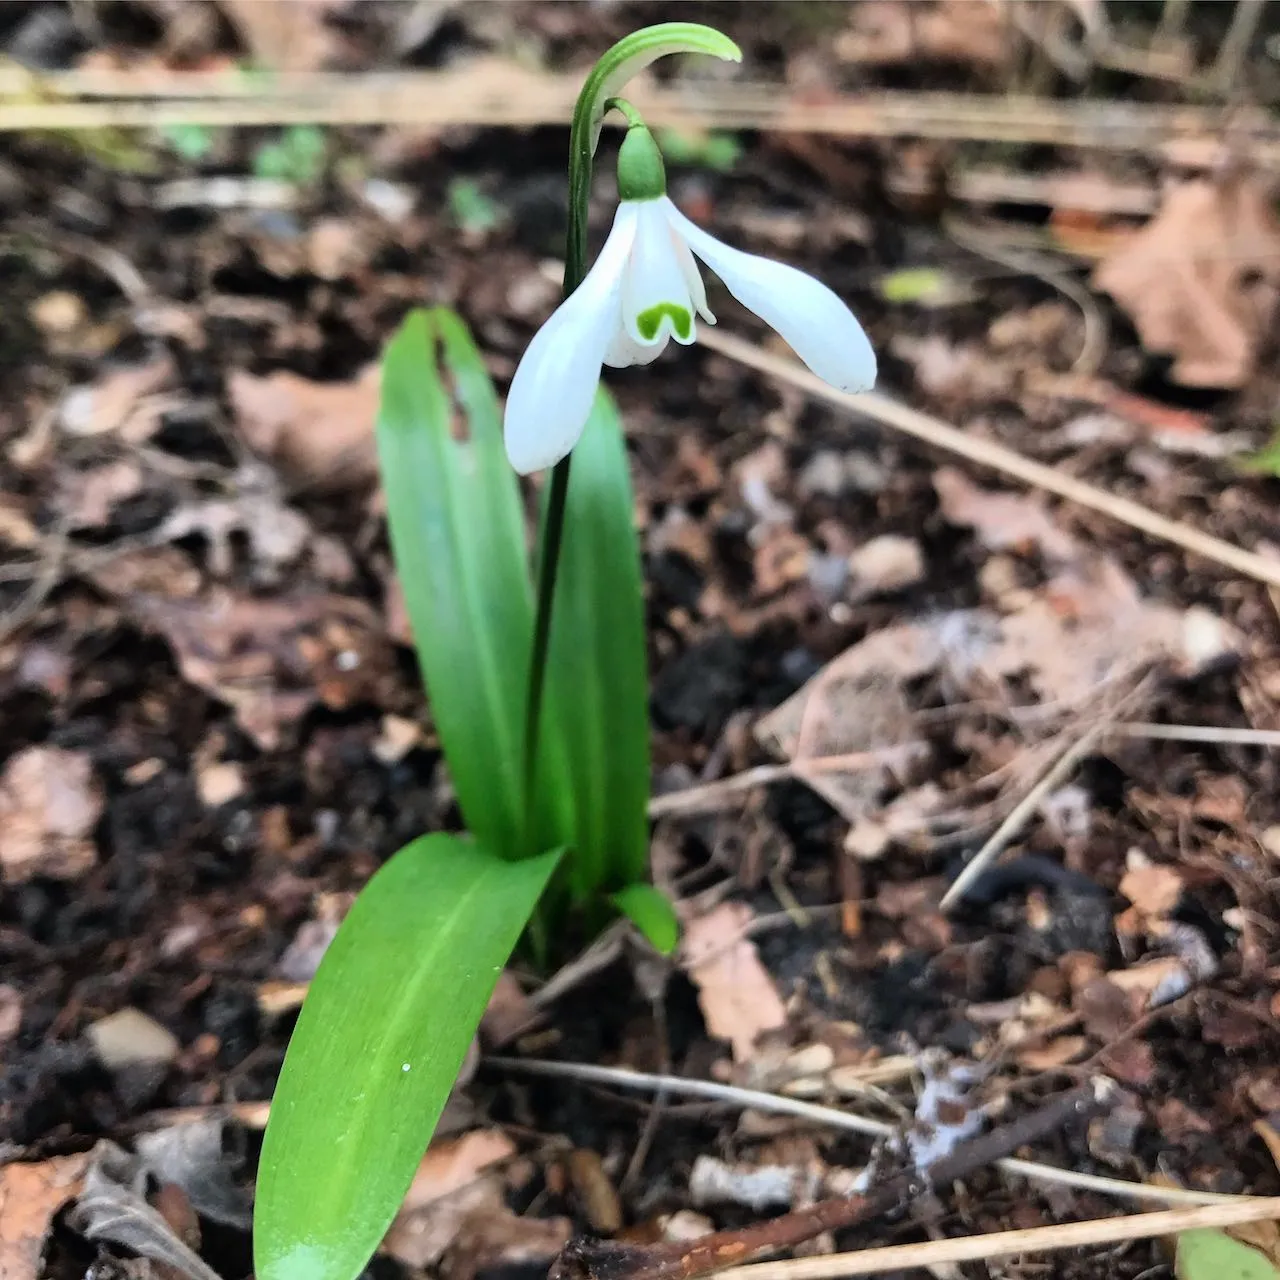
Plant them in generous drifts under deciduous trees or along a shaded border edge, and within a few years they’ll naturalise into the kind of white carpet you see in the famous snowdrop gardens open to the public each February.
Worth knowing too, there’s a properly dedicated community of snowdrop collectors, known as galanthophiles, who pay serious money for rare cultivars with unusual markings or forms. Single bulbs of the most sought after varieties have changed hands for well over a thousand pounds at specialist auctions. You certainly don’t need to spend anything close to that, the common Galanthus nivalis I’m recommending here costs a few pence a bulb, but it’s a fun bit of context to share if anyone asks why you’re quite so excited about a small white flower.
Winter Aconites are close behind Snowdrops in flowering, sometimes even beating them to it in a mild year, with cheerful buttercup-yellow flowers held above a distinctive ruff of green foliage. They’re every bit as fussy as Snowdrops when bought dry, and I’d always recommend sourcing them in the green if you can find a supplier offering them.
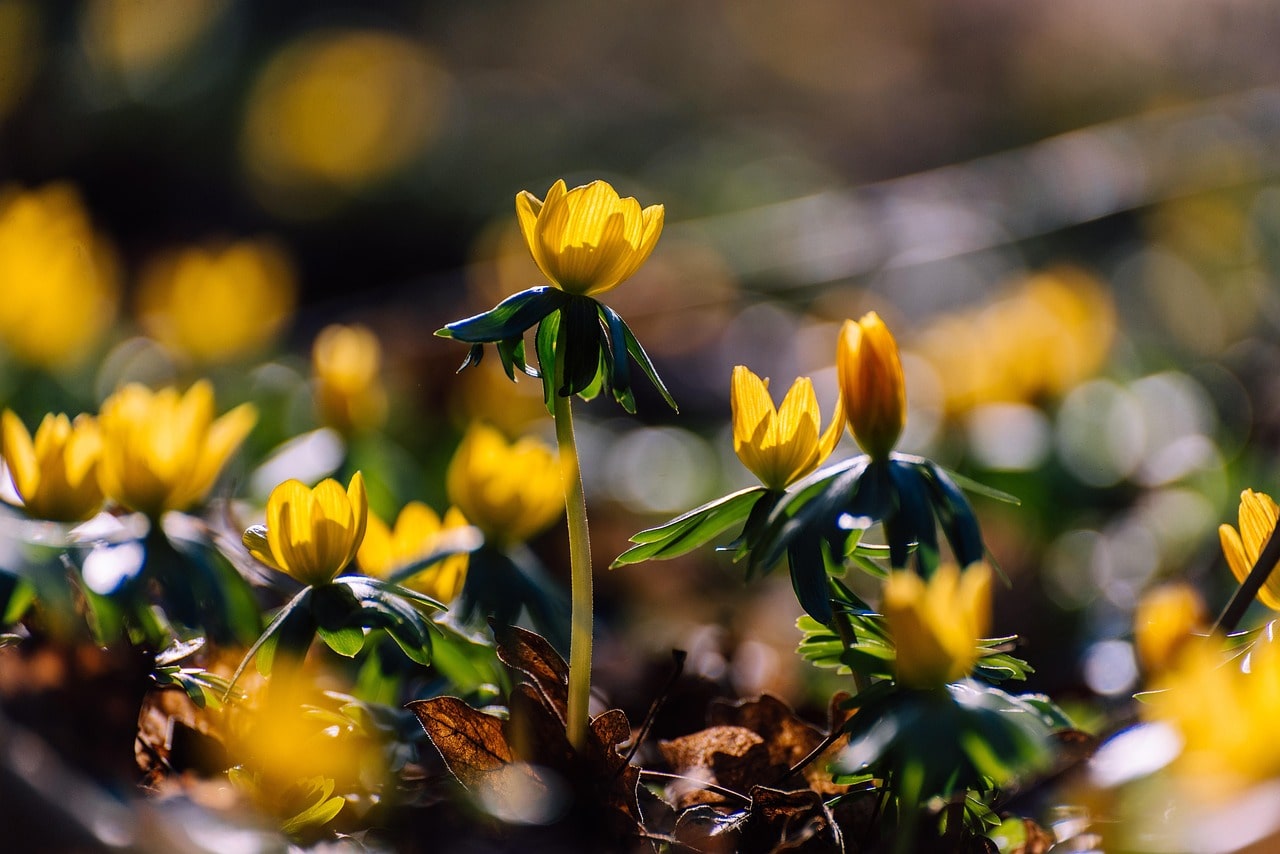
They look particularly good planted alongside Snowdrops, since the contrast between the white and the yellow adds real interest to a border that would otherwise be bare at that time of year.
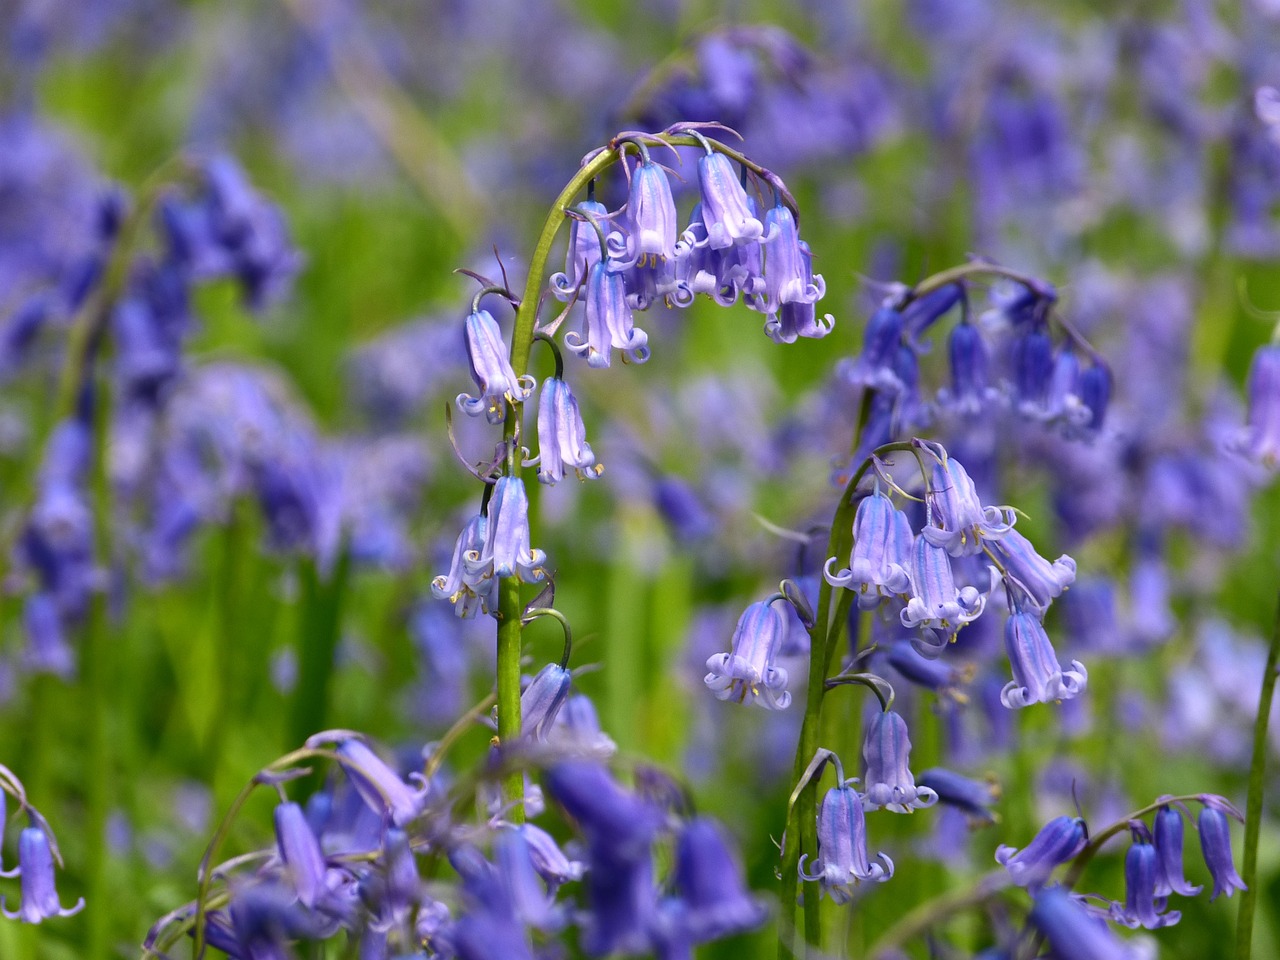
English Bluebells are occasionally sold in the green too, usually a little later in spring once they’ve finished flowering in April or May. One important note here: our native bluebell is protected under the Wildlife and Countryside Act, so it’s illegal to dig up bulbs from the wild. Always buy from a reputable nursery that can confirm their stock is cultivated, never wild-collected, and check you’re buying the true native species rather than the more vigorous Spanish Bluebell or a hybrid of the two, which can outcompete and genetically swamp our native populations if planted near woodland.
Daffodils (Narcissi) are less commonly sold in the green since they’re far less demanding as dry bulbs to begin with, but you will occasionally find specialist suppliers offering them this way, along with Leucojum aestivum, the Summer Snowflake, which behaves in a very similar fashion to a large, later flowering Snowdrop. Galanthus flore pleno, the double Snowdrop, is another lovely variation worth seeking out if you want something a little different from the classic single form.
Bulbs in the green are lifted in February and early March, and shipped out directly to customers just after they’ve finished flowering, while their water content is still high. This narrow window is exactly why you won’t find them sat on a garden centre shelf the way dry bulbs are, and why ordering from a specialist supplier ahead of time is worth doing.
I bought mine originally from Gee Tee bulb company, which has an excellent range and a reputation for despatching healthy, well hydrated stock promptly. Whichever supplier you choose, look for one that ships quickly after lifting rather than holding stock in a warehouse, since every extra day out of the ground reduces your chances of a good result.
When your box arrives, open it straight away rather than leaving it by the door until the weekend. Healthy bulbs in the green should have firm, green stems with no sliminess, no strong smell of rot, and no obvious mould on the leaves or roots. A little yellowing at the very tip of a leaf is nothing to worry about, but if a good number of the bulbs feel soft and mushy, or the whole bundle smells off, photograph it and contact your supplier immediately. Reputable specialists will replace a poor delivery without a fuss, but only if you flag it within a day or two of it arriving.
You should plant bulbs in the green as soon as they arrive, usually somewhere between late February and March. They don’t store like traditional dry bulbs such as Daffodils, so it’s worth making sure you’ve got a free afternoon to get them in the ground the day they turn up rather than leaving the box in the shed for a week while life gets in the way.
This guide will show you how to plant bulbs in the green without drama and with the least possible fuss. Gone are the days of back-breaking planting with a dibber on your hands and knees. I call this “the slit method”, and it’s the technique I’ve relied on for naturalising and planting smaller bulbs like Snowdrops in the green across dozens of client gardens, with consistently good results and minimal bending required.
The equipment you will need:
Smaller bulbs generally don’t need as much planting depth as larger ones like Tulips and Daffodils, which makes the slit method mega easy for them. I always find Tulips do better in containers anyway, since they naturally lose vigour over time when left in open ground, whereas smaller naturalising bulbs like Snowdrops just get on with the job in situ.
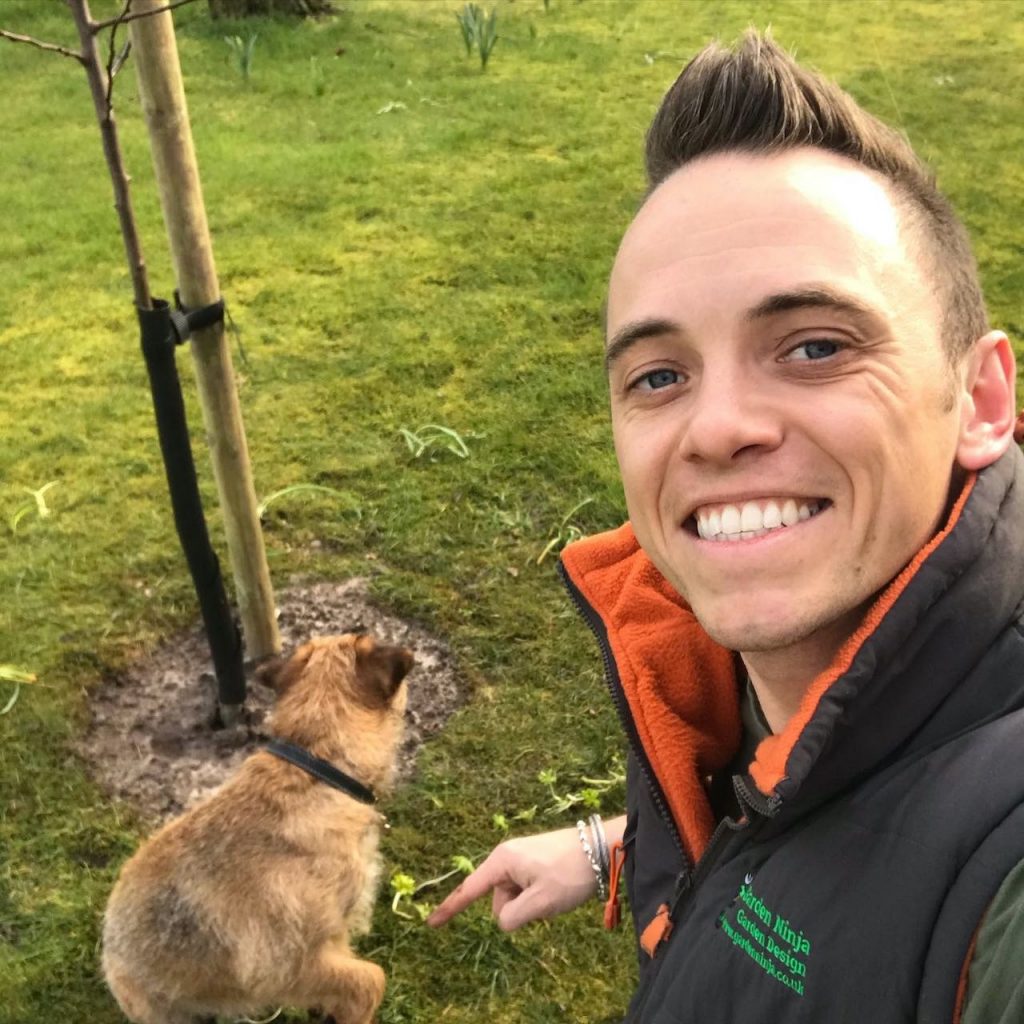
In comparison, Daffodils and other bulbs tend to bulk up and go for gold once they’re in the ground. It’s your personal preference which way you prefer to plant bulbs, but for anything sold in the green, the slit method is by far the quickest and least fussy approach I know.
Using a sharp spade, make a cut into your turf, or soil if you’re planting in a border. Waggle the spade back and forth to open a slit wide enough to fit the bulbs comfortably. I find doing this straight after rainfall works best, since the ground is already moist and ready to receive the bulbs without a struggle. The tool I reach for every single time I’m planting bulbs in the green is a compact, sharp bladed border spade. It makes cutting a clean slit in turf or soil far easier than a full sized digging spade. I use a Spear & Jackson Neverbend Carbon Border Spade from Amazon UK, which has stayed sharp and true through several seasons of exactly this job.
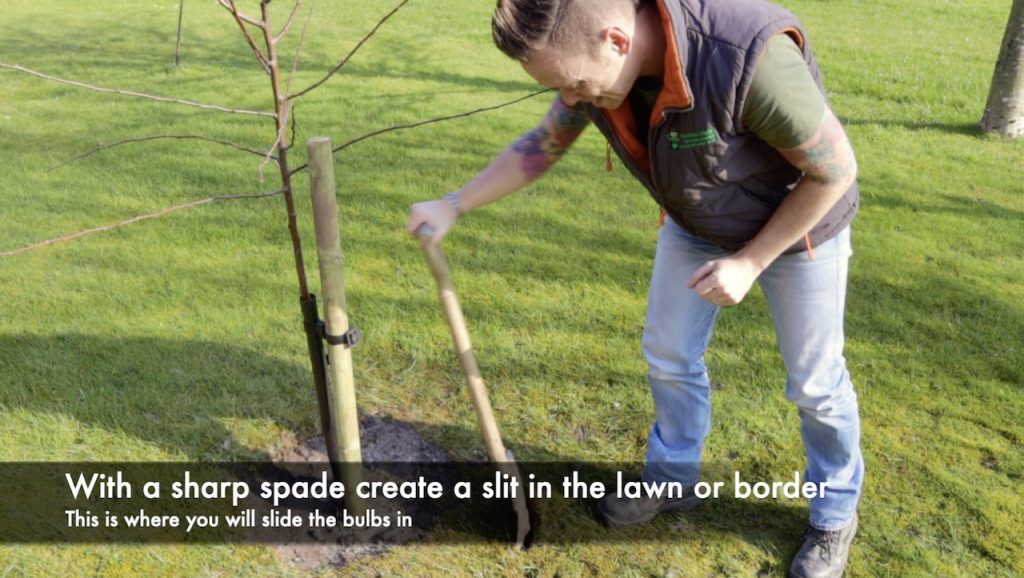
This creates the slit into which the bulbs are going to be planted.
Grab a handful of your bulbs in the green and split them into small bunches of three or five at a time. Don’t be tempted to cram in ten or twenty into each slit. They’ll just get congested and look odd, which rather removes the point of planting in the green in the first place.
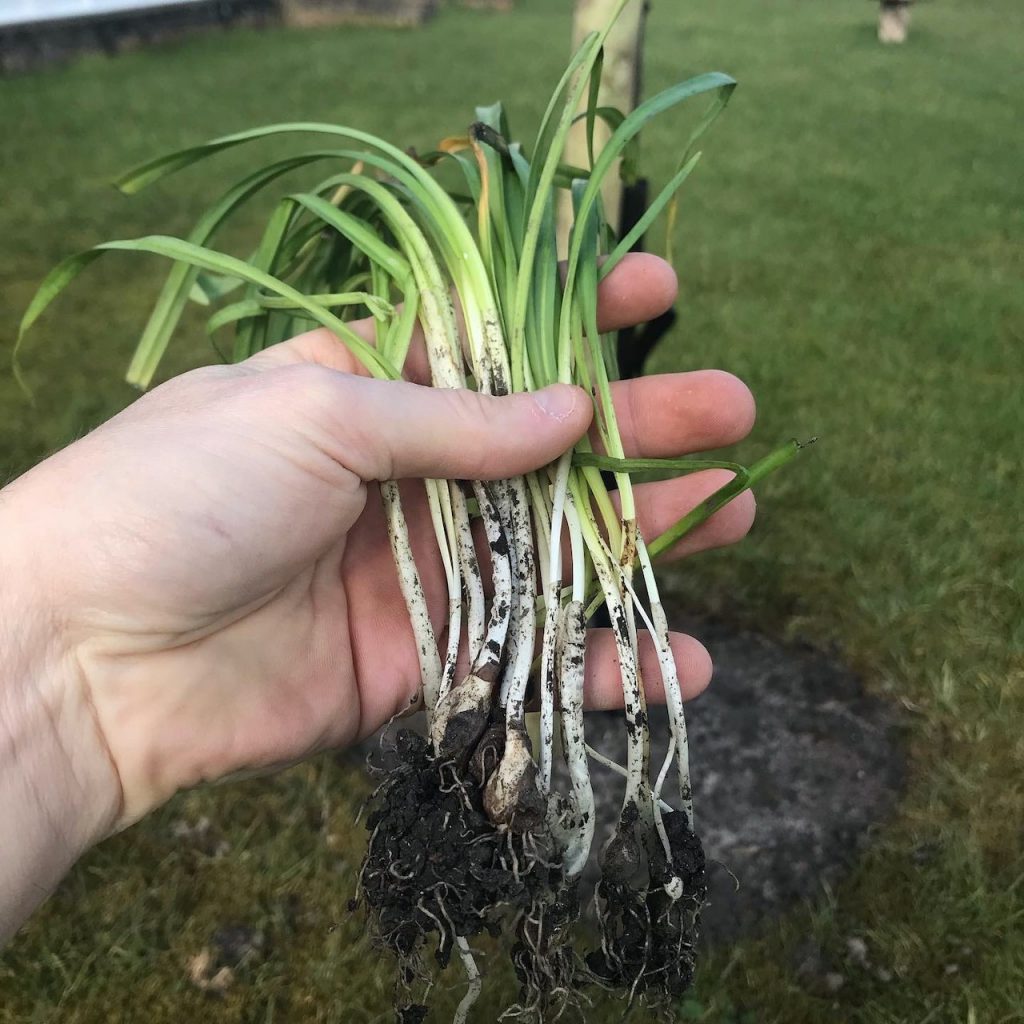
Starting small with groups of three or five means the bulbs will bulk up naturally over the years without needing to compete with each other for resources such as water and nutrients. This leads to a far nicer look next year than rows of congested, sorry looking Snowdrops all fighting for the same patch of soil.
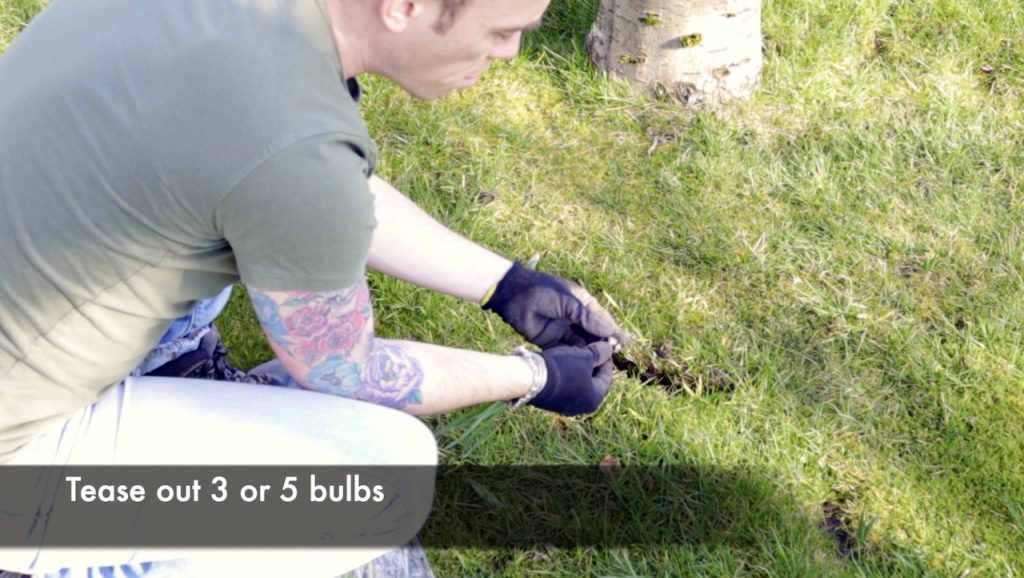
To make things easier, you can even split the bulbs indoors when they first arrive. Sitting at a table makes for a far more comfortable experience than crouching outside. Just make sure you plant them as soon as you’ve split them, since they’ll be losing moisture from the moment they’re separated, and you need to get them back in the ground so they can establish properly.
Slide the divided bulbs in individually, at a spacing of roughly 10cm apart within each slit, so that they’re buried up to a depth that fully covers the lower white part of the stem. This white section shows the previous planting depth, and it’s white simply because it doesn’t need chlorophyll while underground, where it’s not photosynthesising anyway.
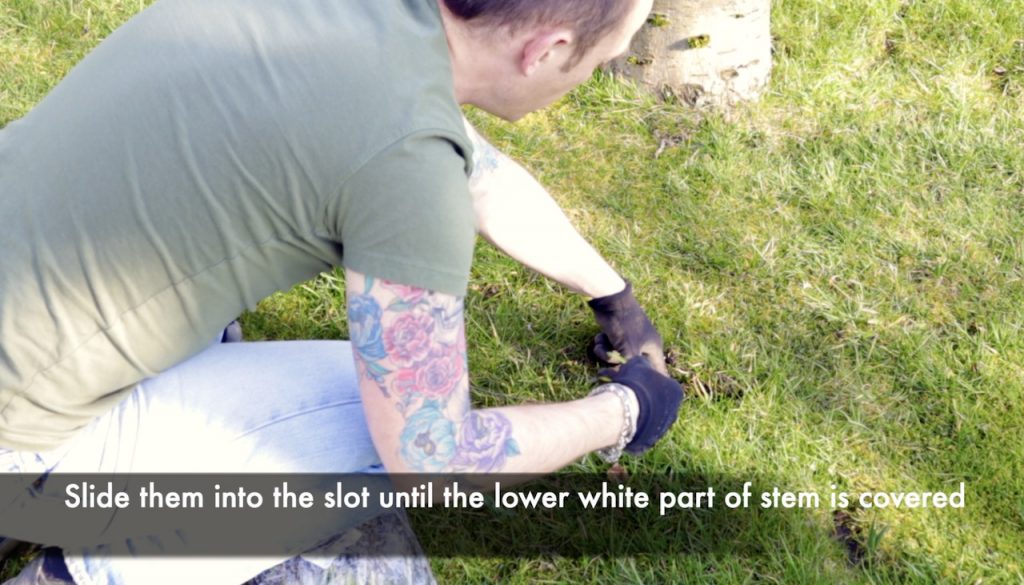
This white part of the stem is a handy indicator from nature, showing you exactly which bit should end up buried, which takes a lot of the guesswork out of getting the depth right.
If you’re planting more, leave at least 6 to 8 inches between the first batch and the next slit. You might decide to use a wider spacing to make your bulbs go further across a bigger area, and that’s entirely a matter of personal preference and how naturalistic you want the final effect to look.
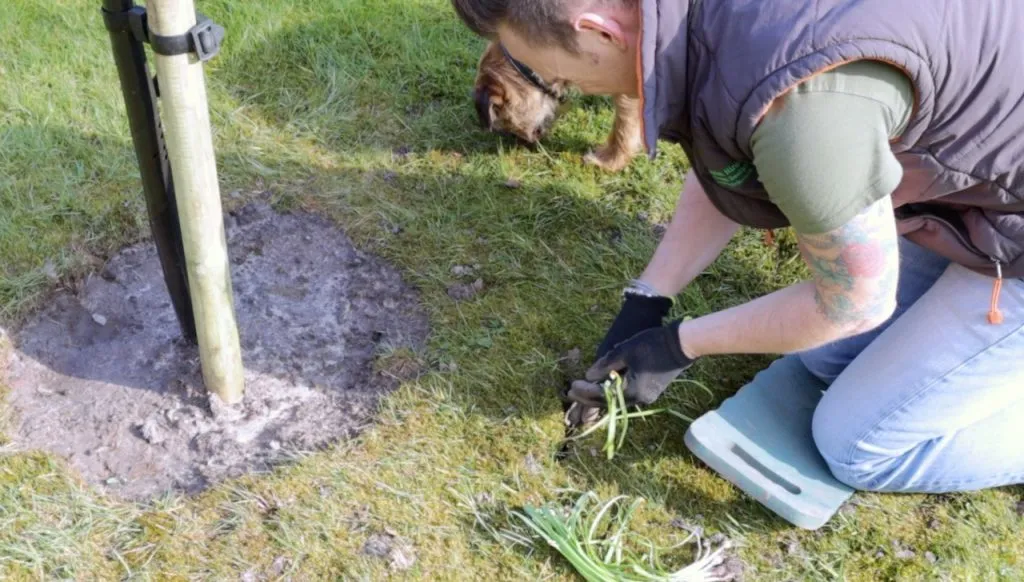
Once you’ve got three or five bulbs settled into a slit, push it back together firmly, fully covering the bulbs beneath the soil surface.
They may lean to one side to begin with, but don’t worry, they’ll recover within a week or two. Always water them thoroughly after planting with a watering can, since this settles the soil around the roots and helps prevent the air pockets that can otherwise dry the bulb out. That’s it, the job’s done, and your bulbs are properly planted.
Clean off your spade and get inside for a brew, you’ve earned it.
One more thing if you’re naturalising into a lawn, leave the grass unmown for around six weeks after flowering has finished so the foliage can die back naturally and feed the bulb for next year. My lawn care month by month planner covers exactly when it’s safe to bring the mower back out.
💡 Top Tip
Pop a slate or metal marker at the edge of each group as you plant, especially if you’re mixing varieties or planting into a lawn that gets mowed. The foliage dies back completely by early summer, and it’s remarkably easy to forget exactly where a group of bulbs is sitting once the grass grows back over the top. 🛒 I use reusable slate plant markers from Amazon UK for exactly this, since you can wipe them clean and reuse them season after season.
Snowdrops, Galanthus, can be properly tricky to establish when planted as dry bulbs. I’ve had some great successes and some abject failures over the years, and it really can come down to the individual batch of bulbs you’re sent. If planting as dried bulbs, it’s essential they get a good frost to trigger flowering, so you need to get them into the ground early in autumn. Even then, they typically take 1 to 2 years to establish properly.
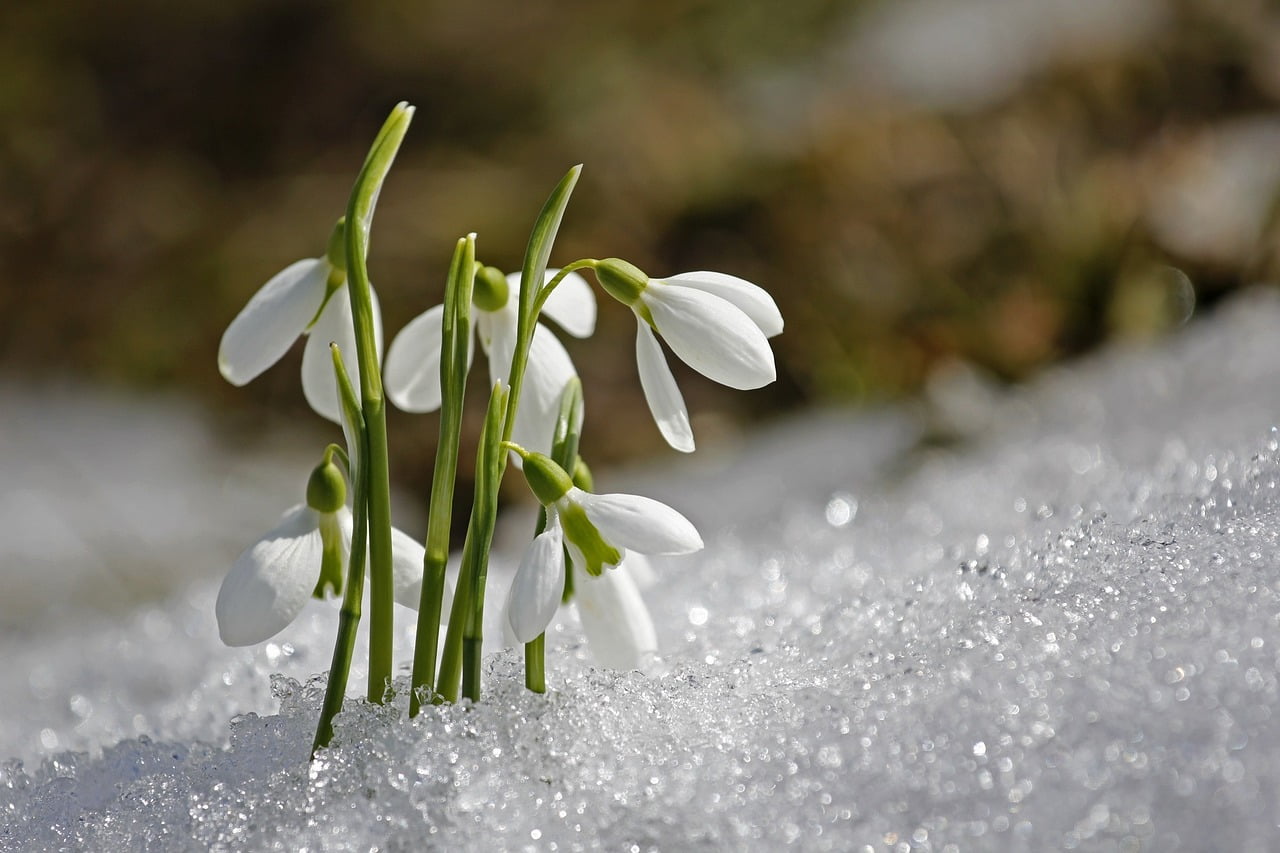
Bulbs in the green only take one year to establish, which is a much quicker and more reliable turnaround than planting dry Snowdrop bulbs. The bulb and root system get going far faster too, since there’s no dormancy period to wake up from first.
Daffodils are far less demanding than early flowering bulbs such as Snowdrops or Winter Aconites. In most cases, they’ll flower the year after you plant them, taking a single year to reach flowering.
You can plant Daffodils any time in winter with a high success rate, providing they’re planted deep enough, at least two to three times their own depth.
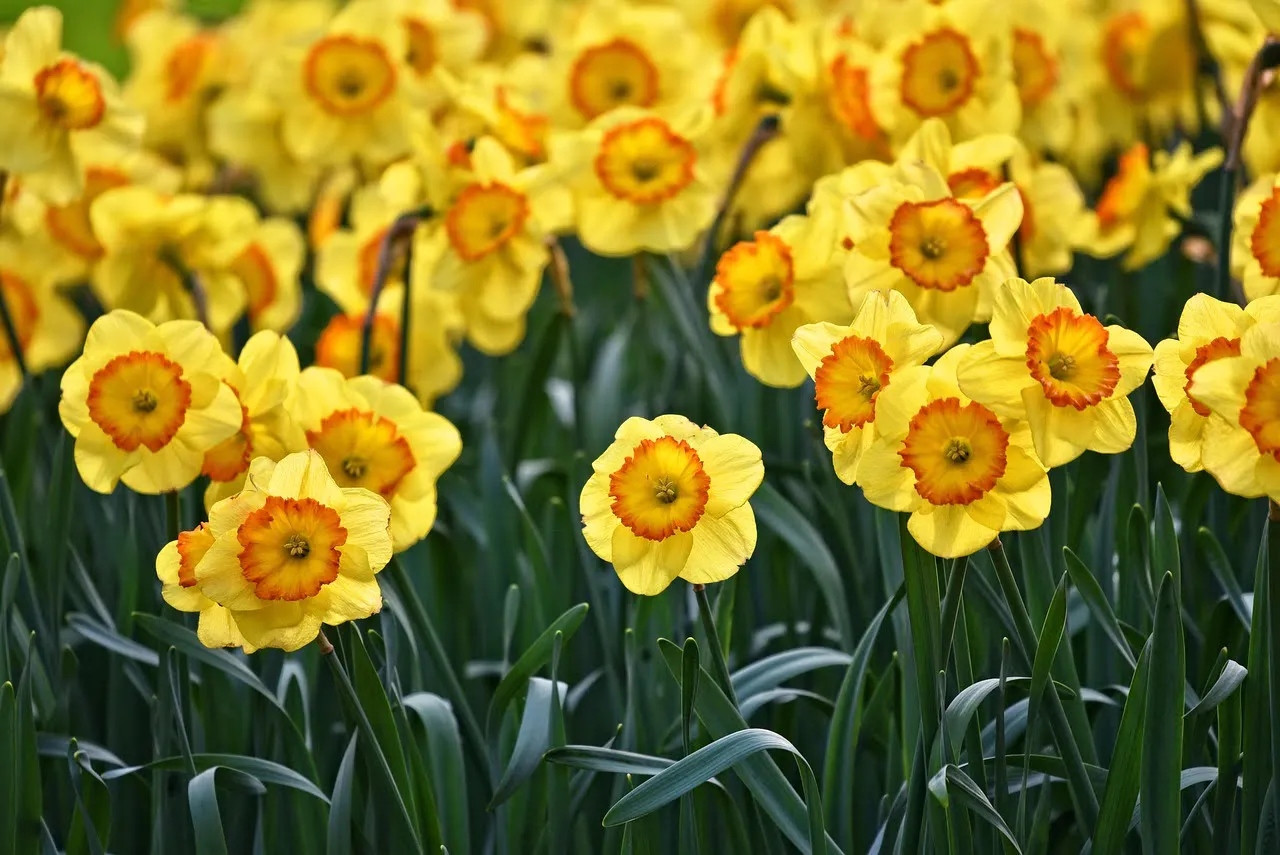
Yes, Daffodils are perennial bulbs, meaning they’ll grow back reliably year after year. Every few years they’ll also multiply, making them an excellent budget friendly choice for beginner gardeners who want a display that only gets better over time without any further spending.
Once your bulbs are established, they need very little ongoing care. A light scattering of a general purpose, slow release feed as the foliage emerges in late winter can help clumps bulk up faster, but it’s entirely optional rather than essential, most naturalised bulbs do perfectly well fed by nothing more than a decent leaf mulch each autumn. I’d hold off feeding entirely in the first year after planting in the green, and let the bulb settle in on its own before asking any more of it.
The best time to plant dry bulbs in the garden is autumn, September to October. This is because the ground is still warm, allowing the bulbs to begin establishing their root system before winter properly sets in. It’s a gentle, gradual way of getting them ready for the following spring.
That said, given how much our climate fluctuates from one year to the next, I’ve planted dry bulbs in winter with success plenty of times. Life gets busy, and you don’t always get around to it in October. I’ve generally found it’s far better to get bulbs in the ground late than not at all.
Any lifted bulb will only last roughly one year, or twelve months, once it’s been lifted from the ground. Beyond that, it starts to either rot or dry out beyond any hope of recovery. It’s worth remembering that these lifted bulbs are still transpiring, breathing and using water, even sitting in a bag on a shelf. They need to get back into the ground to replenish those lost nutrients and rehydrate properly, or they will simply die.
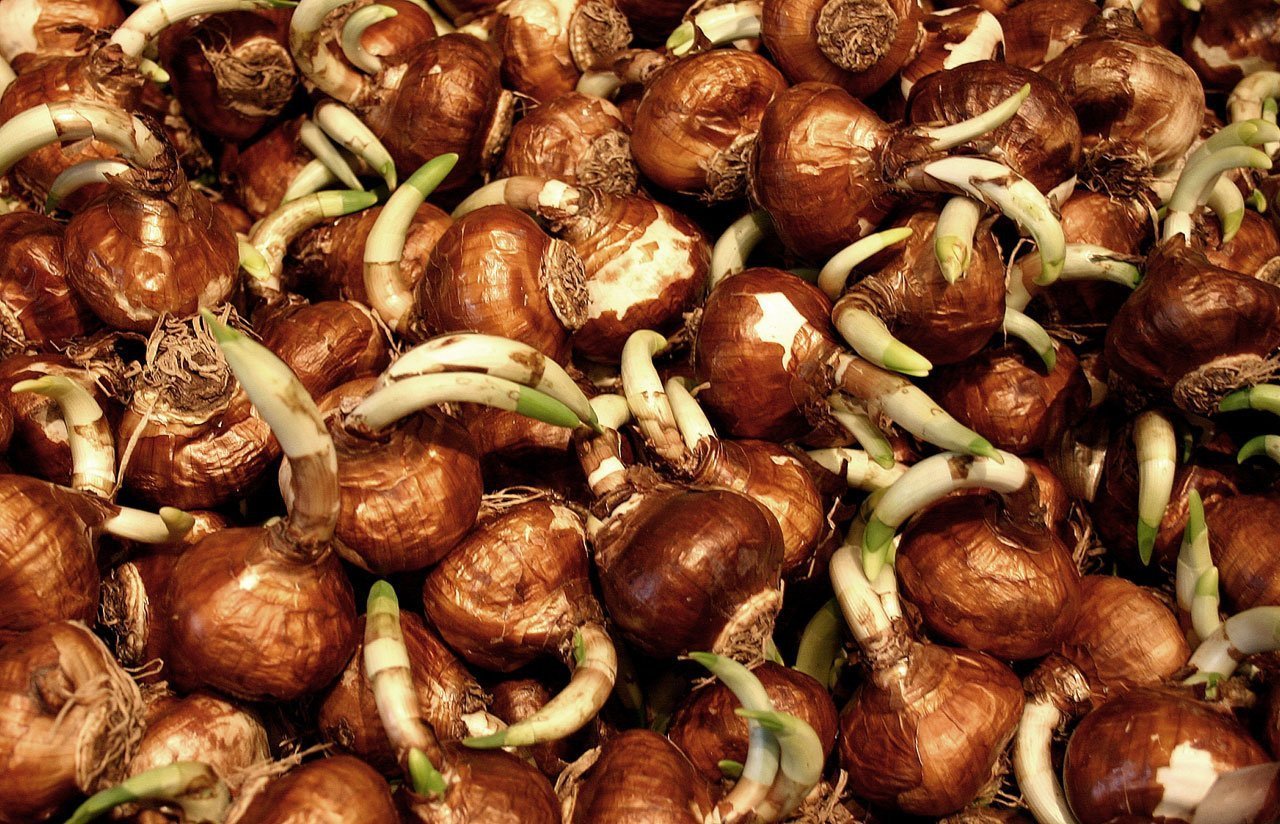
Bulbs in the green are even less forgiving than this, given they were never dried out to begin with. Treat delivery day as planting day wherever possible, and you’ll get far better results than trying to fit it in the following weekend.
As a garden designer, I always think about what’s planted alongside spring bulbs, not just the bulbs themselves in isolation. Snowdrops and Winter Aconites look properly stunning planted together, with the white and yellow flowers contrasting beautifully against bare winter soil. Add in pink or white flowering Cyclamen coum and you’ve got a proper late winter display running from January right through to March with almost no ongoing effort once it’s established.
I often use bulbs in the green to underplant deciduous trees and larger shrubs in client gardens, since the bare canopy overhead lets plenty of light through in late winter, and the bulbs have generally died back and disappeared long before the leaf canopy closes over in late spring, meaning you get two seasons of interest from the same patch of ground without one competing with the other.
For the best naturalistic effect, resist the temptation to plant in neat rows or blocks. Scatter a handful of your divided bulb groups by hand across the area you’re planting and put them in roughly where they land, adjusting only if two groups end up practically on top of each other. This is exactly how these bulbs would spread in the wild, and it gives a far more convincing, established looking result within just a couple of seasons.
As the vibrant colours of spring bulbs begin to grace our gardens, the last thing we want to see are signs of disease or pest damage tarnishing their beauty. Yet like all living things, spring bulbs aren’t immune to the challenges posed by pests and diseases.
From fungal infections to pesky critters, these threats can affect the health and vitality of our spring bulbs. Here’s a rundown of the common pests and diseases of spring bulbs like Daffodils and Snowdrops.
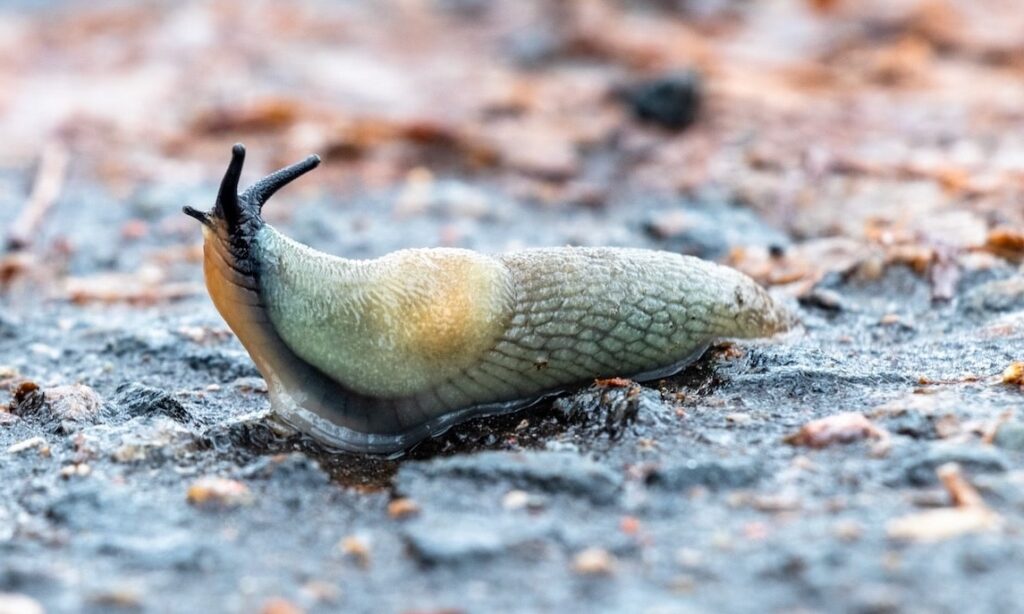
Bulbs in the green are spring flowering bulbs, most commonly Snowdrops, that are lifted and sold with their green foliage still attached rather than as dry, dormant bulbs. They’re supplied straight after flowering, usually in February and March, and planted immediately for much faster, more reliable establishment than dry bulbs planted in autumn.
Dry bulbs are lifted while dormant, dried out for storage, and sold months later in autumn. Bulbs in the green are lifted with their foliage and moisture intact, then sold and replanted within days. The lower stress on the bulb means faster establishment, often flowering well within a single year rather than two or three.
Bulbs in the green are only available for a short window each year, typically from late February through March, just after the plants have finished flowering. Specialist bulb suppliers take orders ahead of time and despatch them as soon as they’re lifted, so it’s worth ordering early rather than waiting until the season is underway.
Use a sharp spade to cut a slit in the soil or turf, divide your bulbs into small groups of three to five, and slide them into the slit at roughly 10cm spacing, burying them to the same depth as the white part of the stem. Firm the soil back over and water thoroughly straight after planting.
No, native English Bluebells are protected under the Wildlife and Countryside Act 1981, and it’s illegal to dig up bulbs from the wild without landowner permission. Always buy bluebells in the green from a reputable nursery that can confirm the stock has been cultivated rather than collected from woodland or hedgerows.
Most bulbs in the green, particularly Snowdrops, establish within a single year and will flower the following spring. This compares favourably with dry Snowdrop bulbs, which can take one to two years to settle in, and sometimes fail to establish at all if they’ve dried out too much before being planted.
Yes, always water bulbs in the green thoroughly straight after planting. This settles the soil around the roots, closes any air pockets left by the slit method, and helps the bulb recover from the stress of being lifted and moved. After that initial watering, they generally need no further attention beyond normal rainfall.
Yes, bulbs in the green can be planted in pots and containers, which is a useful option if you’re short on border space or want a moveable display near a doorway. Use a peat free, moisture retentive compost, plant at the same depth as you would in open ground, and keep the compost consistently moist while the bulbs establish.

Join over 100,000 gardeners on YouTube
Free gardening videos from the Garden Ninja, with 8 million views and counting.
Subscribe on YouTube, it’s freeGetting a handful of Snowdrops into the ground is a lovely first step, but the gardeners who get the most out of their plot are the ones thinking about the whole year, not just one late winter display. My online courses walk you through exactly the same planning process I use with paying design clients, from working out what your soil and light actually allow, right through to building a border that carries interest from January through to December.
Courses start from just £29, so there’s an entry point whatever stage you’re at.
For the garden you’ve already got, not the one you’re starting from scratch. Seven checklists and video lessons from BBC Garden Rescue’s Lee Burkhill, built to help you work out what’s worth keeping before you spend a penny.
Garden Design Examples for Small Gardens: 30 Design Templates & Planting Plans: In this online gardening course, I’ll walk you through 30 fantastic garden designs, explaining the logic behind the layout, the plant choices, and take-home tips for applying them in your own garden.
Learn how to transform and design your own garden with Lee Burkhills crash course in garden design. Over 5 hours Lee will teach you how to design your own dream garden. Featuring practical design examples, planting ideas and video guides. Learn how to design your garden in one weekend!
Garden Design for Beginners Online Course: If you want to make the career jump to becoming a garden designer or to learn how to design your own garden, this is the beginner course for you. Join me, Lee Burkhill, an award-winning garden designer, as I train you in the art of beautiful garden design.
Planting spring flowering bulbs is one of the most reliable ways to bring a garden to life in the darkest, quietest months. They provide early pollen for honeybees and other insects, and they brighten up the winter gardening months when very little else is doing much at all. Bulbs can be planted in containers and even the smallest of gardening spaces, so they’re well worth the small amount of effort involved.
Buying bulbs in the green is a reliably fast way of establishing spring bulbs, and once clients have tried it, they very rarely go back to gambling on dry bulbs for Snowdrops or Winter Aconites again. If you take away one thing from this guide, let it be that: the method exists, it works, and it’s far simpler than most gardeners assume before they’ve tried it for themselves.
If you have questions or comments on bulbs in the green, why not let me know in the comments below, or over on the Garden Ninja forum. You can also Tweet, Facebook or Instagram me.
Happy Planting!


Lee Burkhill, known as the Garden Ninja, is an award-winning garden designer and horticulturist with over 30 years of gardening experience and 15 years as a professional garden designer. A qualified RHS (Royal Horticultural Society) professional, Lee specialises in sustainable garden design and practical horticultural advice. He designs and presents on BBC1’s Garden Rescue and in leading gardening publications. Lee combines three decades of hands-on gardening knowledge with professional design qualifications to help gardeners create beautiful, functional outdoor spaces.
View all posts by Lee Burkhill





JOIN THE NINJAS

Be the first in line for new Guides, Discount codes and Offers