For the garden you’ve already got, not the one you’re starting from scratch. Seven checklists and video lessons from BBC Garden Rescue’s Lee Burkhill, built to help you work out what’s worth keeping before you spend a penny.
69


Quick Answer
A pleached tree is a tree trained into a flat, formal screen of branches on top of a clear stem, often called a hedge on stilts. Plant them at the width of their frame, usually 1.5m apart, at least 40cm from fences, and brace each one with a stake, a horizontal timber rail and rubber tree ties. Hornbeam is the most reliable deciduous choice, and Photinia or Portuguese Laurel give year-round cover.
As a garden designer who specialises in awkward and overlooked gardens, I use pleached trees a lot in my designs. They offer a host of benefits to a small garden: politely blocking out nosey neighbours, adding some contemporary drama, and leaving the space underneath them free for planting or seating.
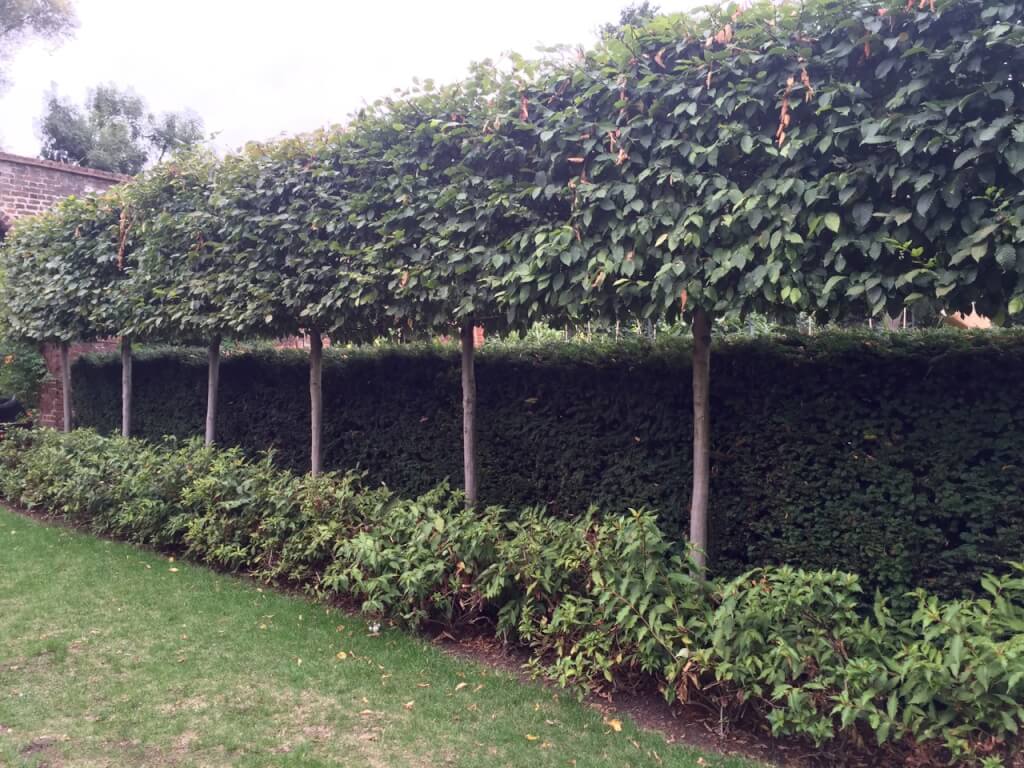
Pleached trees give privacy and year-round structure while taking up very little ground, which makes them brilliant for small gardens where every square metre counts.
They are a bit of a diva when it comes to planting and staking, and this is where most people fall short with pleached trees and topiary. If you do not take the time to prepare them correctly, your design concept will fall short too. Poorly supported or incorrectly planted trees will lean, migrate, or fail to achieve the crisp, uniform lines that make pleached trees so special. A small amount of time spent on preparation gives you years of clean, symmetrical screening, and this guide covers every step, from choosing a variety to clipping the frame and reaching the top safely.
Jump To
This page contains affiliate links for products I use and love. If you take action (i.e. subscribe, make a purchase) after clicking a link, I may earn some gardening commission which helps me keep the Garden Ninja Blog free for all.
🛒 Buy the soft rubber tree ties I use on every pleached tree from Amazon UK
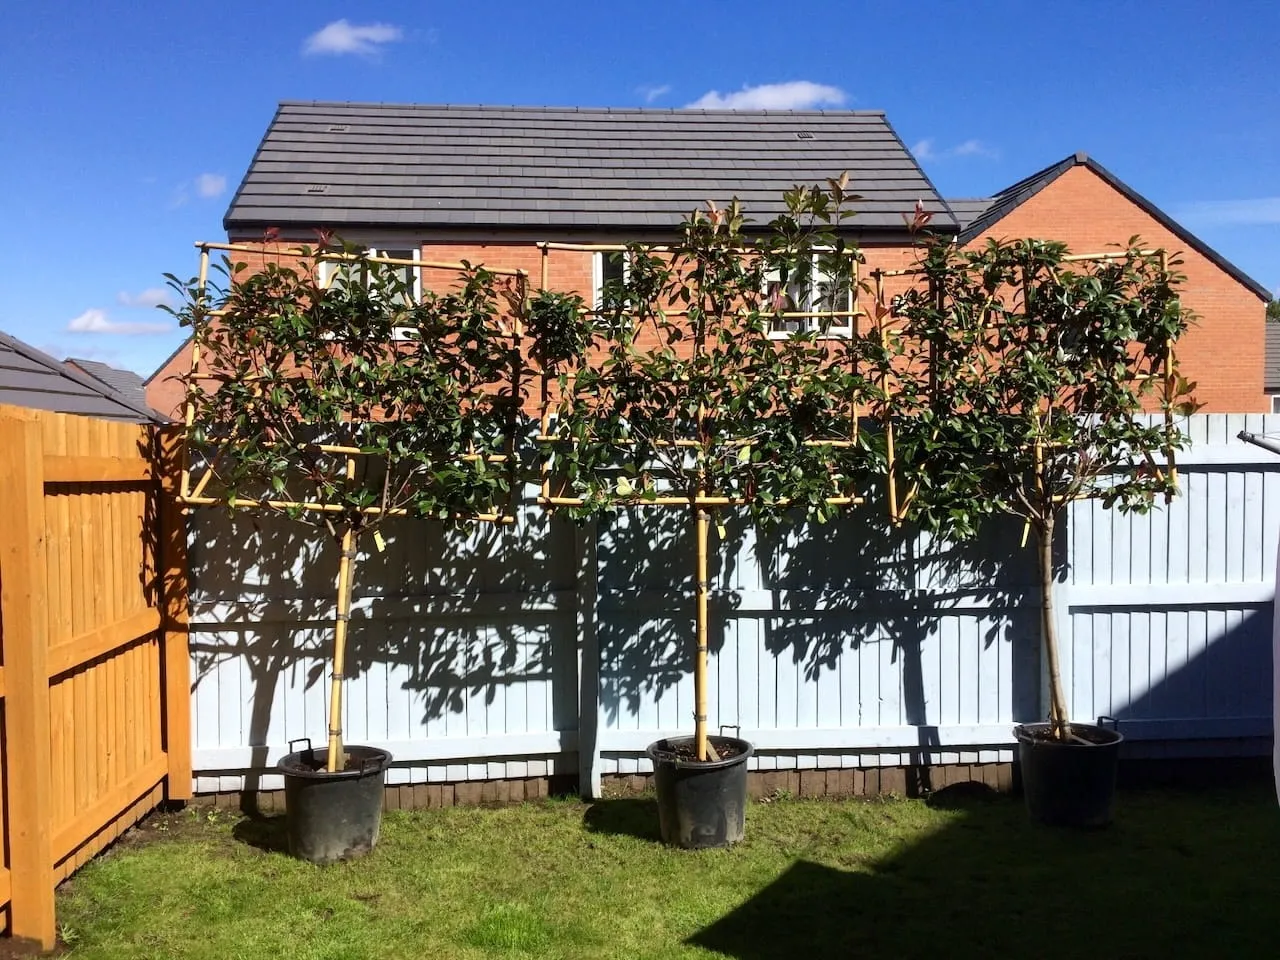
A pleached tree is a tree that has been trained to create a formal screen of branches and foliage on a single, clear stem. Think of it as a “hedge on stilts”, where the trunk rises between 1.8m and 2.2m before the branches form a continuous, narrow screen above. The branches are trained horizontally onto a supporting framework, creating a flat plane rather than the rounded canopy you would expect from a standard tree.
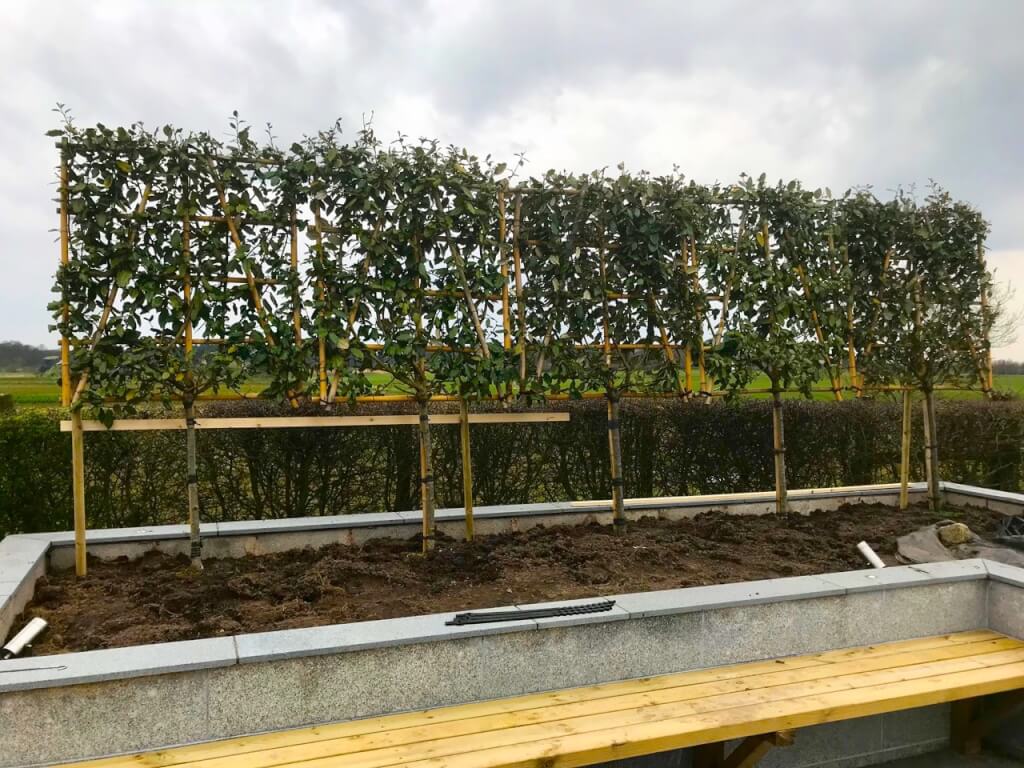
When several pleached trees are planted in a row, their young shoots are interwoven to create a living wall. That makes them brilliant for privacy screening above existing fences, defining garden rooms, or adding architectural structure without using up valuable ground space.
Espalier trees have horizontal branches spaced at regular intervals all the way up the trunk. Pleached trees keep a clear stem below, with the horizontal branches concentrated at the top, which creates that distinctive raised hedge.
The practice dates back to medieval times, when pleached walkways known as “pleached allées” gave shaded paths in grand European gardens. The technique became particularly popular in 17th and 18th-century French formal gardens, and it has made a strong comeback thanks to contemporary designers at shows like RHS Chelsea, since pleached trees sit comfortably in both traditional and modern gardens.
Pleached trees pack a serious punch in garden design, particularly on a smaller urban plot or an overlooked garden. Here is why they have become such a go-to solution in my designs.
Standard trees spread outwards, casting shade and taking up planting space. Pleached trees grow vertically with a narrow footprint. You get the height and screening without sacrificing the area beneath them, which stays free for underplanting with shade-loving perennials or for a bench. In fifteen years of professional design, I have not found a more effective way to add height and privacy to a small plot without eating into the usable garden.
Most fencing stops at around 1.8m, but overlooking windows and raised neighbouring properties often sit higher. Pleached trees bridge that gap, extending your screen by another 1.2m to 1.5m without trellis extensions on top of the fence.
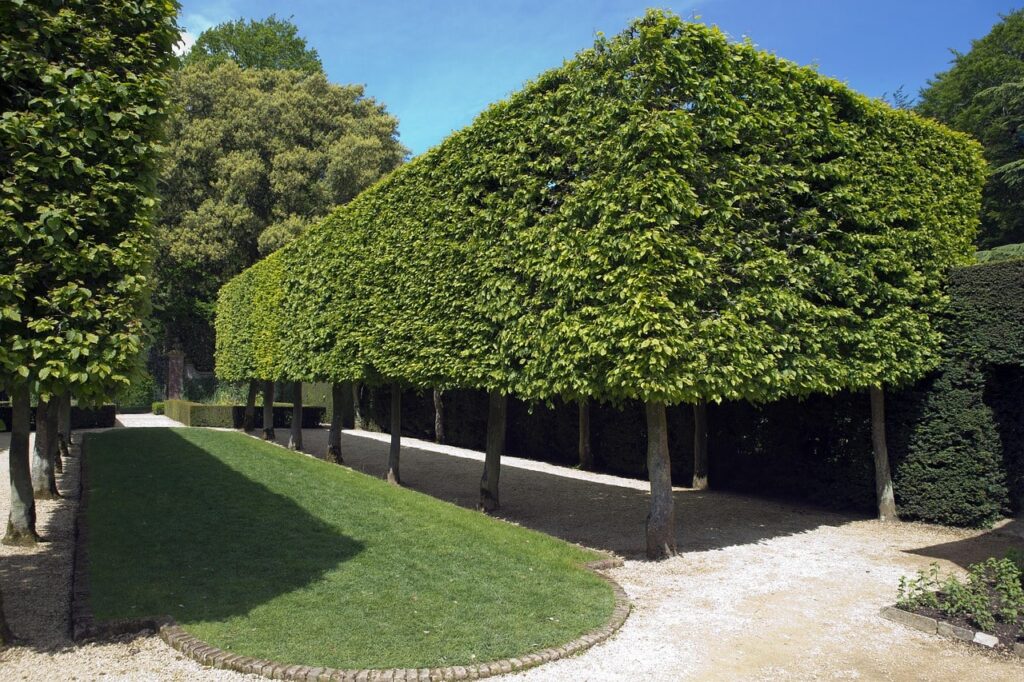
How much winter cover you get depends on the species. Hornbeam and Beech hold their russet leaves through winter, giving structure and partial screening even when dormant. Evergreen options like Photinia or Cherry Laurel keep screening all year, though they can look a bit heavy in winter if they are not pruned properly.
The clean lines of pleached trees add formal structure to a garden design, create defined spaces and draw the eye upward, which makes a small garden feel larger. Because you buy them already trained, the effect is there from the day they go in.
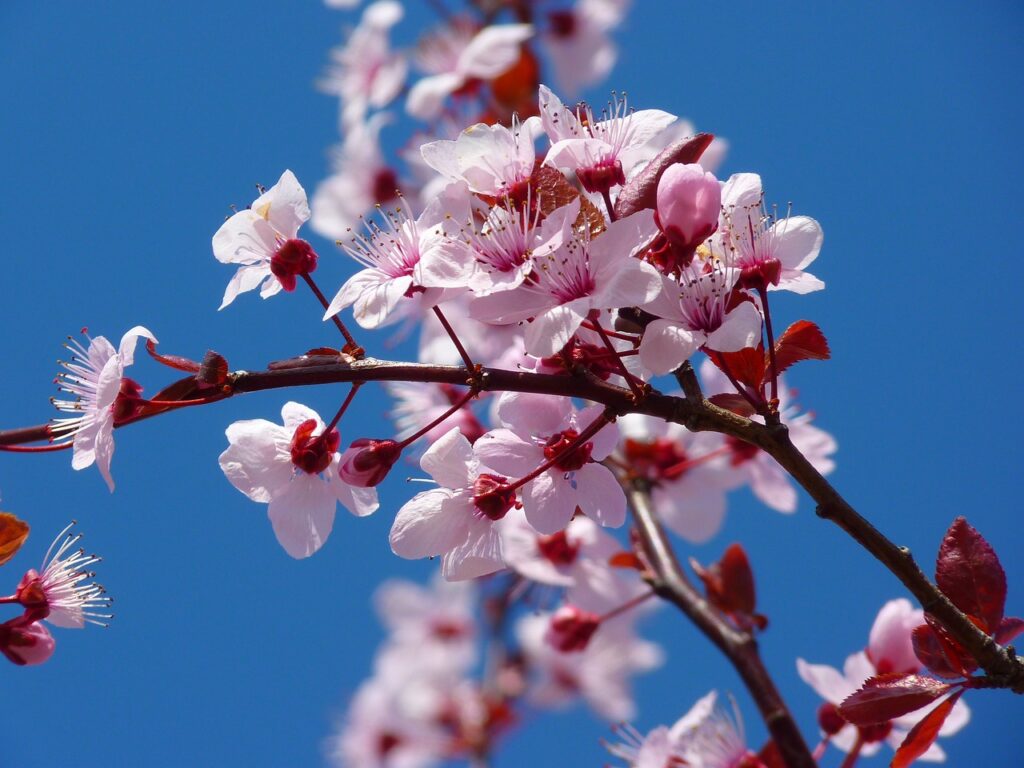
Despite their manicured look, pleached trees still give nesting sites for birds, particularly the denser evergreen varieties. The flowers of species like Crab Apple and Lime support pollinators, and the canopy gives shelter to smaller garden birds through winter.
The trade-off is maintenance: at least two clips a year and a permanent support frame. If you want maximum screening from minimum ground space, pleached trees are worth that effort.
If privacy is the goal, most people weigh pleached trees against a taller fence or a conventional hedge. A standard garden fence tops out at 2m in most back gardens without planning permission, and a hedge of the same height takes up 60cm to a metre of border depth at its base. A row of pleached trees reaches 3m or more while taking up only the width of a trunk at ground level, which is why I use them on narrow plots where a hedge would swallow the border.
A conventional hedge is the better choice where you want screening all the way down to the ground, a wildlife corridor, or the lowest possible cost per metre. If that sounds more like your garden, my guides to fast-growing hedges and planting bare root hedging cover the options, and bare root whips cost a fraction of a single pleached tree.
For exposed, windy sites, my hedges for windy or exposed sites guide is worth reading first, since a pleached canopy catches the wind like a sail. In many of my designs the answer is both: an existing fence or low hedge at the bottom, with a row of pleached trees lifting the screen above it. My guide to increasing privacy with planting shows more ways to layer it.
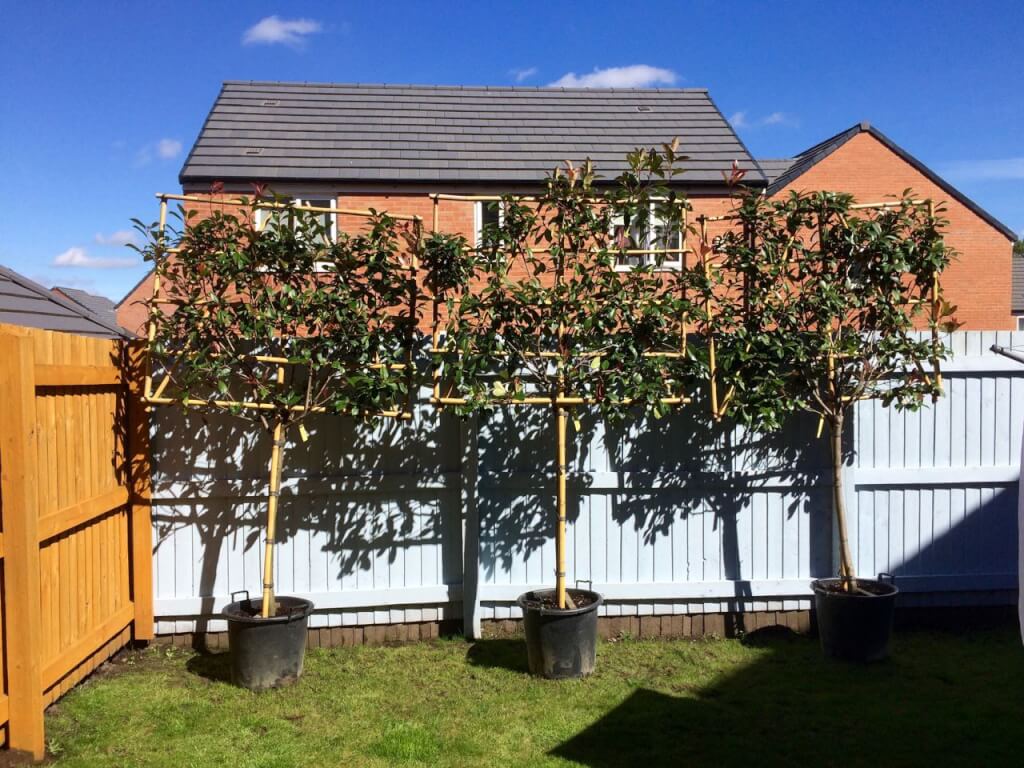
Pleached trees come in a good range of species. The choice between evergreen and deciduous largely depends on whether you need year-round privacy or are happy with a seasonal screen. These are the varieties I use most in UK gardens, with my own assessment of each.
💡 Top Tip
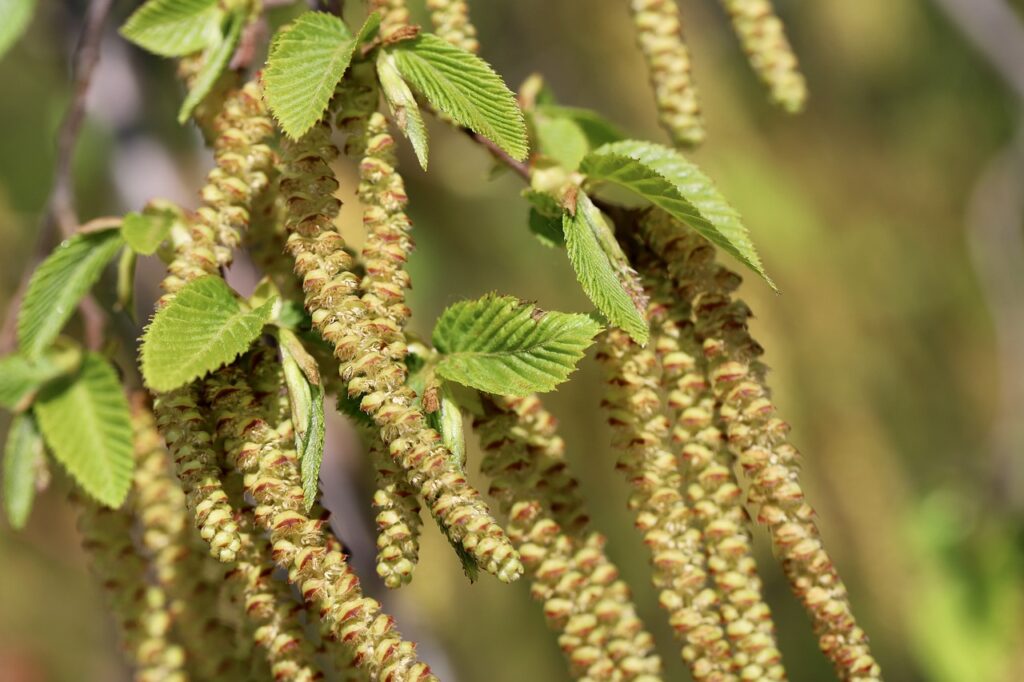
If you need year-round privacy, go evergreen. If you want the most reliable, low-maintenance pleached tree for most UK gardens, Hornbeam is hard to beat. It holds its golden-brown leaves through winter, giving structure and partial screening even when dormant, and it tolerates most UK soils, including heavy clay, and most exposures.
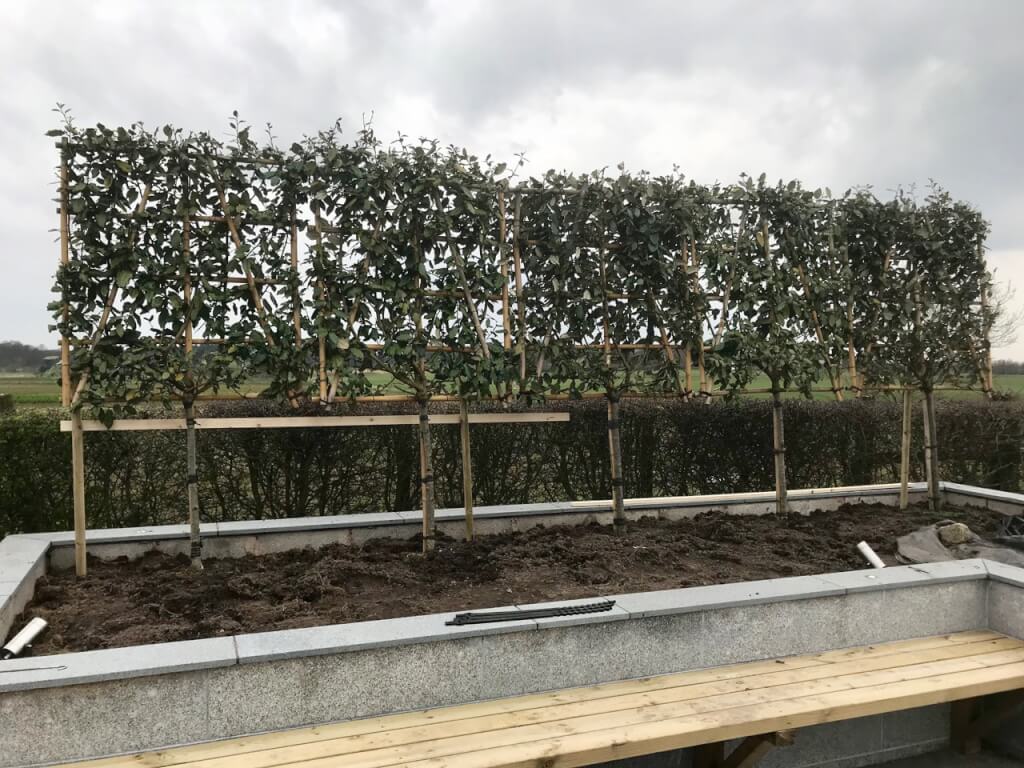
For the best evergreen privacy, I lean towards Portuguese Laurel for a smart, formal look and Photinia ‘Red Robin’ where clients want a flush of red in spring. Cherry Laurel gives the fastest dense cover but needs clipping with secateurs rather than a hedge trimmer if you want to avoid half-cut, browning leaves. If you choose Photinia, my guide on pruning Photinia covers timing that keeps the red new growth coming.
Pleached trees are not cheap, so it helps to understand what you are paying for and what sizes are available before you set a budget.
Standard frame sizes typically start at 120cm wide by 120cm or 150cm high for the trained canopy, sitting on a clear stem of around 1.8m. Larger frames of 150 x 180cm or 180 x 180cm are available at premium prices. Stem height varies from 1.4m for lower screening up to 2.2m for height above tall fencing.
Typical costs vary widely with maturity and species. A young, freshly pleached tree with a 120 x 150cm frame might start at around £150 to £250, while a mature specimen with a 180 x 180cm frame and several years of training can reach £800 to £1,500 per tree. Evergreens like Photinia and Cherry Laurel tend to cost more than deciduous Hornbeam, with fruit trees like Crab Apple somewhere in the middle.
Delivery needs planning. These trees arrive by lorry, usually with a tail-lift, so you will need access for the vehicle and the manpower to move each tree into place. Some suppliers charge per tree for small orders (often under four trees), while larger orders may include free or subsidised delivery.
Rootball or potted affects timing. Most pleached trees are grown as rootballs and sold from October through April, during the dormant season. Pot-grown specimens are available all year but cost more.
Establishment time is the bit everyone forgets to ask about. Pre-pleached trees from a reputable nursery take one to two growing seasons for the canopies to merge into a continuous screen. Training young trees yourself is a four to five-year project, so for most gardeners, buying pre-pleached makes far more sense.
Pleached trees are planted in much the same way as any container-grown tree, but the staking is where the real skill lies. The best time to plant pleached trees is October or November, when autumn rain has arrived but the ground is still warm enough for roots to start growing before winter. Pot-grown trees can go in at any point of the year, provided the soil is not frozen, but they need far more watering to establish through summer.
Before you dig, check for underground services, including drains, pipes and cables. Tree roots and drainage systems do not mix, and the cost of a damaged drain will dwarf the cost of the trees. If you are unsure what is under your garden, the free LinesearchbeforeUdig service will tell you about cables and pipelines on your plot.
Soak each tree’s rootball in a bucket or trough of water for at least 10 minutes before planting. This fully hydrates the roots and cuts transplant stress. Dry roots at planting are one of the most common reasons pleached trees fail to establish in their first season.
Loosen the soil in the base and around the sides of the hole and remove any debris, so water drains freely. Do not dig too deep. The top of the rootball should sit level with the surrounding soil surface, not buried beneath it. On heavy clay in particular, planting too deep risks waterlogging the roots through winter.
Avoid adding compost or plant feed at this stage, as it slows the tree’s rooting. If you want a natural root booster, sprinkle mycorrhizal fungi into the planting hole so it touches the roots.
🛒 Buy RHS Rootgrow mycorrhizal fungi from Amazon UK
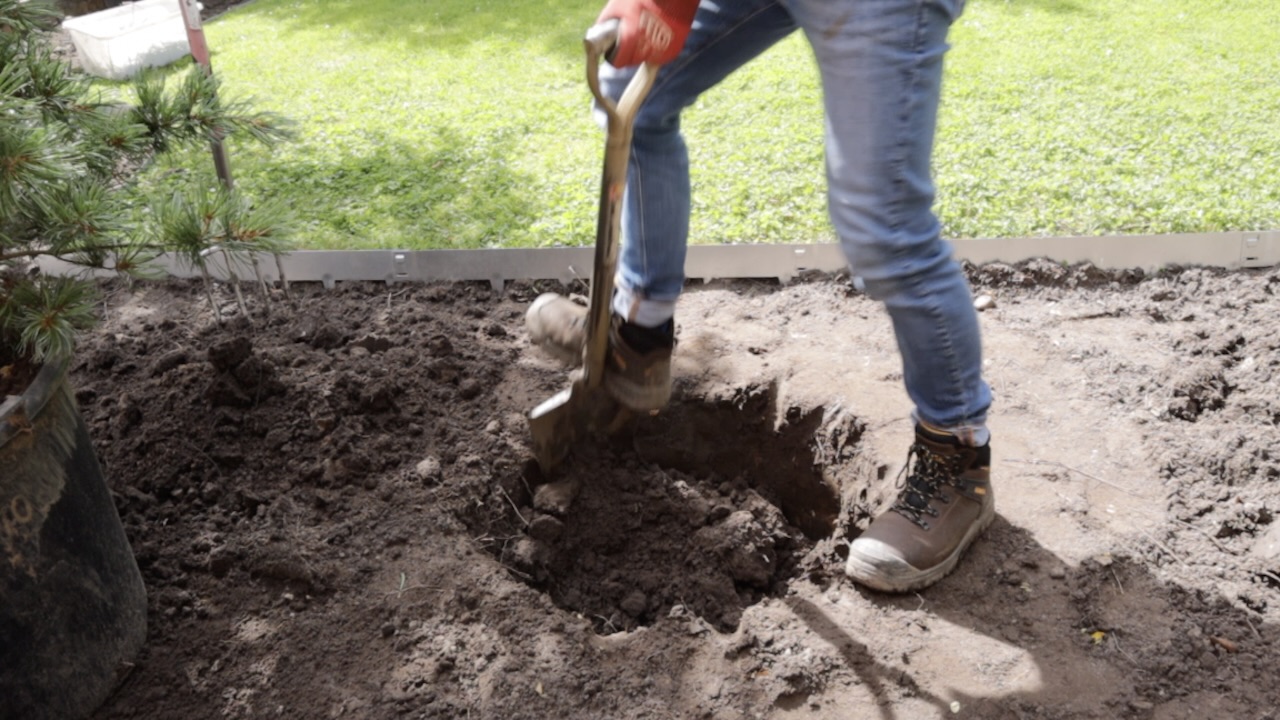
Lean the pleached tree against the inside of the hole so the weight rests on the ground rather than on the canopy, and have a partner hold the frame while you loosen the pot. Some pleached trees are braced and stapled into their pots, and that bracing needs removing first. Position the bamboo frame on the side of the stem facing away from where your supporting stakes will go.
Add or remove soil until the tree is level and true. Keep standing back to check the top and sides of the frame line up with the adjacent trees, since it is much easier to correct any lean now than after backfilling. A string line pulled tight along the row gives you a sighting guide before you commit, the same trick I use when setting out a new hedge.
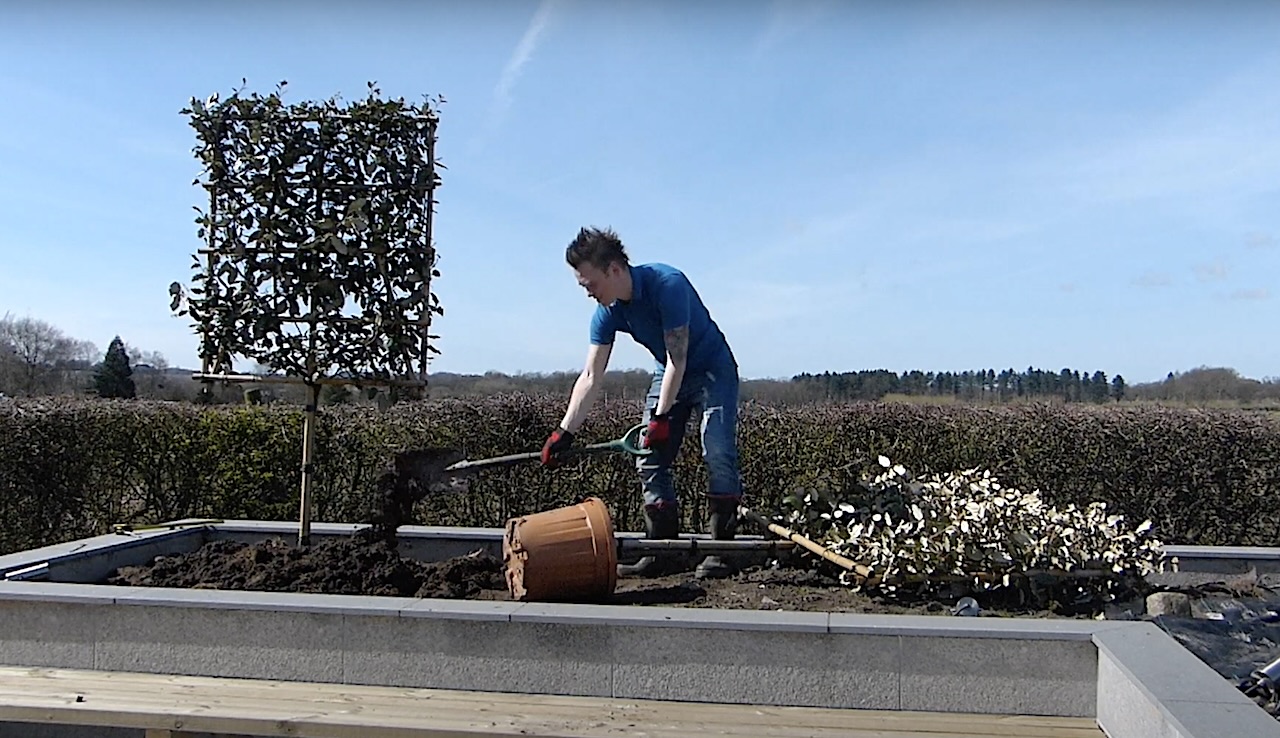
Backfill with the same soil you dug out. There is no need to add fertiliser or compost, since the tree needs to send its roots outward in search of nutrients, which anchors it over the next few years. Give the stem a gentle shake as you backfill to settle the soil around the roots and remove air pockets that can leave dry spots and kill roots.
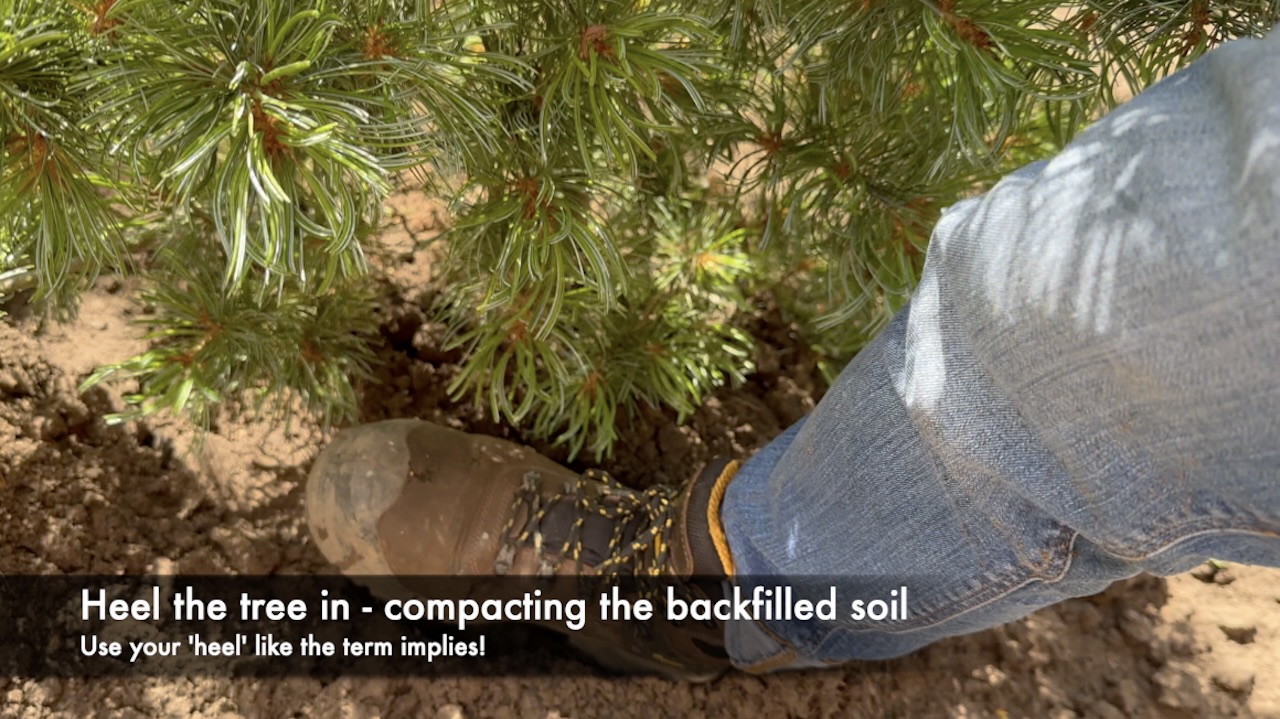
Press down firmly on the ground around the base of the tree with your heel, pushing inward towards the trunk. This is known as heeling in. If you skip this, the tree will suffer from settlement and wind rock, and it will struggle to establish its root system.
See the next section for detailed instructions on bracing and supporting your pleached trees.
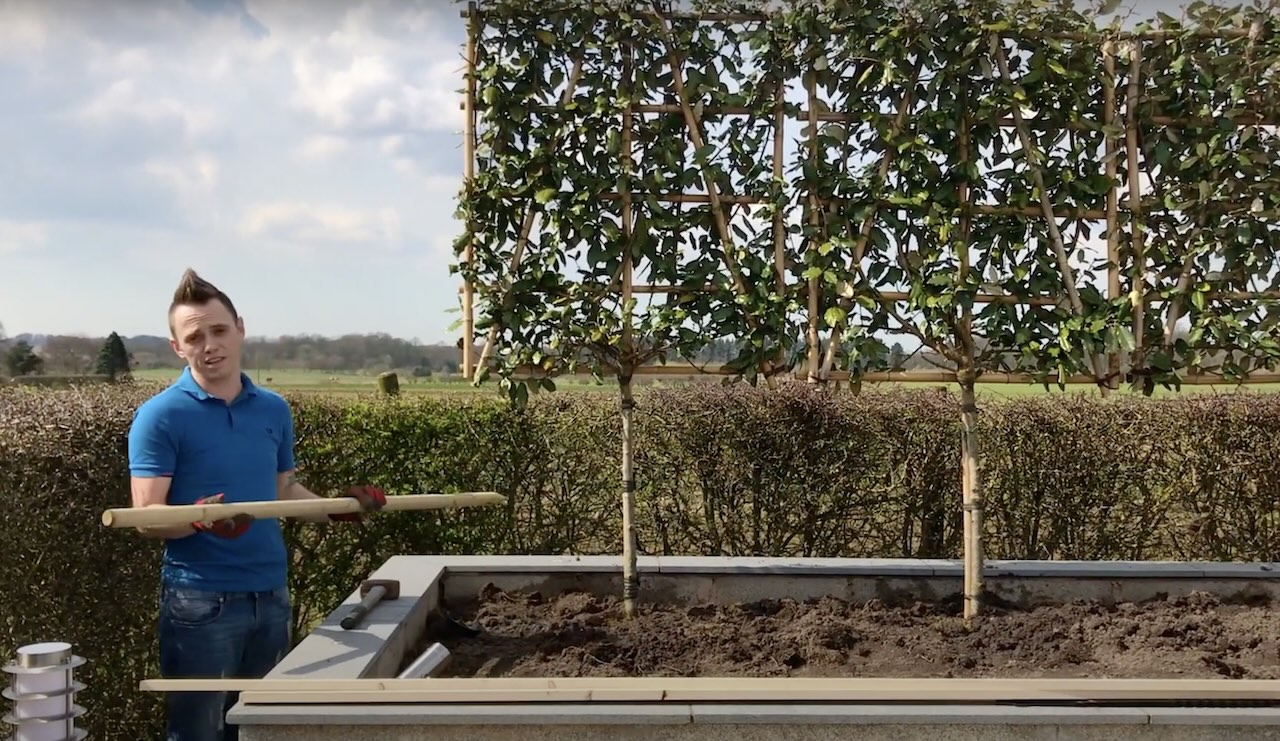
Every pleached tree needs a support framework. The large, flat canopy acts like a sail in the wind, so without proper support even a well-planted pleached tree can rock, lean or uproot entirely in exposed conditions. Stakes on a standard tree come out after two or three years, but pleached tree supports stay as a permanent part of the installation.
A solid frame keeps the trees stable while they establish and holds the frames of neighbouring trees level with each other, which is what gives that crisp, professional finish.
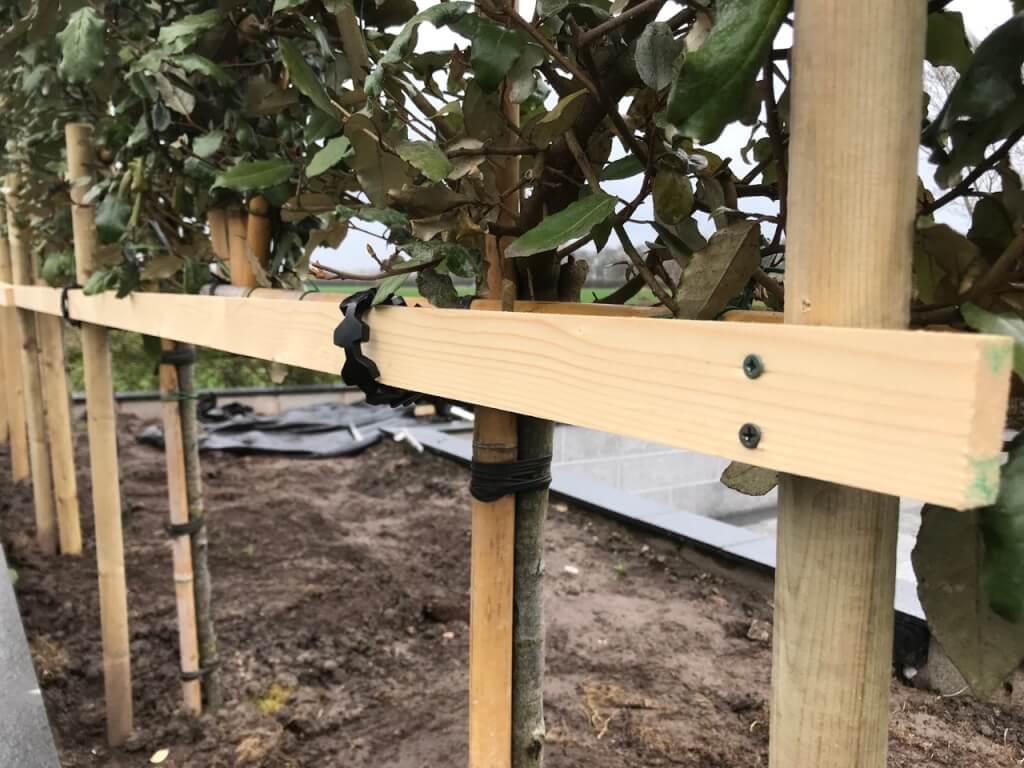
The best method I have found over the years combines fence-post stakes with pressure-treated timber battens. I design the frame to have minimal visual impact, mirroring the positions of the tree trunks so it does not distract from the trees. The key is a support that holds the trees in position without flexing. If your trees are going into a raised bed against a wall, where you cannot drive stakes deep, there is a useful thread on supporting pleached trees in a raised bed on the forum.
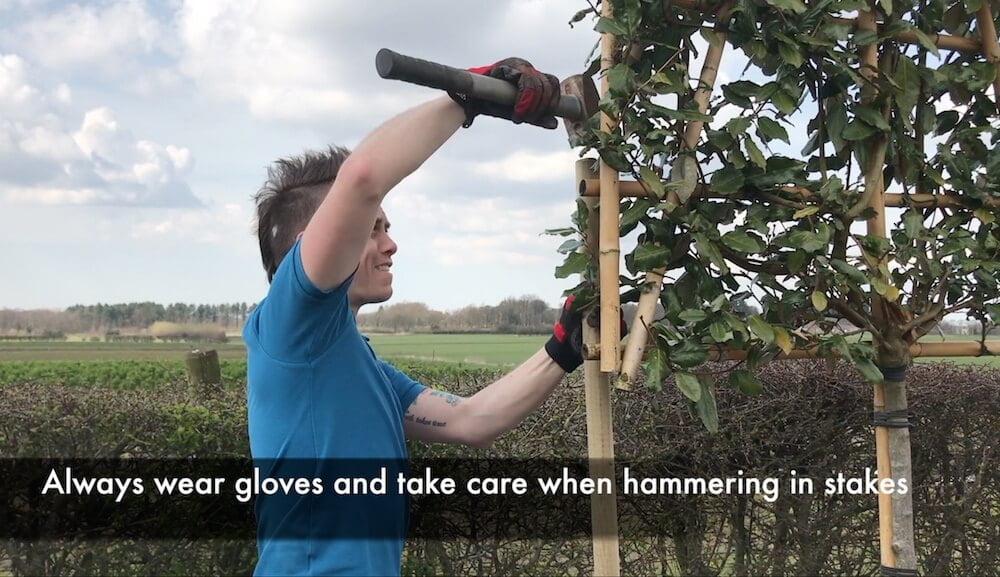
Use 2.4m stakes, driven deep enough that they do not wobble. A post driver or lump hammer is enough for most soils, and there is no need to concrete them in. Position one stake directly behind each tree, aligned with the trunk. Drive each stake in firmly before moving to the next, checking each one is upright and in line.
🛒 Buy 2.4m pressure-treated tree stakes from Amazon UK
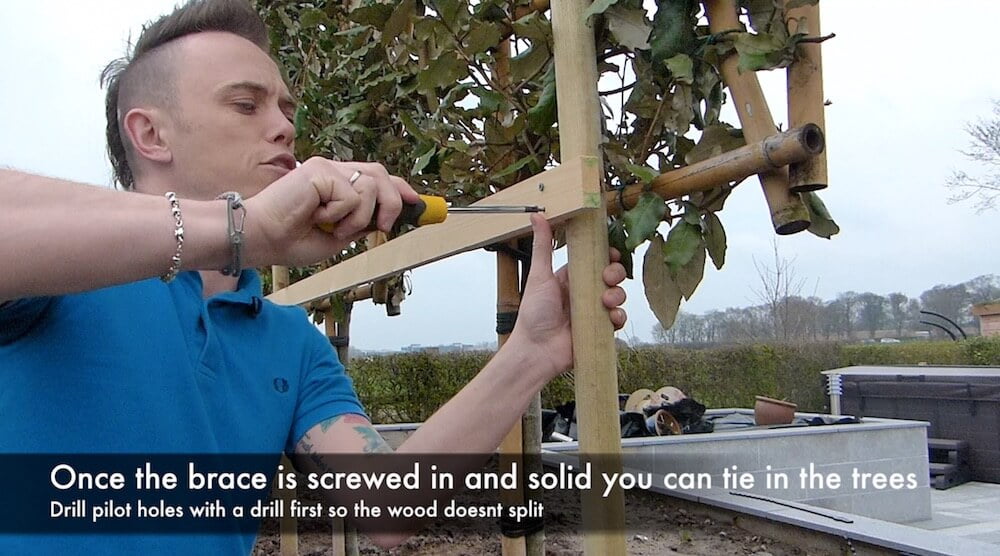
Brace the stakes horizontally with a length of pressure-treated timber running behind all the trees. You will need a spirit level, a pencil, a drill and suitable exterior screws, such as 50mm decking screws. Position the horizontal brace just below the bottom of the tree frames to keep it unobtrusive. The brace ties all the stakes into a single structure, giving you a stable, level framework across the whole row.
Drill two pilot holes and fix the first end of the brace. Then use the spirit level to mark the correct height on each remaining post, drilling pilot holes and screwing in each one in turn. By the end you will have a level brace running across the back of all your pleached trees.
🛒 Buy Forgefix 50mm decking screws for the support frame from Amazon UK
Always use a rubber or flexible tree tie. String, wire or cable ties will cut into the bark as the tree grows, and can kill it.
Look closely at quality pleached trees from a good nursery and you will see the branches and supports are tied with rubber strips. They allow movement and growth without cutting into the tree. When a rigid tie cuts into the bark, it damages the vascular system that carries water and nutrients, and the tree can die from the point of the cut upward.
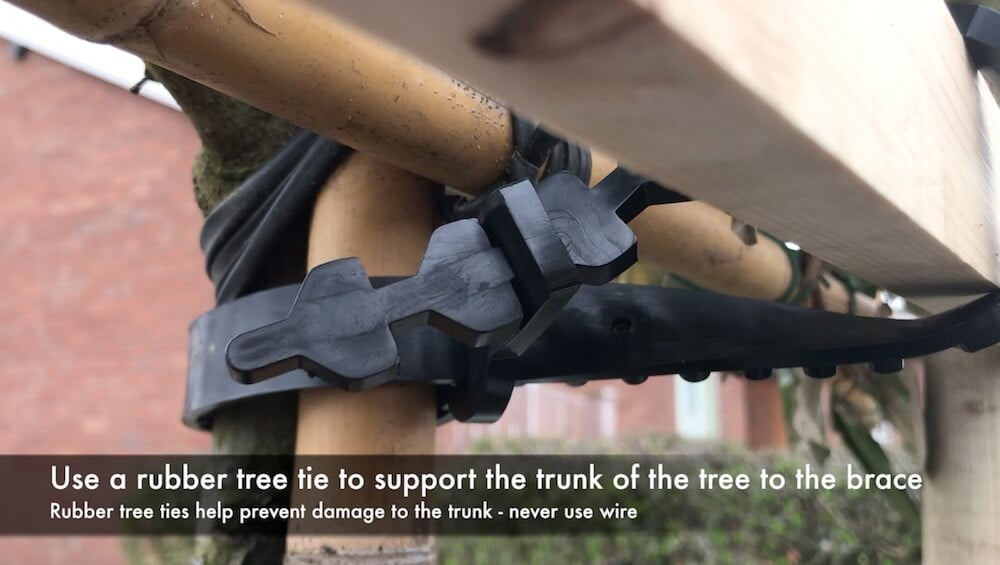
Rubber tree ties let the tree move slightly in the wind, which helps it build trunk strength. They can also be adjusted over time, loosening them as the trunk thickens. You never want a tie that constricts the bark, so check every tie each spring.
A standard rubber tree tie has two parts: a solid loop that goes around the stake or rail, and a slotted length that wraps around the trunk, with an arrowhead fitting back through the slots. Tie it firmly enough to hold the tree in position, but not so tight that it strangles the stem. Think of it like a tie around a shirt collar: snug enough to look neat, loose enough to breathe.
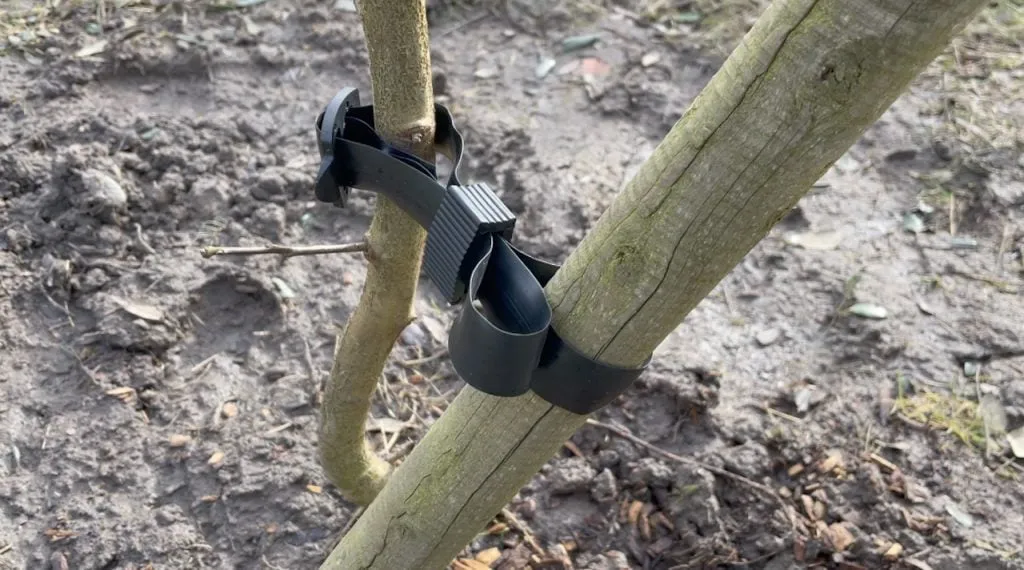
🛒 Buy soft rubber tree ties from Amazon UK
Sort the spacing and positioning before you dig. Get this wrong and you will end up with gaps that never fill, trees competing for resources, or a row that looks misaligned from inside the house.
Tree to tree spacing should match the width of the frame, so the canopies just touch and interweave as they grow. For standard 120cm frames that means 1.2m centres, 150cm frames go in at 1.5m, and larger 180cm frames at 1.8m. Plant closer and the trees compete; plant further apart and the gaps take years to close.
Distance from boundaries matters more than you would think. Plant at least 40cm to 50cm away from fences or walls, which gives you access to trim the back of the trees and lets air circulate to prevent fungal problems. Against a building rather than a fence, increase this to a full metre to protect foundations and allow maintenance access.
Underground services often get forgotten until you hit something expensive with your spade. Check for drains, service pipes and cables before digging.
Sight lines and shadows deserve some thought. Walk around your garden at different times of day and work out where shadows will fall. Pleached trees cast dappled shade beneath, which is lovely over a seating area, but a row along your south-facing boundary could take a lot of light from a terrace or vegetable bed. Check the views from inside the house too, so you screen what needs screening without blocking views you want to keep.
Flat or gently sloping ground is ideal for a row of pleached trees. On a pronounced slope the frames no longer form a continuous line when viewed from the front. On gradual slopes this is manageable, but on anything steeper than about 10 to 12 degrees you may need to step the planting positions to compensate.
Once the trees are tied and supported, give them a thorough watering. For the first two growing seasons, water generously at least twice a week, more often in warm, dry weather. Establishment failure in pleached trees is almost always down to too little water in the first summer after planting.
Keep checking the trees for movement and adjust the ties if needed. A gentle tug on each tree every few weeks through the first autumn tells you whether the root system is establishing, and newly planted trees should feel firmer as the season goes on.
In spring, spread a mulch of well-rotted compost or bark around the base of each tree, keeping it clear of the trunk itself. It holds moisture, suppresses weeds and slowly improves the soil as it breaks down. Piling mulch against the stem can rot the bark, so leave a small gap.
With most pleached trees you will clip them twice a year, just like a hedge. Trim off any shoots growing past the frame and tie new growth into any gaps. Rub out or cut off shoots that appear lower down the clear stem as soon as you see them, to keep the trunk line clean.
Pruning pleached trees keeps their shape and encourages dense growth across the frame, and it works exactly like clipping a formal hedge raised up onto stems. Everything in my guide to how to cut, prune and trim hedges applies here, from keeping your cuts parallel to the frame to cleaning up the clippings afterwards. Clip at least twice a year: a main clip in late summer once birds have finished nesting, and a structural tidy in late winter before they start. In a vigorous year, a light extra trim in early summer keeps things tidy, as long as you check for nests first.
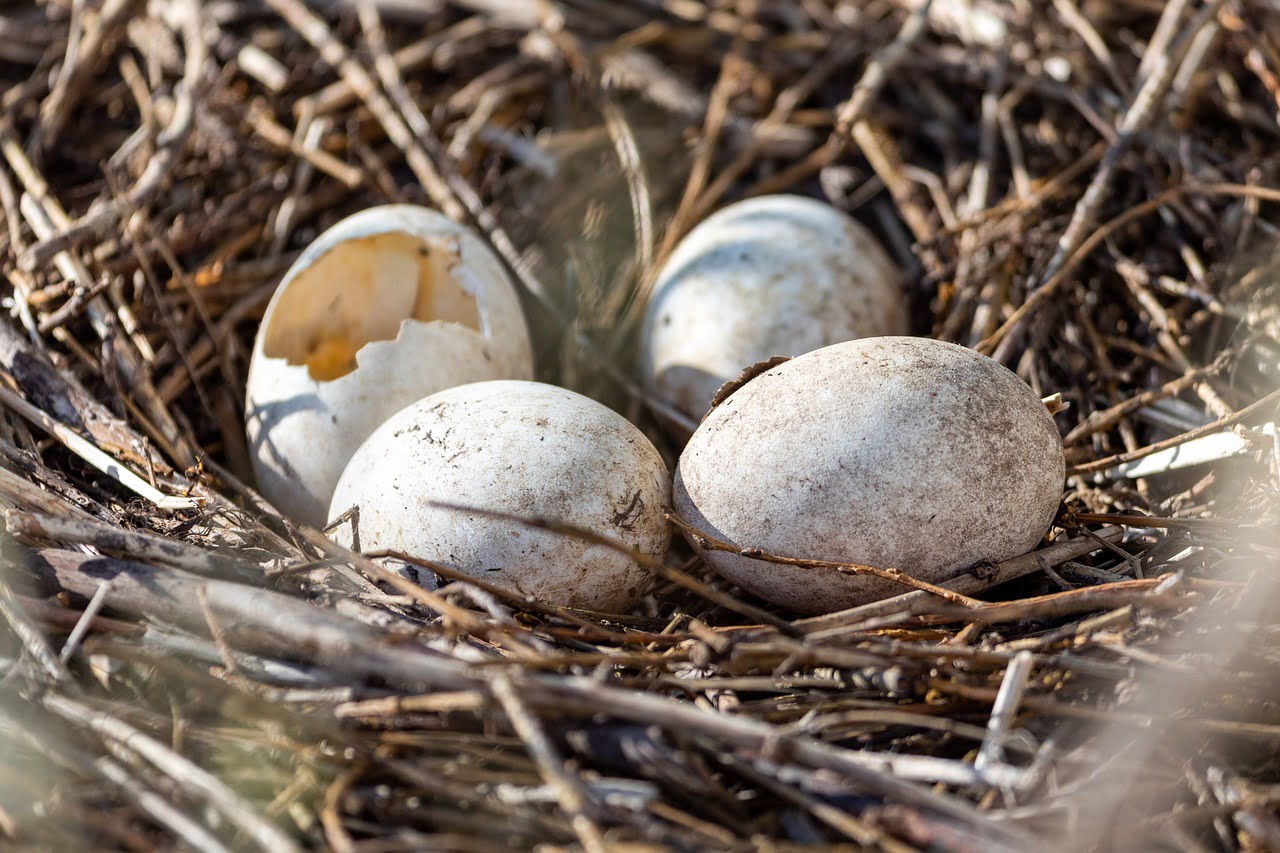
The bird nesting season in the UK runs roughly from March to August, and it is an offence under the Wildlife and Countryside Act 1981 to damage or destroy an active nest. That shapes the timing. Do the main clip in late August or September, once the nesting season is over, cutting all the new growth back to the frame. Then do a lighter structural tidy in late winter, around February, while deciduous trees are bare and you can see every branch clearly, tying in any shoots needed to fill gaps. My hedge cutting guide covers the rules on cutting hedges during nesting season in more detail, and the same rules apply to a pleached screen full of birds. Avoid clipping in hot, dry spells, since fresh cuts in a heatwave stress the canopy and scorch the leaves left behind.
You need three tools for pleached trees: secateurs for individual shoots and large-leaved evergreens like Laurel, hand shears for the flat faces of the canopy, and something to reach the top. For a short row of two or three trees, hand shears give you the most control, and a good pair of Japanese shears with high-carbon blades holds its edge for years. Wipe your blades with garden disinfectant between trees if any of them are showing signs of disease, since it stops you carrying it along the row.
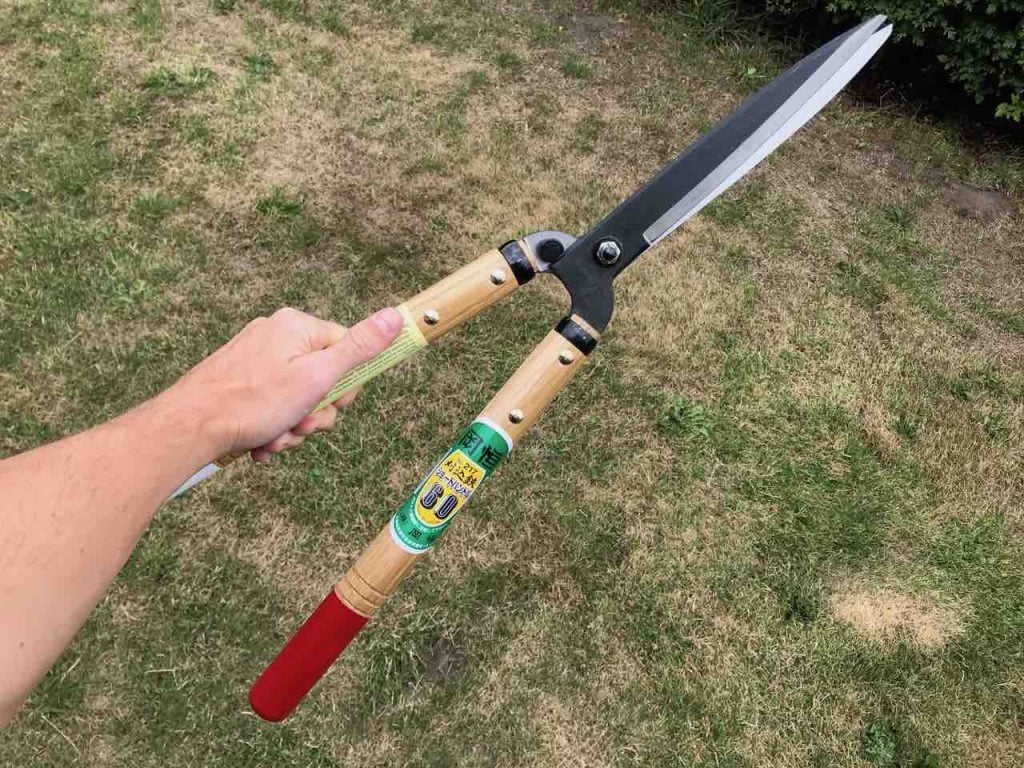
🛒 Buy the Kimura Japanese hedge shears I use from Amazon UK
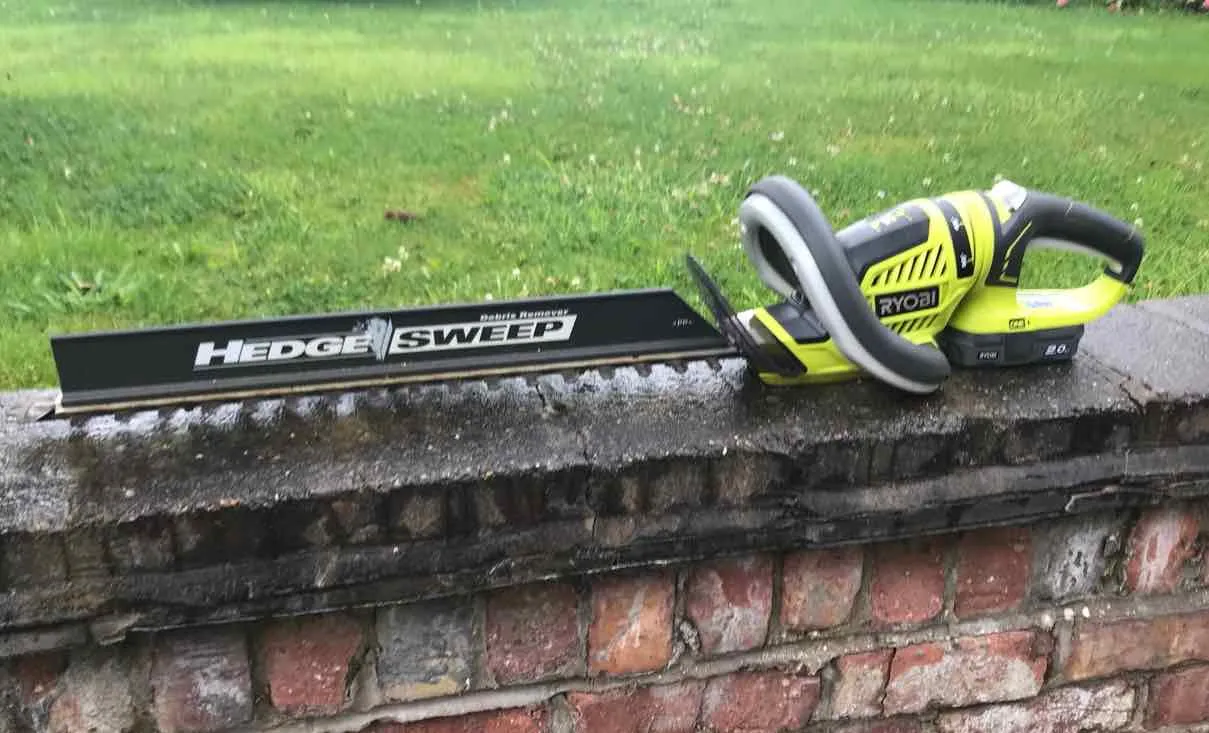
For a longer row, a cordless hedge trimmer saves hours. The canopy of a pleached tree sits at 1.8m to 3.5m, so a long-reach trimmer lets you clip the face and even the top of the frame from the ground. I use the Ryobi ONE+ system on my own hedges, and the long-reach model runs off the same batteries as the handheld one. My guide to the best cordless hedge trimmers UK compares the models I have tested, and my Ryobi hedge trimmer review covers the handheld model in detail.
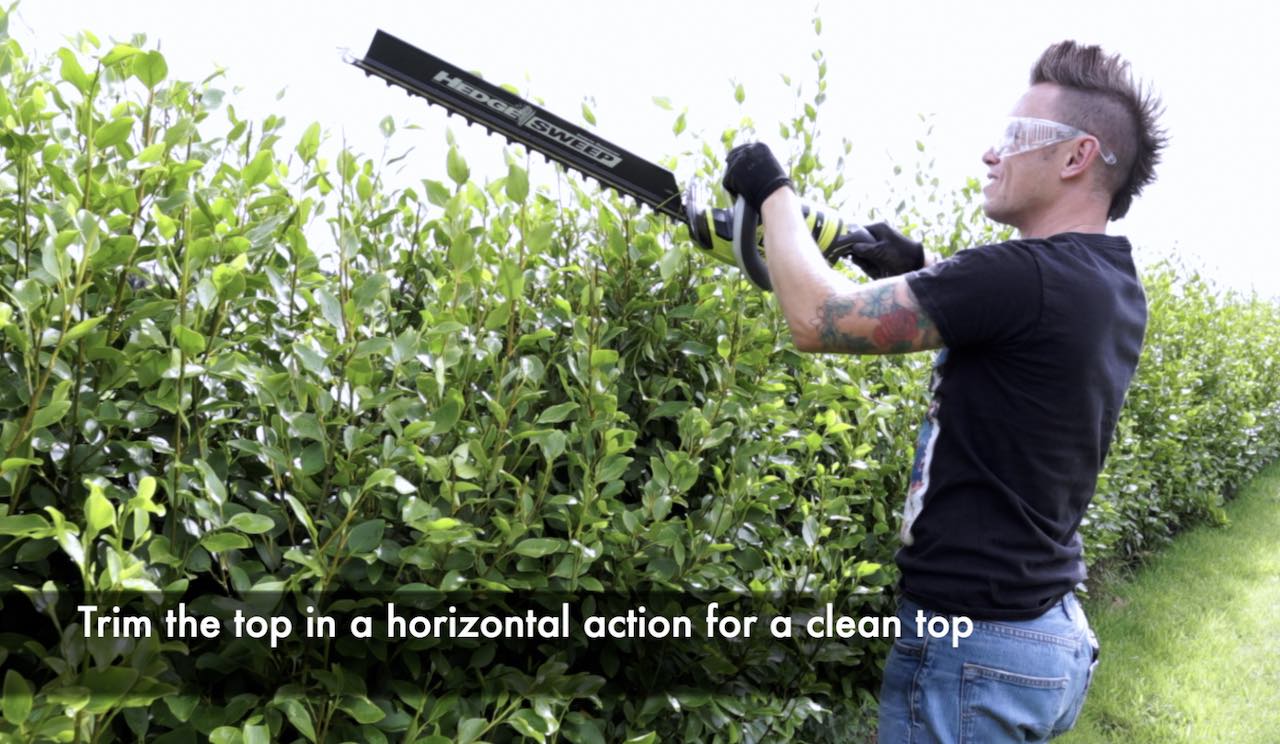
🛒 Buy the Ryobi ONE+ Long Reach Hedge Trimmer from Amazon UK
The top of a pleached frame is usually 3m or more off the ground, which is beyond comfortable reach even with a long-reach trimmer, and it sits right above a planted border. An ordinary step ladder is the wrong tool here. Its four feet will not sit level on soft soil, and you end up leaning out sideways to reach the frame. For pleached trees and tall hedges I use a Henchman tripod ladder, because the single adjustable rear leg can be pushed right into the border behind the plants while the front legs stand on the path or lawn, and the ladder stays stable on uneven, sloping ground.
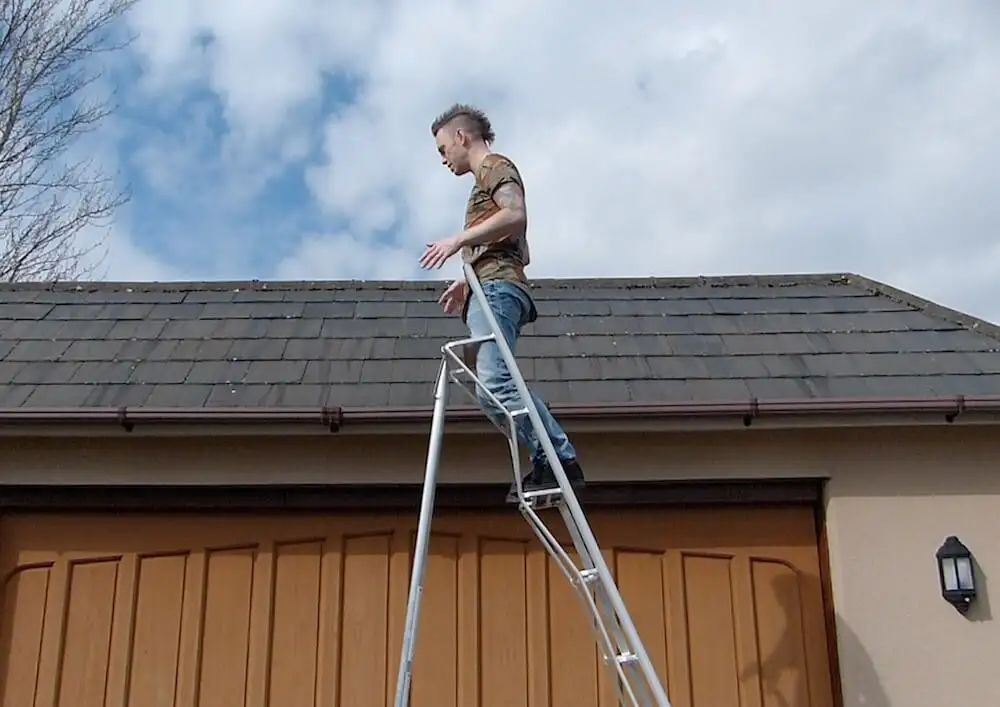
I have been using Henchman ladders for years, and my full Henchman tripod ladder review covers the sizes, the platform models and the cheaper alternatives. For most pleached trees on a 1.8m stem, an 8ft or 10ft tripod puts the top of the frame at a comfortable working height. Whatever you use, keep both hands free for the tool, never overreach from the ladder, and move it along the row rather than stretching for the next tree.
🛒 Buy the Henchman Fully Adjustable Tripod Ladder from Amazon UK
Start by removing any dead, damaged or diseased branches, cutting back to healthy wood or the nearest side branch. Thin out overcrowded or crossing branches to let air and light into the canopy, which helps prevent disease and encourages even growth across the frame.
Trim all new growth back to the shape and size of the pleached frame, and pay particular attention to vertical shoots that break the horizontal structure. These upright water shoots are vigorous and, if left, quickly spoil the flat plane that makes pleached trees so distinctive. Tie any long horizontal shoots into gaps rather than cutting them off, then lightly trim the sides and top to keep the frame square. Run a string line along the top of the row at the height you want, the same way I set up a formal hedge, and every tree will finish level.
Inspect pleached trees through the growing season for signs of damage, disease or unwanted growth. Rub out or cut off any shoots that appear on the clear trunk below the frame, since they divert energy from the canopy and spoil the clean line of the stems.
Every client who asks me for pleached trees gets the same honest run-through before we order a single tree, because for every upside there is a catch you need to be happy living with. Here is how they stack up, side by side.
If the upsides column describes what your garden is missing and you can commit to two clips a year, pleached trees will earn their keep. If cost or upkeep is the deciding factor, go back to the pleached trees vs a hedge or fence section, since a conventional hedge may suit you better.
Even with careful aftercare, pleached trees can suffer from pests, diseases or environmental stress. Most problems can be put right if you catch them early.
Aphids: these small insects feed on sap, causing leaves to curl and distort, and on Lime they produce sticky honeydew. Natural predators like ladybirds, lacewings and blue tits are your best long-term allies, and a strong jet of water knocks back a heavy infestation.
Scale insects: scale insects cling to stems and the undersides of leaves, sucking sap and causing yellowing. Scrape off small colonies with a thumbnail or soft brush in spring, and a winter plant oil wash on deciduous trees helps smother overwintering scale.
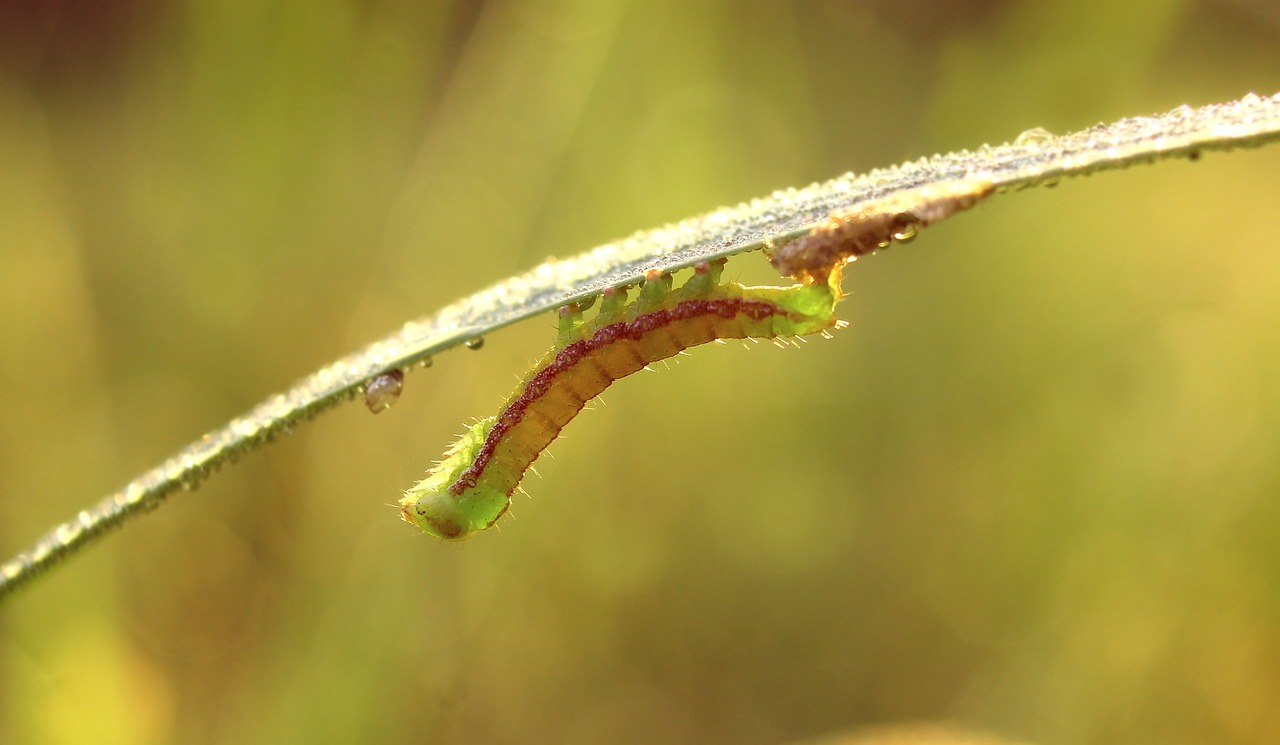
Caterpillars: caterpillars can strip leaves in early summer. Pick them off by hand where you can reach them, and let the birds nesting in your screen do the rest.
Powdery mildew: shows as a white, powdery coating on leaves and stems, particularly in congested, poorly ventilated canopies and on trees that are dry at the roots. Thin the canopy to improve air flow and keep the trees well watered in dry spells.
Leaf spot: dark spots or blotches on the leaves point to a fungal leaf spot, common on Photinia and Cherry Laurel in wet years. Remove and bin badly affected leaves, and clear up fallen leaves from underneath. Never compost diseased material, since it can spread the problem around your garden.
Anthracnose: anthracnose causes dieback and leaf blight, particularly in wet springs. Prune out affected branches and thin the canopy to reduce humidity.
Drought stress: water trees thoroughly through dry spells, particularly in the first two years after planting, and mulch around the base to hold moisture in.
Frost damage: late frosts can scorch the soft new growth of Photinia and Cherry Laurel. Hornbeam and Beech are far tougher. Cover young evergreen canopies with horticultural fleece during a hard late frost if new growth has already started.
Root compaction: heavy foot traffic compacts the soil around the roots, restricting growth and nutrient uptake. Mulch the root zone and keep regular paths away from the trunks.
Wind rock or root lift: this usually happens when a tree has not been heeled in or braced properly. Re-firm the soil and add extra support straight away, since a rocking tree cannot grow new roots.
Nitrogen deficiency: symptoms include yellowing older leaves and weak growth. Apply a balanced feed in spring to correct it. My preferred organic option is comfrey tea, which gives a balanced feed without the risk of overfeeding that comes with synthetic products. See my guide to making comfrey tea for a free feed.
Iron deficiency (chlorosis): leaves turn yellow between the veins, often on very alkaline soils. Treat with sequestered iron applied as a soil drench in spring.
In most UK gardens you do not need planning permission to plant trees, pleached or otherwise. The exceptions are properties with a planning condition or restrictive covenant covering the boundary, which is common on new-build estates, and listed buildings. The bigger consideration is the high hedge law in England and Wales, under Part 8 of the Anti-social Behaviour Act 2003, which covers a line of two or more mostly evergreen or semi-evergreen trees over 2m tall, and lets a neighbour complain to the council if it affects their light or enjoyment of their home. A row of evergreen pleached trees can fall under that, so keep the height sensible and talk to your neighbours before planting. Deciduous species such as Hornbeam and Lime fall outside it.
For year-round privacy, Portuguese Laurel, Photinia ‘Red Robin’, Cherry Laurel and Holm Oak are the most reliable evergreen pleached trees in the UK. Hornbeam and Beech are the best deciduous options for privacy, since they hold their brown leaves through winter and still give partial screening. For the fastest summer screen on a large plot, Lime is quickest to fill in, though it drips honeydew in summer.
Pleached trees are a good idea when you need screening above fence height on a small or narrow plot, since they give 3m or more of privacy while taking up only the width of a trunk at ground level. They are a poor fit if you want a low-cost or low-maintenance screen, because each tree costs £150 or more, needs a permanent support frame, and needs clipping at least twice a year. For a long boundary on a budget, a conventional hedge is better value.
Pre-pleached trees from a nursery merge into a continuous screen within one to two growing seasons with proper care. If you train young trees yourself from scratch, expect four to five years before you get the full pleached effect. Fast-growing species like Lime establish quickest, while slower growers like Hornbeam and Holm Oak take longer but give denser, longer-lasting screens.
Most garden pleached trees are kept at a total height of 3m to 3.5m, made up of a 1.8m to 2.2m clear stem and a frame of 1.2m to 1.8m above it. You set the final height by clipping the top of the frame each year, so they stay the height you choose rather than growing into full-size trees. Keeping the top at a height you can reach from a tripod ladder makes maintenance far easier.
It is possible, but it takes commitment. You will need large pots of at least 80 to 100 litres, excellent drainage, regular feeding through the growing season, and daily watering in summer. The trees need repotting or top-dressing every three to four years and will never reach the vigour of trees planted in the ground. Pots work well for rented homes or roof terraces, but for permanent screening, plant them in the ground.
Yes. The support posts and horizontal rail should stay in place permanently, where the stakes on a standard tree come out after a few years. A pleached canopy is a flat sail sitting on a single stem, and the roots take years to anchor that much wind resistance. The frame prevents wind rock, keeps the trees aligned and keeps the row looking uniform, so treat it as part of the structure.
Most nursery pleached trees come with a bamboo cane frame that guides the initial shape. You can remove it once the branches have become woody and hold their position, typically after three to five years in the ground. Many gardeners leave it in place, since it keeps supporting the shape and gives a guide to clip against, and it becomes barely noticeable behind the foliage.
Plan for two clipping sessions a year: a main clip in late summer and a structural tidy in late winter. For a row of ten trees, each session takes roughly half a day to a full day, depending on your experience, your kit and how vigorous the trees are. Add watering during establishment and the odd feed, and you are looking at three to four days of work a year. A long-reach trimmer and a tripod ladder cut that time considerably.
You can, but results vary. You need young, pliable trees, ideally under five years old, with straight trunks and flexible branches. Older trees have stiff branches that resist training and can snap. If you want to try, start with a species known for flexibility such as Hornbeam, Beech or Lime, put up a proper framework, and train the branches gradually over several years. For most gardeners, buying pre-pleached trees gives far better results with far less frustration.

Join over 100,000 gardeners on YouTube
Free gardening videos from the Garden Ninja, with 8 million views and counting.
Subscribe on YouTube, it’s freeA row of pleached trees is only one layer of a privacy plan. Working out where it sits, what goes underneath it, and how it ties into the rest of the garden is the design side that my online courses walk you through, using the same process I follow on client gardens.
With courses starting from just £29, you can plan the whole garden around your new screen rather than fitting it in afterwards.
For the garden you’ve already got, not the one you’re starting from scratch. Seven checklists and video lessons from BBC Garden Rescue’s Lee Burkhill, built to help you work out what’s worth keeping before you spend a penny.
Garden Design Examples for Small Gardens: 30 Design Templates & Planting Plans: In this online gardening course, I’ll walk you through 30 fantastic garden designs, explaining the logic behind the layout, the plant choices, and take-home tips for applying them in your own garden.
Learn how to transform and design your own garden with Lee Burkhills crash course in garden design. Over 5 hours Lee will teach you how to design your own dream garden. Featuring practical design examples, planting ideas and video guides. Learn how to design your garden in one weekend!
Garden Design for Beginners Online Course: If you want to make the career jump to becoming a garden designer or to learn how to design your own garden, this is the beginner course for you. Join me, Lee Burkhill, an award-winning garden designer, as I train you in the art of beautiful garden design.
Pleached trees are one of the most useful tools in a garden designer’s kit for small or urban gardens where ground space is precious. Their narrow footprint gives you screening above fence height without giving up the ground beneath them. Choose the right species for your privacy needs, space the trees at the width of their frames, and build a permanent support frame with rubber tree ties from day one.
After that, it is hedge care raised onto stems: water generously for the first two years, clip twice a year outside the nesting season, and use a long-reach trimmer or a stable tripod ladder to keep the top level. Do those things consistently and a row of pleached trees will give you a crisp, formal screen for decades.
Happy gardening from The Garden Ninja! 🌿


Lee Burkhill, known as the Garden Ninja, is an award-winning garden designer and horticulturist with over 30 years of gardening experience and 15 years as a professional garden designer. A qualified RHS (Royal Horticultural Society) professional, Lee specialises in sustainable garden design and practical horticultural advice. He designs and presents on BBC1’s Garden Rescue and in leading gardening publications. Lee combines three decades of hands-on gardening knowledge with professional design qualifications to help gardeners create beautiful, functional outdoor spaces.
View all posts by Lee Burkhill




You must be logged in to post a comment.





JOIN THE NINJAS

Be the first in line for new Guides, Discount codes and Offers





We are buying 6 pleached beach trees for screening cover in our garden. We have our house on the market at present to sell. So we will be putting them for now into large pots. What will be the best way of securing /staking them until we move?
Hi Robert, Great to hear from you. I would still stake them with a brace of some description or they will blow over. If you can fix this brace to a fence or wall that would be best if you’re then going to move them again. Failing that I’ve used elasticated strapping (the ones with hooks on the end) to keep them tied to a fence before I’ve moved them. Hope that helps! Happy Gardening.
Hi there, we are thinking of getting some pleached trees for our back garden as it is very overlooked by our neighbors. I think we will need about 12.
Please can you advise how far out from a fence pleached trees should be planted? Thank you
Hi Christine. Great to hear from you. I’d always advise that a foot or 50cm is about right. This means you can trim the back and there’s some airflow. Too close and you can’t clip and you may end up with issues as airflow helps keep plants healthy. If they’re too crammed things like fungus or pests can take over for example. Hope that helps!
Hi,
My pleache’d trees have been in the ground three years now and have good growth but at what point ,if any, do I loosen or remove the trunk ties for the supporting canes?
Hi
We are looking at 6 pleached evergreen for privacy at the side where we border neighbours but the wind can be quite strong as it whips between the houses. 1.8m stem and 1m frame can you please advise which would be most suitable.
Thank you
Hello,
We have removed 2 large llalandii from our back garden and now need to replant with something to hide the overlook from neighbours. I love the look of pleached trees but with the previous stumps we can’t plant new trees closer than 2m, preventing the pleached frame from meeting and leaving a gap. Will the pleached trees ever grow across the gap or is it better to plant a traditional tree instead and just wait for it grow tall enough?
Thanks
Hi – I’m considering using pleached trees in my front garden to screen people looking into our house. I have a 4.4m fence that the trees would screen above, so don’t know if I’d need 3 or 4 trees. What would you advise? The trees I’ve seen have 1.2m screens, so how close do you plant them to each other? Is it OK to overlap them? And how far do the grow sideways? Or is the idea to always keep them the same width as the screen? Great advice about framing them too – I will definitely do this!
Hi
Would you use an electric or battery operated hedge trimmer to prune pleached trees or prune by hand using shears?
Is there plant food I can buy to help growth?
Hi Michelle, The best way you can help plants and trees grow strong is by using a decent compost mulch placed directly on the soil. I have an article on that here. Hope that helps. Lee https://www.gardenninja.co.uk/mulching-your-garden/
Hi
We’ve moved into a new house and the developer planted red robin pleached trees but some have died is there any way I can encourage some branches to go across further to the next wooden support. As I think then I’d only need to replace two
Hi Alison, Great to hear from you. To encourage bushy lateral growth you pruning back to the next stet of buds this will encourage more bushy growth. There’s no easy way to make a stem or branch grow longer without some skill and patience. Cutting back to the next set of buds is the easiest way to encourage further growth. Checkout my pruning guide series on Youtube here.Happy Gardening. Lee https://www.youtube.com/playlist?list=PL7HK5RsLCR9crgatYb4LcwE34Om3cKsIO
I am planting hornbeam footballs and want them to grow into a pleached hedge. Any tips.
Hi Katy, Thanks for your comment on pleached trees. If you’re planting root balls you need to make sure that your planting hornbeam standards and not hedging plants. A standard has one main stem. It’s then a case of over years training each shoot at the top into a frame that you would need to build. In all honesty, it would be quicker to buy the pleached trees already established as it is a real skill to achieve. All the best. Lee
Hi Lee
I’d like a pleached hedge but the plants are very expensive. I’ve found some nice pleached apple tress which are about 5 foot high. Will they grow taller over time, or stay the same height.
Thanks for advice. Iris
Hi Iris, It depends on the rootstock. In my experience they won’t grow too vigorously, obviously, it depends on the rootstock they are grafted onto. They are probably pleached more for produce than height or vigour. Happy Gardening. Lee
I’d love to plant some pleached hornbeam or crabapple trees along my back fence. Sadly I don’t have the budget to buy mature pleached trees. Can I buy young trees and train them once they’re in position or do they need to be grafted on smaller rooting stock?
Hi Phillipa, Most pleached trees are grafts to speed up the framing of the pleached tree. Training can take considerable time but if you pick a fast growing tree like beech it can be made simpler! Hope that helps. Happy pleaching. Lee
Hi, we have built a raised bed (2.3m long, 50cm deep and 60cm high) infront of an oil tank which faces lengthways towards our patio. Behind the oil tank there is our side path and then a fence separating us from our neighbours. Unfortunately our neighbours have a bedroom window which looks directly down onto our patio (over the top pf the tank). Given that there is an entrance door into our house by the oil tank, I thought adding pleached trees into the raised bed would be neat and effective for screening. However I am wondering if it is too small an area? The height we need to achieve is 2.7m max. Any larger than that and we will be coming into our bedroom! I have thought of a tree but don’t want one that will cover the path into our door (infront of the raised bed), or interfere with the porch over the door.
If you think pleached would work in that space, can you make any suggestions on which type of pleached trees would suit that size please?
Many thanks 🙂
I have planted some new cherry laurel pleached trees this month (November) and apart from mulching, is there anything I should do to protect the branches from hard frosts or snow?
Hi Lee, This is such a fantastic guide, it’s so useful to have both the video and the step-by-step instructions. Thank you so much for sharing! It’s really great. xx
Thanks Rachel I’m glad my tree guides are so useful! Happy Gardening. Lee