How to Prune Photinia Red Robin: UK Timing & Technique Guide
Lee Burkhill: Award Winning Designer & BBC 1's Garden Rescue Presenters Official Blog
Beginner level
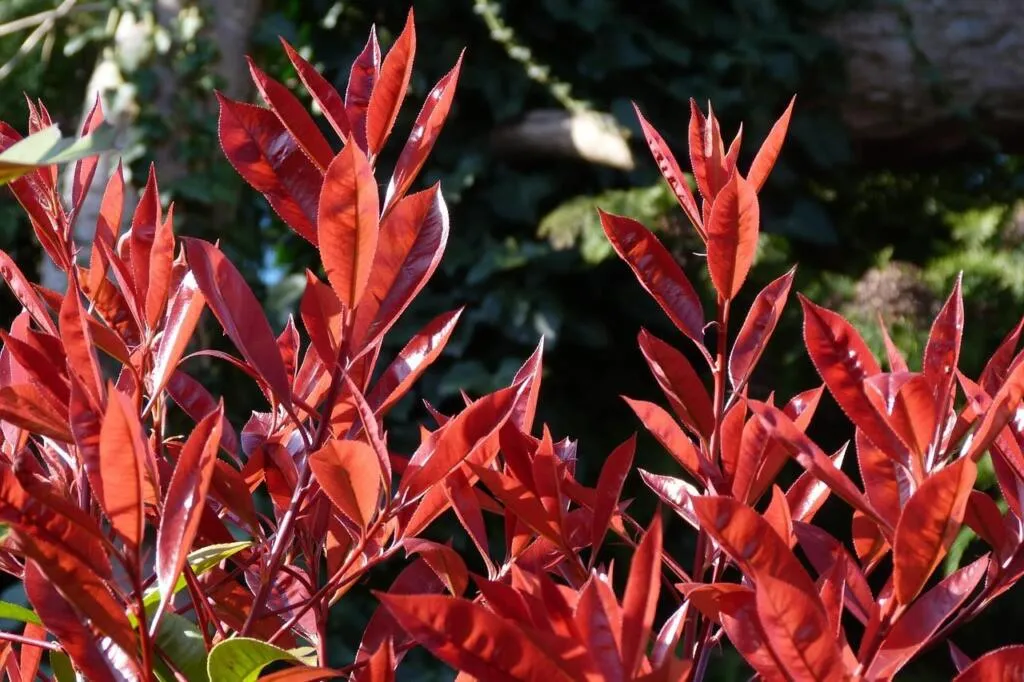
Photinia Red Robin is one of the most popular evergreen shrubs in UK gardens, and for good reason. That flush of vivid scarlet new growth in spring is one of the most striking things in the May garden, and as a hedging plant it provides year-round privacy and structure. But over the years I have seen more poorly pruned photinias than almost any other shrub: either sheared mechanically into tight boxes that never produce that characteristic red growth, or left entirely alone until they become leggy, sparse at the base and riddled with leaf spot disease.
The good news is that pruning photinia is not complicated once you understand two things: when to cut, and why you are cutting. Get the timing right,and photinia rewards you with multiple flushes of red growth through the season. However, prune at the wrong time, and you’ll either lose the colour entirely or create wounds that become entry points for fungal disease. In this guide, I will walk you through everything you need to know, from the correct tools to use to renovation, pruning an overgrown specimen, and tackling the dreaded black spot.
I should say upfront that photinia is a shrub I have a nuanced relationship with. I have pruned and maintained it extensively in client gardens and sometimes used it in my own planting schemes, and I have also answered a lot of forum questions from gardeners whose photinias have gone wrong. It is a brilliant plant in the right position, managed correctly. In the wrong position or without any pruning at all, it can disappoint. This guide will make sure yours falls firmly in the first category.
Quick Answer
Prune photinia (Red Robin) twice a year: once in early spring (March to April) to trigger the main flush of red growth, and again lightly in early summer (June) to encourage a second flush. Use sharp, clean bypass secateurs or loppers. Never prune in late summer or winter. Remove up to one third of growth at each pruning. Always sterilise your tools between plants to prevent spreading leaf spot disease.
This page contains affiliate links for products I use and recommend. If you make a purchase after clicking a link, I may earn a small commission, which helps keep the Garden Ninja blog free for all.
About Photinia Red Robin
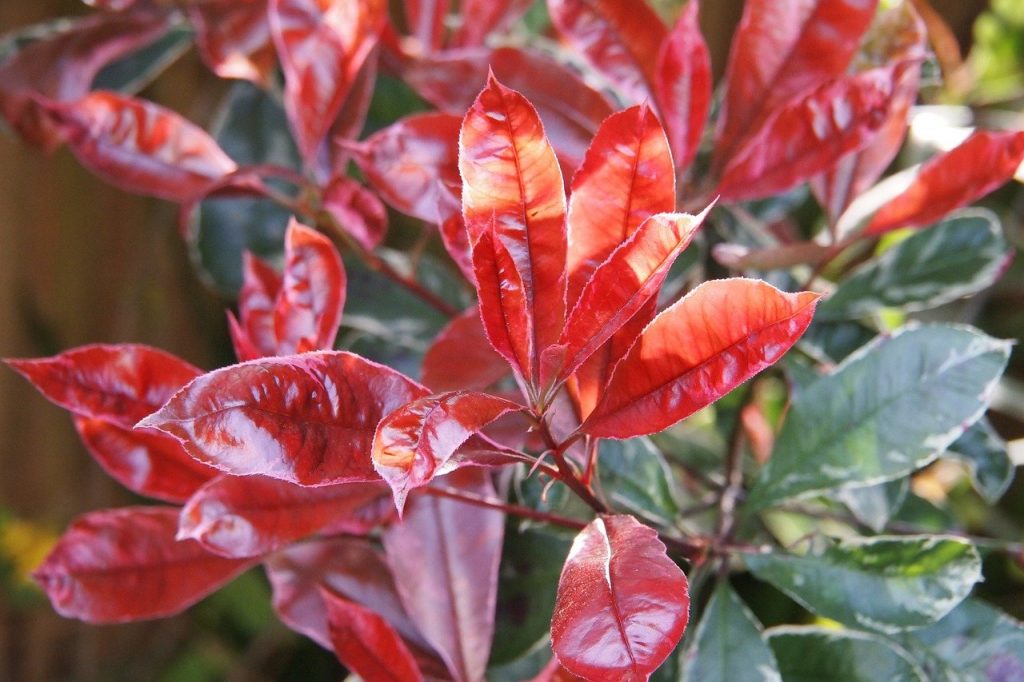
Photinia x fraseri ‘Red Robin’ is a hybrid evergreen shrub that belongs to the rose family (Rosaceae). It is a cross between Photinia glabra and Photinia serratifolia, bred specifically for its vivid red new growth and its tolerance of the temperate UK climate. The name Red Robin refers to this characteristic: when new shoots emerge, they are a deep, glossy scarlet that gradually matures to dark green over several weeks.
In the right conditions, photinia is vigorous, relatively fast-growing and very long-lived. It tolerates most soils as long as drainage is good, and will grow in partial shade, though it produces its best red colouring in full sun. The one condition it dislikes is exposure to cold, drying winds. Photinia in an exposed position tends to look patchy and stressed, and is far more susceptible to disease. Sheltered spots, ideally backed by a fence or wall, are where it truly thrives.
Why pruning photinia matters
There is a tempting logic that says an evergreen shrub that looks healthy does not need pruning. With photinia, this logic fails for several reasons, and understanding why will help you approach pruning with real purpose rather than just tidying the edges.
First, the red colouring. The vivid scarlet that makes photinia so desirable only appears on fresh new growth. Once a shoot matures and its leaves turn dark green, the colour remains until new growth appears.
Pruning is the trigger that produces new shoots and new red growth. A photinia that is never pruned will still produce some red growth at the tips, but it will be sparse, high up, and increasingly lacklustre as the plant matures and channels energy into its established woody framework.
Second, shape and density. Left unpruned, photinia naturally becomes leggy, tall and open at the base, with most of the foliage concentrated at the top. This is particularly frustrating when it is being used as a privacy hedge. Pruning encourages lateral branching from lower on the stems, building the dense, bushy framework that makes photinia such an effective screen.
Third, disease prevention. Photinia leaf spot (caused by the fungal pathogen Diplocarpon mespili) thrives in humid, congested canopies where air circulation is poor. Regular pruning opens up the centre of the plant, improves airflow, allows sunlight to penetrate, and dramatically reduces the conditions that allow leaf spot to take hold. Pruning is one of the most effective preventive measures against the most common photinia disease.
When to prune photinia in the UK
Timing is the most important variable in photinia pruning, and it is where most gardeners go wrong. There are two productive windows and several periods to avoid entirely.
Main pruning: March to April
The most important pruning of the year happens in early spring, from mid-March to mid-April in most parts of the UK. Prune as temperatures rise and the plant gears up for its spring growth surge. Cutting now triggers a vigorous flush of new shoots, and new red colouring, and gives the plant the entire growing season to recover and establish before winter.
Wait until you can see the first hints of new growth beginning to swell on the stem tips before making your cuts, rather than following the calendar mechanically. In a cold spring, late March may still be too early; in a mild year, you might start in early March.
Second pruning: June
A lighter second pruning in June, once the spring flush of red growth has matured to green, encourages a second wave of new red shoots and keeps the plant tidy through summer. This is the cut that many gardeners skip, and it is the one that separates a photinia with two seasons of colour from one with only one. Keep this pruning light. No more than trimming back the current season’s growth by a third, as heavy cutting in June removes too much leafy material during the plant’s peak growing period.
When not to prune
⚠️ Avoid These Pruning Times
Late summer (August onwards): Pruning now triggers new soft growth that will not have time to harden off before the first frosts. This tender growth is highly vulnerable to frost damage, which can cause dieback and disfigure the plant through winter.
Winter: Photinia is not fully dormant in winter as a deciduous shrub would be, and cold temperatures make fresh pruning wounds slow to heal and vulnerable to frost entry. Avoid any pruning from November through to late February.
During wet weather: Pruning in persistently damp conditions significantly increases the risk of fungal disease entering through fresh cuts. Always prune on a dry day and allow cuts to dry before rain returns if possible.
📅 Photinia Pruning Calendar
Month
What to do
January to February
Do nothing. Too cold; wounds heal slowly.
March to April ✅
Main pruning. Remove up to a third of growth. Shape and open up the canopy.
May
Enjoy the red growth. No pruning needed.
June ✅
Light trim to encourage second flush of red. Tidy and shape only.
Light tidying only if really needed. No heavy cuts.
August to October
Avoid pruning. New growth will not harden before frost.
November to December
Do nothing. Dormant period, risk of frost damage to cuts.
Tools for pruning photinia
The right tools make a significant difference to both the quality of the pruning cuts and the plant’s health. Ragged, crushed cuts made with blunt or wrong-type tools heal slowly, create irregular wound surfaces, and are far more susceptible to fungal disease entry. Sharp, clean cuts with appropriate tools heal quickly and leave the plant in the best possible condition.
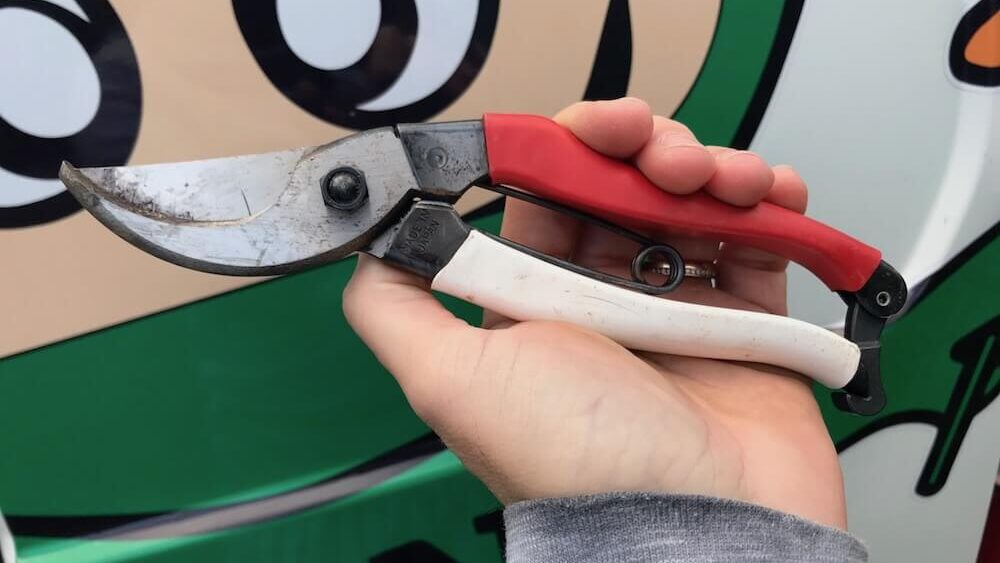
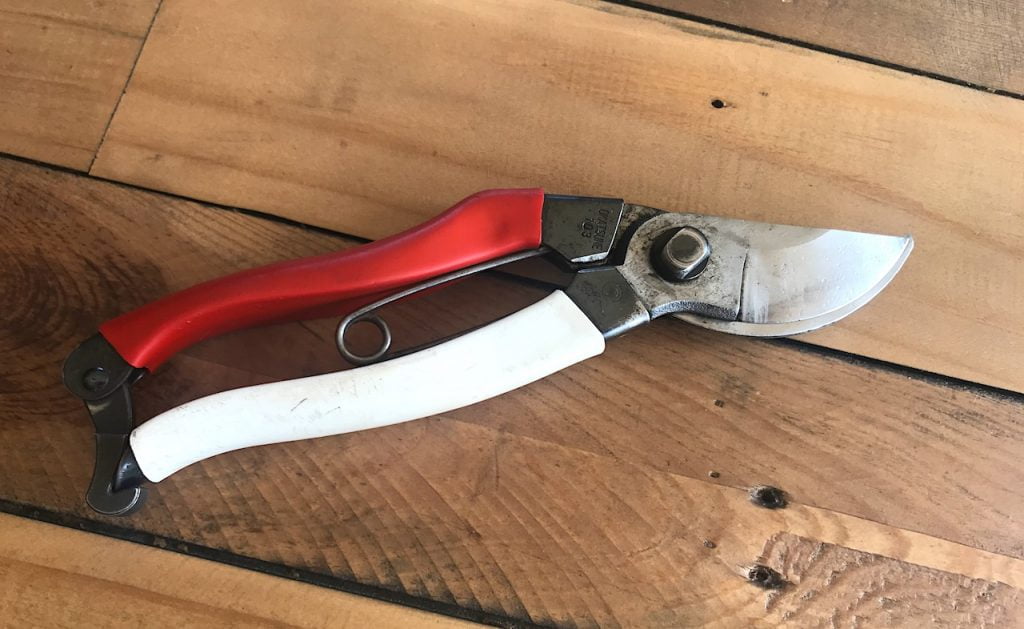
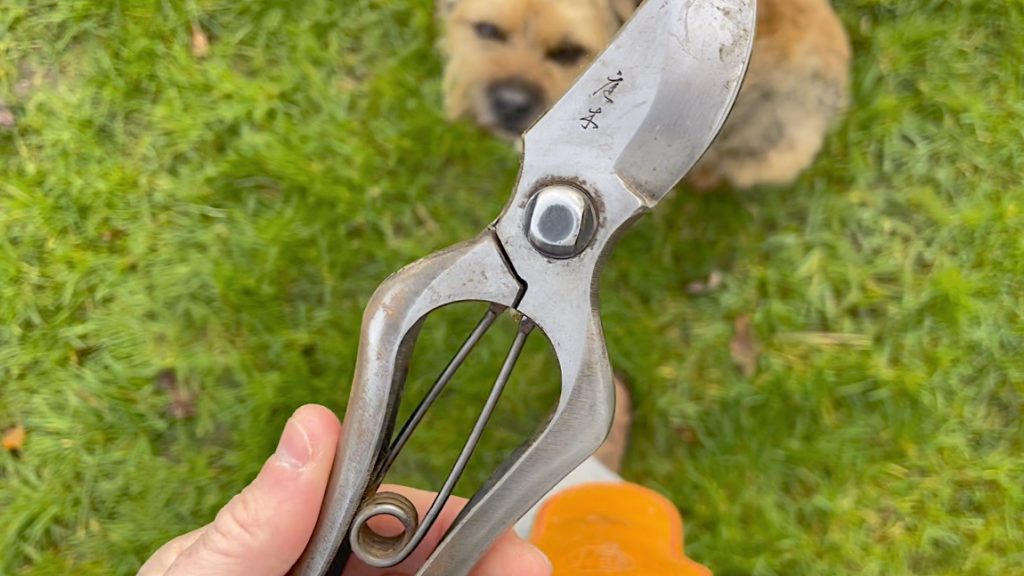
Bypass secateurs
Bypass secateurs are your primary tool for photinia pruning. Unlike anvil secateurs, which crush the stem between a blade and a flat anvil, bypass secateurs cut with a scissor action, producing a clean, precise cut with minimal cell damage.
For stems up to about 15mm in diameter, bypass secateurs should handle everything on a photinia. I use Felco or Niwaki secateurs in my own practice, and both hold their edge well and are worth the investment for the life of the tool.
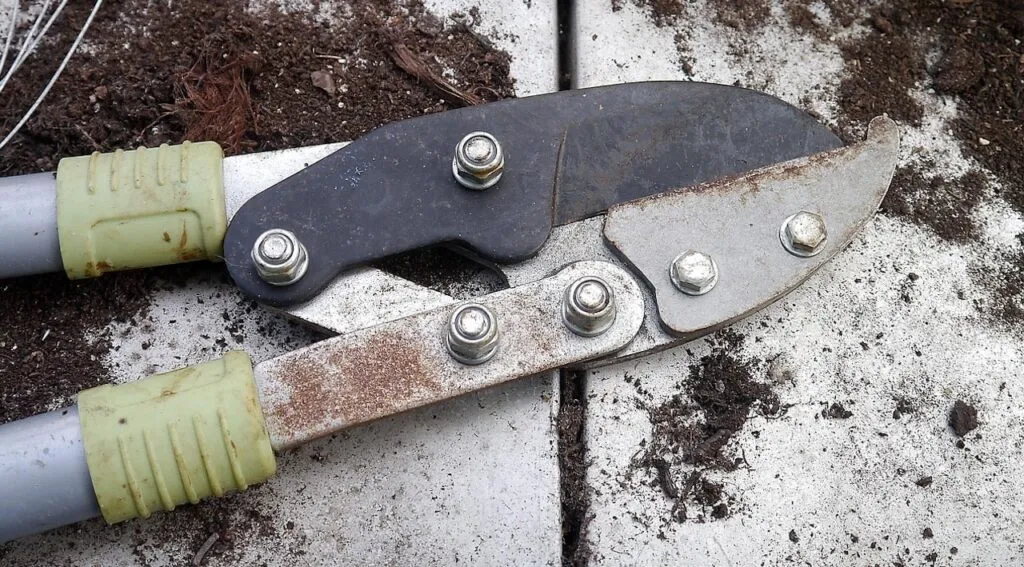
For stems between 15mm and 35mm, which you encounter when opening up a congested photinia or doing renovation work, bypass loppers give you the reach and leverage for a clean cut without straining. Long-handled loppers also let you get into the centre of the shrub safely without stretching awkwardly. As with secateurs, bypass loppers are preferable to anvil types for the same reason: cleaner cuts with less stem crushing.
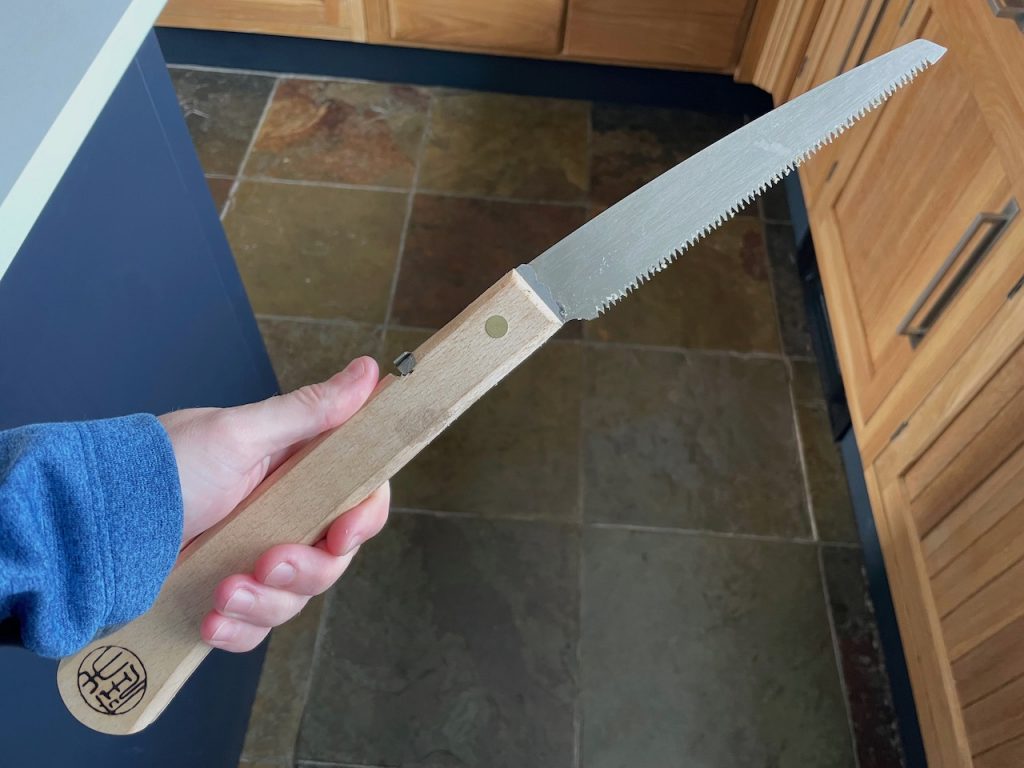
For any stems thicker than 35mm, or where you need to remove an entire old main stem during renovation, a folding pruning saw is the right tool. Do not try to force loppers through thick wood, as you will make a ragged cut and risk damaging the tool. A sharp pruning saw cuts quickly and cleanly and is far safer than attempting to use secateurs beyond their capacity.
This is the tool most gardeners forget, and with photinia, it is highly advisable to avoid the many red robin issues that can arise from using unclean tools.
Photinia leaf spot spreads via pruning tools, and if you are cutting across multiple plants or returning to the same plant after touching infected material, you will spread the fungal spores with each subsequent cut.
Wipe your blades with a sterilising solution between plants and whenever you move from diseased material to healthy stems. A dilute bleach solution (1 part bleach to 9 parts water), methylated spirits, or a proprietary tool steriliser all work. Keep it in a small jar in your pocket while you work.
Here is the process I follow for the spring pruning of a photinia grown as a freestanding shrub. The approach is the same for hedge-grown plants, with some adjustments covered in the next section.
Step 1: Assess before you cut
Stand back and look at the whole plant before you pick up the secateurs. Identify any obviously dead, damaged or diseased stems. These come out first regardless of the overall shape. Then consider where the plant is too dense in the centre (restricting airflow), where it has become leggy (long bare stems with growth only at the tips), and what overall shape you want to achieve. Five minutes of assessment before cutting saves mistakes that take years to grow out.
Step 2: Remove the three Ds first
Start with dead, damaged and diseased material, what I call the three Ds of pruning. Cut any dead stems back to healthy wood, and remove crossing or rubbing branches that cause wounds. If you spot any stems with leaf spot, cut them back to healthy tissue and remove the cuttings from the garden entirely.
Never compost diseased photinia prunings. Bag them for garden waste collection or burn them. The fungal spores survive composting, and you risk spreading the disease back onto your plants.
Step 3: Open up the canopy
Remove some stems from the interior of the plant to improve airflow and light penetration. You are not trying to hollow out the plant, but to give the canopy more breathing room. Cut selected stems back to a main branch or to ground level rather than just tipping them. A stem cut back hard will regenerate vigorously, whereas a tipped stem will simply produce a bushy cluster at the same point.
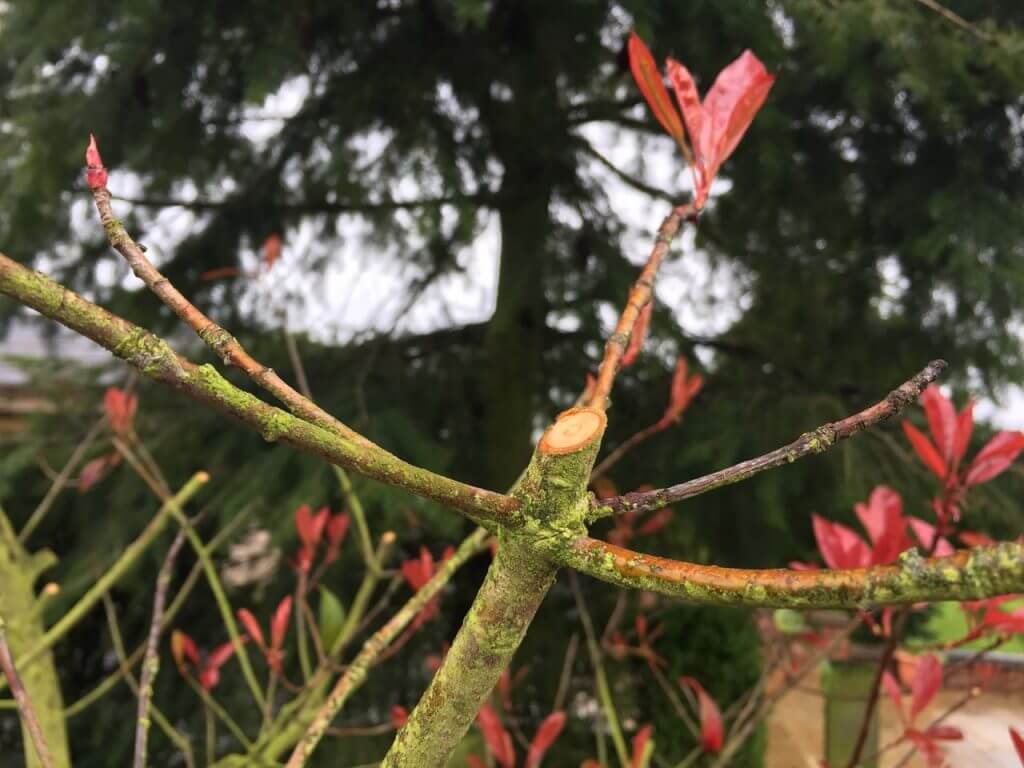
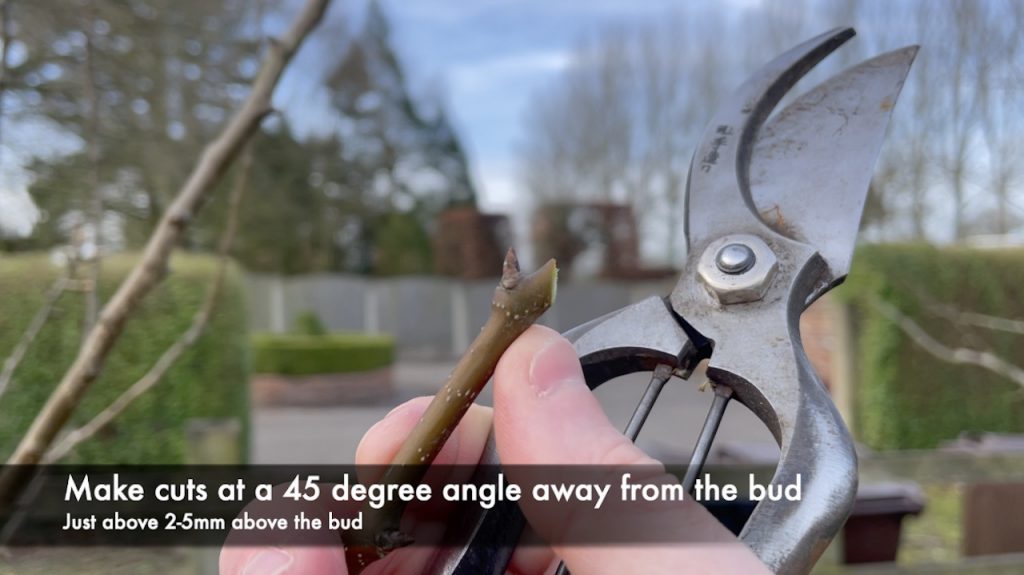
Step 4: Shape and reduce
Now address the overall shape and size. Cut back the remaining stems by up to one-third, always cutting just above an outward-facing bud at a 45-degree angle sloping away from the bud. This angle matters: it allows water to run off the cut surface rather than pooling, reducing the risk of disease.
The bud below your cut will grow in the direction it points, so choosing outward-facing buds creates an open, outward-growing shape rather than an increasingly congested one.
Step 5: Clear up thoroughly
Collect all prunings and remove them from the garden. Do not leave cut material lying under or around the plant, as fallen leaves and prunings are a reservoir of leaf spot spores and other fungal diseases. A clean bed around the base of the plant, with fresh mulch of bark or peat-free compost applied after pruning, improves both the plant’s aesthetics and growing conditions.
Pruning photinia as a hedge
Photinia makes a spectacular formal hedge when well managed, with its red new growth creating a visual effect unlike that of almost any other hedging plant. The pruning approach for a hedge differs from that for a freestanding shrub mainly in tool choice and shaping objective.
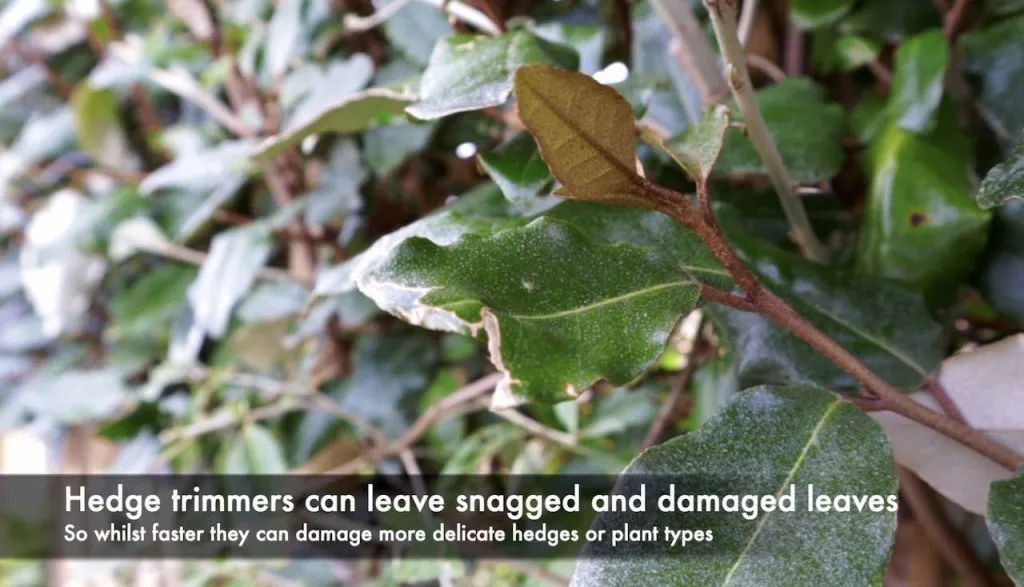
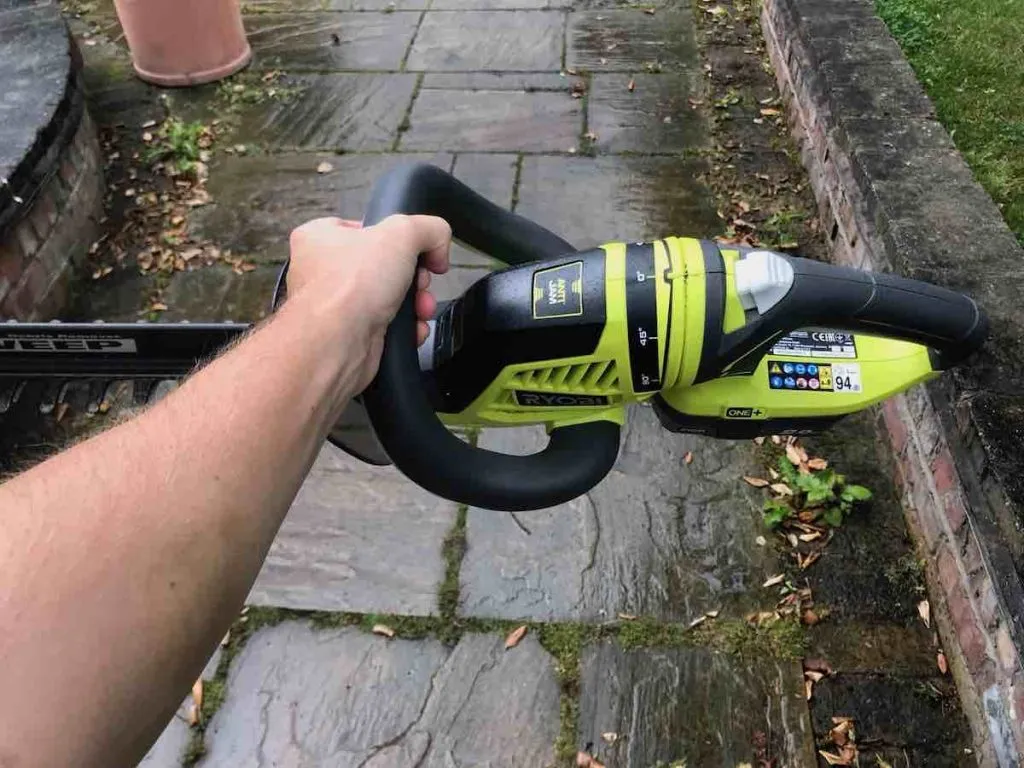
I strongly advise against using power hedge trimmers on photinia. Trimmers rip rather than cut, leaving torn leaf edges that turn brown and look unsightly for months, and those ragged edges are prime entry points for fungal disease.
The difference between a photinia hedge pruned with sharp secateurs and one sheared with electric hedge trimmers is immediately visible. One looks polished and healthy, the other looks butchered. Use secateurs for the pruning cuts themselves and shears only for the very lightest final tidying if needed.
When shaping a photinia hedge, aim for a very slight taper, wider at the base than at the top. This is not about aesthetics but about physics: a hedge that is wider at the top than the base shades its own lower stems, causing them to thin out and leave bare patches at eye level. A gently battered profile (wider at base, narrower at top) allows light to reach the full height of the hedge and maintains dense growth from ground level upward.
💡 Top Tip
If you want flowers as well as red growth on a photinia hedge, prune only around 50% of the stems in spring. The stems you leave will go on to produce the creamy white flower clusters in May to June. The pruned stems will produce the red growth. You get the best of both, though in reality, for most gardeners who are growing photinia primarily for its colour and screening value, maximising red growth by pruning all stems is the better approach.
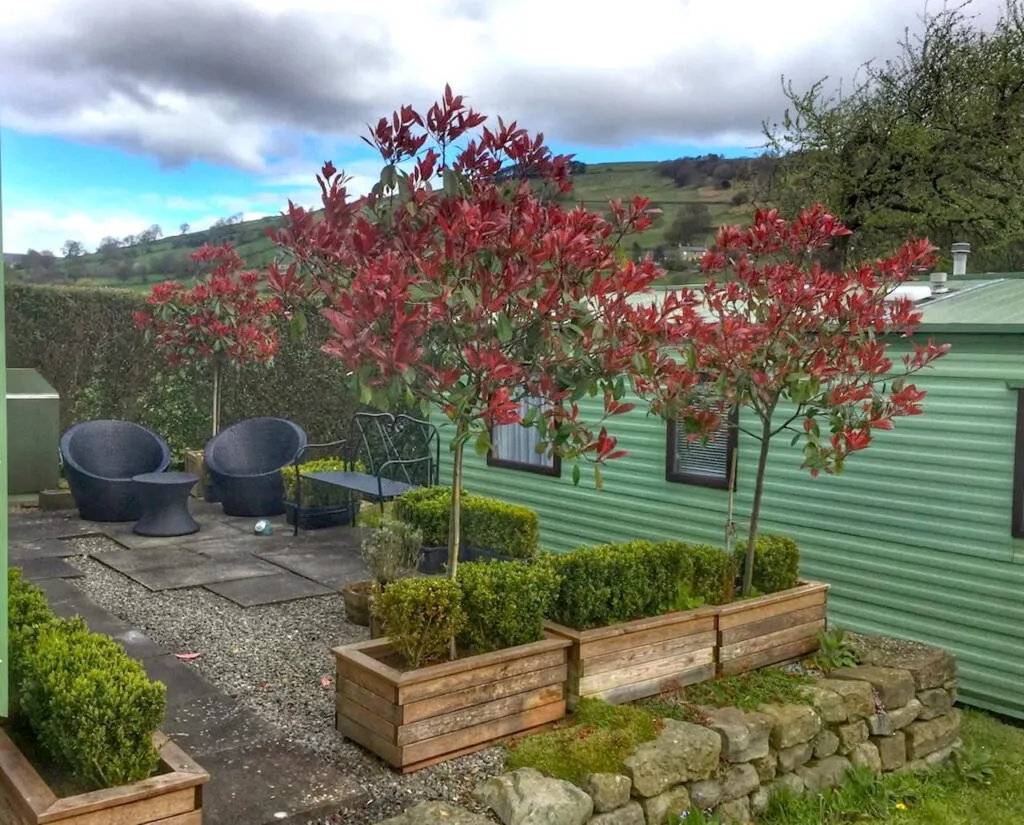
When to prune pleached photinias
Pleached photinias have become increasingly popular in UK gardens as a way of creating a raised, structured screen above fence height, delivering privacy without the weight and bulk of a full hedge at ground level.
I have used pleached photinias in a number of client projects, and they are striking when well-maintained. The challenge is that the pruning approach differs enough from that of a standard photinia hedge or freestanding shrub to warrant addressing separately.
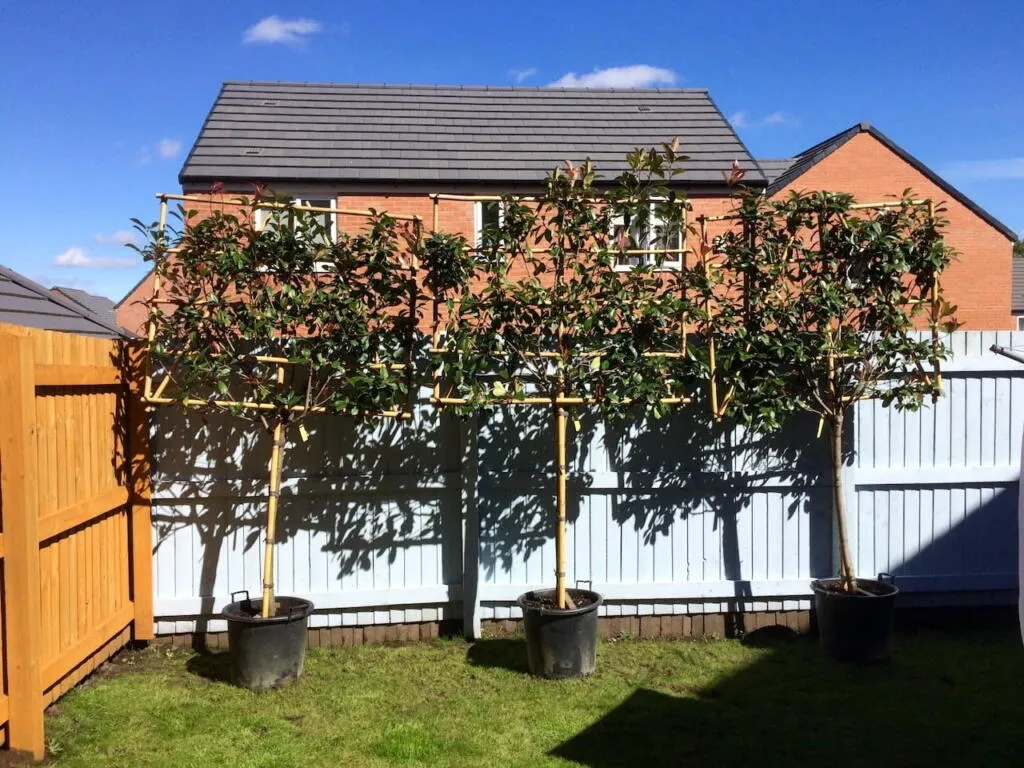
A pleached photinia consists of a clear stem, usually between 1.5m and 2m of trunk, with a flat, trained canopy above it. The canopy is typically tied into a framework of horizontal wires or bamboo canes and kept to a defined rectangular shape.
The goal when pruning is always to maintain that flat, clean framework while encouraging the red new growth that makes pleached photinias so visually effective. Any growth that breaks out of the plane of the canopy needs to be removed promptly, and any suckers or shoots from the clear trunk section should come off as soon as they appear.
Timing for pleached photinias
The timing principles are the same as for a standard photinia: prune in March to April for the main cut, and again lightly in June to encourage a second flush of red. However, with pleached specimens, the June pruning is arguably more important than it is for a hedge, because the flat canopy creates exactly the kind of dense, airless conditions that favour leaf spot. Keeping the framework open and airy is a higher priority with pleached forms, and the June cut helps maintain that airflow through the centre of the canopy.
Avoid pruning pleached photinias in late summer and winter for the same reasons that apply to standard forms. Soft late-season growth on a pleached specimen is particularly exposed to frost damage because the canopy sits in an elevated, more open position with less shelter than a ground-level hedge.
How to prune a pleached photinia canopy
Work methodically across the flat face of the canopy, cutting back the current season’s growth to two or three buds from the main lateral framework. This is finer, more precise work than pruning a hedge, and bypass secateurs, rather than any kind of trimmer, are the only appropriate tools.
Tie in any vigorous laterals that are growing in the right direction before cutting. Any growth you can train into the framework rather than remove is growth that thickens the screen over time.
On the sides and top of the canopy, cut back firmly to maintain the defined outline. On the rear face (if accessible), thin out congested growth in the same way as you would open up the centre of a freestanding shrub. The interior of a pleached canopy can become very dense over time, and if light cannot reach the base of the trained framework, the oldest stems will gradually die back, leaving gaps that are difficult to fill.
💡 Top Tip
Check the ties attaching your pleached photinia framework to its support posts every spring before pruning. Ties left in place for more than a season can cut into the bark as the stems thicken, creating wounds that become entry points for disease. Replace any ties that are tight or have started to embed, and adjust the framework wires if the horizontal canes or battens have shifted. A five-minute check before you start pruning saves significant problems later.
A word of caution on pleached photinias
I want to be honest about pleached photinias, because they are often sold as a low-maintenance screening solution, and the reality is somewhat different. In my experience, photinia works considerably better as a sheltered shrub or ground-level hedge than as a pleached tree. The elevated position exposes the canopy to more wind and weather than Photinia naturally likes; the clear stem means any leaf drop or disease in the canopy is immediately visible, and the maintenance commitment is higher than for most other pleached species.
If you are planning a pleached screen and you want something lower-maintenance, consider hornbeam (Carpinus betulus) or lime (Tilia) instead. Both are far better suited to the pleached form than Photinia. If you already have pleached photinias and they are performing well in a sheltered position, the pruning guidance above will keep them looking their best. If they are struggling in an exposed spot, no amount of pruning will overcome that fundamental siting problem.
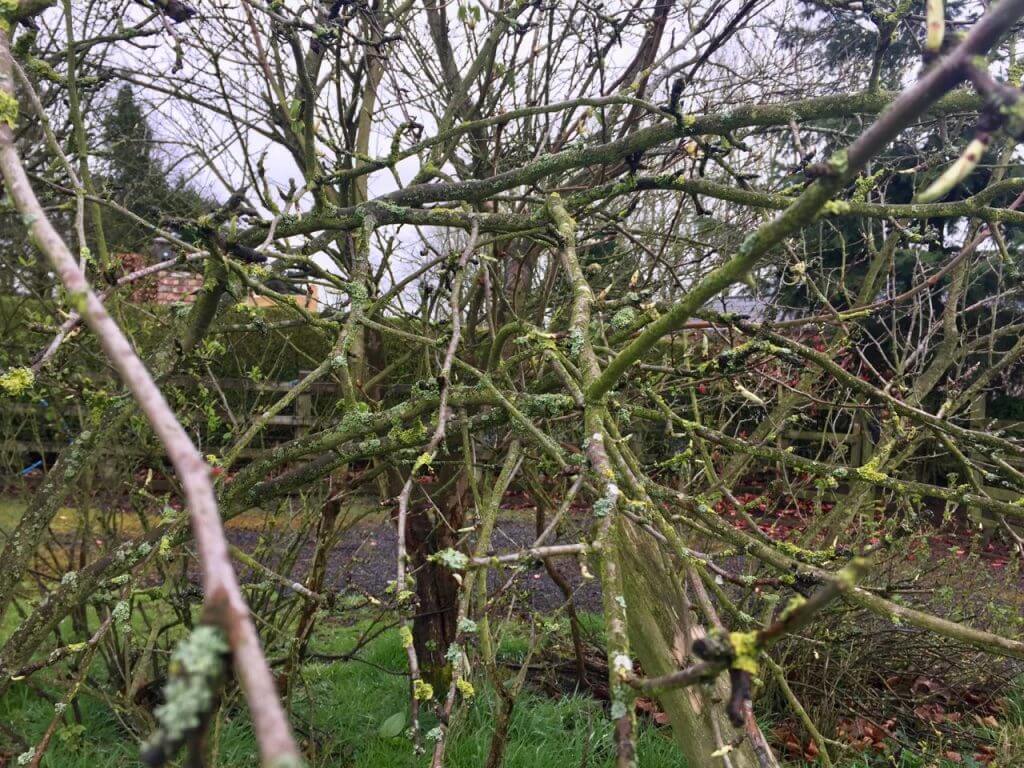
Renovation pruning an overgrown photinia
Photinia responds well to hard renovation pruning, which is one of its great strengths as a shrub. Even a large, leggy, neglected specimen can be brought back to a compact and healthy shape, though the process works best when spread across two seasons rather than attempted all at once.
The reason for spreading renovation over two years is to avoid removing too much of the plant’s leafy material in a single cut. Photinia manufactures its food through photosynthesis in the leaves, and removing more than half the leaf mass at once can cause serious stress and, in weakened or diseased specimens, death. The rule I follow is: never remove more than half the plant in a single pruning, and for older established plants, restrict each year’s renovation cut to around a third of the overall volume.
In the first spring, cut back one side of the plant hard, removing old, congested stems right back to the main framework or to ground level. Feed with a balanced fertiliser after pruning and water well during dry spells through the first season. By the following spring the hard-pruned side will have produced vigorous new growth. Now cut back the other side in the same way. Within two seasons you will have a completely renovated plant without the risk of killing it outright.
If you have an extremely overgrown photinia that you want to reduce dramatically in height, the best time to do this is May rather than spring. Hard cutting in mid-May, rather than the standard March to April window, gives the plant slightly more warmth in the soil before the shock of significant reduction, and the long growing season ahead gives it the best possible chance of recovery. Always feed generously after any hard renovation or pruning.
How to maximise red growth on photinia
The red colouring is the whole point of growing photinia, and there are several things you can do beyond timing your pruning correctly to get the most vibrant and long-lasting colour.
Position matters enormously. Photinia in full sun produces significantly more vivid red colouring than the same plant in partial shade. In a shaded position, the leaves still turn red, but the colour is less saturated and fades more quickly to green. If your photinia is underperforming in colour, the first question to ask is whether it is getting enough direct sun.
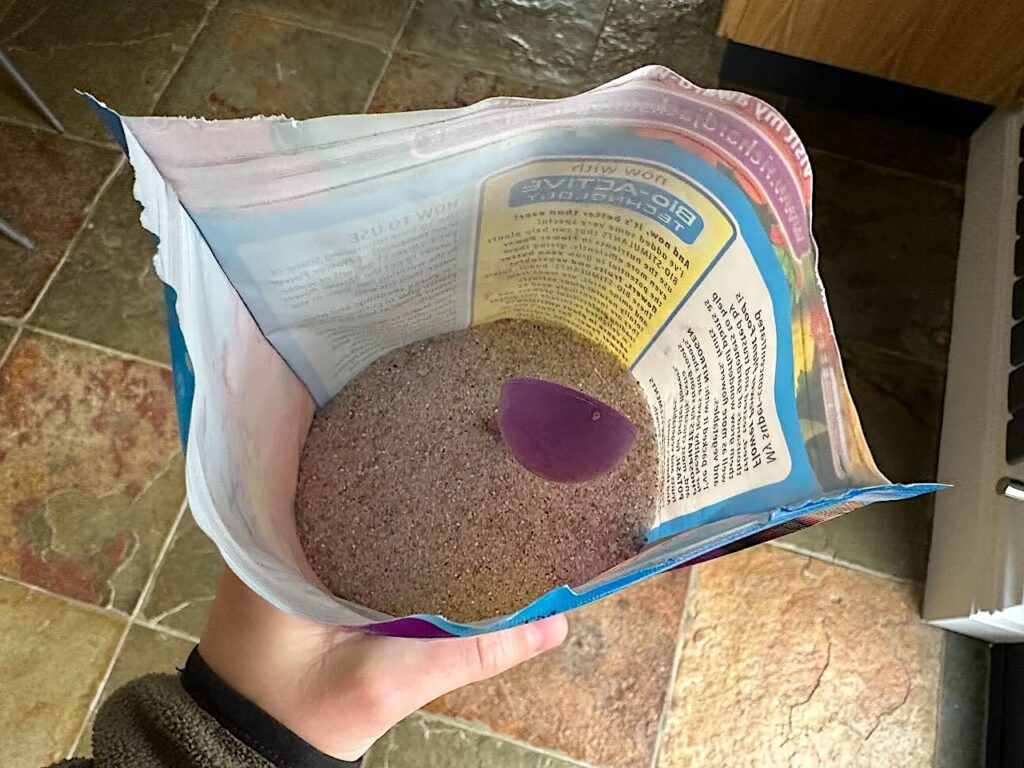
Feeding in spring directly impacts the quality of new growth. Apply a balanced granular fertiliser around the base of the plant in March, just before you prune, and this nutrients boost will support the flush of new red shoots that follows.
A second application of a high-potassium liquid feed in early summer, around the time of the June pruning, supports hardening of the new growth and improves disease resistance. Do not overfeed with high-nitrogen fertilisers, which encourage lots of soft, sappy growth that is more susceptible to disease and frost damage.
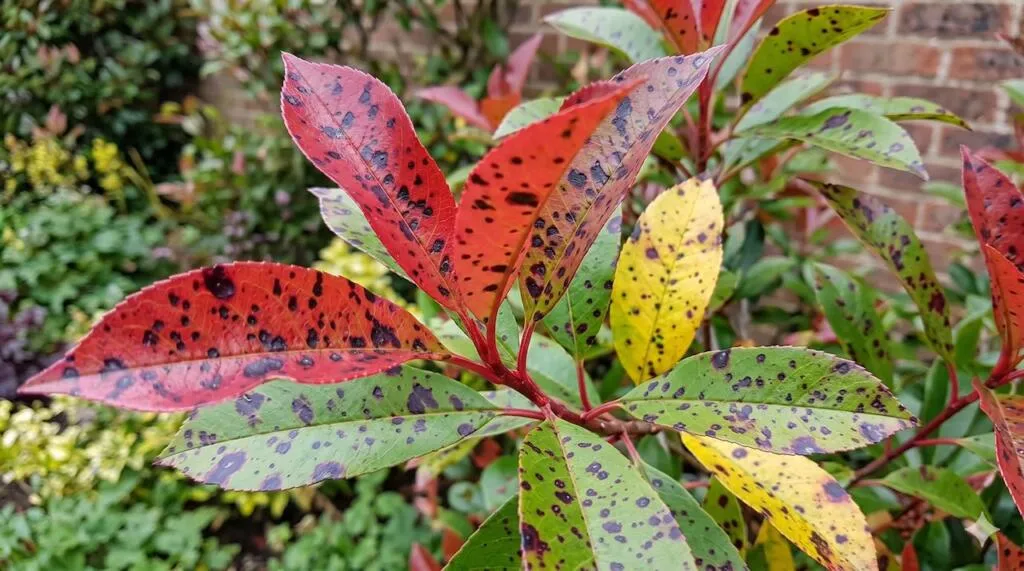
Photinia leaf spot is the most common problem you will encounter with this shrub and, in my experience answering questions on the forum, the one that causes the most anxiety. The good news is that it very rarely kills the plant. The bad news is that it is persistent and needs a combined approach of cultural management and careful pruning to bring it under control.
Leaf spot appears as dark brown or black spots on the leaves, often with a yellow halo. As the disease progresses, the spots coalesce, the leaf yellows entirely and drops. In severe cases, you can lose significant amounts of foliage. The fungal pathogen responsible (Diplocarpon mespili) is spread by water splash and on contaminated tools, and it thrives in humid, airless conditions.
This is why a congested, unpruned photinia in a damp, shaded position will almost always have leaf spot, while a well-pruned plant in a sunny, sheltered spot often shrugs it off entirely.
How to manage leaf spot
The cultural approach is almost always more effective than reaching for a fungicide. Begin by removing all affected leaves and stems, cutting back to healthy growth. Remove and dispose of all fallen leaves from around the base of the plant. Never compost this material. Improve airflow by opening up the canopy as described in the pruning steps above. If the plant is in a damp, shaded position, consider whether it can be moved or whether surrounding plants can be reduced to improve light and air movement.
For severe infestations, a copper-based fungicide such as Bordeaux mixture, applied according to the label and repeated at two-week intervals during the growing season, can help reduce fungal pressure. However, fungicides alone without the cultural improvements above will not solve the problem. They treat the symptom rather than the cause.
💡 Top Tip
Newly planted photinias often get leaf spot in their first year or two, even in ideal conditions. Transplant stress weakens the plant’s natural defences. Do not panic and do not immediately reach for chemicals. Give the plant a season to establish, improve drainage and soil condition if needed, make sure it is in a sunny and sheltered spot, and keep on top of removing affected leaves. Most photinias grow through early leaf spot problems as they establish and strengthen.
Common photinia pruning mistakes
These are the mistakes I see most often, both in gardens I visit professionally and in questions on the Garden Ninja forum.
Using electric hedge trimmers
As covered above, hedge trimmers tear rather than cut photinia stems and leaves, leaving brown, ragged edges that look unsightly and invite disease. Always use sharp secateurs for photinia pruning.
Pruning in late summer or autumn
Autumn pruning triggers new soft growth that will be killed by the first frost. This weakens the plant and can lead to significant dieback of previously healthy stems. Resist the urge to tidy your photinia in September or October.
Never pruning at all
An unpruned photinia becomes leggy, loses its lower growth, produces far less red colouring, and is significantly more susceptible to leaf spot. Pruning once or twice a year is a commitment the plant needs.
Pruning too hard, all at once
Removing more than half the plant’s leafy material in a single session risks seriously stressing the plant. Spread renovation work over two seasons, and never remove more than a third of the plant in any single pruning event to keep the specimen healthy.
Not sterilising tools
Leaf spot spreads on secateur blades. If you move from a diseased plant to a healthy one without sterilising, you are doing the fungus a favour. Keep a sterilising solution with you and use it between every plant.
Planting in an exposed position
This is not a pruning mistake, but it is the root cause of many pruning challenges. Photinia in an exposed, windy position will look thin and stressed regardless of how carefully you prune it. If your photinia is in the wrong spot, no amount of pruning will compensate.
Photinia questions from the Garden Ninja forum
Over the years, I have answered many photinia questions on the Garden Ninja forum. Here are some of the most useful threads for specific photinia problems.
💬 Forum Threads on Photinia
Photinia black spot problem and treatments A member’s Red Robin developing black spots while in a pot, with my response on identifying leaf spot disease caused by Diplocarpon mespili and what to do about it.
What tree to screen neighbours? My honest view on photinia as a screening plant, why it is better as a sheltered shrub than an exposed screening tree, and what to consider instead.
If you have a photinia question that is not covered here, post it in the Garden Ninja forum and I will do my best to help.
Photinia pruning FAQ
Can I prune photinia in autumn?
No. Pruning in autumn triggers new soft growth that will not have time to harden off before the first frosts. This soft growth is easily frost-killed and can lead to significant dieback. Autumn is also a wetter, damper time of year when fungal disease spreads more readily through fresh pruning wounds. Stick to March to April and June as your two pruning windows.
How much can I cut back photinia?
In a standard annual pruning, remove up to one third of the plant’s growth. For renovation of a neglected or overgrown specimen, spread the work over two seasons: remove half the plant hard in year one and the remainder in year two. Photinia can tolerate significant reduction but does not recover as reliably from losing more than half its leafy material in one go as some other shrubs do.
Why is my photinia not producing red leaves?
There are several possible causes. The most common are insufficient pruning (the red colour only appears on new growth), too much shade (photinia produces its best colour in full sun), or the plant being too stressed by disease or poor growing conditions to put energy into vigorous new growth. Try a proper spring pruning, feed with a balanced fertiliser, and check the position. If it is in deep shade or a very exposed, windy spot, those issues will need to be addressed before you see a significant improvement.
Should I use a hedge trimmer on photinia?
I would strongly advise against it. Hedge trimmers produce ragged, torn cuts on photinia’s relatively large leaves, leaving brown edges that look unsightly and create entry points for fungal disease. Use bypass secateurs for all pruning cuts on photinia. It takes longer, but the difference in the plant’s appearance and health is significant.
How fast does photinia grow?
In good conditions, photinia grows around 30-45cm per year. It is fairly vigorous once established, which is why annual pruning is important for keeping it within bounds. In its first year or two after planting, while it is establishing its root system, growth may be slower. Do not be alarmed if a newly planted photinia shows relatively little growth in its first season.
Is photinia poisonous?
The Dogs Trust does not list photinia as toxic to dogs. There are indications that it may cause problems for grazing animals such as horses and cattle, but for typical domestic pets and humans in a garden setting it is not considered a significant risk. If you have concerns about specific animals, check with your vet for the most current guidance.
Take Your Plant Knowledge Further
If you’ve caught the gardening bug and want to learn more about plants, design principles, and creating beautiful spaces check out my online garden design courses. Whether you want to level up your plant knowledge, learn about design principles, or even start a career in garden design, I’ve got courses ranging from £29 to £199 that cover everything you need.
These courses aren’t just for people with gardens either! The principles of understanding plant needs, creating harmonious colour schemes, and designing beautiful, functional spaces apply just as much to indoor plant arrangements as to full garden designs. You’ll learn how to read plants, troubleshoot problems, and create spaces that genuinely work for your lifestyle.
29
Garden Design Examples for Small Gardens: 30 Design Templates & Planting Plans
Garden Design Examples for Small Gardens: 30 Design Templates & Planting Plans: In this online gardening course, I’ll walk you through 30 fantastic garden designs, explaining the logic behind the layout, the plant choices, and take-home tips for applying them in your own garden.
Weekend Garden Makeover: A Crash Course in Design for Beginners
Learn how to transform and design your own garden with Lee Burkhills crash course in garden design. Over 5 hours Lee will teach you how to design your own dream garden. Featuring practical design examples, planting ideas and video guides. Learn how to design your garden in one weekend!
Garden Design for Beginners: Create Your Dream Garden in Just 4 Weeks
Garden Design for Beginners Online Course: If you want to make the career jump to becoming a garden designer or to learn how to design your own garden, this is the beginner course for you. Join me, Lee Burkhill, an award-winning garden designer, as I train you in the art of beautiful garden design.
Photinia Red Robin is a forgiving and rewarding shrub when pruned at the right time with the right tools. Prune in March to April for your main cut, and again lightly in June to encourage a second flush of red. Use sharp bypass secateurs, not hedge trimmers. Sterilise your tools between plants. Remove up to a third of the plant each time, and spread any renovation work over two seasons. Keep on top of leaf spot by improving airflow and promptly removing affected material.
Your subscription could not be saved. Please try again.
Your subscription has been successful.
Lee Burkhill
Lee Burkhill, known as the Garden Ninja, is an award-winning garden designer and horticulturist with over 30 years of gardening experience and 15 years as a professional garden designer. A qualified RHS (Royal Horticultural Society) professional, Lee specialises in sustainable garden design and practical horticultural advice. He designs and presents on BBC1’s Garden Rescue and in leading gardening publications. Lee combines three decades of hands-on gardening knowledge with professional design qualifications to help gardeners create beautiful, functional outdoor spaces.