Why Is My Photinia Going Brown? Complete UK Diagnosis Guide
Lee Burkhill: Award Winning Designer & BBC 1's Garden Rescue Presenters Official Blog
Beginner level
Whilst Photinia are nearly always listed as the easiest evergreen shrub for beginner gardeners or new build gardens, they often end up suffering from brown leaves. I'm going to explain why choosing the right site and conditions can prevent this, and how to treat red robins whose leaves suddenly turn brown!
Quick Answer
Photinia red robin goes brown most commonly from photinia leaf spot, a fungal disease that produces dark spots with a purplish halo, or from frost damage to the vulnerable new red growth. Other causes include drought stress, waterlogging, wind scorch, and over-pruning. Identify the pattern of browning before treating: spotty and spreading means disease, whole-leaf browning usually means weather or watering issues.
If your Photinia red robin has brown leaves, you are not alone. It is one of the questions I am asked most often in my forum, and it comes up regularly on my Garden Rescue appearances too. Brown patches on an otherwise glossy evergreen shrub are alarming, and the frustrating thing is that several completely different problems can look almost identical at first glance. Whilst it’s a good-value, high-impact shrub, it’s actually quite temperamental if it’s planted in the wrong spot and can quickly look messy.
The good news is that Photinia is a tough, resilient plant. In the vast majority of cases I see, the issues are entirely fixable once you know what the problem is, usually the location! In over 20 years of designing gardens across the UK, I have planted hundreds of photinias and diagnosed most of the problems they can encounter. This guide walks through every cause of browning I have come across, how to tell them apart, and exactly what to do about each one.
What is Photinia red robin, and why does it go brown?
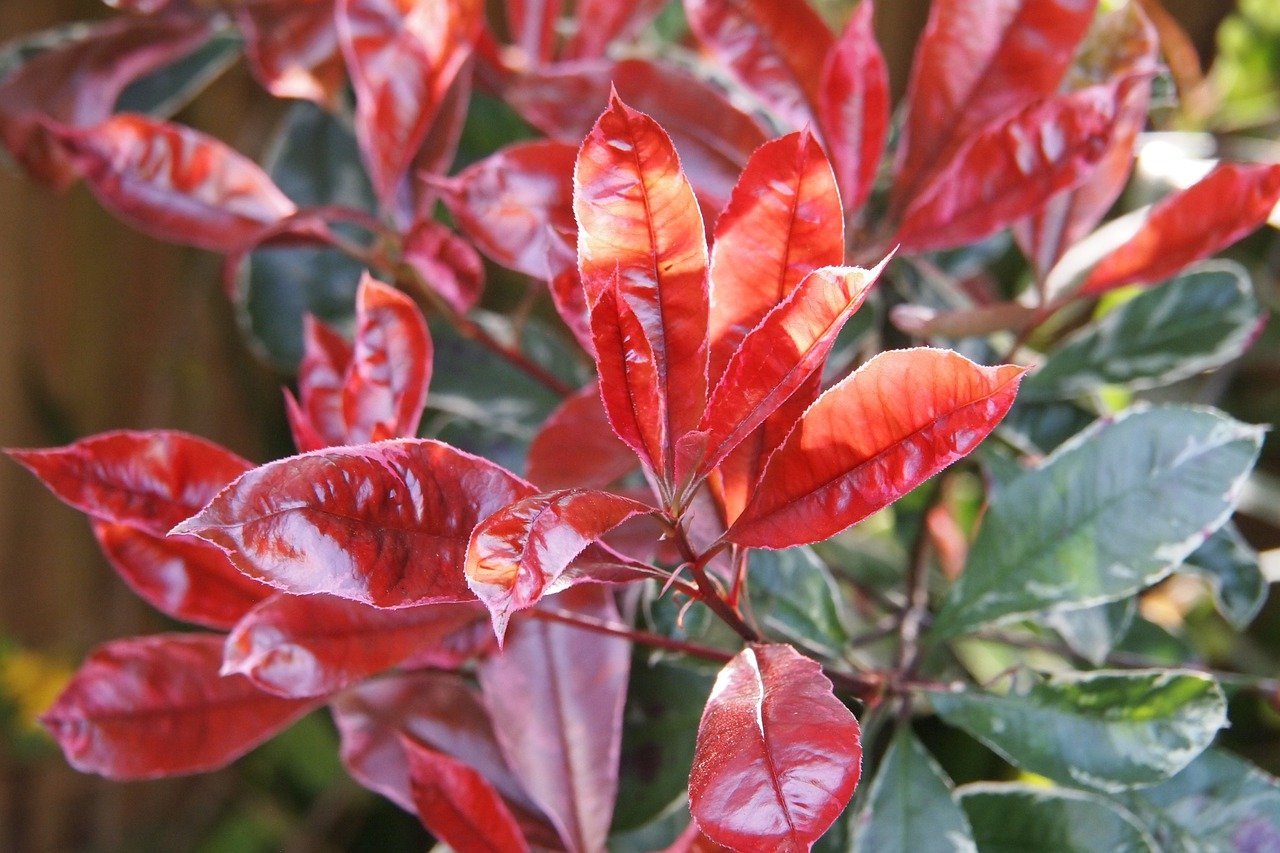
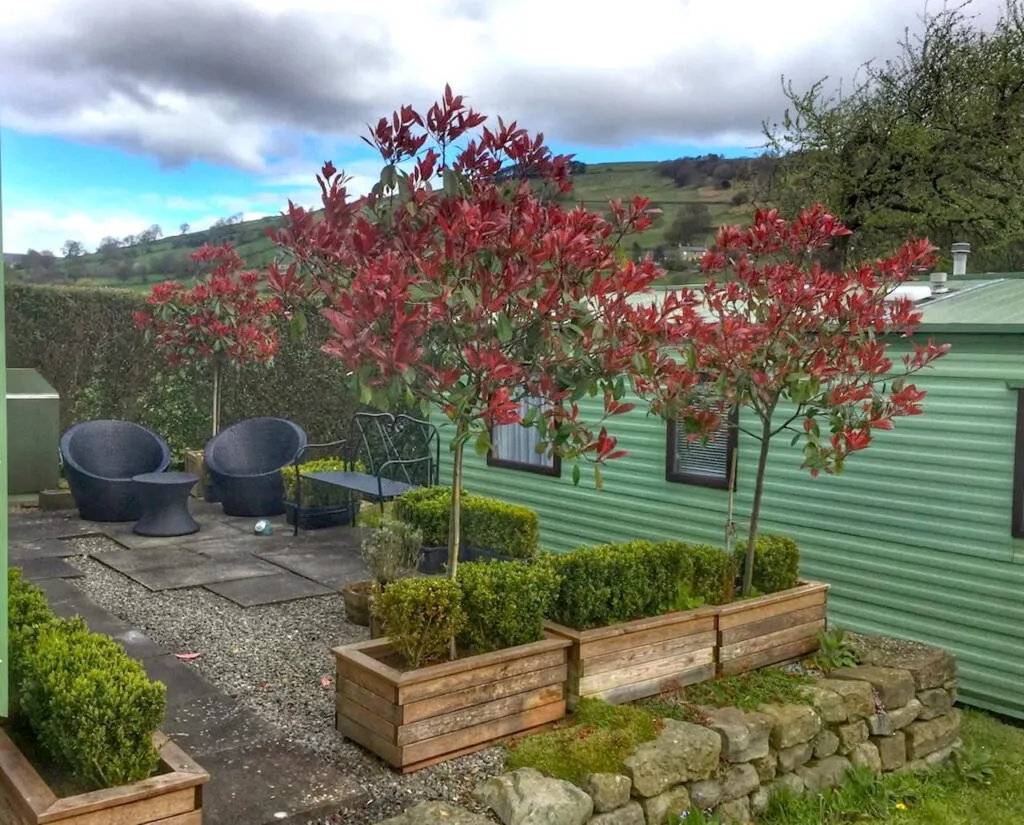
Photinia x fraseri ‘Red Robin’ is one of the most widely planted evergreen shrubs in the UK. Its appeal is that the new growth flushes a brilliant, almost theatrical red before maturing to a deep glossy green, and you can trigger fresh flushes simply by clipping the plant at the right time. It makes an excellent hedge, a handsome standalone specimen, and a reliable backbone shrub for mixed borders. I have planted it in more client gardens than I can count. Beginner gardeners also love Red Robin, as it offers great value and instant screening and interest in our gardens.
Its susceptibility to browning is the trade-off for that conspicuous new growth. The young red leaves are softer and more vulnerable than the mature green ones, and several stresses can cause them to turn brown, sometimes within days of emerging. Understanding which stressor is responsible is the first and most important step, because the treatment for fungal disease is completely different from that for drought, and applying the wrong solution can make things considerably worse.
💡 Top Tip
Before reaching for a fungicide or starting any treatment, spend five minutes looking closely at the pattern of browning. Is it spots with distinct edges? Whole leaves wilting from the tips? Brown confined to the newest growth only? The pattern tells you the cause, and the cause tells you the cure.
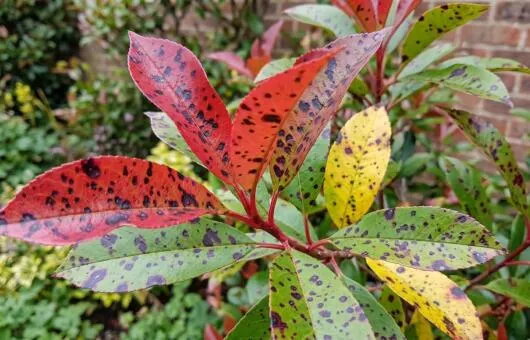
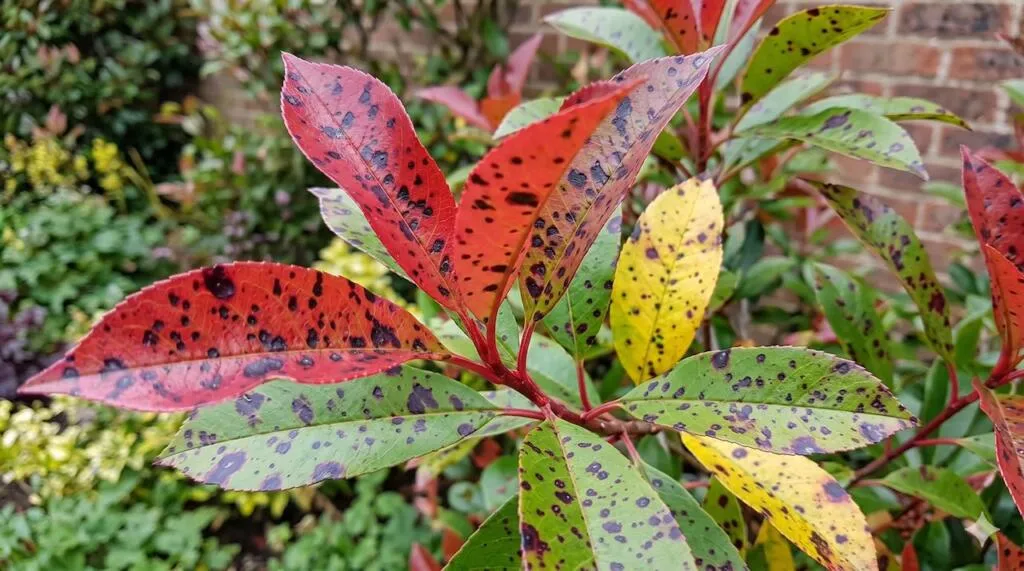
Photinia leaf spot: the most common cause of browning
The single most frequent reason I see Photinia going brown in UK gardens is photinia leaf spot, caused by the fungal pathogen Entomosporium maculatum. This disease thrives in the wet, mild conditions that are extremely common throughout most of the UK, which is partly why Photinia suffers from it far more here than it does in its native range. If you garden in a wet region or your Photinia is in a sheltered, humid spot, leaf spot is the first thing to suspect. This, again, is a site issue: where you plant it. Don’t think you can shove Photinia in a shady corner in wet heavy clay and not see some leaf spotting; you need airflow and some light to prevent it.
The symptoms are distinctive once you know what to look for. Leaf spot begins as small, circular dark spots on the leaf surface, typically no larger than a few millimetres across. The key identifying feature is that these spots have a clearly defined edge and are often surrounded by a yellowish or purplish halo. As the disease progresses, the spots enlarge and merge, and affected leaves turn brown and eventually drop. The disease tends to start on the older, lower leaves and work its way upward, unlike frost damage, which hits the newest growth first.
Leaf spot spores spread via water splash, which is why overhead irrigation, heavy rain, and crowded planting are all risk factors. I have seen severe outbreaks in client gardens where Photinia was planted close to a fence or wall, creating a still, humid microclimate. The same plant grown in an open position with good air circulation around it rarely gets it badly!
💡 Top Tip
If you are not sure whether you have leaf spot, pick an affected leaf and look at it against the light. Leaf spot produces tiny, raised black spore-producing bodies visible within the spots themselves. It looks almost like a pepper dusting inside the brown area. If you can see this, the diagnosis is confirmed.
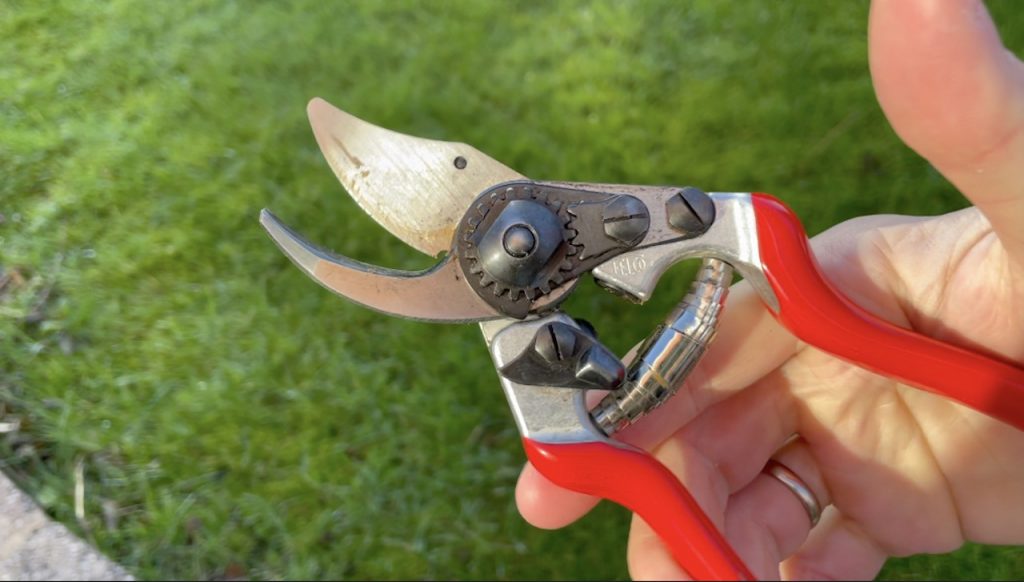
The treatment for leaf spot involves removing and disposing of all infected leaves; never compost them, as this recycles the spores. Cut out affected branches to clean wood and disinfect your secateurs between cuts with a garden disinfectant spray to avoid spreading the pathogen. Improving air circulation by thinning congested growth is the single most effective long-term intervention. In severe cases, a copper-based fungicide applied according to label instructions can help slow the spread, but it will not cure an already infected plant on its own.
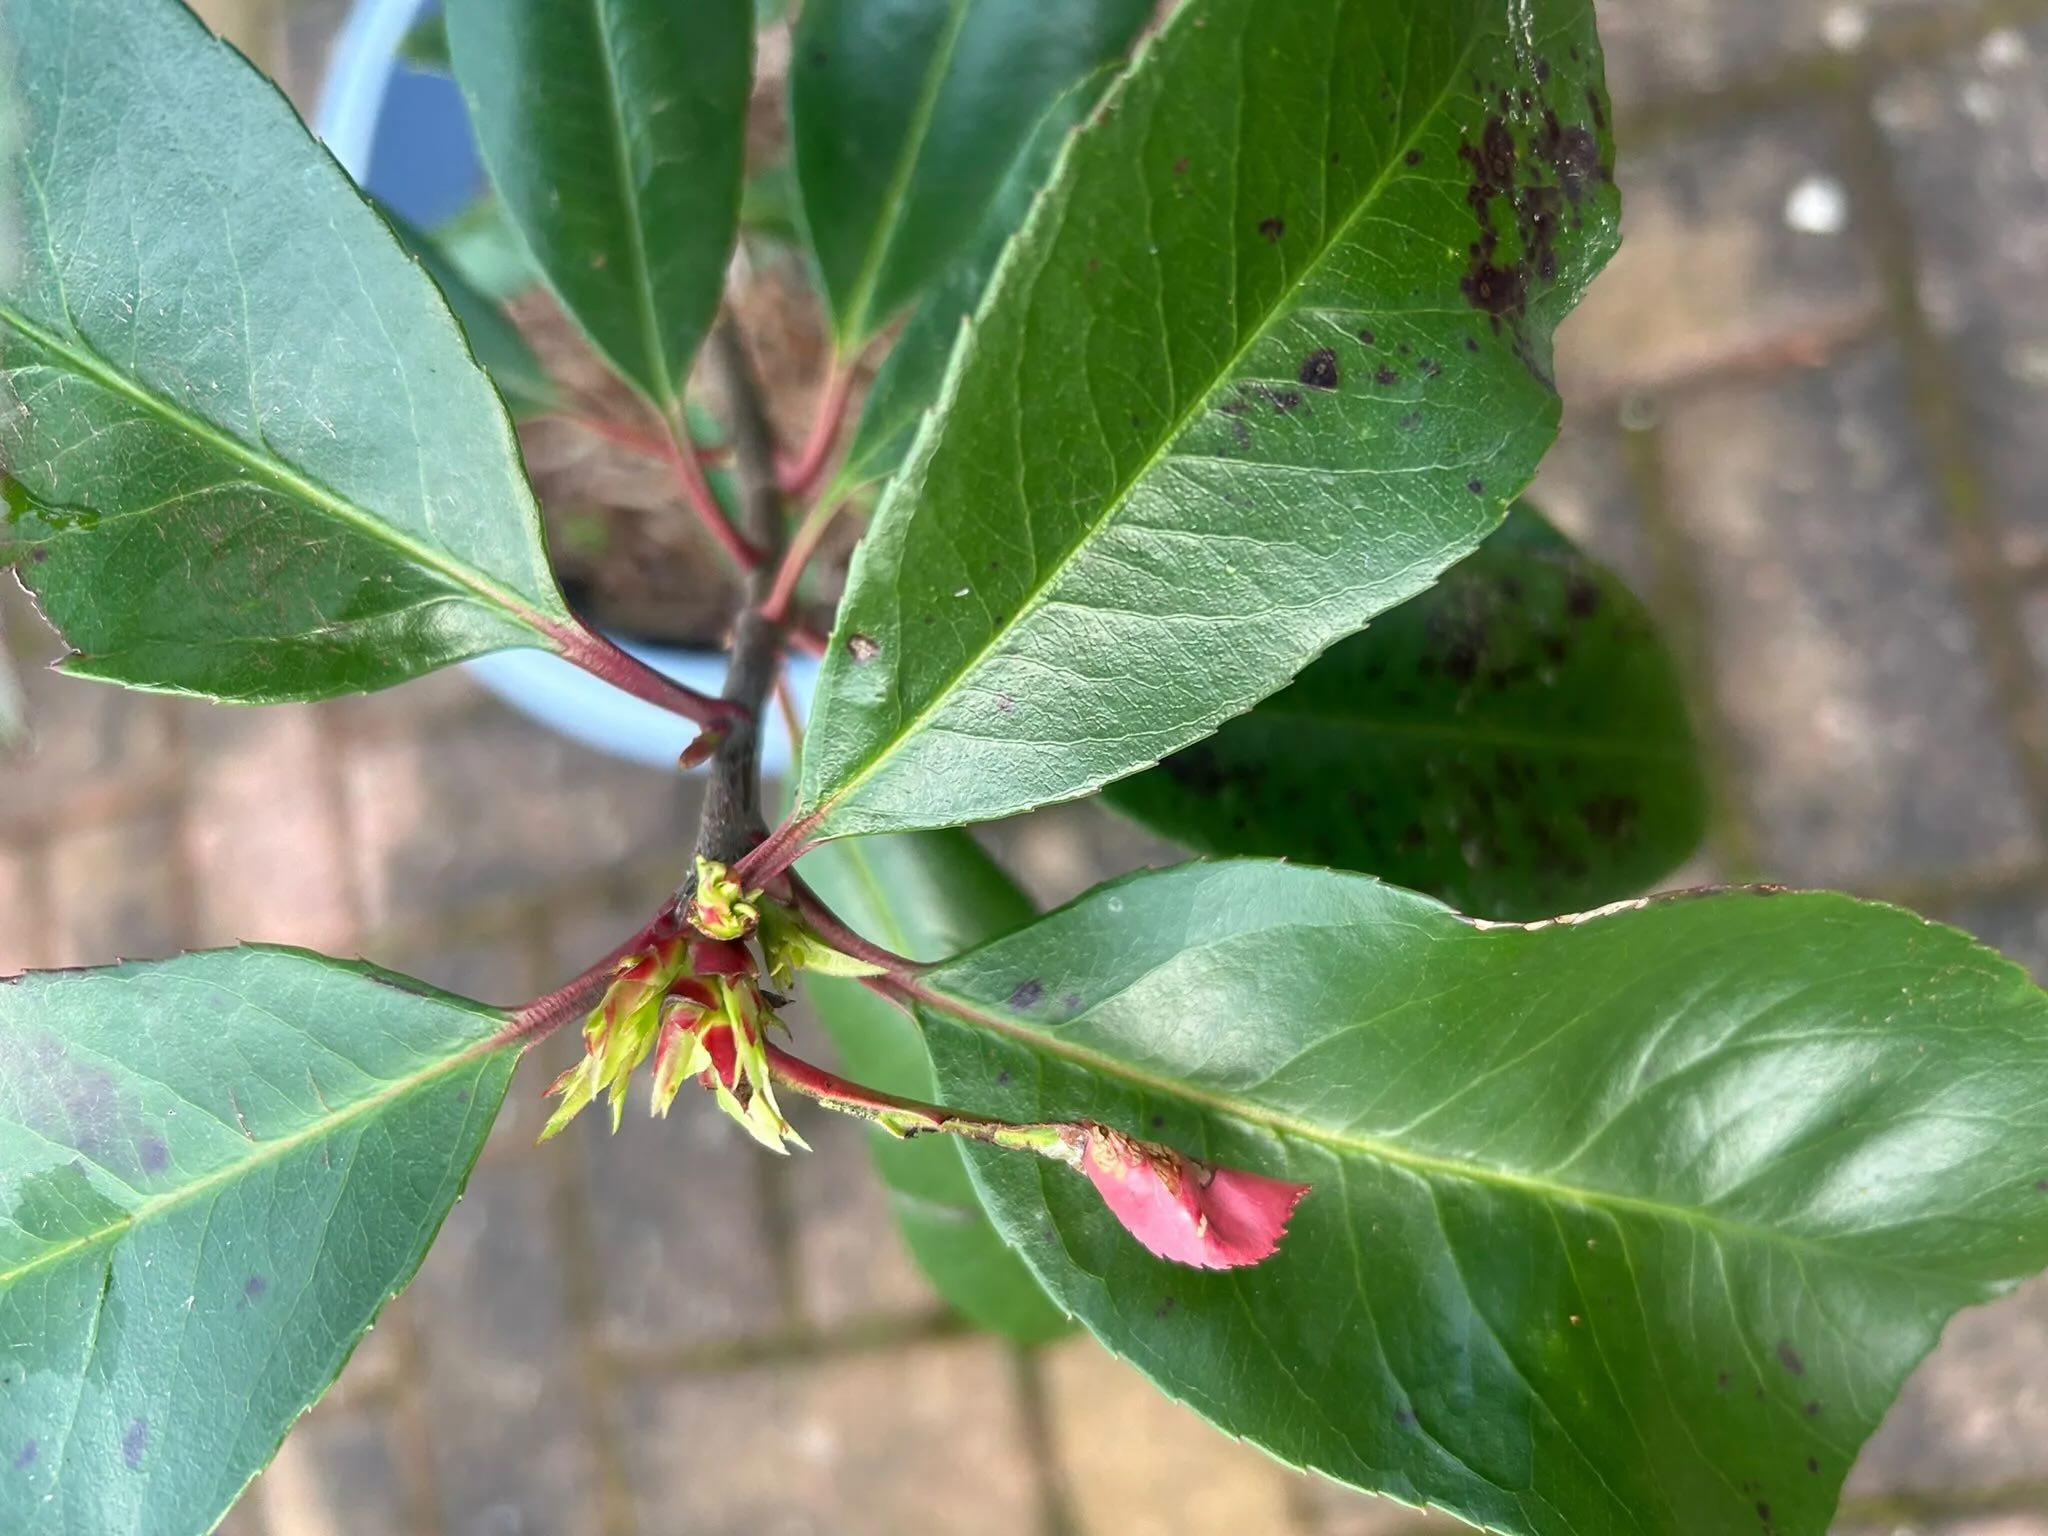
Frost damage on Photinia: when the new red growth turns brown
Frost damage is easy to confuse with leaf spot at first glance, but the pattern of browning is completely different once you know what to look for. Where leaf spot starts on older leaves low down, frost damage targets the newest, most vulnerable growth at the shoot tips. It typically appears suddenly, overnight, after a late frost, and the brown tissue is soft and collapsed rather than dry and spotted.
Photinia’s new red growth is soft and water-filled, which makes it particularly susceptible to frost. The water inside the cells freezes, ruptures the cell walls, and the tissue dies. This is why late frosts in April and May can cause significant browning on an otherwise healthy plant that sailed through the entire winter without issue. The frost hits precisely when the plant is pushing its most vulnerable new growth, which is maddening timing.
In my own garden in Liverpool, which is not known for gentle springs, I have watched Photinia go from beautifully flushed red to crispy brown within 48 hours of a sharp April frost. The plant always recovers, but it is a dispiriting sight. The treatment is straightforward: cut the damaged shoots back to the nearest healthy bud or healthy leaf, making a clean, angled cut just above that point. New growth will follow in due course. Do not cut back any further than necessary, as you are removing the plant’s energy reserves unnecessarily.
⚠️ Warning
If you are planting a new photinia in an area known for late frosts, hold off planting until late spring when the worst frost risk has passed. Alternatively, plant in a sheltered south or west-facing position against a wall, which offers several degrees of temperature protection. Young plants are considerably more vulnerable than established ones.
Drought stress and underwatering
Photinia is a reasonably drought-tolerant plant once established, but it is not immune to dry spells. In sandy or free-draining soils, or during extended hot summers, drought stress can cause browning that is often mistaken for disease. The distinguishing feature here is the pattern: drought browning typically starts at the leaf tips and edges, working inward as the problem worsens, and the leaves often have a scorched, papery quality rather than the damp, collapsed look of frost damage or the spotted pattern of disease.
Newly planted Photinia is far more susceptible to drought than established plants because it has not yet developed a deep root system to draw on moisture reserves in the subsoil. I always advise watering newly planted Photinia deeply and regularly for the first two growing seasons, particularly during dry spells, and mulching around the base with a 5 to 7 centimetre layer of organic mulch to retain soil moisture. From year three onwards, most plants cope well without supplementary watering except in extended dry periods.
Suppose you suspect drought stress. Water deeply at the base of the plant rather than using a light overhead spray, which wets the surface but does not reach the roots. A slow, deep soak once a week during dry weather is far more effective than a daily sprinkle. Once watering is corrected, the existing damaged leaves will not recover, but new healthy growth will follow.
Photinia requires well-drained soil. It absolutely does not tolerate waterlogged ground, and if planted in a boggy spot or in heavy clay that pools water in winter, root rot is a near certainty over time. This is one of those cases where the visible symptoms above ground, browning and wilting leaves, look superficially similar to drought, which creates the cruel situation of a gardener watering more vigorously in response to a problem that is actually caused by too much water.
Root rot caused by waterlogging tends to cause a more generalised yellowing and browning across the whole plant rather than the leaf-tip pattern of drought, and the leaves often feel limp and soft. If you dig carefully around the base of the plant and inspect the roots, waterlogged roots will be brown to black and smell unpleasant, compared to the cream-white colour of healthy roots. A badly affected plant will often loosen in the ground as the root system deteriorates.
The solution for a plant in unsuitable conditions is to improve drainage. For a hedge or established plant in clay soil, adding generous quantities of grit and organic matter to the planting area before planting makes a significant difference. For an established plant that is struggling, try lifting it carefully in Autumn, improving drainage in the planting area, and replanting it in a mix of good topsoil and grit. In genuinely waterlogged ground, Photinia is simply the wrong plant for the site, and a moisture-tolerant alternative would serve you better.
Wind scorch
Wind scorch is a common problem for Photinia planted in exposed positions, particularly on the east or north side of a property where cold, desiccating winds blow across the plant in late winter and early spring. The effect is similar to drought in that it causes the plant to lose moisture faster than the roots can replace it, especially when the ground is still cold, and root activity is limited.
Wind-scorched leaves tend to brown on the side of the plant facing the prevailing wind, and the damage is often asymmetrical, which is a clear distinguishing feature from disease, which tends to spread more evenly through the plant. The damaged leaves will look dry and papery, sometimes with a bleached quality, and you will often notice that the sheltered side of the plant looks perfectly healthy while the exposed side is suffering.
If wind scorch is a recurring problem, planting a windbreak of faster-growing plants to protect the Photinia is the most effective long-term solution. For an established plant, a temporary windbreak of hessian or garden fleece around the most exposed side during harsh winters is worthwhile. Remove it once the worst of the cold is over and new growth begins to push.
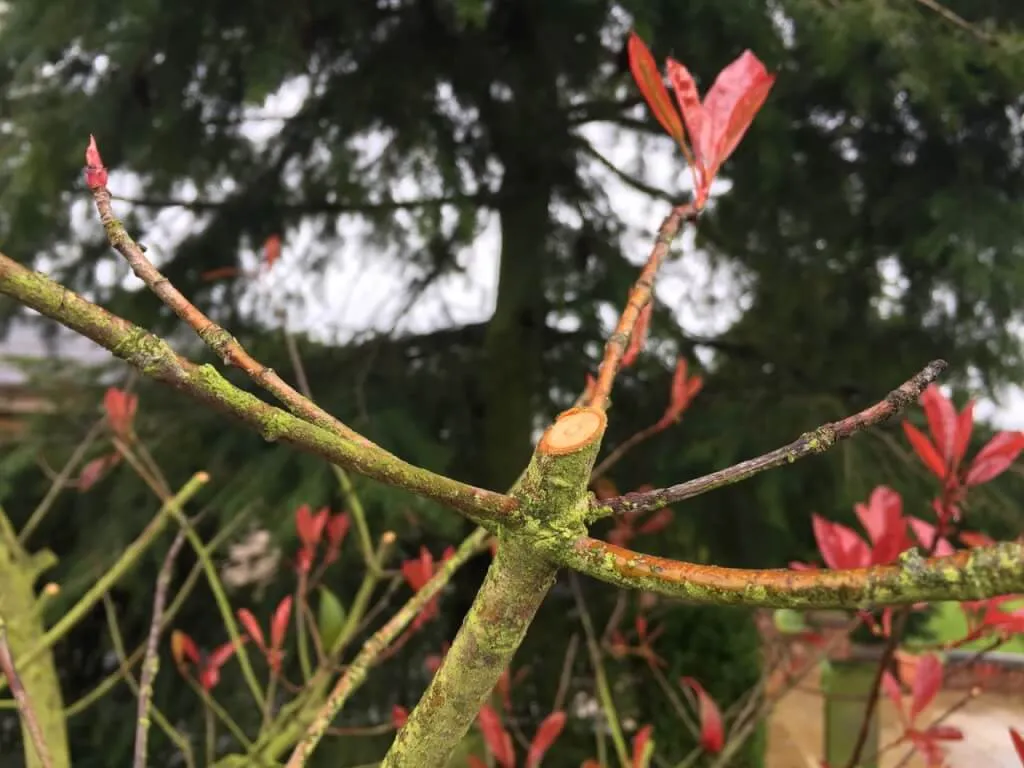
Photinia responds well to pruning and can be clipped quite hard, but it is not invincible, and cutting into the old, brown wood below the green leafy growth will not produce new shoots. This is a mistake I see regularly in garden makeovers where an overgrown photinia hedge has been cut back too aggressively, leaving brown stumps that never flush again. Unlike a laurel or box, Photinia cannot regenerate from bare brown wood. You should always ensure you cut back to within the plant’s leafy green zone.
Clean pruning cuts just above a healthy bud encourage strong new growth rather than die-back
Pruning at the wrong time of year can also cause stress browning, particularly if heavy cutting is done in late Autumn or winter when the plant cannot respond quickly with new growth and the cuts are exposed to cold and damp. The best times to prune Photinia are April to May after the first flush of red growth has matured, and again in late summer around August. Pruning at these times encourages fresh red growth and gives the plant time to harden off before Autumn.
💡 Top Tip
You can trigger additional flushes of red growth through the season by clipping lightly immediately after the existing red leaves have matured to green. Each flush takes approximately six to eight weeks. Pruning in April, June, and August can give you three flushes of red in a single growing season.
Nutrient deficiency and soil pH problems
Photinia is tolerant of most soil types but does best in slightly acidic to neutral soil, with a pH of roughly 5.5 to 7. In highly alkaline or chalky soils, the plant can struggle to take up iron and manganese, leading to a condition called chlorosis, where the leaves turn yellow-green between the veins, sometimes with brown scorched patches developing as the deficiency worsens. This is distinct from disease or frost damage and tends to be a gradual rather than sudden onset.
A simple soil pH test will tell you whether alkalinity is a factor. If your soil pH is above 7.5, Photinia will struggle chronically rather than thrive, and no amount of feeding will fully compensate for the wrong soil chemistry. Applying a sequestered iron product in spring can help in mildly alkaline conditions, and acidifying the soil gradually with sulphur chips over several years is the longer-term approach. In very alkaline conditions, it may be worth reconsidering the plant choice and selecting a shrub better suited to chalk, such as viburnum or cotoneaster.
In well-suited soils, Photinia benefits from a general balanced fertiliser in spring to support the energy demands of fresh growth. I use a slow-release granular fertiliser worked into the soil around the root zone each March. For plants clearly struggling in tired, depleted soil, a liquid feed during the growing season can help accelerate recovery.
Once you have identified the cause, the recovery process follows a logical sequence. Here is how I approach it when a client’s Photinia needs rescuing.
Step 1: Diagnose the pattern of browning. Spots with halos mean leaf spot. Tip and edge browning on the side facing the wind suggests wind scorch. Brown, collapsed new growth appearing suddenly after cold nights means frost. Generalised yellowing and wilting often point to waterlogging. Start here before doing anything else.
Step 2: Remove all affected material. Cut back to clean, healthy growth using sharp, disinfected secateurs. Do not cut into bare brown wood with no leaves below it, as this will not regrow. Dispose of all infected material in the bin rather than the compost heap, particularly if leaf spot is the cause.
Step 3: Address the underlying cause. Improve drainage if waterlogging is the problem. Water deeply and mulch if drought is the issue. Erect a windbreak if exposure is causing scorch. Improve air circulation if leaf spot is recurring.
Step 4: Feed to support recovery. A balanced slow-release fertiliser in spring, or a liquid feed for a plant mid-recovery, gives the energy needed to push new healthy growth.
Step 5: Be patient. Photinia recovers well, but it does so on its own schedule. A badly affected plant may take a full growing season to look fully healthy again. I always tell clients to resist the temptation to cut back further or add more feed while waiting. Give the plant what it needs, correct the underlying problem, and let it work.
💡 Top Tip
If the plant is very badly affected by leaf spot, hard pruning in late spring to remove all infected growth and open up the structure can be genuinely transformative. It looks brutal but photinia responds to hard pruning remarkably well, pushing vigorous new growth from lower down the stems provided you stay within the leafy zone.
How to prevent Photinia from going brown: long-term care
Prevention is considerably easier than cure, and the principles are straightforward. The most important single factor is air circulation. Photinia planted with adequate space around it, so that air moves freely through the canopy and leaves dry quickly after rain, will rarely develop significant leaf spot even in wet years. A photinia crammed against a fence or planted in a dense mixed hedge with restricted airflow is set up to suffer.
Choosing the right site matters just as much. Photinia does best in a sheltered position that avoids the worst of cold easterly winds, in well-drained soil, in full sun to partial shade. South and west-facing positions suit it particularly well. North and east-facing walls tend to produce more disease problems and slower, less vigorous growth.
Watering at the base rather than overhead is a small habit that makes a meaningful difference to disease incidence. Wet leaves in still, humid conditions are ideal for fungal spores to germinate and infect. Always water in the morning if you must water overhead, so leaves dry out through the day rather than sitting wet overnight.
Annual feeding in spring and a mulch of organic matter each Autumn keeps the plant in vigorous good health, and a healthy photinia resists disease and weather stress considerably better than a weak or stressed one. I use fish, blood, and bone as a spring feed and well-rotted garden compost as an Autumn mulch, both of which are inexpensive and effective.
Regular pruning is one of the best tools for keeping Photinia healthy and reducing disease pressure because it removes old, infected material, opens up the plant structure, and stimulates fresh growth that is more resistant than old, tired foliage. There is a full guide on pruning technique in my How to Prune Photinia Red Robin article, but the key principles are worth covering here.
The two best pruning windows are late April to May, after the first flush has matured, and August, after the summer flush. Avoid pruning in late Autumn or winter, as the cuts are slow to heal and more vulnerable to infection. Always cut to just above a visible bud or healthy side shoot, at a slight angle to shed rain away from the cut surface. Sharp, clean secateurs make a significant difference to how quickly cuts heal.
For a plant that has been heavily affected by disease, renovation pruning can be worth doing in May. This involves cutting the plant back significantly, by up to half its height and spread, to remove the bulk of infected material and start afresh. Follow with a generous feed and a deep mulch, and the plant will typically push strong new growth within six weeks.
Best disease-resistant photinia varieties for UK gardens
Not all photinias are equally susceptible to leaf spot. If you are planning a new planting or replacing a struggling plant, it is worth choosing a variety with better disease resistance.
🌿 Photinia Varieties At A Glance
Variety
Disease Resistance
Notes
Photinia x fraseri ‘Red Robin’
Moderate
The standard variety; most widely available but most susceptible to leaf spot in humid sites
Variegated pink and cream new growth; ornamental but not as vigorous as the straight species
Photinia davidiana
Very good
Deciduous species, less red new growth but excellent autumn berries; very disease resistant
Photinia x fraseri ‘Carré Rouge’
Good
Compact variety, excellent for smaller gardens; better than ‘Red Robin’ in damp sites
If you are replacing a photinia that has repeatedly struggled with leaf spot in a wet or sheltered position, ‘Robusta’ is the variety I would recommend as my first choice. It has considerably better disease resistance than the standard ‘Red Robin’ and is just as ornamentally effective, with bold, glossy leaves and a strong red flush of new growth. I have planted it in client gardens where ‘Red Robin’ consistently failed and seen it thrive without issue.
Yes, in most cases. Leaf spot rarely kills Photinia outright, but it can severely weaken the plant if left untreated over several seasons. Remove all infected material, improve air circulation, and feed the plant well. Recovery typically takes one full growing season for a moderately affected plant.
Why does my Photinia have brown spots on the leaves?
Dark spots with a defined edge and a yellowish or purplish halo are the classic signs of photinia leaf spot (Entomosporium maculatum). Remove affected leaves and improve air circulation. Avoid overhead watering and consider a copper fungicide in persistent cases.
My Photinia looks brown all over after winter. Is it dead?
Probably not. Scratch the bark of a main stem with your thumbnail. If you see green tissue beneath, the plant is alive. Browning after a harsh winter is usually frost or wind scorch damage to the foliage rather than death of the plant itself. Cut back to healthy wood and feed well in spring. New growth will appear within weeks once temperatures rise.
How do I stop my Photinia hedge from going brown?
The most effective measures are ensuring good air circulation through the hedge by pruning annually, watering at the base rather than overhead, promptly removing and disposing of any infected leaves, feeding in spring, and mulching the root zone. Planting a disease-resistant variety such as ‘Robusta’ in a new hedge makes a significant long-term difference in wet gardens.
Can I use a fungicide on Photinia?
Yes. A copper-based fungicide or a product containing mancozeb can help slow the spread of leaf spot when applied as a preventative spray in spring before new growth emerges, and again when growth is actively pushing. Follow label instructions carefully. Fungicide is most effective as prevention rather than cure, and it works alongside, not instead of, removing infected material and improving conditions.
When is the best time to plant Photinia?
Container-grown Photinia can be planted at any time of year, though Autumn and spring are ideal as the soil is warm and moist, and establishment is quicker. Avoid planting during frost or drought. In colder northern regions, spring planting gives a new plant the full growing season to establish before its first winter.
Is Photinia easy to grow?
Generally yes. In well-drained soil in a reasonably sheltered position with adequate space for air circulation, Photinia is a very low-maintenance plant that needs only annual pruning and feeding. The main issue is leaf spot in humid, sheltered or wet conditions. Match it to the right site, and it will reward you with years of outstanding ornamental effect.
Enjoyed this Photinia troubleshooting guide? My Garden Design for Beginners course will help you design the whole space with confidence. Step-by-step video lessons, real-world case studies, and a design certificate at the end, all taught by me, Lee Burkhill, award-winning designer and BBC1’s Garden Rescue presenter.
29
Garden Design Examples for Small Gardens: 30 Design Templates & Planting Plans
Garden Design Examples for Small Gardens: 30 Design Templates & Planting Plans: In this online gardening course, I’ll walk you through 30 fantastic garden designs, explaining the logic behind the layout, the plant choices, and take-home tips for applying them in your own garden.
Weekend Garden Makeover: A Crash Course in Design for Beginners
Learn how to transform and design your own garden with Lee Burkhills crash course in garden design. Over 5 hours Lee will teach you how to design your own dream garden. Featuring practical design examples, planting ideas and video guides. Learn how to design your garden in one weekend!
Garden Design for Beginners: Create Your Dream Garden in Just 4 Weeks
Garden Design for Beginners Online Course: If you want to make the career jump to becoming a garden designer or to learn how to design your own garden, this is the beginner course for you. Join me, Lee Burkhill, an award-winning garden designer, as I train you in the art of beautiful garden design.
The most common cause is photinia leaf spot, a fungal disease that produces dark spotted leaves and spreads in wet, humid conditions. Frost damage targets new red growth all of a sudden after cold nights. Drought causes tip and edge browning, waterlogging causes generalised yellowing and wilting, and wind scorch causes the exposed side of the plant to brown. Identify the pattern before treating. Remove affected material, improve air circulation, correct any watering or drainage issues, and feed well in spring. Photinia is a tough plant and recovers well once the underlying cause is addressed.
Your subscription could not be saved. Please try again.
Your subscription has been successful.
Lee Burkhill
Lee Burkhill, known as the Garden Ninja, is an award-winning garden designer and horticulturist with over 30 years of gardening experience and 15 years as a professional garden designer. A qualified RHS (Royal Horticultural Society) professional, Lee specialises in sustainable garden design and practical horticultural advice. He designs and presents on BBC1’s Garden Rescue and in leading gardening publications. Lee combines three decades of hands-on gardening knowledge with professional design qualifications to help gardeners create beautiful, functional outdoor spaces.