Lee Burkhill: Award Winning Designer & BBC 1's Garden Rescue Presenters Official Blog
Beginner level
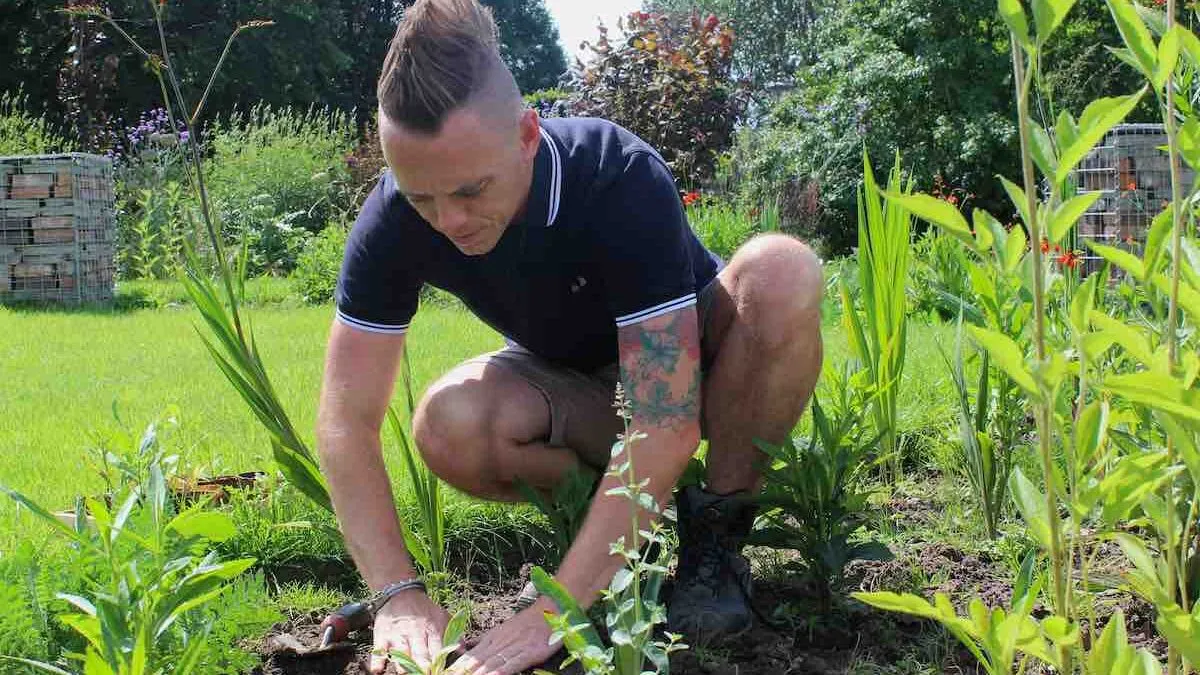
Growing your own vegetables isn't just about cultivating vibrant gardens; it's a journey that reconnects you with nature and the joy of harvesting your efforts. Whether you have acres of land or a cozy balcony, the magic of watching tiny seeds transform into luscious produce is incredibly rewarding. In this guide, we'll explore the top 20 vegetables to start growing as a beginner gardener.
Embarking on a gardening journey can be exciting and rewarding, especially when growing your own vegetables. Whether you’re looking to add fresh vegetables to your home-cooked meals, connect with nature, or enjoy the satisfaction of nurturing plants, starting with the right vegetables can set you on the path to success.
This comprehensive guide explores the top 20 beginner vegetables ideal for newbies to grow in their gardens. Vegetables provide both delicious homegrown goodness and a sense of accomplishment. These are all crops that I’ve grown for years and included in my garden design work, as they are fantastic for beginners.
So come on Garden Ninjas, let’s delve deeper into the top 20 beginner vegetables to grow!
This page contains affiliate links for products I use and love if you take action (i.e. subscribe, make a purchase) after clicking a link, I may earn some gardening commission, which helps me keep the Garden Ninja Blog free for all.
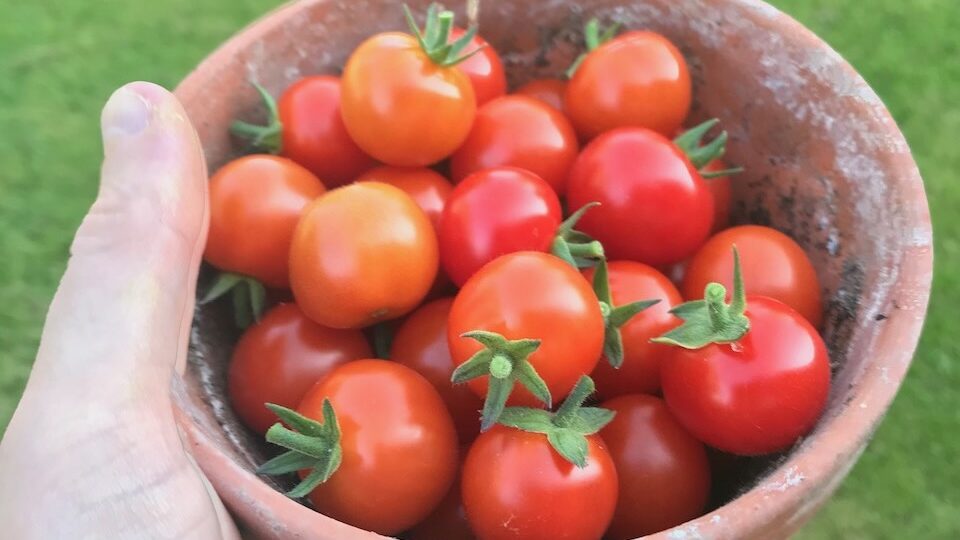
1. Tomatoes
Tomatoes are a garden favourite for a reason, whether it’s the unbeatable taste or that fresh tomato smell. With countless varieties available, from cherry to beefsteak, they thrive in warmer climates and our greenhouses. Their juicy, flavorful fruits can be enjoyed fresh, in salads, sauces, or even roasted. If you have a greenhouse, this is the go-to vegetable to grow.
But what if you don’t have a greenhouse? Well, you can still grow tomatoes by starting them off inside but you wait until the frosts have passed before placing them somewhere sheltered outside. Against a wall or somewhere in full sun is best. The main difference when growing tomatoes under glass vs. outside is the amount of trusses or side shoots you leave on, which we will get into further in this guide.
Growing tomatoes from seed is a really cost-effective way to grow your first vegetables. By growing from seed, you learn quickly the different stages of growth of your tomatoes, making looking after them super easy! Tomato seedlings need 18-22 degrees to germinate, any colder and they simply won’t germinate which is why starting them off inside is a good idea.
Tomatoes are a great source of essential nutrients, including vitamins A, C, and K, as well as potassium, folate, and dietary fibre. They are also packed with antioxidants like lycopene, which gives them their vibrant red colour. Lycopene is known for its potential to reduce the risk of chronic diseases and protect cells from damage caused by free radicals.
Can I grow tomatoes without a greenhouse?
Yes, you can, but you won’t get as much fruit as you would in a greenhouse. If growing tomatoes outside, you need to restrict their growth to conserve their energy by pruning out laterals or side shoots known as trusses.
In a greenhouse, you leave 6 side shoots or trusses on your tomato plants.
When growing tomatoes outside, you only allow 4 side shoots or trusses to contain energy.
This is to make sure that fruits ripen, given the colder outside, and the more trusses, the more fruit that the plant has to create and sustain.
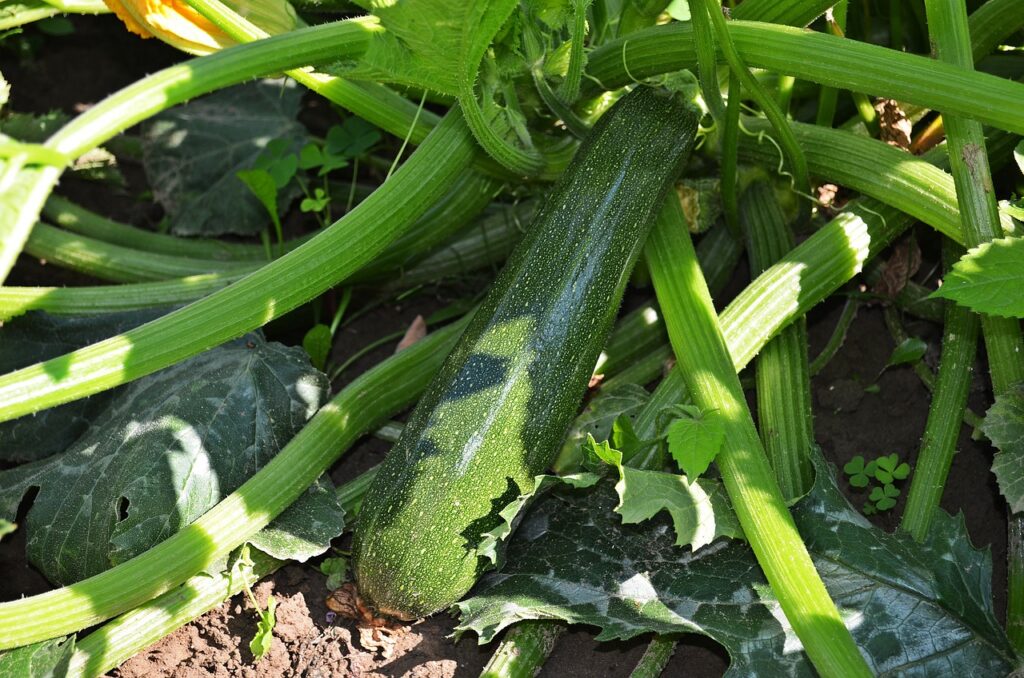
2. Courgettes
Courgettes are probably the easiest beginner gardening vegetable to grow. They nearly took the first place if it wasn’t for the tomato flavour beating courgettes in intensity! However, these vegetables are super easy to grow from seed, and once outside in containers, you’ll end up with more courgettes than you know what to do with!
They’re perfect for container gardening, meaning they are great for balcony gardening, small yards or tiny gardens. Grow them from seed indoors from March and then pot them on when they have 4 true leaves.
Courgettes need very little in terms of maintenance and are slug-proof! Give them a liquid feed in containers of a balanced 7:7:7 organic plant feed.
Use them in stir-fries, on the grill, or in the oven. Pick them regularly when they reach the size of a cucumber; if you leave them longer, they turn into large marrows and can be a mix of bitter skins and tasteless flesh if left to mature too long.
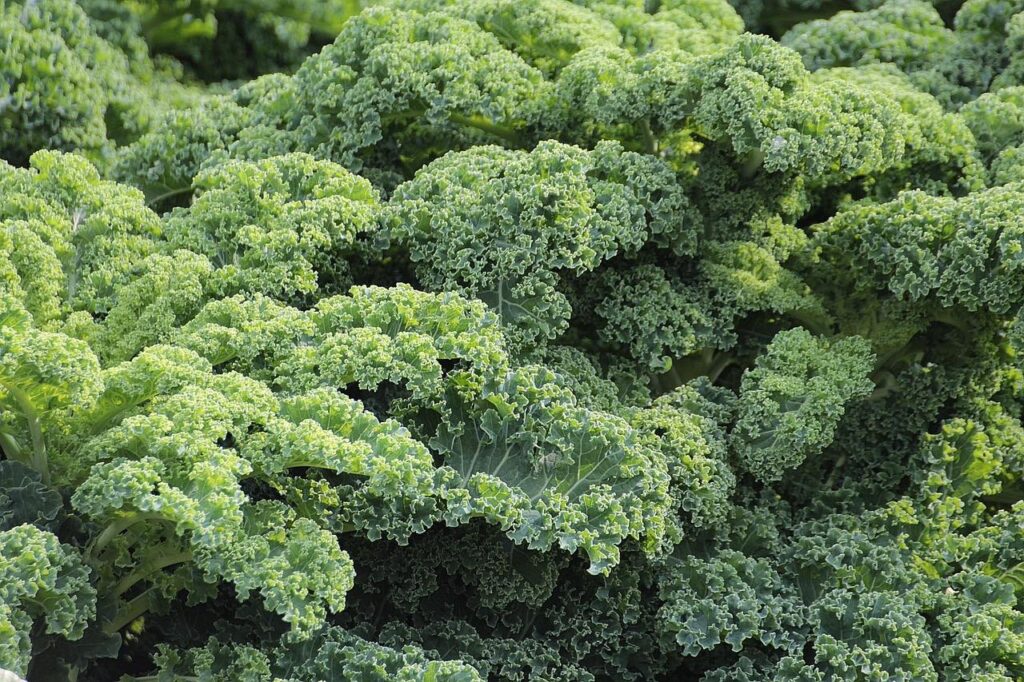
3. Kale
These fast-growing vegetables are practically foolproof for beginners. These leaves act as beautiful foliage and have many uses in stir-fries, juices and stews. Grow Kale from seed early in the season or consider perpetual perennial kale, Collard Greens, that comes back each year after harvesting in winter.
Kale has earned its reputation as a “superfood” due to its exceptional nutritional profile and potential health benefits. Packed with an array of vitamins, minerals, and antioxidants, kale is a powerhouse of goodness that supports overall well-being.
Why is Kale a superfood?
First, kale is incredibly rich in vitamins. It’s a fantastic source of vitamin K, which is crucial for blood clotting and bone health. It’s also loaded with vitamin C, an antioxidant that boosts the immune system and promotes collagen production for healthy skin.
Kale’s mineral content is noteworthy, too. It’s a good source of minerals like potassium, which helps regulate blood pressure, and calcium, essential for strong bones.
But what truly sets kale apart is its antioxidants. It’s bursting with compounds like flavonoids and carotenoids, which combat oxidative stress and inflammation. This reduces the risk of chronic diseases like heart disease and certain cancers.
Furthermore, kale is incredibly low in calories but high in fibre, aiding digestion and supporting weight management. Its high fibre content also helps stabilise blood sugar levels. So grab some seeds and get growing!
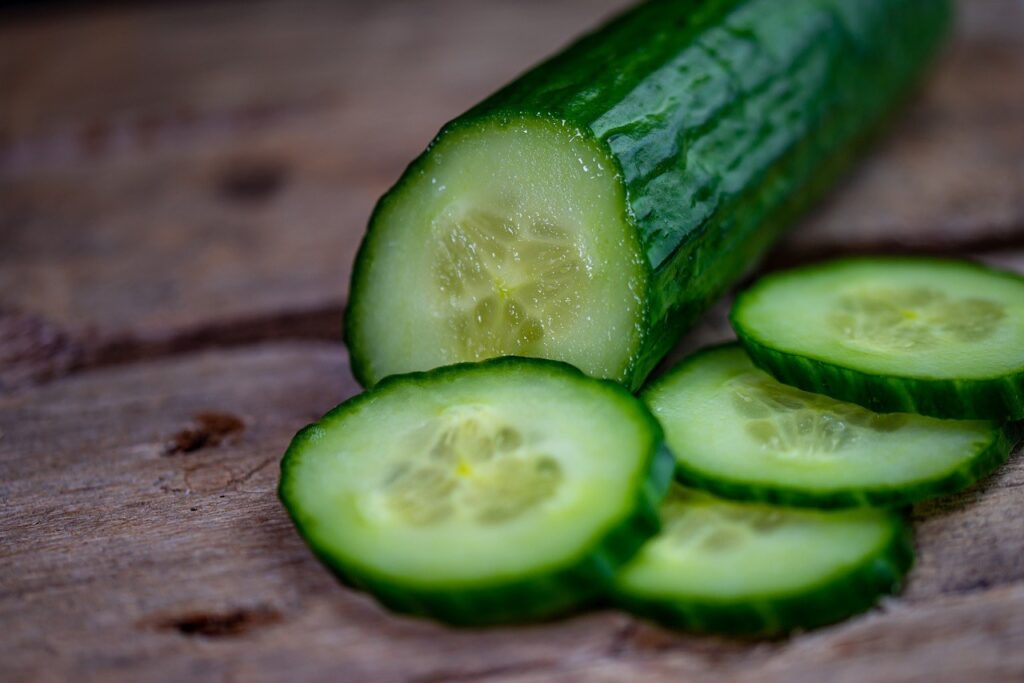
4. Cucumbers
Cucumbers are known for their crisp texture and refreshing taste, useful for sandwiches, salads, eaten fresh or even pickled. They taste far nicer than any shop-bought cucumber. However, they can take a lot of work if you don’t have a greenhouse, as they need really warm temperatures. My advice would be to just grow one cucumber plant if space is limited, and to grow it vertically up bamboo canes.
You’ll probably get 6 large cucumbers off each plant, and the taste is exquisite and fresh!
The best way to grow cucumbers is by germinating a couple of seeds in one small pot and then ‘pricking them out when they get 2 true leaves (the 2 leaves preceding the first 2 seed leaves). Cucumbers need lots of water and a high potassium feed, along with 21 degrees plus to ripen, which is why they are a great greenhouse vegetable for hot summers!
Cucumbers provide a range of vitamins and minerals, including vitamin K, vitamin C, potassium, and magnesium. Vitamin K is important for bone health and blood clotting, while vitamin C supports the immune system and skin health.
Cucumbers are 95% water, which is why they are linked to healthy skin, as eating them helps hydrate your body’s water content and thus gives you glowing, plump skin!
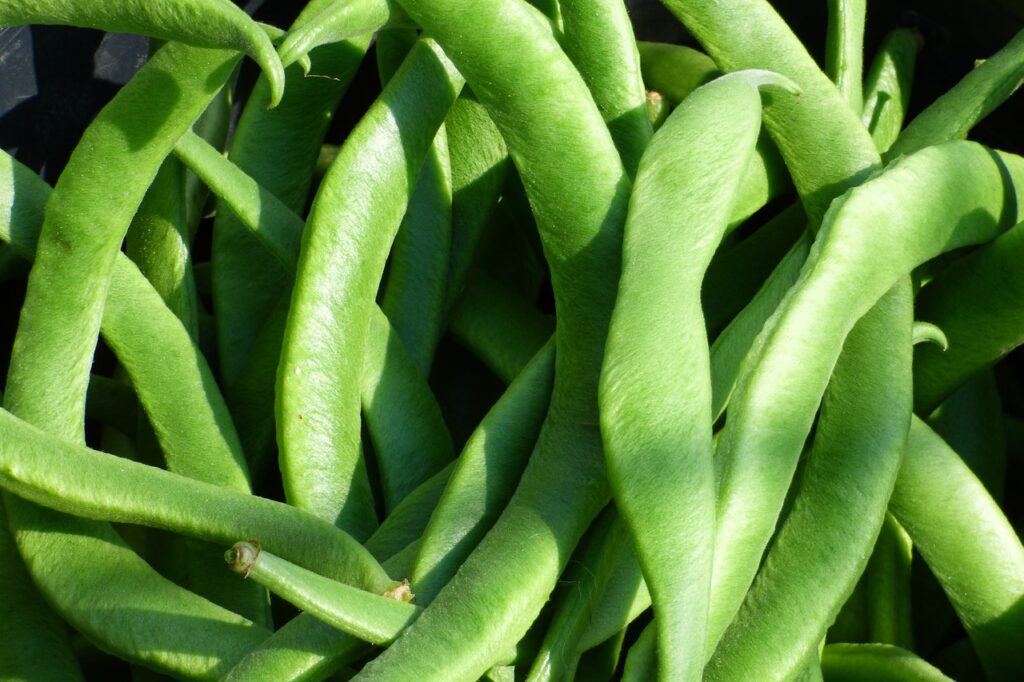
5. Runner Beans
Easy to grow and prolific, runner beans and French beans offer a satisfying crunch at the dinner table. Most beans are climbing plants, so they need sturdy supports such as bamboo canes or obelisks to grow up in the summer. Runner beans are easy to grow from seed and it’s always best to directly sow them in their final positions as they don’t like root disturbance when being planted out. Sow direct into the soil from April onwards.
Runner beans are one of the easiest vegetables to grow, which is why beginner gardeners often start off with them. Aside from the delicious taste of fresh beans, here are some other reasons to consider them as a new gardener!
i) Fast Germination
Runner beans have relatively fast germination times, usually within a week or so after planting. This quick start gives growers a sense of progress early on.
ii) Tolerant of Various Conditions
Runner beans are quite adaptable and can tolerate a range of soil types, although they prefer well-draining soil. They can also handle varying sunlight conditions, though they do best in full sun. They will even grow on balconies or in tiny garden spaces if given some bamboo canes to climb.
iii) Attractive Flowers
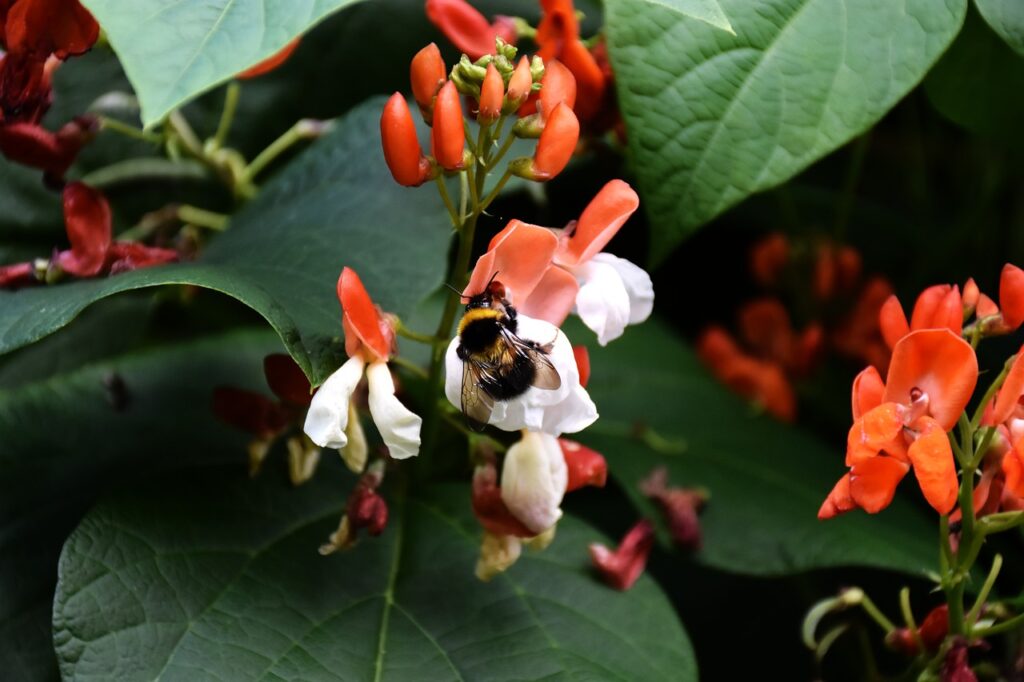
Runner beans are not just about the beans; they also produce attractive, vibrant flowers that can enhance the aesthetics of a garden space. This, in turn, provides pollen for honey bees and beneficial garden insects.
iv) Low Maintenance
These beans require minimal attention once established. Regular watering, especially during dry periods, and occasional feeding are usually enough to keep them thriving. The one thing to watch out for is exposure; runner beans hate strong winds or gales.
v) Vigorous Growth
Runner beans are known for their vigorous growth. Once they start climbing their supports, they can shoot up quite rapidly, creating a lush and productive vertical display. Packed full of delicious beans mid-summer!
vi) Disease Resistance
While not immune to all pests and diseases, runner beans generally have good resistance to common bean pests and diseases, making them a reliable choice for beginners. So you’re not battling powdery mildew, blight or an attack of insect predators!
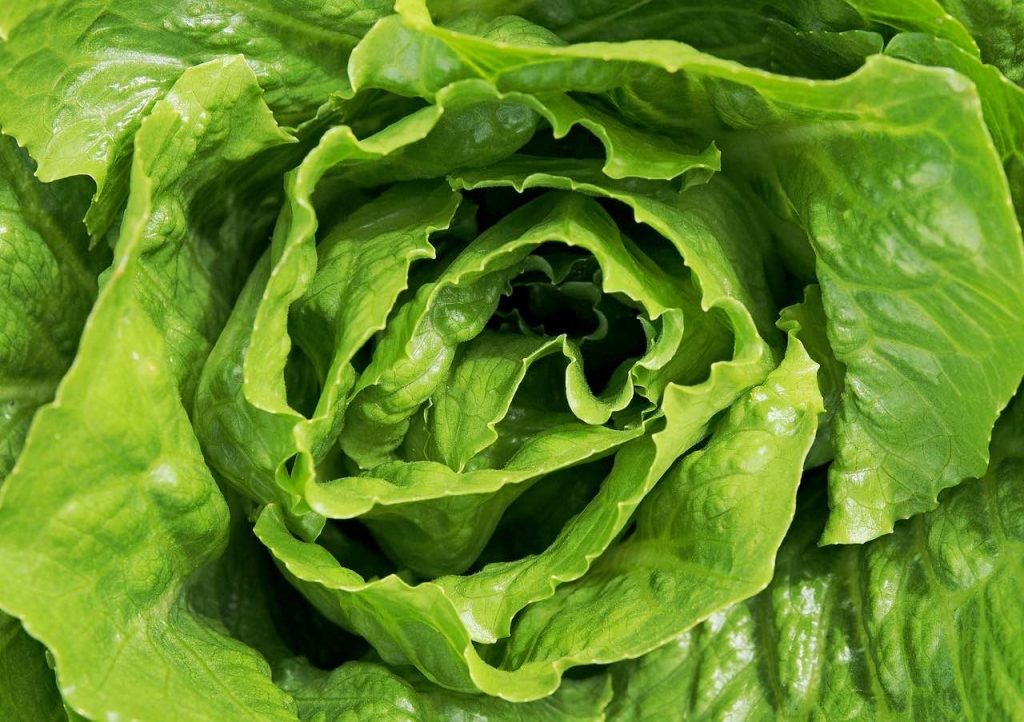
6. Lettuce
Lettuce is a cool-season crop that’s perfect for beginners, and it can be grown in any-sized garden or even an apartment windowsill. These crops are the fastest of all vegetables, often germinating in a matter of days and being ready to harvest after 3 short weeks.
Plant different types for a continuous supply of fresh salad greens throughout the growing season. There are many lettuce varieties to choose from, including leaf lettuce, head lettuce, and romaine lettuce. This variety allows you to experiment with different flavours, textures, and colours.
Lettuce is space-friendly because it doesn’t take up much space. It can be grown in small beds, containers, or even in hanging baskets, making it suitable for gardens of all sizes.
Another beauty of growing lettuce is that you can harvest continuously throughout the year. Many lettuce varieties can be harvested on a “cut-and-come-again” basis. This means you can pick the outer leaves as they mature, allowing the inner leaves to continue growing. This extends the harvesting or cropping period.
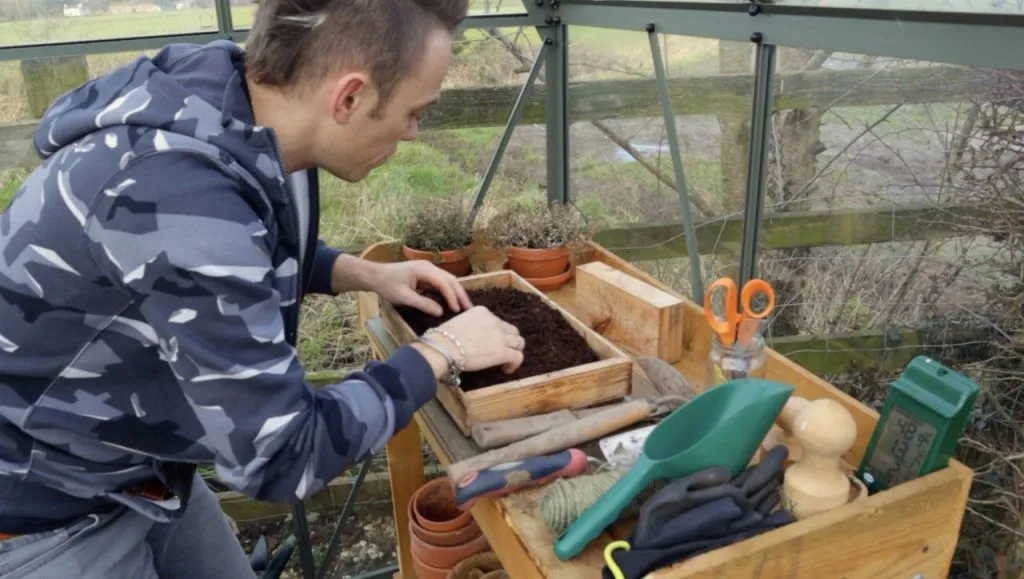
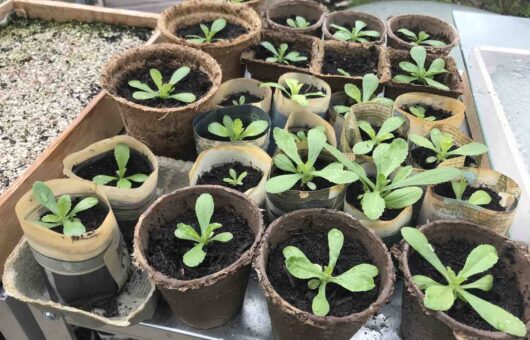
Lettuce is a cool-season crop, which means you can enjoy fresh greens in the early spring and fall when other crops might struggle in the heat and grow in places that don’t typically get much sun throughout the year. Try growing them in seed trays like the ones I’m demonstrating below in the greenhouse. This allows you to move them into position around a small garden.
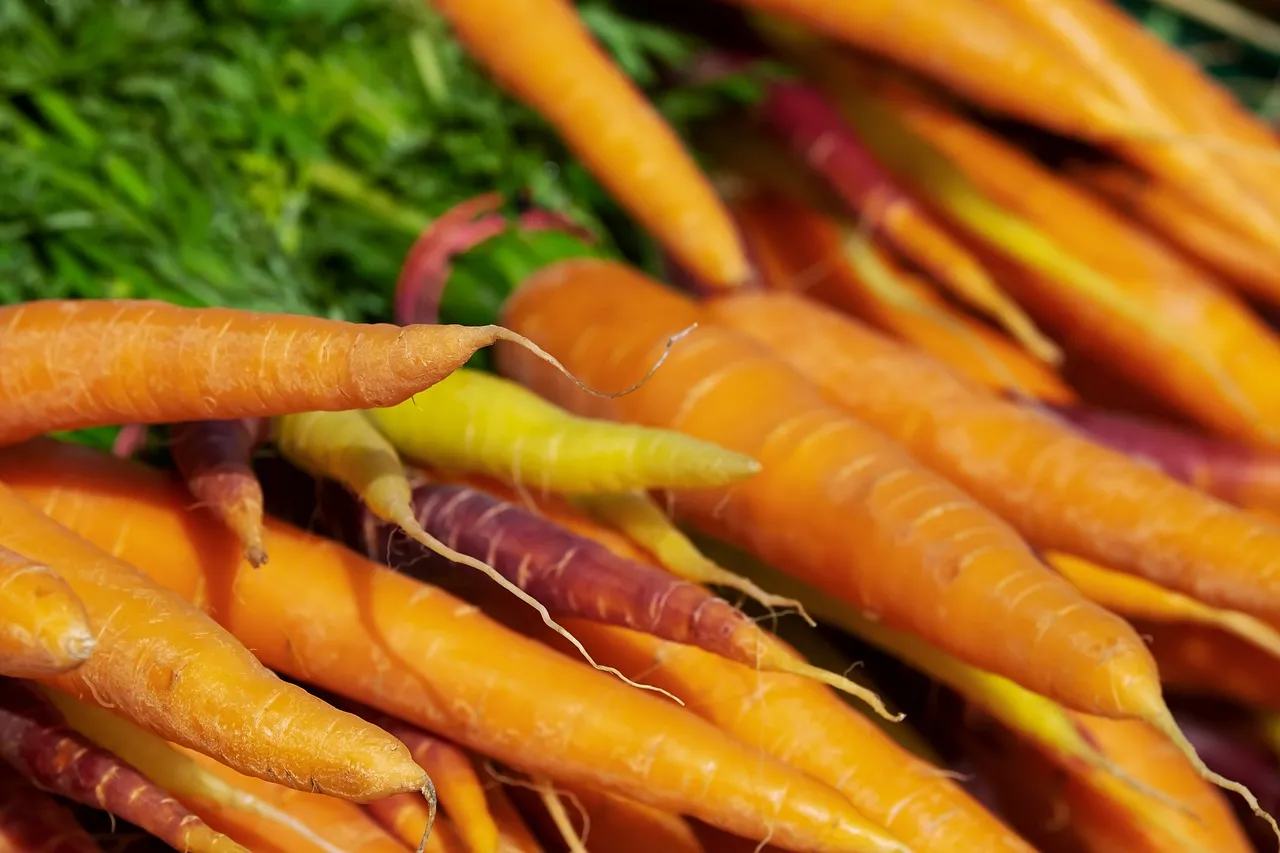
7. Carrots
Carrots (Daucus carota) are not only nutritious but also fun to grow, especially with children, given their bright orange roots. You can grow them in containers, making them ideal for limited-space gardens.
Carrots germinate quickly in 7-14 days, meaning there’s not as much waiting around as other crops. When sown thinly in pots or containers, you can ensure a steady crop throughout the summer of either microgreen carrots (very small) or wait for them to bulk up in size.
Their vibrant orange roots can be harvested when young for tender baby carrots or left to mature for larger ones. You can now grow heritage or heirloom carrots, which range in colours such as purple, yellow and orange!
The best growing conditions for carrots are free-draining soil with lots of rich organic matter, like compost. If your soil is stony or heavy clay, you’ll end up with stunted carrots or ones that don’t grow properly. This is why carrots do so well in raised beds, where you can pick a free-draining soil type rather than fight against clay soil or stones.
The one thing to look out for is carrot fly, which will quickly demolish your carrot crops if you’re not careful. The good news is that the adults are weak fliers and can’t fly over50cm. So, putting carrots in containers or raised beds usually prevents this. Choose carrot fly-resistant cultivars and avoid dividing carrots during the day when flies are most active, as the smell of the roots will attract the carrot flies. Spacing your carrot seedlings correctly, to begin with, means there’s no need to thin out your crop.
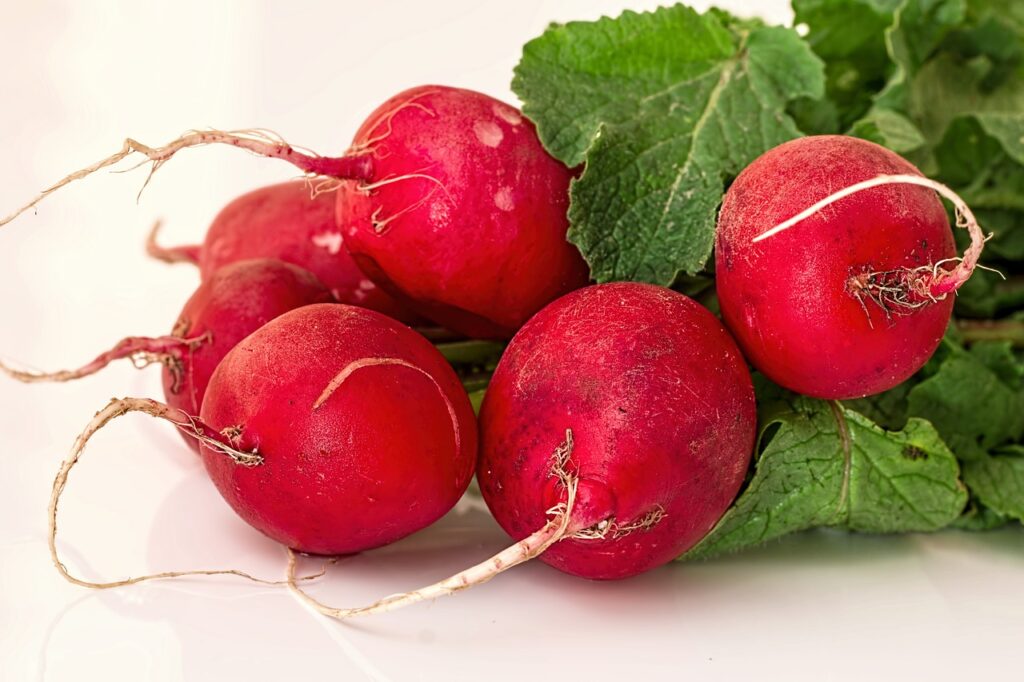
8. Radishes
Radishes are the champions of fast growth, making them an excellent choice for impatient gardeners. Think of them as the sprinters of the vegetable world! Another crop that’s great for small gardens with limited space. I’ve grown radishes for years in containers on window sills for a fast salad crop.
Radishes are usually ready to harvest within 20 to 30 days from planting, depending on the variety. Check the size specified on the seed packet for guidance. Gently pull them out of the soil, and you should have crisp, colourful radishes ready to enjoy.
Despite their small size, radishes are a good source of essential nutrients, including vitamin C, vitamin K, potassium, and dietary fibre. The potassium in radishes can help regulate blood pressure, which is vital for maintaining cardiovascular health. Although small radishes really pack a punch!
Their peppery bite adds a punch to salads and sandwiches, as well as to other culinary uses.
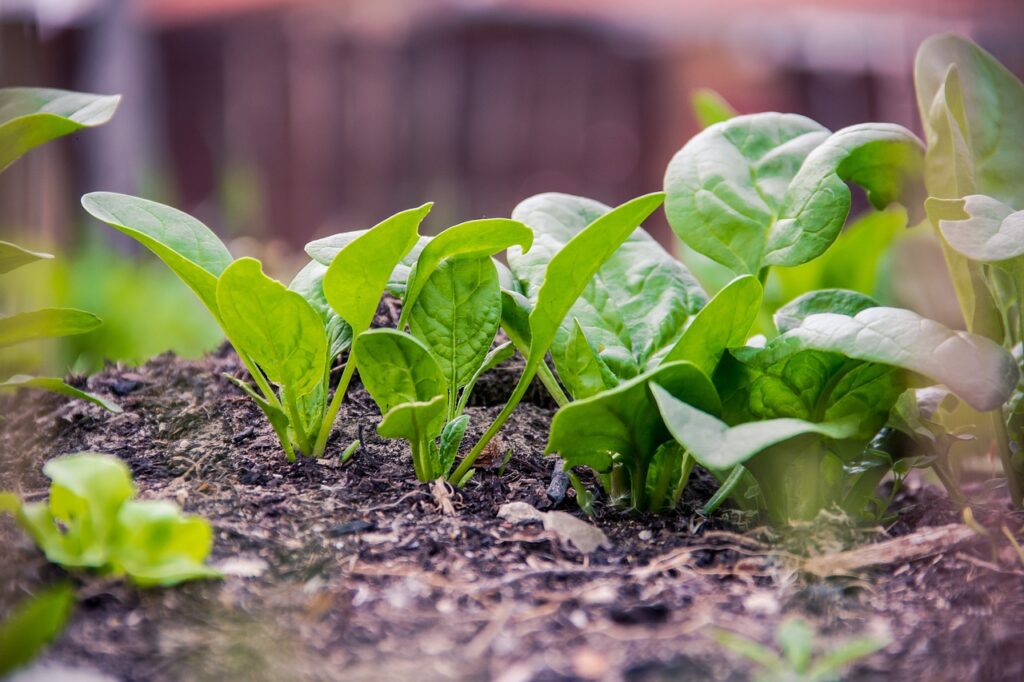
9. Spinach
Spinach is rich in nutrients, grows well in cooler weather and can cope with some shade. Great for north-facing aspect gardens.
Spinach prefers cooler temperatures of 15–20°C and can be grown in the most compact spaces, such as balconies or postage-stamp-sized gardens. Sow a little and often for a consistent crop throughout the year.
Young baby spinach leaves taste great in salads, whereas older leaves are better cooked.
Spinach also adds glossy green foliage to your vegetable beds or, if interplanted with ornamental herbaceous perennials. Spinach’s versatility makes it a staple in salads, smoothies, and cooked dishes, helping pack your diet with various nutrients.
Spinach is a powerhouse of essential nutrients, including vitamins (A, K, C, E, and B vitamins), minerals (iron, magnesium, potassium), and dietary fibre. So, it makes a great dietary boost when grown at home.
Beware, though, young spinach plants are prime fodder for slugs and snails, so consider growing them under mesh or a greenhouse until they are big enough to withstand slug attacks. Another top tip is to encourage birds and frogs into your garden with a small pond or water feature to help keep slugs at bay!
10. Herbs (Basil, Mint, Parsley, etc.)
Herbs are a flavour-packed mini garden all in themselves. You can grow different varieties of herbs in one space. Hence, I’ve grouped them all together. Due to their relatively small size, herbs make an excellent selection for a window box where they can be picked and harvested right outside the kitchen window.
If you’re growing aromatic herbs, you want to put them in the sunniest position possible to get the best results.
Herbs are perfect for beginner gardeners, as they’re often forgiving and can be grown indoors or outdoors without taking up much space. These herbs can be used in salads, stews, cooking, herbal teas or even cocktails!
The best beginner herbs to grow are Basil, Thyme or Mint. All of which can be grown in pots either indoors or outdoors. Pick them regularly to encourage more growth and sow regularly to ensure a crop of fresh herbs all year round.
One tip is to remember that many herbs are tender, such as Coriander, Basil and Parsley. They won’t survive winter frosts, so grow these under glass in winter and repeat-sow to ensure a year-round crop. (If you want to know the top ten herbs to grow as a beginner, checkoutthis article here.)
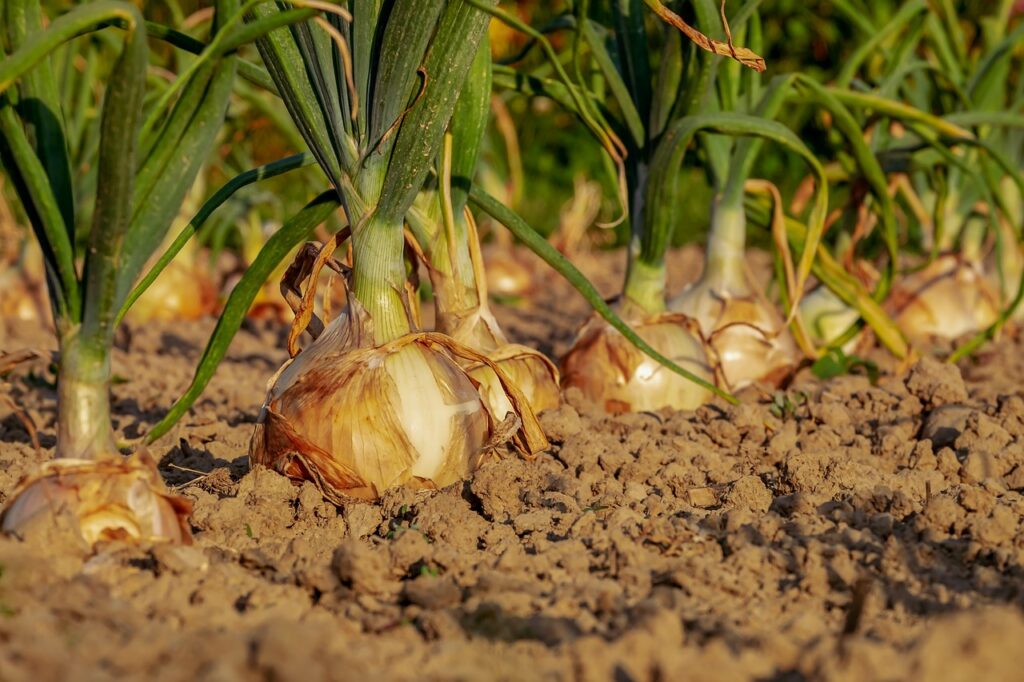
11. Onions
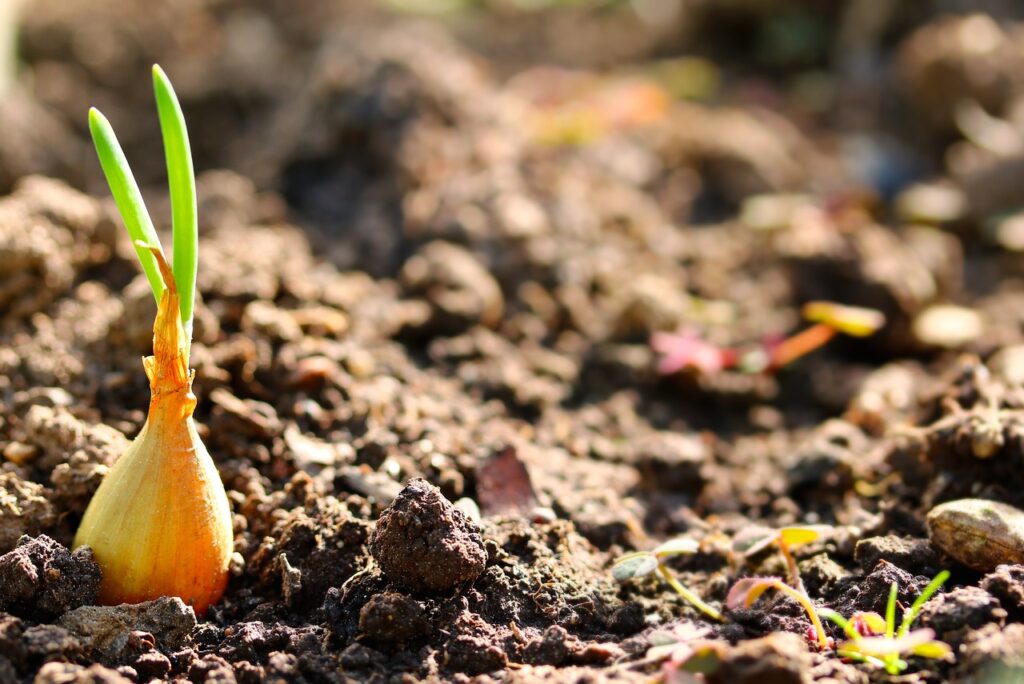
Onions are a kitchen essential and can be grown from sets or seeds. The easiest way to grow them is from ‘baby onions’ sets, ready to be planted in their final position.
An onion ‘set’ is a small, immature onion bulb that is used for planting to grow a new onion plant. These sets are baby onion bulbs grown from seeds during the previous growing season and harvested before they fully mature. Onion sets are commonly used as a quick and convenient way to grow onions.
Using onion sets can be a convenient way to jump-start your onion garden, especially if you’re looking for an earlier harvest. They’re a popular choice among gardeners who want to enjoy homegrown onions without the longer wait associated with growing from seed.
How to plant Onion sets
Here’s how onion sets work. You plant Onion sets in the spring or Autumn. They are planted directly into the soil at a shallow depth, usually about 1 to 2 inches deep. The pointed end (the top) is generally facing upwards. Once planted, the onion sets will start to develop roots and shoots. These shoots will eventually grow into mature onion plants.
The benefits of planting onion sets are that they have a head start in growth, which can result in earlier and more consistent harvests than growing onions from seeds. They are also less prone to pests and diseases than onions started from seeds, as seeds can fall prey to slugs, aphids and other things that like to nibble at them!
Always use proper spacing when planting onion sets. Space onions 5–10cm (2–4in) apart, in rows 25–30cm (10–12in) apart.
It may be tempting to squeeze lots in, but this will result in smaller onions and potential pest or disease problems. They need enough room to grow and develop without overcrowding. Follow the spacing guidelines on the packaging or your local gardening resources.
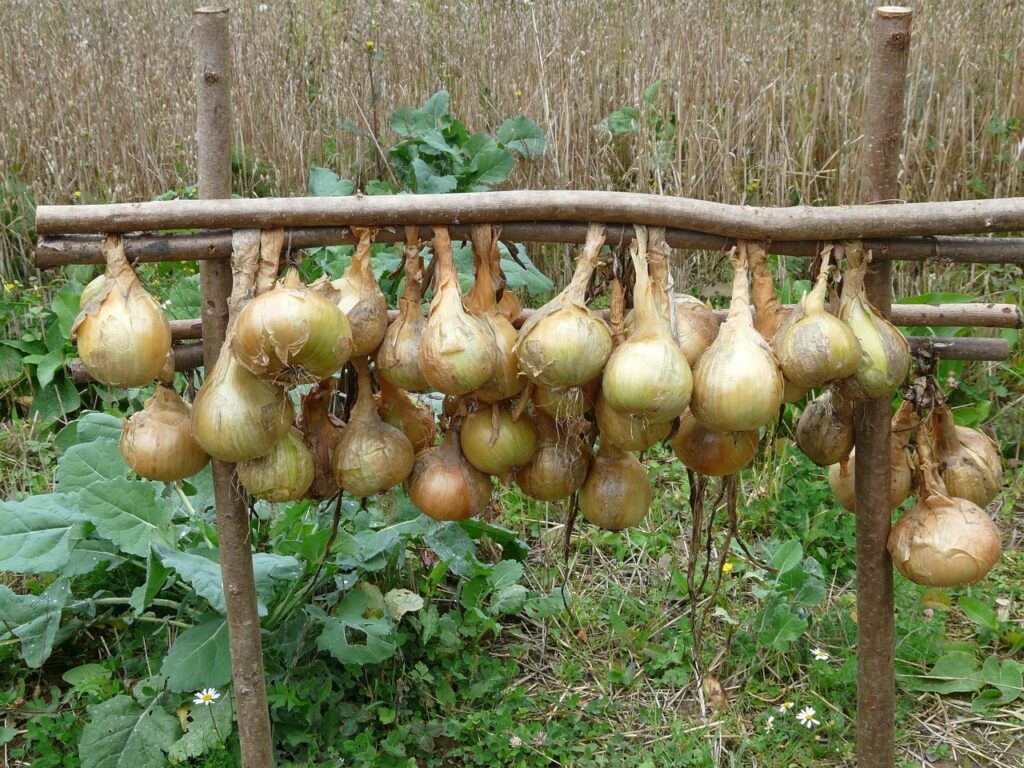
Onion sets will mature and form full-sized onions in a few months. When the tops (foliage) start to turn yellow and flop over, it’s a sign that the onions are ready to be harvested. Carefully lift the bulbs from the soil, and let them cure (dry) in the sun, lying on their side, for a few days before storing. This drying preserves the onions for storage in a cool, dry place for months!
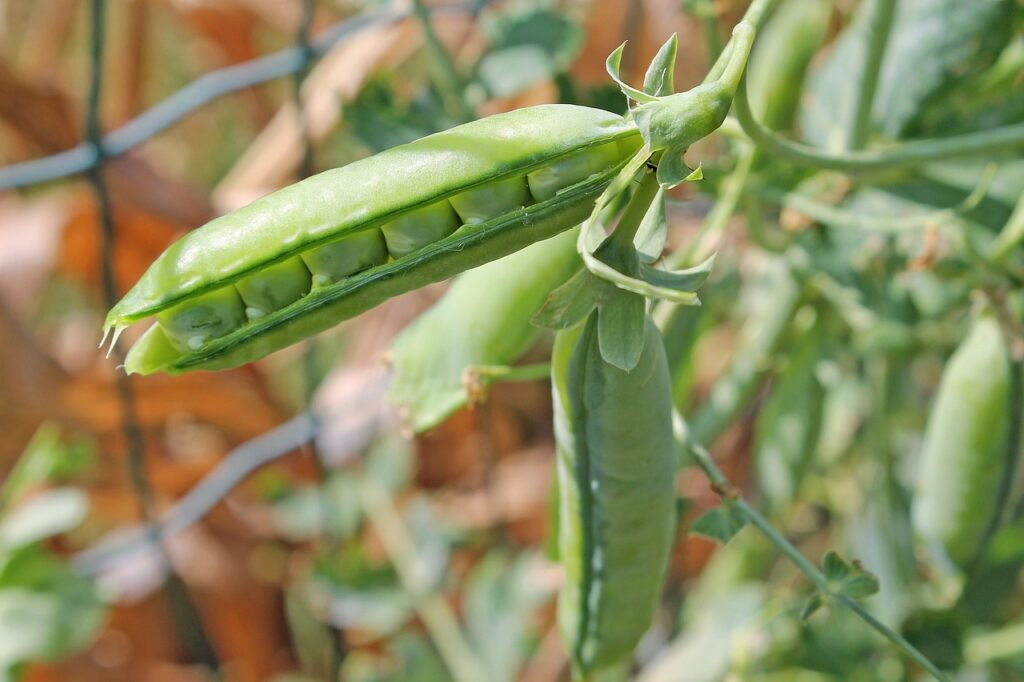
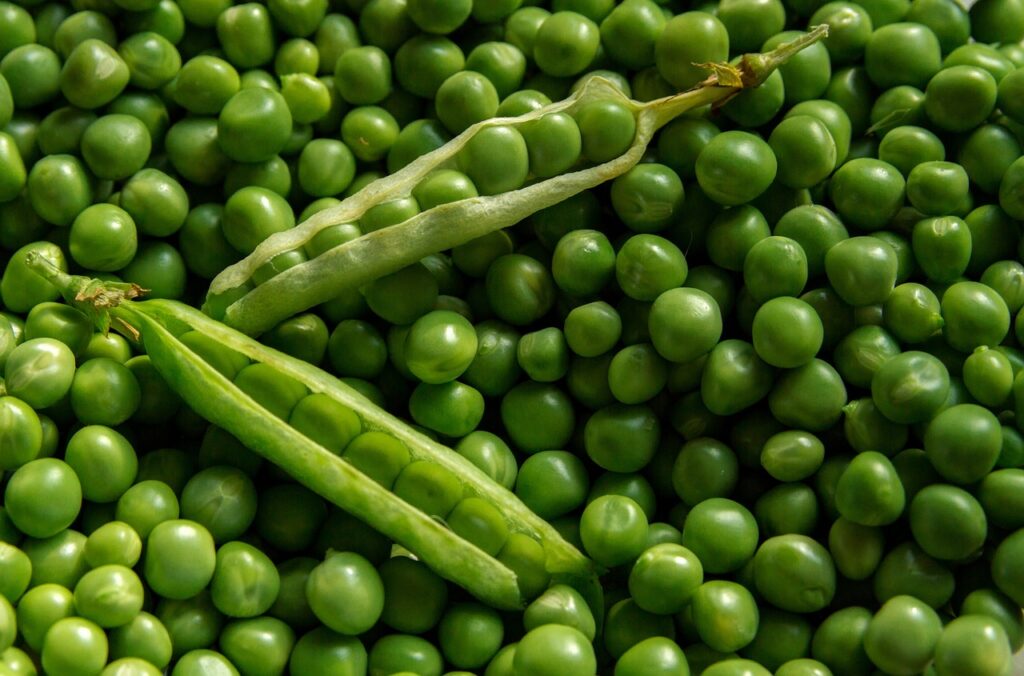
12. Peas
Peas are a joy to grow and offer a sweet, crisp taste incomparable to shop-bought versions. Fresh peas have the finest, sweetest taste, and I can guarantee that once you plant them, most won’t make it to the table as you snack on them when harvesting!
Plant them early in the season for the best results, and try not to disturb them. Plant them in their final positions so they have the full season to scramble up some supports.
Peas need to be planted in rows. Plant peas 7.5cm (3in) apart in either a single row or a double row with 30cm (1ft) between them (for the supports). Place your supports between the rows for the peas to grow up.
You can also install a trellis or netting system for your pea plants to climb on if you’re growing them in smaller spaces or in balcony gardens. This can be made from wood, bamboo, metal, or even garden netting. Place the trellis or netting in rows, leaving enough space for the pea plants to climb. As the pea plants grow, gently guide their tendrils onto the trellis or netting so they can climb and attach themselves.
How long does it take to grow and harvest peas?
The time it takes for peas to grow and be ready for harvest depends on the type of pea you’re growing.
Shelling peas, also known as garden peas or English peas, are harvested for their mature seeds inside the pods. Germination takes 7-14 days. Then, flowering occurs 40-50 days after planting.
Harvesting peas usually happens 60-70 days after planting. You’ll notice the pods becoming plump and the peas inside developing, which means that peas take about 2-3 months to grow and harvest.
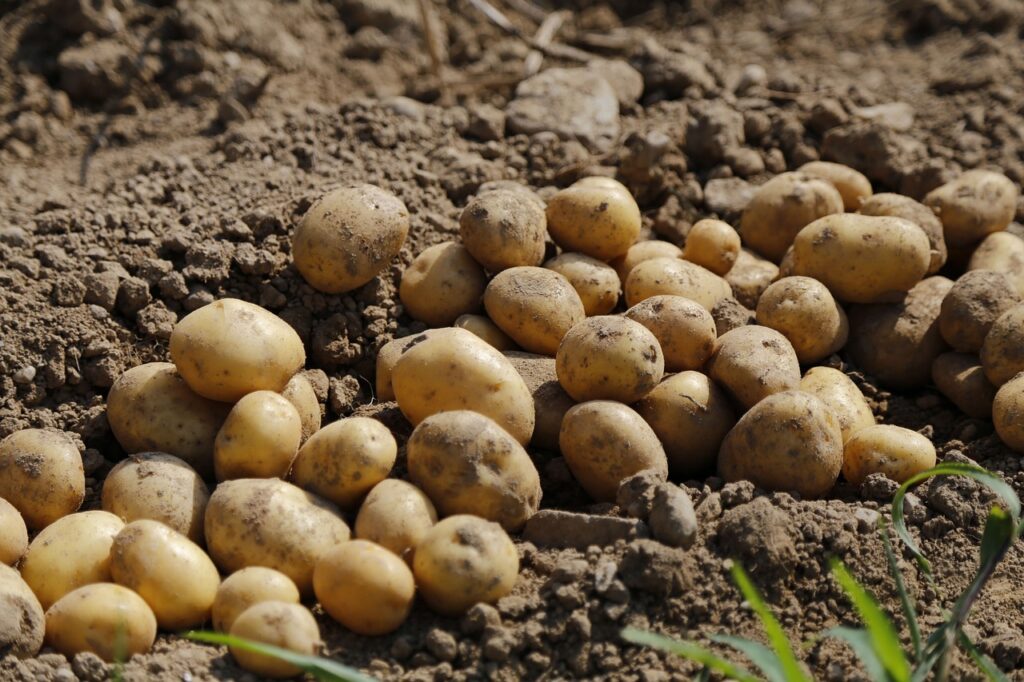
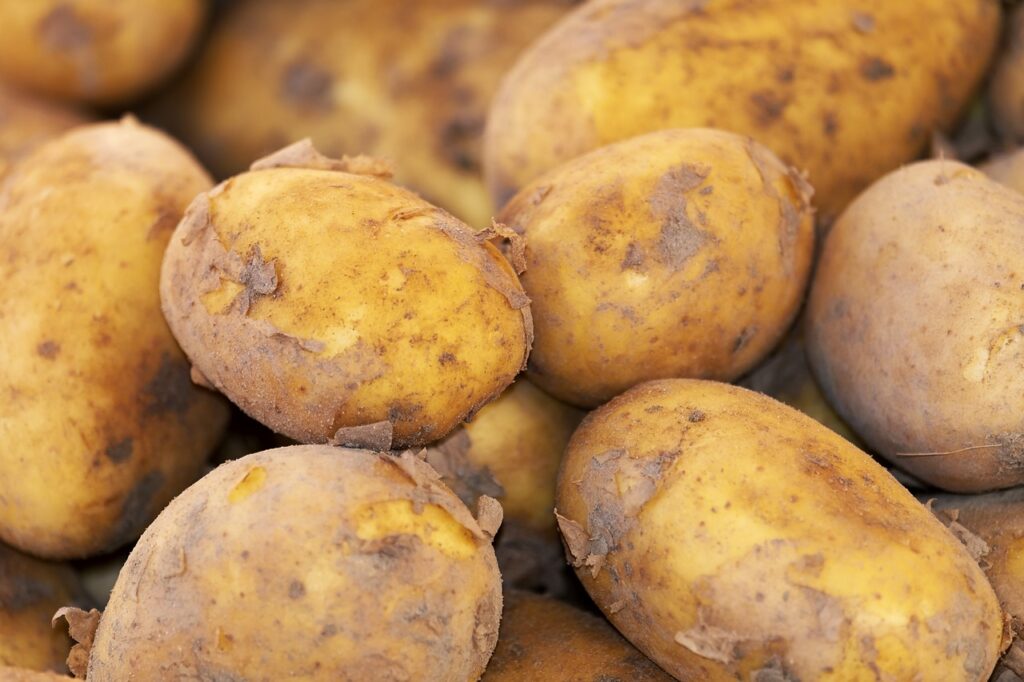
13. Potatoes
Potatoes can be grown in the ground or in containers, making them an excellent vegetable for beginner gardeners to try. I’ve seen them grown in tubs, sacks and even old supermarket ‘bags for life’. Making potatoes a thrifty vegetable to grow, even on a budget!
Potatoes are a great beginner vegetable because they produce wonderful foliage and beautiful flowers, similar to tomato flowers!
Potatoes are pretty undemanding, other than deep planting containers and soil. As the potatoes grow, you mound soil around the stems, a practice called earthing up. They require deep soil for the earthing up of the tubers, keeping them underground. If left out in the sun, they turn green and can be poisonous. Hence, the need to mound the soil up.
There are 3 different types of potatoes based on when in the year you harvest them—known as “Early,” “mid-season,” and “late” potatoes. These terms describe when different varieties of potatoes are typically harvested, based on their growth cycle: early, mid, or late. Here’s an explanation of these three types of potatoes commonly grown.
1. Early Potatoes
Early potatoes are varieties with a shorter growth cycle and are ready to harvest relatively quickly after planting.
Earlies are typically ready for harvest in about 75 to 90 days from planting, depending on the specific variety and growing conditions.
Early potatoes have thin skins and a tender texture. They are often considered “new potatoes,” which are young potatoes harvested before they reach full maturity.
New potatoes are prized for their delicate flavour and creamy texture. They can be boiled, steamed, or roasted whole.
2. Mid-Season Potatoes
Mid-season potatoes have a moderate growth cycle and are harvested between early and late potatoes.
They take longer to mature than early potatoes, usually around 90 to 110 days from planting.
Mid-season potatoes have a good balance of starchiness and waxy texture, making them suitable for various culinary uses, including boiling, mashing, roasting, and frying.
3. Late Potatoes
Late potatoes have a longer growth cycle and take the most time to mature.
Late potatoes are harvested after mid-season potatoes, typically around 110 to 135 days from planting. Late potatoes tend to have thicker skins and a higher starch content. They are well-suited for baking, mashing, and frying.
These potatoes are often stored for longer periods because their thicker skins help protect them during storage.
The choice between early, mid-season, and late potatoes depends on your preference and how you plan to use them. Early potatoes are favoured for their tender, young qualities, while mid-season and late potatoes tend to have a more developed flavour and texture. Selecting a variety from each category allows you to enjoy a continuous harvest throughout the growing season.
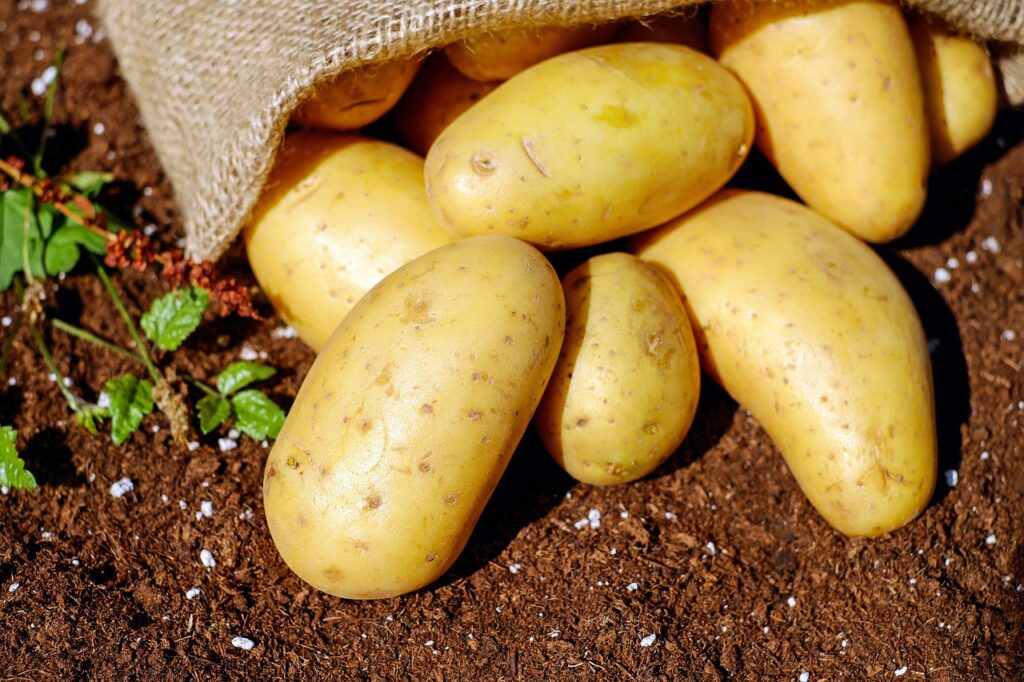
How to plant potatoes
Planting potatoes is usually done with seed potatoes. These small potatoes have been bred to be free of diseases such as blight or other potato illnesses. Usually, you ‘chit’ the potatoes to work out whether the eye or growing stem will emerge from, so you know which way up to plant them.
Chitting potatoes, also known as pre-sprouting or green sprouting, is a technique used to encourage the growth of short, sturdy shoots on potato tubers before planting in the ground. This practice is often done a few weeks before planting to give the potato plants a head start and potentially increase yields. Chitting is particularly useful in regions with short growing seasons or cooler climates where the soil takes longer to warm up.
Choose healthy seed potatoes that are free from disease and damage. Seed potatoes are the potatoes you intend to plant to grow new potato plants. Place the seed potatoes in a cool, well-lit area. This could be a windowsill, a cool room, or a greenhouse. Ensure the area is not too warm, as high temperatures can encourage weak, elongated sprouts.
Set the potatoes with their “eyes” facing up. The eyes are the small indentations or dimples on the surface of the potato where the sprouts will emerge. Allow the potatoes to sit and develop sprouts. This process usually takes around 2 to 6 weeks, depending on the potato variety, temperature, and conditions.
The potatoes are ready for planting once the sprouts are about 1-2 inches long. Be gentle when handling the sprouted potatoes to avoid damaging the sprouts. When planting the chitted potatoes, bury them with the sprouts facing upwards. The sprouts will emerge from the soil and grow into potato plants. Then you can start earthing them up!
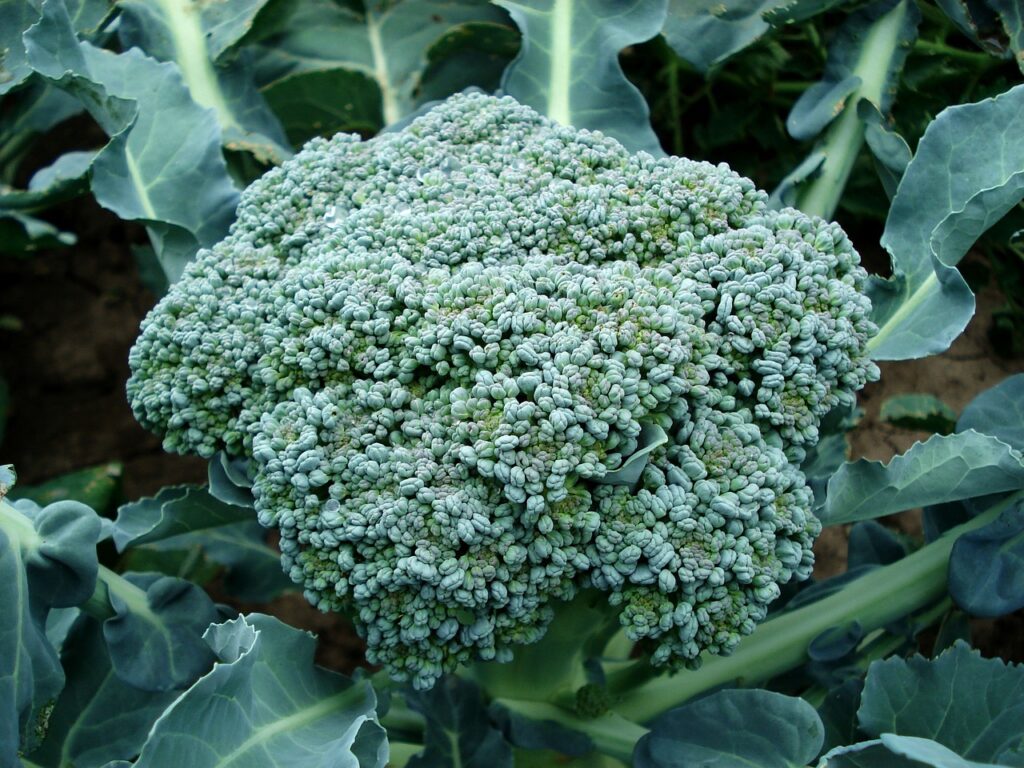
14. Broccoli
Broccoli is a nutrient-packed vegetable that can be grown from spring all the way through to autumn if carefully planted in succession throughout the year. Broccoli’s compact growth habit makes it suitable for smaller garden spaces, too, if grown in containers, and the vegetable looks nice as an ornamental plant before harvesting.
Plant broccoli 30cm apart and 45cm between rows, so there’s plenty of space for side shoots to develop. Growing broccoli takes patience, though, with average crops taking 4 to 10 months to harvest. Broccoli’s side shoots can be harvested regularly, though, meaning you have a steady supply.
Broccoli needs protection from cabbage white butterflies, slugs and other garden pests, but once established, it is a slow-burning vegetable in the garden. This is why quick crops like radishes, greens and herbs can be grown alongside it to utilise your vegetable beds before they’re fully ready for harvest.
Broccoli is one of the winter crops that enables us to grow our own vegetables even in winter.
Broccoli can grow up to 90cm in height, so it will need support in exposed areas.
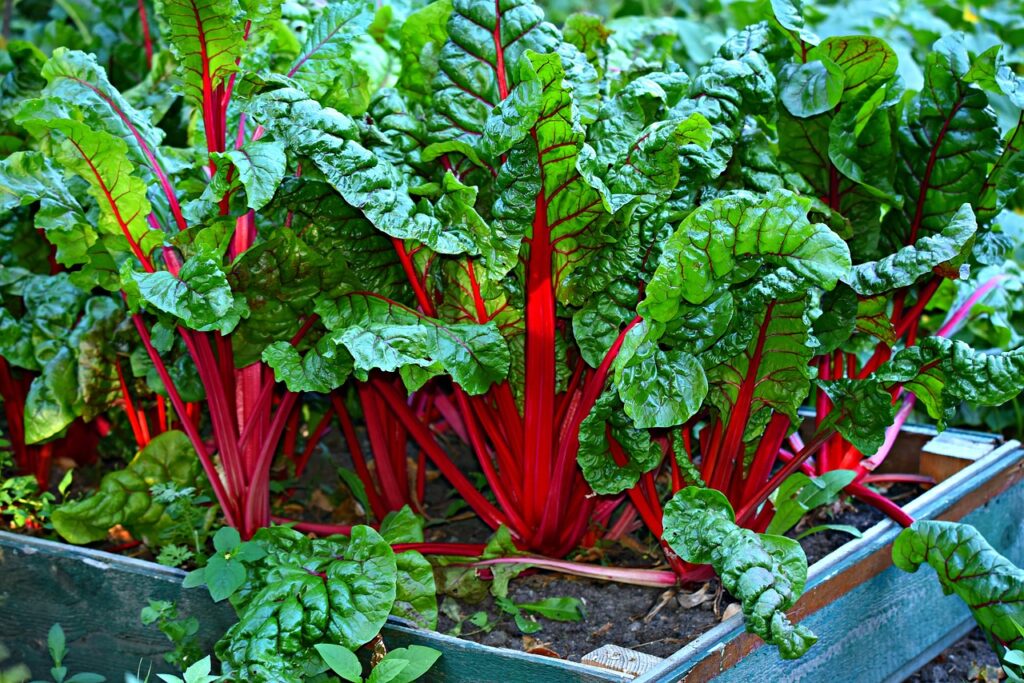
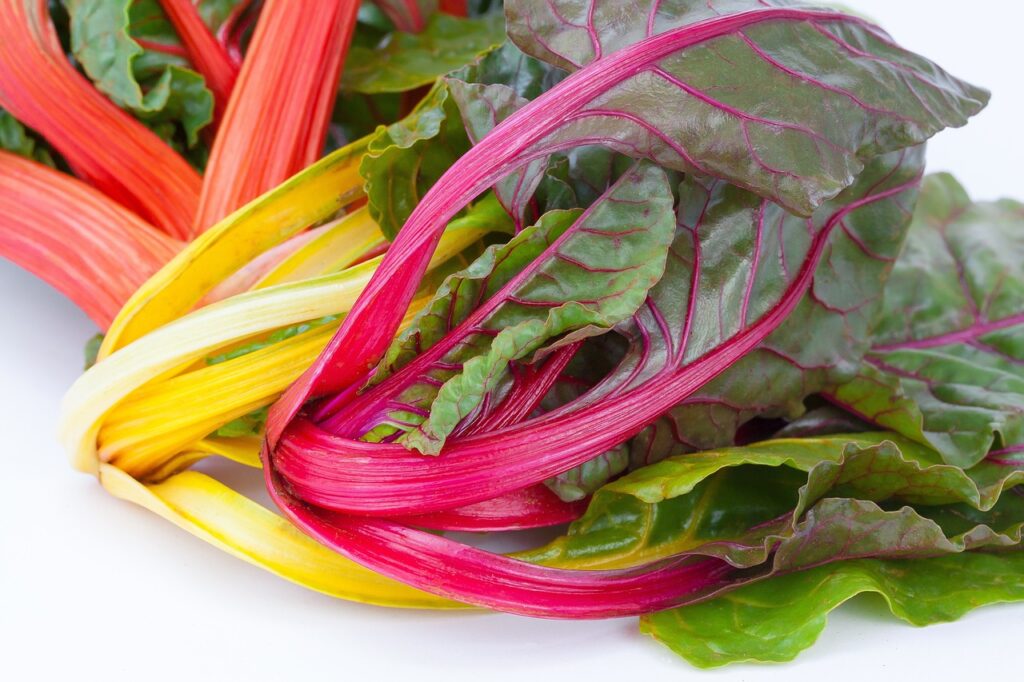
15. Chard
Chard is one of the easiest and probably overlooked leafy green vegetables to grow at home.
Swiss chard, as seen below with its blood-red stems) is known for its adaptability and resilience, making it a forgiving option for beginners. It can thrive in a variety of soil types and light conditions, making it easier to manage for those still learning the ropes of gardening.
This vegetable requires minimal attention and care. Once established, Swiss chard is relatively self-sufficient, needing only occasional watering and basic maintenance such as removing damaged leaves. It’s a fabulous crop for container gardens.
Swiss chard seeds germinate relatively quickly, in 7 – 14 days, offering the satisfaction of seeing green shoots emerge from the soil. This quick progress can be encouraging and motivating for novice gardeners.
Swiss or rainbow chard is a versatile crop that offers colourful stems and nutritious leaves. The leaves can be enjoyed in salads, sautéed, or used as a spinach substitute in various recipes. The vibrant stems add a pop of colour and flavour to dishes.
Another great advantage of Swiss chard is its ability to provide a continuous harvest. As outer leaves are harvested, new ones continue to grow from the centre, ensuring a steady supply of fresh greens throughout the growing season.
Swiss chard adds aesthetic charm to any garden with its colourful stems ranging from bright red to vibrant yellow and its glossy green leaves. It can help create an attractive and vibrant garden space.
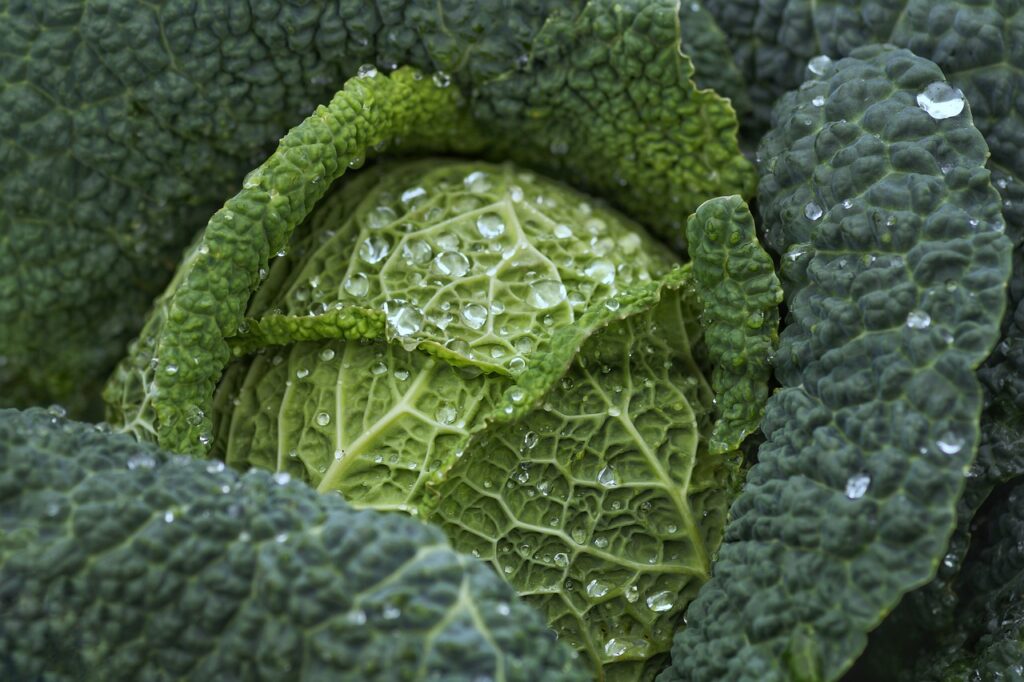
16. Cabbage
Cabbage is a hardy vegetable that can withstand colder temperatures and makes the perfect late-season vegetable. Cabbage is for the patient gardener who wants to take their time! If you find that your allotment gardens are pretty empty in the winter, then cabbage offers a winter vegetable harvest.
Cabbages are from the Brassica family of vegetables and need high nitrogen levels to grow to their potential. So, always choose a high N feed. They will quite happily grow in partial shade, too, but need protecting when young from slugs, snails and cabbage white butterflies. Using a mesh or a fruit cage over your young cabbages can help.
There are three main types of cabbage to grow in your garden, depending on when you want to harvest them.
Early Cabbage: Some early cabbage varieties can mature in as little as 60 to 75 days from transplanting.
Mid-Season Cabbage: Mid-season cabbage varieties typically take around 80 to 100 days from transplanting to reach maturity.
Late Cabbage: Late cabbage varieties take the longest, usually 100 to 130 days from transplanting to maturity.
Cabbage is a staple for coleslaw and fermented foods like sauerkraut. It’s the perfect accompaniment for Sunday roasts and hearty winter stews!
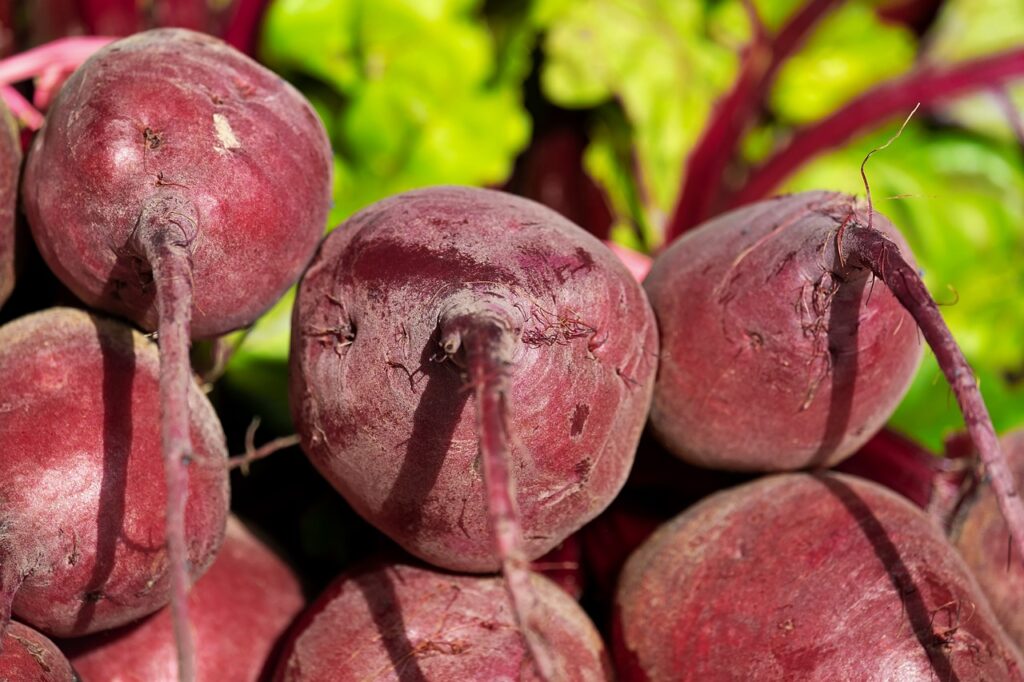
17. Beetroot
Beets or beetroot offer both edible roots and nutritious greens. They take up barely any space and can be easily stored over winter, so you have a crop all year round. We sometimes call beetroot quick or catch crops, as they can be grown in the spaces between other, larger, slower-growing vegetables.
Beetroot is a cool-season crop, growing best in milder weather with temperatures of around 16°C. This means you’re best to grow beetroot in early Spring and then Autumn, avoiding heatwaves, which can cause beetroot to bolt (go to flower and set seed).
Beetroots can be harvested between 40 and 60 days. As soon as they are golf-ball-sized, you can eat them or let them get bigger, depending on your preference. If grown too big, they tend to go woody and lose their flavour.
Beetroots don’t have many pests or diseases, which is a bonus. The biggest issue is that they bolt in warm weather, but there are even bolt-resistant cultivars now available!
They come in various colours and can be roasted, boiled, or grated raw into salads.
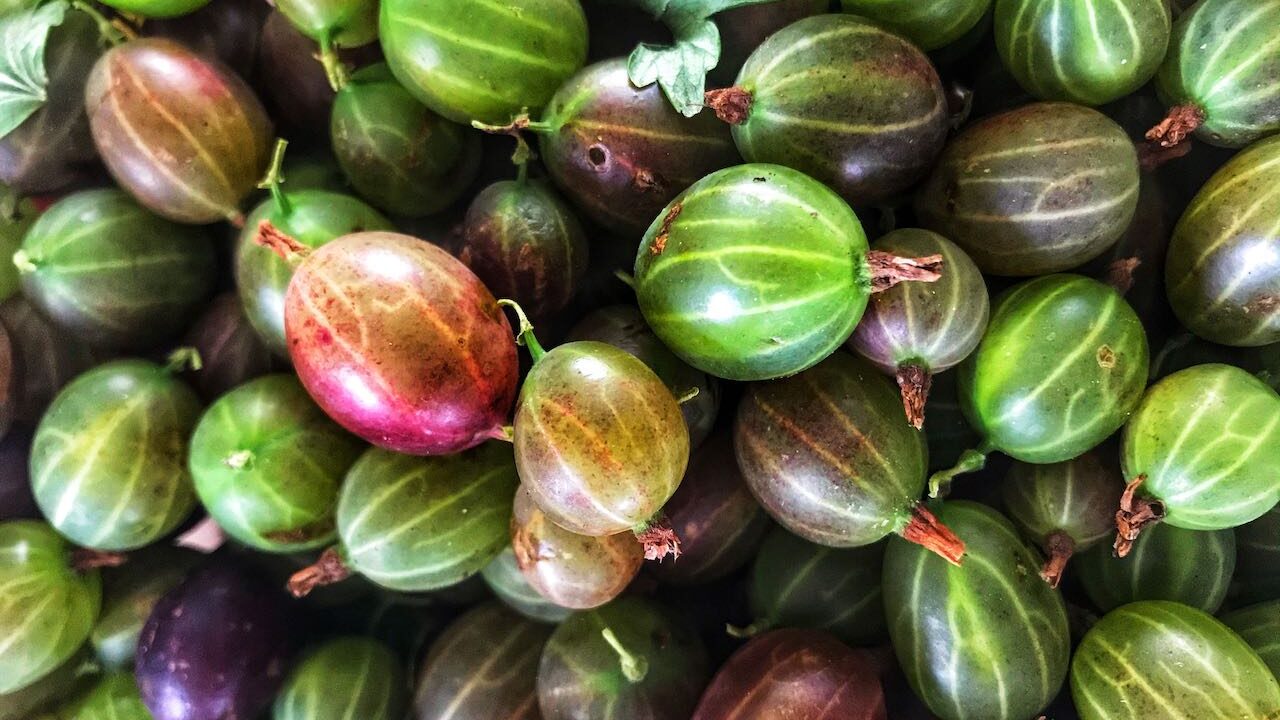
18. Gooseberries
Ok, so Gooseberries are hardly a vegetable, but are worthy of a spot in any allotment, or grow your own garden for their delicious fruit! Gooseberries are one of the least fussy fruit shrubs and will reward you with tasty, plump fruits each July, especially with a bit of winter pruning.
Gooseberries thrive in temperate climates and are well-suited for regions with cold winters. They can tolerate frost and even thrive in areas with chilly spring temperatures. So, if you have a north-facing cold garden like the northern parts of the UK, gooseberries will be fine!
Gooseberries prefer well-draining soil that is rich in organic matter. Soil pH should be slightly acidic to neutral, ideally between 6.0 and 6.5. But don’t worry too much; I’ve grown gooseberries everywhere in all my gardens.
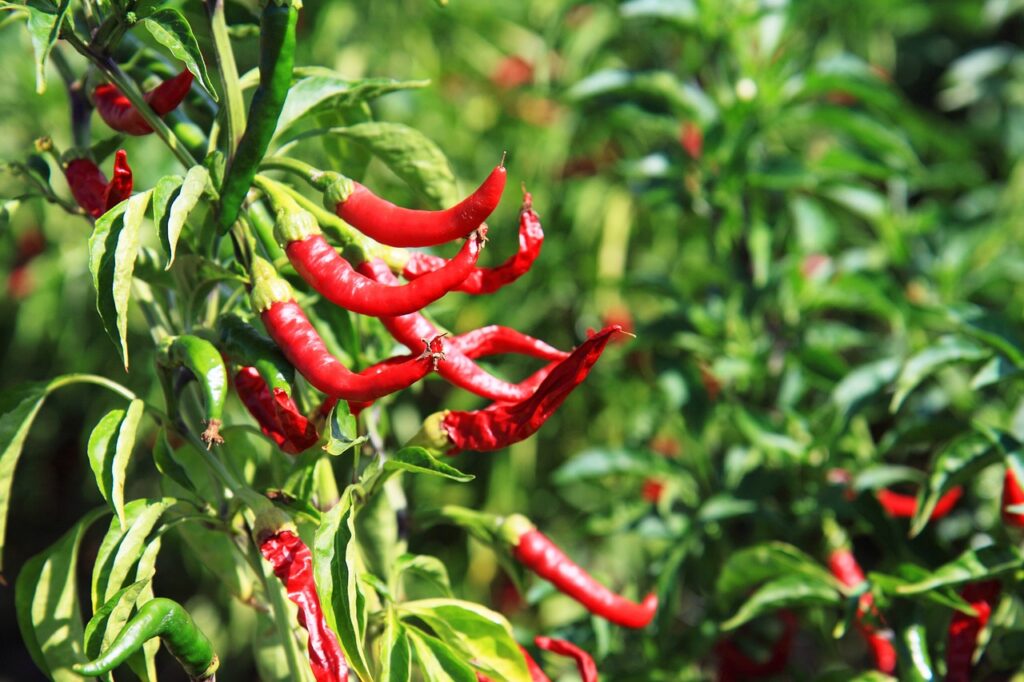
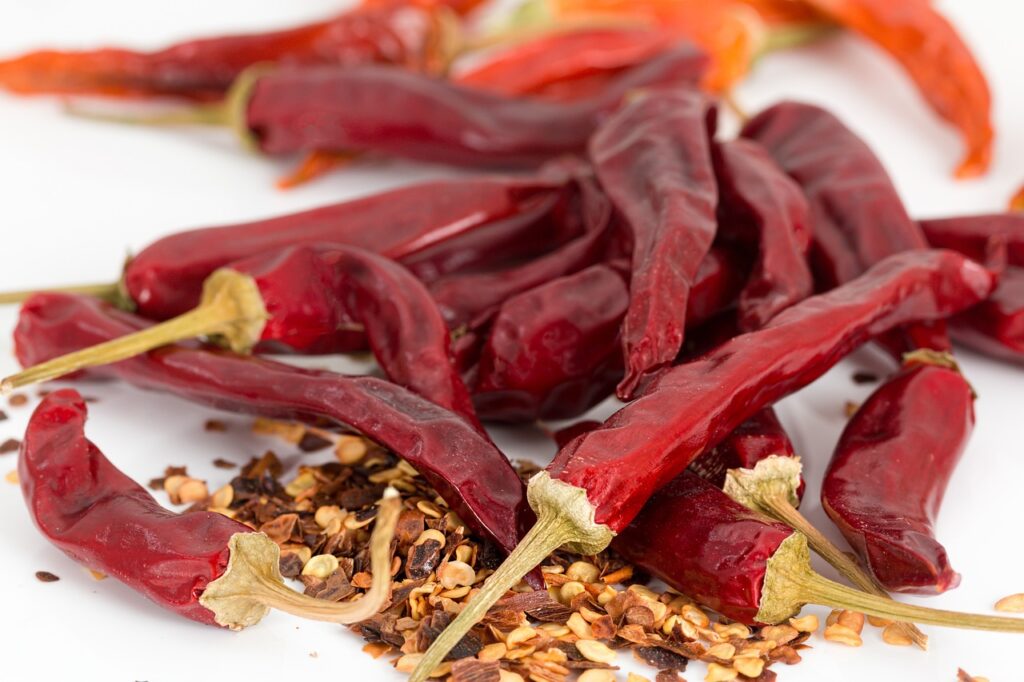
Chillies really help turn up the heat in the garden and are a beginner gardener’s favourite, as they can add spice to so many dishes in the kitchen. Chillies make great window-sill spices; you can grow them on any sunny windowsill, in a greenhouse, or in a cold frame.
Chillie seeds germinate quickly, usually taking 1 – 2 weeks before you see seedlings. Then transplant your chillies when they have 2 true leaves (usually the 3rd and 4th leaves to emerge).
Treat them like you do tomatoes, growing them under glass, and you will be rewarded with hot chillies through summer to late autumn.
Pinching out chilli peppers, also known as “topping” or “pinching,” involves removing the growing tip of the plant to encourage branching and create a bushier, more productive plant.
Pinching out chilli plants is typically done when they have a few sets of true leaves (leaves that follow the initial seed leaves). This is usually around 4 to 6 weeks after germination. You want the plants to have developed a strong root system and started growing well, with at least 4 to 6 side shoots actively growing.
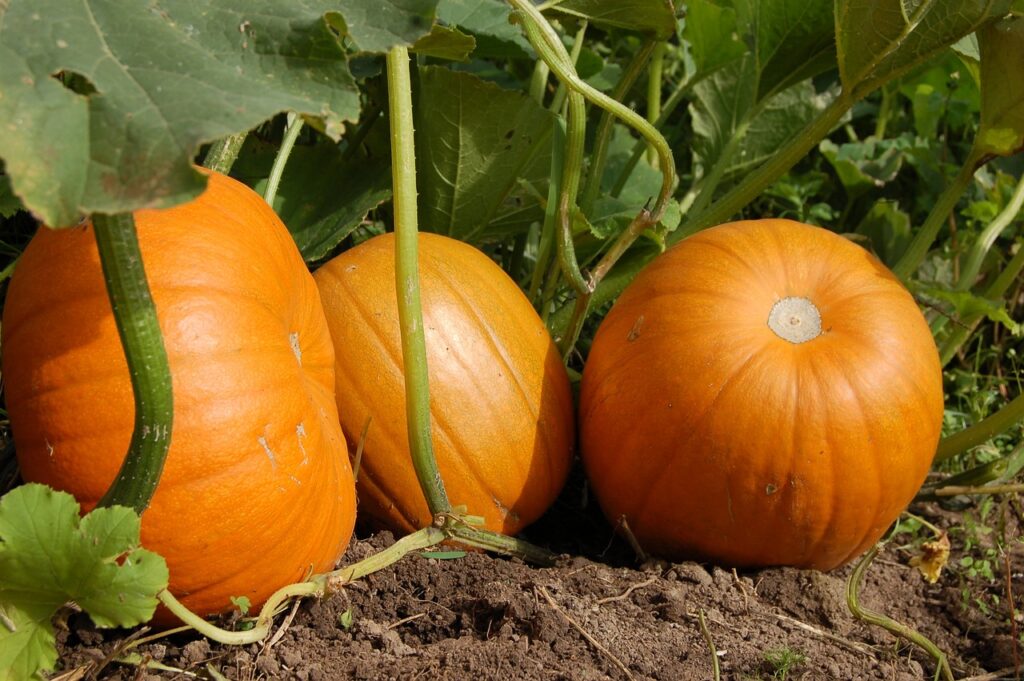
20. Pumpkins
Last but not least, we have the humble Pumpkin! While pumpkins need more space to spread out, they’re a fun addition to a larger garden. They’re great for Halloween and can be used in cooking and baking.
Pumpkins are a long-season crop, taking anywhere from 3 to 4 months to fully develop into a harvestable pepo (the name given to a Pumpkin or Squash fruit).
You know, when they are ready to harvest, a thumbnail doesn’t pierce or leave a mark on the pumpkin skins.
Pumpkins thrive in warm weather, so they grow best in regions with a long growing season and plenty of sunlight.
Pumpkin plants produce male and female flowers. The female flowers, recognisable by the small fruit at their base, require pollination to produce pumpkins.
Bees and other pollinators play a vital role in transferring pollen between flowers. Ensure a healthy pollinator population in your garden to maximise fruit set. Pumpkins are also hungry, so once you have fruit, give them a balanced weekly plant feed. Also, consider placing straw under the fruit to keep it off the wet ground, which can cause it to rot!
What Next?
If you really want to amp up your gardening skills and make your garden beautiful, why not take one of my online garden design courses? Whether you want to take a crash course in a weekend or spend more time becoming a fully-fledged garden designer, I have courses for all abilities. That way, you can put all of your knowledge of full sun herbaceous perennials into practice in your own garden. The best thing is they are affordable, and you don’t need to go back to university — study at your own time and refer back to the course materials at any time for as long as you want. So what’s stopping you from creating the garden of your dreams?
Study Online Anywhere
Video Lessons
Quizzes
5 Sample New Build Garden Designs
Beginners guide to planting
Certificate upon Completion
29
Garden Design Examples for Small Gardens: 30 Design Templates & Planting Plans
Garden Design Examples for Small Gardens: 30 Design Templates & Planting Plans: In this online gardening course, I’ll walk you through 30 fantastic garden designs, explaining the logic behind the layout, the plant choices, and take-home tips for applying them in your own garden.
Weekend Garden Makeover: A Crash Course in Design for Beginners
Learn how to transform and design your own garden with Lee Burkhills crash course in garden design. Over 5 hours Lee will teach you how to design your own dream garden. Featuring practical design examples, planting ideas and video guides. Learn how to design your garden in one weekend!
Garden Design for Beginners: Create Your Dream Garden in Just 4 Weeks
Garden Design for Beginners Online Course: If you want to make the career jump to becoming a garden designer or to learn how to design your own garden, this is the beginner course for you. Join me, Lee Burkhill, an award-winning garden designer, as I train you in the art of beautiful garden design.
As a beginner gardener, growing your own vegetables can be an immensely gratifying experience. These top 20 vegetables are well-suited for newcomers, offering a mix of simplicity, versatility, and deliciousness. Remember that gardening is a journey, and mistakes are part of the learning process. So roll up your sleeves, get your hands dirty, and watch your garden flourish as you savour the rewards of homegrown produce.
Make sure you visit my YouTube channel for more gardening guides. You can also check out my Tweet, Facebook or Instagram for more garden help and tips.
Your subscription could not be saved. Please try again.
Your subscription has been successful.
Lee Burkhill
Lee Burkhill, known as the Garden Ninja, is an award-winning garden designer and horticulturist with over 30 years of gardening experience and 15 years as a professional garden designer. A qualified RHS (Royal Horticultural Society) professional, Lee specialises in sustainable garden design and practical horticultural advice. He designs and presents on BBC1’s Garden Rescue and in leading gardening publications. Lee combines three decades of hands-on gardening knowledge with professional design qualifications to help gardeners create beautiful, functional outdoor spaces.