How to Lay Turf: Complete Guide to Installing Perfect Lawn in 2026
Lee Burkhill: Award Winning Designer & BBC 1's Garden Rescue Presenters Official Blog
Beginner level
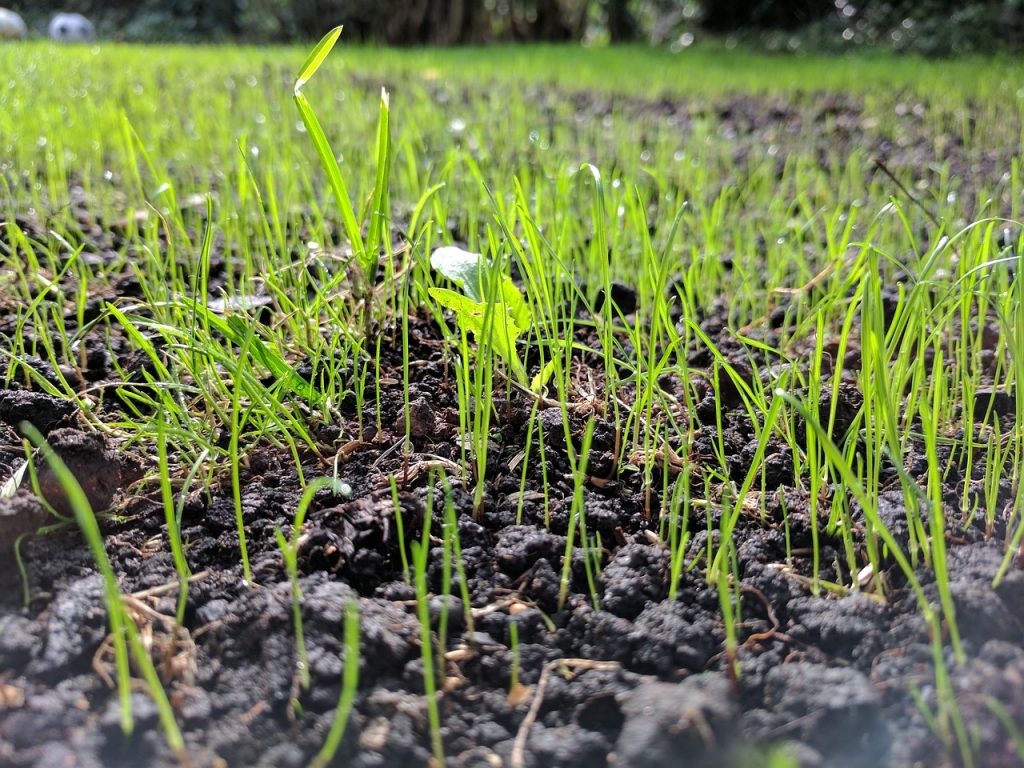
Welcome to the ultimate guide on how to lay turf, your go-to resource for transforming your garden lawn into a lush, green paradise! Whether you're starting from scratch or rejuvenating an existing lawn, the process of laying turf is easy when you follow this guide which will result in a vibrant and healthy carpet of grass. Let's look at how to create the perfect lawn.
Quick Answer
Prepare the ground by digging to 15cm, removing all weeds and debris, levelling, and creating a fine tilth. Lay rolled turf in a staggered brickwork pattern, butt joints tightly, water immediately, and keep moist for four to six weeks. The best time to lay turf in the UK is September to November or March to April when soil temperatures sit between 8 and 15°C.
Have you just moved into a new property or new build? You may face bare earth or, in older properties, a lacklustre lawn that needs help ASAP! This ultimate guide to laying and fixing lawns will help you make the most of your garden and create a fabulous lawn in no time!
Grass lawns are tough, resilient, evergreen, and low-maintenance, making them an excellent garden surface for lower-maintenance gardeners. Laying turf with rolled turf or sowing grass seed is relatively easy if you prepare the ground properly first, and you’ll have a new lawn in no time! Most lawns can be laid or sown by seed in just one weekend and it’s a cost effective way to green up your gardens.
This lawn care guide will show you how to lay turf effectively, regardless of your chosen method. I will provide easy, step-by-step instructions for laying rolled turf or lawns from seed.
This page contains affiliate links for products I use and love. If you take action (i.e. subscribe, make a purchase) after clicking a link, I may earn some gardening commission which helps me keep the Garden Ninja Blog free for all.
What is a lawn?
A lawn is an area of soil often in a garden which is planted with several different grass species to form a living green surface. Sometimes, other hard-wearing plants, such as clover or camomile, are used. A lawn has the distinct characteristic of being kept short through mowing and cutting, usually with a lawn mower.
In my garden design practice, most clients consider a garden lawn an essential part of an English garden. It’s understandable as to why that’s the case.
Garden lawns are probably one of the most widely recognised garden design components. Turf has a variety of uses, such as lounging on a deck chair, manicuring it to perfection, getting your mates around to have a BBQ on it, or even as a football pitch for your children. A well-laid garden lawn with lush turf is a staple of a multi-functional garden.
Lawns are a great form of ground cover for gardening. It allows you to walk, play, or exercise on them, providing a multifunctional space in any garden. Lawns are usually made up of 3 or more grass species that grow together as a living ground cover or mat.
What can I use turf for?
Lawn turf is used to cover large amounts of the garden at a relatively low cost, enabling you to walk over it or use it for garden furniture.
Perfect for informal and utility gardens:
Hard-wearing surface for play areas and children’s gardens
Low-maintenance option that’s zero fuss
Ideal for busy families who want a functional outdoor space
Great for formal ornamental lawns:
Manicured stripes and pristine appearance
Perfect for garden enthusiasts who enjoy weekly maintenance
Suited to those who love feeding, scarifying and perfecting their lawn (for the few, not the masses!)
One thing I’m adamant against is the use of artificial turf. You can read the horrific environmental impact of fake grass and why to avoid it here.
Choosing between rolled turf or grass seed
When it comes to planting a lawn, you have a couple of options depending on how much time or budget you have. If you want to get your lawn down as quickly as possible, then rolled turf is the quickest bet. However, if you’re on a budget or need a very specific lawn seed mix, then sowing by seeds is the best bet.
Let’s take a closer look at the two main ways to install a garden lawn.
1. Rolled turf installation
The fastest method is using rolls of precut turf, which are laid. They are installed in a staggered brickwork fashion, meaning they are fast but more expensive than seed.
Benefits of rolled turf
Fast to lay
Instant impact
Cost-effective for large areas
Drawbacks of rolled turf
Expensive compared to grass seed
Requires considerable watering
Can become stressed if laid in warmer periods
2. Sowing grass seed
This method uses lawn seed, scattered onto prepared soil, which is allowed to germinate and grow into a lawn. This method is slow but cheaper than rolled turf.
Birds will often feed on the seeds before they germinate
Every gardener will have their preference. Some gardeners swear by creating a lawn from seed and enjoying the germination of the seeds, while other people prefer to get their lawn down in one weekend for that instant look. Here are the benefits and drawbacks of both methods of laying a lawn.
Costs of Lawn Seed per m2
Category
Price (£)
Cost per m² (£)
Budget Lawn Seed
Cheap
0.16
Mid Range Lawn Seed
Affordable
0.30
Premium Lawn Seed
Luxury
0.40
To work out how much it will cost to seed a new lawn simply work out the size of the area in m2 and then multiply by the price of the seed above.
i.e. If you use a budget seed at 16p per m2, then a 30m2 garden would be 30×0.16=£4.60. Alternatively, the same lawn with a premium seed would be 30×0.40=£12.
What’s the quickest way to lay a lawn?
The answer is rolled turf, but while it quickly gives you an instant lawn, it requires the most watering and initial maintenance to get established. You will need to water it thoroughly three times per week for the first month until it’s established.
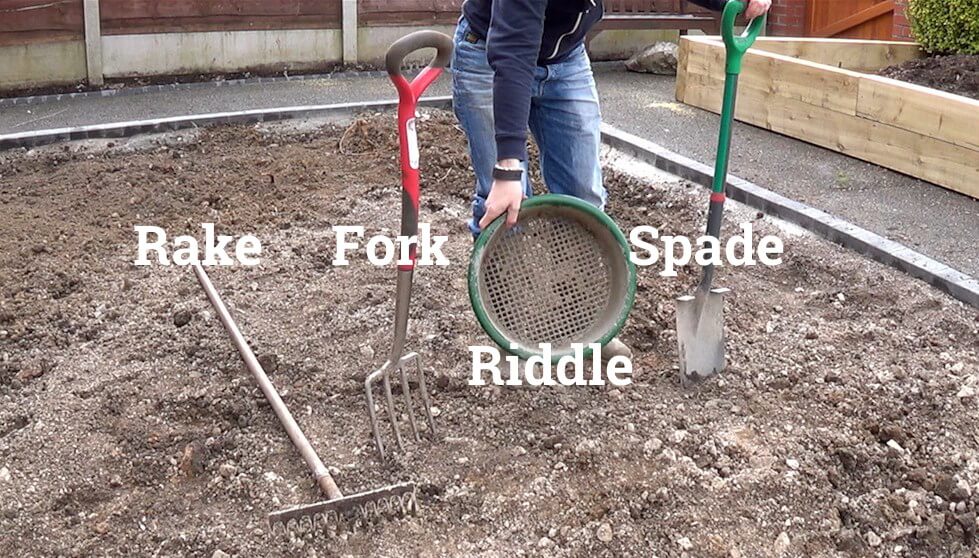
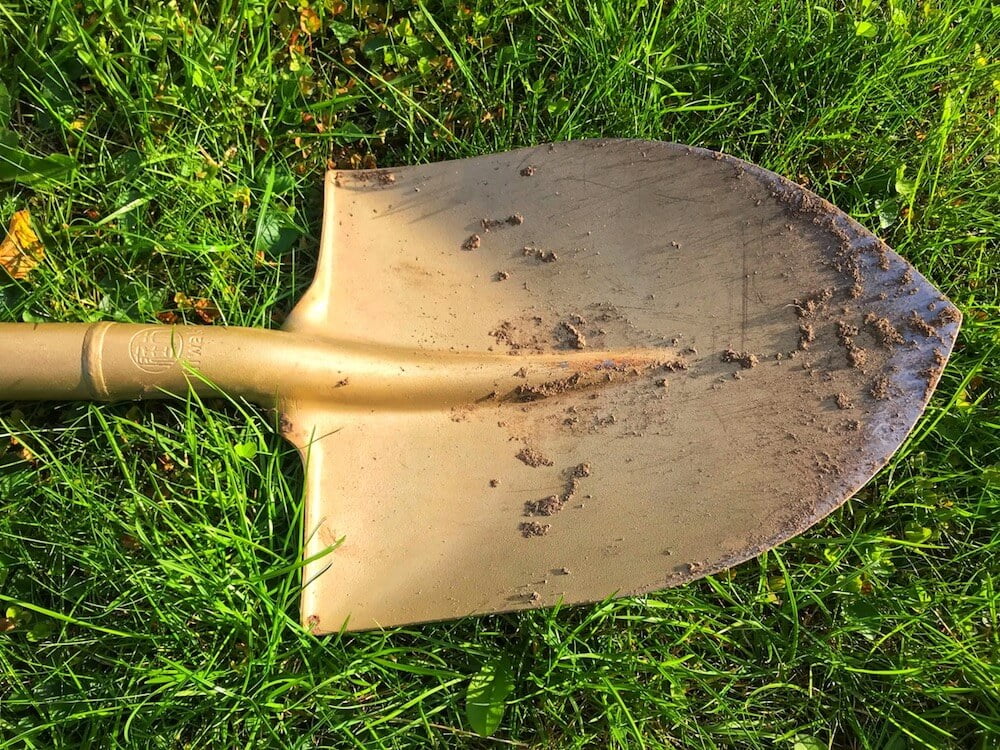
Equipment for laying turf
Below is a handy list of the garden equipment you will need when laying a lawn with rolled turf or seeding an area to create a garden.
Turf (measure the space in metres squared then add 10% extra)
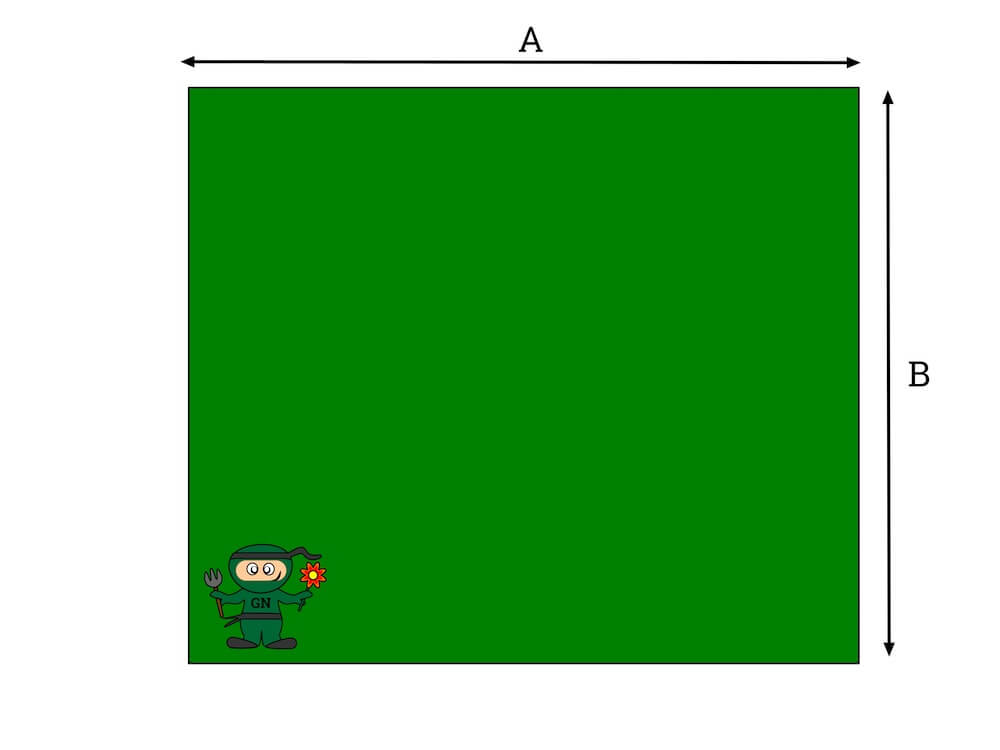
Before fitting a lawn, determine how much grass seed or turf you need. You do this by measuring the length and the width of the area to be turfed.
i) For rectangular lawns: Take measurement A and multiply by B (shown below) to get the square area, ideally in square metres.
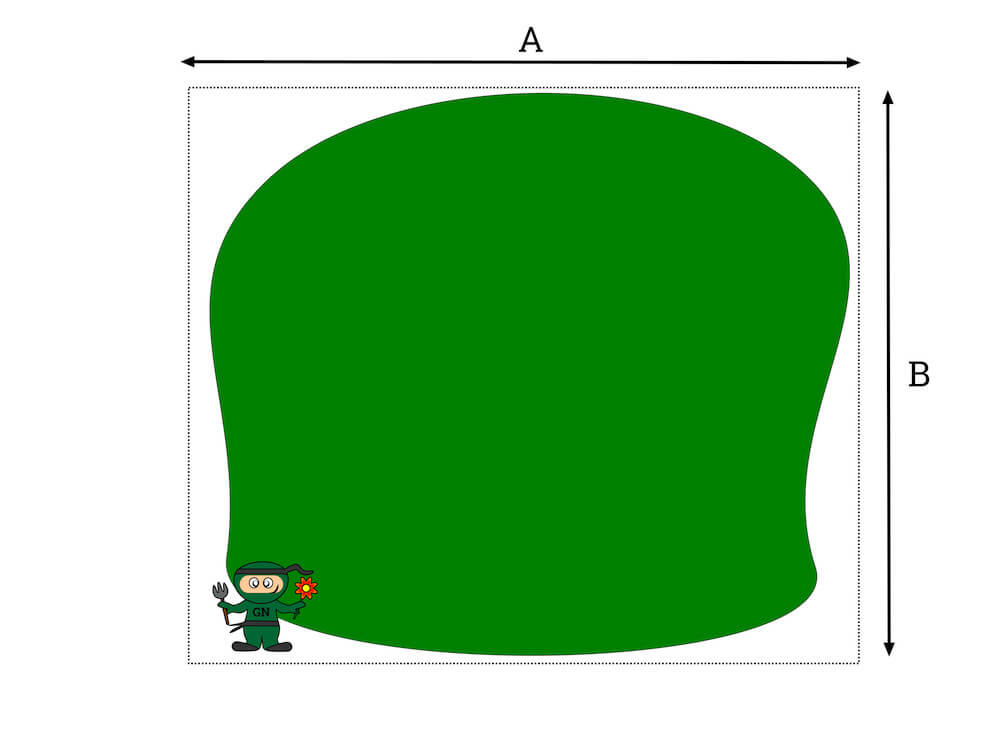
ii) For curved lawns: If you want a curvy lawn, work on measuring a square or rectangle dimension slightly bigger than the free-form area, as it makes it far easier to order turf. The leftover turf can then be turned upside down and stacked at the back of a border, breaking down and making excellent loamy compost. No waste!
How to lay a rolled turf lawn
Creating a lawn from rolled turf is the quickest method of getting the lawn of your dreams. In a few hours, you can have a brand-new lawn. First, you prepare the ground, ensure it’s level, create a fine tilth for the lawn to root into, and then stagger your turfs. Lastly, water your new lawn.
Follow the detailed lawn installation steps below to create a fantastic lawn instantly!
⚠ Remove Existing Lawn First
Never lay new turf directly over an existing lawn, even a scruffy one. New turf laid over old grass will struggle to root into the soil, and weeds and old grass can push through the surface within weeks. Lift all existing turf with a spade, remove weeds, roots, and any debris, and start with bare, prepared soil. The extra work is absolutely worth it to avoid a lawn that fails to establish properly.
⚠ Weedkiller Timing Warning
Do not use residual weedkillers in the weeks before laying turf. These can persist in the soil for several weeks and will prevent new turf from rooting properly. If you have used a weedkiller to clear an area, always check the product label for the recommended gap before laying grass.
Clearing weeds before you lay turf
The step most people underestimate, and the one that causes the most regret six months later, is dealing properly with perennial weeds before a single turf roll goes down. Annual weeds, the ones that grow from seed each year, are not a significant problem. They will struggle to establish through a healthy, well-laid lawn. Perennial weeds are a completely different matter, and if you ignore them at the preparation stage you will be fighting them through your turf for years.
The reason this matters so much is timing. Once turf is laid, your options for dealing with perennial weeds become very limited. You cannot use systemic weedkillers on an established lawn without damaging the grass. You cannot dig them out without lifting turf. The preparation stage is genuinely your only opportunity to eliminate them properly, and it is worth taking seriously.
The worst offenders to deal with before laying
Bindweed is one of the most persistent perennial weeds. Left in the ground before turfing, it will push through new turf within weeks and is very difficult to remove without lifting the lawn.
Bindweed is the most troublesome. Its roots go deep and even small fragments left in the soil will regenerate. It will find its way through turf joints within a single growing season and, once it does, the only solutions are spot-treatment with a glyphosate gel or lifting the turf entirely.
Couch grass spreads aggressively through underground rhizomes and will grow through a new lawn faster than almost any other weed. Remove every piece during preparation.
Couch grass spreads through underground rhizomes and is almost impossible to eradicate once established in a lawn. Every small piece of white root left in the ground has the potential to regenerate. When digging over the area, remove every fragment you find and compost or bin them rather than leaving them on the surface where they can re-root if they dry out and get knocked back into the soil during raking.
Creeping thistle and creeping buttercup both spread by underground runners and will appear through new turf if not removed. They are easier to deal with than bindweed or couch grass as their root systems are shallower, but they still need thorough manual removal during the digging stage.
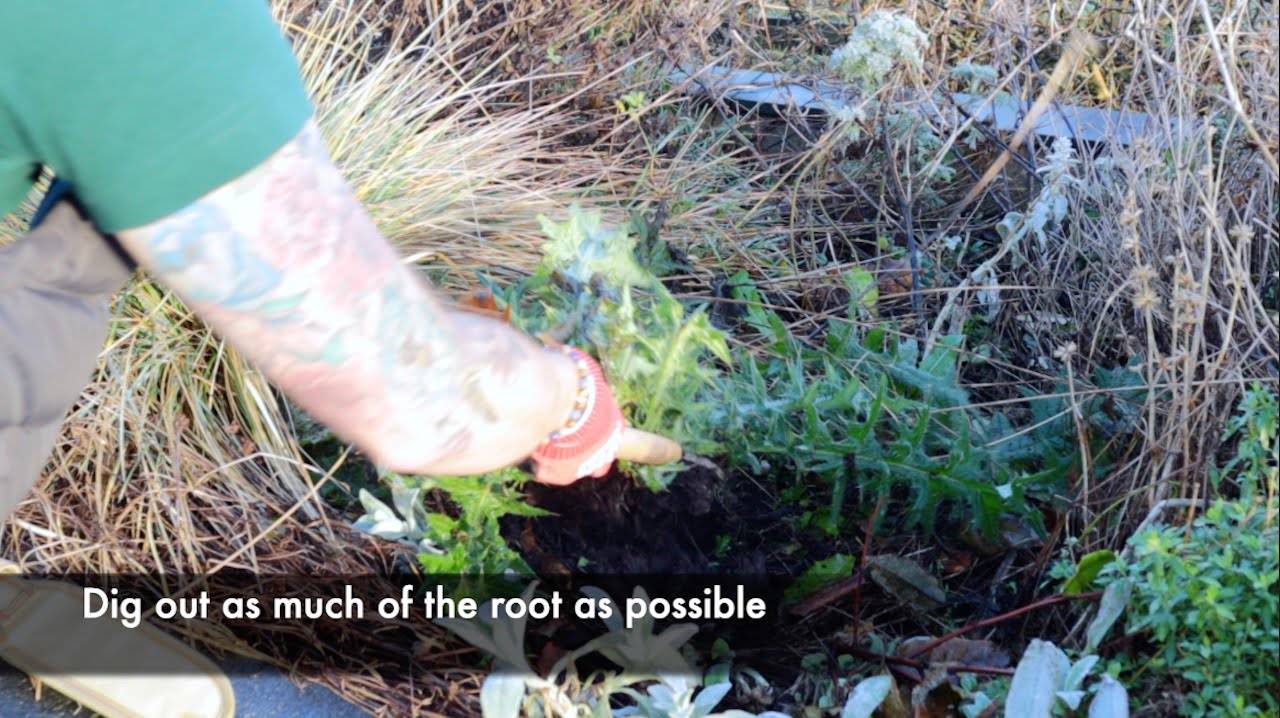
Removing every fragment of perennial weed root at the preparation stage is far easier than dealing with them once turf is established above them.
Using weedkiller to clear a weedy plot before turfing
If the area you plan to turf has a serious perennial weed problem, applying a systemic contact weedkiller containing glyphosate several weeks before you begin preparation is the most effective approach. Glyphosate is absorbed through the leaves and travels down into the root system, killing the plant from the inside out rather than just burning off the top growth. For it to work properly, the weeds need to be actively growing when you apply it, and you need to wait until the foliage has died back before cultivating the soil.
⚠ Critical Timing Point
There are two separate weedkiller warnings that apply to turfing, and they apply in opposite scenarios. If your plot has perennial weeds, use a systemic contact weedkiller such as glyphosate and wait two to four weeks for it to work fully before digging. Do not cultivate too early or you will interrupt the translocation of the chemical to the roots. Separately, do not use residual weedkillers (those that persist in the soil) at any stage before turfing, as these prevent new turf from rooting. Always check whether your weedkiller is contact or residual before applying.
For a heavily infested plot, a second application after the first treatment and another two-week wait will deal with any regrowth from stubborn roots. This adds time to your project but is considerably less frustrating than managing persistent weeds through an established lawn for the next five years.
Once you have treated and waited, dig the plot over thoroughly as described in step 3 and remove every piece of dead root you can find. Even after a successful glyphosate treatment, physically removing root fragments during digging reduces the risk of any regeneration from pieces that may not have received a full dose.
💡 Top Tip: The Stale Seedbed Method
If you have time before your turf delivery, prepare the ground, rake it level, and then wait two weeks before laying. This gives weed seeds in the disturbed topsoil time to germinate. Hoe them off shallowly and then lay your turf on what is effectively a freshly weeded surface. This simple technique significantly reduces the number of annual weeds that come through your new lawn in the first season.
For more detailed advice on dealing with specific problem weeds, my complete guide to weeding your garden covers identification and removal techniques for all the most common UK perennial weeds.
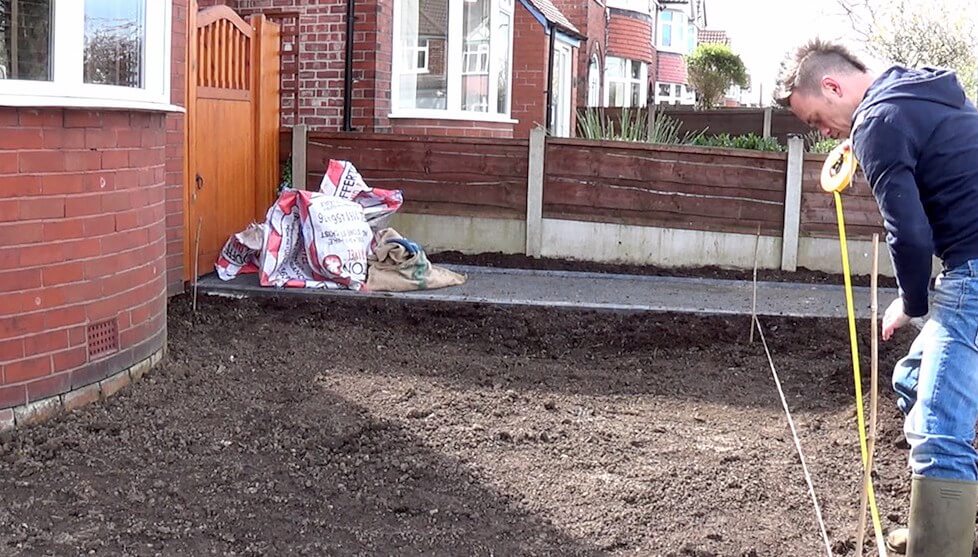
1. Preparation is key to laying turf effectively
Before you lay turf, most of the work needed is in preparation. You may rush to get a new lawn, but preparation is key and saves drama or lawn installation failure.
This is because turf will follow any lumps or bumps if laid on a poorly prepared surface. If the ground is not entirely level and weed-free, you start in a losing position. Rectifying these issues afterwards is a nightmare, and you should be enjoying beers on your lawn, not spending hours levelling it, weeding it, and cursing it!
2. Measure the area of the lawn you want to lay
This will enable you to order your turfs.
You’ll need at least two measurements to work out the surface area. Simply multiply one side by the other.
A good rule of thumb is to order 10% more than you need. This is so that when you’re staggering your joins, you are not left with a few tiny pieces to finish an edge. You can use a longer whole piece of turf, which will bed in far better than smaller bits pushed together, which will dry out faster.
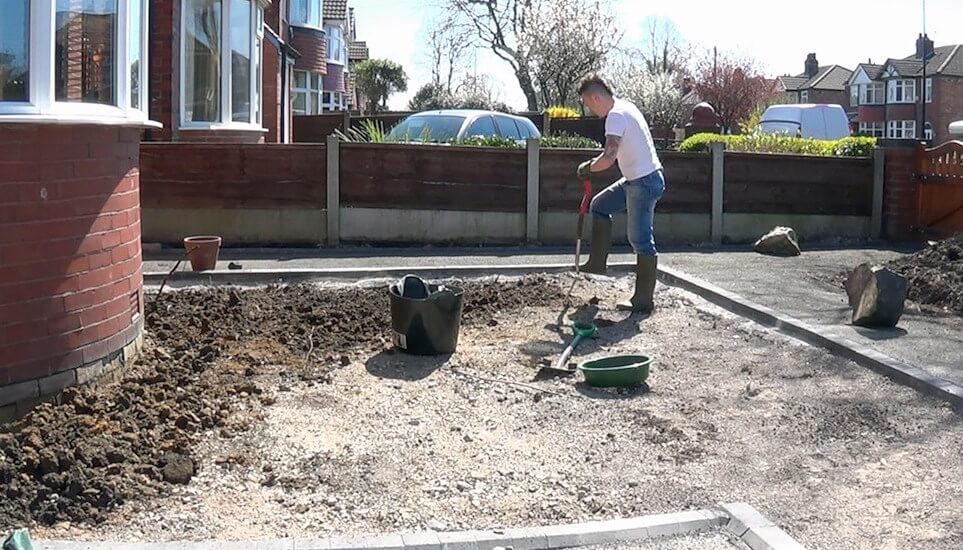
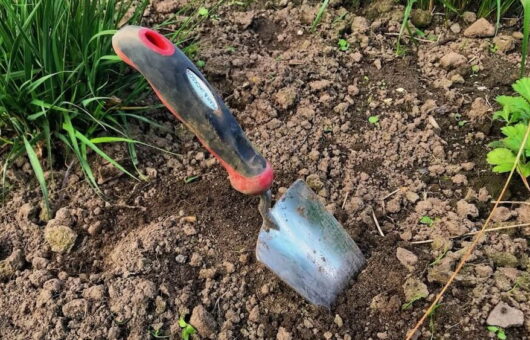
3. Prepare the ground by digging over the plot to 15cm
This helps aerate and break up compaction in the soil. Compaction causes all sorts of problems, such as waterlogging, poor growth, dead spots, and diseases in new turf. Using your spade and fork, turn over the ground to a depth of at least 15cm. This is the minimum depth needed for grass roots to establish properly. On very hard, compacted, or heavily clay ground you may need to go slightly deeper. This is hard work but essential.
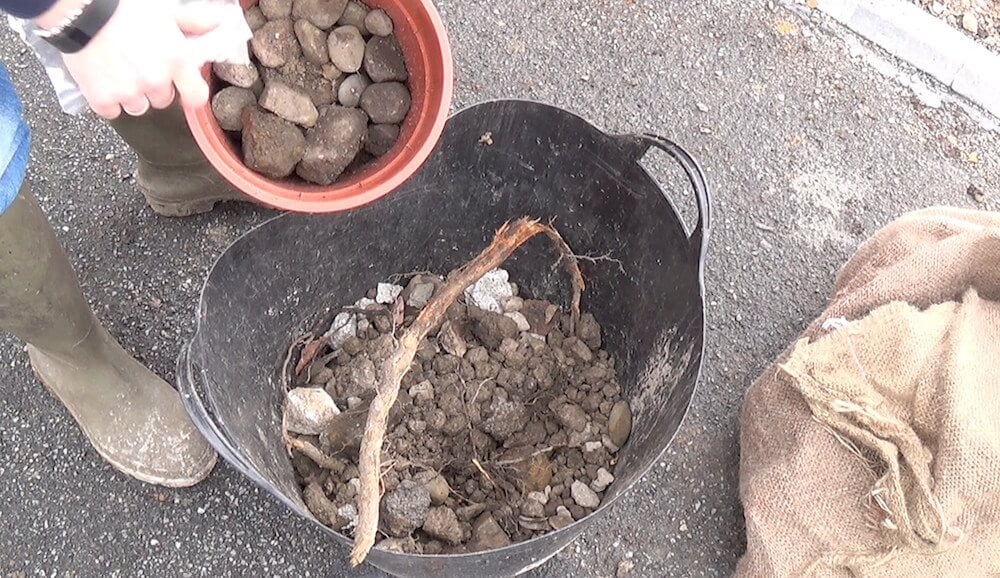
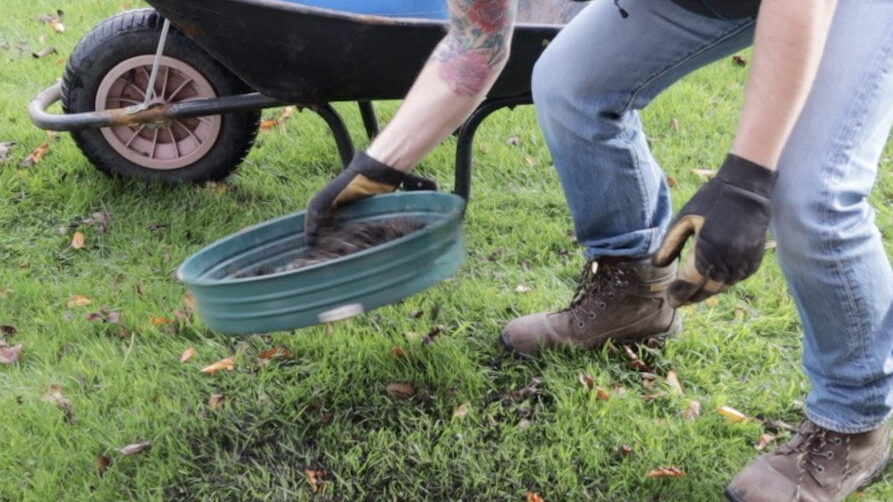
4. Remove any weeds, debris and stones from the plot
Use a riddle if the ground has many stones and debris. A riddle or grill is like a giant sieve; you can put your soil in one scoop at a time and filter through to remove bits of weeds and rubbish from the ground. This is especially true on new build properties.
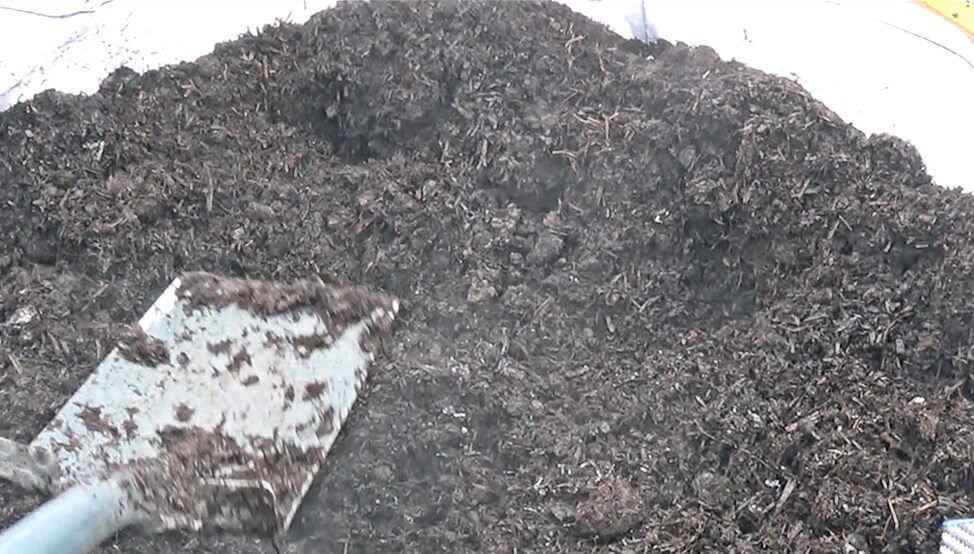
5. Dig in some compost or other organic matter
If your soil is impoverished, then it’s a good idea to work in some 🛒 fresh peat-free compost at this stage. This will provide long-term nutrients for the lawn and help retain moisture without becoming waterlogged. I usually dig in some compost to help break up any heavy soil.
Alternatively, if the soil is light and in good condition, then you can skip this step.
6. Do you need to add topsoil?
This is the step most DIY guides skip, and it is the one that causes the most failures on new build plots and gardens where the existing ground is builders’ rubble, compacted subsoil, or poor sandy soil with no organic matter. Grass roots need a minimum of 10 to 15cm of good quality topsoil to establish properly. If what you have is less than this depth, or if the material in the ground is not genuine topsoil, you need to either excavate and replace it or top it up before laying turf.
On a typical established garden where the lawn is being replaced, this is rarely an issue. On a new build property, a recently landscaped garden, or a plot where soil has been stripped or contaminated during construction work, it is very often the issue. I have seen beautifully laid turf on BBC’s Garden Rescue fail within a season simply because the soil beneath was compacted clay subsoil with inadequate depth for root penetration. No amount of watering fixes that problem once the turf is down.
💡 Top Tip: How to Calculate Topsoil Volume
Multiply the length of your lawn area by the width by the depth of topsoil required (all in metres). For a 5 x 4 metre lawn needing 10cm (0.10m) of topsoil: 5 x 4 x 0.10 = 2 cubic metres. Topsoil is sold by the cubic metre or tonne. One cubic metre of topsoil weighs approximately 1.3 to 1.5 tonnes depending on moisture content and soil type, so two cubic metres would require around 2.6 to 3 tonnes delivered.
When buying topsoil, look for BS3882 certified multi-purpose topsoil, which is the British Standard for topsoil quality and guarantees a consistent grade suitable for lawn establishment. Avoid any topsoil described as “economy” or “screened” without a quality certification, as it may contain weed seeds, stones, or inadequate organic matter. If you are improving rather than replacing, a layer of 5cm of good topsoil raked into the existing surface before levelling will still make a significant difference to how quickly your turf roots.
Topsoil unlikely to be needed. Improve with compost and fertiliser.
New build, soil looks grey or pale
Almost certainly subsoil. Add 10 to 15cm topsoil before laying.
Sandy soil, drains very fast
Add topsoil or mix in compost and turf lawn fertiliser to improve water retention.
Heavy clay, waterlogging risk
Improve drainage first, then add 5cm of grit-enriched topsoil before levelling.
Post-construction with rubble or debris
Excavate to remove rubble, then replace with at least 15cm of quality topsoil.
One final point on timing: if you add a significant depth of new topsoil, give it at least one to two weeks to settle before laying turf. Topsoil will compact slightly after delivery, and turf laid on freshly delivered, uncompacted soil will sink unevenly as it settles, giving you the lumpy lawn you were trying to avoid. Rake, tread, relevel, and only then lay your turf.
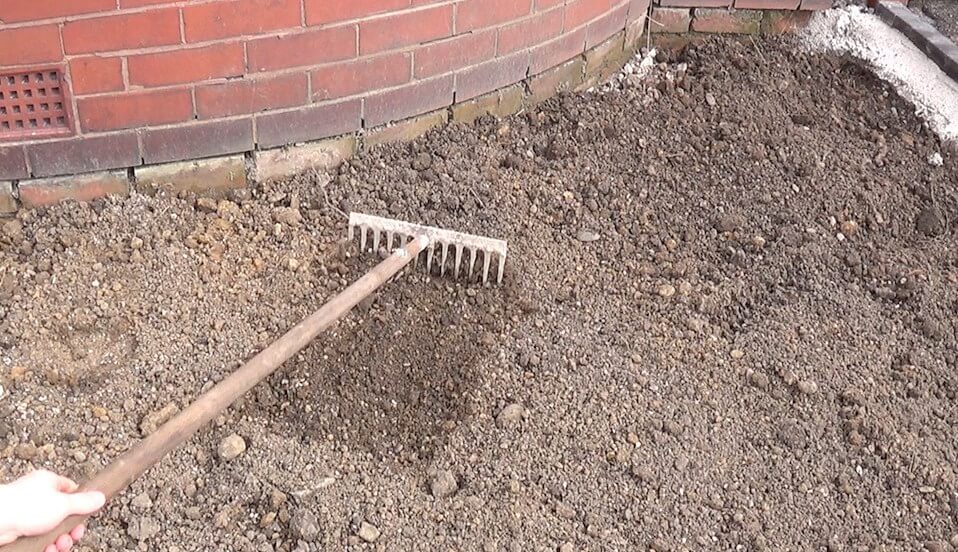
7. Rake in a pre-turfing fertiliser
Before levelling, rake in a general-purpose lawn fertiliser at around 70g per square metre. This gives your new turf the nutrients it needs to root quickly and establish well. This step is especially worthwhile on impoverished or sandy soils where natural fertility is low. If you’ve already added compost in step 5, the fertiliser is a useful additional boost rather than a replacement.
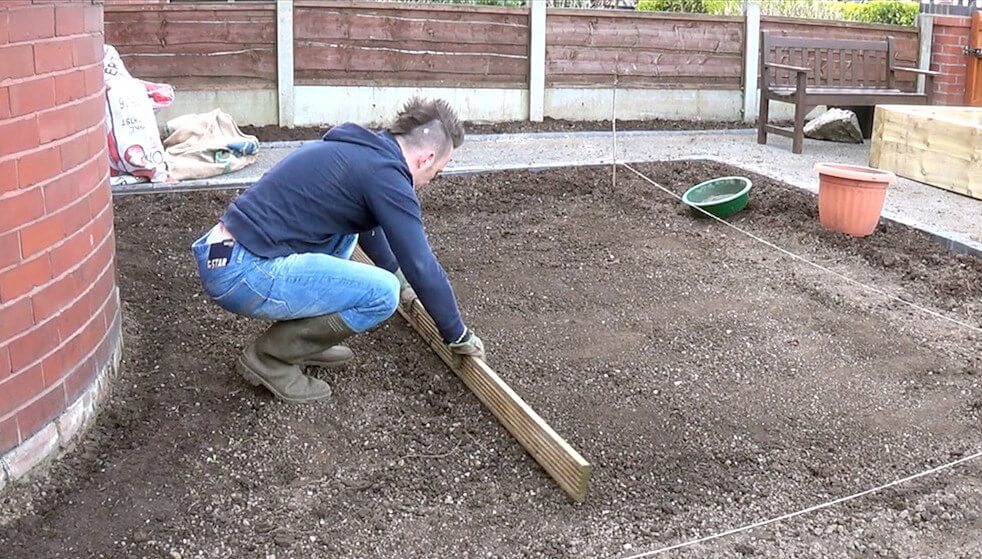
Using a back-and-forth action, first rake over the plot. Then use a plank of wood to level out the soil. This will help pull the soil across the plot level and further break up any small clods. Again, if debris or rocks appear, remove them.
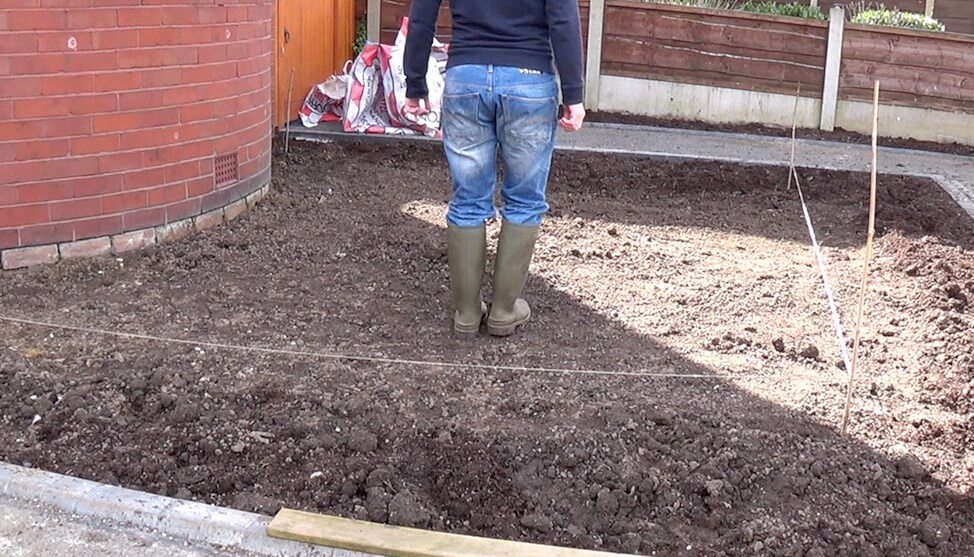
9. Consolidate the raked area
Now it is time to shuffle! Using your feet, preferably with shoes on, shuffle across the lawn in straight lines one way and then the other. Consolidating the soil means that the lawn won’t sink as readily and ensures there are no big air pockets in the soil. If there are, fill these pockets and then relevel.
10. Check the area is level
Using the plank of wood and a spirit level, check that the area is level. Always take a couple of measurements lengthways and widthways until the ground is level. If it is unlevel in areas, rake and even out, then shuffle again.
11. Create a tilth for your lawn to root through
Using the rake on your level surface, lightly rake the top layer to create a fine tilth. Tilth is a powdery, light layer of fine soil that enables quick root uptake for your turf. Rake your tilth one way and then rake 90 degrees the other way afterwards over the same area.
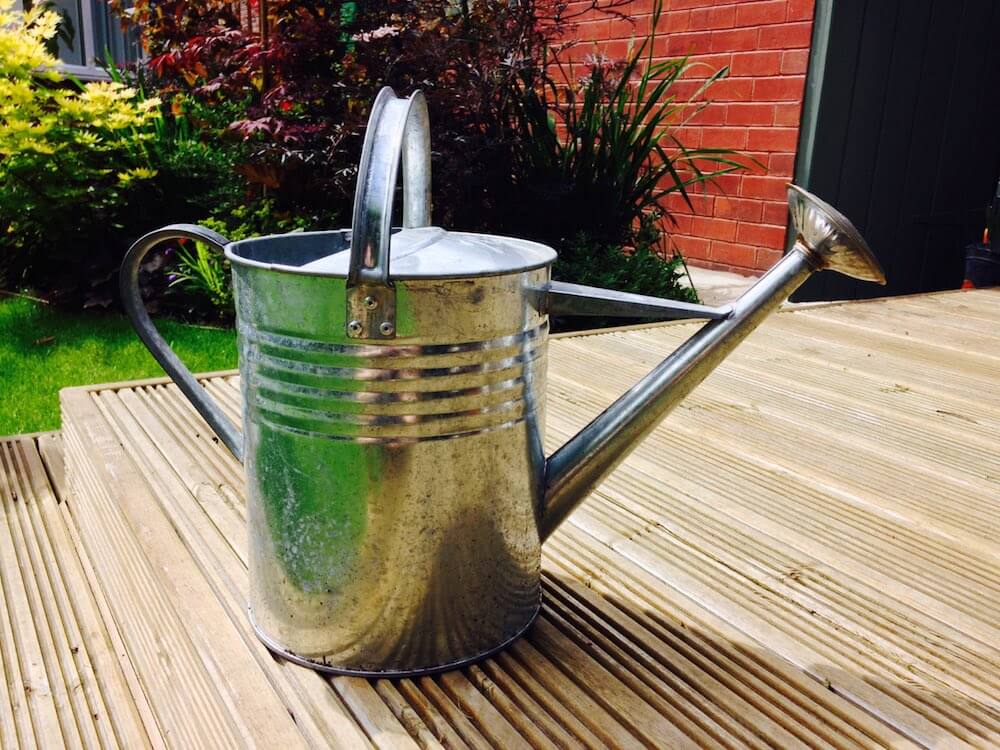
12. Lightly water the prepared soil before laying
Immediately before you start laying turf, give the prepared soil a light watering. This gives the grass roots something moist to reach into as soon as they make contact with the ground, which is particularly important in warm weather or if the soil has dried out during preparation. Do not flood it, just a gentle pass with a sprinkler or watering can to dampen the top few centimetres.
13. Order your turfs
You can buy them either online in advance or from a local DIY store. Once you have your fresh turfs, you must lay them within 24 hours and not let them dry out, so bear this in mind if the weather changes or your preparation gets delayed.
Fresh, healthy turfs should be a good green colour, not yellow or brown. Turfs should also be moist, not bone dry.
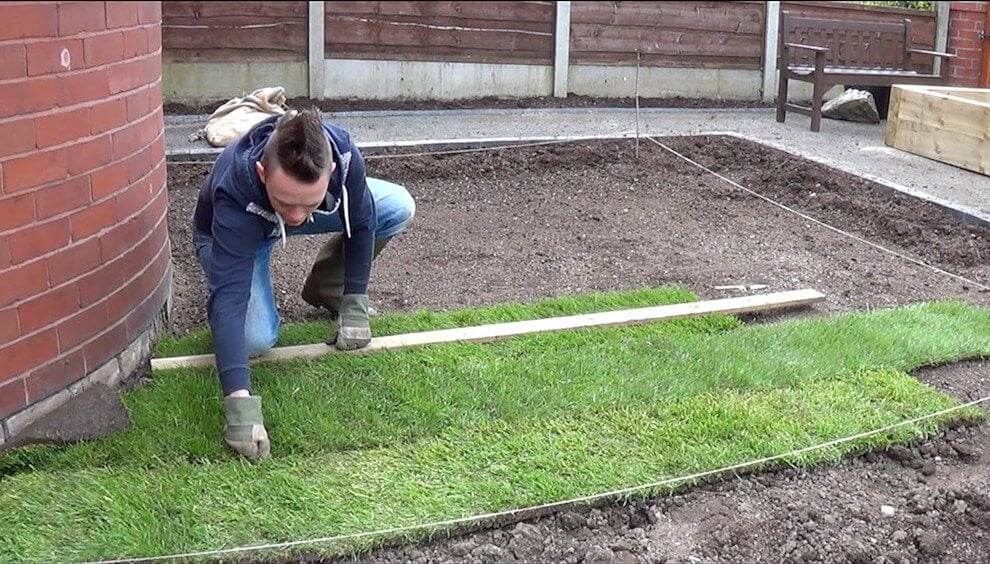
14. Start to lay turfs in a brickwork fashion
Using the board, lay this out over the soil and work forward or backwards. It doesn’t make much difference, though some would claim forwards is better. In the video, I turf backwards, so it’s easier for you to see the joins and laying technique.
The aim is to use the large sections of your metre-long turfs together rather than short sections of leftovers. It is better to have two medium-sized turfs than one full-size and one tiny piece next to each other. Smaller turfs tend to dry out, which will impact lawn uptake.
Use a sharp knife to cut any turfs, leaving a clean edge. Don’t be tempted to tear them as it damages the grass and gives a rough, messy edge.
💡 Top Tip: Laying on a Slope
If your garden has a slope, always lay turf rolls across the slope rather than down it. Laying down a slope causes the rolls to slide before they have rooted, and the joints can open up as the turf settles. Laying across the slope keeps every row stable and ensures joints are staggered correctly.
15. Butt up the joints tightly
This enables the turfs to mesh together. Gaps will cause them to dry out and curl. You can butt them up by hand and then use the back of a rake to compress the turfs lightly to ensure contact with the ground and each adjacent turf.
Never stretch turfs to fit together. Always overlap them slightly, then push them down to create a firm join.
16. Neaten up edges
Make sure with your knife that any ragged edges or wonky bits are cut to a straight line. The edge of the board provides a clean, neat surface for cutting a clean edge.
17. Fill any turf gaps with sand and compost
If the turf has gaps or awkward cracks around pavers or trees, use a mix of sharp sand and compost to fill them. This ensures the turf meshes well and spreads into these spaces.
18. Water the grass thoroughly after laying
Water your turf as soon as it has been laid. There’s no need to feed your newly laid turf. In fact, it will root quicker to the soil if you don’t. Ensure that the grass never fully dries out for the first few weeks.
It’s better to water heavily every 4 to 5 days rather than a light sprinkle each day. Frequent light waterings can encourage Poa annua, a grass weed, to propagate in the newly laid turf. Take more care to check that the edges don’t dry out.
Avoid walking on the grass for the next 2 to 3 weeks, or if you have to, use the board to walk on to reduce the pressure of your feet on the newly laid turf, which is still establishing.
💡 Top Tip: Protect Your Turf Edges
The exposed outer edges of a newly laid lawn dry out faster than any other part, particularly where turf meets a hard surface like a path, patio, or fence board. Once you have finished laying, lightly brush a small amount of fine topsoil or sieved compost along all exposed edges to cover them. This keeps the moisture in and prevents the edges from curling or shrinking back as they establish. Once the turf has rooted after three to four weeks you can brush away any excess. It takes five minutes and makes a real difference to how cleanly the edges establish.
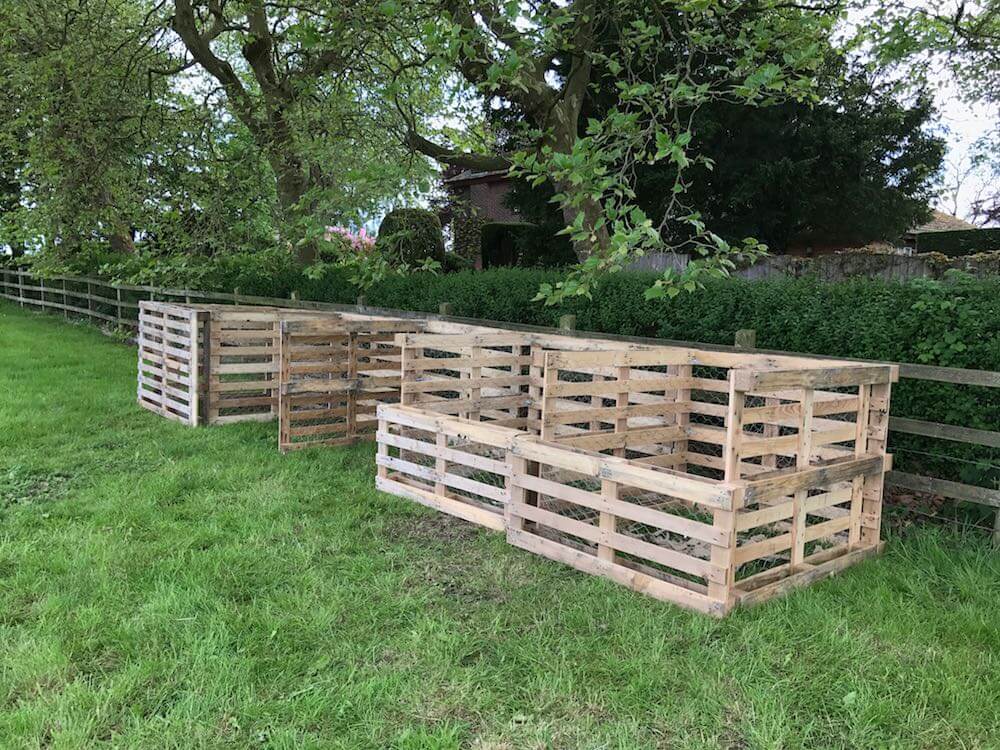
19. Recycle leftover turfs and create your own loam
Place any leftover turfs upside down, grass side down, at the back of borders, or even in a bin bag that is then loosely covered. If using the bin bag method, stack the turfs on top of each other somewhere out of direct sunlight.
In months to come, the grass will have decomposed, leaving lovely, fresh, nutrient-rich loam. So there’s no waste!
When should you first mow a new lawn?
The first mow should be when the grass is 5cm or 2 inches tall. Set the lawn mower blade to take a third off, so 1.5cm. Be careful not to scalp or cut the lawn too short whilst it is still establishing, which may impede its development.
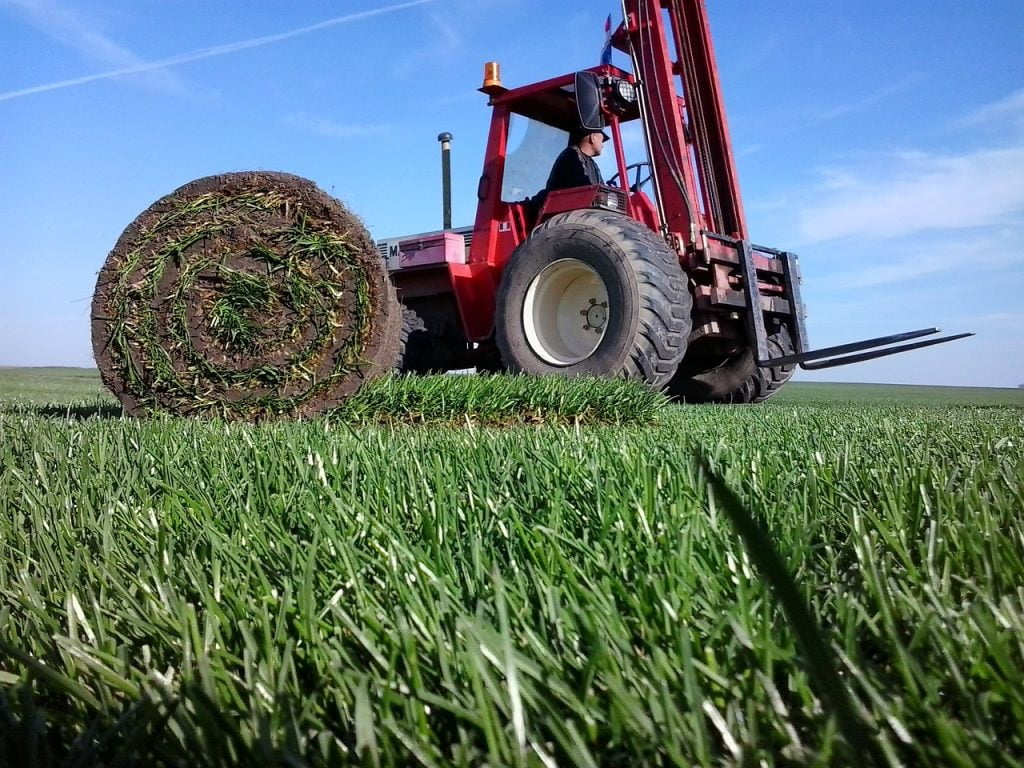
What’s the size of rolled turf?
Rolls of turf come in two standard sizes in the UK, which are either 1 metre squared or 1 yard squared (0.84m). Once you’ve worked out the ground size for your lawn, you can determine how many turfs to order.
How much does rolled turf cost?
Turf costs have risen considerably in recent years. As of 2026, budget rolled turf costs around £1.50 per square metre, with mid-range and premium turf running from £2 to £3.50 per square metre. A typical 50m² lawn therefore costs between £75 and £175 in turf alone, before preparation materials, topsoil, or tools.
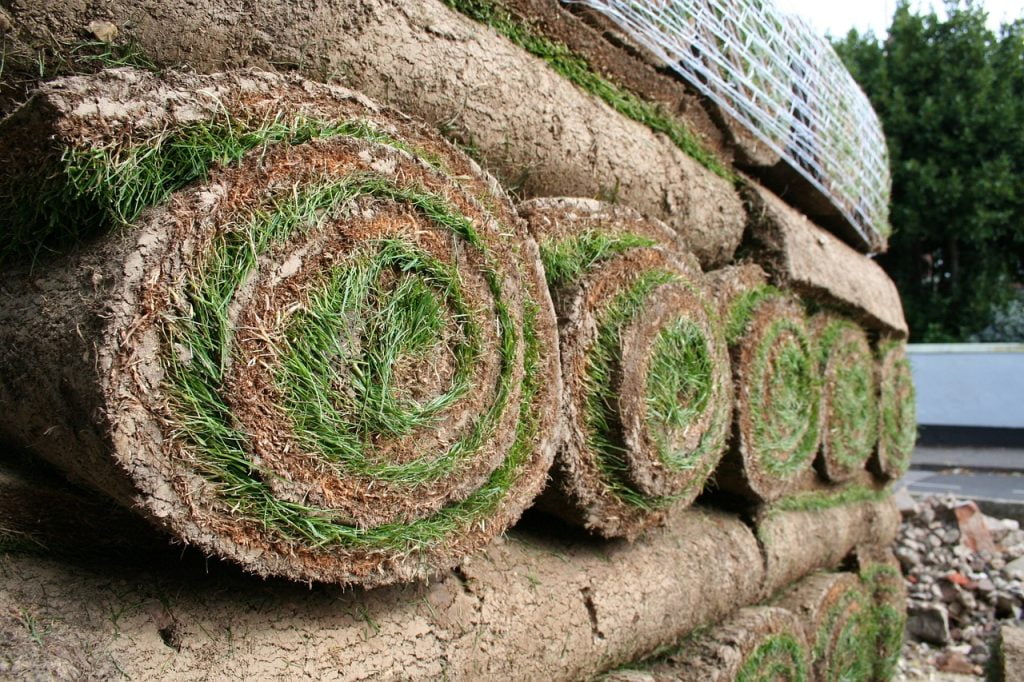
The larger 1m turfs are often a better option as there’s less joining and you get more for your money. However, the larger rolls are heavier to lift and move.
Whilst you can buy discounted rolled turf for very low prices, I’d advise against this as they are usually on very thin soil bases and therefore take far more water to establish and keep healthy. I often find that these cheap turf rolls in garden centres, when unrolled, suffer from the yellow-smelly syndrome described below!
Why is my rolled turf yellow or smelly?
If you’ve bought rolled turf and notice it’s turned yellow when you unwrap it, you have a problem. This is a sign of turf that’s sat rolled for too long and has started to lose chlorophyll due to lack of sunlight, which all plants need. Usually it will come back to life with some sun, but it may slow down the time it takes for the turf to establish.
Always check the turf you’re buying by unrolling it slightly first to check.
If the turf smells eggy, rotten, or pungent, it has probably started decomposing with anaerobic bacteria. If it feels sloppy and you could tear it easily, then this turf will not survive. Since this cannot usually be saved, compost it instead, or if at the garden centre, choose different turf rolls.
What’s the best lawn seed?
Lawns are very rarely made up of just one type of grass plant. They usually feature a mix of grass species to ensure thick, rich coverage. Some lawn seeds produce thick, rugged grass, excellent for harder-wearing utility lawns, whereas other species use thinner, more delicate grass used in fine ornamental lawns.
As a general rule of thumb, ornamental lawns require far more maintenance than utility lawns as the seed types are less vigorous. Below are three common lawn seed mixes depending on the type of lawn you want to sow in your garden.
Utility Grass Seed Mix Example:
Festuca rubra spp. rubra (Creeping red fescue) 40%
Poa pratensis (Annual meadow grass) 30%
Lolium perenne (Perennial ryegrass) 30%
Ornamental Grass Seed Mix Example:
Festuca rubra spp. rubra (Creeping red fescue) 35%
Sowing a lawn from seed gives you the ultimate freedom to pick the very best mix of grasses for your garden conditions. However, you can only sow a lawn from seed between March and September, never in winter.
How to sow a lawn from seed
Once you’ve chosen the seed mix for the type of lawn you are laying, it’s now time to distribute them evenly and at the right density for your lawn.
1. Choose your lawn seed-spreading method
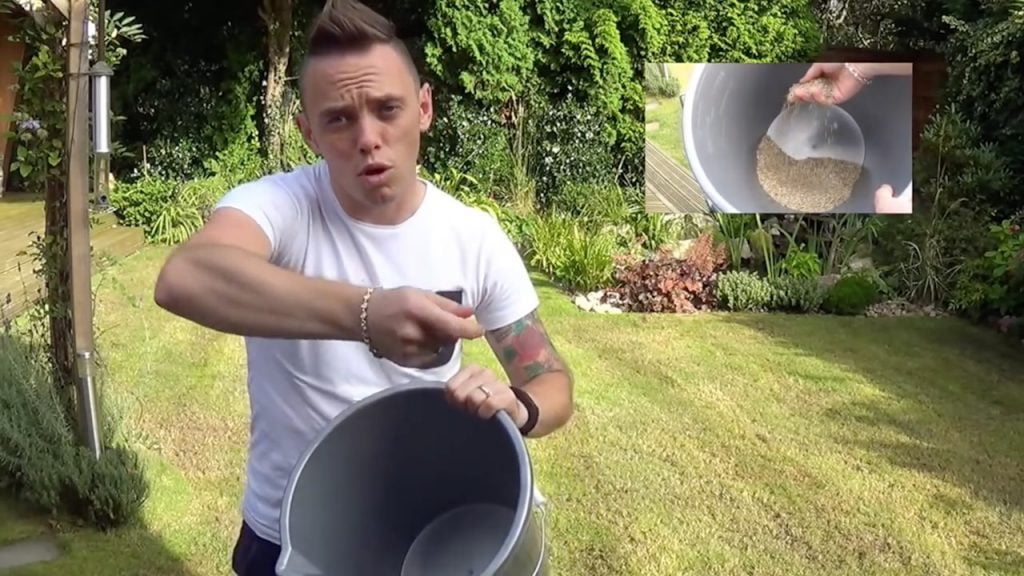
My preferred method is to use a 🛒 lawn seed spreader. These relatively cost-effective and easy-to-use tools enable the correct distribution of seeds to be dropped as you wheel them over the area. If you’re spreading by hand, it’s a good move to split the total amount of seed into four amounts and move both horizontally and vertically in four passes to drop the seed evenly.
You can also mix the seed with fine sand if scattering by hand to make it easier to see where you’ve spread it.
2. How to spread lawn seed
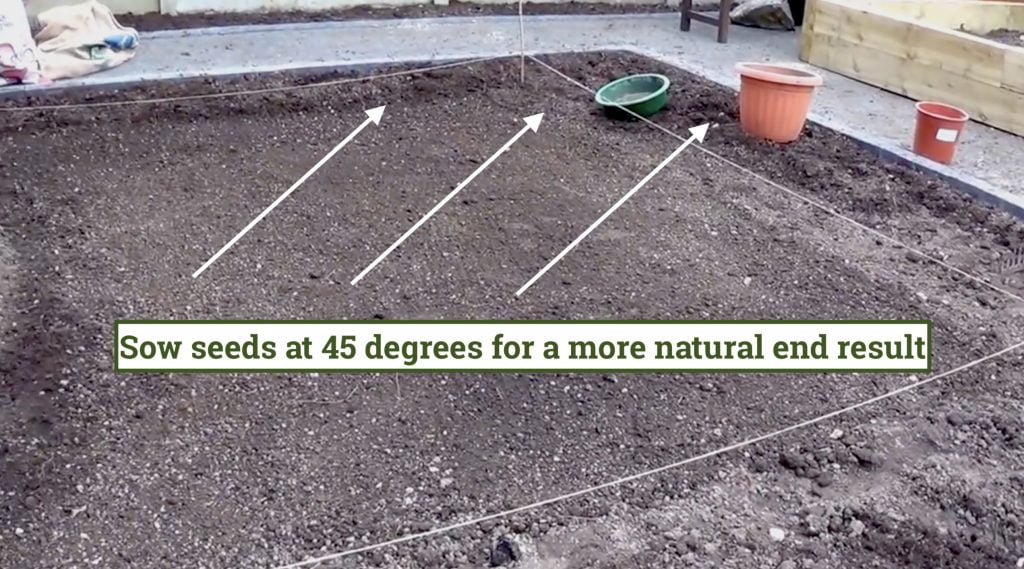
If using a 🛒 seed spreader, then a suitable method is to seed at a 45-degree angle in rows rather than vertical stripes. This is because it becomes less obvious to the naked eye as the lawn establishes.
It also means any gaps are less likely to be visible at first, so you can go back and reseed these areas. Don’t be tempted to over-sow the lawn with more seed than recommended. It just means you’re creating more challenging conditions for the rest of the lawn to germinate.
Some lawn experts recommend using the back of a rake to tamp down the seed. However, in my experience this is where most new gardeners can cause more harm than good. Unless the weather is bone dry, your grass seed can stick to your shoes or a wet rake will lift it and cause a mess in your distribution. Instead, I recommend light watering with a fine hose sprinkler, even the mist attachment if possible. This is so you don’t disturb the seed that’s been carefully laid out.
5. Watering the lawn until germination
Keep your new lawn watered, especially in warmer weather. It doesn’t need to be soaked, but don’t let the ground completely dry out or get scorched. Then, in 7 to 21 days, your seeds should start to germinate, and the magic begins!
Keeping Birds off Your Lawn Seed
One important point to stress is the need to keep birds off your lawn seed. Birds will eat your lawn seed and undo all of your lawn installation efforts!
The best way to do this is to crisscross string about 3 inches off the ground just before watering the seed. Tie these to pegs on the outskirts of the seeded area, creating a matrix of string to stop the birds from easily landing.
When walking on the newly laid seed, use your wooden plank to stand on so as not to move the seed about.
Other methods involve placing a well-stocked bird feeder elsewhere in the garden. Don’t panic if the birds take a bit or disturb certain areas. You can always reseed these once the rest of the lawn has germinated. This is a good way of keeping everything in balance, trainee Ninja!
How long does lawn seed take to germinate?
Lawn seeds should germinate and show green shoots between 7 and 21 days. This depends on the weather, average temperature, and moisture availability.
If your seed hasn’t germinated after 21 days, light sieving of compost over the top and a watering can help kick-start it. The compost retains moisture longer, allowing the seeds to imbibe (take on) the water needed to sprout.
How long does lawn seed take to germinate in the UK?
In the UK, lawn seed germination usually takes 10 to 14 days to see your seedlings sprout green shoots. However, compared to other parts of the world, lawn seed germination will be surprisingly quick here in the UK. This is because we have a perfect mix of sunlight and rainfall during the spring and summer, creating the perfect conditions for speedy lawn seed germination.
What’s the best time of year to lay a lawn?
The best time to lay a lawn in the UK is between September and November or March and April, when soil temperatures sit between 8 and 15°C. At these temperatures grass roots establish quickly, moisture levels are generally good, and you avoid both the frost risk of winter and the drying heat of summer. Autumn is slightly preferable as cooler temperatures and autumn rainfall reduce your watering burden considerably.
We want to avoid hotter summer weather because the heat causes much-needed moisture to evaporate from the turf. In extreme cases, the lawn will lose more moisture than we can water it, causing stress. This results in lawns not rooting properly and needing life support as we waste water trying to keep them alive.
Whilst you can lay a lawn at any time of year, there are two conditions you want to avoid:
Heatwaves
Frost
Both conditions make it hard, sometimes impossible, for rolled turf to take or grass seed to germinate, so should be avoided. As a practical guide, if soil temperature drops below 5°C, do not lay turf. Equally, if air temperature is above 25°C for several days, wait for cooler conditions if at all possible.
Laying turf in summer
Many new gardeners think summer is the best time for laying a new lawn. It’s actually one of the worst times, given the extra water and resources it will take to get a lawn established. However, sometimes you have no choice, especially if your garden landscaping has run over and you need to get some lawn down in the summer.
If you have to lay turf in summer, keep these points in mind:
In a heatwave, cover the turf with a wet towel to prevent it from drying out
If rolled turf is left for over 48 hours, unroll it after this time
Water turf immediately after laying with a heavy soaker
If turfing a large area, water in sections as you go
Can I lay a lawn in winter?
You can lay a lawn from rolled turf in winter if you’re desperate, but frost, sub-zero temperatures, and hard ice-covered ground will make it very difficult, if not impossible, for the lawn to root.
If the soil temperature is below 5°C, I wouldn’t advise laying a lawn.
Sowing lawn seeds in winter is challenging and not advisable as the seeds probably won’t germinate. If they do, any frosts may kill off their young shoots. The grass seeds have an inbuilt germination system that will stop them from growing if the conditions aren’t right. It will be too cool for them to take on water and start to root, so they will sit there getting eaten by the birds!
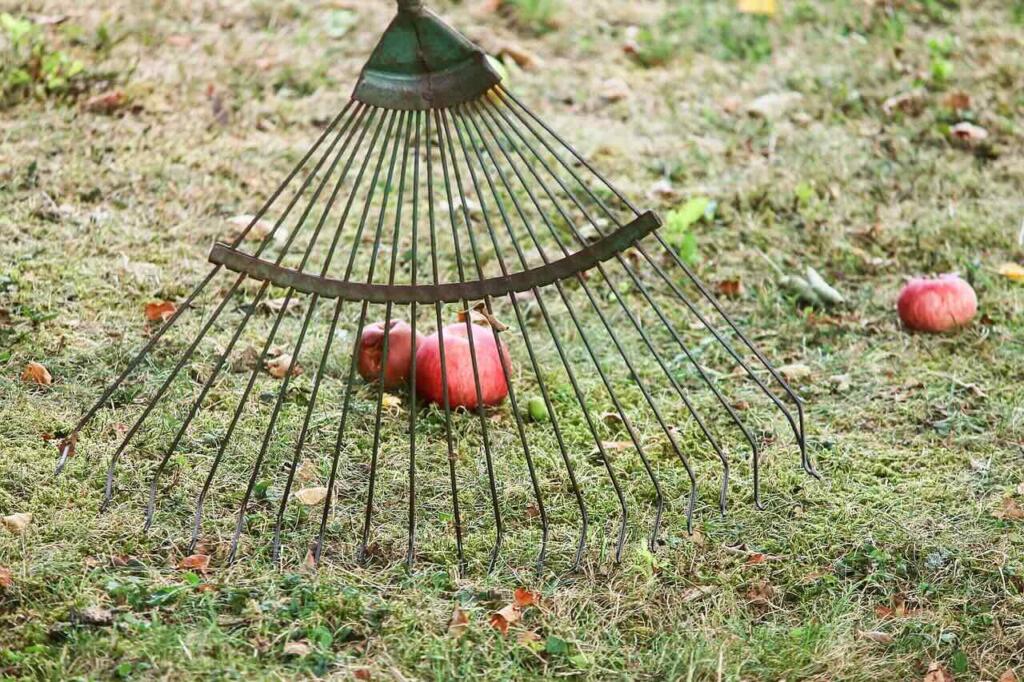
How to fix a mossy lawn
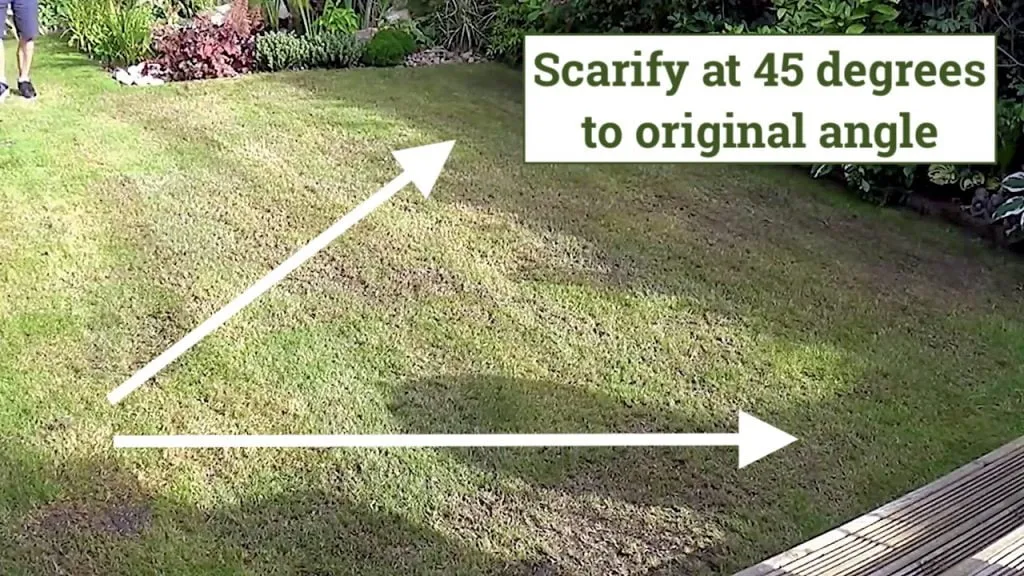
Scarifying a lawn involves the process of mechanically removing thatch, moss, and other debris that may have accumulated on the surface of the lawn. Thatch is a layer of dead grass, roots, and other organic matter that can build up over time and prevent air, water, and nutrients from reaching the soil. Using a scarifier or dethatching machine, the thatch layer is gently raked out, allowing for better airflow, water penetration, and nutrient absorption into the soil.
In addition to removing thatch, scarifying also helps control moss growth, which can thrive in compacted and shaded lawn areas. By raking out moss and other debris, scarifying opens up the turf, allowing sunlight and air to reach the grass plants and promoting healthier growth.
Furthermore, scarifying stimulates the lawn’s natural regrowth process by encouraging the spread of grass seeds and the development of new shoots. This helps to fill in bare patches, improve the density of the turf, and create a more uniform and lush appearance.
Scarifying is an essential lawn care practice that rejuvenates the turf, enhances vigour, and creates optimal growing conditions for healthy grass. Depending on the condition of the turf and the level of thatch buildup, it is typically recommended that the lawn be scarified once or twice a year. For best results, scarify in spring or autumn.
The Freshness Factor: Timing Is Everything!
When turf is lifted and rolled, the clock starts ticking. Grass begins to degrade immediately due to exposure to wind and sunlight, which dry out the soil and damage those precious grass plants. To keep your lawn looking lush, insist on turf delivered within 24 hours of being lifted.
Here’s the kicker: if the temperature climbs above 15°C, the inner layers of the turf roll can overheat, literally cooking the grass from the inside out. Ask your supplier if they cold-store the turf after harvesting. This can be a lawn lifesaver in warmer months.
Say No to Plastic Netting in Turf
Some turf suppliers use plastic netting to give their grass an artificial boost in strength during harvesting. It sounds handy, but let me explain why it’s not ninja-approved:
Shortcut Growing Times: Netted turf often means the grass has been rushed through a shortened nurturing period of just 6 months instead of the recommended 12 to 14 months. This leaves you with weaker grass plants.
Compromised Soil Bond: Because netted turf is grown with less soil, it struggles to establish a strong bond with your garden’s surface, leading to patchy results.
Plastic Pollution: Netting restricts aeration and scarifying. Those plastics don’t break down, leaving an unwanted legacy in your garden.
How to fix a lumpy, bumpy lawn
A smooth, even lawn is not just visually appealing but also easier to maintain, especially if your lawn mower ends up scalping your lawn every weekend. If your lawn is bumpy and uneven, don’t worry. Restoring its lush appearance is entirely achievable with a bit of know-how. Here’s my expert guide to levelling a lumpy lawn and keeping it that way.
1. Identify the Cause
Before tackling uneven spots, figure out what’s causing the bumps. If you don’t, you may find they return and all your hard work is for nothing. Common culprits include:
Soil Settling: Especially common after construction or poor initial soil preparation
Drainage Issues: Water pooling can erode soil and create uneven patches
Pest Damage: Burrowing animals like moles or insects can disrupt your lawn
Thatch Build-Up: A thick layer of organic material can cause surface irregularities
2. Topdressing for Minor Lawn Bumps
For small dips, a topdressing approach is both simple and effective. This can easily be done in a weekend and is the lowest effort method for fixing bumpy and lumpy lawns.
Prepare the Mix: Use a blend of sand, loam, and compost for balanced drainage and fertility
Apply the Mix: Spread a thin layer (no more than 1cm) over low spots
Rake and Water: Use a garden rake to distribute the soil evenly, ensuring it fills dips without smothering grass, then water thoroughly to help the soil settle
Repeat as Needed: Allow the grass to grow through the topdressing. If unevenness persists, repeat in a few weeks as the top dressing settles and fills the voids in your lawn
3. Fixing Significant Bumps and Holes
For more noticeable lumps and dips, it’s time to take a hands-on approach. Do this in spring or early autumn, but never in winter.
Remove the Turf: Cut through the grass using a sharp spade horizontally, focusing only on the bump. Keep the grass intact like a turf patch and set it aside ready to be reused
Adjust the Soil: Add or remove soil as needed to level the area, using the same topdressing mix for best results
Replace the Turf: Carefully lay the turf back into place, pressing down firmly, and water generously for the first 2 to 3 weeks
4. Aerate and Overseed
Aerating can make a massive difference if your lawn feels compacted and bumpy across large areas. You use a hollow tine aerator tool or lawn aerator machine that works over the entire lawn to remove tiny plugs of soil, allowing air into spaces which you can then refill with sand to help drainage.
Aeration: Use a core aerator to remove soil plugs, loosen the soil, and promote healthy grass roots. It’s well worth doing this every 5 to 10 years on all lawns to stop lumps and compaction building up
Overseeding: Spread fresh grass seed after aerating to thicken the lawn and cover newly levelled patches
5. Tackle Drainage Problems
Poor drainage is a common reason for uneven lawns, especially in newly built homes and houses that have their gardens on heavy clay soil.
Regrade the Lawn: Adjust slopes so water drains away from your home and garden beds
Install Drainage Systems: French drains or dry wells can redirect excess water. If you have just moved in, bite the bullet and get a landscaper to lay a French drain or drainage crates under the soil before laying a lawn
Use Permeable Soil: Ensure your topsoil mix contains sand or grit to improve water flow and has plenty of organic matter. Remove any hardcore and builders’ waste uncovered when adding drainage
6. Prevent Future Bumps
Regular Mowing: Mow at the right height for your grass type to avoid scalping
Consistent Watering: Water deeply but less frequently to promote deep roots
Seasonal Maintenance: Regularly fertilise, overseed, and aerate to maintain even growth
Pest Control: Stay vigilant for signs of pests like moles or lawn grubs
Your First Mow: Getting It Right From the Start
After weeks of nurturing your new turf, the thought of running a mower over it can be terrifying. Done correctly, that first cut is actually a crucial step in establishing a healthy, thick lawn.
The All-Important Tug Test
Before you even think about firing up the mower, you need to check if your turf is properly rooted. This is where the “tug test” comes in. Grab a handful of grass blades and give them a gentle but firm tug upwards. If the turf lifts easily or you can see daylight under the edges, it’s not ready. The grass should feel securely anchored.
Getting Your Blade Height Spot On
For that first cut, set your mower blades high at 4 to 5cm (about 2 inches). This might seem tall compared to your usual lawn height, but it is important. Never remove more than one-third of the grass height in a single cut, especially on new turf.
The grass plants are still putting all their energy into developing roots, and scalping them at this stage will stress them unnecessarily. I always tell my clients: you’re giving it a haircut, not shaving it bald.
Mowing Direction Strategy
Change your mowing direction for the first few cuts. If you laid your turf in straight lines, mow diagonally across these lines for the first mow. This prevents the mower wheels from following the same turf joints every time, which can cause compaction along the seams. Once your lawn is fully established (around 8 weeks), you can start creating those satisfying stripes by mowing in alternating directions each week.
What to Do With Those First Clippings
Always collect the grass clippings from your first few mows. New turf is still developing its structure, and a layer of clippings can smother the young grass and prevent light from reaching the base of the plants. Pop the clippings straight into your compost bin. Once your lawn is fully established after about 8 weeks, you can start leaving clippings on the lawn as a natural fertiliser.
Warning Signs: When Your Turf Isn’t Ready
Don’t mow if you notice any of these red flags:
Soggy or waterlogged turf: wait for drier conditions
Turf edges curling up: the pieces haven’t knitted together properly
Yellow or brown patches: these areas need more time to establish
Footprints that don’t spring back: the soil underneath is too soft
I once had a client who was so eager to mow that he ignored these signs and ended up with ruts throughout his new lawn. We had to lift and relay several sections, which is definitely not the outcome anyone wants.
Your Lawn’s First Two Months: A Week-by-Week Journey
Creating a new lawn goes through distinct phases, each with its own needs and milestones. Here’s what to expect during those crucial first eight weeks, based on more than thirty years of watching lawns grow from scraggly turf rolls into lush green carpets.
Weeks 1 to 2: The Critical Period
This is make-or-break time for your new lawn. The grass roots are frantically trying to push through the turf base and establish contact with your prepared soil.
Your watering mission: Water thoroughly every other day, or daily if it’s particularly warm or windy. Give it a proper soaking of at least 20 to 30 minutes with a sprinkler to ensure water penetrates right through the turf into the soil below. Light, frequent watering encourages shallow rooting.
Foot traffic: Absolutely none. Even walking across it to check how it’s doing can cause damage. If you must cross it, lay down planks to distribute your weight.
Visual milestone: By the end of week 2, you should see the turf joints starting to close up slightly. The grass colour should remain vibrant green, not yellowing or browning.
Weeks 3 to 4: Root Development Phase
Roots are now properly exploring your soil, and you should start to see the turf pieces knitting together.
The tug test milestone: By week 3, your turf should pass the tug test. If it doesn’t, give it another week and keep up the watering routine.
Watering adjustment: You can start reducing frequency slightly to every 2 to 3 days rather than daily, but make each watering session longer and deeper. We’re training those roots to grow down, not just spread sideways.
Light use begins: Once your turf passes the tug test, you can start gentle use. Children and pets should still be kept off for another week or two. If your grass has reached 7 to 8cm tall and passes the tug test convincingly, you can consider that first mow.
Weeks 5 to 8: Full Establishment
By week 5, this is when the lawn transitions from new turf to proper lawn, though it’s still got some growing up to do.
Normal use begins: By week 6, your lawn can handle normal family use. Garden parties, playing catch, setting up the deck chairs. Just avoid anything too intensive, like football practice, for a few more weeks.
Watering maturity: Reduce watering to twice weekly, but make each session substantial.
Visual milestone: By week 8, your lawn should look like it’s been there for years. The colour should be uniform, the surface level, and the whole thing should feel springy and lush underfoot.
🌿 Lawn Care Guides
Once your new lawn is established, keep it in top condition with these essential guides.
Why not level up your gardening skills with my Garden Design for Beginners course? It is the perfect place to begin! I offer several courses from £29 to £199 to help you learn the basics of garden design.
In my most comprehensive course, I, Lee Burkhill, award-winning garden designer and presenter on BBC1’s Garden Rescue, will guide you through the step-by-step process, helping you go from a beginner to a confident designer ready to tackle any project.
What You’ll Learn:
Design Principles: Master the core concepts that form the foundation of great garden design
Planting Techniques: Learn how to select and arrange plants to create beautiful, sustainable spaces
Design Styles and Layout Options: Explore different garden styles to suit every type of outdoor space
Course Features:
20 hours of study time
Flexible online learning that you can fit around your schedule
Engaging video lessons and quizzes to test your knowledge
Real-world case studies to put your learning into practice
Certification upon completion
This course is available now for just £199. Start your garden design journey today and gain the skills to create stunning spaces with confidence.
29
Garden Design Examples for Small Gardens: 30 Design Templates & Planting Plans
Garden Design Examples for Small Gardens: 30 Design Templates & Planting Plans: In this online gardening course, I’ll walk you through 30 fantastic garden designs, explaining the logic behind the layout, the plant choices, and take-home tips for applying them in your own garden.
Weekend Garden Makeover: A Crash Course in Design for Beginners
Learn how to transform and design your own garden with Lee Burkhills crash course in garden design. Over 5 hours Lee will teach you how to design your own dream garden. Featuring practical design examples, planting ideas and video guides. Learn how to design your garden in one weekend!
Garden Design for Beginners: Create Your Dream Garden in Just 4 Weeks
Garden Design for Beginners Online Course: If you want to make the career jump to becoming a garden designer or to learn how to design your own garden, this is the beginner course for you. Join me, Lee Burkhill, an award-winning garden designer, as I train you in the art of beautiful garden design.
If you follow this lawn care guide, you’ll have the perfect lawn in no time, whether using rolled turf for the instant new lawn or the more selective lawn seed. Although lawn seed takes far longer to establish, it does allow you to pick a precise blend of grass seeds for more problematic shady or delicate ornamental lawns.
Lawns help provide year-round greenery to your garden, which helps lift your mood and provide a beautiful foil for the rest of your garden plants. During the winter, your lawn will require slightly different care to the summer when it’s actively growing. If you need winter lawn tips, then this article will show you what to do during the colder months to keep your turf looking fantastic!
Once established, you’ll be able to use a lawn mower to keep your new lawn looking fantastic all year round. There are even robotic lawnmowers now to remove the need to lift a finger!
Your subscription could not be saved. Please try again.
Your subscription has been successful.
Lee Burkhill
Lee Burkhill, known as the Garden Ninja, is an award-winning garden designer and horticulturist with over 30 years of gardening experience and 15 years as a professional garden designer. A qualified RHS (Royal Horticultural Society) professional, Lee specialises in sustainable garden design and practical horticultural advice. He designs and presents on BBC1’s Garden Rescue and in leading gardening publications. Lee combines three decades of hands-on gardening knowledge with professional design qualifications to help gardeners create beautiful, functional outdoor spaces.