How to grow tomatoes: Ultimate seed & plug plant guide
Lee Burkhill: Award Winning Designer & BBC 1's Garden Rescue Presenters Official Blog
Beginner level
Growing tomatoes can be one of the most satisfying edibles to grow in your garden. The rich scent as you enter the greenhouse, ripening red fruits and the taste is unparalleled. But how easy is it to grow your own tomatoes, and is it worth the effort? I'm going to help convince even beginner gardeners that they are worth growing!
Growing your own fruit and vegetables is a fantastic way to engage with your garden, reduce your carbon footprint and help eat better organic produce. Tomatoes are among our most popular fruits to buy in supermarkets and can be found year-round (usually flown halfway around the world, sadly). Often, these ‘forced tomatoes’ taste rather lacklustre and have a dull orange colour instead of the vibrant red of fresh tomatoes.
Quick Answer
Sow tomato seeds indoors or under glass from January to April, aiming for March as the ideal time. Seeds need a temperature of at least 18°C to germinate. Once seedlings have four sets of leaves, pot them on into rich peat-free compost. Plant outdoors only after the last frost, usually late May. Feed weekly with a high-potassium liquid tomato feed once the first truss sets, and harvest from August onwards.
Did you know you can easily grow tomatoes at home with seeds at a fraction of the cost, with a taste unparalleled by the wet, cold, anaemic-looking shop-bought varieties? This guide will show you how to grow tomatoes at home, whether in a greenhouse, on a windowsill, or outdoors.
This page contains affiliate links for products I use and love. If you take action (i.e. subscribe, make a purchase) after clicking a link, I may earn some gardening commission, which helps me keep the Garden Ninja Blog free for all.
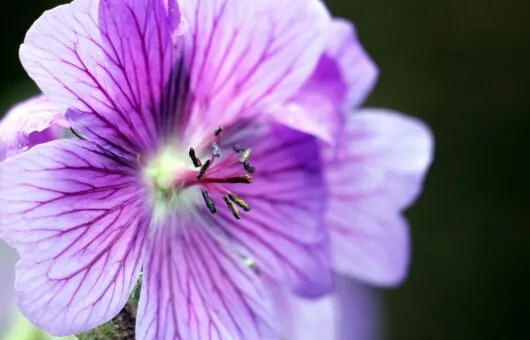
Where are tomatoes originally from?
Tomatoes are originally wild native plants from the Andes and also grow in parts of Bolivia, Chile, Colombia, Ecuador and Peru. They have been bred, transported and crossbred as varieties, hybrids and cultivars worldwide. Even though they’ve been bred outside their native countries, they still need hot, sunny conditions to grow properly. Forcing them in cold, shady or windswept gardens will just result in lacklustre results or tomato plants that die.
When to sow tomato seeds?
The best tomatoes are grown early in the year around March under glass or indoors, which gives the tomatoes time to grow strong, provide near-endless fruit and ripen properly. You can grow them from seed indoors as early as January or under glass. Then, as soon as the warm weather comes, you can even transfer your tomatoes to the garden when the weather is milder, and frosts have passed.
The best time to sow tomato seeds is March.
A packet starts at just a couple of pounds and gives you access to far more variety than any garden centre shelf.
It takes about five months from seed sowing to harvesting tomatoes. So, they are not a quick crop. If you think of the ultimate height of a tomato plant, you can see why. They put on loads of growth in the first part of the season and then send out side shoots known as trusses, which is where the flowers and fruits are born!
Growing tomatoes from plug plants or shop-bought container plants means you can get fruit in 3 months, and in a good hot summer, sometimes 2 months.
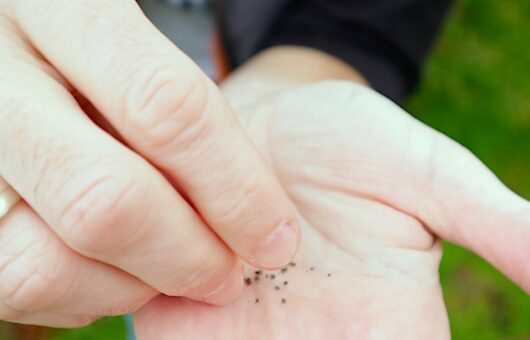
How to sow tomato seeds from scratch
Whilst you can harvest your own seeds from existing tomatoes, it’s best to buy your seed for consistency and choice. Buying tomato seeds allows you to pick a variety that suits your taste, growing space and requirements. You are ensuring they grow ‘true to form’ and for beginner gardeners, it’s a much more predictable growing process!
Tomato seeds are relatively cheap to get hold of, and there are hundreds of varieties to choose from!
Equipment needed to grow tomatoes
You will need the following to grow tomatoes from seed. I’ve linked to everything I use myself at Garden Ninja HQ.
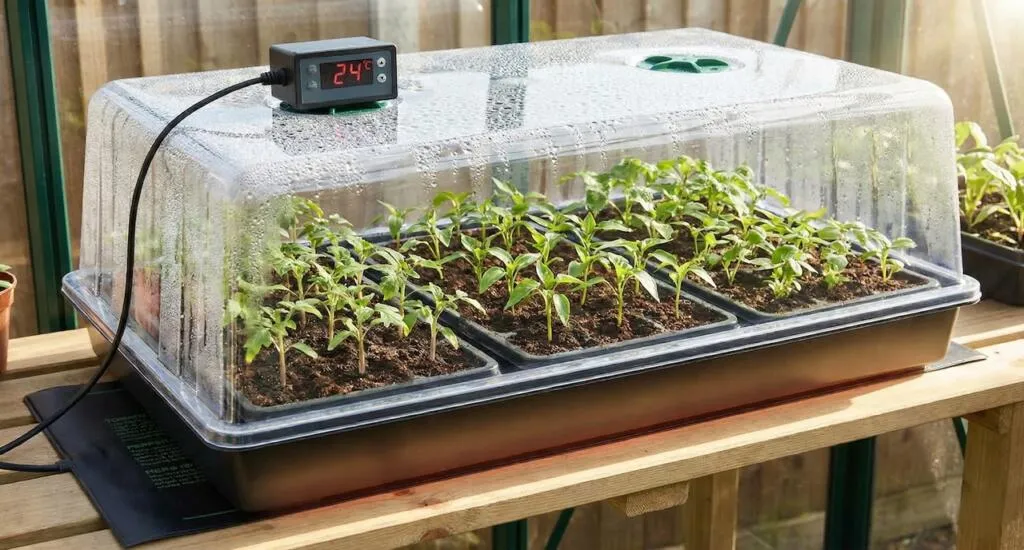
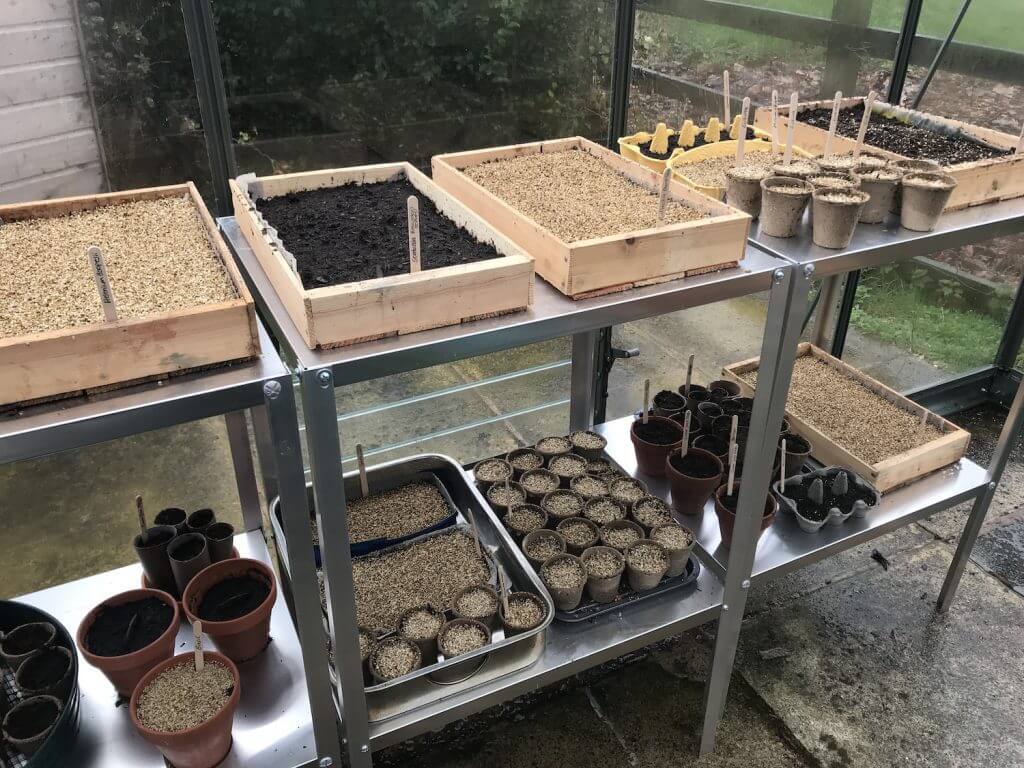
Step 1: Sowing tomato seeds
Sow tomato seeds from January to April in seed compost or fresh multipurpose compost. Don’t try and cheat and grow them in soil; it’s too dense, can be too rich for seedlings and gets very heavy when wet.
Sow your seeds about ¼ inch (6.5mm) deep. You can either use a seedling tray; wooden ones are best and fully recyclable. Alternatively, you can sow them individually into pots.
I find it’s best to sow them into individual pots rather than seedling trays. This is because they like to have deep roots. By sowing individually in pots, you don’t need to prick out and disturb them as much later on.
Step 3: Place tomato seeds under glass
Tomatoes need a temperature above 18°C (around 25°C is best) to germinate. Tomatoes are sensitive to cold. So trying to grow them directly outside when it’s cold or frosty is a road to nowhere.
If you have a greenhouse this is the best place to sow tomatoes. The second best place is indoors on a sunny window sill. If not, grow them in a cold frame from early April onwards (the drawback to the last method is that you’ve got a far later harvest, and the fruits may not ripen).
Tomatoes take 7 to 14 days to germinate, so you do need some patience compared to faster-germinating plants like borage or lettuce.
Step 4: Keep your tomato seedlings warm and damp
Tomatoes are a hot-weather plant and need heat to help them to grow. Keep the soil moist, but be careful not to overwater, making the soil soggy and inhibiting growth.
Keep the temperature between 18 and 24 degrees. If you have a cold snap, consider a greenhouse heater or keep a church candle lit in there with the door closed.
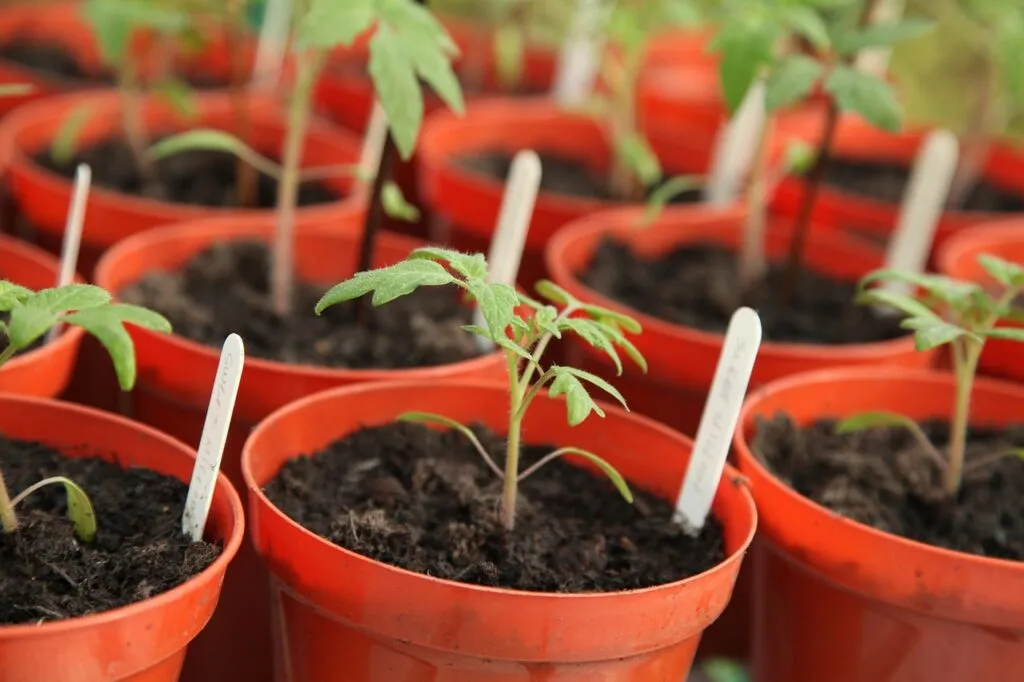
Step 5: Prick out or pot on your tomatoes when they have 4 sets of leaves
Once your tomato seedlings are large enough to handle, usually around 12cm or 5 inches tall, you can then transfer them into individual containers or large pots. These will become their final planting place if growing under glass. It’s now important to plant them in a super-rich compost mix. Dalefoot composts are the best for long-term feed, but any other peat-free compost will do.
If planting them outside in a sheltered sunny seed bed, then wait until the last frost has passed. If night temperatures drop below freezing, keep them inside for now, as any frost will kill them. When planting outdoors, ensure it’s in full sun or south facing area of the garden.
Step 5: Ensure tomato plants never dry out
Keep your tomato plants adequately watered during the growing season. Stressing them with drought will cause their stems to collapse or the fruits to split and crack. It’s best to make sure you water them a little and often rather than flood them when dry. This flooding causes the fruits to sometimes burst or split.
Step 6: How to feed your tomato plants
Tomato plants are really hungry once fruiting begins, and this is an area where many beginners let themselves down. Even when planted in high-quality peat-free compost, tomatoes will exhaust the available nutrients surprisingly quickly once they start to flower and set fruit. From the moment you see the first truss setting, they need weekly feeding without fail.
Choose a high-potassium liquid tomato feed and apply it weekly once the first truss has set. The high potassium content supports fruit development and ripening, which is exactly what you want at this stage. Before flowering, a balanced feed with a higher nitrogen content encourages healthy leaf and stem growth, but once fruit appears, switch to the dedicated tomato formula.
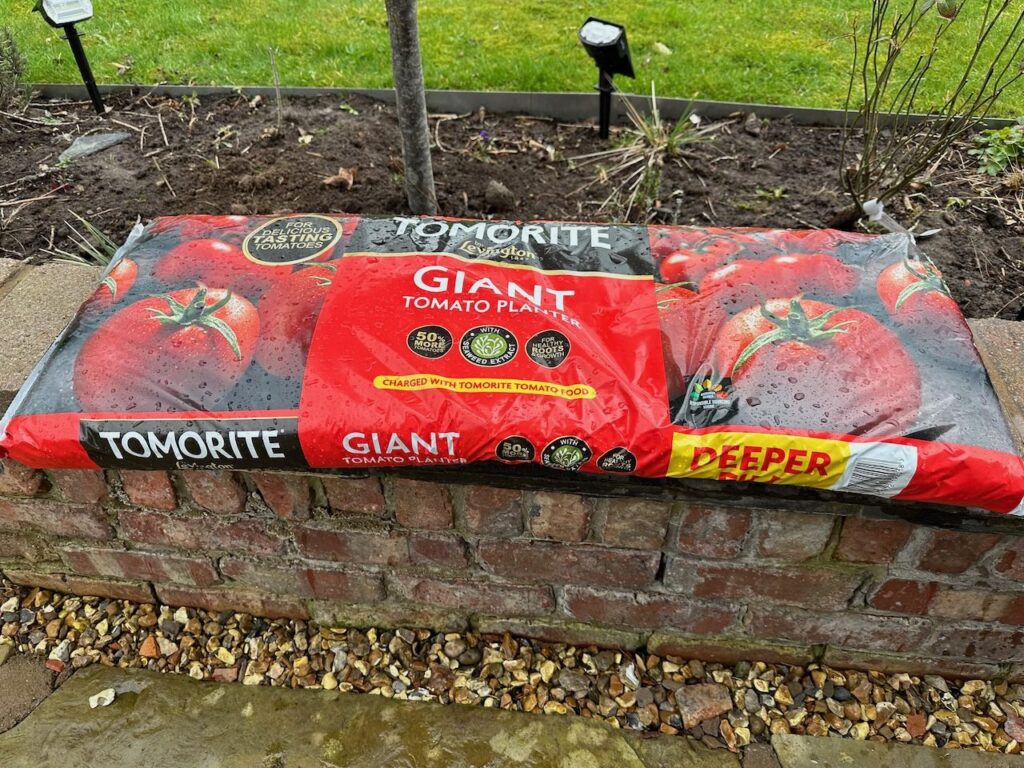
Look for a formula with a potassium-rich N-P-K ratio. Brands like Tomorite are a solid, well-proven choice.
My personal favourite alternative is homemade comfrey tea, which is naturally high in potassium and completely free to make if you grow comfrey in your garden. I use it throughout the season at Garden Ninja HQ, and the results are excellent. It does smell fairly alarming when you first make it, but the tomatoes absolutely love it.
A few things to bear in mind when feeding. Container and grow-bag-grown plants need feeding more frequently than those grown in the open ground because watering leaches nutrients out of the restricted compost volume much faster. Never skip feeding once you start. Irregular feeding is a common cause of blossom end rot (see the problems section below). If in doubt, feed little and often rather than giving a large dose infrequently.
Step 6: Pinch out the top when they reach 6 trusses
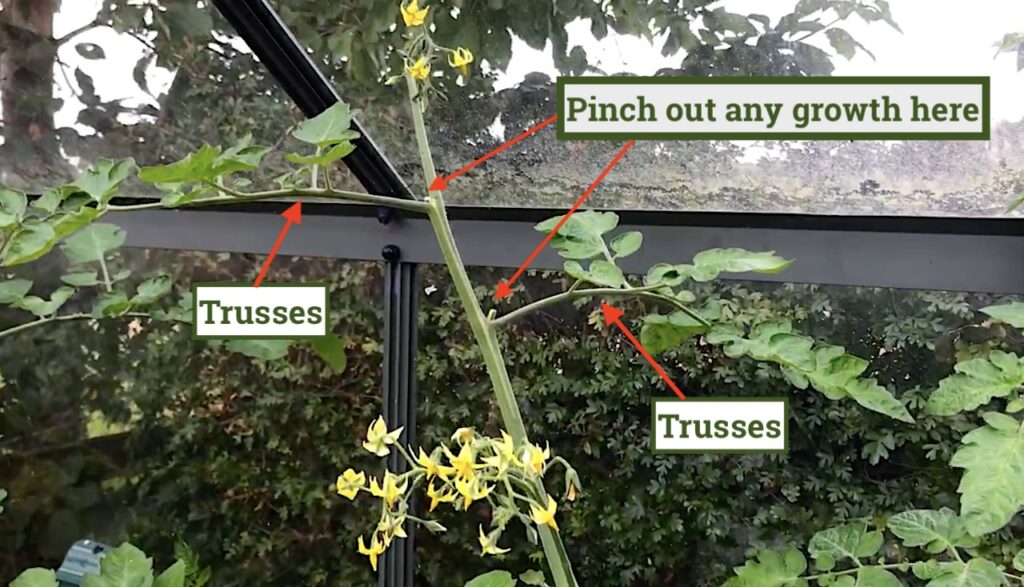
Once your tomato plants are growing vigorously, it’s important to pinch out the top to control their growth.
For greenhouse grown tomatoes, let them grow to a height of 6 trusses.
For outdoor tomato varieties, pinch them out at a height of 4 trusses, as they won’t get enough heat here in the UK to reach their full potential, so conserve the energy for fruit instead.
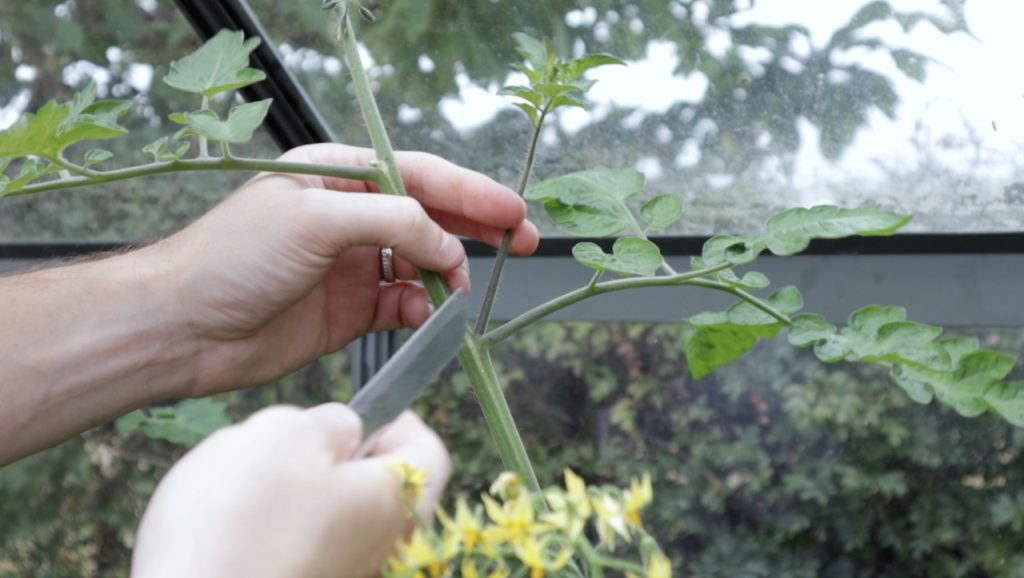
It’s also important to nip out the side shoots from the trusses. These are the shoots that grow in between the main stem and the truss (big shoots growing horizontally off the main stem). See the image below to know which bits to pinch out. Use your fingers and simply snap off the growth in between the truss and the stem.
We pinch these out as tomatoes are bushy growing plants. If we don’t nip these out, they get overcrowded, and hard to harvest, and the weight of the fruits can sometimes cause these side shoots or trusses to snap with the weight. This practice of pinching out tomatoes just controls the growth, giving bigger fruit that are easier to harvest and look after.
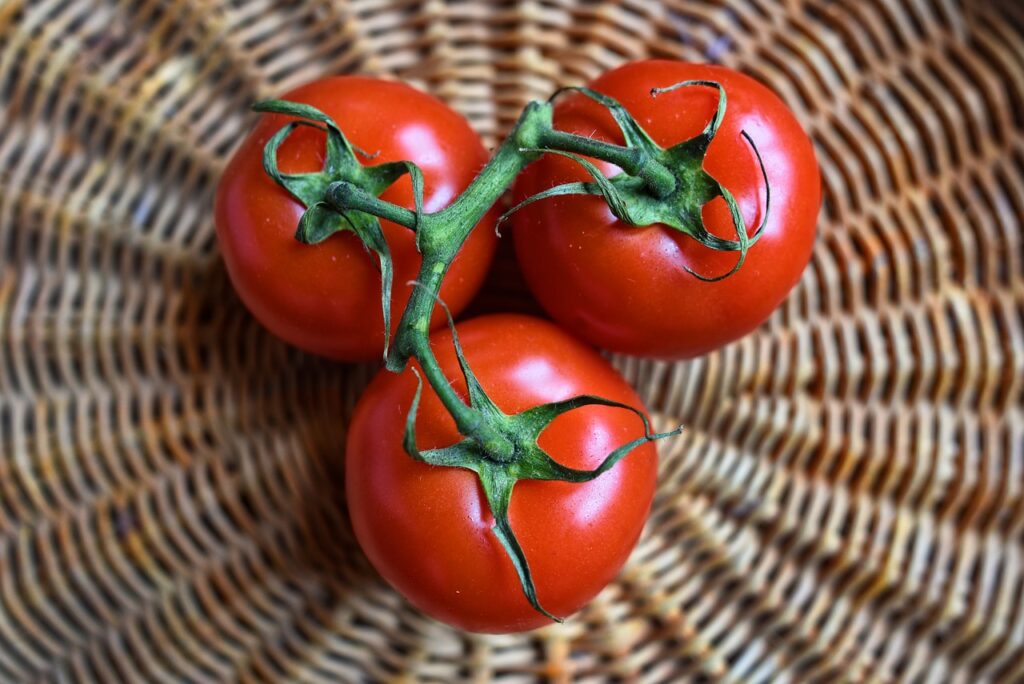
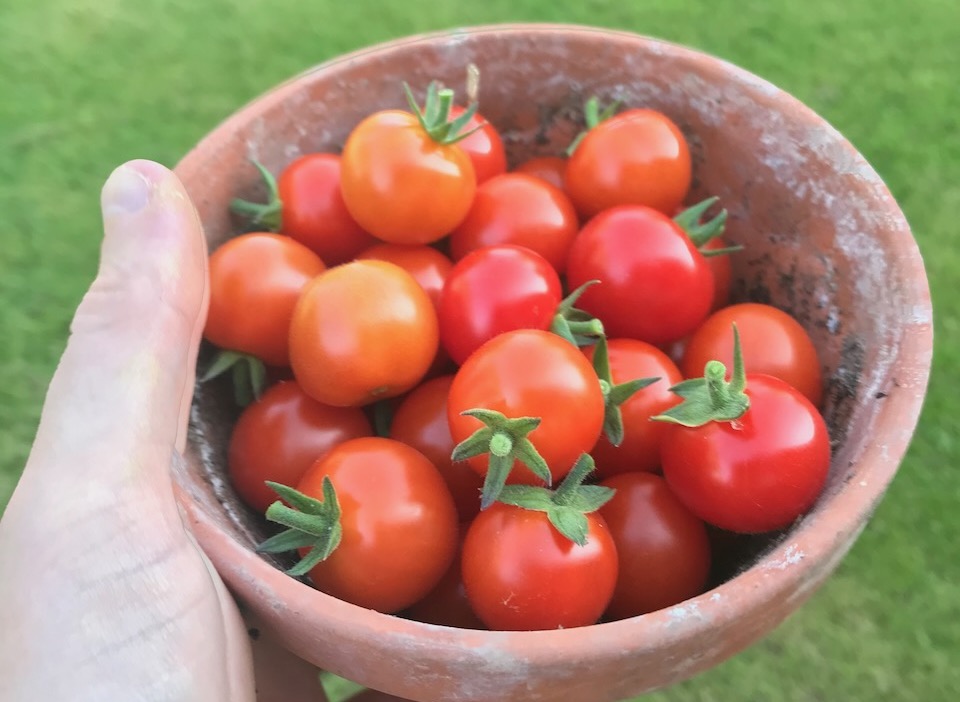
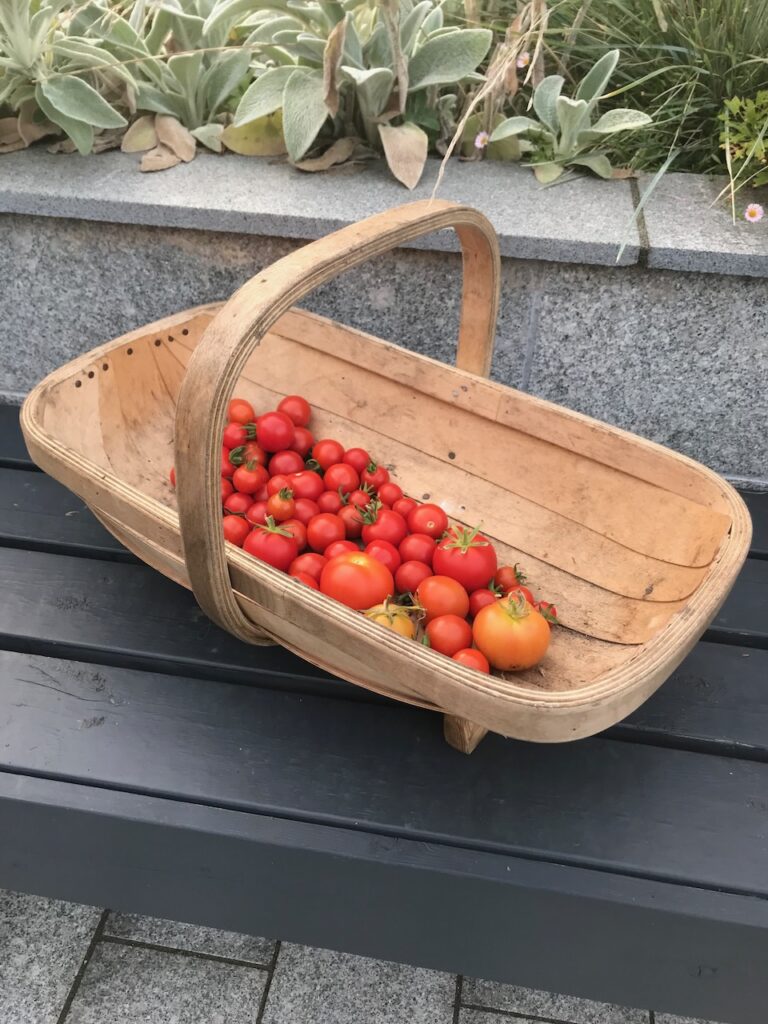
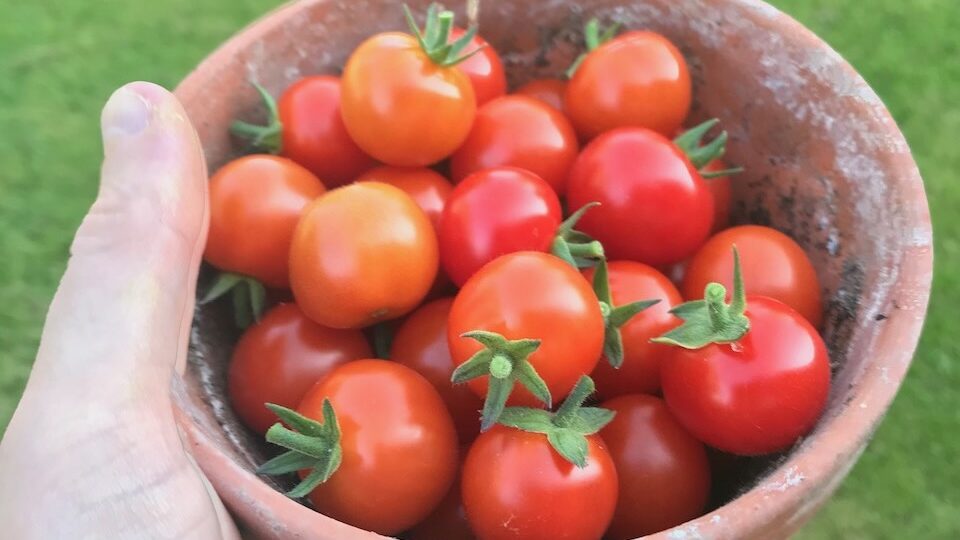
Step 7: Harvest your fruits when ripe in late summer
Around August time in the UK it’s time to harvest your fruits! This is the best bit of growing tomatoes. Once they are red and plump-looking, they should easily pull away from the vine. For clusters of tomatoes, you can simply cut the vine with some clean, sharp secateurs.
Congratulations, you’ve grown your own tomatoes!
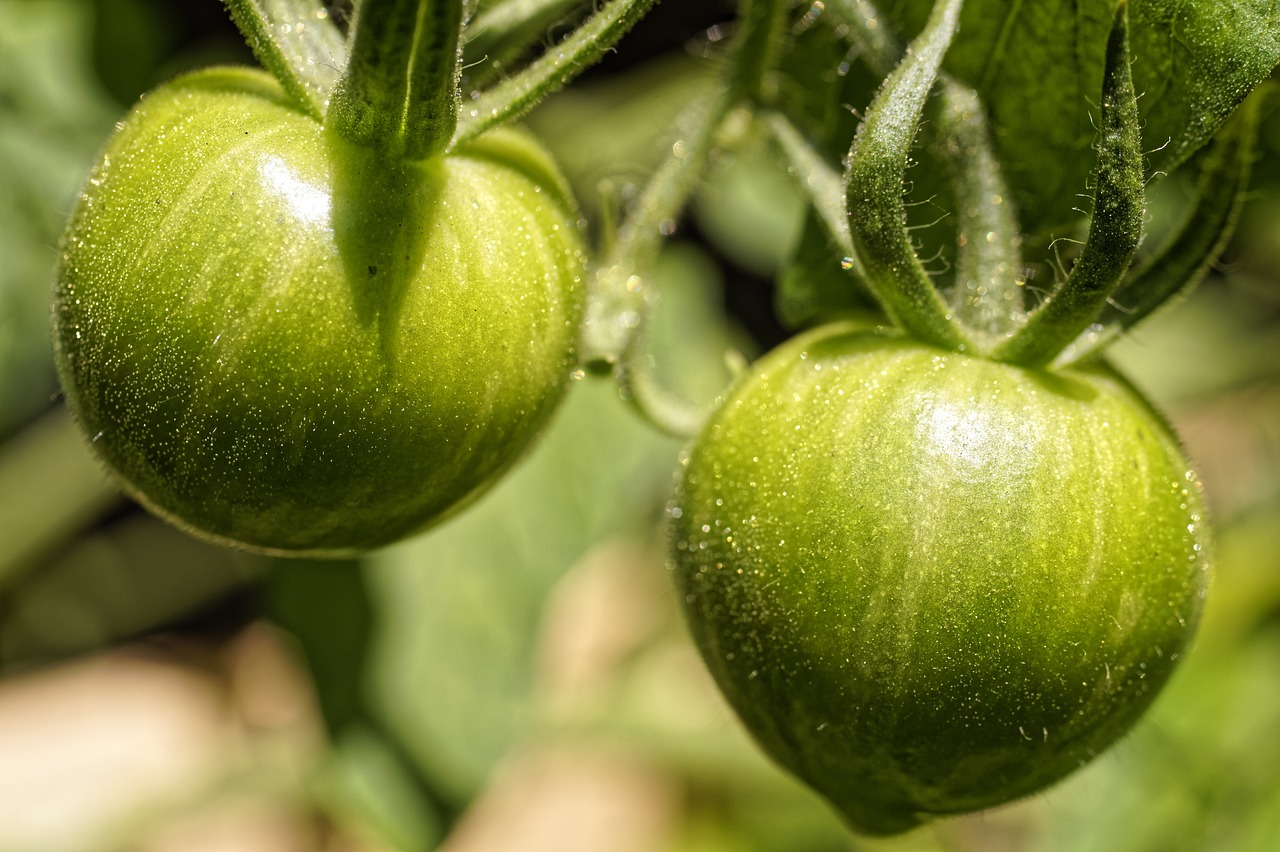
Can I eat green tomatoes?
As for green tomatoes, leave them on the vine to see if they ripen in a few weeks. If you’re at the end of the growing season, i.e., September, you can still harvest these, but it’s best to cook or preserve them rather than eat them raw. They will be hard and quite tart, but they do make excellent pickles or are lovely fried in butter!
Growing tomatoes from plug plants
Plug plants are ready-grown mini tomatoes that you can pot on immediately to their final planting position. By using plug plants you skip out the seed-sowing stage entirely.
The process is exactly the same as for growing tomatoes from seeds. Only you get to start at the ‘potting on’ stage, which is step 5 above. If you’re going to plant tomatoes directly outside in raised beds or vegetable patches, make sure you plant them out only after the last of the frosts. Plant out plug plant tomatoes in May in the UK.
Ensure you space your tomatoes with enough room to allow for all their growth in the summer. A good rule for spacing tomatoes is to give them 50cm (20 inches) apart in rows with canes for support.
They will need a good quality peat-free compost mulch and feed throughout the year. Outdoor-grown tomatoes should have their tops pinched out when they reach 4 trusses high. This is to focus energy on fruiting as they won’t get as warm as if grown in a greenhouse.
In my experience, growing tomatoes in a greenhouse is far easier for beginners, and you get much more fruit!
Grow bags are a great way to ensure your tomato plants have enough feed during the growing season. They can make it really easy for beginners to get their tomatoes off to a good start. Most grow bags are long, thin bags of compost that two or three tomato plants can be put into when the grow bag is laid flat.
Grow bags are a cheap way of ensuring your tomatoes have fresh compost each growing season.
Often, grow bags have holes marked for cutting, making it easy to plop in your tomatoes. They are long and heavy, so they tend to easily weigh down taller tomatoes. Stopping the tomatoes in the greenhouse from bending over, but they still need staking.
However, there are some drawbacks to using grow bags over containers for tomatoes. They often use peat-based compost, which is bad for the environment. They are too shallow to earth up tomatoes, and they dry out really quickly. They are often not deep enough for a tomato’s root system and take up a lot of room. They are also not deep enough for canes to support tomatoes easily.
There’s plenty of advice about not reusing compost for growing your own fruit and vegetables, with all sorts of antiquated reasons. Much of this comes from old advice about controlling pests, which we now know much more about. With the introduction of organic gardening and companion planting, pests shouldn’t be too much of an issue.
The quick answer is: yes, you can reuse tomato compost at the end of the season. In fact, I’ve got a handy video guide on what to do with your old compost below.
Unless your tomatoes have had blight or a disease during the season, the compost will be fine. If you’ve had tomato blight, always dispose of the compost, as you can spread it if not.
When reusing old compost for fruit and vegetables, it’s worth checking how hungry the new plants are for nutrients. Tomatoes and potatoes are very hungry, so they will need additional nutrients or feed if you’re reusing compost. If you don’t top this compost up, you may end up with lower yields.
The bottom line when it comes to tomato compost is to reuse it as much as possible, either by using it as a mulch elsewhere in the garden, top-dressing your lawn, or adding an organic feed so you can reuse it for other crops like lettuce.
How much sun and warmth do tomatoes need?
Tomatoes are a hot climate full sun plants, so we must mimic those conditions to get the best out of them. They will need, on average, 8 hours of sunlight in the growing season, especially if you want the fruits to ripen to a rich red colour.
In terms of temperature, they need a minimum of 21 to 24°C (70 to 75°F). Temperatures below this will stunt their growth, and temperatures above this can cause fruits to split or plants to bolt (grow excessively tall, causing them to fall over).
To grow tomatoes successfully from seeds, you’ll need some starter trays and 3 to 4-inch pots to transfer them into after they begin to grow. You’ll also need rich, fertile soil or peat-free potting compost and a good spot with plenty of sun (around eight hours a day) and shelter.
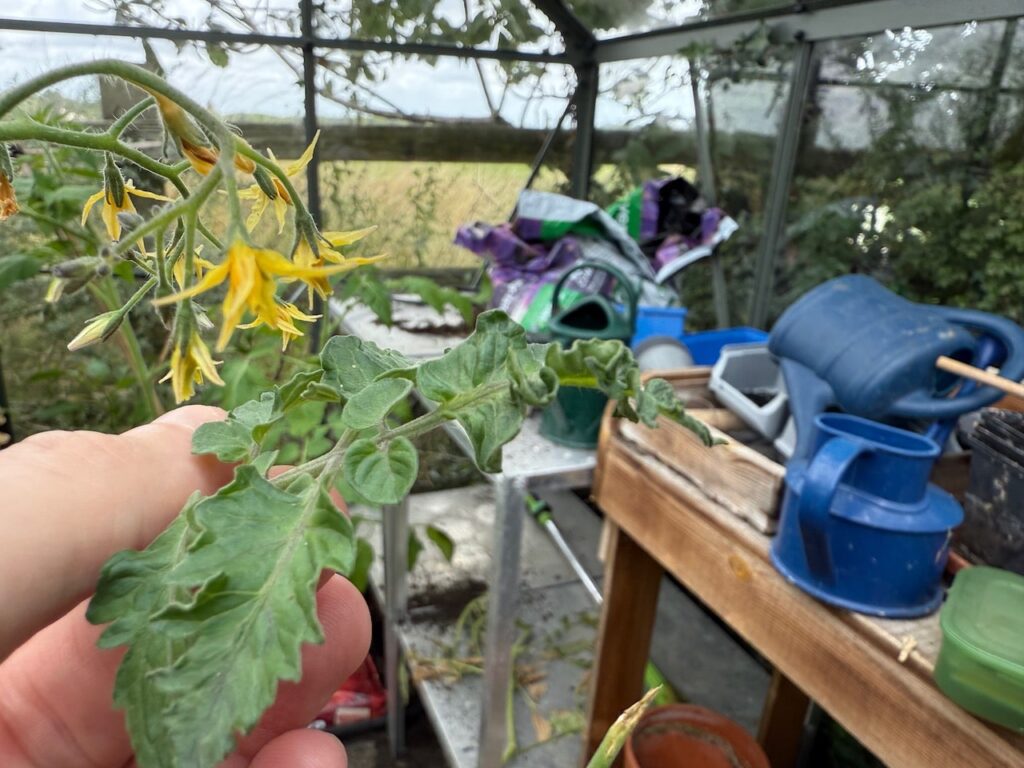
What’s the difference between a truss and a side shoot?
When it comes to growing tomatoes, there’s often confusion over the differences between a truss and a side shoot. Side shoots need to be removed because they will weaken the plant’s structure, fruiting potential and make for an overly bushy plant.
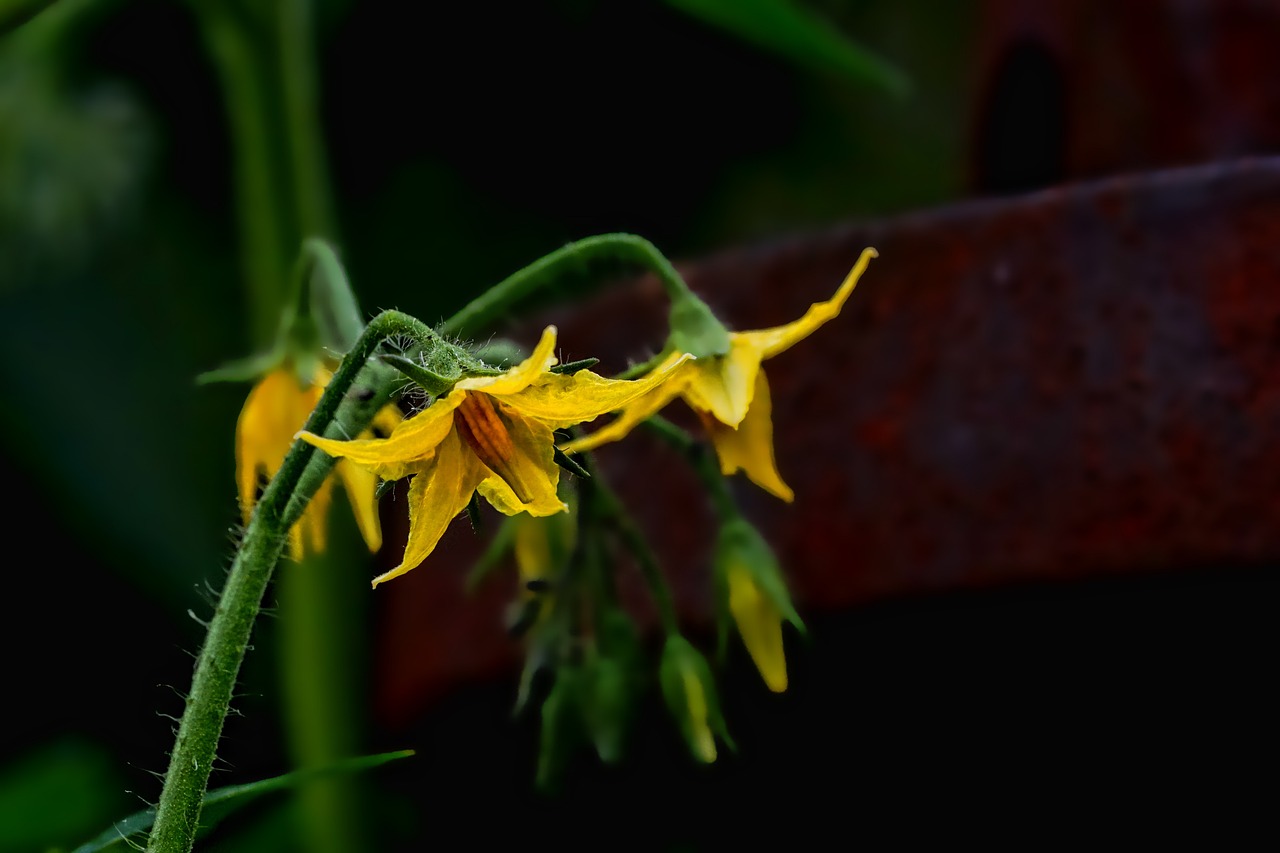
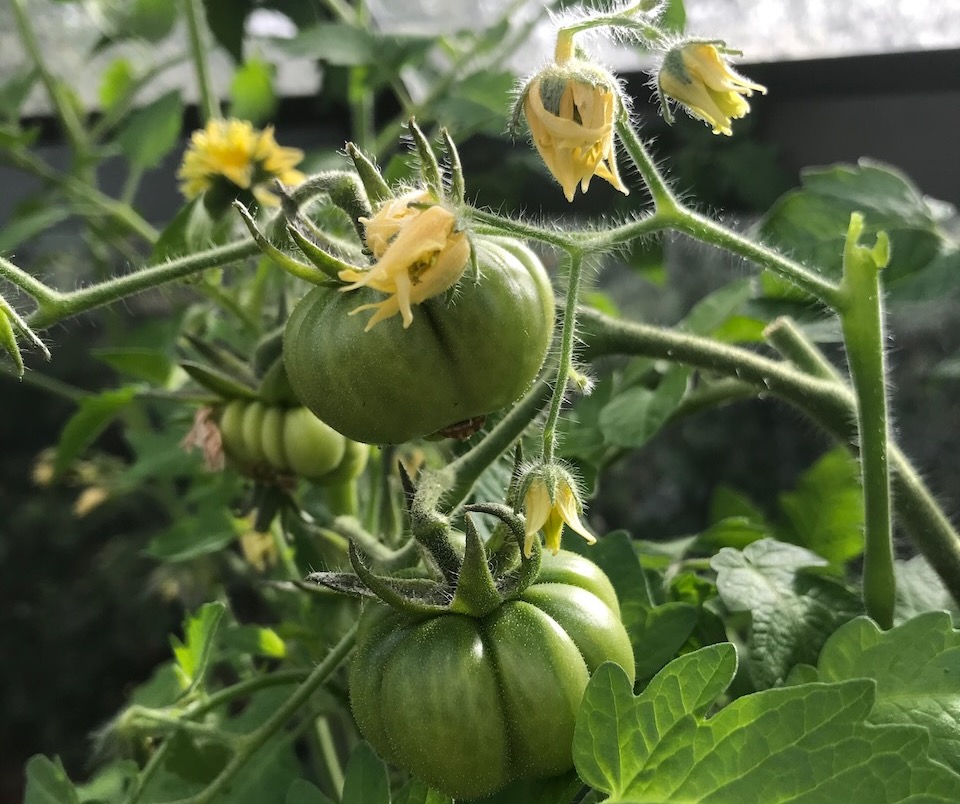
Tomato trusses are where flowers and fruit are created. They grow off horizontally from the main stem. They will flower, and if the flowers are pollinated by insects (or a gardener with a paintbrush), then they turn into fruit.
A side shoot grows between a truss and the main stem at a 45-degree angle. These, too, can flower and fruit, but not as efficiently as a truss, as they usually don’t grow as long. Side shoots take away precious energy from trusses. Trusses are the most effective way of growing fruit in horizontal layers that can be easily picked and supported by canes.
Can I use seeds saved from store-bought tomatoes?
Yes, you can, but it’s not always advisable. This is because most commercially grown tomatoes are hybrids produced by crossbreeding two parent plants with desirable characteristics. However, these traits tend to only hold true in year 1; after that, the results can be erratic, and the characteristics may revert.
The only way to ensure like-for-like is heirloom tomato varieties that haven’t been crossbred. However, you must keep them separate from other tomatoes once they’re pollinated, so they don’t become hybrids. A bit of a faff if you ask me!
So even if you save, dry out and then sow the seed from supermarket tomatoes, they probably won’t grow as expected. Save yourself the heartache and grab some seeds instead, is my experience!
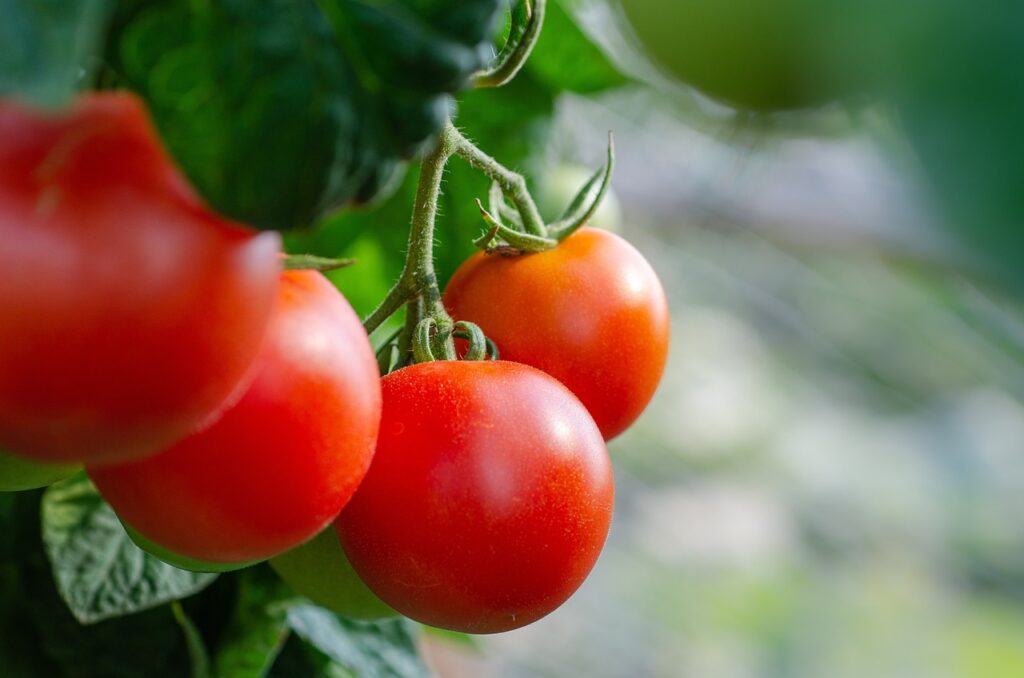
When to harvest tomatoes
Harvest tomatoes in late summer, usually from August onwards. You can tell when a tomato is ripe as it will be a vibrant red colour (unless you’re growing purple or other coloured varieties). They will be firm but not hard, and they will easily twist off from the tomato truss.
Harvesting just before they become fully ripe is a good idea as they last longer when taken inside. If you leave them too late, they can spoil quickly inside.
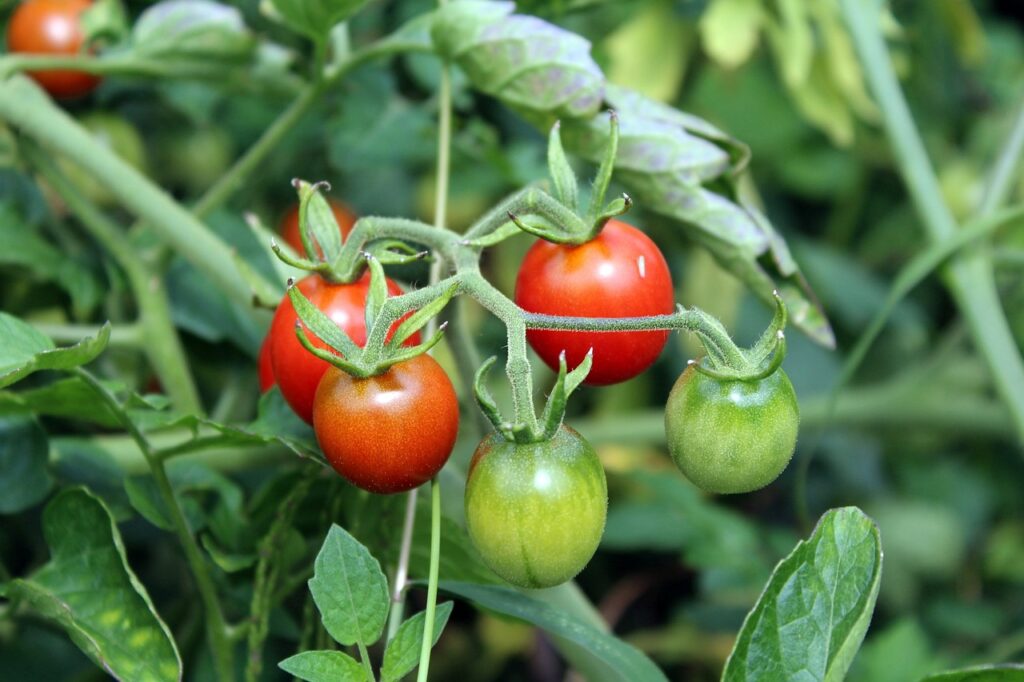
Understanding Tomato Ripeness Stages
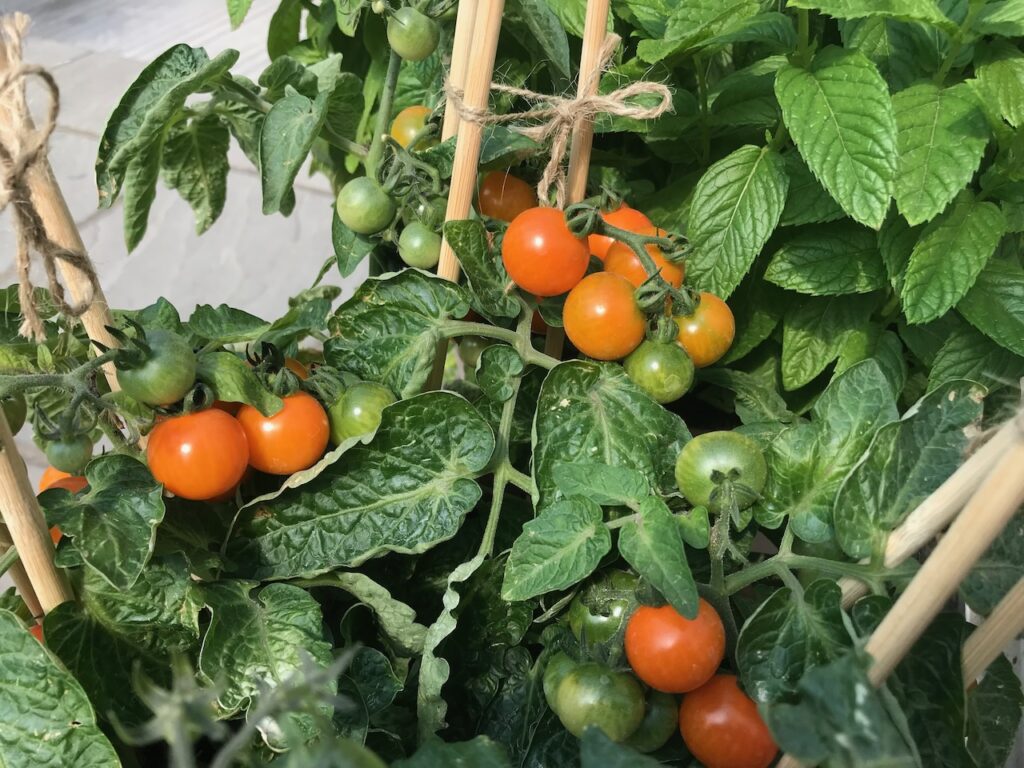
Tomatoes don’t simply switch from green to red overnight. They progress through several distinct stages, each offering different harvesting opportunities. The mature green stage occurs when fruits have reached full size but remain completely green and glossy. At this point, they’ve developed enough to ripen off the plant if necessary. The breaker stage follows, where you’ll notice the first hint of colour change, typically a slight yellowing or pinkish blush at the blossom end.
As ripening progresses, tomatoes enter the turning stage, where roughly 10 to 30 percent of the surface shows colour change. The pink stage sees 30 to 60 percent colour development, followed by the light red stage at 60 to 90 percent colour change. Finally, the red ripe stage represents full colour development with optimal flavour and texture.
The Art of Perfect Timing
For the finest flavour, allow tomatoes to ripen fully on the vine until they yield slightly to gentle pressure and have developed their full colour. Vine-ripened tomatoes contain higher levels of sugars and acids, creating that complex, rich taste that makes home-grown fruit so superior to shop-bought alternatives. The fruit should feel firm but give slightly when gently squeezed, and the skin should have a slight glossy sheen without any wrinkles or soft spots.
However, practical considerations sometimes require earlier harvesting. If nighttime temperatures consistently drop below 10°C (50°F), or if you’re approaching the first frost date for your area, it’s wise to harvest mature green tomatoes. These can ripen indoors and will still develop good flavour, though perhaps not quite matching the intensity of vine-ripened fruit.
Weather Considerations and Timing
British weather presents unique challenges for tomato growing, and understanding how weather affects ripening helps you make better harvesting decisions. During periods of excessive rainfall, fully ripe tomatoes may split or develop fungal problems. Therefore, harvesting at the light red stage and allowing final ripening indoors can help prevent losses. Similarly, during heatwaves above 30°C (86°F), tomatoes may develop uneven ripening or sunscald if left on the vine too long.
The approach of autumn requires particular attention. Once daytime temperatures consistently stay below 18°C (65°F), ripening slows dramatically. At this point, harvest any tomatoes that have begun to show colour, as they’ll ripen more reliably indoors than on increasingly stressed plants outdoors.
Harvesting Techniques for Best Results
Proper harvesting technique preserves fruit quality and encourages continued production. Pick tomatoes during the cooler parts of the day, preferably morning after the dew has dried but before the heat of midday. Twist and pull gently, or use clean secateurs to cut the stem, leaving a small piece attached to the fruit. This prevents damage to the fruit and reduces entry points for bacteria.
Handle harvested tomatoes gently, as even firm fruit can bruise easily. Place them stem-side down in shallow containers, avoiding stacking that might cause pressure damage. Never refrigerate freshly picked tomatoes, as temperatures below 12°C (55°F) break down flavour compounds and create that disappointing, mealy texture common in supermarket tomatoes.
What not to plant next to tomatoes?
If you’re planting tomatoes outside in a raised bed, there are a few plants you shouldn’t plant next to them. The reasons for this are usually that they compete for resources, will inhibit the tomato’s growth or encourage pests that will prey on your plants.
Brassicas (cabbage, cauliflower, broccoli and Brussels sprouts) inhibit tomato growth and are best kept at the far end of any raised bed. Potatoes share the same nightshade family as tomatoes and compete for the same nutrients. It also means they are susceptible to the same diseases, so keeping them apart is sensible. Corn attracts the same pests, meaning more nibbled vegetables all round.
Fennel is quite a poor companion for many vegetables and should be grown on its own or with herbs, and it will actively inhibit the growth of tomatoes. Aubergines are also in the nightshade family and are all susceptible to blight, which can ruin your tomatoes very quickly if introduced nearby.
What companion plants to use with tomatoes
If you want to help reduce pests such as white fly, cabbage white caterpillars or slugs nibbling your tomatoes, then using companion plants is a great way to do this without resorting to chemical pesticides. We should always try to be as light-touch as possible as ethical, environmentally conscious gardeners. I never use chemicals in my garden. They are too damaging to wildlife and can end up accidentally in our food sources.
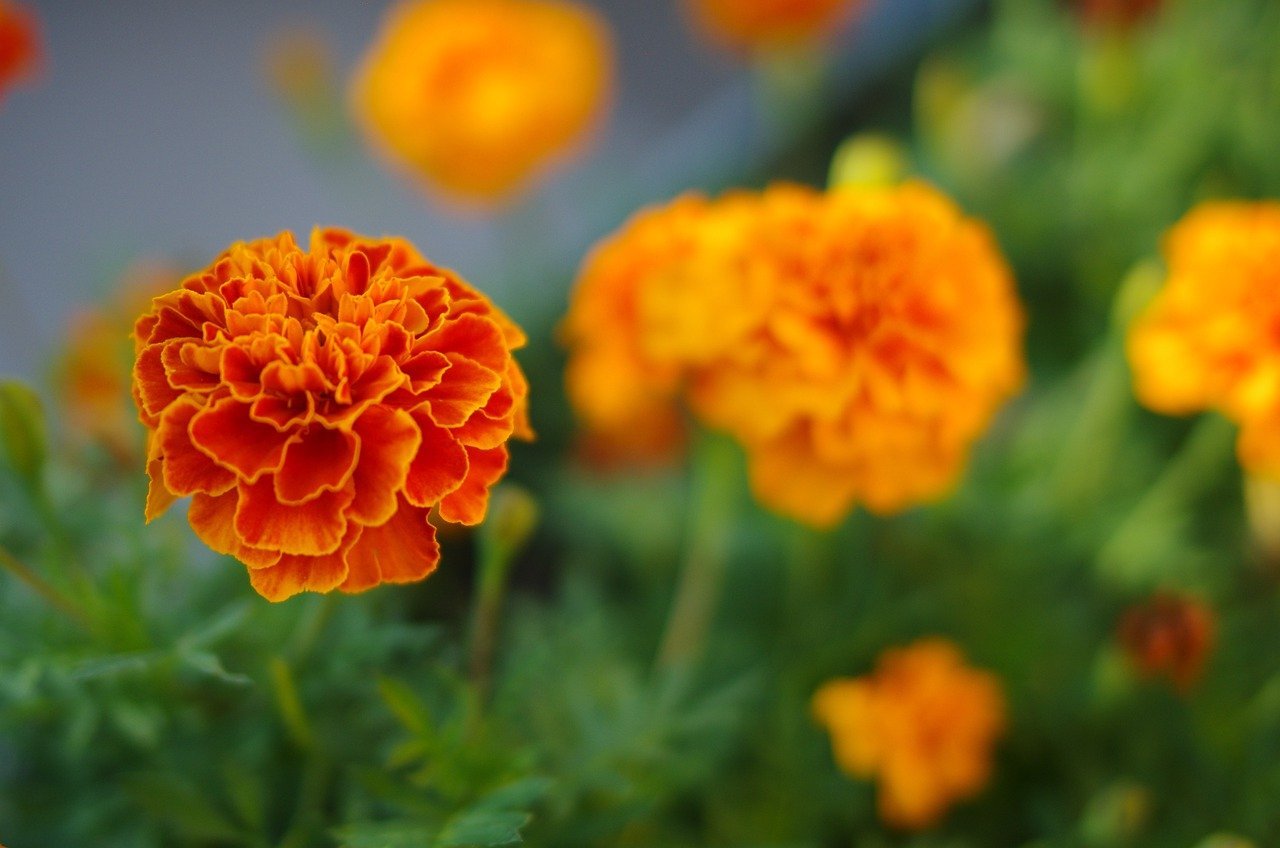
Companion plants either help put off pests with their scent or entice beneficial predators to the area to nibble pests before they get to your tomatoes. French marigolds repel slugs and snails and are one of the most useful companion plants in the kitchen garden. Petunias repel flies. Nasturtiums act as sacrificial lambs for pests to munch on, drawing them away from your tomatoes. Cosmos attract aphids away from your tomatoes but also attract hoverflies that feast on them.
What are the best beginner tomato varieties to grow?
Below are a few of my tried-and-tested tomato varieties to grow from seed or as plug plants. After twenty years of designing gardens and helping Ninjas grow their own, these are the ones I keep coming back to. There’s a mix of regular tomatoes, cherry and beefsteak depending on what type you want to grow.
As a rule, cordon (indeterminate) varieties need their side shoots pinched out and benefit from staking, while bush (determinate) varieties like Tumbling Tom look after themselves and are ideal if you’re short on time or growing in containers on a balcony.
Common tomato problems and how to fix them
Even when you do everything right, tomatoes can throw up problems that leave you scratching your head. I’ve answered hundreds of questions about tomato growing on my forum over the years and the same issues come up again and again. Here are the most common ones, what causes them, and how to sort them out.
Blossom end rot
This is the one that catches most beginner tomato growers out. Blossom end rot shows as a dark, sunken patch at the bottom of the fruit, at the end where the flower was. It looks alarming but it is not a disease. It is a physiological disorder caused by calcium deficiency within the fruit, which itself is almost always triggered by irregular watering.
When a plant is allowed to dry out completely and is then flooded with water, the roots cannot take up calcium efficiently enough to supply the developing fruits. Container and grow-bag-grown tomatoes are by far the most susceptible because their restricted compost volume dries out so quickly in warm weather. The fix is consistent, regular watering, little and often, keeping the compost evenly moist rather than cycling between wet and bone dry. Once a fruit develops blossom end rot, that fruit is lost, but consistent watering from that point will protect future fruits on the same plant.
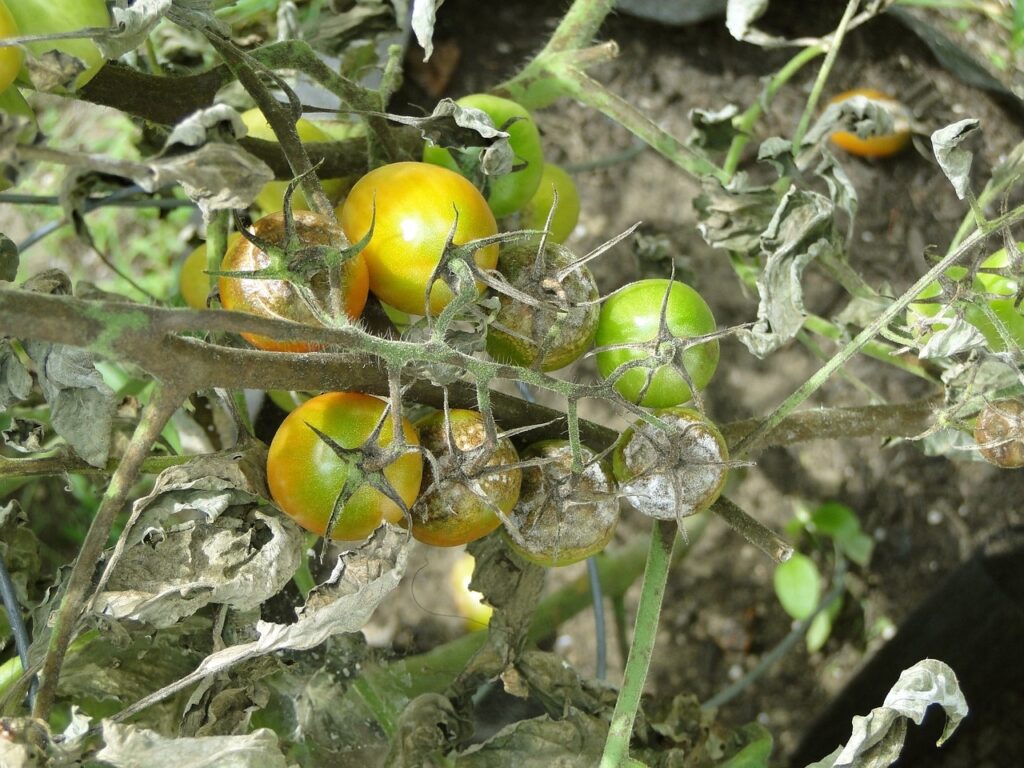
Tomato blight
Blight is the most serious problem outdoor tomato growers face in the UK, and in a wet summer it can destroy an entire crop within days. It shows as brown or black patches on leaves and stems, which spread rapidly, causing the plant to collapse. The fruit develops dark, sunken patches and rots. Blight is caused by the water mould Phytophthora infestans, which thrives in warm, wet, humid conditions. Essentially a classic British August.
Once blight takes hold there is no cure. Remove and bin (do not compost) any affected plants immediately to stop it spreading. Going forward, improve airflow around your plants by ensuring they are not overcrowded, avoid wetting the foliage when watering, and consider growing blight-resistant varieties like Ferline or Mountain Magic. Tomatoes grown entirely under glass are far less susceptible, which is another reason I always recommend greenhouse growing for beginners here in the UK.
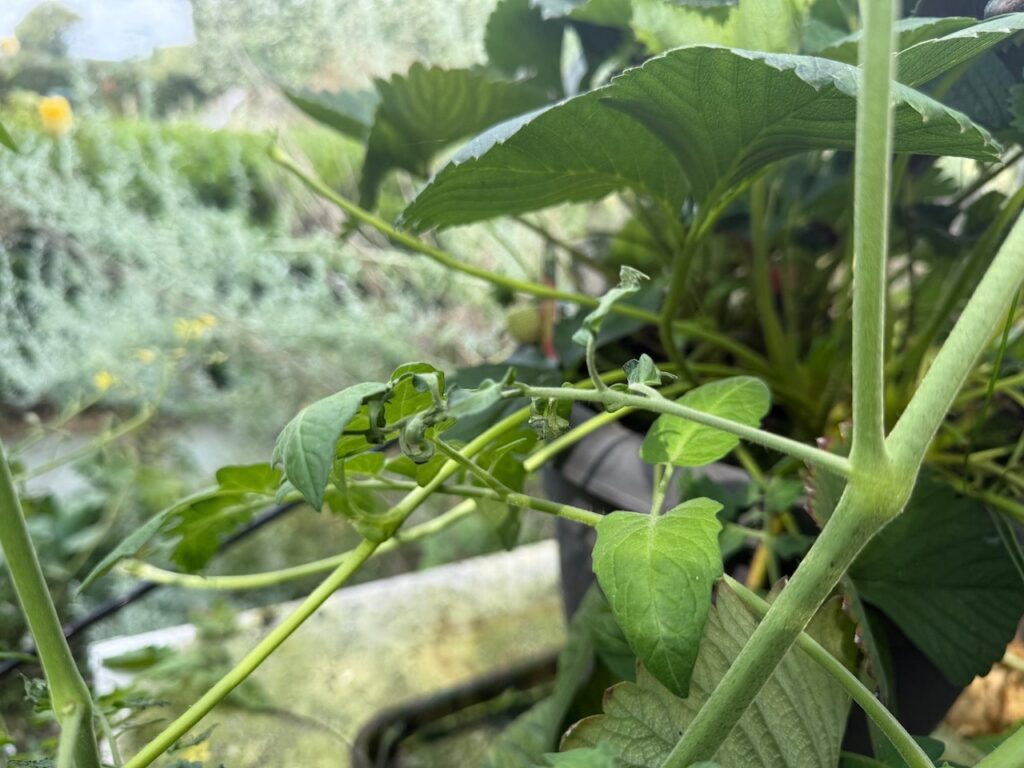
Tomato leaf curl
Curling or rolling leaves on tomato plants is one of the most common queries I get on the forum, and the good news is that most leaf curl is completely harmless. Physiological leaf roll, where the lower leaves curl upwards along the midrib, is a normal stress response to high temperatures, inconsistent watering, or very vigorous growth. The plant is simply reducing the surface area exposed to heat. It looks alarming but rarely affects yield.
However, leaf curl can also be caused by broad mite damage, herbicide drift, or, in some cases, by viral infection. If curling is accompanied by distorted, twisted, or mottled leaves and stunted growth, something more serious may be going on. Check under the leaves for pests and consider whether any weedkillers have been used nearby. Even trace amounts of certain herbicides on the wind can cause persistent, spiralling leaf distortion in tomatoes.
Split or cracked fruits
Split skins and cracked fruits are almost always caused by irregular watering, particularly a sudden heavy watering or downpour after a period of drought. The plant takes up water rapidly and the skin of the fruit cannot expand fast enough to accommodate it, so it splits. This is most common after a dry spell followed by heavy rain, or when gardeners over-compensate for forgetting to water by flooding the plants.
Fruits that have split should be harvested immediately and used straight away, as the exposed flesh quickly develops fungal problems. Prevention again comes down to consistent, even watering. A thick mulch of compost around the base of outdoor tomatoes helps retain soil moisture and buffer the plant against sudden changes.
Yellow leaves
Some yellowing of the lower leaves on a tomato plant is entirely normal as the season progresses. The plant naturally redirects energy upwards towards the growing tip and fruiting trusses. However, widespread yellowing higher up the plant usually indicates a nutrient deficiency, most commonly magnesium or nitrogen. Yellowing between the leaf veins while the veins themselves stay green is a classic sign of magnesium deficiency, which is common in tomatoes grown in containers. A foliar feed of Epsom salts (magnesium sulphate) dissolved in water and sprayed directly onto the leaves is a quick and effective fix. If the leaves are yellowing uniformly without the vein pattern, nitrogen deficiency is more likely. Switch to a balanced liquid feed until vigour returns, then switch back to a high-potassium tomato feed once fruiting resumes.
Transform Your Garden Knowledge with Garden Ninja’s Expert Resources
Ready to elevate your gardening beyond basic tasks? My comprehensive online courses provide the expertise to transform you from enthusiastic beginner to confident garden creator.
With courses starting from just £29, you gain access to award-winning design knowledge.
29
Garden Design Examples for Small Gardens: 30 Design Templates & Planting Plans
Garden Design Examples for Small Gardens: 30 Design Templates & Planting Plans: In this online gardening course, I’ll walk you through 30 fantastic garden designs, explaining the logic behind the layout, the plant choices, and take-home tips for applying them in your own garden.
Weekend Garden Makeover: A Crash Course in Design for Beginners
Learn how to transform and design your own garden with Lee Burkhills crash course in garden design. Over 5 hours Lee will teach you how to design your own dream garden. Featuring practical design examples, planting ideas and video guides. Learn how to design your garden in one weekend!
Garden Design for Beginners: Create Your Dream Garden in Just 4 Weeks
Garden Design for Beginners Online Course: If you want to make the career jump to becoming a garden designer or to learn how to design your own garden, this is the beginner course for you. Join me, Lee Burkhill, an award-winning garden designer, as I train you in the art of beautiful garden design.
Growing your own tomatoes can be a really rewarding way to start your grow-your-own-produce journey. The smell of fresh tomatoes in a greenhouse signifies summer to all gardeners. Given that tomatoes are pretty foolproof to grow and have so many culinary uses, they’re an excellent first edible to grow in your garden.
By following this easy guide, you’ll be the envy of your neighbours as you grow an array of tomatoes, whether cherry, beefsteak or regular salad tomatoes. With their unrivalled taste and organic qualities, you’ll never return to supermarket tomatoes!
Your subscription could not be saved. Please try again.
Your subscription has been successful.
Lee Burkhill
Lee Burkhill, known as the Garden Ninja, is an award-winning garden designer and horticulturist with over 30 years of gardening experience and 15 years as a professional garden designer. A qualified RHS (Royal Horticultural Society) professional, Lee specialises in sustainable garden design and practical horticultural advice. He designs and presents on BBC1’s Garden Rescue and in leading gardening publications. Lee combines three decades of hands-on gardening knowledge with professional design qualifications to help gardeners create beautiful, functional outdoor spaces.