Why Is My Laurel Hedge Dying? Complete UK Diagnosis Guide
Lee Burkhill: Award Winning Designer & BBC 1's Garden Rescue Presenters Official Blog
Beginner level
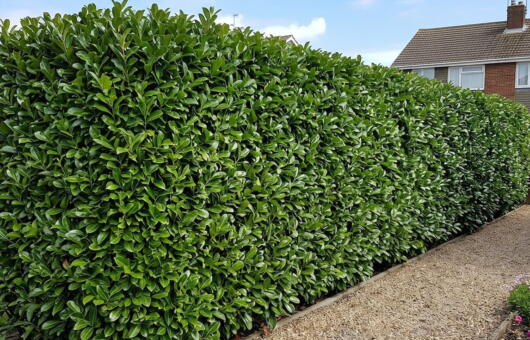
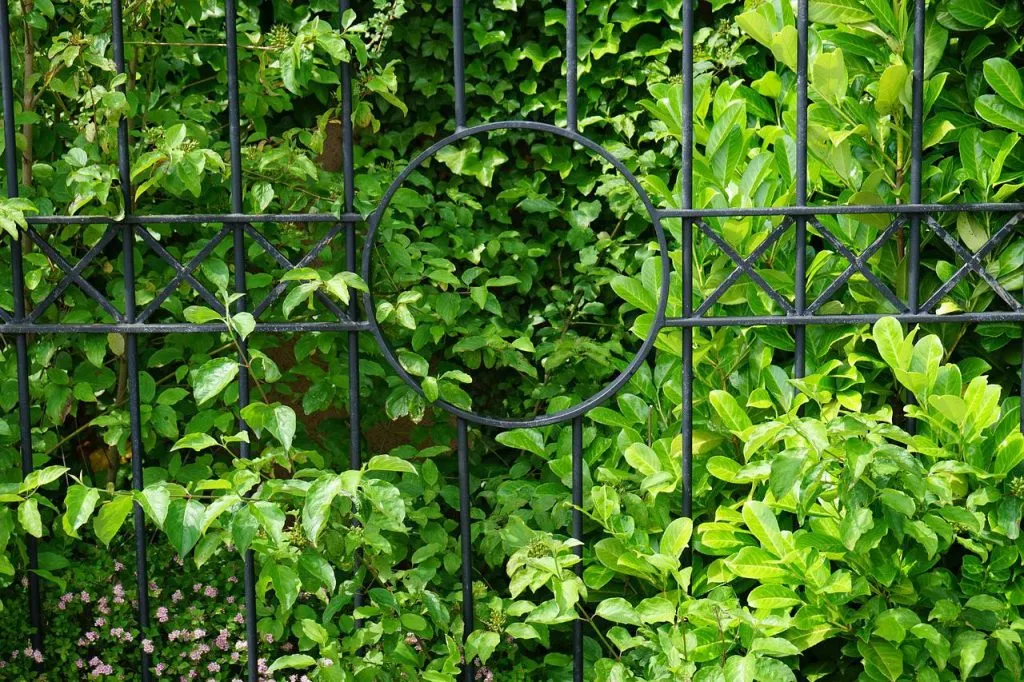
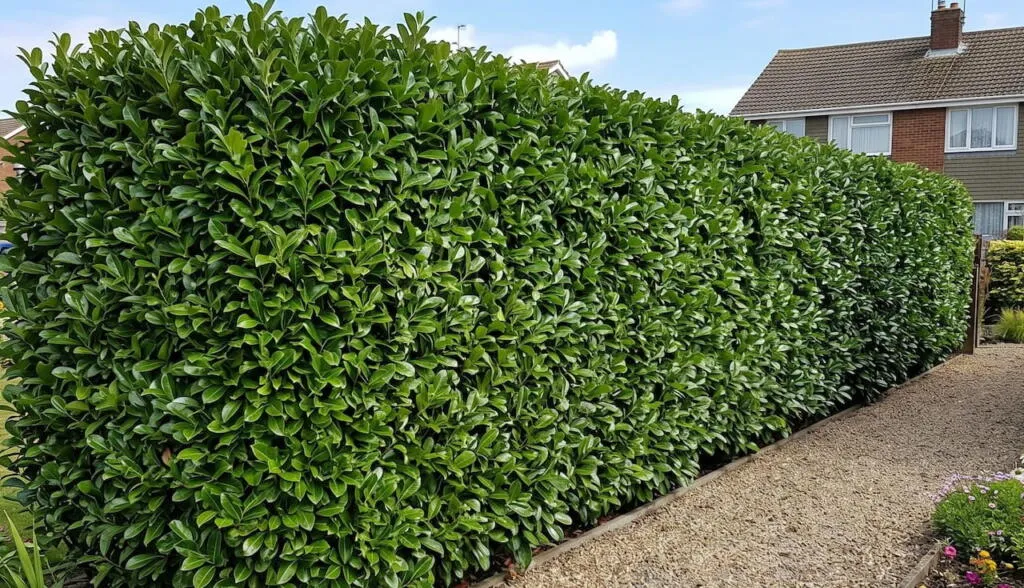
Laurel hedging is a tough, fast-growing evergreen plant species that, when healthy, makes dense hedges for our gardens and boundaries. As tough as it is, sometimes cherry laurel can suffer from yellowing, brown leaves or die back completely. Nobody wants a gappy, crispy or ill-looking hedge, so here is my comprehensive Garden Ninja guide to fixing a sickly Laurel hedge.
Why Is My Laurel Hedge Dying? Complete UK Diagnosis GuideWhy Is My Laurel Hedge Dying? Complete UK Diagnosis Guide
Quick Answer
A dying laurel hedge is most commonly caused by waterlogged or compacted soil, drought stress, shot hole disease, frost damage or incorrect pruning technique. In most cases the hedge can be rescued by improving drainage, adjusting watering, feeding with a balanced fertiliser and cutting back affected growth. Only severely root-rotted specimens are truly beyond saving.
Laurel hedges are one of the most reliable evergreen screening plants in the UK garden, which is precisely why watching yours turn yellow, develop holes in the leaves or start dropping foliage is so alarming. I get messages about struggling laurel hedges regularly through the Garden Ninja forum, and the good news I almost always have to share is that laurel is a remarkably resilient plant. In the vast majority of cases where a laurel hedge looks terrible, the underlying cause is fixable, and the plant will recover once you address it.
The starting point for any laurel rescue is matching your symptoms to the right cause. The table below is the quickest diagnostic tool I can give you. Match what you are seeing to the most likely cause and then jump to the relevant section for the full explanation and fix.
The most important thing to know before you do anything is that laurel very rarely dies from disease alone. In my experience, the vast majority of dying laurel hedges are environmental problems in disguise. The right diagnosis almost always leads back to soil conditions, water management or site issues rather than an untreatable disease. That is reassuring because environmental causes are fixable.
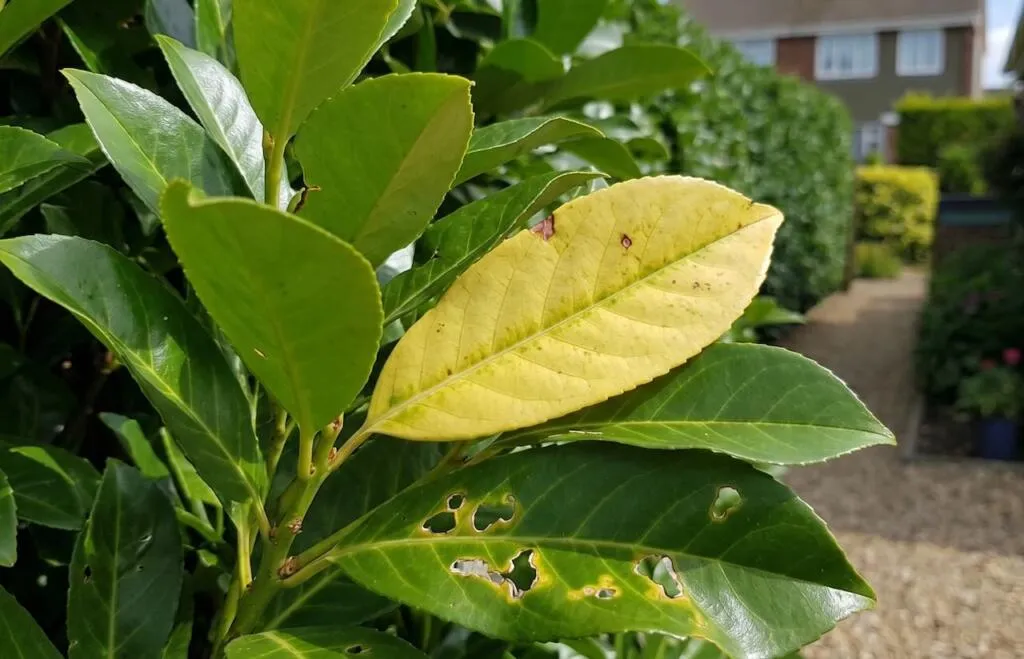
Yellow Leaves on Laurel: Causes and Fixes
Yellow leaves are the single most common complaint about laurel hedges in the UK, and they are also the most misunderstood. Before reaching for a bottle of anything, you need to identify which type of yellowing you are dealing with, because the cause and fix are completely different depending on the pattern.
Uniform yellowing across the whole plant
If the leaves across your entire laurel hedge are turning a uniform pale yellow or lime green, you are almost certainly looking at a nutrient deficiency rather than a disease. Nitrogen is the nutrient most commonly responsible for this pattern. Laurel hedges that have been in the ground for several years without feeding, or those planted into thin or sandy soil, frequently exhaust the available nitrogen and respond with this generalised yellowing. The fix is straightforward: apply a balanced granular fertiliser along the root zone in March and again in June, and mulch with well-rotted garden compost to improve soil structure and long-term fertility.
Yellowing between the leaf veins
If the leaf tissue is turning yellow while the veins themselves remain green, you are looking at iron deficiency rather than nitrogen deficiency. This pattern is called interveinal chlorosis and it is particularly common on laurel hedges planted in alkaline or chalky soils, because high soil pH locks up the available iron and prevents the plant from absorbing it even when iron is physically present in the soil. The fix involves applying a chelated iron product directly to the soil, acidifying the root zone with sulphur chips, and mulching with acidic organic matter such as pine bark or leaf mould. On very alkaline soils this is an ongoing management task rather than a one-off fix.
Lower leaves yellowing and dropping first
When yellowing starts at the base of the plant and works upward, with lower leaves yellowing and dropping before upper ones, the diagnosis is almost always waterlogging or root rot. Laurel roots that are sitting in consistently wet or compacted soil are deprived of oxygen, which prevents them from functioning properly. The plant cannot take up nutrients or water effectively from damaged roots, and the lower leaves are sacrificed first. I cover this in detail in the root rot section below.
💡 Top Tip
Before treating any laurel problem, do the finger test. Push your finger 5 to 10cm into the soil around the hedge roots. If it comes out wet and the soil smells sour or of decay, waterlogging is almost certainly the primary cause and no amount of feeding will fix the plant until drainage improves. If the soil feels bone dry and dusty, drought stress is the culprit.
Yellow leaves after planting or moving
Newly planted laurel hedges that develop yellow leaves in their first season are experiencing transplant stress rather than disease. When bare-root or root-balled laurels are planted, particularly if the weather turns warm and dry quickly after planting, the root system simply cannot keep pace with the water demands of all those large evergreen leaves. The plant’s response is to shed some of that foliage by yellowing it first. This looks alarming but is entirely normal. Keep the plant consistently watered and mulched, and new growth will follow as the roots establish. The worst thing you can do with a transplant-stressed laurel is feed it heavily, which adds more stress to an already struggling root system.
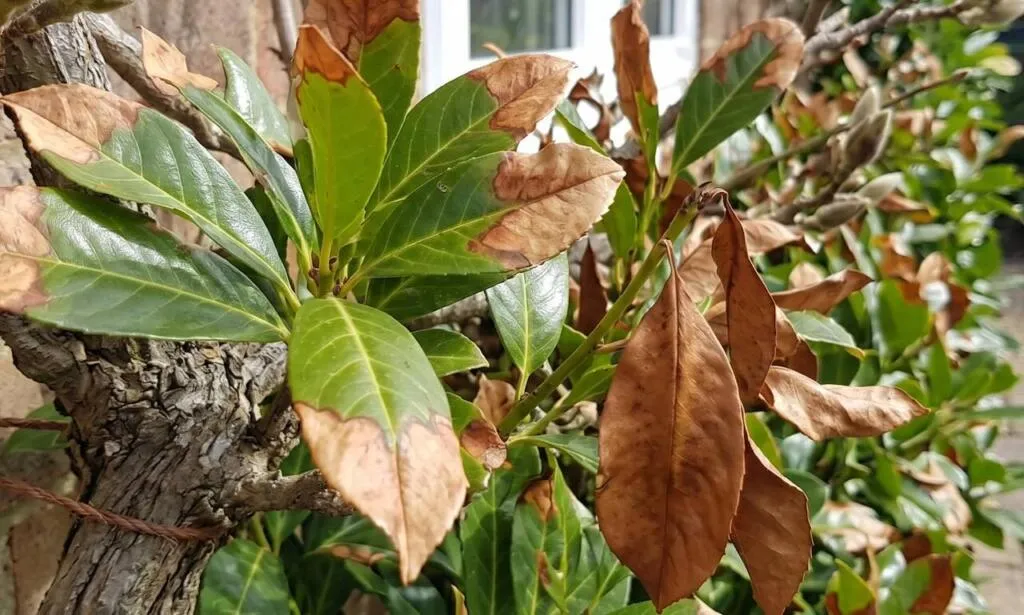
Brown Leaves and Leaf Scorch on Laurel
Brown leaves on laurel tend to have a different set of causes to yellow leaves, and understanding the pattern of browning is essential for the right diagnosis.
Brown crispy leaf tips and edges
When the tips and margins of laurel leaves turn brown and crispy, with the rest of the leaf remaining green, you are looking at either drought stress or wind scorch, or both. Laurel is tough, but in prolonged dry summers it absolutely needs supplementary watering, particularly for hedges planted against walls or fences where rainfall is significantly reduced by the overhead canopy and the structure itself. Wind scorch occurs when cold drying winds in winter or warm desiccating winds in summer pull moisture from the leaves faster than the roots can replace it. Deep, infrequent watering at the base of the hedge is far more effective than light frequent watering. A good soaking once a week in dry weather penetrates to the root zone; a light spray every day barely wets the surface.
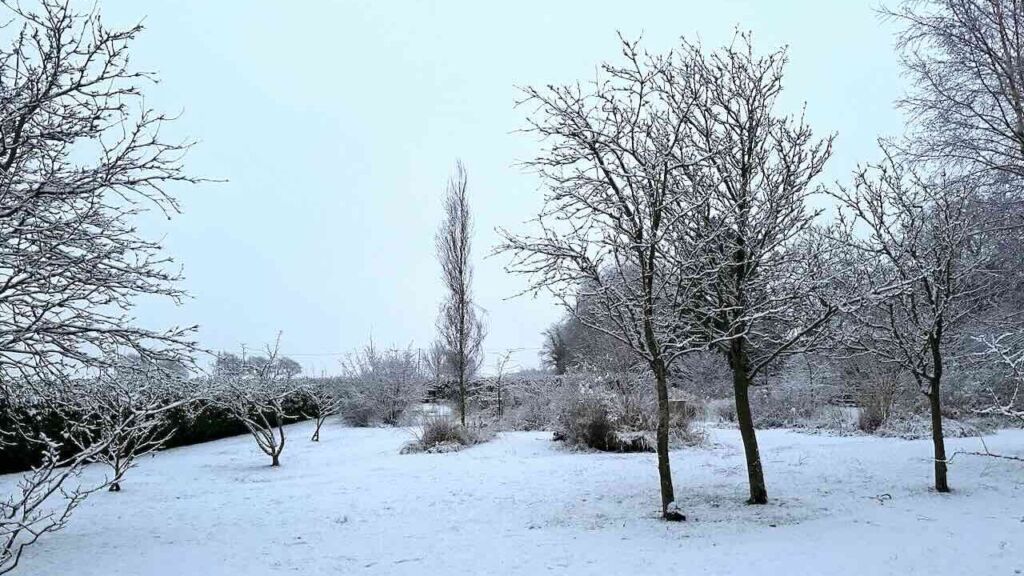
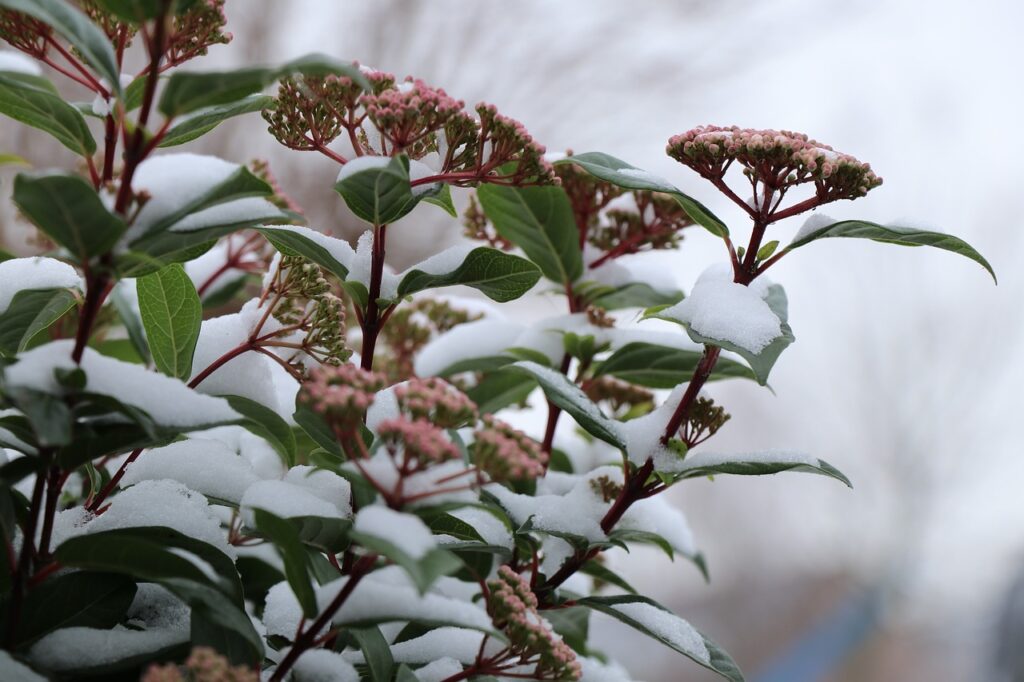
Brown patches appearing after winter
Laurel hedges that develop brown patches in late winter or early spring have almost certainly suffered frost or cold wind damage over the winter months. This is particularly common in the north of England and Scotland, or in exposed gardens that receive the full force of cold easterly winds. The damage occurs when the leaf cells freeze and thaw repeatedly, destroying the cell walls. Fortunately, winter browning on laurel is almost always temporary. New growth emerging in April and May covers the damaged sections and by June most hedges look completely normal again. Cut back any sections that have not recovered by early summer to encourage new growth from lower on the stems. Do not panic and rip out the whole hedge before giving it a full growing season to demonstrate what it can do.
⚠️ Warning
Cherry laurel leaves, seeds and bark contain compounds that produce cyanide when damaged. Always wear gloves when pruning or handling cut material and never compost or burn large quantities of fresh prunings in an enclosed space. Dispose of significant volumes with garden waste collections rather than home composting.
Brown leaf edges after trimming
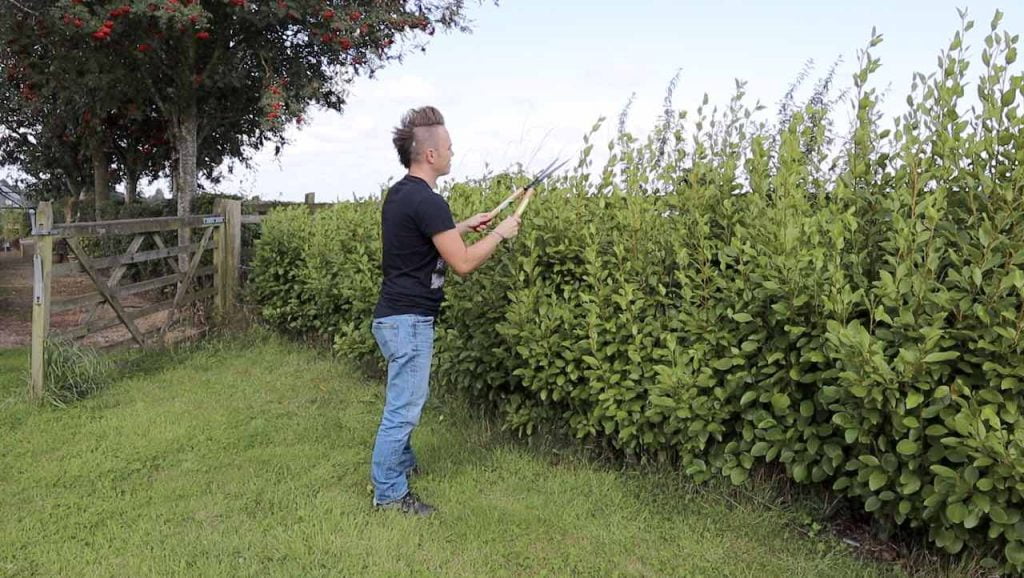
One of the most common and easily preventable causes of brown leaves on cherry laurel is using power hedge trimmers rather than hand secateurs. Mechanical trimmers cut through the large glossy leaves in the middle, leaving a brown cut edge on each sliced leaf that persists until the leaf drops. On Portuguese laurel, which has smaller leaves, this is less of an issue. On cherry laurel, the difference between a hedge trimmed with hand secateurs versus one attacked with a petrol trimmer is dramatic. Where appearance matters, always use secateurs on cherry laurel and cut each stem individually just above a leaf node.
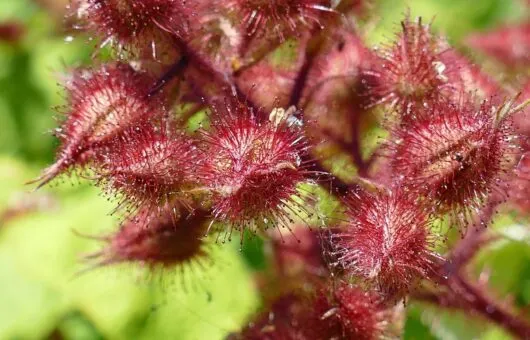
Shot Hole Disease on Laurel Hedges
Shot hole is the name given to a group of bacterial and fungal diseases that cause small brown spots to appear on laurel leaves. As the plant fights back against the infection, the central dead tissue falls away, leaving small round holes in the leaf that look alarmingly as though something has been shooting at your hedge. The effect is genuinely unsettling the first time you see it, but the reassuring truth is that the shot hole is almost always more cosmetic than fatal.
The bacterial form of shot hole is caused by Pseudomonas syringae and creates water-soaked lesions that enlarge and turn tan with a yellow halo before the dead centre drops out. The fungal form, caused by Stigmina carpophila, produces brown spots that may have visible fungal fruiting bodies around the edge. Both are spread during warm, wet conditions when rain splashes spores from leaf to leaf and from the soil onto lower foliage.
Shot hole rarely kills an established laurel hedge. As plants mature and conditions improve, they almost always recover. The main things you can do to manage it are to improve air circulation by thinning congested growth, water at the base of the plant rather than overhead, remove and bin (not compost) fallen infected leaves, and sterilise your pruning tools with diluted disinfectant between cuts when trimming an affected hedge. A copper-based fungicide can be applied in spring to reduce fungal shot hole severity on badly affected plants.
💡 Top Tip
Shot hole is significantly worse on hedges that are trimmed with mechanical shears, because the bruised and cut leaf tissue provides easy entry points for the bacteria and fungi responsible. Switching to hand secateurs and improving airflow through the hedge by occasional thinning of interior stems reduces shot hole considerably without any chemical intervention at all.
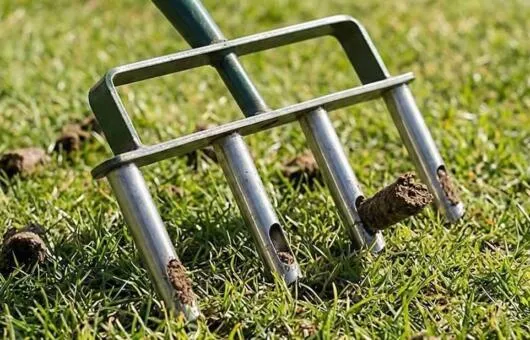
Root Rot and Waterlogging
Root rot is the most serious condition affecting laurel hedges in the UK and the one most likely to cause genuine plant death if not addressed. It is caused by Phytophthora root rot, a water mould pathogen that thrives in consistently wet, poorly aerated soil. The tell-tale signs are yellowing and wilting foliage despite the soil being wet, a sour or decaying smell from the soil around the roots, and dark brown or black discolouration of the roots when you scrape away a little soil to inspect them.
The underlying cause in almost every case I have seen is either compacted soil, clay soil with poor natural drainage, or a planting position in a natural water run-off zone. One of the most common mistakes homeowners make is planting a laurel hedge at the base of a slope without improving drainage first. Water flows downhill and sits longest at the bottom. Laurel roots sitting in that accumulated water through winter will develop root rot within two to three seasons.
If you suspect root rot, excavate carefully around the base of the affected plants to inspect the roots. Healthy roots are white or cream coloured and firm. Rotted roots are dark brown, soft and have a foul smell. If only a portion of the root system is affected, removing the worst-affected plants, improving drainage with coarse grit or a French drain installation, and replanting once conditions improve gives the surviving plants a reasonable chance. If the entire root system is black and mushy, the plant cannot be saved and should be removed. Do not replant laurel immediately into the same position without significantly improving drainage first.
💡 Top Tip
When planting any new laurel hedge, mix coarse horticultural grit into the planting hole at a ratio of roughly one part grit to three parts soil, and plant on a slight mound rather than in a flat trench. This simple step costs very little but dramatically reduces the risk of waterlogging in the critical first two to three years when the roots are most vulnerable.
Frost and Wind Damage on Laurel
Laurel is generally considered a hardy plant and can grow incredibly fast, but there are important differences between the two main species grown as hedges in the UK. Cherry laurel (Prunus laurocerasus) carries an RHS hardiness rating of H5, meaning it is hardy to around minus 15 degrees Celsius in most situations. Portuguese laurel (Prunus lusitanica) is rated H5 to H6 and is generally considered the tougher of the two for UK conditions, tolerating more exposure and doing better on chalky soils.
Despite this hardiness, both species are vulnerable to two specific types of winter damage. The first is rapid temperature fluctuation, where the plant freezes overnight and thaws quickly in morning sunshine. This repeated freeze-thaw cycle damages cell walls and causes the brown patches that appear in late winter. The second is cold desiccating wind, which pulls moisture from the leaves faster than frozen roots can replace it, causing browning from the leaf edges inward.
Young, newly planted laurels are considerably more vulnerable to frost damage than established ones simply because their root systems are not yet extensive enough to provide a buffer during cold snaps. If you are planting a new laurel hedge in autumn, wrapping the plants in horticultural fleece during the first winter and mulching the root zone heavily with bark or compost is a worthwhile investment. Established hedges rarely need this protection but will benefit from a generous autumn mulch to insulate the root zone.
Pests Affecting Laurel Hedges
Laurel is relatively pest-resistant compared to many hedging plants, but there are a handful of insects that can cause visible damage worth knowing about.
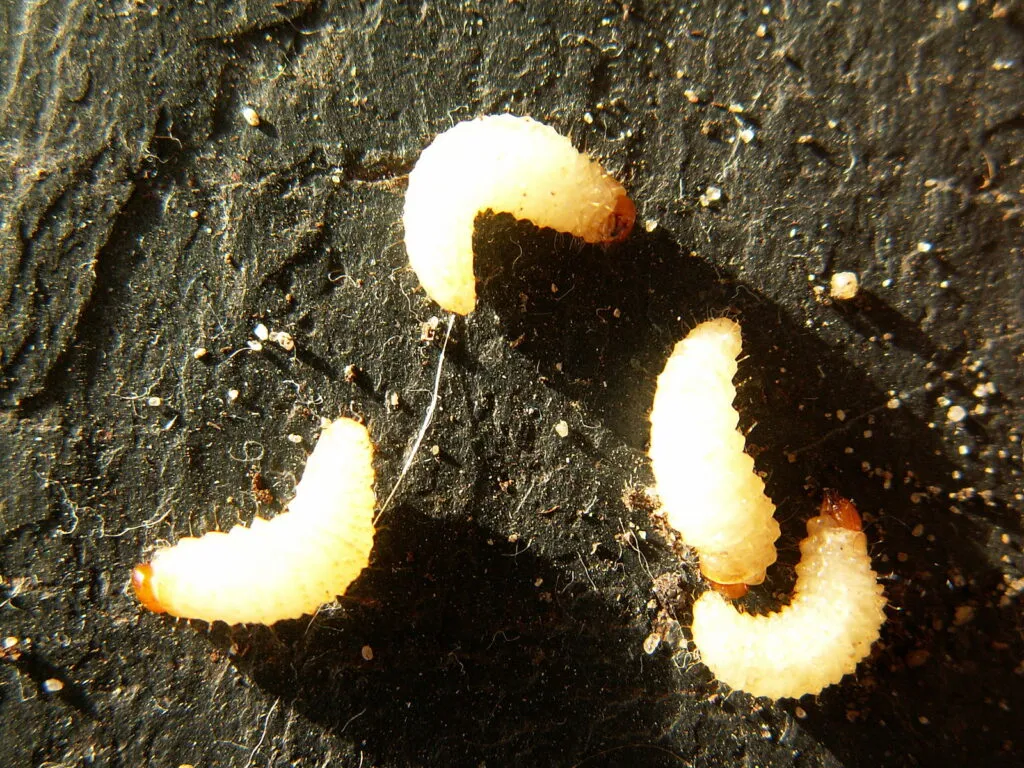
Vine weevils are the most damaging pest affecting laurel, particularly in their larval form. The adults are small, dull black beetles that feed on leaf edges at night, creating characteristic notched or scalloped damage around the leaf margins. The damage itself is rarely life-threatening to an established plant, but it signals that vine weevil grubs may be present in the soil around the roots, feeding on the root system through winter. Biological controls using nematodes (Steinernema kraussei) applied to the soil in late summer are the most effective and environmentally sound treatment. Encouraging natural predators including ground beetles, shrews and birds helps with long-term control.
Slugs can cause significant damage to newly planted laurel, particularly in wet autumns and springs when conditions suit them. Large irregular holes eaten through the leaf rather than from the edges are a slug signature. Organic slug pellets or nematode treatments are the most garden-friendly approach. Older established laurel plants are rarely badly affected by slugs as the foliage becomes increasingly unpalatable as it matures and toughens.
Pruning Damage and Its Consequences
Incorrect pruning is one of the most reliably preventable causes of a struggling laurel hedge, and one I see repeatedly in gardens across the country. There are two main pruning mistakes that cause ongoing problems.
The first is pruning at the wrong time of year. The best time to prune cherry laurel is once in late spring (May to early June) after the main flush of new growth has hardened slightly, and if needed again in late summer (August). Pruning in late autumn or winter leaves open wounds on the plant during its most vulnerable period, when disease pressure from wet weather is high and the plant has little energy to heal and regenerate.
The second is cutting through leaves rather than stems. Using mechanical trimmers on large-leaved cherry laurel creates dozens of cut leaves that turn brown at the cut edge and remain visible for months. Always prune cherry laurel with secateurs, cutting each stem just above a healthy leaf or lateral bud. The result is a hedge that looks immaculate rather than chewed. For Portuguese laurel, with its smaller leaves, mechanical trimming is more acceptable but sharp blades and careful timing still make a significant difference to the finished appearance.
Nutrient Deficiency in Laurel Hedges
Laurel hedges that have been established for more than three or four years without regular feeding are frequently suffering from nutrient depletion, even if the soil was well-prepared at planting. A large, established hedge is a significant consumer of nitrogen, potassium and trace elements, and the soil’s natural reserves are exhausted over time particularly in sandy or thin soils.
A balanced granular fertiliser applied in March and again in June is the single most cost-effective way to maintain a healthy, dark-green laurel hedge. Scatter the granules along the root zone, which extends at least as wide as the canopy, and water in well. A mulch of well-rotted garden compost or bark chips applied afterwards helps retain moisture and adds organic matter to the soil as it breaks down. Magnesium deficiency, which shows as yellowing between the leaf veins on older leaves, can be corrected with a foliar feed of Epsom salts (magnesium sulphate) at 20g per litre of water.
If your laurel hedge is struggling and you are ready to take action, here is the sequence I would follow as a professional horticulturist. Work through these steps in order rather than throwing everything at the plant at once.
Start with a soil assessment. Do the finger test described above to check moisture levels and inspect a small section of roots if you suspect root rot. This step tells you whether you are dealing with an environmental problem or a plant health one, and you cannot proceed sensibly without that information. If the soil is waterlogged, drainage improvement must come first. If the soil is dry and compacted, deep watering and mulching come first.
Once you have addressed the immediate environmental issue, remove all visibly dead, diseased or frost-damaged stems back to healthy wood. Use sharp, clean secateurs and sterilise them between cuts if you suspect bacterial shot hole. This removal of dead material reduces disease pressure and stimulates the plant to direct energy into new healthy growth. Do not be afraid to cut back hard. Laurel regenerates vigorously from old wood in almost every case.
Feed the hedge with a balanced granular fertiliser in early spring once new growth begins to show. Apply a thick mulch of well-rotted compost or bark to the root zone. Water deeply and consistently for the first full growing season, particularly during dry spells. By the following spring in the vast majority of cases you will have a hedge that looks completely transformed.
💡 Top Tip
Give a rescued laurel hedge a full twelve months before deciding it cannot be saved. I have seen hedges that looked completely dead in March producing strong, healthy new growth by June, once the root cause was addressed. Patience is genuinely one of the most important tools in the rescued-hedge toolkit.
Alternatives to Laurel Hedging
Sometimes a laurel hedge is simply the wrong plant for the site. If yours has been a persistent problem despite good care, if your soil is too alkaline, too exposed or too boggy to suit it long-term, then replacing it with a more suitable species makes more sense than continued remediation. The good news is that there are some exceptional alternatives to laurel that offer similar screening, faster establishment or better ornamental value in difficult conditions.
Portuguese Laurel (Prunus lusitanica)
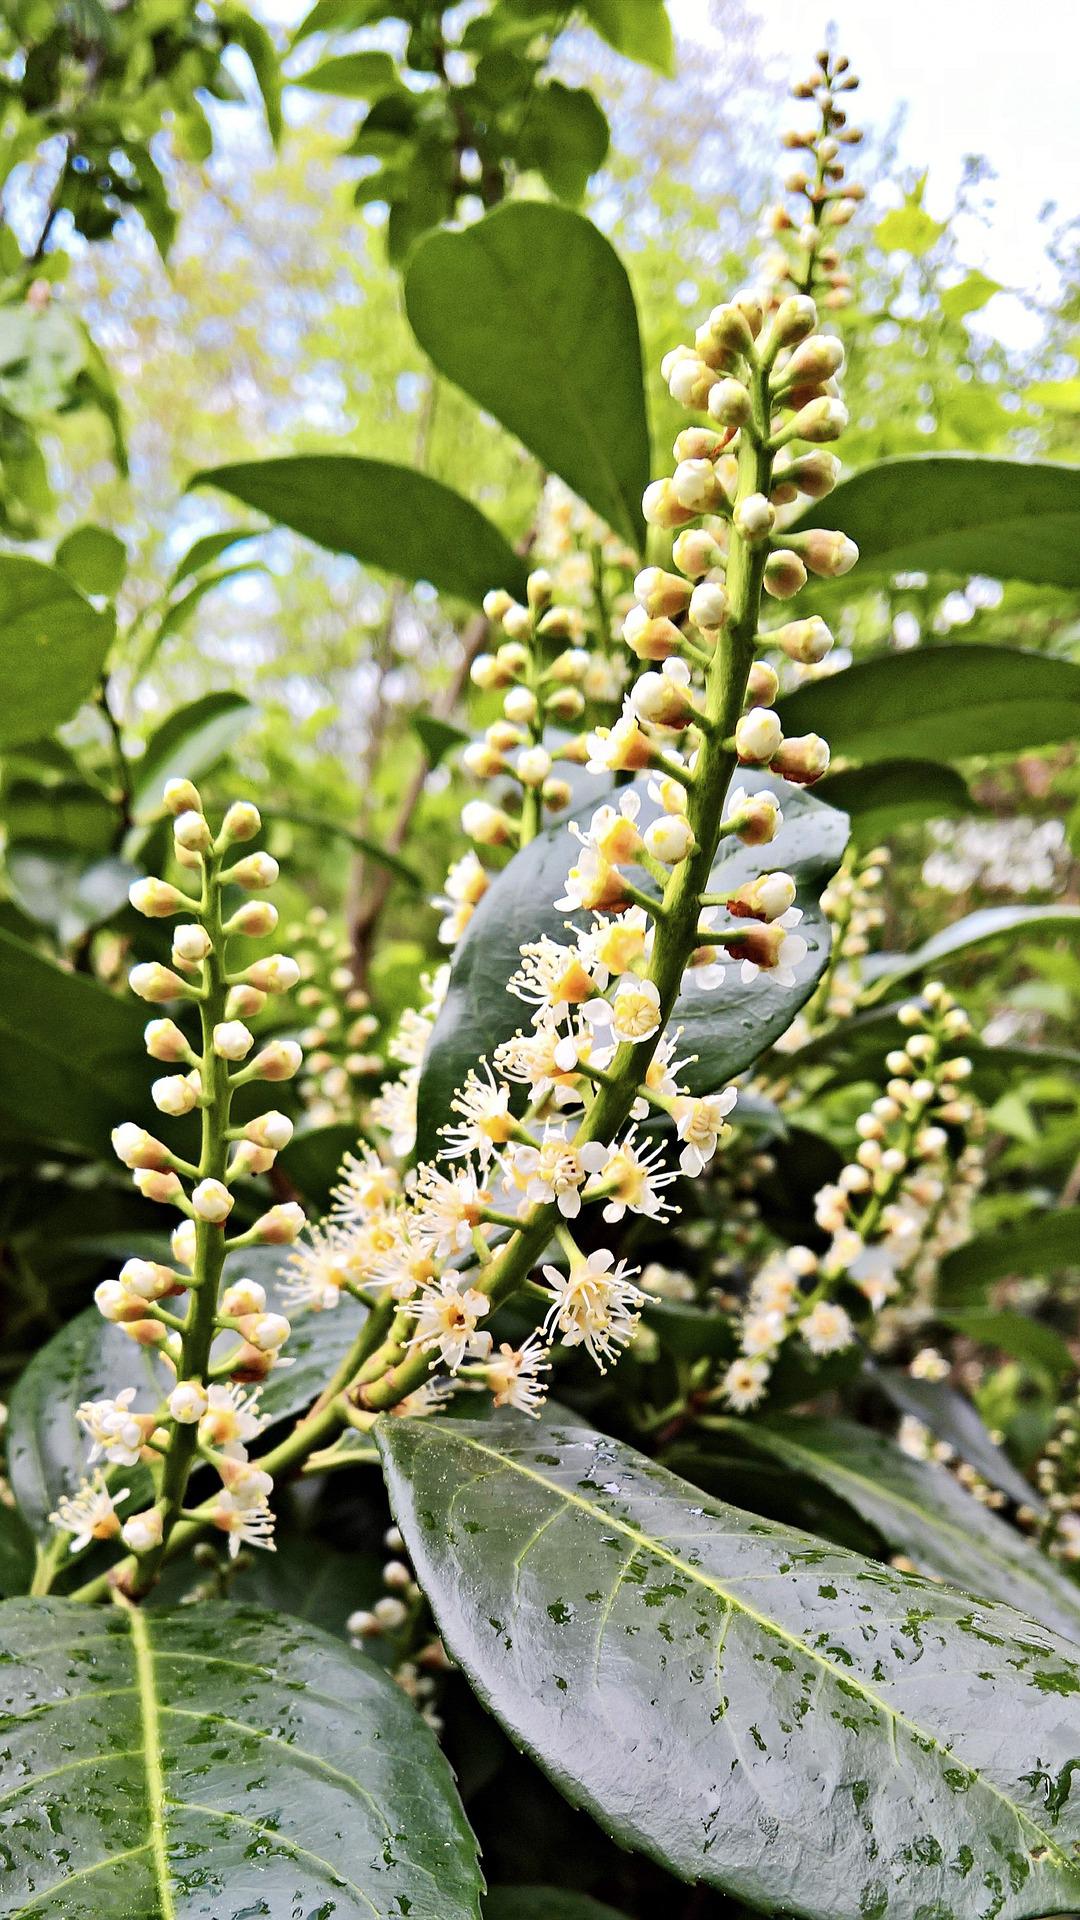
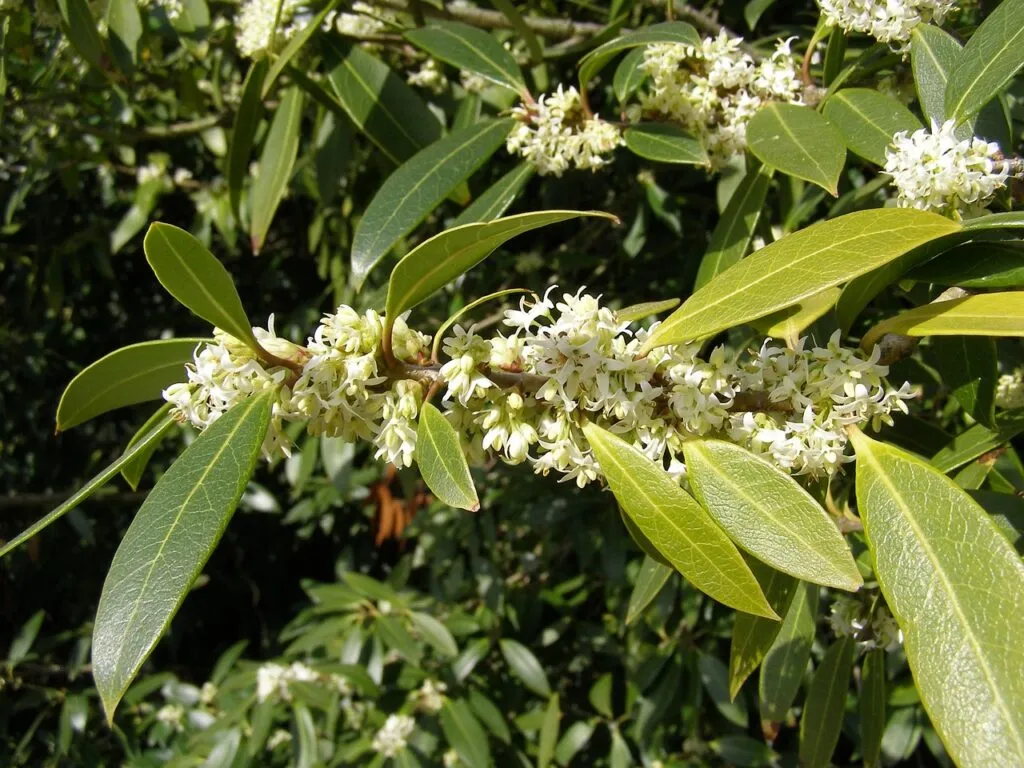
If you love laurel but your cherry laurel is struggling, Portuguese laurel is frequently the answer. It is considerably tougher in exposed positions, tolerates chalk and alkaline soils far better, and produces smaller, more refined leaves that look better when trimmed. The creamy white flower racemes in summer are a genuine ornamental bonus that cherry laurel cannot match, and the small dark fruits that follow are a wildlife magnet. It grows slightly more slowly than cherry laurel but is ultimately a more refined, better-looking and more adaptable plant for most UK gardens.
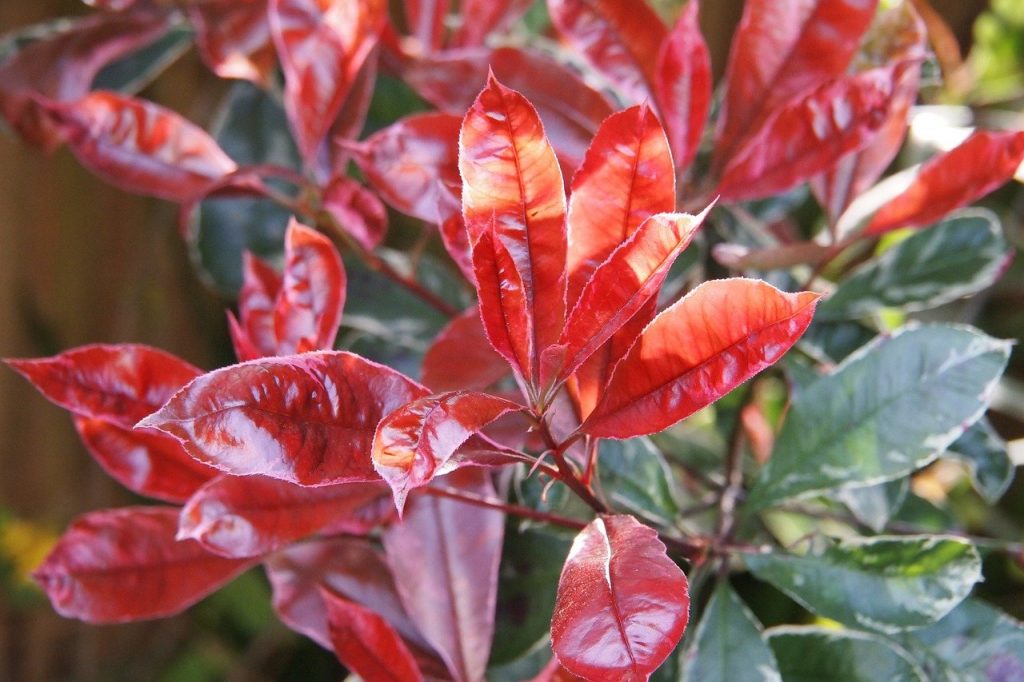
Photinia Red Robin is one of my favourite hedging alternatives to laurel and one I recommend regularly on Garden Rescue. The spectacular bright red new growth in spring and early summer is genuinely one of the most striking things you can have in a garden boundary, and regular trimming encourages repeat flushes of that vibrant colour through the season. It grows quickly, tolerates most soil types except waterlogged ground, and takes clipping into a formal hedge very well.
🌿 At A Glance: Photinia Red Robin
Botanical Name
Photinia x fraseri ‘Red Robin’
Plant Type
Hardy evergreen shrub
UK Hardiness
H5 (hardy to -15°C)
Height / Spread
Up to 5m / 5m (clip to desired size)
Flowering Period
April to May
Best Conditions
Well-drained soil, full sun or partial shade
Key Feature
Spectacular scarlet new growth provides year-round colour interest
Viburnum tinus is one of the most underused hedging plants in the UK, which genuinely surprises me because it offers things that laurel simply cannot. White flowers from November right through to April, attractive blue-black berries that birds love, dense evergreen foliage, and tolerance of shade, exposed positions and most UK soils make it an exceptional all-rounder. It is slightly slower growing than laurel but considerably more ornamental and significantly better for wildlife. If you have a shaded or north-facing boundary where nothing seems to thrive, Viburnum tinus is almost always the answer.
For coastal gardens, exposed sites or anywhere the wind is a constant challenge, Elaeagnus x ebbingei is quite possibly the toughest hedging plant available. It tolerates salt spray, gales, poor soils and severe exposure in a way that laurel simply cannot, while still producing dense, attractive evergreen foliage with a silvery sheen on the undersides. The small, intensely fragrant white flowers in autumn are barely visible but produce a scent that drifts across the garden on still days. Fast-growing and very forgiving, it is a plant I have specified many times on coastal and exposed projects.
🌿 At A Glance: Elaeagnus x ebbingei
Botanical Name
Elaeagnus x ebbingei
Plant Type
Hardy evergreen shrub
UK Hardiness
H5 (hardy to -15°C)
Height / Spread
4m / 4m
Flowering Period
October to November (fragrant)
Best Conditions
Any well-drained soil, full sun, exposed and coastal sites
Key Feature
Exceptional wind and salt tolerance with fragrant autumn flowers
Osmanthus burkwoodii is the choice I make when someone wants a refined, beautiful formal hedge with genuine ornamental value rather than just a green wall. The small, dark, glossy leaves clip into an immaculate formal shape and the intensely fragrant white flowers in April are one of the highlights of the spring garden. It is slow-growing compared to laurel, which actually makes it lower maintenance once established, and it is very tough once it gets going. I think of it as the premium alternative: it costs more upfront in plant cost and patience, but the result is a hedge that looks designed rather than planted.
🌿 At A Glance: Osmanthus burkwoodii
Botanical Name
Osmanthus x burkwoodii
Plant Type
Hardy evergreen shrub
UK Hardiness
H5 (hardy to -15°C)
Height / Spread
3m / 3m
Flowering Period
April
Best Conditions
Well-drained soil, sun or partial shade
Key Feature
Intensely fragrant spring flowers and exceptional formal clipping properties
Escallonia is the hedging plant I reach for in milder coastal gardens, particularly in the south west of England and Wales. It is evergreen, fast-growing, tolerant of sea winds, and produces an abundance of pink or red flowers throughout summer, making it look like a proper ornamental border rather than just a boundary plant. In colder northern gardens, it can suffer in harsh winters, so it is a choice to make with one eye on the local climate. In its preferred conditions, though, escallonia is genuinely exceptional, and the combination of privacy screening and summer colour is hard to beat.
🌿 At A Glance: Escallonia
Botanical Name
Escallonia rubra var. macrantha
Plant Type
Evergreen shrub (semi-evergreen in cold winters)
UK Hardiness
H4 (hardy to -10°C, best in mild areas)
Height / Spread
3m / 3m
Flowering Period
June to September
Best Conditions
Well-drained soil, full sun, coastal and mild gardens
Key Feature
Summer flowers combine screening with ornamental beauty in mild gardens
In most cases yes. Laurel is a remarkably resilient plant, and the majority of struggling hedges can be rescued once the underlying cause is identified and addressed. Environmental problems, including waterlogging, drought, nutrient deficiency and frost damage, all respond well to the right treatment. Only hedges with advanced root rot throughout the entire root system are genuinely beyond saving, and even then individual sections may recover while others are replaced.
Why are my laurel leaves turning yellow?
The most common causes of yellow laurel leaves are waterlogging or root rot (lower leaves yellowing first), nitrogen deficiency (uniform pale yellowing across the whole plant), iron deficiency on alkaline soils (yellowing between the veins), transplant stress in newly planted specimens, or seasonal leaf drop which is entirely normal on mature plants. Match the pattern of yellowing to the most likely cause using the symptom checker above.
What causes holes in laurel leaves?
Small round holes in laurel leaves with brown or yellow halos around them are almost always shot hole disease, caused by bacteria or fungi (most commonly Pseudomonas syringae or Stigmina carpophila). It is spread during warm, wet conditions and is rarely fatal to an established hedge. Improve air circulation, water at the base rather than overhead, remove fallen infected leaves, sterilise tools between cuts and the problem usually resolves itself as conditions improve.
Why is my laurel hedge going brown after trimming?
Browning after trimming on cherry laurel is almost always caused by cutting through the large leaves with mechanical hedge trimmers rather than using hand secateurs. Each sliced leaf develops a brown edge at the cut that persists until the leaf drops. Always prune cherry laurel with secateurs, cutting each stem individually just above a leaf node for a completely different, far more attractive finish.
When is the best time to prune a laurel hedge?
The best time to prune a laurel hedge is late spring, from May to early June, after the main flush of new growth has emerged and hardened slightly. A second light trim can be done in late summer, around August. Avoid pruning in late autumn or winter as the open wounds are more vulnerable to disease during cold, wet weather and the plant has less energy to heal and regenerate.
How much water does a laurel hedge need?
Newly planted laurel hedges need regular, deep watering for the first two growing seasons until established. Water deeply once or twice a week in dry weather rather than lightly every day. Established laurel hedges in normal UK conditions rarely need supplementary watering except during prolonged drought, but hedges planted against walls or fences receive significantly less rainfall and will benefit from watering during dry summers.
Is Portuguese laurel better than cherry laurel?
For most UK gardens, Portuguese laurel is the superior choice. It is tougher in exposed positions, tolerates alkaline and chalky soils better, produces more attractive, smaller leaves that clip cleanly, has ornamental flowers in summer, and is less prone to shot hole disease. Cherry laurel is faster growing and less expensive, which makes it the common choice for quickly establishing privacy screening, but if you have the patience for slightly slower establishment, Portuguese laurel repays you with a more refined, longer-lived and lower-maintenance hedge.
If you want to learn more about plants, design principles, and creating beautiful spaces check out my online garden design courses. Whether you want to level up your plant knowledge, learn about design principles, or even start a career in garden design, I’ve got courses ranging from £29 to £199 that cover everything you need.
These courses aren’t just for people with gardens either! The principles of understanding plant needs, creating harmonious colour schemes, and designing beautiful functional spaces apply just as much to indoor plant arrangements as they do to full garden designs. You’ll learn how to read plants, troubleshoot problems, and create spaces that genuinely work for your lifestyle.
29
Garden Design Examples for Small Gardens: 30 Design Templates & Planting Plans
Garden Design Examples for Small Gardens: 30 Design Templates & Planting Plans: In this online gardening course, I’ll walk you through 30 fantastic garden designs, explaining the logic behind the layout, the plant choices, and take-home tips for applying them in your own garden.
Weekend Garden Makeover: A Crash Course in Design for Beginners
Learn how to transform and design your own garden with Lee Burkhills crash course in garden design. Over 5 hours Lee will teach you how to design your own dream garden. Featuring practical design examples, planting ideas and video guides. Learn how to design your garden in one weekend!
Garden Design for Beginners: Create Your Dream Garden in Just 4 Weeks
Garden Design for Beginners Online Course: If you want to make the career jump to becoming a garden designer or to learn how to design your own garden, this is the beginner course for you. Join me, Lee Burkhill, an award-winning garden designer, as I train you in the art of beautiful garden design.
A dying or struggling laurel hedge is almost always fixable once you identify the true cause. Work through the symptom checker, diagnose the problem accurately, and apply the right solution rather than a scattergun approach. Waterlogging, drought, nutrient deficiency, shot hole disease, frost damage and pruning technique cover the vast majority of cases. If your laurel is simply in the wrong site, the five alternatives above offer better long-term results in challenging conditions.
I hope this guide gives you everything you need to diagnose, rescue and if necessary, replace your laurel hedge. If you have a specific situation that is not covered here, post a question in the Garden Ninja forum where I answer questions regularly and can help you work through the exact symptoms you are seeing.
Your subscription could not be saved. Please try again.
Your subscription has been successful.
Lee Burkhill
Lee Burkhill, known as the Garden Ninja, is an award-winning garden designer and horticulturist with over 30 years of gardening experience and 15 years as a professional garden designer. A qualified RHS (Royal Horticultural Society) professional, Lee specialises in sustainable garden design and practical horticultural advice. He designs and presents on BBC1’s Garden Rescue and in leading gardening publications. Lee combines three decades of hands-on gardening knowledge with professional design qualifications to help gardeners create beautiful, functional outdoor spaces.