For the garden you’ve already got, not the one you’re starting from scratch. Seven checklists and video lessons from BBC Garden Rescue’s Lee Burkhill, designed to help you decide what’s worth keeping before you spend a penny.
69


Sowing seeds is an activity that brings joy and smiles all around to gardeners. Each year, gardeners and allotment holders around the country eagerly sow seeds of both flowers and vegetables to grow in their gardens. Sowing seeds is really cost-effective and offers gardeners an unbelievable variety of plants that you simply can’t buy from garden centres. If you are new to sowing seeds and want to get cracking with growing your own, then this how-to sow seeds guide is for you.
Learning how to grow plants from seed is one of the most rewarding gardening skills you can master. This guide will show you just how straightforward it is to grow almost anything in your garden from seed, even if you have no previous gardening experience.
Quick Answer
To grow plants from seed, fill clean seed trays with fresh seed compost, tamp the surface level, water before sowing, scatter seeds thinly, cover lightly with vermiculite or sieved compost, label everything, and place in a warm bright spot. Keep the compost moist but not waterlogged, remove any propagator cover once seedlings appear, and pot on when true leaves develop.
It’s incredible to think that most plants in your garden can be grown from tiny, unassuming seeds. These little seeds of life allow plants to propagate themselves and spread joy among us gardeners who want to grow our own. You can grow anything you want in your garden, from vegetables to herbaceous perennials like flowers and even trees.
Seed sowing is a simple science, but many new gardeners get it wrong. The excitement that seed sowing brings can lead to a slapdash or misinformed approach that ends with plants failing to thrive. This beginner gardening guide on how to sow seeds will show you how to sow, grow and succeed. Trust me, once you start, you will never look back. If you’re not sure which plants to start with, I’ve also put together a guide to the 25 best plants to grow from seed for beginners that pairs nicely with everything covered here.
Jump To
This page contains affiliate links for products I use and love. If you take action (i.e. subscribe, make a purchase) after clicking a link, I may earn some gardening commission which helps me keep the Garden Ninja Blog free for all.
Before we dive into the details, here is a quick overview of everything involved in growing from seed. Think of this as your at-a-glance checklist. Every step is explained in full further down this guide.
The beauty of sowing seeds is the sheer variety of plants you have at your disposal. You are not stuck with whatever trend your local garden centre is pushing this season. Like that tiny seed embryo, you can break free and create a personalised garden built entirely around what you love.
Over more than 20 years of garden design, I have started thousands of plants from seed. There is something truly magical about watching a plant you have nurtured from a tiny speck grow into something that transforms a garden space. Here is why I think every gardener should give it a go.
Growing plants from seeds can be significantly cheaper than buying established plants from a nursery. A single seed packet costing a couple of pounds can yield dozens of plants that would cost you ten times as much on the nursery bench. For anyone wanting to fill a new border or create a wildflower meadow on a sensible budget, growing from seed is the answer.
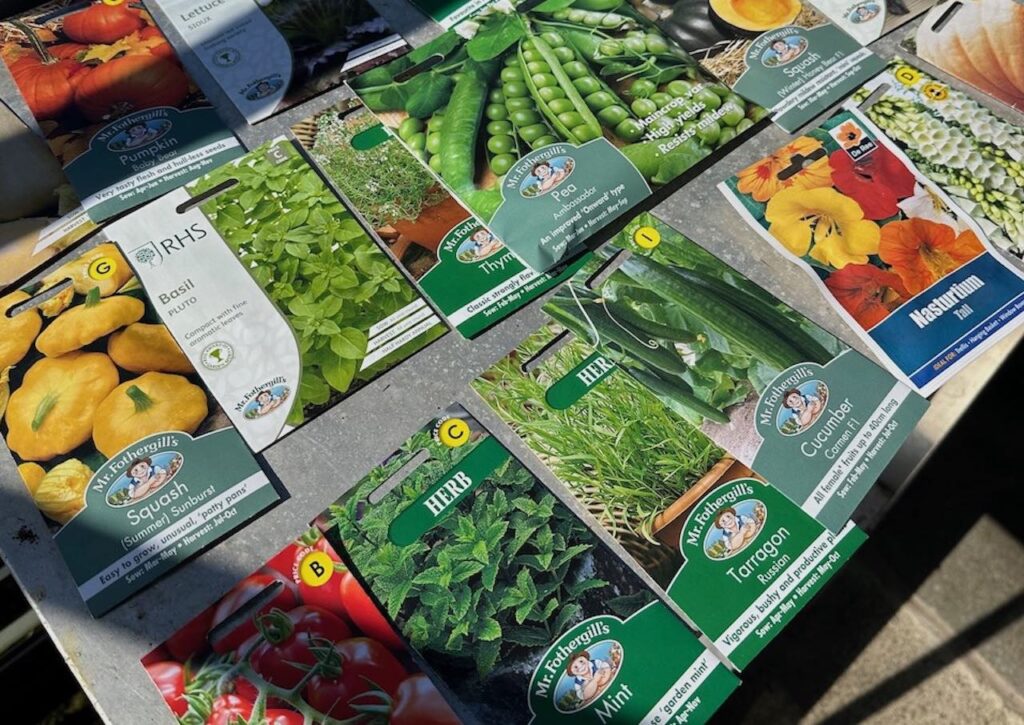
Growing plants from seed gives you access to a far wider variety of species and cultivars than you will ever find in a garden centre. Online seed catalogues from specialist suppliers offer hundreds of varieties of a single vegetable or flower. This is how you grow something properly unusual, the varieties that make visitors stop and ask what on earth that stunning thing is.
Watching a plant grow from a tiny seed into something that fills your garden with colour and life is one of gardening’s great pleasures. It connects you to nature in a way that buying a pot-grown plant simply cannot match. There is real pride in pointing at a full border of cosmos or a productive row of tomatoes and knowing you grew every single one from scratch.
When you grow plants from seed, you have complete control over the growing conditions, from the compost and nutrients to the amount of light and water. This means healthier, more robust plants. You can adjust conditions to start things off earlier in the season, or give certain crops extra warmth and feeding to push them on to bigger, better results.
Growing plants from seed can be a far more sustainable option than buying established plants, which typically come with plastic pots and unnecessary packaging. Using biodegradable seed-starting materials such as toilet rolls, cardboard egg boxes, and wooden trays can significantly reduce waste and minimise your environmental footprint. Gardening without plastic is something I feel strongly about, and seed sowing is one of the easiest places to start.
Before you tear open your first packet, it is worth gathering the right kit together. You do not need to spend a fortune, and many items can be sourced cheaply or improvised from household materials. That said, investing in a few quality pieces of equipment makes the whole process easier and considerably improves your germination rates. Here is everything I reach for when I am sowing seeds.
Seed trays and modules: the backbone of any seed-sowing setup. Seed trays suit fine seeds scattered across a larger area, while module trays give each seed its own individual cell and are ideal for reducing root disturbance at transplant time.
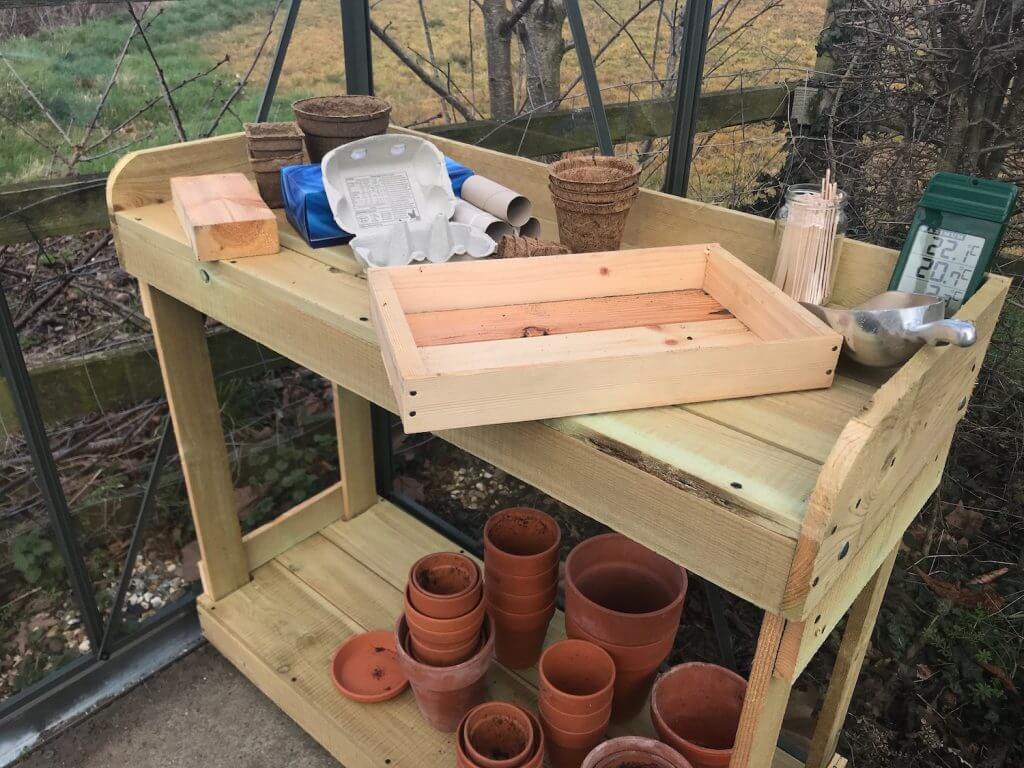
🛒 Shop seed trays and module trays on Amazon UK
Seed compost: a fresh, fine, low-nutrient seed compost is the single most important purchase you will make. Old or general-purpose compost with large lumps is one of the most common causes of poor germination.
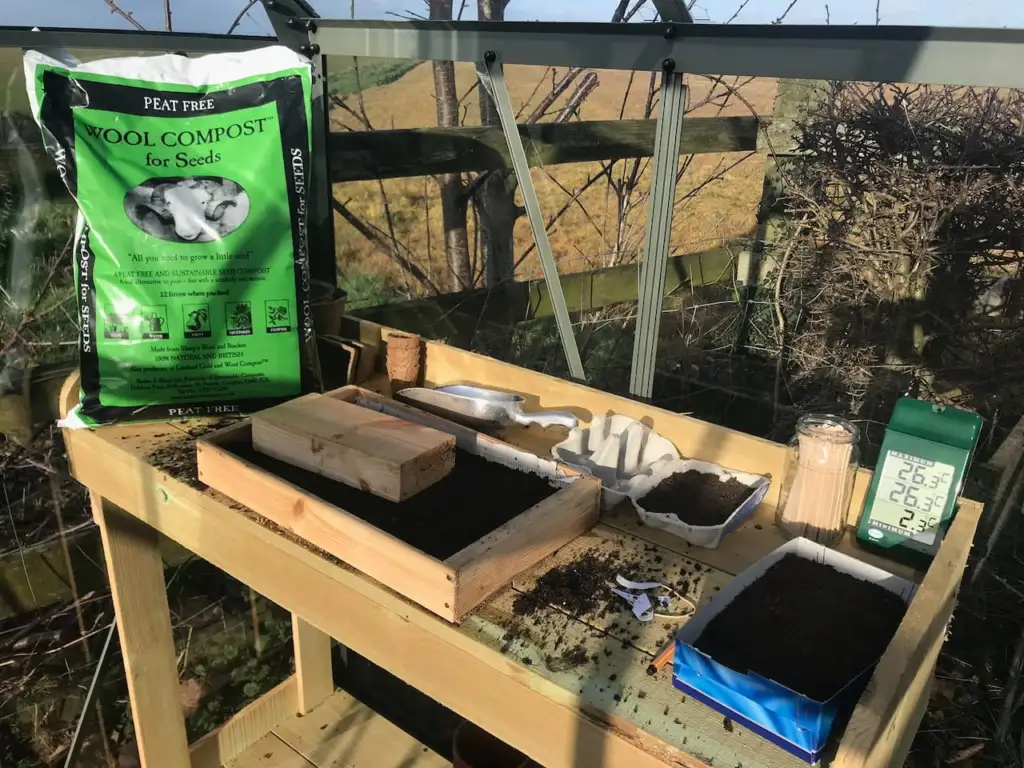
🛒 Shop peat-free seed compost on Amazon UK
Vermiculite: a lightweight, sterile mineral that I use to cover seeds after sowing. It retains moisture, allows light through for surface-sown seeds, and keeps the delicate stem base drier than compost alone, reducing the risk of damping off.
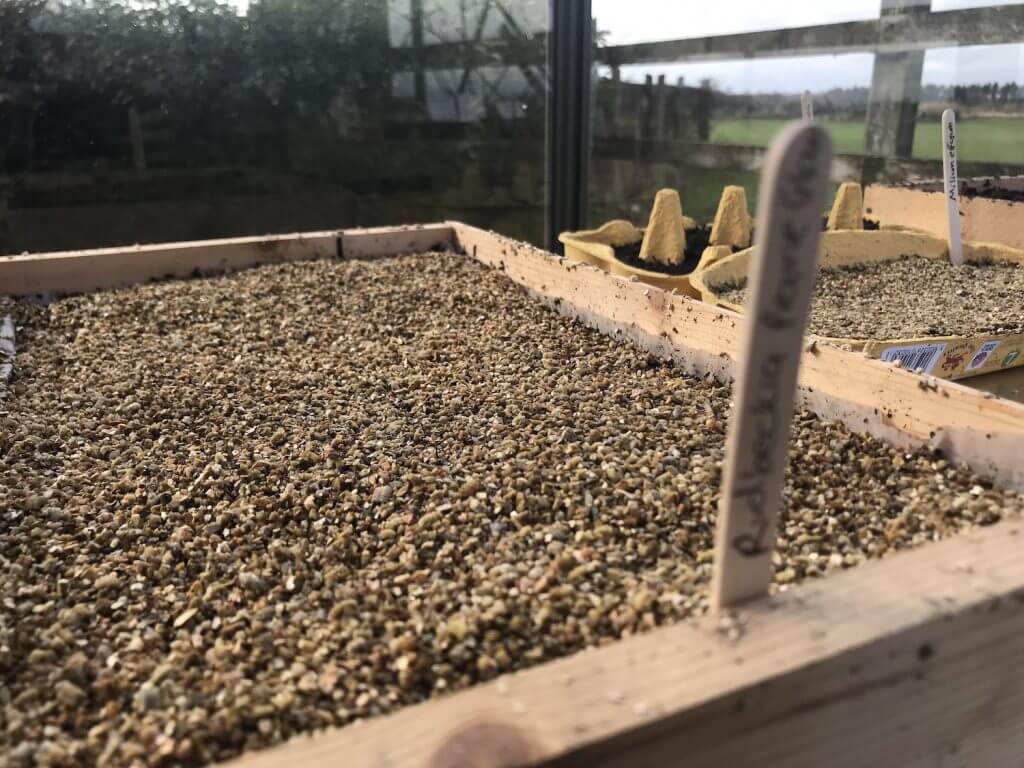
🛒 Shop vermiculite on Amazon UK
Watering can with a fine rose: you must water gently around seeds and seedlings. A coarse flow will displace seeds and damage fragile stems. A long-reach indoor watering can with a proper fine rose is a piece of kit I use every single day during sowing season, without fail.
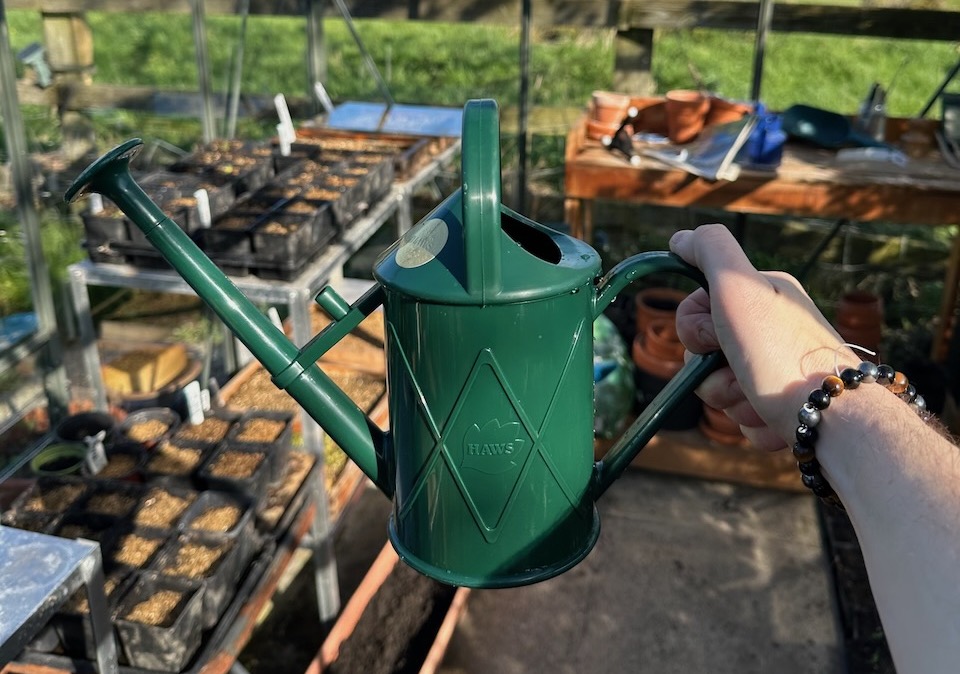
🛒 Shop watering cans on Amazon UK
Propagator: a propagator creates a warm, humid microclimate that dramatically improves germination rates and consistency. If you only sow a few trays per year, a simple unheated propagator lid over your seed tray will do the job. If you sow more seriously, a heated electric propagator is a real game-changer. I cannot recommed these enough, especially if you’re growing indoors, early in the season or you don’t have access to a green house.
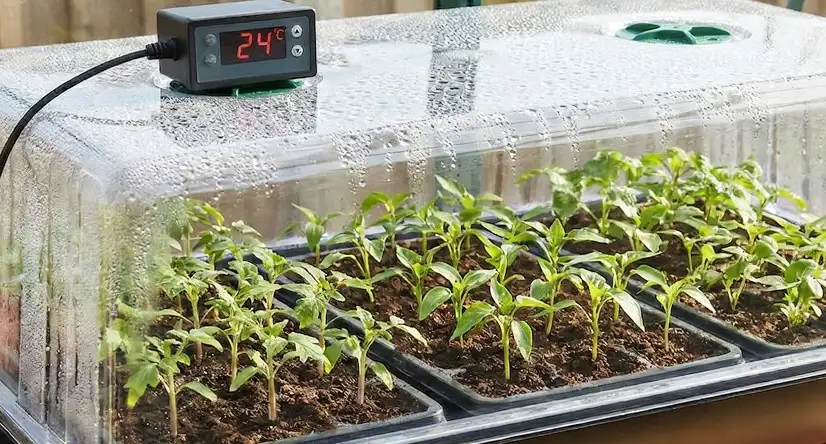
🛒 Shop propagators on Amazon UK
Plant labels and waterproof marker: the single most underrated piece of seed-sowing kit. Every seedling looks the same. Label everything immediately with the plant name and sowing date. A standard pencil is more waterproof than most permanent markers, which fade outdoors.
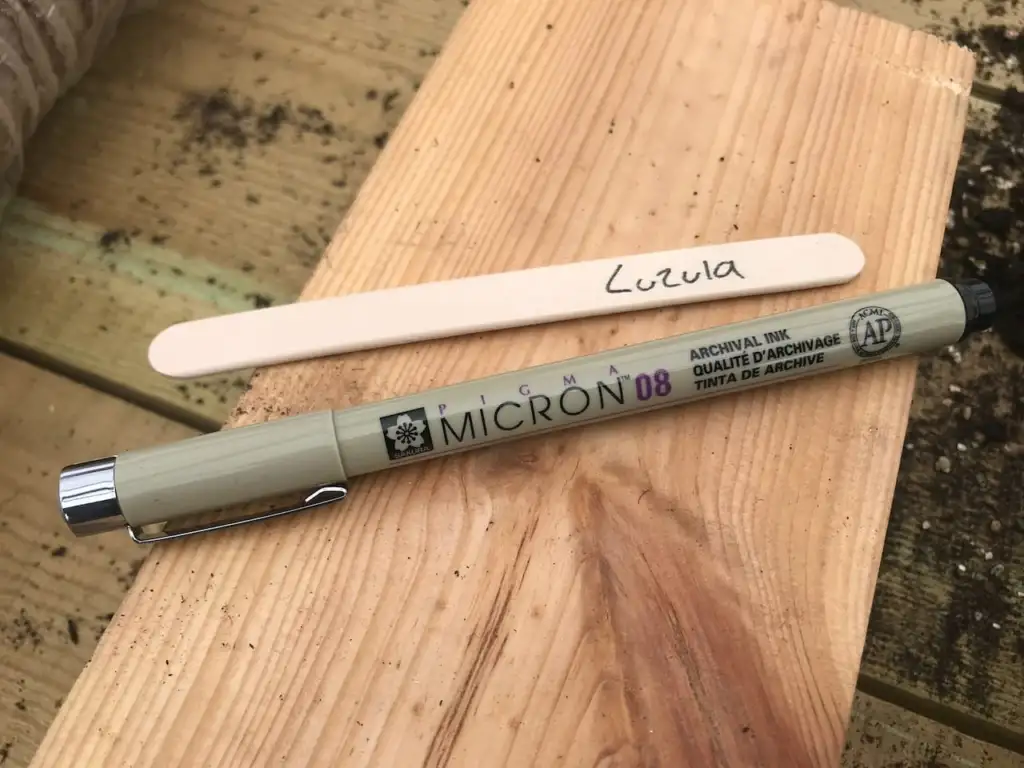
🛒 Shop plant labels on Amazon UK
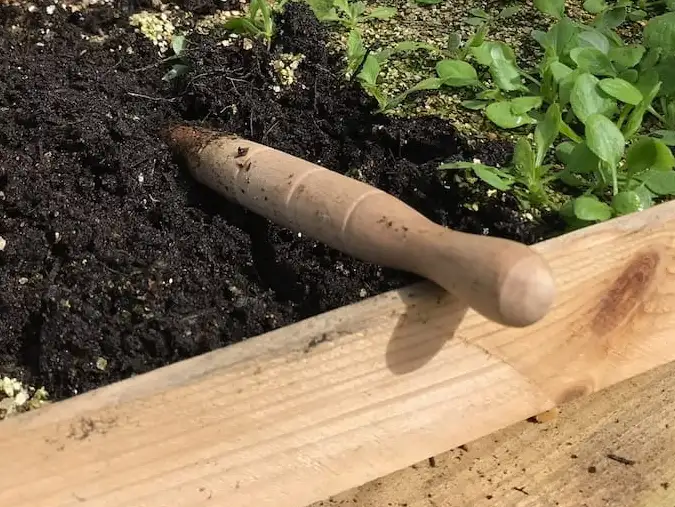
Dibber: a simple pointed tool for making precise holes in compost at the correct depth for larger seeds. You can use a pencil in a pinch, but a proper dibber gives more consistent results and is properly satisfying to use.
The first step before you rip open your seed packets is to select the right growing medium. Choosing a seed compost that is lower in nutrients than general-purpose compost is vital. High-nutrient feed can actually inhibit germination and is a waste of good compost. Seeds contain everything they need to get started on their own.
I would urge you to think twice about using really old, dusty compost dragged out from behind the shed. If you are taking the time to sow, nurture and then pot on your seeds, fresh seed compost is the essential first step. Old compost can be full of fungi and pathogens, which will kill off your seedlings before they have had a chance. It is a false economy.
Choosing the right seed compost also helps you dodge common problems. Damping off, mildew, disease and poor smells from your seed trays can all be avoided with a sterile, quality growing medium. I have used Dalefoot Seed Compost, which is completely natural and made from a mix of sheep’s wool and bracken, and I cannot recommend it highly enough for fine seeds in particular.
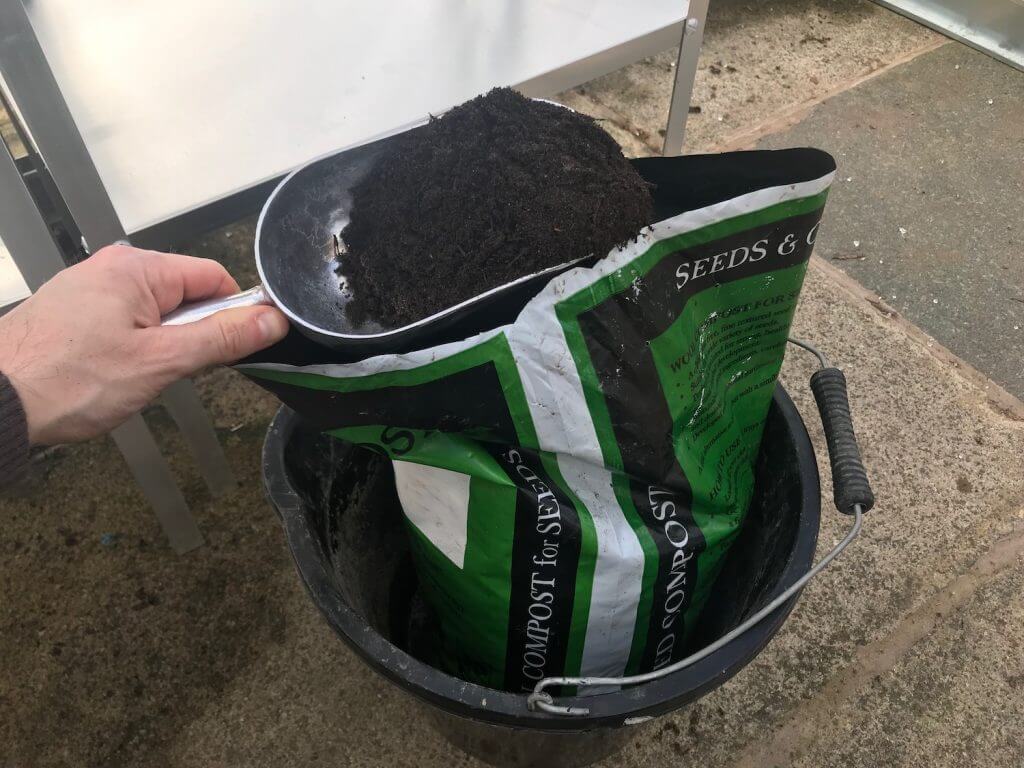
🛒 Buy peat-free seed compost on Amazon UK
One of the most common questions I get asked is whether you actually need dedicated seed compost, or whether the multipurpose bag already in the shed will do. Here’s my honest breakdown of when each is the right call.
💡 Top Tip
If your bag of multipurpose compost has large woody lumps in it, sieve it before using it to sow fine seeds. A fine mesh garden sieve gives you a beautifully smooth surface that tiny seeds can make contact with properly. This alone can dramatically improve germination of species like begonias or antirrhinums.
🛒 Buy a garden sieve on Amazon UK
Many new gardeners use pots that are far too large when sowing seeds, thinking more space and extra compost must be a good thing for the plant. In reality, it is not. Oversized pots waste compost, use up valuable windowsill or greenhouse space, and make consistent watering much harder to achieve. Seeds do not need luxury housing. They just need the right environment to germinate.
The best pots for sowing seeds are seed trays, small P9 seedling pots, and seedling module trays with individual cells. Seed trays are relatively shallow, which suits the early germination phase perfectly. The majority of seeds need just four things to germinate: moisture, warmth, the appropriate light conditions, and adequate airflow to prevent disease.
That is truly all a seed needs. The seed itself has everything inside it to send out those first seed leaves and begin photosynthesising. Once the seedlings have produced a set of true leaves, you can prick them out into larger pots. So think of the seed tray as the catalyst for germination and nothing more. Save the good pots and quality compost for a bit later.

There is a brilliant range of seed tray and pot options available, from recycled plastic to biodegradable coir and wood fibre. Choose biodegradable or long-lasting reusable options where you can.
🛒 Buy biodegradable seed trays and pots on Amazon UK
Fill your seed trays with quality seed compost using your hands, a bucket, a scoop, or an empty pot. Whatever works for you is absolutely fine. The same goes for whether you want to wear gloves or go hands-free and feel properly connected to what you are doing.
Fill the seed tray to within 2cm or 1 inch of the top of the tray or pot. Then tamp it down, compressing the compost to remove air gaps and create a level surface for the seeds. If you skip this step, the compost will bubble and settle unevenly when you water. Seeds falling into those gaps can germinate at different rates, making the whole tray uneven and difficult to manage.
A seed tamper is simply a flat piece of wood or another firm material used to compress and even out the surface. You can buy special wooden tampers or simply make your own from a flat piece of wood, which is what I have done for years. As long as it is level and fits your tray, it will serve the purpose perfectly. Using a tamper before sowing provides an even surface for seed scattering, stops all your seeds from rolling into low points or holes in the compost, gives each seed consistent access to light and moisture, and removes large air pockets which may otherwise prevent seeds from germinating. It takes seconds and makes a real difference to your results.
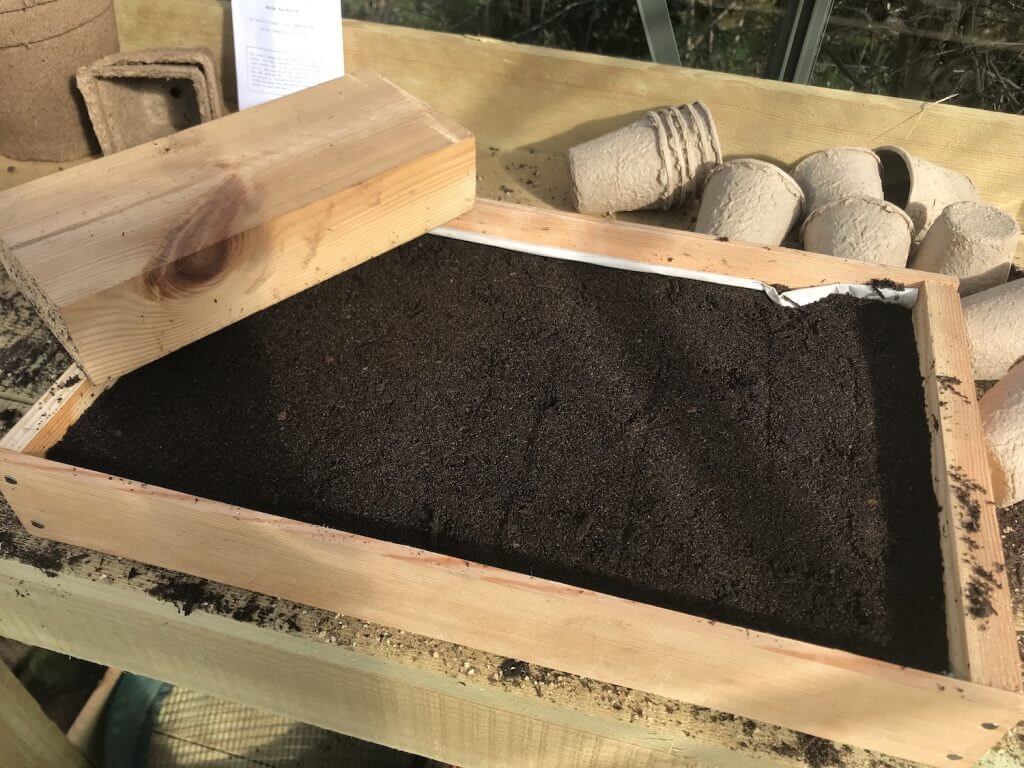
This is one of the most important lessons I share with every new gardener, and it catches many people out. You always water the seed tray or pot before sowing your seeds. Not after.
Watering after sowing simply disturbs the seeds, causes the compost to flow around, and makes for a very messy potting bench. Save yourself the drama. Water after tamping; let it drain, then sow. Give your seed trays either a soak in a sink or a generous drink from a watering can fitted with a fine rose. Let them drain for a minute, and then you are ready.
If you notice the soil surface is uneven after watering, add a little more seed compost, re-tamp and water again before sowing. The effort is worth it.
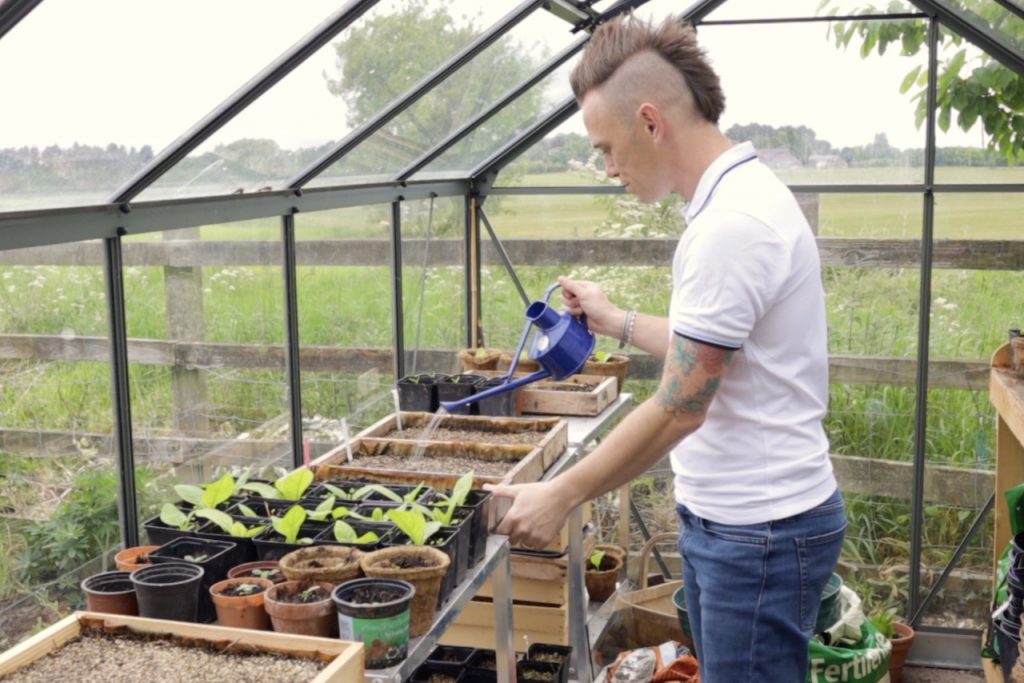
A watering can with a fine rose is properly essential for this job. A coarse flow will dislodge seeds and unevenly compact the compost surface.
🛒 Buy a watering can with fine rose on Amazon UK
💡 Top Tip
For very fine seeds, consider bottom-watering by standing your seed trays in a shallow container of water and allowing the compost to draw moisture up from below. This avoids any surface disturbance and is particularly useful for seeds like begonias, lobelia, or petunia that are almost dust-like in size.
I tend to classify seeds into two broad categories because each requires a different sowing method. Getting this right from the start makes a significant difference to your germination rates. With finer seeds, you can germinate many more plants in a limited space, but they need attention and potting on relatively quickly once they appear. With larger seeds, you need more space per plant, but they are generally more robust and require less fiddly management.
Fine seeds are best sown on a seed tray and scattered lightly and evenly across the compost surface. If seeds are really tiny, like begonias, then mixing them in fine sand before sowing can help distribute them more evenly. Gently tapping the packet to release them gradually tends to work better than pouring, as very fine seeds stick to your fingers easily.
Prepare your seed trays with compost and tamp the level. Water the trays well with a watering can fitted with a fine rose, then allow them to drain. Scatter fine seeds evenly and sparingly across the seed tray surface. Restraint is key here. Then scatter perlite or sieved compost lightly over the seeds to help keep them in contact with the damp compost. Water again very gently, using a fine rose or by misting. Label each tray with the plant name and sowing date immediately.
Many new gardeners assume one packet should fill one tray, but you need to plan for the possibility that all seeds germinate, which can mean a very crowded tray that becomes a damping off disaster. As a rule, sow no more than 50 seeds per seed tray and split the packet across two or three trays if necessary. Alternatively, save the remainder for next year’s growing.
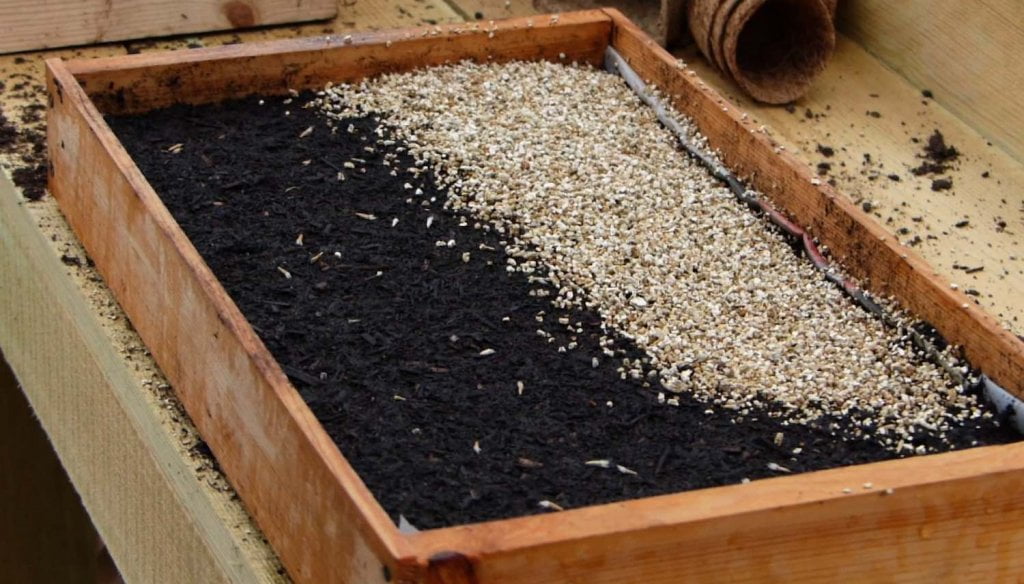
Once you have sown the seeds, most will need a light covering of either sieved seed compost or vermiculite. This helps the seeds make contact with the damp compost beneath and triggers the biological process that causes the seed to take up water and burst into life. That light covering also means you can water from above from this point, as it protects the seeds from being washed away. Always label your seedlings immediately, so you know exactly what you have grown and when.
🛒 Buy horticultural vermiculite on Amazon UK
Egg boxes are a brilliant, recyclable seed tray alternative for new gardeners. They are smaller than standard seed trays, but the depth is ideal for new seeds. You can even use the shallow side where the eggs normally sit as mini modules for when seedlings are pricked out. Two stages of growing from a single piece of recycled cardboard.
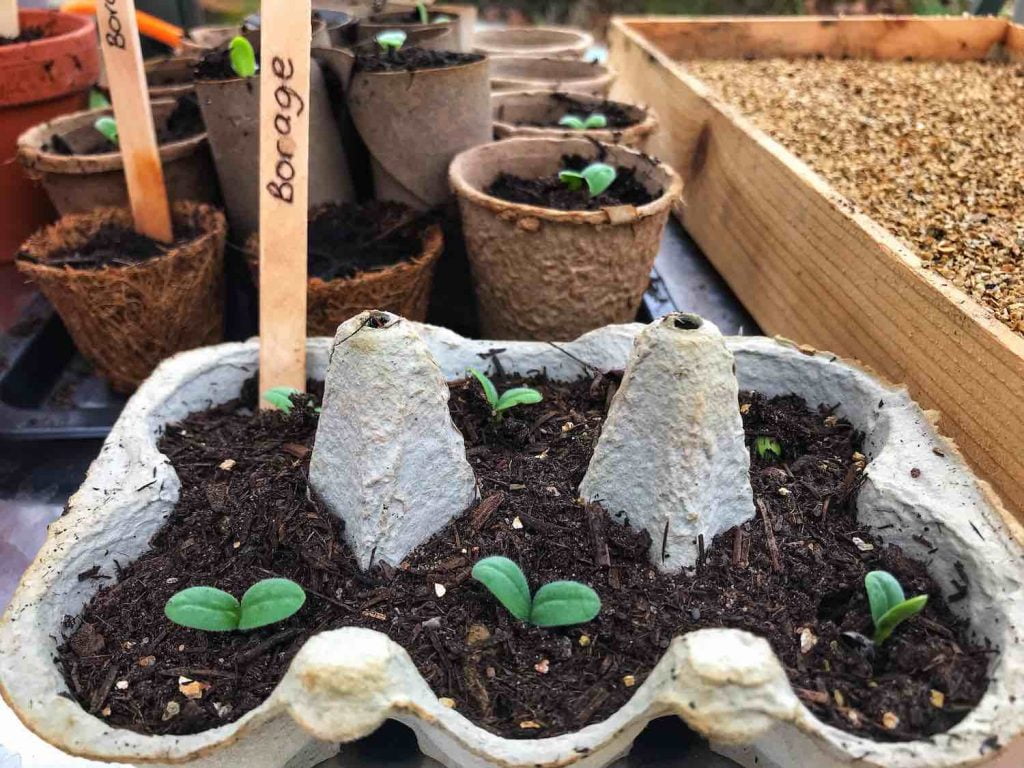
Large seeds such as sunflower, pumpkin, borage, sweet peas, and beans can each be planted individually in their own pots or module cells. Choose the smallest pot possible. You just want to get them to germinate and develop their first roots. Oversized pots at this stage waste compost and make it very difficult to maintain consistent moisture levels. You can pot everything on into larger containers as the plants progress.
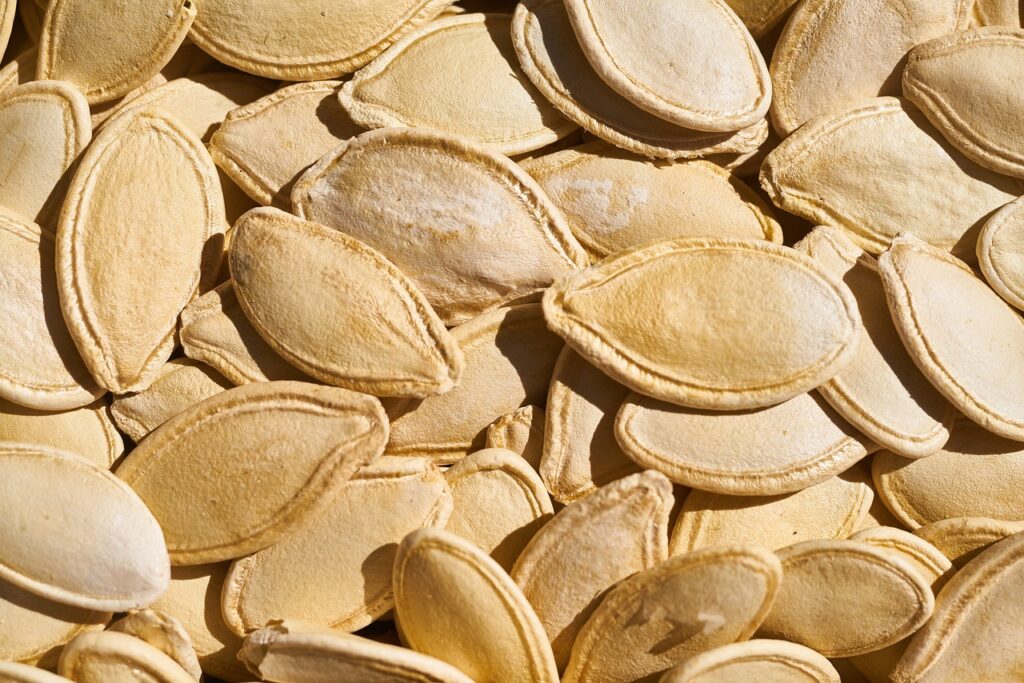
Larger seeds spend longer in their initial pot before transplanting out. The less disturbance to a new seedling, the better, as it allows the roots to establish and helps the plant put on rapid early growth. Choose small P9 or seedling pots, or improvise with toilet rolls, yoghurt pots, or similar. Fill with seedling compost and water well. Using a pencil or dibber, make one hole in the middle of each pot at the correct depth. Pop one seed per pot, cover with compost, top with perlite or vermiculite, water again, label, then place in your greenhouse or on a windowsill tray.
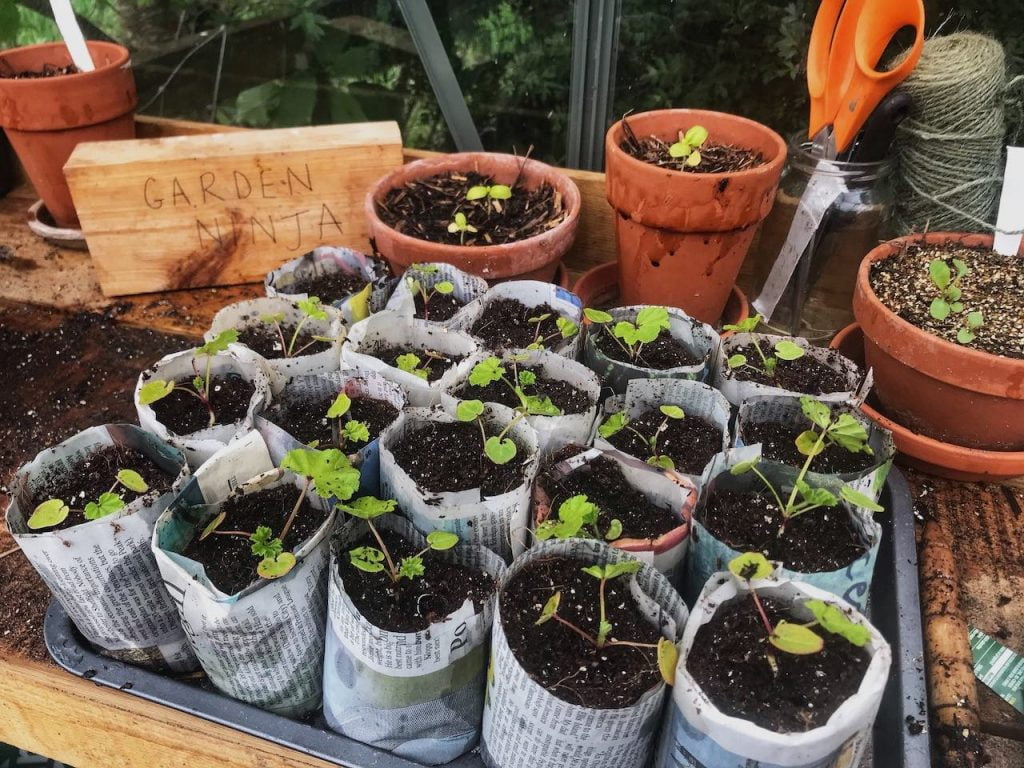
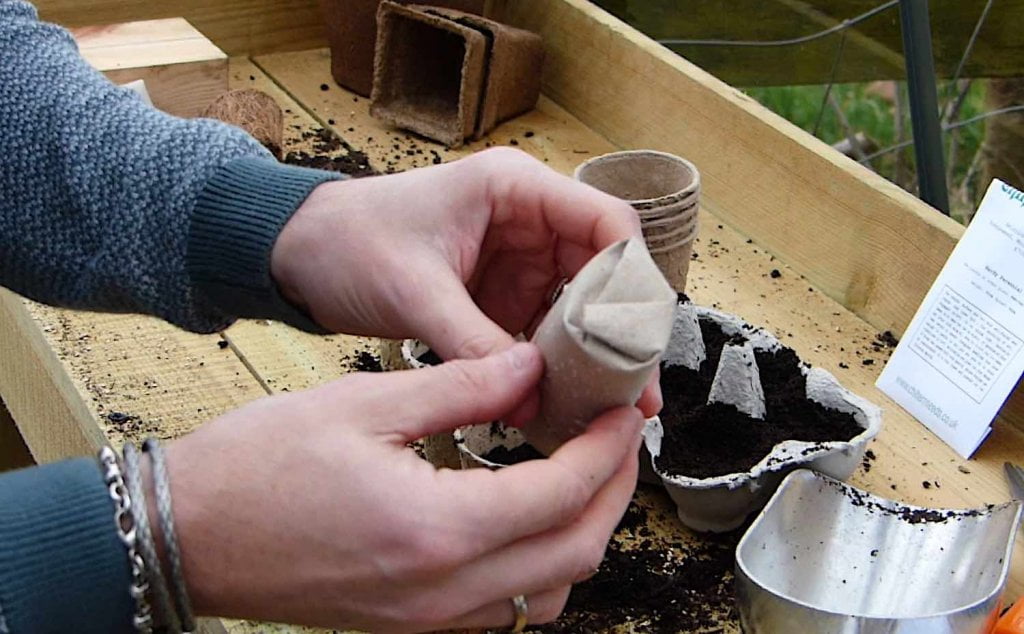
Toilet rolls are a fantastic, free way to either individually sow seeds or pot on seedlings from trays. You might be looking at them thinking there is no bottom, and you would be right. But with a small amount of jiggery-pokery, simply fold one end inward to create a base. You now have your very own mini seed pot, entirely from something that would otherwise go in the recycling. These toilet roll pots are ideal on a budget, and for plants like peas that can be transplanted out pot and all, since the cardboard biodegrades straight into the soil.
This is the question I am asked most often during spring, usually by gardeners who are panicking after a week of staring at a tray of bare compost. The answer is: it depends enormously on the species. The time it takes for seeds to germinate can vary from a matter of days to several weeks or even months.
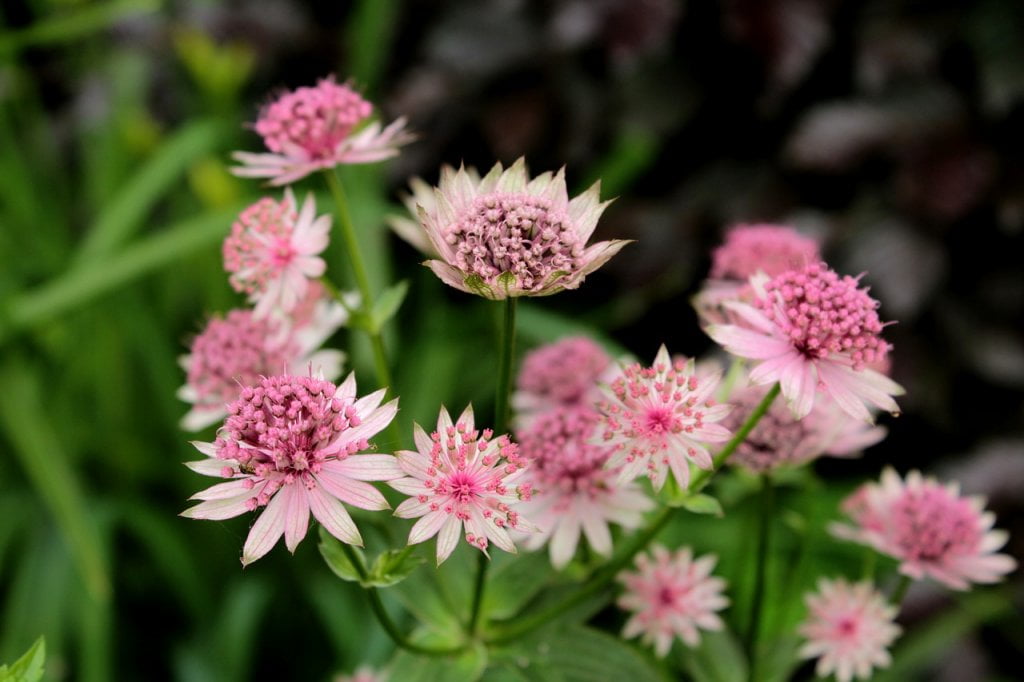
Some fast-germinating seeds like lettuce, radishes, and beans can sprout within a week, while others like carrots, parsley, and peppers can take up to three weeks or more. Germination speed and success depend on temperature, moisture levels, humidity, the specific plant species, and sometimes, if I am being honest, a bit of pot luck. Seeds in an unheated greenhouse will take longer to germinate than seeds placed on a warm indoor windowsill. Some seeds, like Astrantia major, can take up to 80 days to germinate.
Covering seed trays with a propagator lid will speed up germination by trapping warmth and humidity. An electric heated propagator goes even further, providing consistent bottom heat that some seeds, particularly tender crops like tomatoes, peppers, and aubergines, really need to germinate reliably in a UK spring. By sowing a variety of species simultaneously, you will always have some germinating before others, which keeps things interesting. If you have followed the packet instructions for a particular species, please be patient. The worst thing you can do is start poking your fingers into the trays.
Overwatering is also a major cause of seeds failing to germinate. Water only when the compost surface is beginning to dry, and never flood your trays.
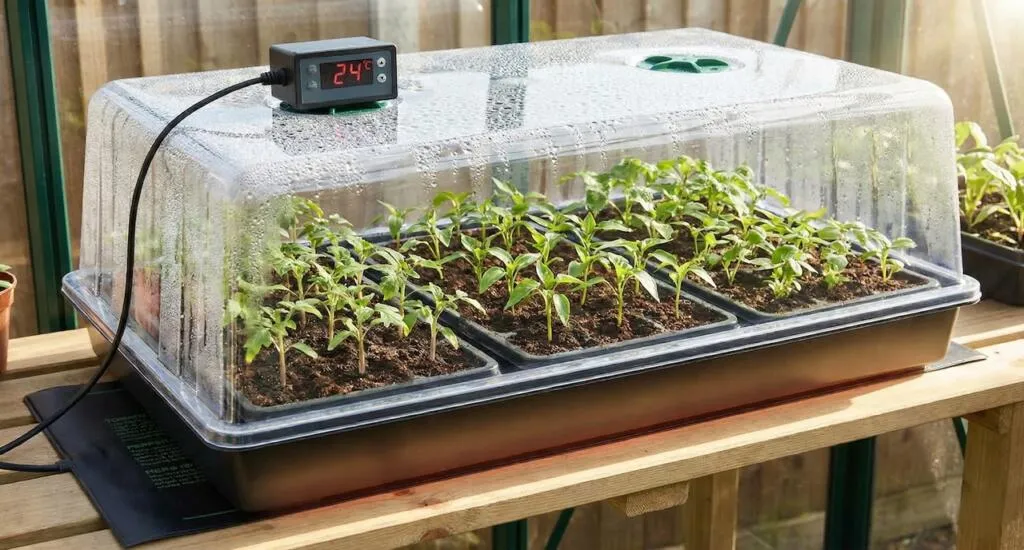
🛒 Buy an electric heated propagator on Amazon UK
💡 Top Tip
Always refer to the seed packet first, as germination times and temperature requirements vary significantly between species. Keeping a simple notebook of what you have sown, when, and how long germination took is something I properly recommend. It becomes an invaluable reference for planning future growing seasons.
As a matter of good horticultural housekeeping, pot hygiene is something I feel strongly about, and I rarely see it emphasised enough in beginner guides. Keeping your pots clean and pathogen-free is essential when sowing seeds; it only takes washing them in clean, soapy water. Dirty pots carry fungal spores, bacteria, and residue from previous growing that can wipe out an entire tray of seedlings within days. I enthusiastically reuse plastic trays and biodegradable alternatives, but I give them all a thorough wash and a dust-off before planting again. A simple rule: if you would not eat off it, give it a clean before you sow in it.
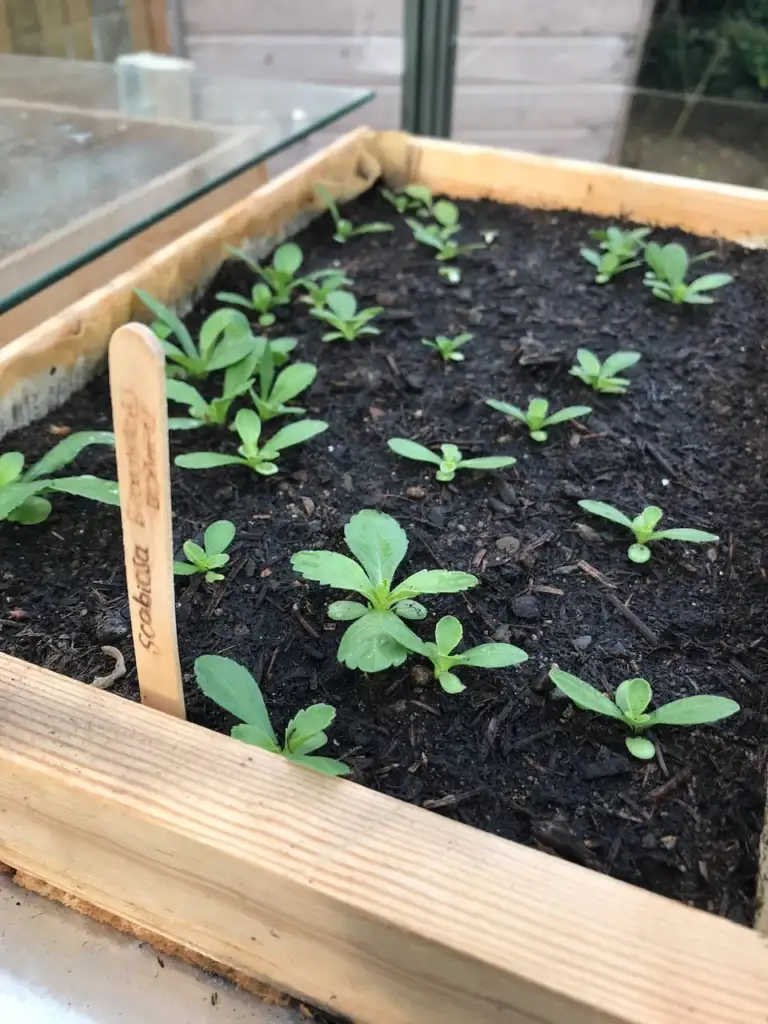
This is one of the most frequently asked questions from new gardeners eager to get going each year. Social media does not help, as in January, you will inevitably see posts of people sowing all manner of things, creating a sense that you should already be sowing too. In most cases, this is premature enthusiasm rather than good advice.
While you can technically sow seeds at any time of year, the chances of plants surviving when sown too early are slim. It is generally a waste of time sowing most vegetable seeds in December or January. The light levels are too low, the temperatures too unpredictable, and seedlings that do germinate often become leggy and weak, requiring life support on a windowsill until it is warm enough outside to plant them out.
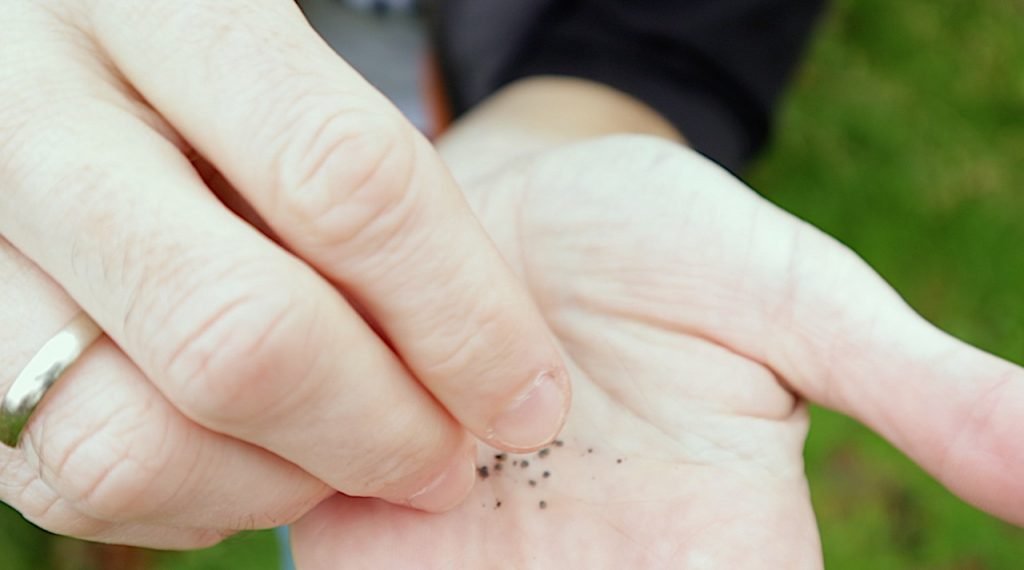
Most seed sowing begins in March when temperatures start to rise, days get longer, and the growing season properly begins. Exceptions include sweet peas, which can be sown in autumn or early January for a longer growing season, and certain brassicas started indoors in late February. For most seeds, March onwards is the practical sweet spot. Always check the seed packet for the specific recommended sowing window for each variety.
One of the questions I get asked more than almost any other is simply: when do I sow this? The honest answer is that timing varies enormously between plant species, but there is a broad seasonal rhythm that applies to most UK gardens. Understanding it will save you from the most common beginner mistake of sowing too early into cold, dark conditions where seeds sulk and rot rather than germinate.
Temperature is the key driver. Most seeds germinate best between 18 and 22°C, though there is meaningful variation. Cool-season crops like lettuce, peas, and broad beans will happily germinate at 10 to 15°C, while warm-season crops like tomatoes, peppers, and aubergines need a consistent minimum of 18°C to perform reliably. This is exactly why a heated propagator is such a valuable tool in early spring. It lets you hit those temperatures weeks before your windowsill or unheated greenhouse can manage it naturally.
Always treat the seed packet as your first reference point. The table above gives you the broad rhythm, but individual cultivars within the same species can have meaningfully different requirements, particularly for flowers, where the range within a single genus like Salvia or Nicotiana can span very different sowing windows. The packet will also tell you whether a seed needs light to germinate (surface sow) or requires darkness (cover with compost), which makes more difference than most beginners appreciate.
💡 Top Tip
A useful rule of thumb for UK gardeners: if you can see weed seedlings germinating naturally in your garden borders, the soil temperature has reached the point where most hardy seeds will also germinate outdoors. Nature gives you the signal for free. Use it.
Everything covered so far in this guide has focused on sowing under cover, in trays, pots, and propagators indoors or in a greenhouse. But a significant number of plants are actually best sown directly into the soil where they will grow and mature, skipping the indoor stage entirely. Understanding which plants suit direct sowing and how to do it properly is an important part of any beginner’s seed-sowing toolkit.
Direct sowing works particularly well for plants that dislike root disturbance, produce long taproots that make transplanting unreliable, or are simply so easy and fast to germinate that the indoor stage adds no real benefit. Carrots and parsnips are the classic examples. Attempt to transplant either of these, and you will end up with forked, misshapen roots and a very disappointing harvest. Poppies, cornflowers, nasturtiums, and many other hardy annuals also prefer to be sown where they will flower, as they establish and bloom more freely this way. Peas, broad beans, and spinach are further crops that do perfectly well sown directly into prepared ground.
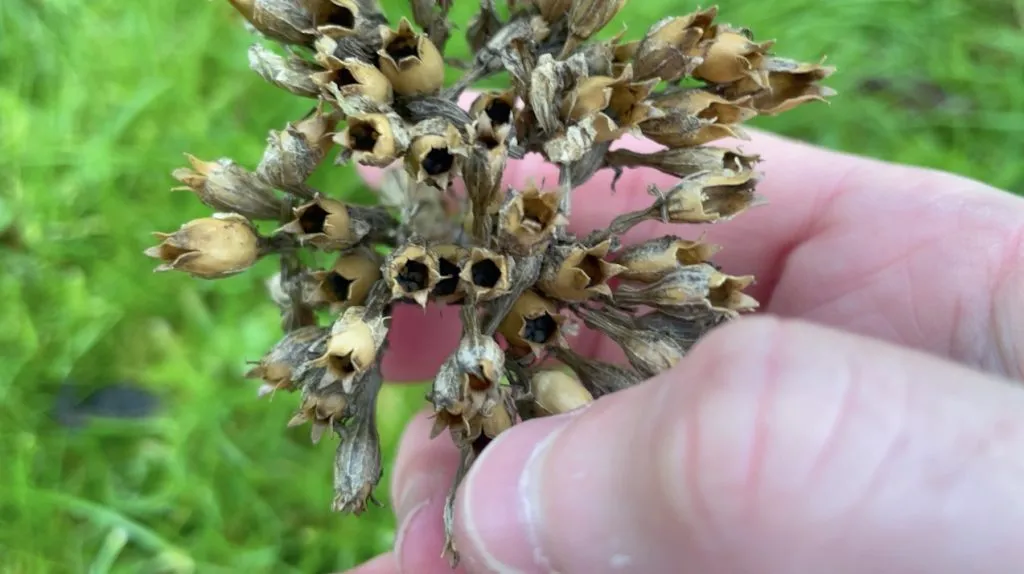
Before you sow anything directly outdoors, soil preparation is everything. Remove all weeds, large stones, and any debris from the area. If the soil is compacted, fork it over lightly to open up the structure. Then rake the surface until you have a fine, crumbly texture. This is what gardeners call a fine tilth. This even, friable surface is what allows seeds to make good contact with the soil and germinate consistently. Large clods, stones, and lumps are the enemy of a good seedbed.
If the soil is dry, water the area the day before you plan to sow and allow it to drain overnight. Sowing into dry soil and watering afterwards can wash small seeds sideways, leaving them poorly positioned. Getting the moisture into the soil beforehand, just as we water the compost before sowing in trays, gives far more consistent results.
🛒 Buy a quality garden rake on Amazon UK
The most common and practical method for most vegetables and many flowers is sowing in drills. A drill is simply a shallow furrow or trench made in the soil surface, typically using the corner of a hoe, a bamboo cane, or a purpose-made draw hoe. The depth of the drill depends on the seed. Check the packet, but as a general guide, cover seeds to approximately twice their own depth. Very fine seeds may need almost no covering at all.
Use a garden line or taut string to keep your drills straight if you are sowing vegetables in rows. This makes it much easier to distinguish your seedlings from weed seedlings that will inevitably appear alongside them. Sow seeds thinly and evenly along the drill, then gently draw the raked-aside soil back over the top. Lightly firm the surface with the back of the rake and water gently. Label the row clearly with the plant name and sowing date.
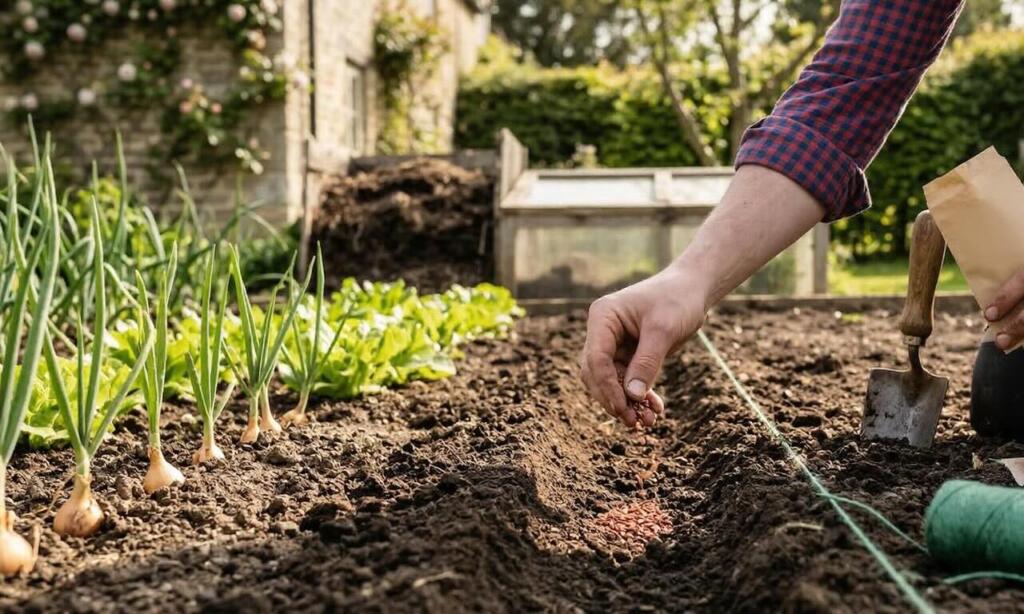
Broadcast sowing means scattering seeds across a prepared area rather than in defined rows. This is the method to use for wildflower meadows, annual flower borders, and any planting where a natural, informal effect is the goal.
Mix very fine seeds with dry silver sand before broadcasting the sand, which makes it far easier to see where you have already sown and helps distribute tiny seeds more evenly across the area. Once sown, lightly rake the surface to cover the seeds, then water gently with a fine rose.
Once your direct-sown seeds germinate, you will almost certainly need to thin them out. Even experienced gardeners sow too thickly outdoors. It is very easy to do. Overcrowded seedlings compete for light, water, and nutrients, and the result is weak, drawn plants rather than the strong, stocky specimens you want.
Thin to the spacing recommended on the seed packet, removing the weakest seedlings and leaving the strongest at the correct distance apart. Do this in stages if you are uncertain, and thin to half the final spacing first. Then complete the job a couple of weeks later, once you can see which plants are performing best.
💡 Top Tip
When thinning, water the row first to soften the soil around the roots. This makes it much easier to remove unwanted seedlings without disturbing the roots of the plants you are keeping. Thin on a still, dry evening when the scent released by crushed foliage, particularly with carrots, is less likely to attract pests like carrot fly.
Pricking out is the process of transferring seedlings from their initial seed tray into individual pots or cells so each plant has space to develop its root system properly. It is one of those tasks that sounds more fiddly than it actually is, and once you have done it a few times, it becomes a quick and satisfying part of the seed-sowing process. Get it right, and your seedlings will go from fragile little things to sturdy, vigorous plants ready to face the world.
The right moment to prick out is when seedlings have developed their first pair of true leaves. These are the second set of leaves to appear. They look like a miniature version of the adult plant, as opposed to the simple, rounded seed leaves (cotyledons) that emerge first. At this stage, the seedling is large enough to handle without undue risk, but still small enough for its roots to fit neatly into a new hole without needing to be crammed or bent.
Before you start, prepare your individual pots or module cells by filling them with good potting compost, tapping gently to settle it, and making a hole in the centre of each with a dibber or pencil. Pre-filling and pre-drilling the holes means your seedlings spend as little time as possible with their roots exposed, which can lead to them drying out and getting stressed.
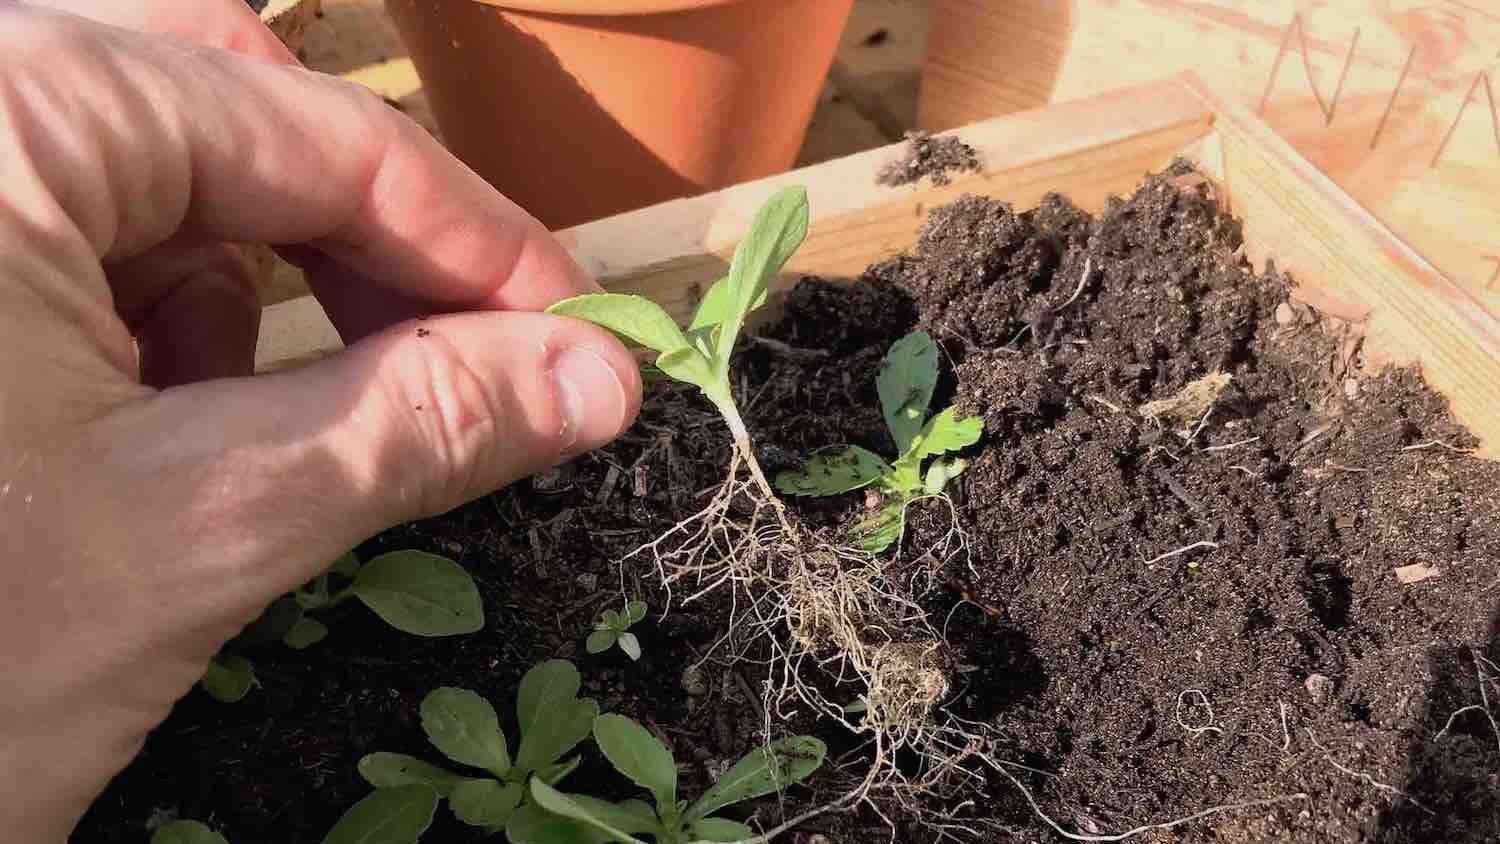
Water the seed tray lightly an hour or so before you plan to prick out. Moist compost holds together around the roots far better than dry compost and reduces root damage during the process.
Use a dibber, pencil, or even an old kitchen fork to gently lever underneath a small clump of seedlings, getting beneath the root mass rather than pulling from above. Always hold the seedling by a leaf, never by the stem. A damaged leaf is recoverable, whereas a damaged stem is not, and the plant will almost certainly die. If the seedling has several in a clump, gently tease them apart with your dibber, or let them separate naturally as you ease them out of the compost.
Lower each seedling into its prepared hole so the roots hang naturally downward, with the seedling sitting at roughly the same depth as it was in the seed tray. Placing it very slightly deeper can actually help stem stability on leggy seedlings. Firm the compost gently around the base with your fingers, then water each pot carefully with a fine rose to settle the compost and close any air gaps around the roots.
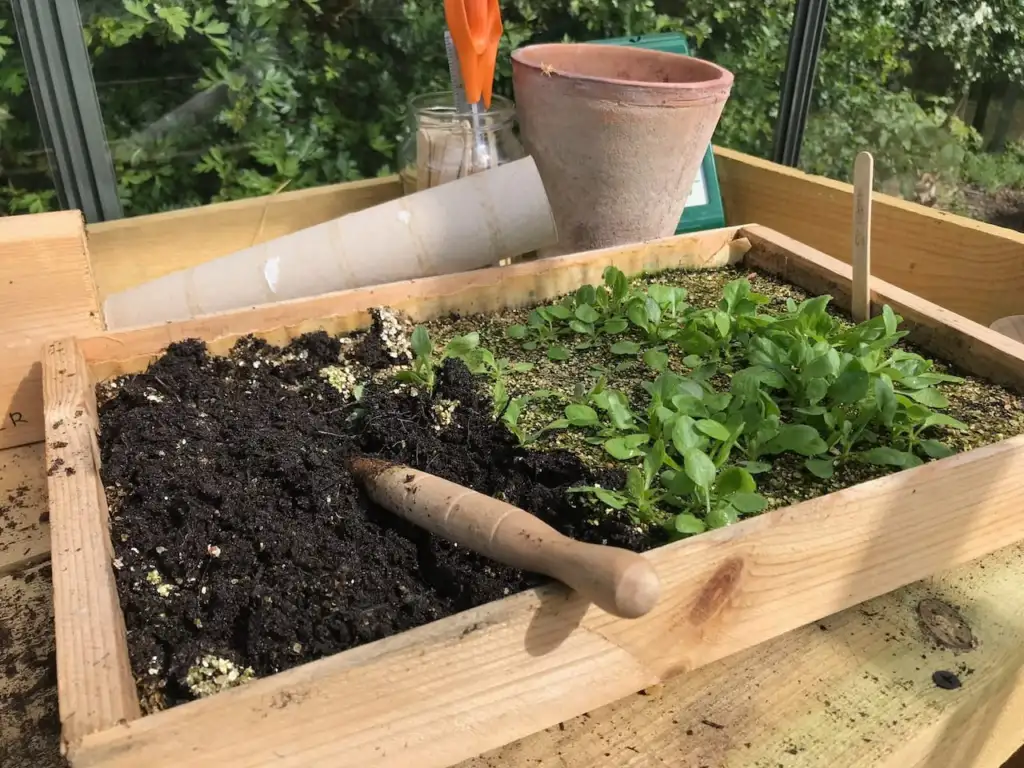
Place the freshly pricked-out seedlings somewhere warm and well-lit but out of direct sun for the first few days while they recover from the process. A little temporary wilting is normal and nothing to panic about. Usually within 24 to 48 hours of a successful pricking out, most seedlings will be standing upright and growing strongly.
🛒 Buy a dibber for pricking out on Amazon UK
💡 Top Tip
If you have more seedlings than pots, always select the strongest, most compact specimens and discard the weakest. It feels wasteful at first, but a tray of six strong, healthy seedlings will always outperform a tray of twelve overcrowded, struggling ones. Quality over quantity at the pricking out stage pays dividends right through to planting out.
If you are using module trays rather than seed trays from the start, such as sowing one or two seeds per module cell, you can largely skip the pricking out stage entirely and move straight from germination to potting on. This is why I increasingly favour this approach for most larger seeds. The roots develop undisturbed, and the transition to larger pots or final planting positions is noticeably less stressful for the plant.
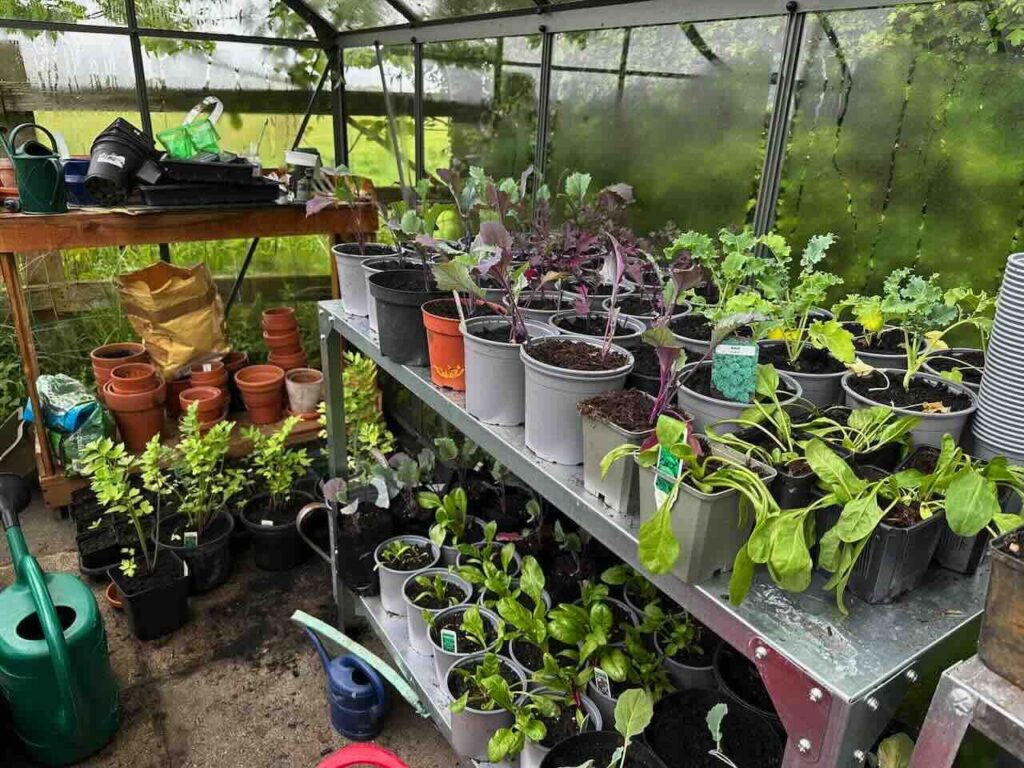
🛒 Buy module seed trays on Amazon UK
Hardening off is the stage of the seed-sowing journey that catches out more beginners than any other. You have done everything right. You have sown carefully, germinated successfully, and pricked out neatly. Then you plant your seedlings directly outside and watch them collapse within days. The cause is almost always the same: the shock of moving from a warm, sheltered indoor environment straight into the variable temperatures, wind, and direct sun of the open garden.
Hardening off simply means acclimatising your seedlings to outdoor conditions gradually over around seven to ten days, so the transition is gentle rather than brutal. Plants grown indoors or in a heated greenhouse have soft, lush growth that has never experienced wind, temperature fluctuation, or unfiltered sunlight. They need time to toughen up before they can cope with those conditions independently.
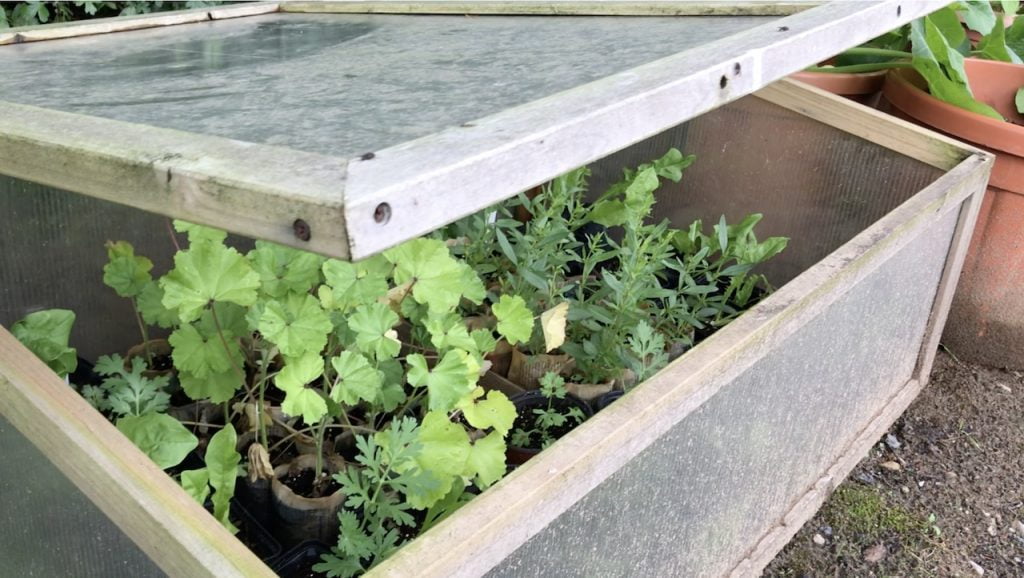
The process is straightforward. Begin by placing your seedlings outside in a sheltered, lightly shaded spot for just a couple of hours on a mild, still day. Avoid direct sun, wind, and any day when frost is forecast. Bring them back indoors before temperatures drop in the evening. Over the following days, gradually increase the time they spend outside, moving them into progressively more exposed positions. By the end of the process, they should be spending full days outdoors in their final conditions, only coming back inside overnight if frost remains a risk. After that, they are ready to plant out permanently.
A cold frame is an excellent tool for this process, acting as a halfway house between indoors and outdoors. Place your seedlings in the cold frame with the lid closed for the first day or two, then prop the lid open during the day over the following days, and finally leave it open day and night before planting out. It gives you a degree of control over the process that simply placing trays outside cannot match.
🛒 Buy a cold frame on Amazon UK
For a full step-by-step guide to the process, including how to handle unseasonable cold snaps during hardening off, visit my dedicated guide: Hardening Off Plants: Why and How to Do It Properly.
💡 Top Tip
Never harden off on a day when frost is forecast, even if it is late spring. A single frost on seedlings that have not yet been fully hardened can undo weeks of careful growing in one night. Check the forecast before you put anything out, and keep horticultural fleece to hand during the hardening off period as insurance against an unexpected cold snap.
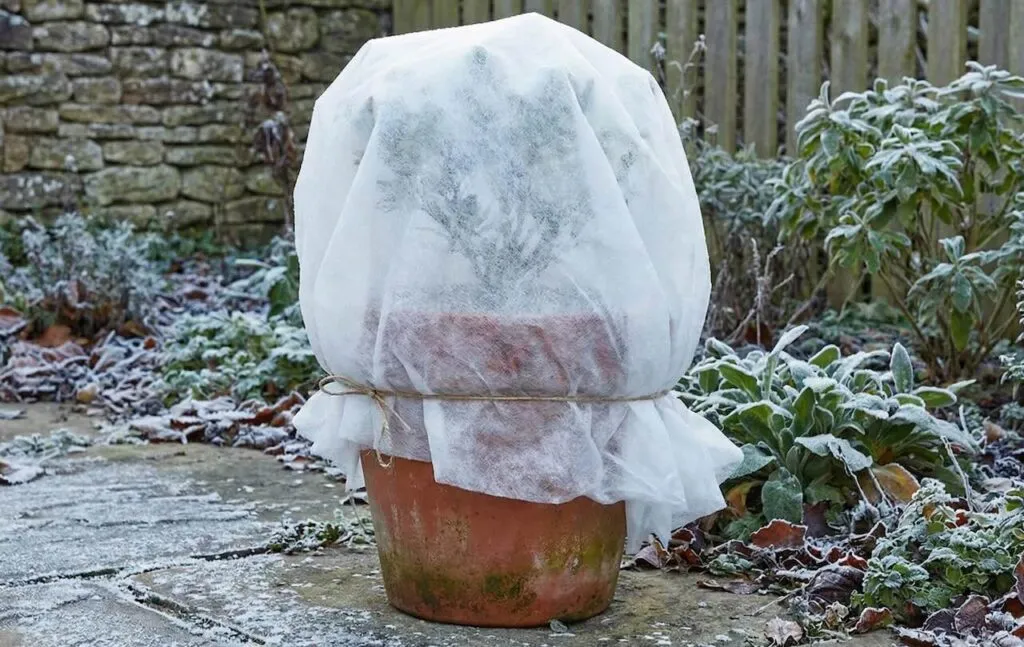
🛒 Buy horticultural fleece for frost protection on Amazon UK
Damping off is not a single disease but rather a set of symptoms caused by various soil-borne fungi and water moulds, including Pythium, Rhizoctonia, Botrytis, and Fusarium. These pathogens attack seedlings just before or after they emerge from the soil, and they can devastate an entire tray of seedlings almost overnight. It is one of the most demoralising experiences for a new gardener, but it is also almost entirely preventable once you know what you are dealing with.
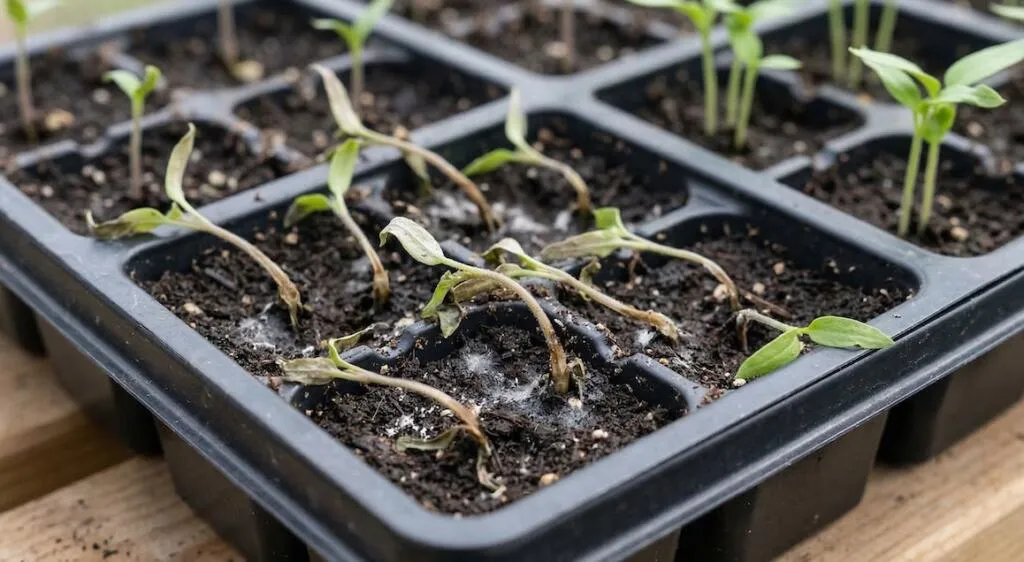
Infected seedlings may germinate normally but soon wilt, collapse, or rot at the base of the stem. Others may never emerge at all, with the seed rotting before it even sprouts. Damping off is especially common in warm, humid, or poorly ventilated environments. Greenhouses, propagators, and windowsills are prime trouble spots if hygiene and watering discipline are not maintained.
The first sign of damping off is usually a healthy-looking seedling suddenly wilting and toppling over. On closer inspection, you may notice a water-soaked, translucent stem at soil level, a pinched, thin section of stem where it has rotted through, or the sudden disappearance of entire clusters of seedlings within a couple of days. Seeds may also rot in the compost without ever sprouting. The damage typically occurs rapidly and most commonly affects seedlings of vegetables, herbs, and flowers grown in trays or small pots.
Several conditions contribute to damping off, and they often occur in combination. Overwatering or consistently wet compost creates the perfect environment for fungal pathogens. Poor air circulation or high humidity amplifies this further. Crowded seedlings with little space between them, contaminated pots or compost, and unsterilised tools or containers all increase risk. The combination of moisture, warmth, and fungal spores is all it takes for the problem to take hold and spread rapidly through your seedlings.
Prevention is the only reliable strategy, because there is no cure once a seedling is affected. With a few sensible precautions, you can minimise the risk significantly.
Start by using clean, sterile containers and seed trays. Wash old pots with hot soapy water and disinfect them using a diluted household disinfectant or horticultural steriliser. Never reuse old compost for seeds, as it may already harbour pathogens. Reuse it as a lawn top dressing or mulch in established flower beds instead.
Use fresh, sterile seed compost with good drainage properties. When sowing seeds, follow spacing recommendations and avoid overcrowding. Dense sowing increases humidity and reduces airflow between seedlings, which is exactly what damping off thrives in. Water only when necessary, and water from below wherever possible, using a tray or saucer so moisture is drawn up through the compost rather than splashing the delicate stems. Always allow the surface to dry slightly between waterings.
Good ventilation is key to reducing the humidity that damping off pathogens love. If using a propagator or covering trays with a lid, remove the cover as soon as seeds germinate. Place seedlings in a well-lit, airy position and avoid trapping warm, moist air around them for extended periods.
Some gardeners use a light dusting of fine horticultural sand or vermiculite over the surface of seed trays to keep the stem base drier. Others water occasionally with a very weak solution of organic chamomile tea or a light dusting of cinnamon, both of which have natural antifungal properties. These should be seen as complementary to good hygiene rather than a substitute for it.
⚠ Warning
Once damping off has taken hold in a seed tray, it spreads rapidly between seedlings. Remove and discard affected seedlings and the surrounding compost immediately. Do not compost the affected material. Improve ventilation and allow the compost to dry slightly before watering again. If the problem is widespread, it is usually best to start over entirely with fresh compost and sterile equipment.
If something’s gone wrong with a tray of seeds or seedlings, this table should help you spot the cause quickly withouhaving to huntng back through the whole guide.
No, but a propagator significantly improves germination rates, especially for tender crops. A warm windowsill will work for many seeds. A heated propagator is a worthwhile investment if you grow tomatoes, peppers, aubergines, or other warmth-loving plants regularly.
You can use multipurpose compost for larger seeds, but I would always recommend a purpose-made seed compost for fine seeds. Multipurpose compost tends to be coarser, higher in nutrients, and more prone to harbouring pathogens. If you do use it, sieve it first to remove lumps and improve the texture.
The most common causes are sowing too early in the year, not enough warmth, overwatering causing rot before germination, using old or contaminated compost, or seeds being buried too deep. Check the packet instructions and compare your conditions against what the specific plant needs. Some seeds also have properly long germination periods. Patience is sometimes simply the answer.
Leggy seedlings, pale, thin and stretched, are almost always reaching for light. It’s usually caused by insufficient light levels, a propagator lid left on too long after germination, or sowing too early in the year when daylight hours are still short. Move affected seedlings to the brightest spot you have immediately, ideally a south-facing windowsill or under grow lights, and remove any propagator cover the moment germination happens rather than leaving it on. You can pot leggy seedlings on slightly deeper than they were sitting to bury some of the stretched stem and improve stability, but the underlying light problem needs fixing too, or the next flush of growth will do the same thing.
Prick out seedlings when they have developed their first pair of true leaves. These are the second set of leaves to appear and look like a miniature version of the adult plant, rather than the simple, rounded seed leaves that emerge first. Pricking out at this stage minimises root disturbance and gives each seedling space to develop properly.
Both work, but watering from below by sitting the seed tray in a shallow container of water is gentler on delicate seeds and seedlings. It avoids disturbing the compost surface and reduces the risk of splashing fungal spores between plants. For established seedlings, a fine-rose watering can from above is perfectly fine.
Vermiculite is a naturally occurring mineral that has been heated and expanded into a lightweight, sterile granule. It is brilliant for covering seeds after sowing because it retains moisture, allows light through for surface-sown seeds, and keeps the stem base drier than compost alone, reducing damping off risk. You can substitute sieved compost in a pinch, but vermiculite is a modest investment that truly earns its keep on the potting bench.

Join over 100,000 gardeners on YouTube
Free gardening videos from the Garden Ninja, with 8 million views and counting.
Subscribe on YouTube, it’s freeWhat if you are on a budget and would like to design your own garden? My Garden Design for Beginners course is the ideal starting point. With online courses ranging from £29 to £199, there is something for every aspiring garden designer.
Join me, Lee Burkhill, award-winning garden designer and BBC1’s Garden Rescue presenter, in my most comprehensive course. I will guide you step by step from a complete beginner to a confident garden designer, ready to create stunning outdoor spaces you can be truly proud of.
Design Principles: Understand the key elements that underpin exceptional garden design.
Planting Techniques: Discover how to choose and arrange plants for beautiful, sustainable gardens.
Design Styles and Layouts: Explore a variety of garden styles to suit every outdoor space and personal taste.
20 hours of in-depth study, flexible online learning at your own pace, engaging video lessons and interactive quizzes, real-world case studies to apply your knowledge, and a certificate upon completion. This comprehensive course is available now for just £199. Begin your garden design journey today and gain the skills to create breathtaking gardens confidently.
Why not level up your gardening skills? My Garden Design for Beginners course is the perfect place to begin. I offer several courses from £29 to £199 to help you learn the basics of garden design.
For the garden you’ve already got, not the one you’re starting from scratch. Seven checklists and video lessons from BBC Garden Rescue’s Lee Burkhill, designed to help you decide what’s worth keeping before you spend a penny.
Garden Design Examples for Small Gardens: 30 Design Templates & Planting Plans: In this online gardening course, I’ll walk you through 30 fantastic garden designs, explaining the logic behind the layout and plant choices, plus take-home tips for applying them in your own garden.
Learn how to transform and design your garden with Lee Burkhill’s crash course in garden design. In over 5 hours, Lee will teach you how to design your dream garden. Featuring practical design examples, planting ideas and video guides. Learn how to design your garden in one weekend!
Garden Design for Beginners Online Course: Want to become a garden designer or design your own garden? This beginner course is for you. Join me, Lee Burkhill, an award-winning garden designer, as I train you in the art of beautiful garden design. Enjoy 20 hours of online study and video lessons, along with quizzes and a completion certificate.
And that is truly all you need to get cracking with growing your own from seed. Welcome, brave gardener, to one of the most addictive and rewarding corners of horticulture. Growing from seed gives you choice, control, satisfaction, and an almost embarrassing amount of plants for very little money. I assure you that you are in for a delightful ride of unexpected developments and genuine achievements.
I would love to hear from you if you are sowing your own. Send me your germination pictures on social media and ask any questions you may have over on the Garden Ninja forum.
Do not forget you can also visit my YouTube channel, where I cover seed sowing and many other growing topics in detail. You can also find me on Twitter / X, Facebook, and Instagram for more garden guides and tips throughout the year.
Happy Seed Sowing!


Lee Burkhill, known as the Garden Ninja, is an award-winning garden designer and horticulturist with over 30 years of gardening experience and 15 years as a professional garden designer. A qualified RHS (Royal Horticultural Society) professional, Lee specialises in sustainable garden design and practical horticultural advice. He designs and presents on BBC1’s Garden Rescue and in leading gardening publications. Lee combines three decades of hands-on gardening knowledge with professional design qualifications to help gardeners create beautiful, functional outdoor spaces.
View all posts by Lee Burkhill


You must be logged in to post a comment.

JOIN THE NINJAS

Be the first in line for new Guides, Discount codes and Offers






There’s nothing more rewarding than filling borders with plants, grown from little tiny seeds. As a beginner gardener, I’m amazed every time they germinate! I cant seem to grow echinacea though, any tips? Thanks! x