-
How to Sharpen Secateurs & Maintain Garden Snips
 Lee Burkhill: Award Winning Designer & BBC 1's Garden Rescue Presenters Official Blog
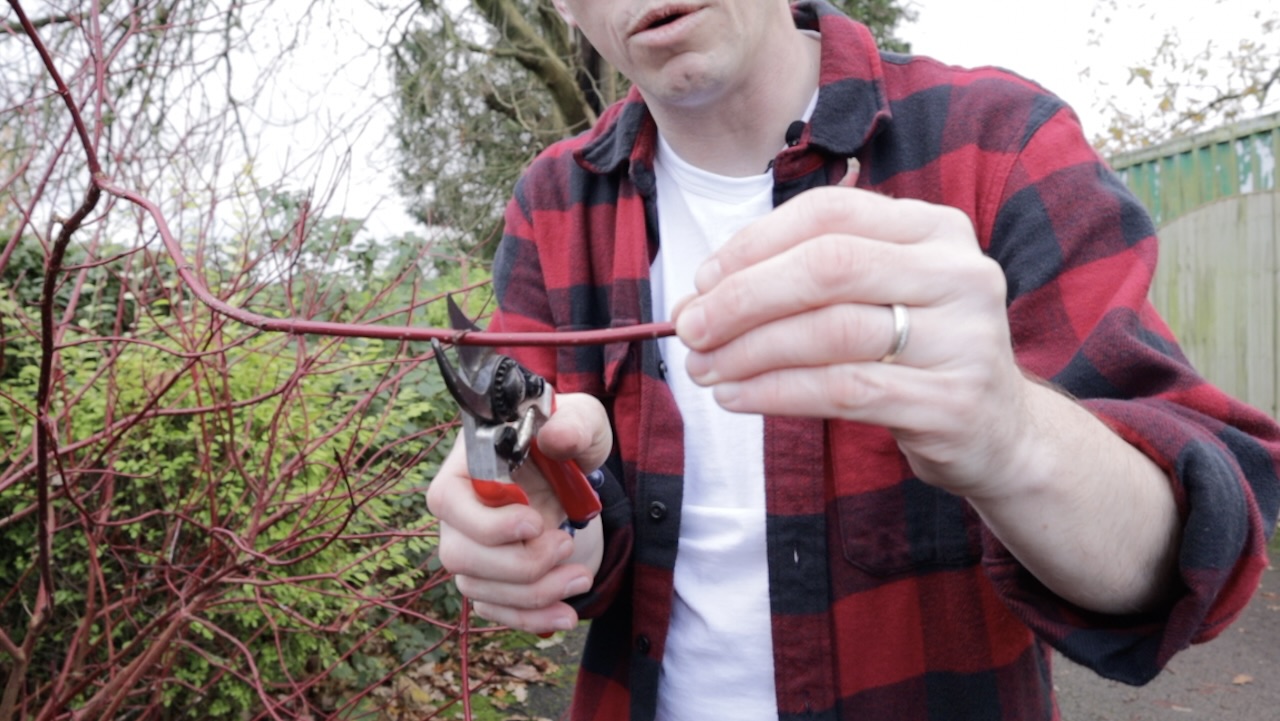
Keeping your tools clean and sharp ensures that garden pruning goes without a hitch. Clean tools enable neat cuts which keep your plants in far better health than old rusty snagged cuts. This guide is going to show you how to sharpen a pair of bevelled bypass secateurs in under 3 minutes. Meaning more time for pruning and less time stuck inside cleaning tools!
Sharp secateurs are the difference between gardening being a joy and being a wrist-destroying slog that damages your plants. I learned this the expensive way three decades ago when I lost an entire shrub to disease after making ragged cuts with blunt snips. The infection entered through those torn edges and killed the plant within weeks. I’ve sharpened my secateurs religiously ever since.
Sharpening secateurs takes about five minutes and transforms them from plant-crushing to precision cutting tools. Sharp blades make clean cuts that heal quickly, dramatically reducing disease risk whilst saving your wrists from repetitive strain. Yet most gardeners I meet are using secateurs so blunt they’re basically just squashing stems rather than cutting them.
This complete guide shows you exactly how to sharpen secateurs properly using a whetstone, how to test they’re actually sharp, when to replace blades instead of sharpening, and the critical mistakes that ruin your tools. Whether you’re using bypass or anvil secateurs, Japanese steel or budget models, I’ll walk you through the entire process from cleaning to final testing.
Five minutes every few weeks is all it takes. Let’s get your secateurs cutting like they did when they were brand new.
Sharp tools make cleaner, neater and easier cuts. They also stop the spread of disease and make your job as an awesome gardener even easier. This guide is going to show you how to correctly sharpen secateurs with a sharpening stone. It’s really not that difficult once you have the correct technique. Let’s get sharpening!
How to Tell When Your Secateurs Need Sharpening
Most gardeners sharpen far too infrequently because they don’t recognise the warning signs. By the time you notice your secateurs have gone blunt, they’ve probably been damaging your plants for weeks. Here’s what to watch for.
The Crushing Test
Sharp secateurs slice through stems. Blunt secateurs crush them. Look at the cut surface after pruning. If it’s clean and smooth, you’re fine. If it’s ragged, split, or shows crushing on one side, your blades are blunt. Fresh green stems are particularly revealing; they should appear as if they’ve been cut with a knife, not crushed in a vice.
I see this constantly with clients who’ve been “pruning” their shrubs but actually just mangling them. The stems have bark peeling away from torn edges, splits running down from the cut, and obvious crushing damage. Every one of those wounds is an entry point for disease.
Increased Cutting Effort
If you’re squeezing harder than you used to for the same cuts, your secateurs are blunt. Sharp blades require surprisingly little pressure. I can prune pencil-thick stems with sharp secateurs using just my fingertips. If you’re engaging your whole hand and feeling strain in your wrist after fifteen minutes of pruning, you need to sharpen.
This matters enormously for preventing repetitive strain injuries. Blunt secateurs force you to use far more hand strength, which, over a long pruning session, adds up to serious wrist and forearm fatigue.
Stems Slipping Between Blades
When you close the secateurs on a stem and it slides out sideways rather than being cut, either your blades are blunt or the central pivot has loosened. Try tightening the pivot nut first. If stems still slip, the blade edge has worn down and needs sharpening or the gap between blade and anvil has widened from repeated sharpening of the flat side (which you should never do).
Bark Tearing Rather Than Cutting
On woody stems, blunt secateurs peel or tear the bark rather than cutting through it cleanly. You’ll see bark lifting away from the cut surface, sometimes in long strips. This is terrible for the plant because the damaged bark area can’t callus over properly and remains vulnerable to infection and water loss.
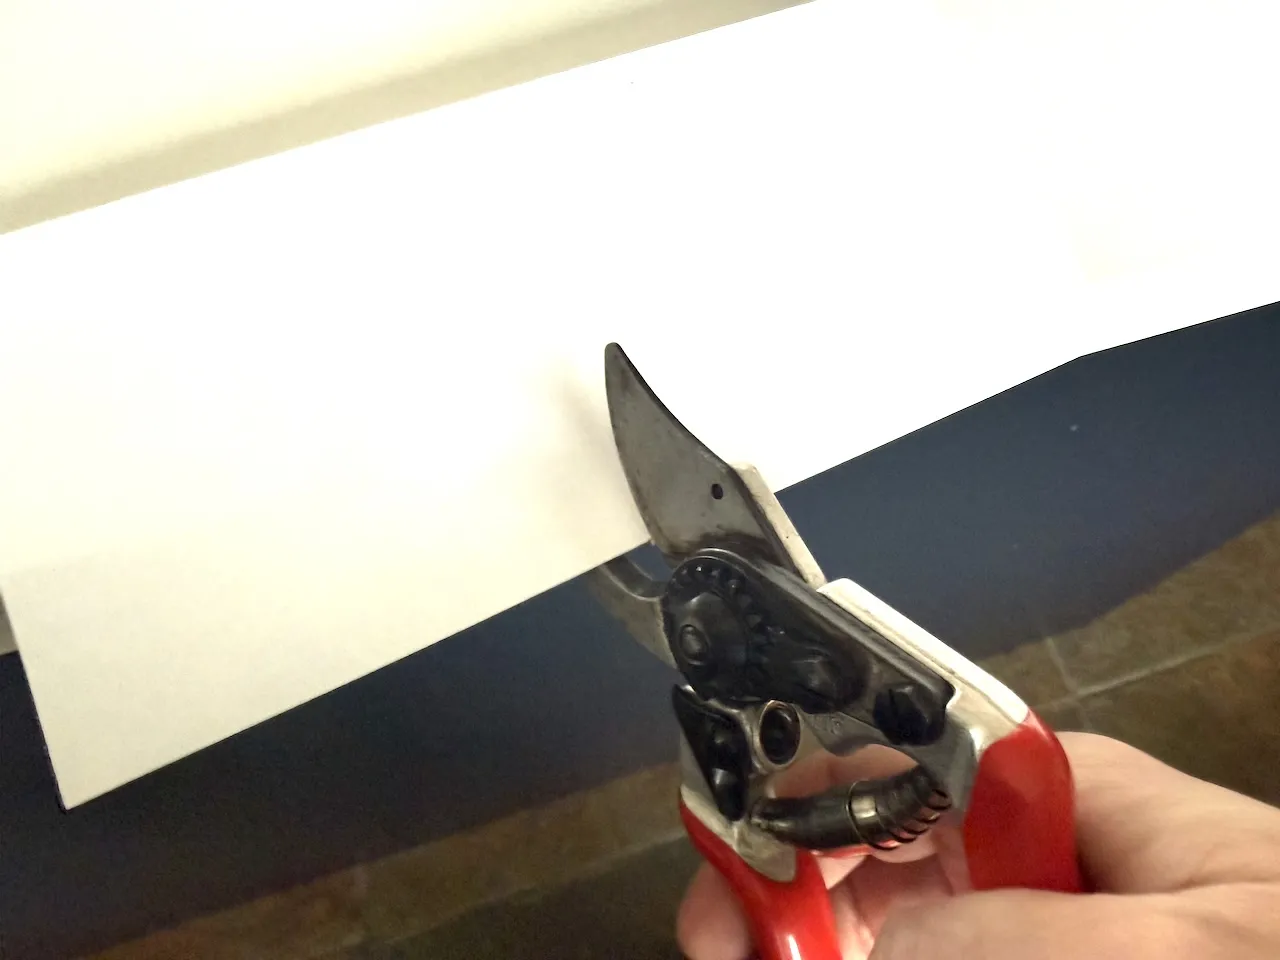
The Paper Test
This is the definitive test. Hold a sheet of A4 paper vertically in one hand. With sharp secateurs, you should be able to slice cleanly through the paper from top to bottom in one smooth motion. The paper shouldn’t fold, bunch up, or tear. It should fall cleanly cut. If your secateurs can’t pass this test, they need sharpening immediately.
How to clean secateurs
First things first, we need to ensure that our secateurs are clean before we sharpen them. If you try to skip steps, you’ll end up with uneven sharpening, a ruined sharpening block and plenty of drama. So take your secateurs to a sink and give them a good scrub down.
I use a crean mate from Japan (spelt crean, not clean), which is an abrasive sponge that helps me remove any sap or gunk that’s built up on the secateurs. I wet it first and then give it a scrub, and the marks and debris quickly vanish.
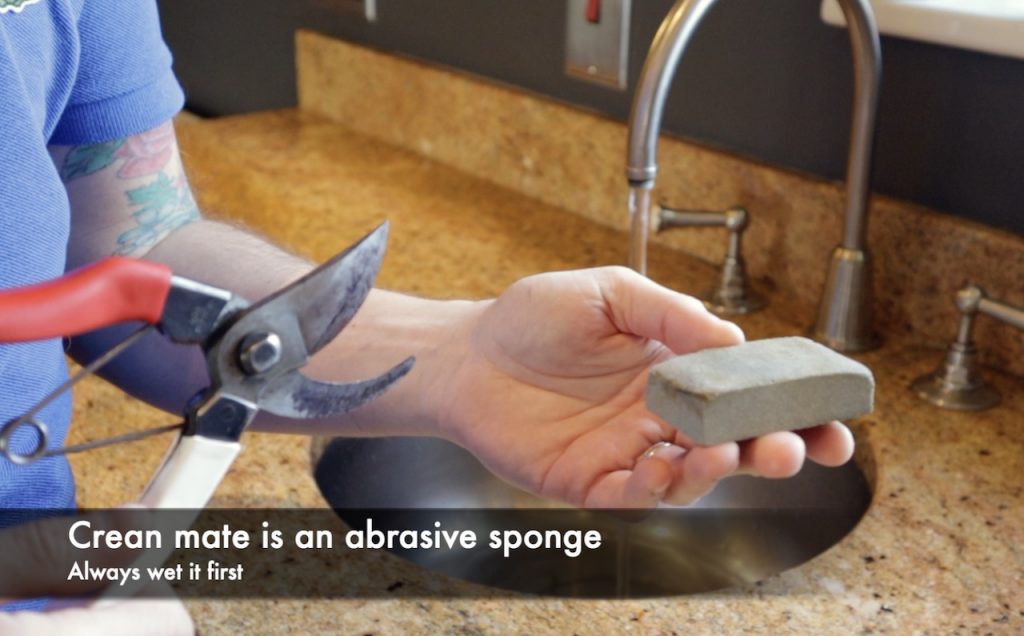
You can use wire wool or a pan scrub, which is a bit more brutal. Use clean water only to remove the sticky substances. I avoid detergent or soap as they can remove the grease from the secateur hinges, causing them to stick and behave erratically. In this case, less is more, so just stick with clean water.
Sharping Secateurs: Step-by-Step Guide
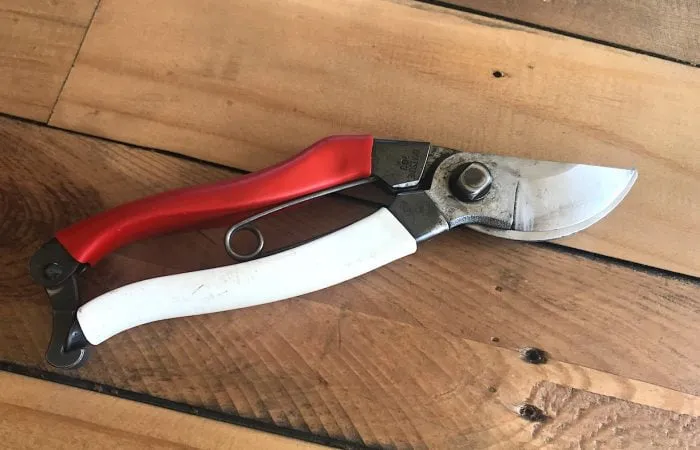
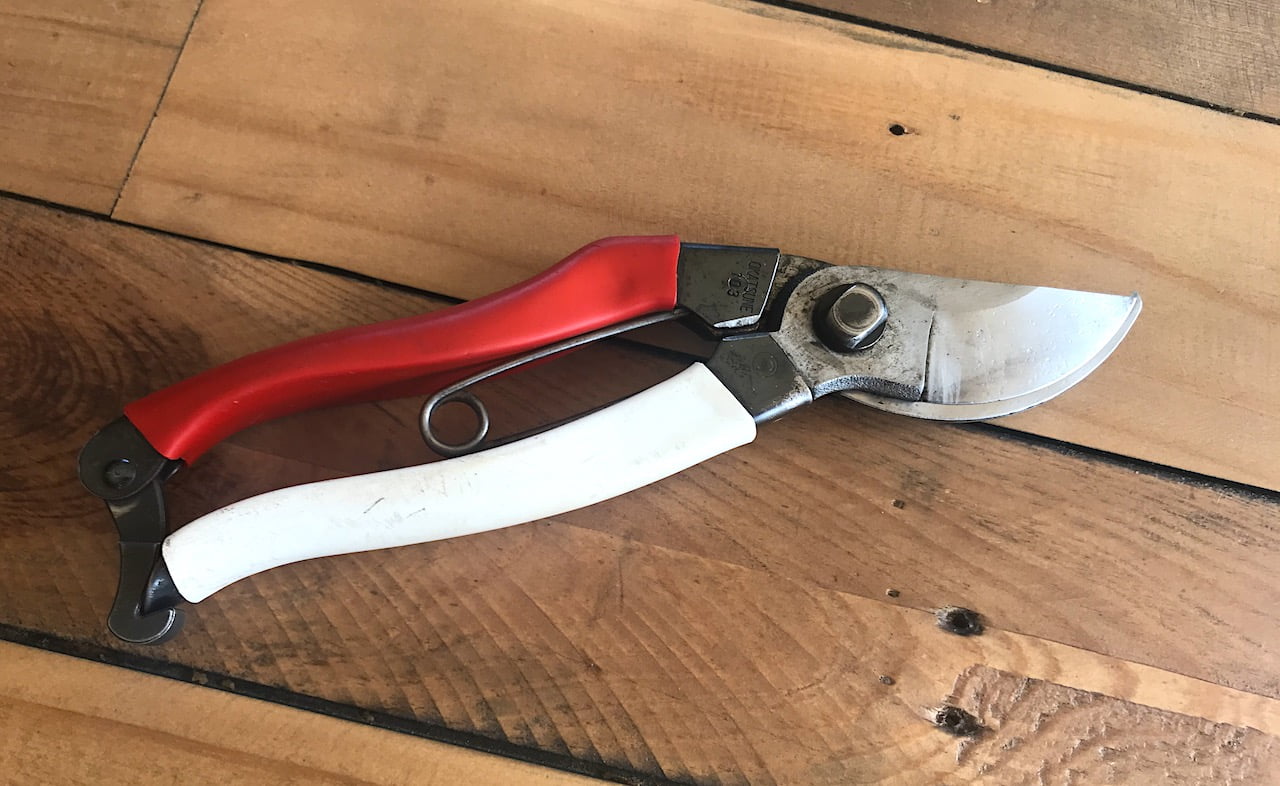
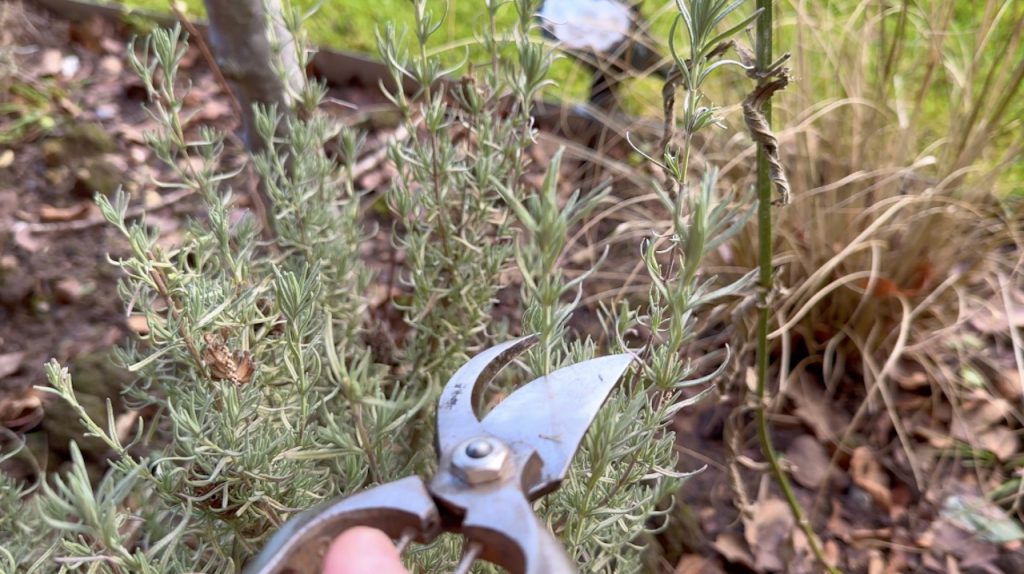
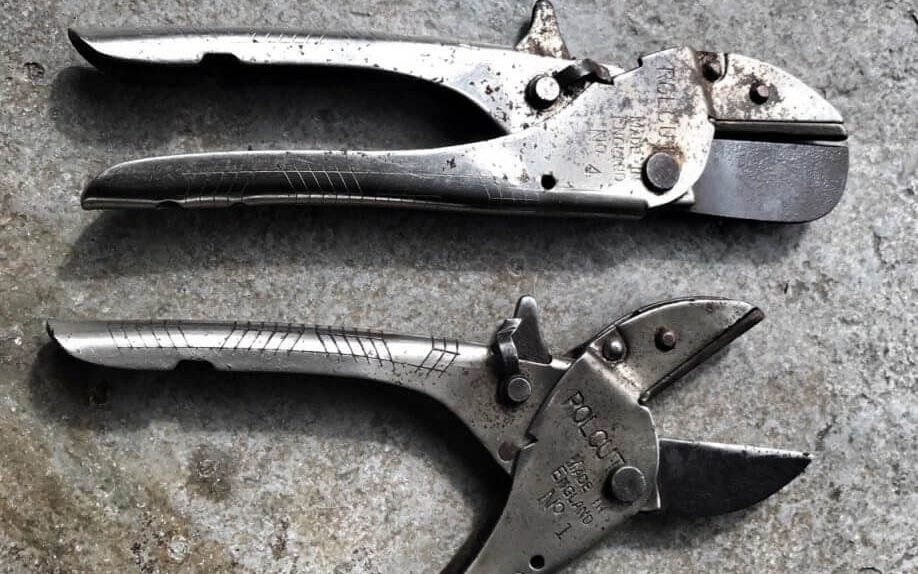
This guide is going to mainly focus on bypass secateurs, the kind where the blade passes over the other arm. This is because they are the most popular and adaptable of secateurs when compared to anvil pairs, where the blade meets and crushes into a plate.
Bypass secateurs nearly always have a bevelled blade making sharpening a bit tricky for the uninitiated. However, once you have the right tools and technique it’s relatively straight forward.
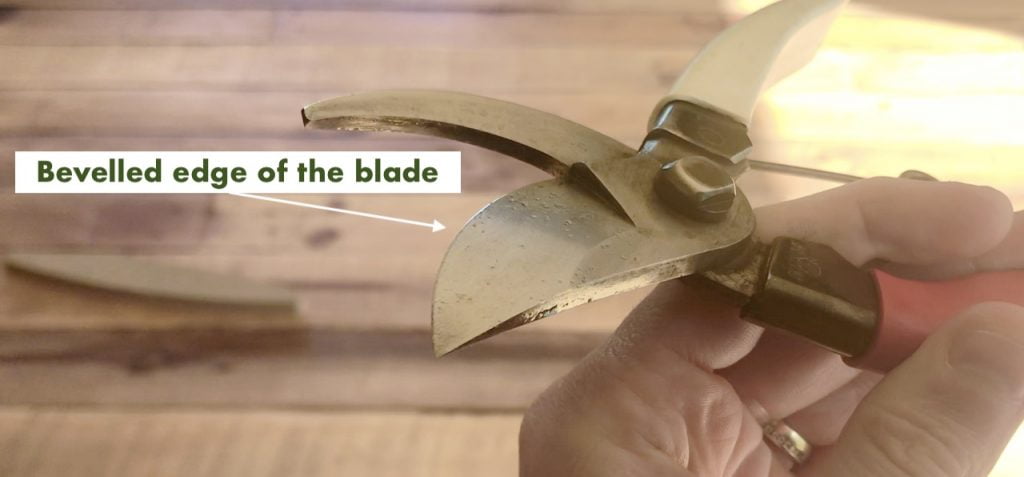
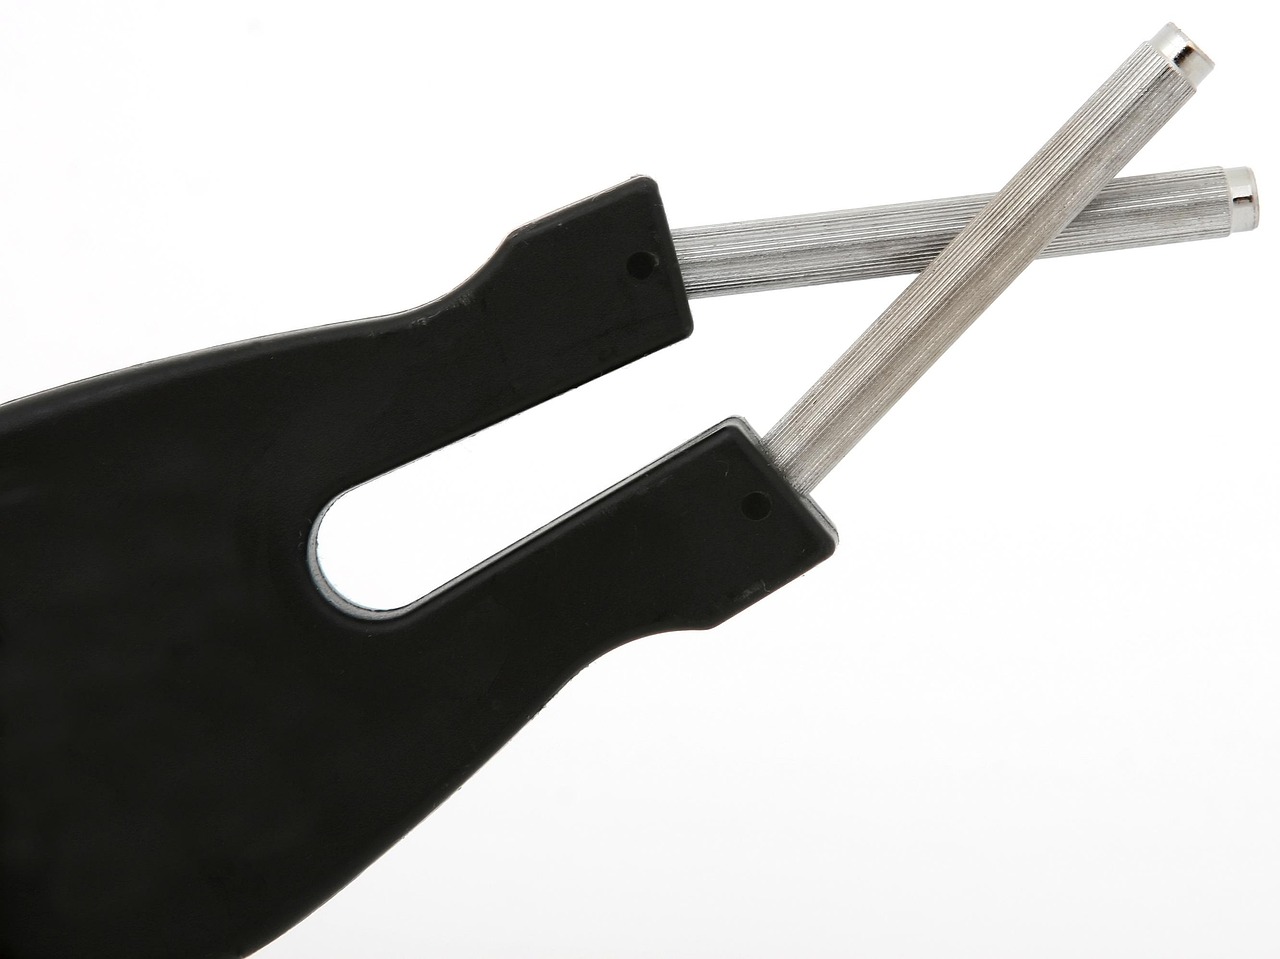
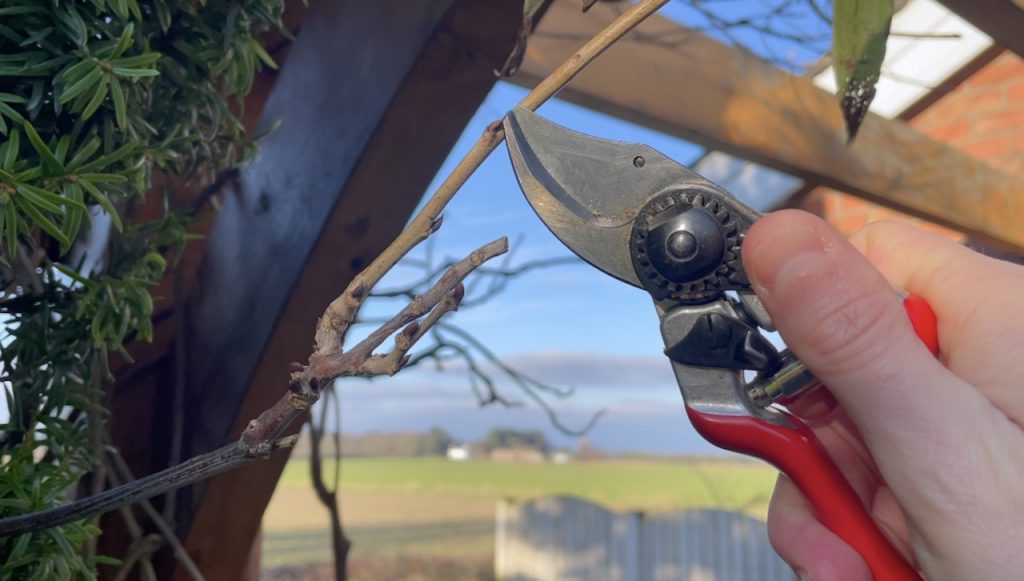
It’s the bevelled/slanted side that needs the sharpening. You can see this above.
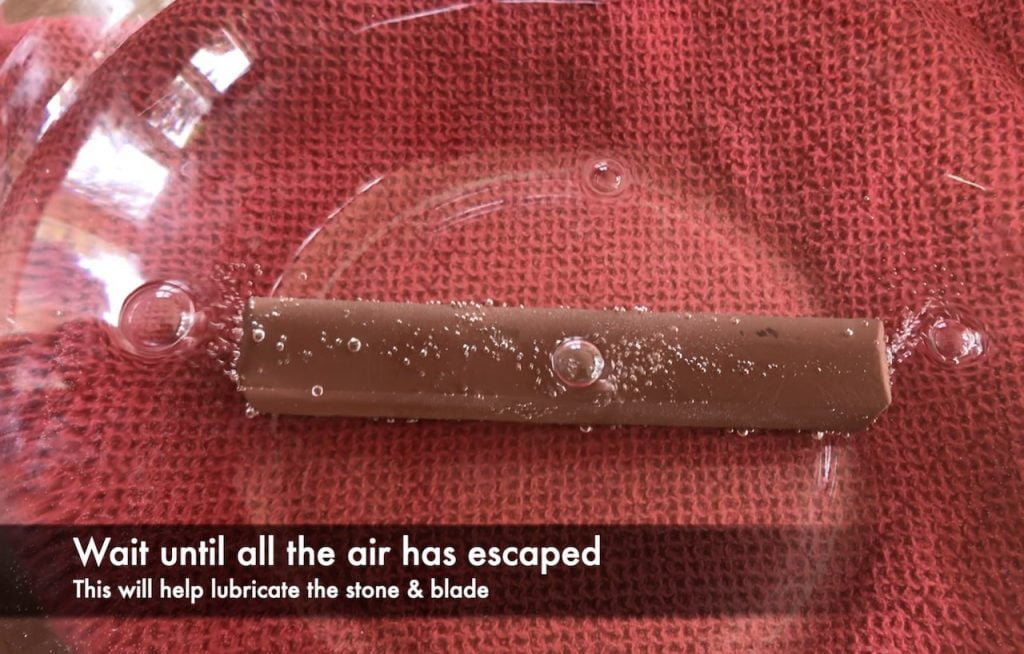
1. Always soak your whetstone or sharpening block before sharpening.
This helps lubricate it and makes the whole process far easier. Place it in a tub or bowl of water until the bubbles stop escaping.
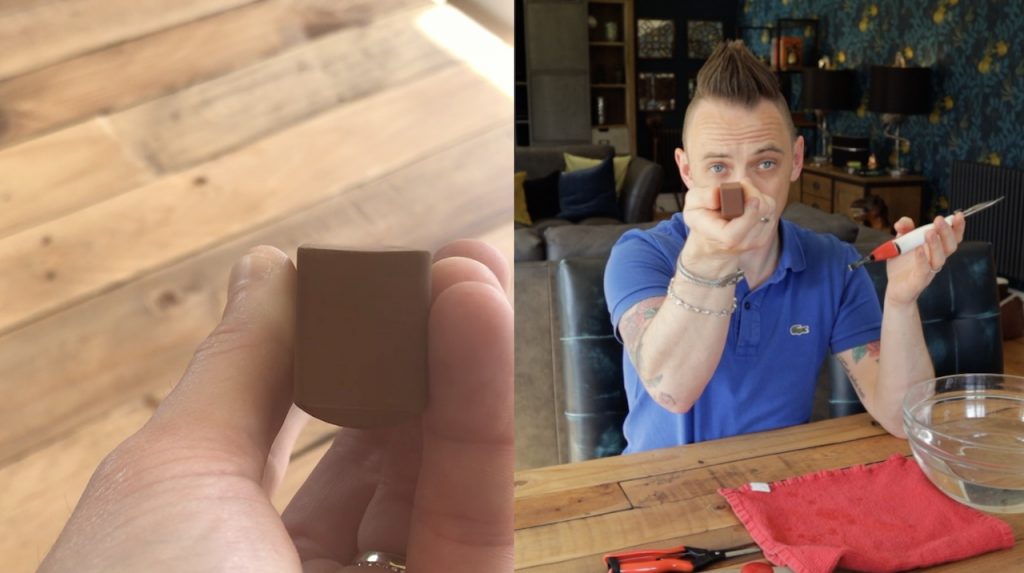
2. Hold your secateurs open in your non-dominant hand
The left hand is for right-handed people, and the right is for left-handed.
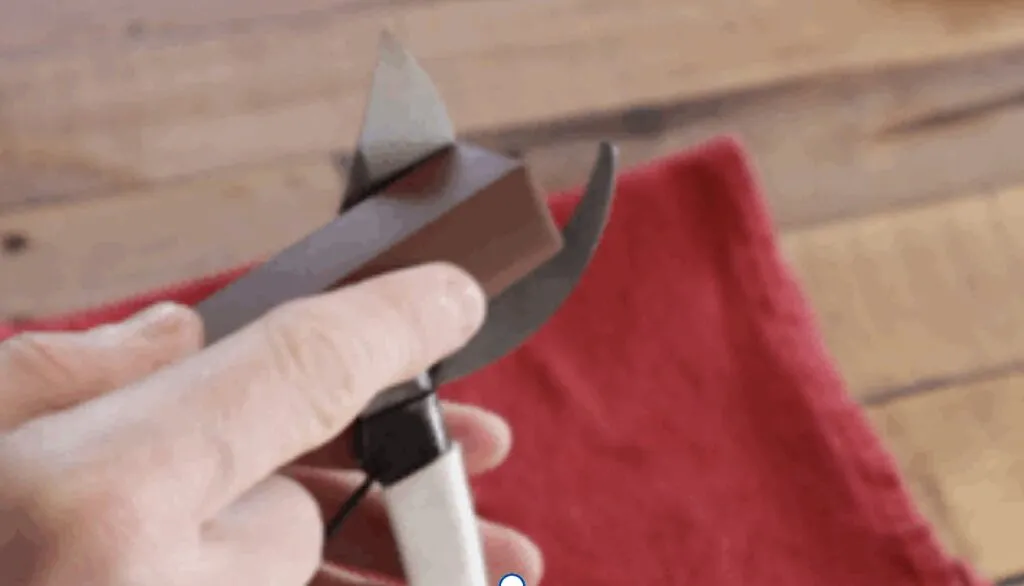
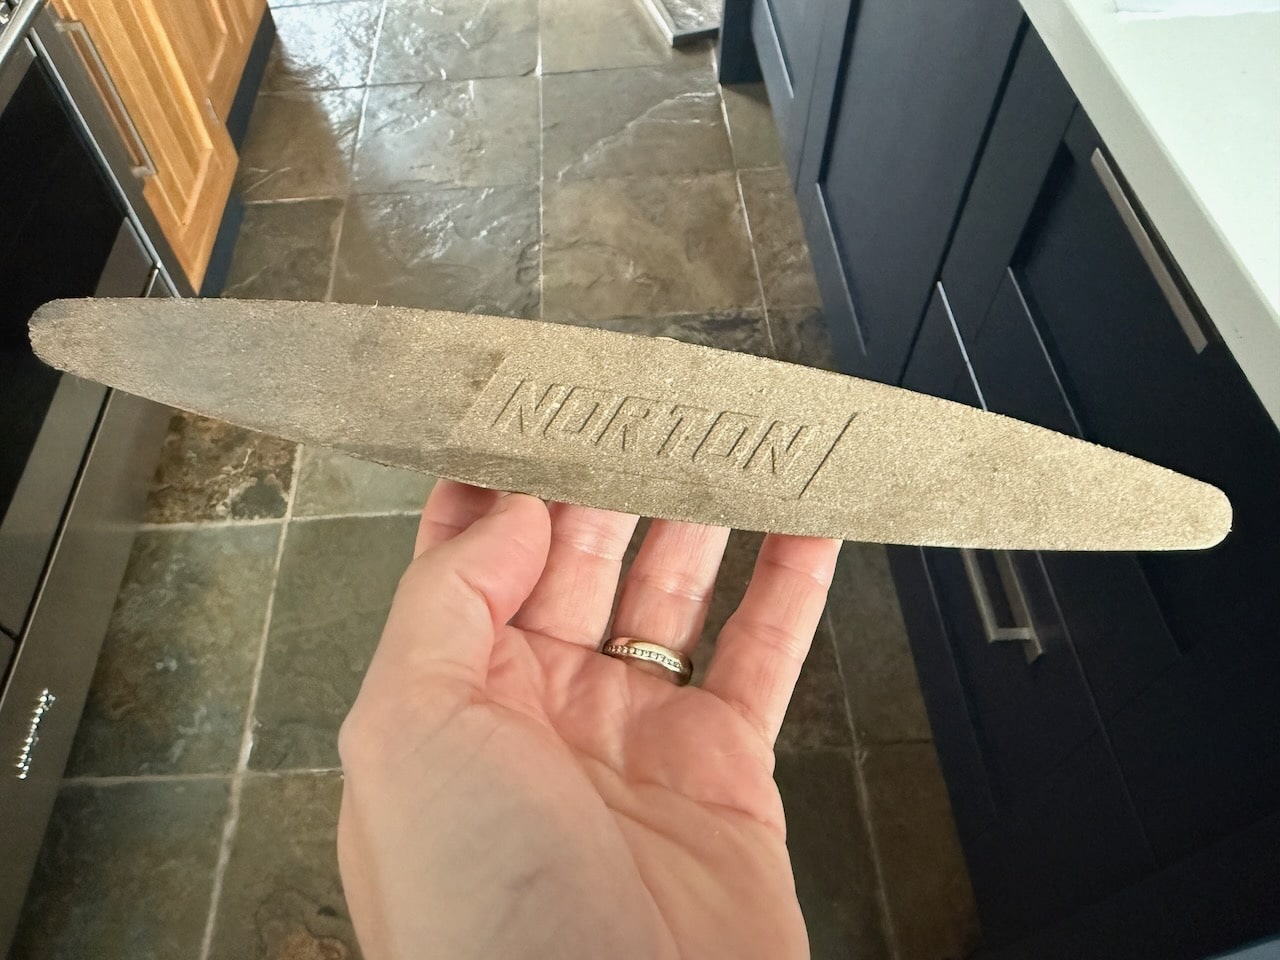
3. Find the curved side of the sharpening block
Take the sharpening block – the one I use in the guide is concave, so you want a slightly curved edge against the blade. If using other sharpeners, you will want to hold the sharpening block at a 30-45-degree angle against the blade. The concave ones seem to do this naturally due to their shape.
Try and keep this angle as consistent as possible so you get a uniform sharp edge.
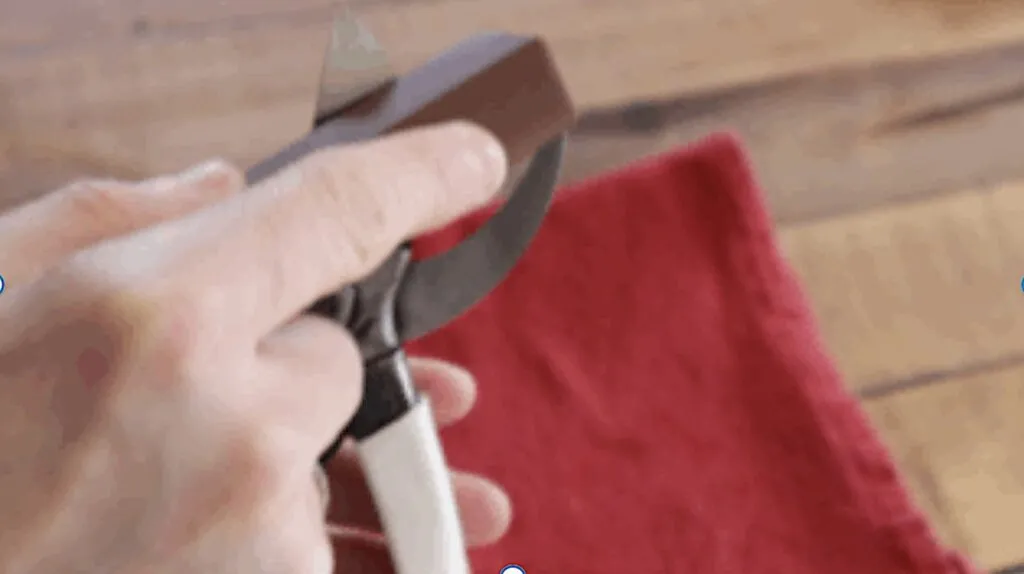
4. Pass the block from edge to edge away from the blade
In clean, smooth movements, pass the sharpening block along the blade from edge to edge, working outwards.
Ensure you use the entire length of the sharpening stone and blade to achieve a smooth, clean edge. Repeat this movement for 2 minutes on the bevelled side.
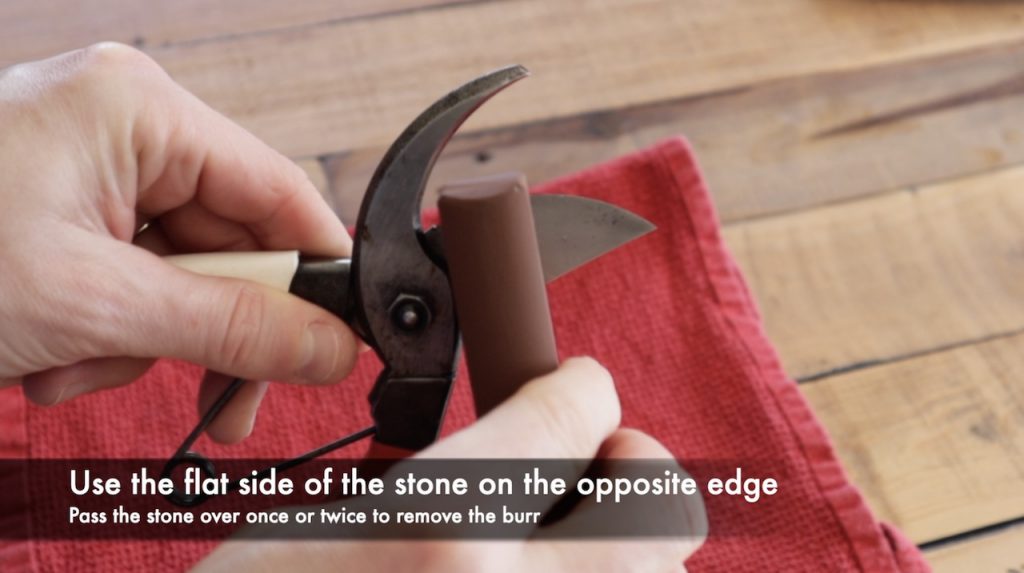
5. Remove the burr from the other side
Lastly, you now need to remove the ‘burr’ from the other side. These are abrasive fragments of metal, probably unnoticeable to the human eye, that can cause tears on plant matter. Using the flat edge of the sharpening stone, make two clean flush movements across the area to remove this.
NB: If you do more than this, you can dull the blade you’ve just sharpened!
What sharpening stone to use?
I prefer to use whetstones, not because you coincidentally wet them, but whet means to sharpen. ie to whet (sharpen) your appetite! There are various other tools and files available that you can utilise. However, I find these concave stones really intuitive once you have the technique and you get a better, sharper finish.
I also find you have a better understanding of what you’re doing rather than just grinding the blade away, hoping it’s sharper afterwards.
| Sharpening Tool | Best For | When to Use |
|---|---|---|
| Whetstones (1000 grit) | Regular maintenance sharpening, achieving finest edge | Home workshop sharpening, when you have time for a proper job |
| Diamond Sharpeners | Speed, convenience, sharpening on the go | Mid-season touch-ups, carry in tool belt for quick fixes |
| Multi-Sharp Guided Tools | Beginners, guaranteed correct angle | Learning to sharpen, ensuring consistent results every time |
| Sharpening Files | Removing major damage, chips, nicks | Serious blade damage requiring aggressive metal removal |
| Sharpening Steels | Quick honing between full sharpenings | Touch-ups during pruning season, realigning blade edge |
Sharp stone course ratings explained
The coarseness of the sharpening implement affects how fine the end result on the blade is. The lower the coarse, the rougher the impact.
For damaged tools, a rougher, coarser file is necessary to remove this damage. You then work your way up, refining the edge.
For most average-condition secateurs, I’d recommend using the 1000 coarse types.
- 200-500 coarse is very rough for filing down chips
- 1000 coarse is perfect for sharpening secateur blades
- 3000+ is for such fine work and expert sharpening of grafting knives or lethal sharp blades.
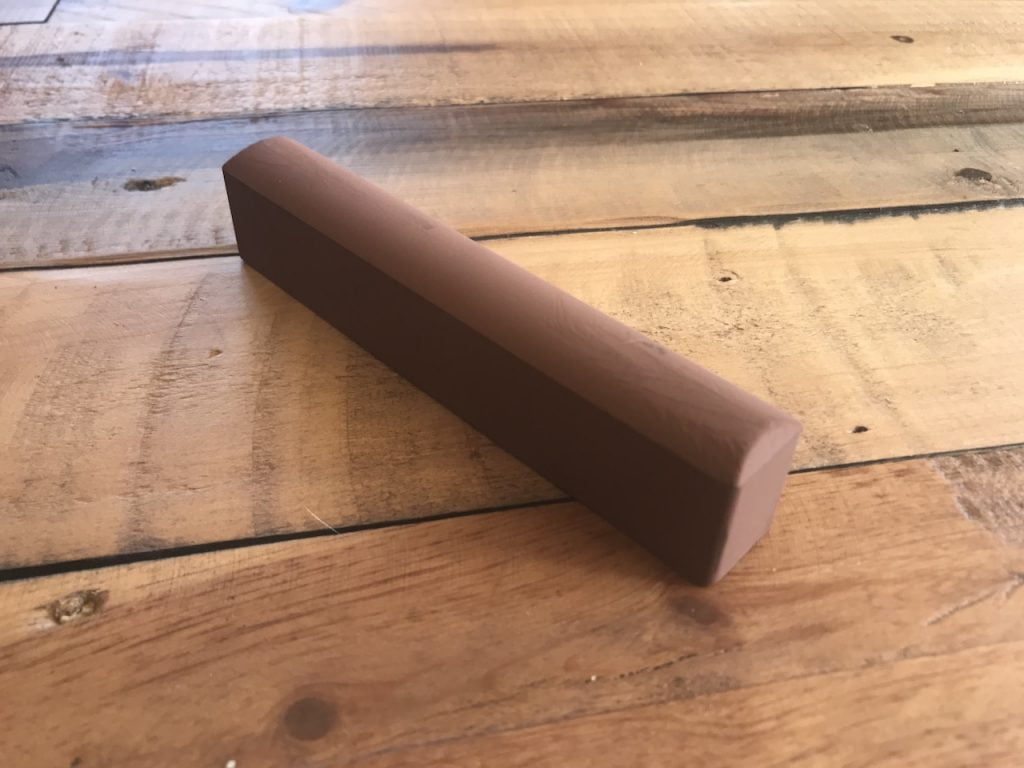
This 1000 coarse above is perfect for regular sharpening.
Choosing the Right Sharpening Tool for Your Secateurs
Whilst I prefer whetstones and that’s what I’ve demonstrated in the main guide, other sharpening tools work brilliantly for secateurs. Each has advantages depending on your situation.
Whetstones (My Preference)
Best for: Control, traditional sharpening, achieving the finest edge
Whetstones give you complete control over the sharpening angle and the amount of metal you remove. The 1000-grit I recommend is perfect for regular maintenance sharpening. The concave shape fits naturally against the curved blade of secateurs. You develop a feel for the process that makes it almost meditative.
The downside is whetstones need preparation (soaking in water), and they’re the slowest method. If you’re sharpening mid-pruning session in the garden, whetstones are less convenient than other options.
Diamond Sharpeners
Best for: Speed, convenience, sharpening in the garden
Diamond sharpeners are pocket-sized sticks or blocks embedded with industrial diamond particles. They cut metal quickly, require no water or oil, and can be carried in your pocket for sharpening on the go during large pruning jobs.
I keep a diamond sharpener in my tool belt when I’m doing a full day of hedge cutting or rose pruning. Quick touch-ups between sections keep the secateurs cutting perfectly without stopping to fetch whetstones and water. They’re more expensive than whetstones initially, but virtually indestructible.
Multi-Sharp Guided Sharpeners
Best for: Beginners, guaranteed correct angle, consistency
These clever devices guide you to sharpen at exactly the right angle by clamping onto the blade. You can’t go wrong with the angle because the tool enforces it. Silicon carbide cutting surfaces sharpen quickly.
The limitation is that they’re fiddly to set up, and you need the right size screwdriver to tighten the clamp properly. Once you know what you’re doing with angles, whetstones or diamond sharpeners are faster. But for learning, these are brilliant. There are also multi-tools like the one below that don’t need as much configuration but don’t sharpen as precisely.
Sharpening Files
Best for: Removing major damage, aggressive material removal
Metal files cut very aggressively and are the tool for removing serious nicks, chips, or reshaping badly damaged blades. They’re too brutal for regular maintenance sharpening, where you just want to touch up an edge.
I use files maybe twice a year when secateurs have been dropped, used to cut wire by mistake, or otherwise seriously damaged. Then I follow up with a whetstone or diamond sharpener to refine the edge files left behind.
Sharpening Steels
Best for: Quick honing between full sharpenings
Sharpening steels (like those used by chefs) realign the blade edge rather than removing material. They’re brilliant for quick touch-ups but can’t restore a truly blunt blade. Think of them as maintenance between proper sharpenings rather than a sharpening method themselves.
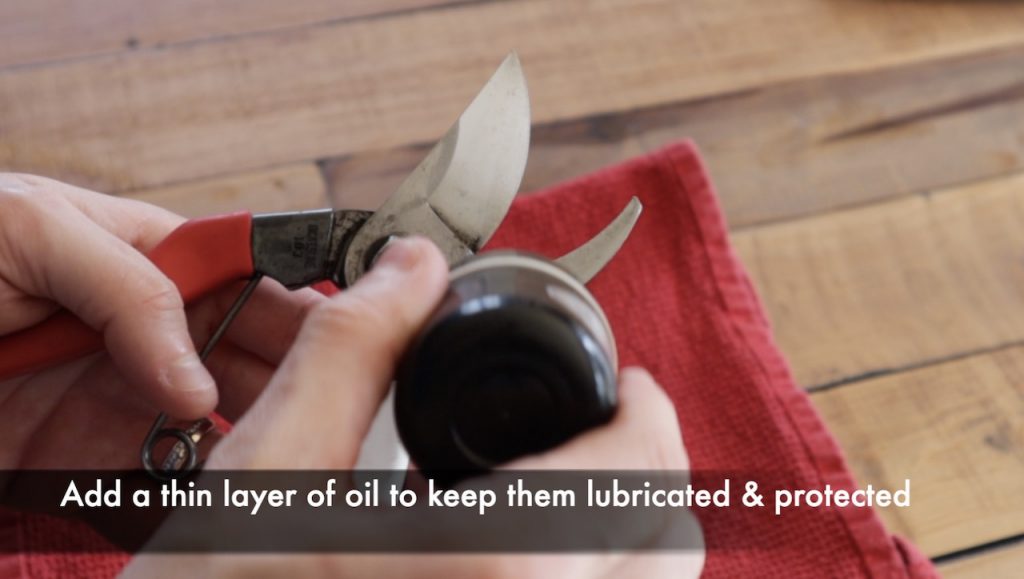
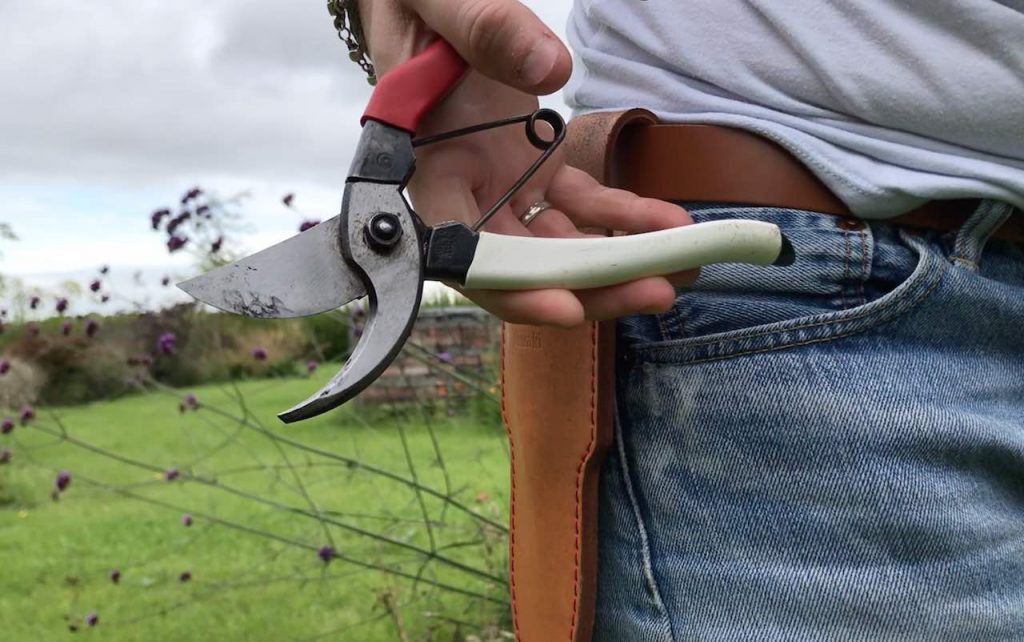
Oiling secateurs
After sharpening the secateurs, I always oil the blades with camellia oil. This helps keep the blades lubricated for smooth cuts and protects them from sag and rust. I find oiling them to be a really good protective layer, making cleaning and future sharpening really easy.
I have an oil dispenser that allows a small amount of oil to be rubbed into the blades. If you don’t have one of these, use a small drop of lubricant, WD40, or even clean cooking oil, and wipe it on sparingly with a clean cloth. You don’t want them dripping!
How often should I sharpen my secateurs?
This all depends on how much you use them. I use mine daily in my gardening practice. So, I sharpen mine weekly. If I’ve just hard pruned a shrub, I will sharpen them straight after finishing this intensive task.
If you only use your secateurs a few times a month, then a once-a-month sharpening may be sufficient. Use your experience and common sense. In my experience, it’s better to have the sharpening done more often than less frequently.
Common Secateurs Sharpening Questions Answered
How do you sharpen secateurs?
Clean the secateurs thoroughly, then run a wetted sharpening stone along the bevelled (angled) edge of the blade at 20-30 degrees for about two minutes. Use smooth strokes working away from the blade edge. Never sharpen the flat back of the blade. Finish by removing the metal burr from the flat side with two light passes. The entire process takes five minutes once you’ve got the technique down.
How often should you sharpen secateurs?
Sharpen secateurs based on usage, not a fixed schedule. If you use them daily for professional work, sharpen them on a weekly basis. Weekend gardeners using them a few times monthly need sharpening every 3-4 weeks. Always sharpen after heavy pruning sessions, especially when tackling thick, woody stems. The test is simple: if they’re crushing stems or leaving ragged cuts rather than slicing cleanly, they’re overdue for sharpening.
Can you sharpen secateurs with a file?
Yes, a metal file works for sharpening secateurs, though it’s more aggressive than a whetstone. Use long sweeping strokes following the bevelled edge angle. Files are brilliant for removing serious nicks and damage, but can remove too much metal if you’re not careful. For regular maintenance, sharpening with whetstones or diamond sharpeners gives better control and a finer edge.
Do you sharpen both sides of secateurs?
No, only sharpen the bevelled (angled) side of the cutting blade. Never sharpen the flat back except to remove the burr. Sharpening the flat side creates a gap between the blade and anvil, which means your secateurs will tear and crush stems rather than cutting cleanly. This is the single biggest mistake people mak,e and it ruins secateurs permanently.

How do you know if secateurs are sharp enough?
Test sharpness by cutting through a sheet of paper held vertically. Sharp secateurs should slice cleanly through with minimal effort. If the paper folds, crushes, or tears rather than cutting, your secateurs need more sharpening. Never test sharpness by running your finger along the blade; that’s how you get stitches. In the garden, sharp secateurs cut woody stems in one clean motion with no crushing or splitting visible on the cut surface.
Should I oil secateurs after sharpening?
Always oil secateurs after sharpening to protect the freshly exposed metal from rust and to lubricate the moving parts. Use camellia oil, general-purpose machine oil, or even clean cooking oil. Apply a few drops to the blade and pivot point. Work it in by opening and closing the secateurs several times, then wipe off the excess. This protective layer makes future cleaning easier and prevents corrosion.
When should I replace secateur blades instead of sharpening?
Replace blades when they’re deeply nicked, bent, or cracked, when the blade has been sharpened so many times that the flat back is noticeably thinner, or when the gap between the cutting blade and the anvil is so wide that stems slip between them. If sharpening doesn’t restore clean cutting action, the blade is done.
Most quality secateurs, like Felco, have replacement blades available; cheap supermarket secateurs are usually cheaper to replace entirely than to buy new blades.

Bypass vs Anvil Secateurs: Sharpening Differences
This guide focuses on bypass secateurs because they’re what ninety percent of gardeners use, but anvil secateurs have different sharpening requirements worth mentioning.
Bypass Secateurs (Most Common)
The cutting blade passes by the anvil blade in a scissor action. The cutting blade has a bevelled edge that does all the work. You only sharpen this bevelled edge, never the flat back. The anvil blade (lower blade) doesn’t need sharpening; it’s basically just a support platform.
Bypass secateurs give the cleanest cuts and are best for living plant material where you want neat wounds that heal quickly.
Anvil Secateurs (Less Common)
The cutting blade comes straight down onto a flat anvil, crushing the stem against it. Think guillotine rather than scissors. The cutting blade has a straight edge, often bevelled on both sides.
Sharpening anvil secateurs means maintaining that straight cutting edge. Use the same whetstone technique but work on both sides if the blade is double-bevelled. The anvil itself (the flat plate) never needs sharpening, but it can get dented from use, at which point you need a replacement anvil.
Anvil secateurs are better for dead wood where clean cuts matter less. I don’t recommend them for general pruning because they crush stems rather than slicing them, which damages living tissue.
Troubleshooting Secateurs Problems
1) Secateurs Still Won’t Cut Cleanly After Sharpening
Cause: The central pivot has loosened creating a gap between blade and anvil, or you’ve accidentally sharpened the flat back of the blade over time creating that gap, or there’s sap buildup between the blades preventing them closing properly.
Solution: Tighten the central pivot nut first. If that doesn’t fix it, dismantle and check if there’s crud preventing the blades meeting. If the blade has been over-sharpened on the flat side and there’s now a permanent gap, you need a replacement blade or new secateurs.
2) The Blade Has Chips or Nicks
Cause: Cutting wire, hitting stones whilst pruning, or dropping the secateurs onto hard surfaces damages blade edges.
Solution: Use a coarse file (200-500 grit) to reshape the blade edge, removing the damaged section. This is aggressive work that removes significant metal. Once you’ve eliminated the nick, switch to your regular whetstone (1000 grit) to refine the edge. Deep damage sometimes can’t be fully removed without making the blade too thin; at that point you need a replacement blade.
3) Secateurs Are Stiff to Open and Close
Cause: The pivot point needs lubrication, there’s rust in the mechanism, or you’ve overtightened the central bolt.
Solution: Apply oil to the pivot and spring, working it in by opening and closing repeatedly. If still stiff, slightly loosen the central bolt by a quarter turn. If rust is the issue, you may need to dismantle, clean thoroughly, remove rust with wire wool, then reassemble with proper lubrication.
4) The Spring Keeps Falling Out
Cause: Worn spring or the central bolt isn’t tight enough to hold everything together properly.
Solution: Check if the spring is stretched or damaged. Quality brands sell replacement springs. Ensure the central bolt is properly tightened. If the spring keeps falling out despite correct assembly, the secateur body itself may be worn where the spring seats, in which case you need new secateurs.
5) Blades Crossing Over Rather Than Meeting
Cause: The pivot bolt is loose or the blade is bent.
Solution: Tighten the pivot bolt. If blades still cross, look down the blade edge to check if it’s bent. Minor bends can sometimes be carefully straightened with pliers, but bent blades usually mean it’s replacement time.
Problem: Secateurs Rust Between Uses
Cause: Storing them damp, not oiling after use, or keeping them in a wet shed.
Solution: Always wipe secateurs dry after use, oil them regularly, and store in a dry place. If they’ve already rusted, use wire wool and WD-40 to remove surface rust, then establish a routine of oiling after each use. For severe rust, you may need to dismantle and clean thoroughly.
Critical Safety Rules
Never run your finger along the blade edge to test sharpness. Use the paper test instead. I’ve seen people slice themselves to the bone, testing sharpness. Freshly sharpened blades are razor sharp and can cut you before you’ve had a chance to process what happened.
Always sharpen, moving away from your body. If the sharpening tool or blade slips, it should move away from you, not towards you. Position yourself so that any slip sends things away from your legs, stomach, and other hand.
Secure the secateurs properly. Whether you’re holding them or using a vice, they need to be stable. Wobbly secateurs mean poor sharpening and potential injury when the blade suddenly moves whilst you’re pressing down with the sharpening stone.
Work somewhere well-lit. You need to see what you’re doing. Sharpening in dim light means you can’t judge angles or see if you’re working on the correct part of the blade.
Keep children and pets away whilst sharpening. A dog charging through or a child grabbing your arm at the wrong moment equals a hospital trip.

Clean up metal filings. The burr removed from blades is made of sharp metal particles. Don’t leave these on your workbench or floor where they can embed in skin. Wipe up thoroughly with a damp cloth.
Pruning Guides
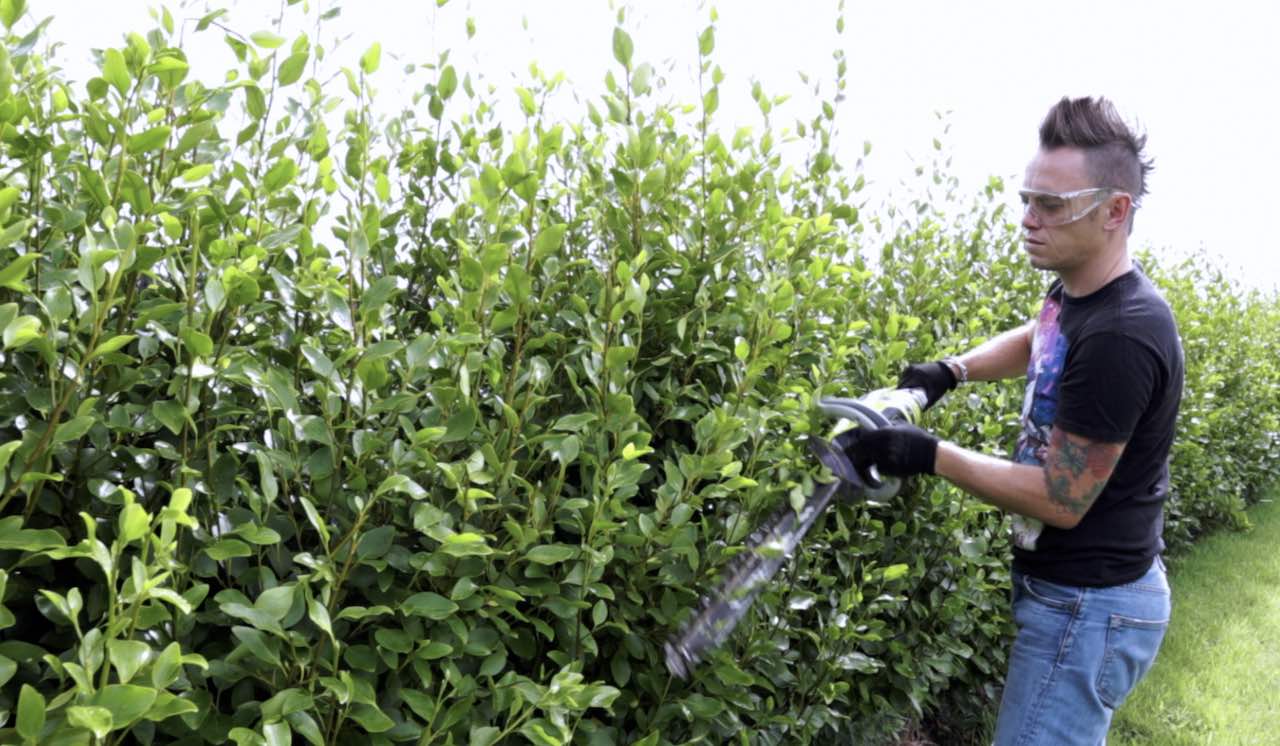
- How to trim hedges
- How to prune Cornus/dogwood shrubs
- How to prune a Hydrangea
- Rose Pruning Guide
- Fruit Tree Pruning
- Winter Pruning
- Pruning Herbaceous Plants
- Pruning Ornamental Grasses
Summary
It may seem pedantic of me, but keeping your secateurs clean and sharp really is in your garden’s best interests. A solid, sharp pair will cut cleanly through all sorts of plant matter, saving stress on your wrists and your plants.
Taking a few minutes periodically to sharpen them is actually a really relaxing task to do. So hopefully, now you know how you’ll be keeping your snips super sharp to reduce garden drama when pruning.
If you have questions or comments about sharpening secateurs, please let me know below. You can Tweet, Facebook or Instagram me. You can also follow me on YouTube, where I’ve got plenty of garden guide vlogs!


Lee Burkhill
Lee Burkhill, known as the Garden Ninja, is an award-winning garden designer and horticulturist with over 30 years of gardening experience and 15 years as a professional garden designer. A qualified RHS (Royal Horticultural Society) professional, Lee specialises in sustainable garden design and practical horticultural advice. He designs and presents on BBC1’s Garden Rescue and in leading gardening publications. Lee combines three decades of hands-on gardening knowledge with professional design qualifications to help gardeners create beautiful, functional outdoor spaces.
View all posts by Lee Burkhill


Categories
2 thoughts on “How to Sharpen Secateurs & Maintain Garden Snips”
Leave a Reply
You must be logged in to post a comment.
Other posts
-

Start here: to begin your gardening journey! Read more
-
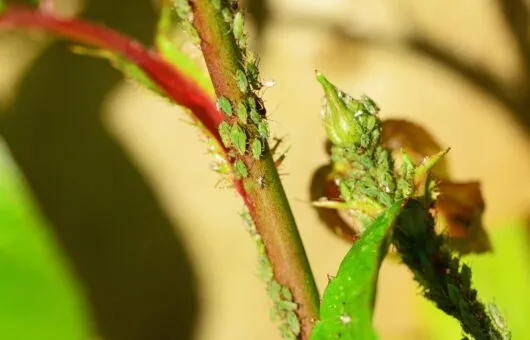
How to Naturally Remove Greenfly & Aphids from Your Garden Read more
-
How to Plant Bare Root Roses Read more
-

Best Cordless Hedge Trimmers UK 2026: A Garden Designer’s Honest Guide Read more
-
Can I Prune Trees in the Winter? Read more
-
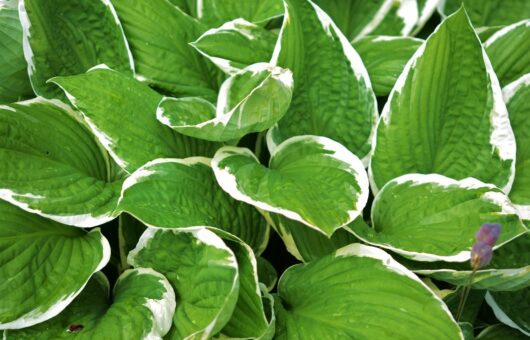
How to grow & care for Hostas Read more


Where can I buy sharpening tools for the sequester sharpening?
You can buy the Niwaki sharpening stone here. https://www.amazon.co.uk/dp/B07VHD5D5C/ref=cm_sw_r_as_gl_api_gl_i_83SNR010X0XQE6QBCQ03?linkCode=ml2&tag=gardenninja-21 (This is an affiliate link so if you do choose to buy receive a small commission that helps keep this blog free to use!)