How to prune roses: the beginner’s guide to easy pruning
Lee Burkhill: Award Winning Designer & BBC 1's Garden Rescue Presenters Official Blog
Intermediate level
Knowing how to prune roses can be a thorny subject for beginner gardeners. Have you ended up owning some really awkward gnarled roses? Maybe you have moved house and found some thorny atrocities in your borders. Not sure where to start to get them back into shape? Are you thinking you may just dig them up? Well, stop right there! This guide will show you how you can easily renovate your roses, even if you've never pruned a plant before.
If you’re panicking at pruning or looking after Roses, don’t worry, even when I first started gardening, I avoided Roses for so long as I didn’t have the confidence to look after them. But after many years and being trained by some of the best in the business, I now love planting, designing with, and pruning Roses.
This guide will show how easy it is to prune even the most unruly roses with my viral video guide and demonstrative photos (click here to jump straight to instructions), whipping them back into shape in a couple of seasons. I will show you how to prune roses without any drama or even existing skills. All you’re going to need is some sharp secateurs and gloves, never forget the gloves!
Quick Answer
Prune most roses in the UK in February, cutting back to an outward-facing bud at a 45-degree angle. Remove all dead, damaged and diseased stems first, then prune crossing stems and reduce last season’s growth by one third. Always mulch and feed afterwards. Climbing roses are pruned in autumn after flowering; ramblers immediately after their summer flush.
This page contains affiliate links for products I use and love. If you take action (i.e. subscribe, make a purchase) after clicking a link, I may earn some gardening commission, which helps me keep the Garden Ninja Blog free for all.
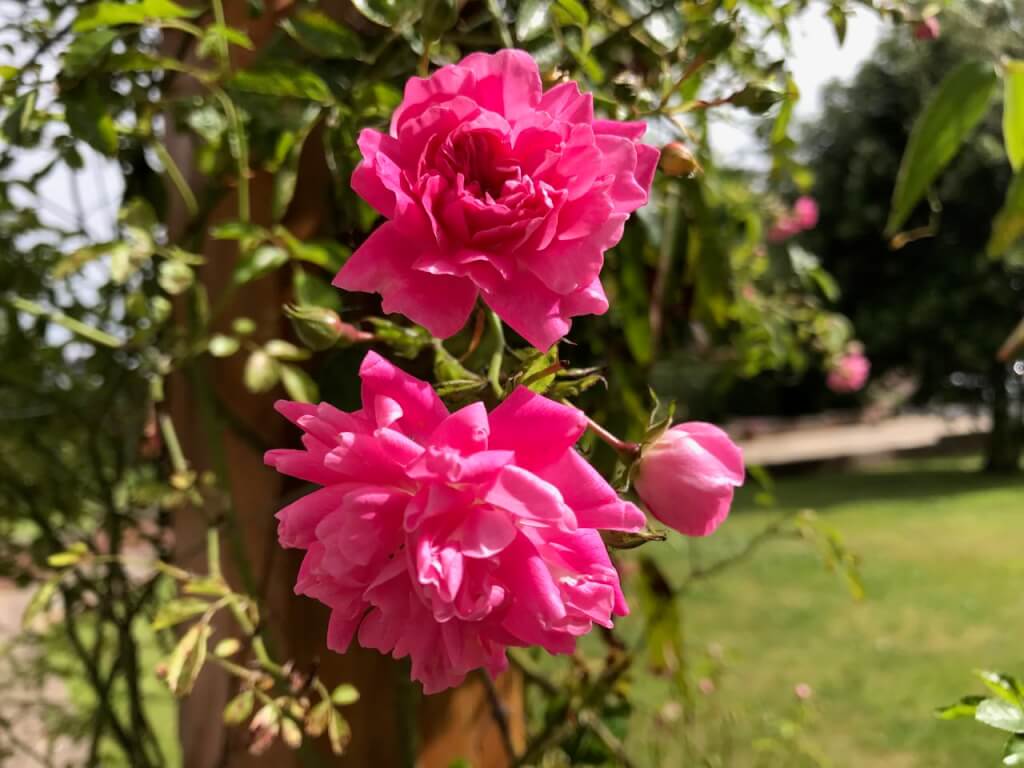
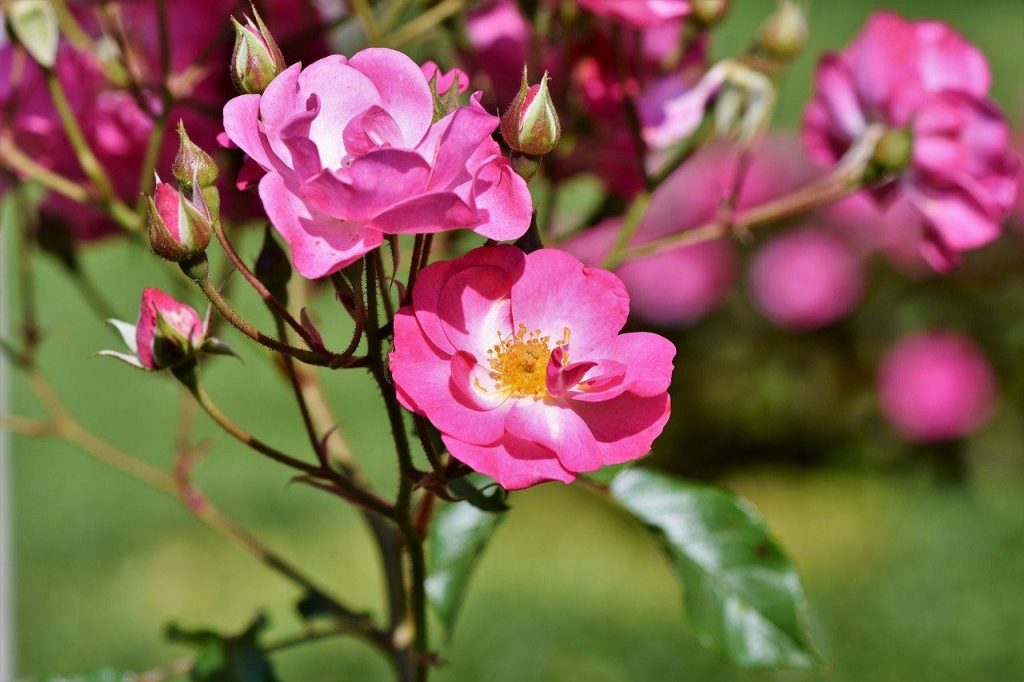
How to prune roses
For beginner gardeners, roses can be daunting and intimidating to keep. Roses look beautiful, but their thorns and the need for high levels of care and support can deter new gardeners from growing them.
When I first started gardening, I, too, had these feelings. I didn’t know how to manage them or what to do with them after they had flowered, leading to the couple I had turned into nasty, tangled messes! It’s so easy to opt for a shrub or herbaceous perennial instead.
But I want you to know that pruning roses is relatively easy in winter when you know how and can help keep your garden looking its best. After designing hundreds of gardens and spending fifteen years working as a professional garden designer — including regularly appearing on BBC1’s Garden Rescue — I can tell you with complete confidence that the fear around rose pruning is almost always worse than the task itself. Roses are remarkably resilient and forgiving plants, and a good, confident prune in February will be rewarded tenfold come summer. The main steps when pruning roses are:
A) Snip Away the 3 D’s
Start by removing any dead, damaged, or diseased wood. Cut back to an outward-facing bud to encourage new growth in the right direction and give your plant a lovely, open shape.
B) Cut out the Rubbing Stems
If stems are growing too close together, snip them back to prevent rubbing or competition for space. Plants need room to breathe and show off their best selves!
C) Reinvigorate from the Bottom Up
Older stems that have lost their vigour? Remove them to make way for fresh new growth lower down. It’s like a rejuvenating haircut for your plant!
D) Tidy the Tiddlers & Stragglers
Get rid of any stubby snags — those short, dead stems with no growth — and thin, twiggy branches that won’t give you much in terms of flowers or foliage. Focus the plant’s energy where it matters.
When to prune roses in the UK?
The time to prune roses in the UK and Europe is in winter, when the leaves have fallen, and the bare skeleton of the rose bush, shrub, or climber is visible. This is when the rose is dormant.
February is the best month to prune all roses, just before spring. The exception is climbing and rambling roses, which I prune in late autumn instead, once they have finished flowering.
One of the best natural cues for timing your pruning is to watch your forsythia. When those bright yellow flowers start appearing on the bare forsythia stems in late winter, it’s a reliable signal that your roses are just waking up and will respond brilliantly to a good prune. Nature is a far better gardener than any calendar.
Can I prune roses in frost?
Whilst you can prune roses during frosts, it’s advisable to wait until the frosts finish to ensure you don’t end up harming your rose with brittle, snagged cuts. One way to check if the frost is too harsh for rose pruning is to flex one of the tips of the rose; if they break or shatter, then it’s too cold to prune your rose.
The same rule applies to any hard frost that is forecast in the coming days after pruning — the fresh open cuts are vulnerable, and a severe frost following immediately after pruning can cause dieback into the stem.
Should I prune my roses each year?
Yes, yearly pruning of roses helps maintain their health and vigour, resulting in more flowers. I prune all of my roses once a year and then give them a good plant feed in spring, as they are hungry plants. While you may feel that pruning them back each year slows their growth, it is in their best interests, and most commercial roses are bred on smaller rootstocks to control vegetative, thorny growth and improve flowering potential.
When to prune which type of rose?
Pruning roses encourages a more manageable and floriferous display — lots of gorgeous, well-spaced flowers — on our roses. Below is a table of the main types of roses and the best time of year to prune them.
Rose Type
Description
When to Prune
Hybrid Tea Roses
Large, elegant blooms on long stems. Known for their classic rose shape.
Prune in winter (February). Hard prune to 4–6 buds from base for best blooms.
Floribunda Roses
Clusters of flowers with continuous blooms throughout the season.
Prune in winter (February). Slightly lighter than Hybrid Teas.
Grandiflora Roses
Tall bushes with large flowers in clusters; a hybrid of Hybrid Tea and Floribunda.
Fragrant, repeat-flowering shrubs combining old rose charm with modern reliability.
Prune in winter (January to February). More forgiving than Hybrid Teas; see dedicated section below.
Climbing Roses
Long canes trained on trellises, walls, or arches.
Prune in autumn after flowering. Tie in new canes horizontally to encourage blooms.
Rambling Roses
Vigorous, arching roses flowering on old wood in a single summer flush.
Prune immediately after flowering in late summer. Never prune in winter — you’ll remove next year’s flowers.
Shrub Roses
Hardy, disease-resistant bushes with informal, sprawling growth.
Light prune in winter; remove roughly one third of growth and any dead wood.
Old Garden Roses
Fragrant, historic varieties that existed before 1867. Often once-flowering.
Light tidy after summer flowering, then main prune in winter.
Rugosa Roses
Hardy, rugged roses with wrinkled leaves and fragrant flowers.
Prune sparingly in winter, only if damaged or badly out of shape.
Miniature Roses
Small, compact roses with tiny blooms.
Prune in winter. Treat like a Hybrid Tea but on a smaller scale.
Groundcover Roses
Low-growing, spreading roses that form a carpet of flowers.
Prune sparingly after flowering in summer.
Tree Roses (Standards)
Roses grafted onto a tall stem to create a tree-like form.
Prune the head in winter as you would a Hybrid Tea or Floribunda.
Pruning David Austin and English roses
David Austin English roses are by far the most popular rose type in UK gardens right now, and for good reason. They combine the lush, many-petalled flower form of old garden roses with the repeat-flowering reliability of modern varieties, and they tend to be considerably more disease-resistant than older Hybrid Teas. I specify them regularly on Garden Rescue and in my own garden design projects, and the question I get asked most often is whether they need to be pruned differently from other roses.
The answer is yes, but only slightly. English roses are fundamentally shrub roses, so the same principles apply. Remove dead, damaged and diseased wood first, open up the centre, and reduce by roughly a third. What makes them different is how they behave at different stages of their life, and getting this right makes a genuine difference to how quickly they establish and how well they flower.
In the first year after planting, the priority is roots rather than flowers. The plant is putting its energy into establishing underground, so a light prune is all that is needed. Simply reduce stems to around 30 to 45cm from the ground, remove any remaining foliage, and clear up all fallen leaves from around the base where disease spores can overwinter.
It feels almost brutal to cut a new rose back this hard, but sacrificing the first season’s blooms pays dividends in the long run. You are building a plant that will outperform and outlast one that was allowed to rush into flowering before its root system could properly support it.
In the second and third years, you can begin to prune more firmly as the plant builds its mature shape, reducing by up to half and removing any older stems that are beginning to lose their vigour. By year three or four, a mature English rose can be treated much like any established shrub rose, though varieties with a naturally arching habit — such as Gertrude Jekyll or Lady of Shalott — benefit from a lighter hand than more upright growers.
🌿 Garden Ninja Tip — English roses and the open goblet: Unlike Hybrid Teas, many English rose varieties have a naturally arching, vase-like habit that lends itself to a slightly less severe prune. Rather than cutting back to four to six buds, aim for an open, airy framework of well-spaced stems at a height of around 45 to 60cm in years two and three. Let the plant’s own character guide you rather than imposing a rigid shape onto it.
One thing that often catches people out with English roses is the enormous variation in growth habit across the range. A compact variety like Olivia Rose Austin grows very differently from a vigorous arching grower like Roald Dahl, and what works for one may not suit the other. If you have a specific David Austin variety, it is always worth checking their website for cultivar-specific notes, but the general framework above will serve you well for the vast majority.
If you don’t prune your roses, they can quickly get out of shape and only flower at the very ends of the growth, leading to tall, straggly, awkward-looking roses. Pruning also prevents them from becoming damaged in the winter by wind rock or wounds appearing from crossing or rubbing branches. Pruning roses keeps your plants healthy, happy, and full of buds, which means flowers! Creating good airflow through the centre of the plant also dramatically reduces the risk of fungal diseases such as black spot and mildew — something I see causing real problems for gardeners who never prune their roses properly.
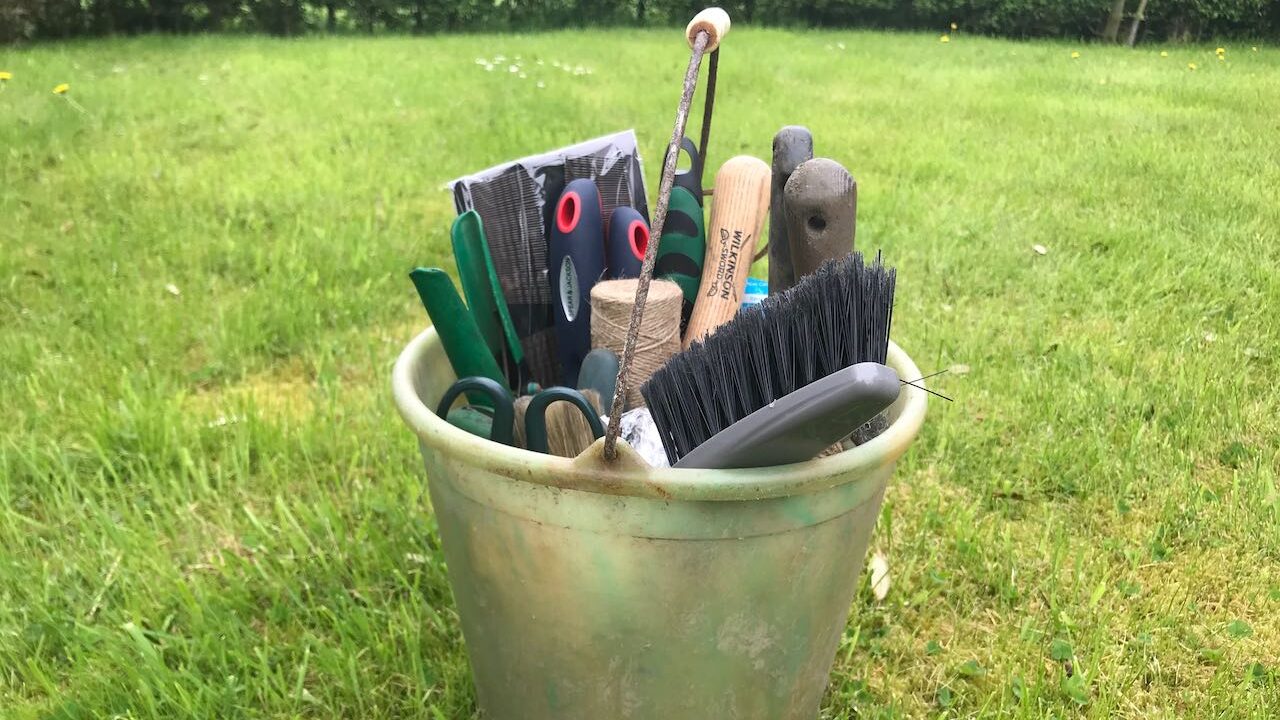
Tools for rose pruning
Using the right tools to prune your roses is essential. If you try to use old rusty scissors or secateurs, you’ll likely find pruning roses difficult. The wrong tools can lead to poor pruning cuts and infections, which can do more harm than good. As pruning roses should be easy and fuss-free, let’s take a look at the tools needed.
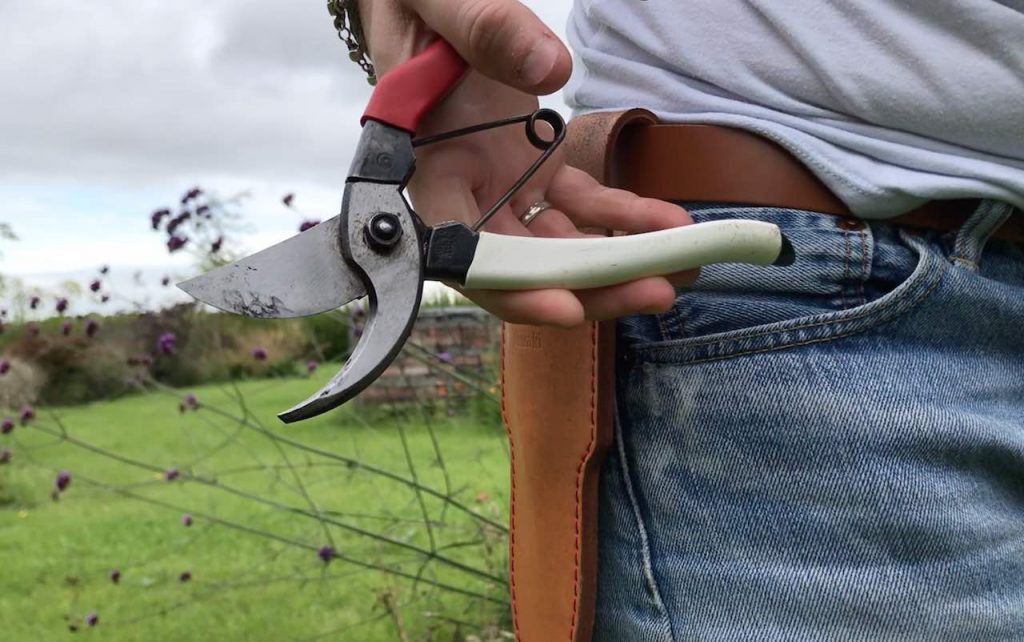
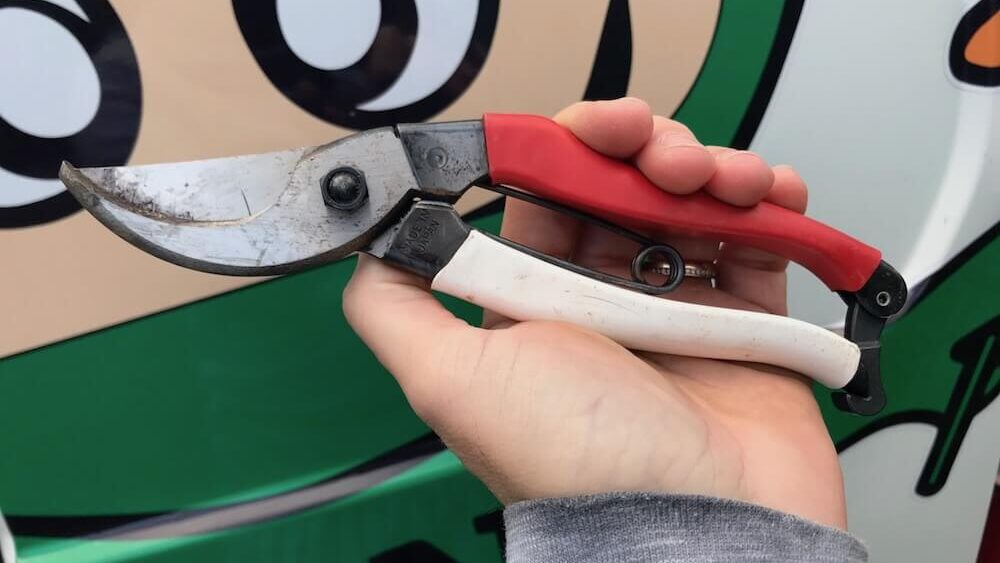
1. Clean, sharp secateurs — bypass, not anvil
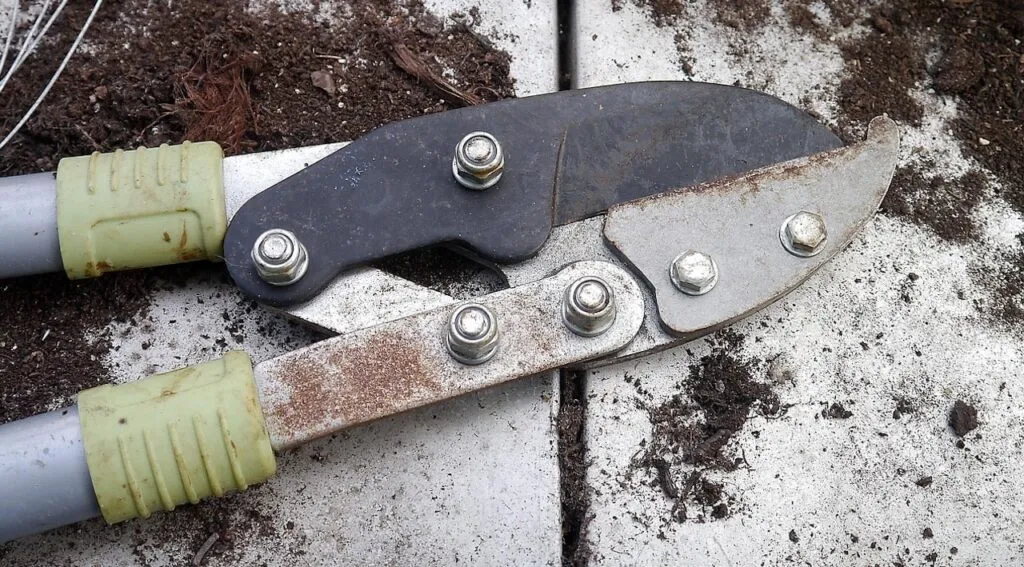
Before you start, you will need a clean, sharp pair of 🛒 quality bypass secateurs. I’ve already provided advice on the kinds of secateurs and how much the beginner gardener should spend here. These are essential to ensure neat and tidy cuts. If not, the rose may get damaged or diseased.
One important distinction worth knowing: there are two main types of secateurs — bypass and anvil. Bypass secateurs work like scissors, with two blades sliding past each other to create a clean, sharp cut. Anvil secateurs have a single blade that closes onto a flat plate, which can crush the stem slightly. For roses, bypass secateurs are always preferable as they make far cleaner cuts that heal more quickly, reducing the risk of disease entering through the wound. Save anvil secateurs for very thick, old, dead wood where a clean cut is less critical.
For older, established roses with woody stems thicker than around 1.5cm, a pair of long-handled loppers will save you a great deal of effort and avoid you straining your secateurs on stems that are simply too thick for them. Loppers give you the additional leverage needed to make clean cuts through hardwood without damaging your secateurs or crushing the stem. A good pair of loppers is also invaluable when hard pruning a neglected rose to renovate it.
🛒 Browse garden loppers on Amazon UK — look for bypass loppers with a cutting capacity of at least 35mm to handle mature rose stems comfortably.
3. A bucket for your cuttings
It’s important to clear up your cuttings, as rose pruning is sharp and woody. If not, you may find yourself grabbing a thorny branch when weeding your flower beds. While you can compost rose cuttings, I’d be mindful that they take a while to break down, and often their thorns still remain. I recycle them in my green bin or shred them rather than put them on my compost heap.
A bucket or 🛒 flexi trug is best for collecting rose prunings, but it also doubles as a handy tool caddy!
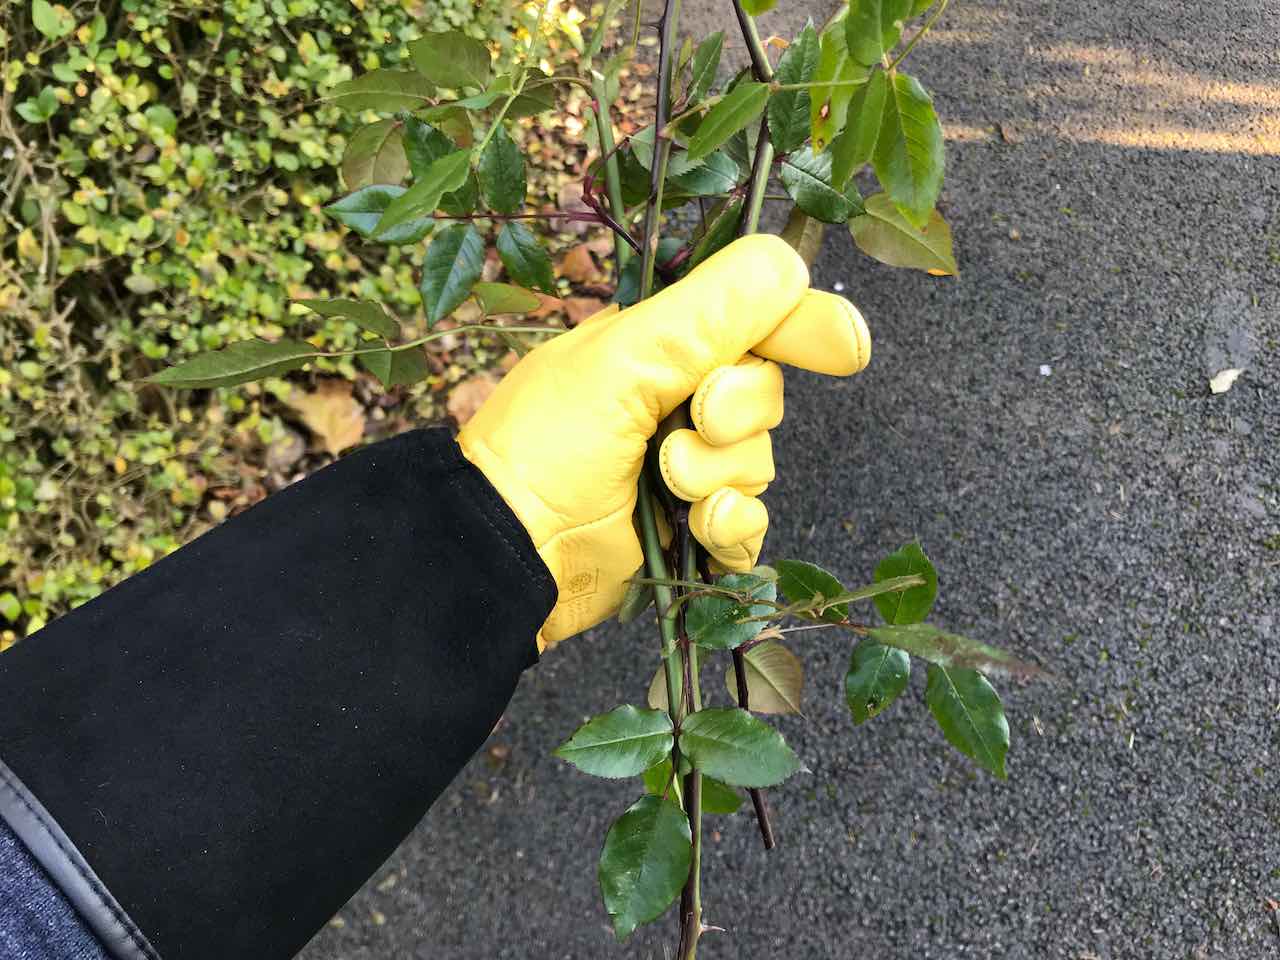
4. Gloves — ideally gauntlet-style
I cannot stress this enough that gloves are essential when pruning roses. The thorns on wide varieties are extremely sharp and can cause nasty puncture wounds that are prone to infection. Gauntlet-style gloves that extend up the forearm are ideal, particularly when working with climbing roses or pushing branches back through a trellis. Don’t skip this step! I’ve made that mistake once or twice over the years and my forearms looked like I’d been wrestling a hedgehog.
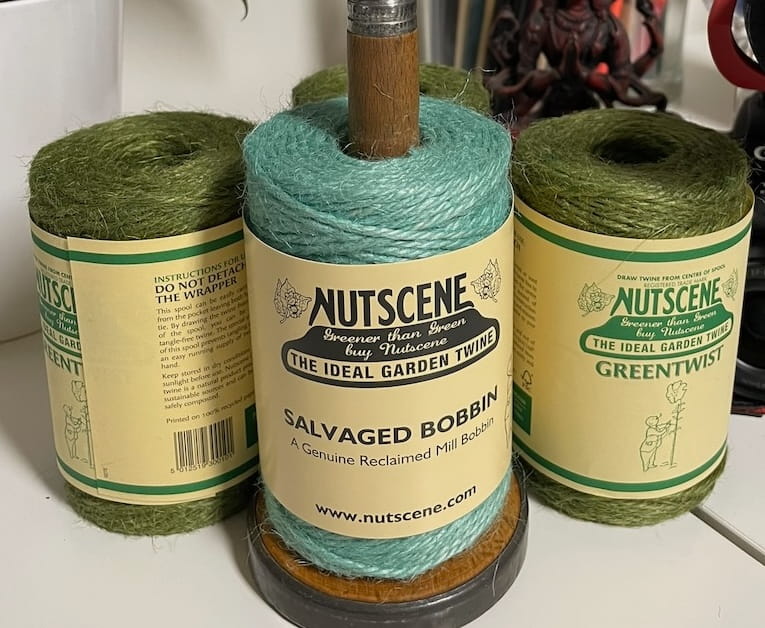
The last bit of kit you need for pruning roses is some high-quality twine or string to tie back your roses to support obelisks or trellises. The reason I recommend high-quality twine like Nutscene is that rose thorns can easily rip through cheaper twines, and you’ll find yourself constantly re-tying stems that have broken loose — frustrating when you’ve already done all the hard work.
6. Tool cleaning solution
One often-overlooked but genuinely important step is cleaning your secateurs between plants. Rose diseases such as black spot and rose canker can survive on tool surfaces and be transferred from one plant to the next during a pruning session. A quick wipe of the blades with a cloth dipped in rubbing alcohol or a dilute bleach solution takes only seconds but could save you weeks of plant health problems later in the season. Make it a habit, particularly if you are working through a garden with multiple rose plants.
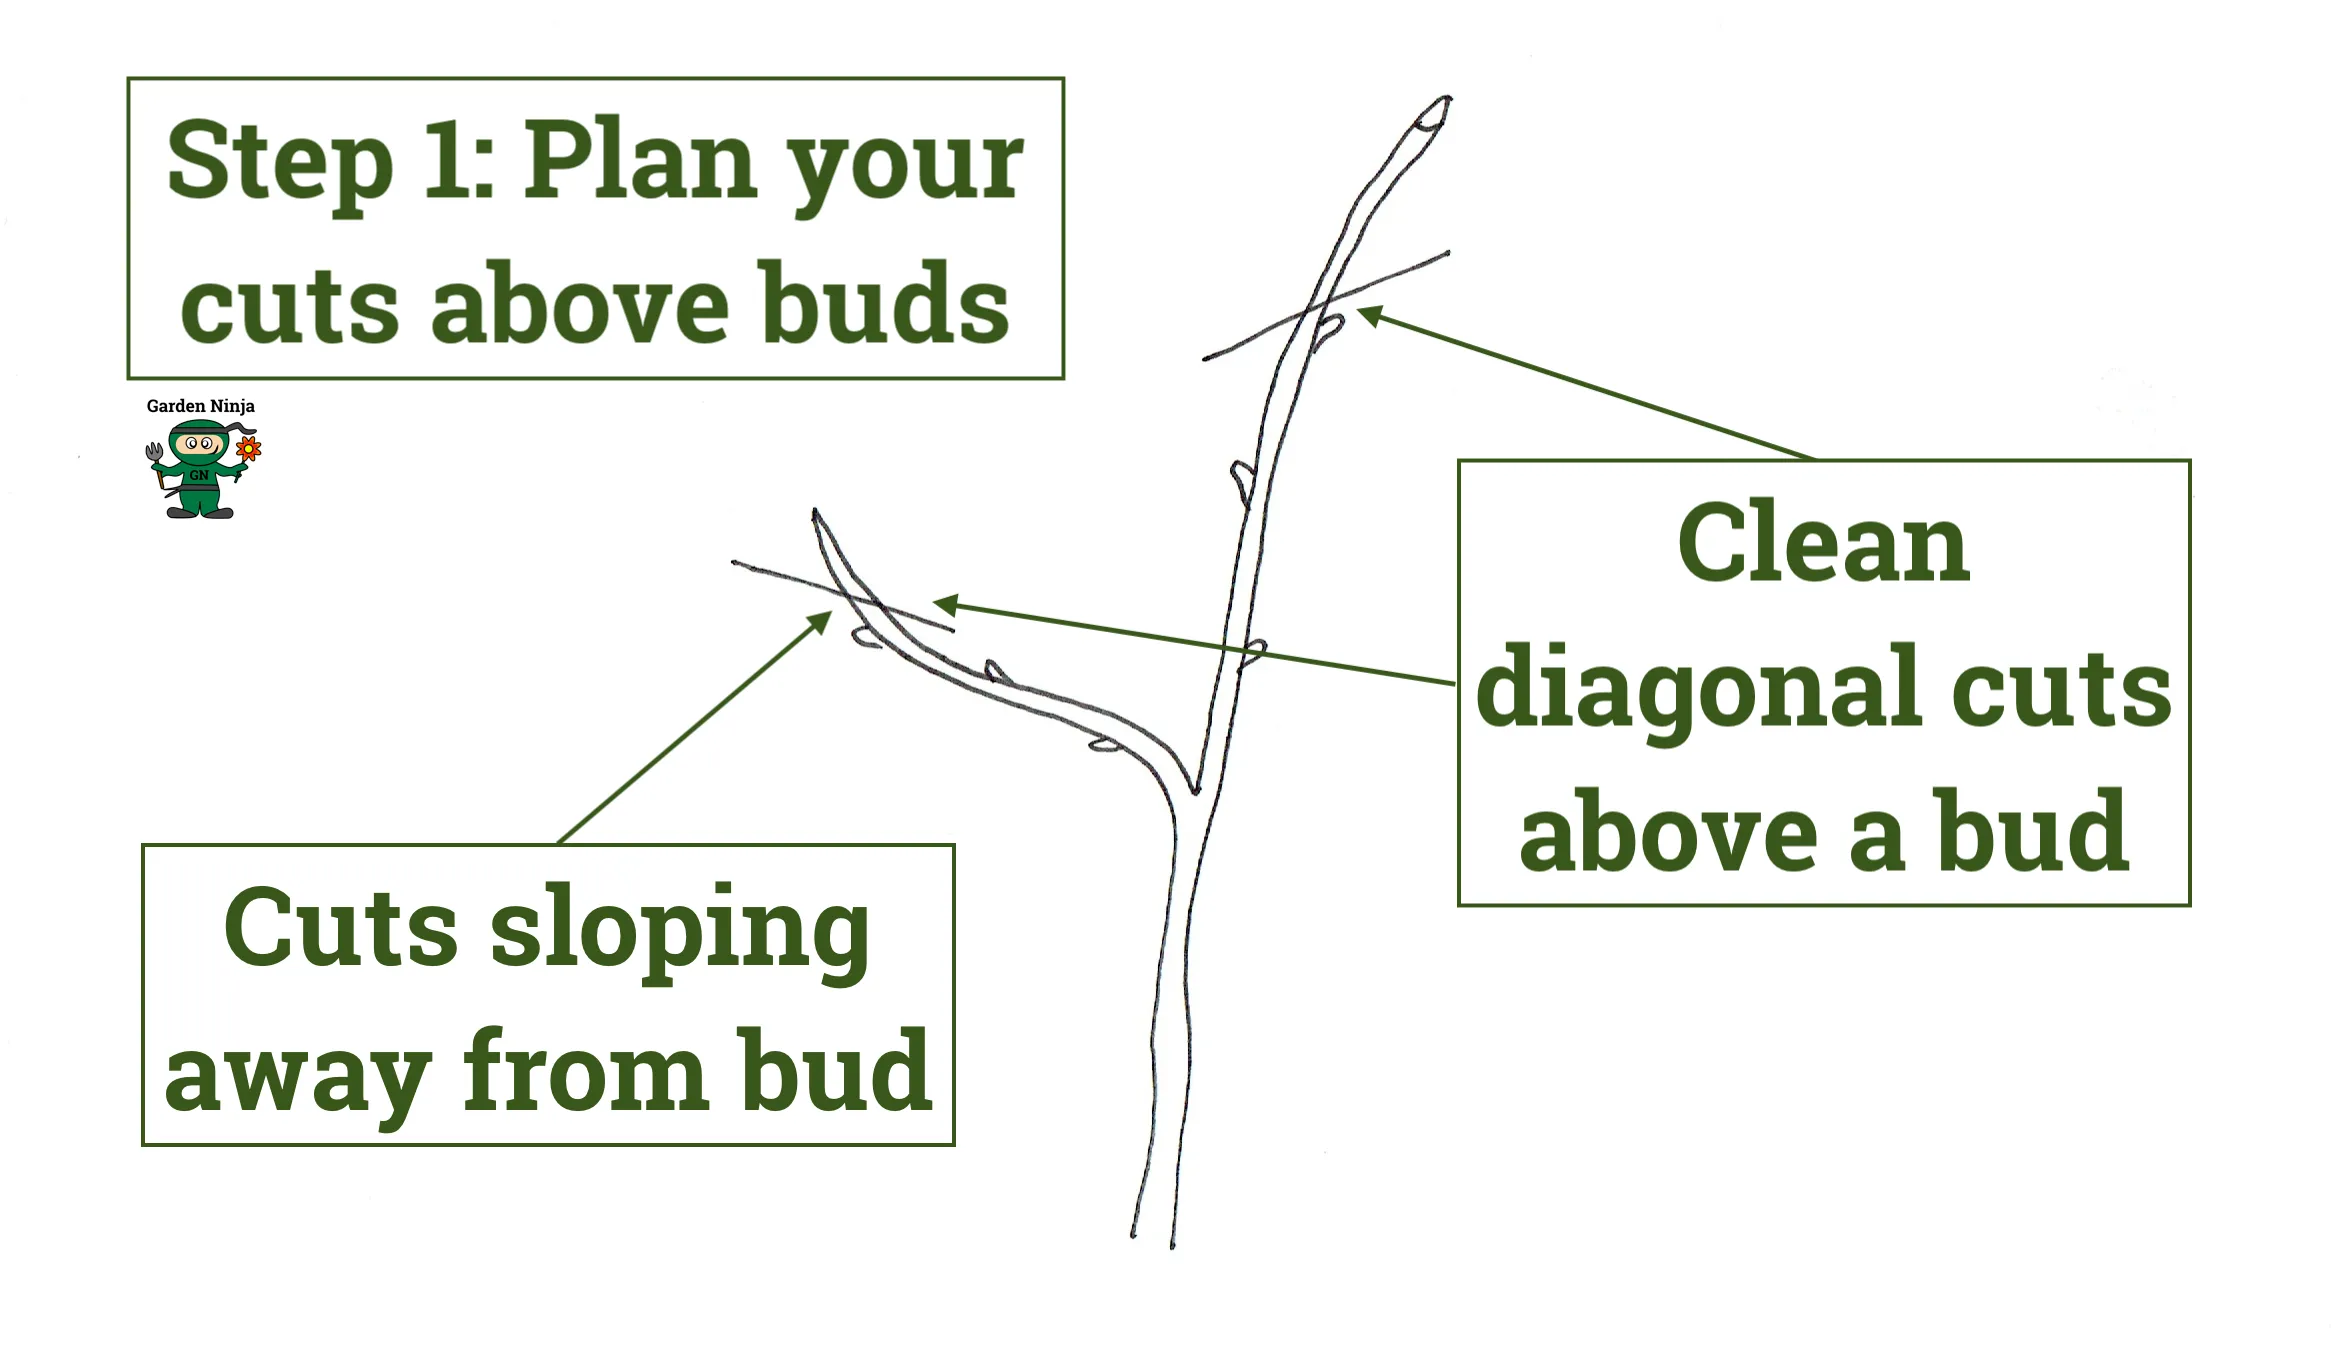
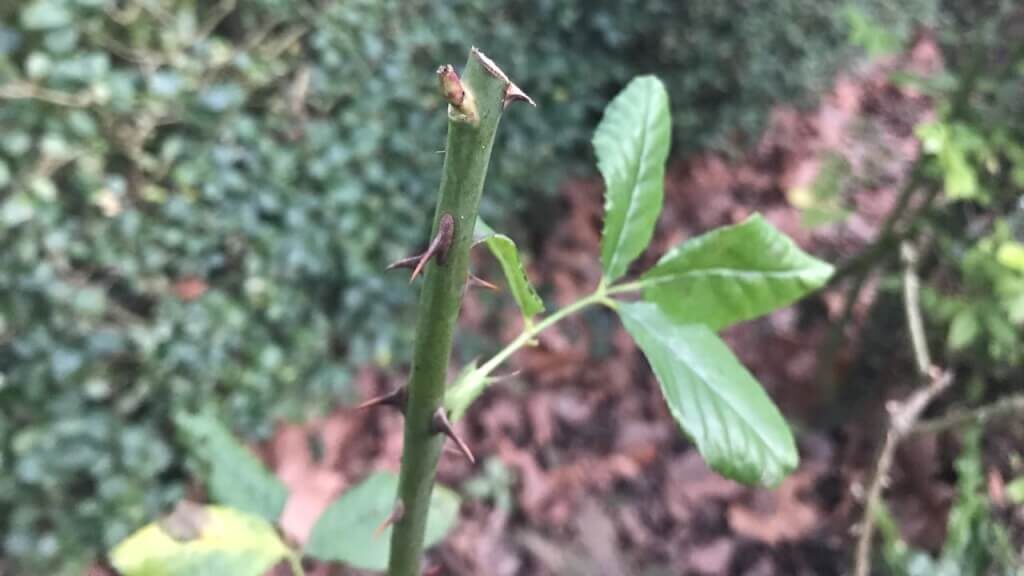
When making any pruning cuts, you always want to cut at an angle away from the lateral bud below (lateral buds turn into horizontal growth off the main stem — think of them as mini branches). This allows rainwater to run off away from the bud. If you cut the wrong way, the chances of the bud rotting increase, meaning your pruning becomes less effective. The RHS recommends cutting no more than 5mm above the bud, which is roughly the width of your thumbnail — so you’re not leaving a long, dead snag above the bud that will die back.
You also want to avoid cutting too far above a bud, which will encourage the part above the bud to die back. However, it’s not rocket science, and practice will help you determine exactly how high to cut. The cut is angled away from the bud and not too far up, as shown below. If you leave too much growth above the bud after pruning it, it will die back. Also, don’t cut too close, or you may damage the bud.
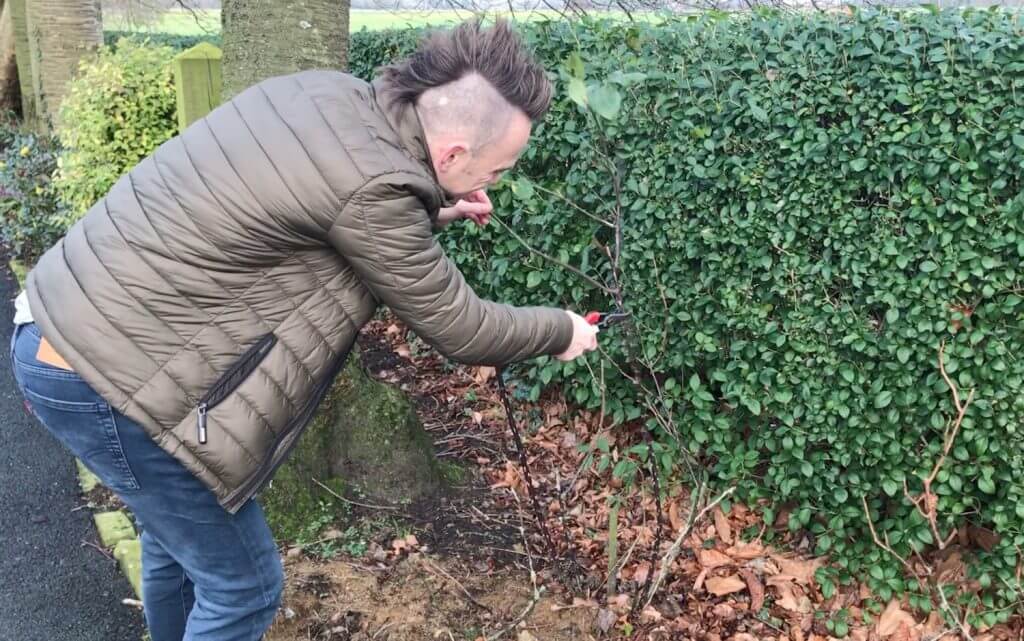
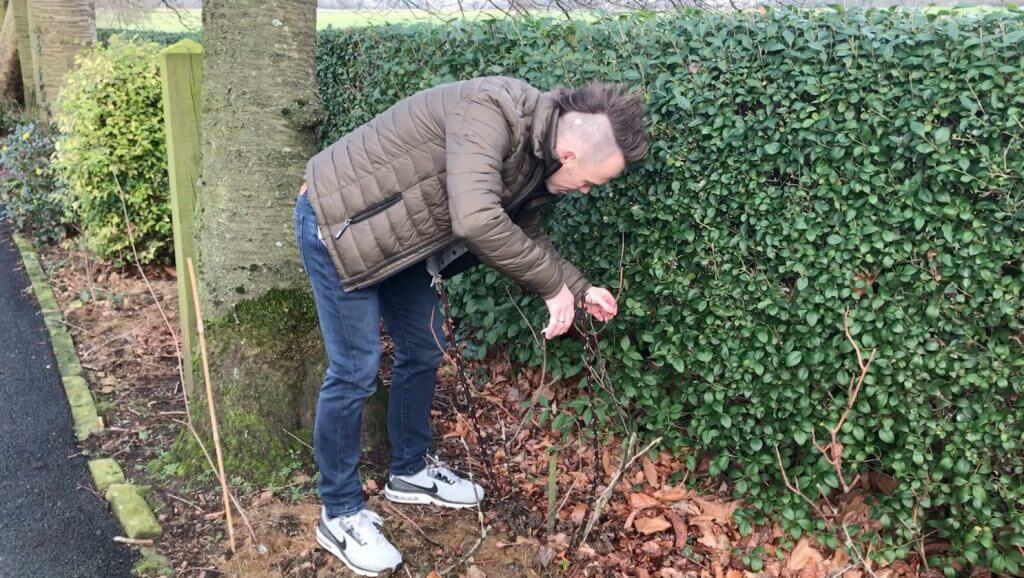
How to prune a rose easily: step-by-step
Pruning roses is super easy, but it seems to daunt many new gardeners. However, ignoring rose pruning just leads to awkward, straggly roses with fewer flowers and more drama. It’s easy to prune any rose if you follow these four steps. There are a few nuances with pruning certain types of roses, which I cover further down the guide.
These four rose pruning tips are nearly foolproof for most roses, even if you don’t know what type of rose you are dealing with. You can’t go wrong by following these steps in late winter.
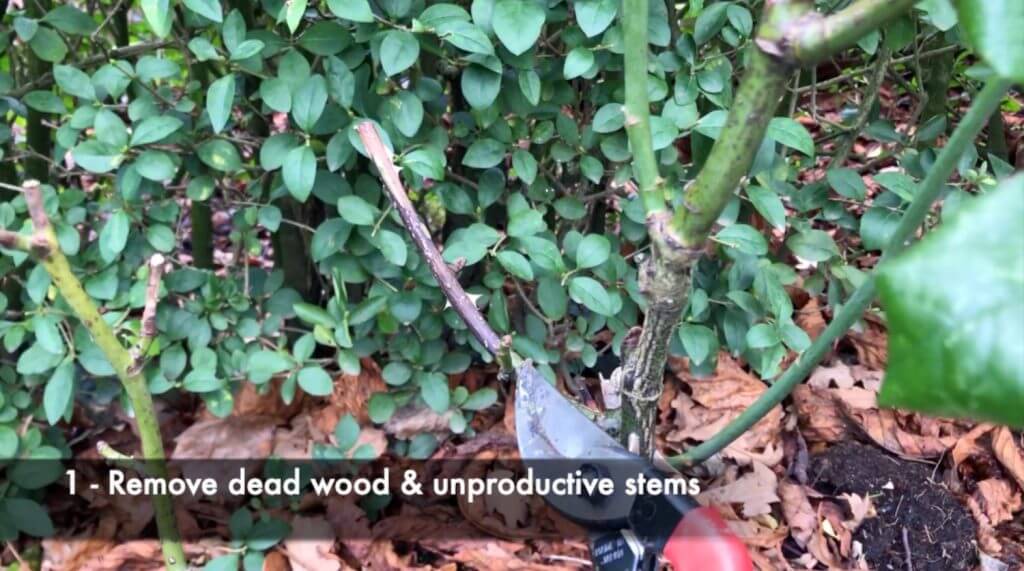
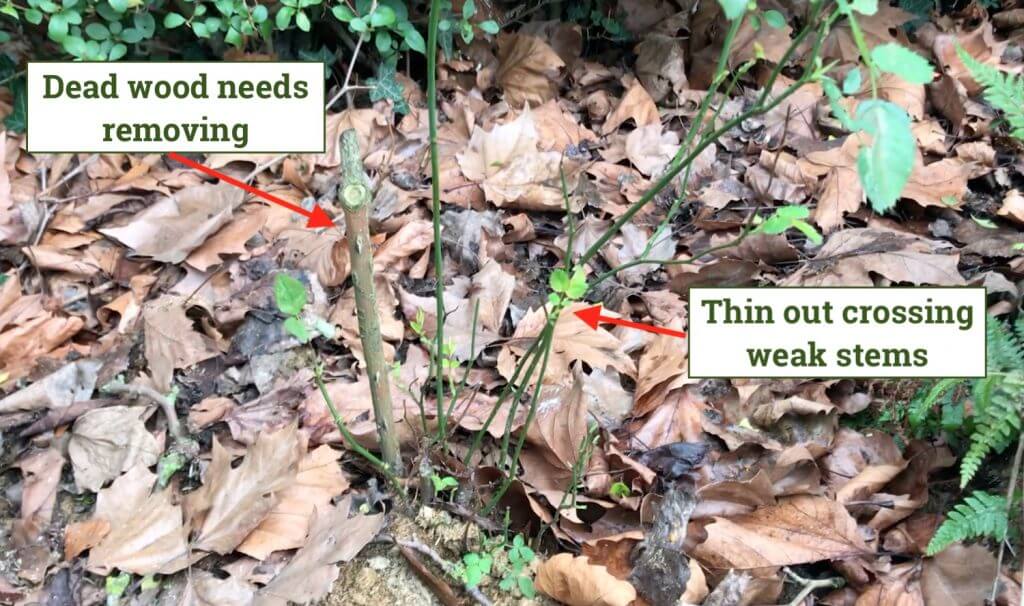
Step 1. Remove all dead, diseased and damaged stems
Before we get all giddy pruning the ‘green’ bits of your roses to encourage flowers, we need to undertake some basic housekeeping. By removing the older wood, you’re helping to concentrate the plant’s energy on the new growth and flowers, rather than wasting it on redundant stems.
If you notice brown, crispy stems or old, gnarled stems that have no signs of life, we need to remove them. Cut all dead, damaged, or diseased stems back to the next living part of the stem. In the case of really old stems, take them back to the ground. If you’re unsure what’s dead, snip a small amount off. If it’s crispy and dry on the inside, it’s dead, so take it back. Living stems will have a bright white or pale green centre — that’s the pith, and it’s your indicator of a healthy stem worth keeping.
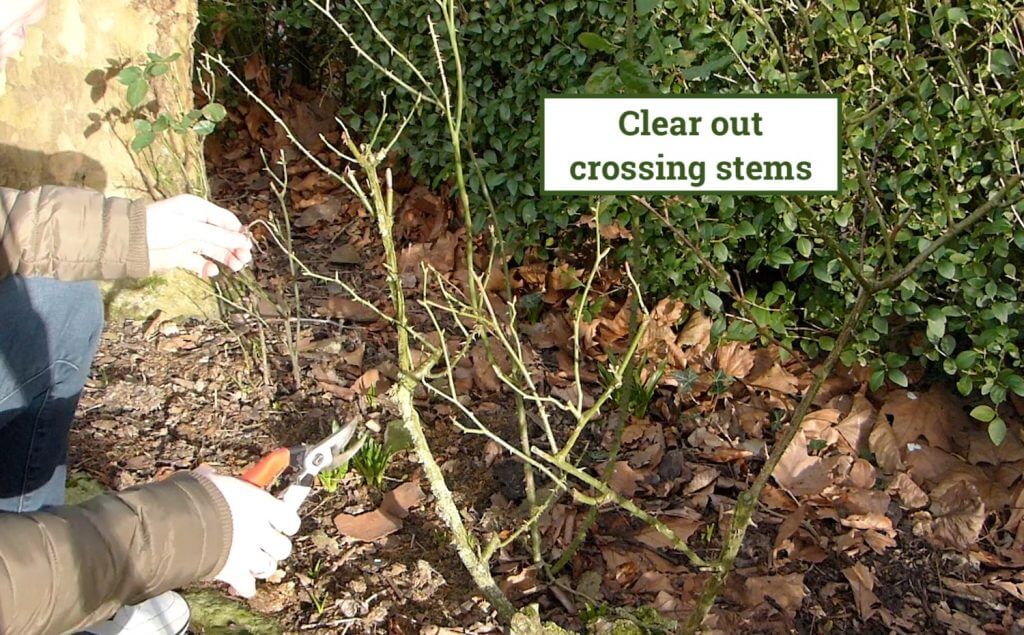
Step 2. Prune out any crossing stems on the rose
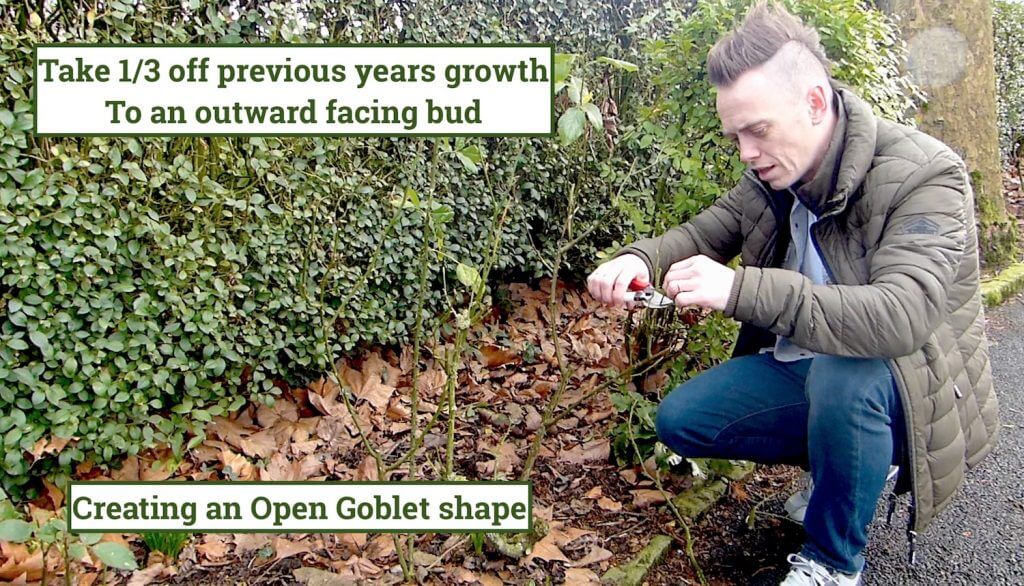
The next stage is to prune out any crossing stems. When pruning roses, you’re aiming for what is known as the ‘Open Goblet’ shape. This simply means that the rose bush has airflow and an open shape. Think of the palm of your hand with your fingers in an open cup shape.
Crossing branches rub stems and cause congestion. It also restricts airflow, so rose problems such as mildew and black spots can easily spread. You can spot rubbing stems in winter as you will see notches on the stems where two branches have rubbed. Permanently remove the weaker (thinner) branch and keep the strong one. Yearly rose pruning each winter will eventually stop this from happening.
Step 3. Remove 1/3 of last year’s growth on the rose
This last area can be quite contentious in the gardening world, but I’ve never shied away from that! Each ‘type’ of rose — from Hybrid Tea, Floribunda, Climbing, Rambling — all has certain attributes when it comes to pruning. This guide is for the beginner who doesn’t know where to start or the type of rose they have.
As a rule of thumb, removing one-third works well to get a rose into a reasonable shape. You can see from the two pictures below the amount I’m taking off this Hybrid Tea rose.
Above: The stem before the cut
Above: The stem after one-third has been removed
As a good rule of thumb, if you don’t know, then cutting out one-third — including older stems — is a good place to start. This allows you to remove the offending branches and then ‘sculpt’ the remaining rose into a neat and open shape. If you know what type of rose you have, you can always search for more species-specific guides if need be.
Step 4. Mulching roses after pruning
I can’t stress the need for this step when pruning a rose or any shrub. Mulching will ensure your roses have a steady, slow-release feed when spring comes. Mulching also reduces competition from weeds and helps retain moisture. Think of it as the icing on the cake; it’s not the same without it! If you have no idea what mulching is, you can find a handy video below.
Roses are hungry plants, so horse manure or compost are good mulch. I wouldn’t recommend wood chips, as they tend to rob nitrogen from the soil as they break down and will inhibit the rose’s growth. Apply a layer around 7–10cm deep, keeping it a few centimetres away from the base of the stems to avoid rot.
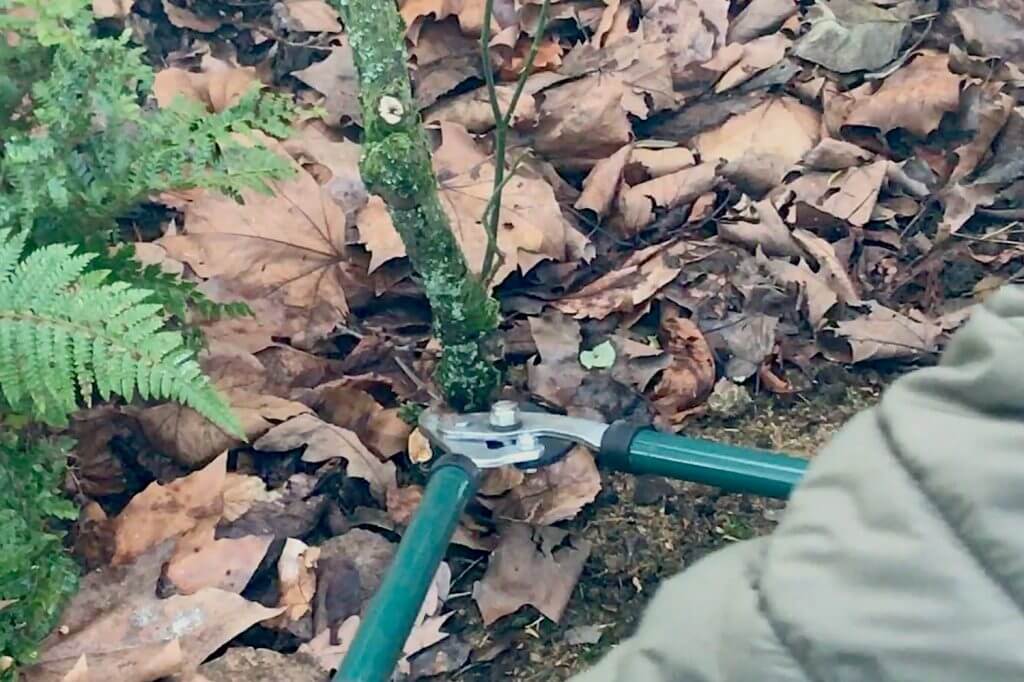
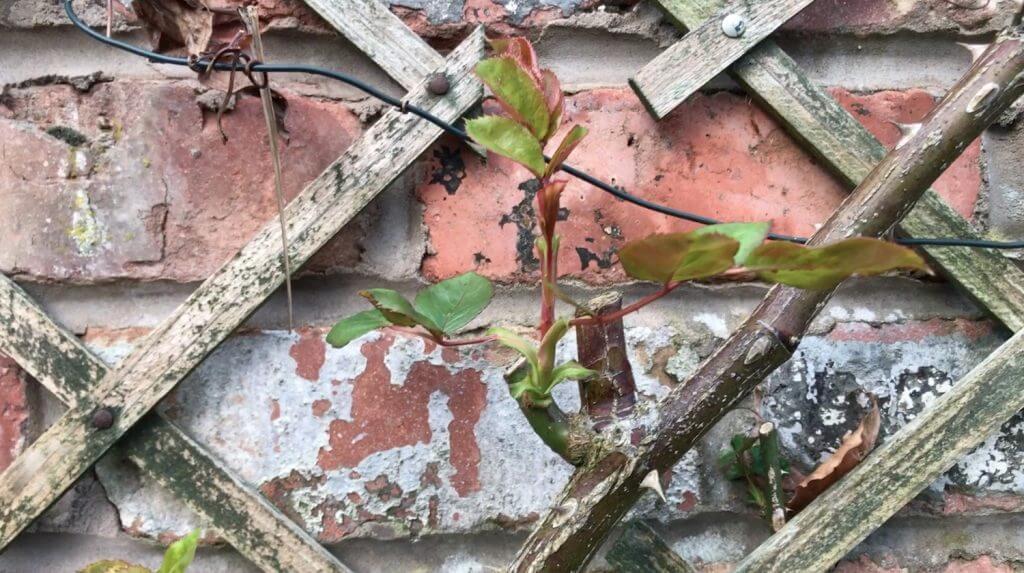
How to hard prune roses & renovate
Sometimes, you must hard prune your rose to renovate it, as shown with the gnarled witch’s finger below. If the stem where the growth occurs is old, gnarled, and plain ugly, it is best to take it back to the ground. You can remove this stem with a 🛒 sharp pair of garden loppers or a 🛒 clean pruning saw.
If you have just moved into a new house and garden with lots of very old, tall, leggy, and a bit all over the show roses, then a hard prune is the best way to completely rejuvenate even ancient roses. I’ve seen roses that have been completely neglected for a decade come back absolutely magnificently after a good renovation prune — roses are genuinely tough plants that respond brilliantly to being cut back hard.
This will delay your flowering for a year or so, but in some cases, it is the only way to properly renovate a rose. Trust me, it will be worth it for lush green stems the following year. As shown in the image below, old, unproductive growth should be completely hard-pruned out.
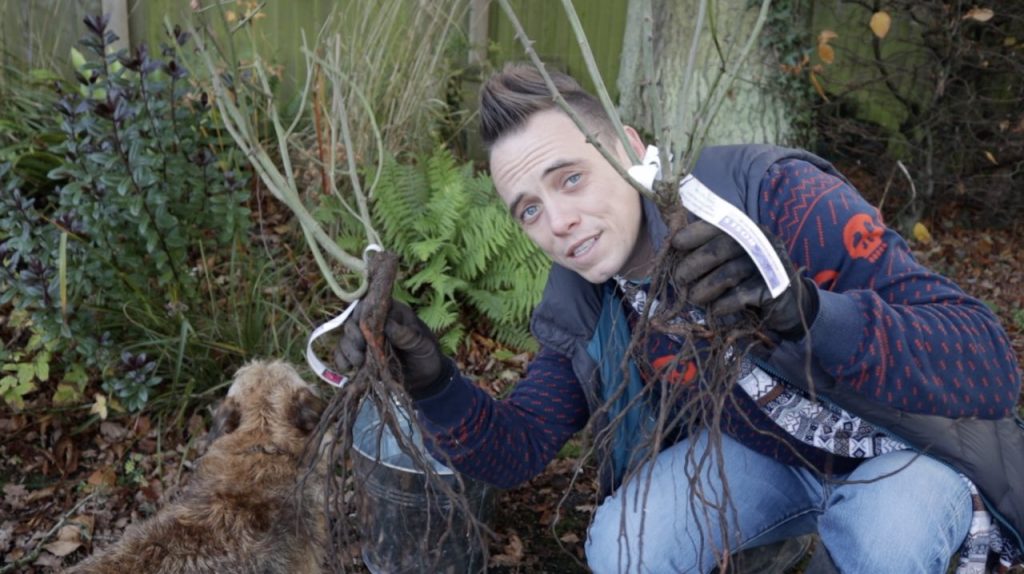
Pruning newly planted roses
One of the most common questions I get from gardeners who have just bought a new rose is whether they need to prune it in the first winter. The answer is yes. Whether you have planted a bare-root rose in the autumn or a potted rose in spring or summer, the first-year pruning approach is different from how you will treat an established plant, and understanding why makes it much easier to follow through on what initially feels like a counterintuitive step.
A newly planted rose is focused almost entirely on root development. Everything happening underground in that first season is building the foundation that will support years of flowering to come. If you allow the plant to spend its energy rushing into flower before that root system is properly established, you get a weaker plant that takes longer to reach its potential. A light to moderate first-year prune channels energy into roots rather than blooms, and the results in year two and beyond are noticeably better.
For a bare-root rose planted in autumn or early winter, prune it back in February of the following year to around 30 to 45cm from the ground, removing any remaining foliage and cutting to an outward-facing bud as you would with any rose. It can feel brutal to cut a new plant back this hard, but the roses that perform best in subsequent years in my own garden and on client projects have almost always been the ones that were pruned confidently in that first winter rather than left to race away unchecked.
For a potted rose planted in spring or summer, a slightly different approach applies. If it has been in the ground for less than six months when February comes around, keep the first-year prune lighter by removing dead, damaged and diseased growth, open up the centre, but leave a little more height than you would with an established plant. Give it a proper structural prune the following February once it has had a full season to settle in. The key thing in both cases is to clear up all fallen leaves and cuttings from around the base after pruning, as disease spores can overwinter in the debris and reinfect the plant in spring.
🌿 Garden Ninja Tip — bare-root timing: Bare-root roses are best planted between November and March while dormant. If you plant one in November and prune it back in February, you are essentially giving it three to four months of root establishment before asking it to direct energy into new shoots. That head start makes a real difference to first-year performance and long-term vigour.
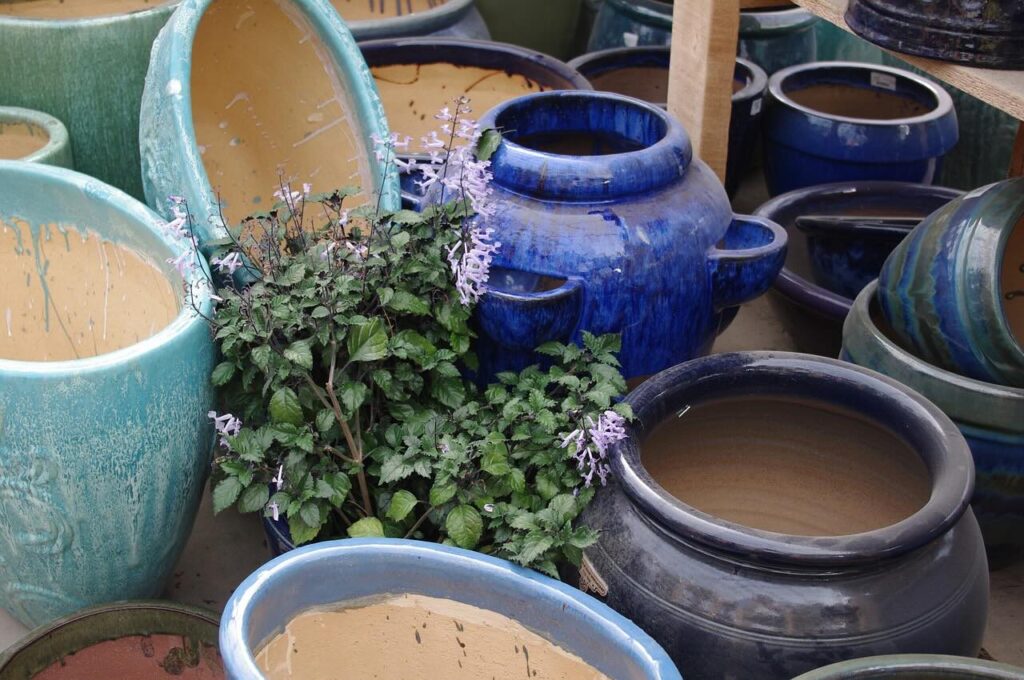
Pruning roses in containers
Container-grown roses are one of the best ways to enjoy roses in a smaller garden, on a patio, or flanking a front door, and they prune in exactly the same way as their border-grown counterparts. The same principles apply: remove dead, damaged and diseased stems, open up the centre to an open goblet shape, reduce last season’s growth by a third, and mulch the surface of the compost afterwards. What changes with container roses is what happens around the pruning, because the confined root space creates a set of maintenance needs that border roses simply do not have.
The most important thing to understand is that a rose in a pot will exhaust its compost far more quickly than one in the ground. The roots have a finite volume of growing medium to work with, and once the nutrients in that compost are depleted, the rose will struggle regardless of how well it has been pruned. For this reason, feeding after pruning is essential.
I use a slow-release granular rose fertiliser worked into the surface of the compost in late March, and a liquid feed every fortnight through the flowering season.
Every two to three years, the rose will benefit from being repotted into fresh compost. This is best done in late winter or early spring, immediately after pruning, before new growth begins in earnest. You do not necessarily need to move it to a larger pot. Simply shake as much of the old compost as you can from the roots, cut back any dead or circling roots, and replant into fresh rose compost. It takes less than half an hour but the difference in vigour and flowering in the following season is remarkable. I have rescued roses that were struggling badly in exhausted compost this way, and the transformation after repotting is always satisfying.
One note on watering: container roses dry out considerably faster than border roses, particularly in summer, and drought stress is one of the most common reasons a container rose fails to flower well or develops black spot. Check the compost daily in hot weather and water thoroughly when the top few centimetres feel dry, making sure water drains freely from the base of the pot.
🛒 Rose fertiliser for containers on Amazon UK — a specialist granular rose feed will give container roses the potassium, magnesium and trace elements they need for strong flowering.
Pruning climbing roses
Climbing roses are relatively easy to prune, but timing is key. You want to prune your climbing roses in autumn, directly after flowering. I find it easier at this time of year, as you can see which growth has produced flowers and which isn’t performing. When you tie in new canes, train them as horizontally as possible rather than straight upward — horizontal stems produce far more flowering sideshoots along their length, giving you a much more spectacular display.
I aim for one main stem and maybe one or two others. Anything more than this I remove. This prevents a tangled mess and concentrates resources on flowering buds.
With a climbing rose, you can be pretty brutal, taking all side growth back to the main stem, just above the last outward-facing bud. Don’t worry that it is cruel; they are resilient, and it will come back. You want to create a strong framework for growth. If you let the stems get too leggy, they will pull away from the trellis and start to entwine with other stems.
Pruning rambling roses
Rambling roses can be pruned in late summer and will be ready for flowering the following year. Rambling roses are vigorous, sprawling climbers that produce cascades of flowers, often in a single, breathtaking flush during the summer. Unlike many other types of roses, ramblers bloom on old wood — growth from the previous year — so their pruning schedule and techniques differ significantly from modern climbers or bush roses.
The best time to prune rambling roses is immediately after they finish flowering, typically in late summer or early autumn. Pruning at this time ensures you remove only the spent flowering stems and preserve the new growth that will produce blooms next year. Avoid late autumn or winter pruning, as this can remove essential flowering wood and leave the plant vulnerable to frost damage. This is the single most common mistake I see people make with rambling roses — they treat them like climbing roses and end up with no flowers the following summer.
I prune vigorous ramblers like Rosa ‘Rambling Rosie’ with shears, not secateurs, snipping off a good 6 inches of this year’s growth and then tying back any loose stems or laterals. It’s a bit easier than pruning climbing roses as they have far thinner stems, so they don’t need to be pruned back precisely to the next bud; they can cope with shears versus secateurs if you have a large rambling rose to contend with!
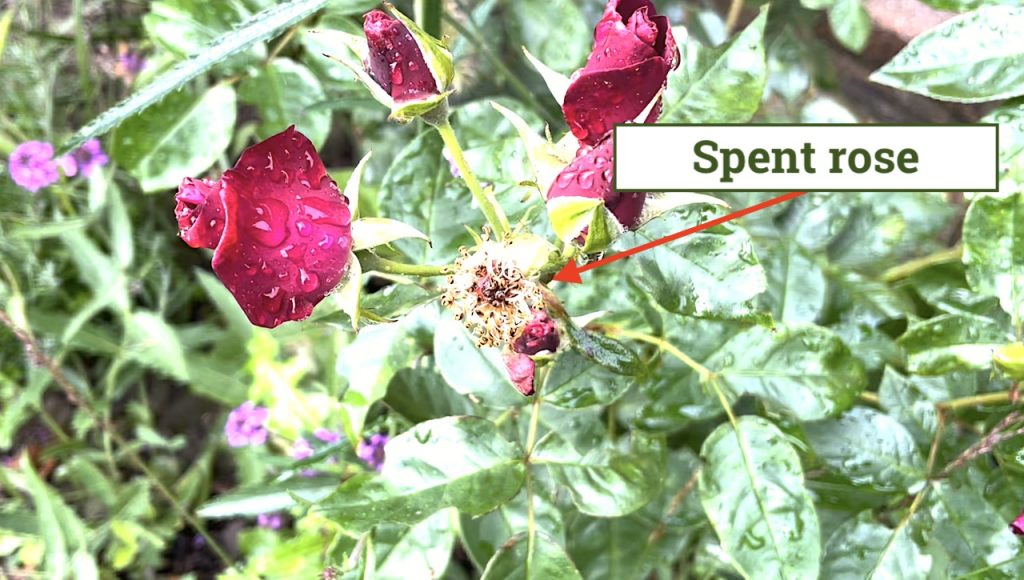
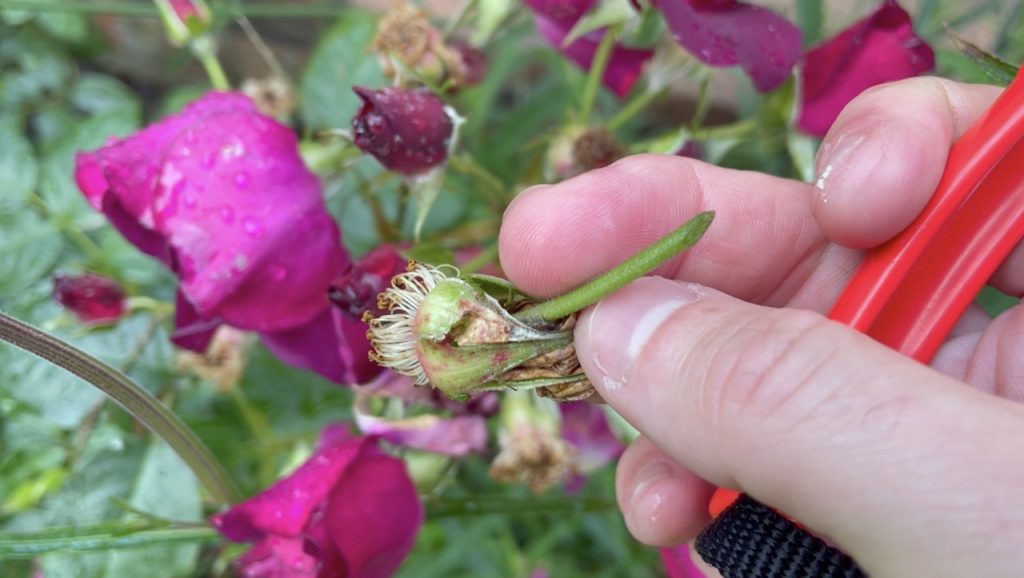
How to deadhead roses
Deadheading roses is a simple pruning technique that encourages them to flower for longer. It involves removing a spent flower or rose that is starting to lose its petals. This is done as soon as the rose’s flower petals begin to fall, as the rose is in its peak summertime flowering window.
Deadheading removes the flower back to the next set of leaves, removing the entire flower stalk. Deadheading roses prevents the plant from producing hips or seeds, thus conserving energy for the rose to produce more flowers. After all, the rose wants to create hips to reproduce, which is why it flowers. Removing these flowers before hips form forces the rose to keep flowering. If you’re wondering why your roses are not flowering, it could be one of the 9 issues I’ve written about.
The exception here is if you want to enjoy the decorative hips in autumn — many species of roses produce stunning red or orange hips that are well worth leaving, and they are also a brilliant food source for birds through winter.
To deadhead a rose, snip the flower off once it starts to fade back to the next set of leaves down.
How to identify and remove rose suckers
Rose suckers are one of those things that catch many gardeners off guard, and they are very much worth knowing about. Most garden roses are grafted plants so the decorative top growth (called the scion) is grafted onto a vigorous rootstock, and the join is usually visible as a slight swelling at or just below soil level.
Occasionally, shoots will emerge directly from the rootstock below this graft union, and these are what we call suckers. They look different to the rest of the rose, often with smaller leaves, more thorns, and a paler, more washed-out leaf colour.
If left unchecked, suckers will gradually take over the plant at the expense of the desirable grafted rose. The vital thing to remember is that you should never cut a sucker. Cutting rose suckers only encourages it to regrow more vigorously, like a hydra growing two heads. Instead, trace the sucker back to its origin point on the rootstock, scrape away the soil to expose it fully, and then pull it sharply away from the root. This tears the sucker off cleanly, removing the growth cells that would cause it to reshoot. It sounds brutal, but it is genuinely the most effective approach.
🌿 Garden Ninja Tip — Spotting suckers: A sucker from the rootstock typically has seven or more leaflets per leaf, whereas most garden roses have five. If the new growth looks different from the rest of the rose and emerges from below the graft union, treat it with suspicion. Trace it back and remove it at the source by pulling rather than cutting.
Feeding roses after pruning: what and when
Roses are one of the hungriest plants in the garden, you almost can’t feed them enough when they are growing and flowering! They are extraordinary performers over a long season, and that takes a lot of energy. After all the effort of a good winter prune, properly feeding your roses converts that pruning work into a spectacular summer display. I see far too many gardeners who prune their roses brilliantly but then give them nothing to work with nutritionally, and the results are always disappointing.
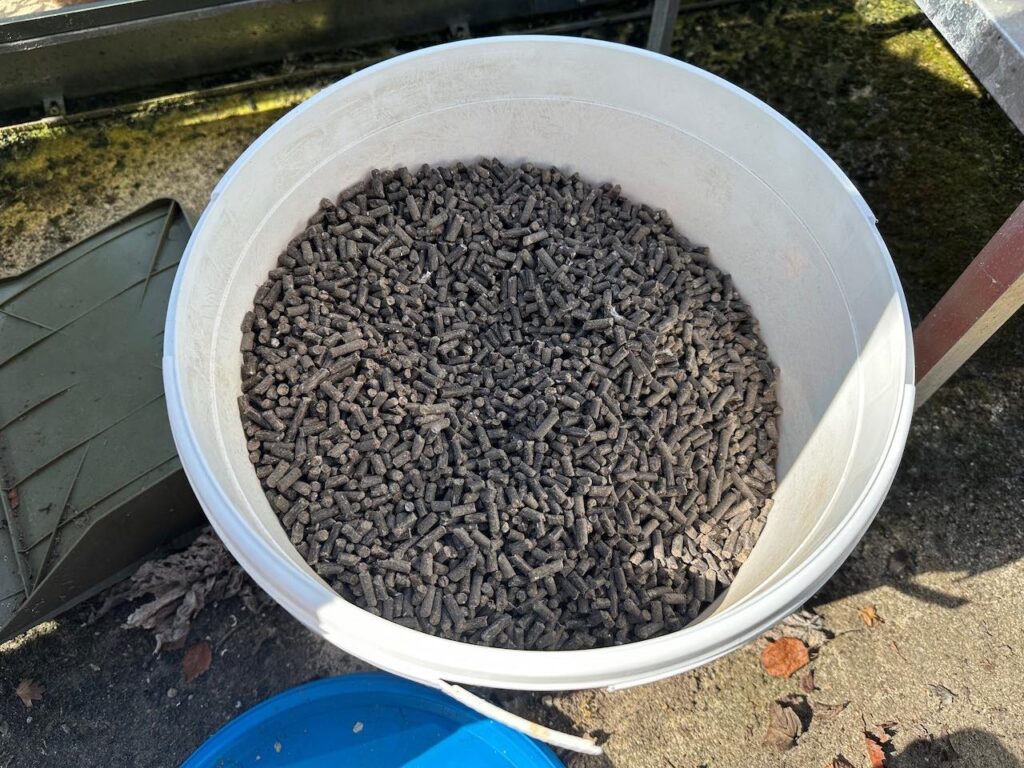
The feeding calendar I follow for roses in my own garden and on client projects is straightforward. In late March or early April, once the risk of harsh frost has passed and you can see the buds beginning to break into growth, apply a balanced granular rose feed around the base of each plant or chicken pellets, which are a fantastic organic rose feed.
Work it lightly into the soil surface and water it in if the ground is dry. Specialist rose fertilisers provide a balanced mix of nutrients, including potassium for flower quality, magnesium for healthy foliage, and the trace elements roses particularly appreciate.
After the first flush of flowers in early summer, I feed again with the same granular fertiliser to support the second flush of blooms. Avoid feeding after the end of July, as this encourages soft new growth that is vulnerable to frost damage as the season ends.
⚠️ Warning — wood chips as mulch: Avoid using wood chips or bark chippings directly around the base of your roses. As fresh wood chips break down, they draw nitrogen out of the soil during decomposition, which can starve your rose of exactly the nutrients it needs for growth and flowering. Stick to well-rotted garden compost, horse manure, or specialist soil improvers instead.
Rose diseases to watch for when pruning
Pruning time is actually the perfect opportunity to audit the health of your rose and address any disease issues before the growing season begins. Here are the most common problems I encounter in client gardens and on Garden Rescue, and what to do about them at pruning time.
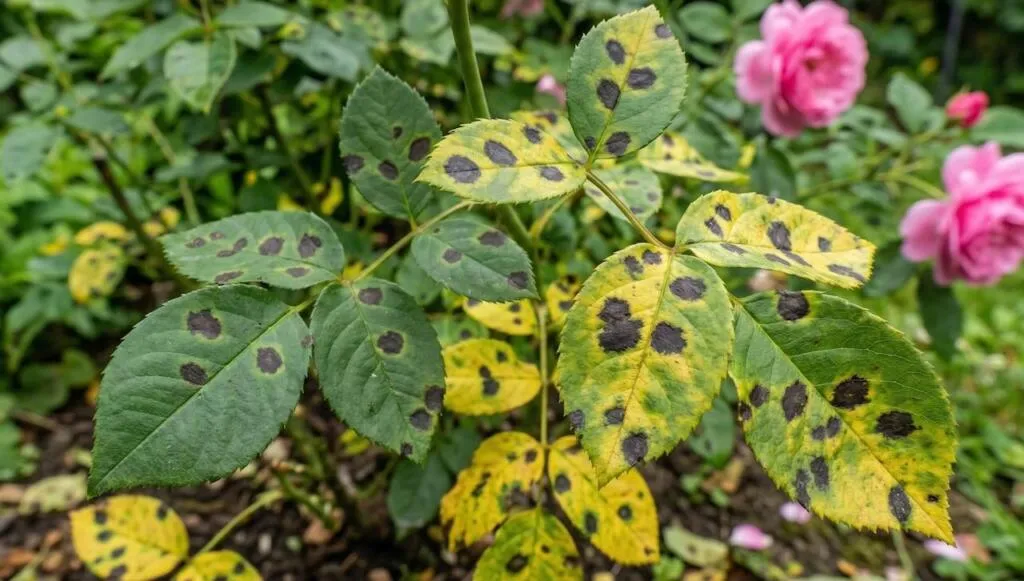
Black spot
Black spot is by far the most common rose disease in the UK, caused by the fungal pathogen Diplocarpon rosae. It appears as dark purple or black circular spots on the leaves, often with a yellow halo, and, if left unchecked, will cause the plant to drop its foliage prematurely. At pruning time, remove all affected stems and immediately collect and dispose of any fallen leaves from around the base of the plant.
Do not compost them, as the spores survive composting and will simply reinfect next season. Improving airflow through your open goblet pruning shape is one of the best long-term preventative measures you can take.
Rose dieback
Dieback is when stems progressively die from the tip downwards, turning brown and shrivelling as they go. It can be caused by fungal canker, harsh winter weather, or physical damage. At pruning time, simply cut back all affected stems until you reach clean white pith in the centre. That’s your sign that you’re into healthy tissue. Sterilise your secateurs after dealing with any diseased wood to avoid spreading the pathogen to healthy stems.
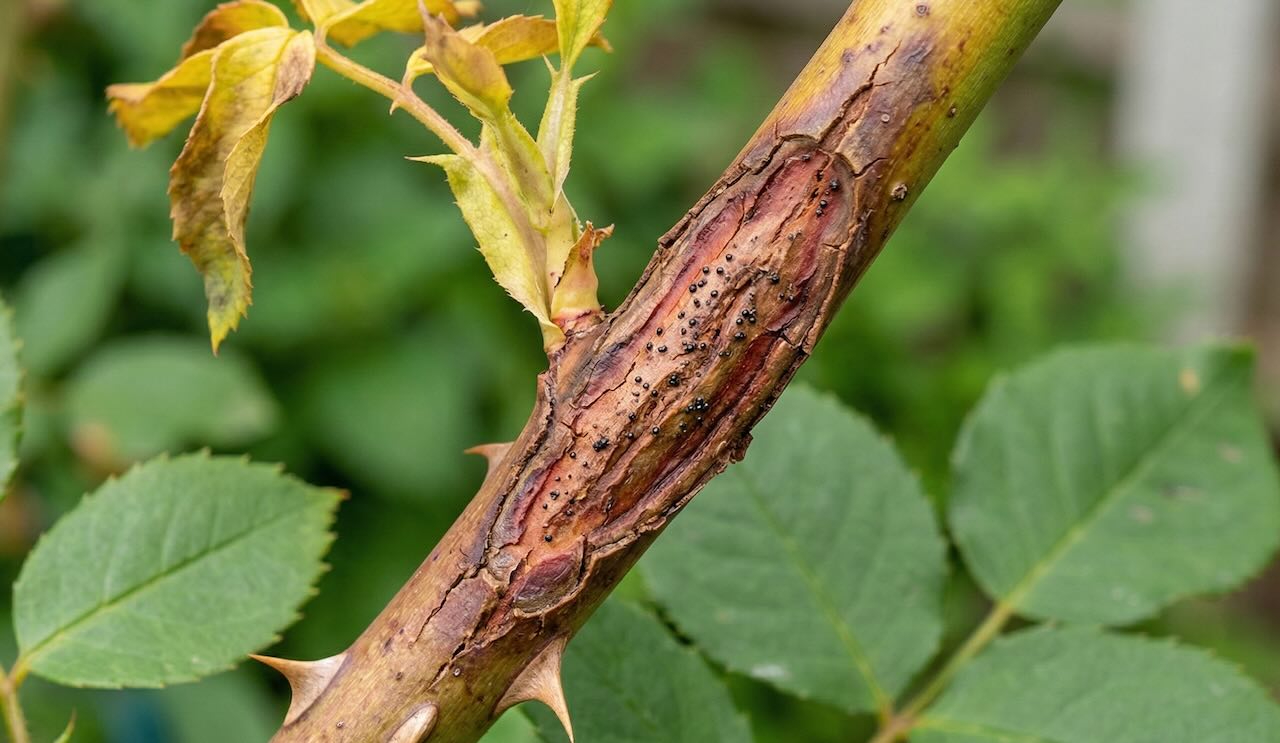
Rose canker
Canker appears as brown, sunken, often discoloured patches on the stems, usually near a pruning wound or damaged area. It’s another fungal issue that thrives in wet conditions and enters through damage or cuts. The remedy is the same. Cut back to clean, healthy wood and dispose of the affected material. Making clean, angled pruning cuts that drain water away from the wound is one of the best preventative measures against canker entering through pruning cuts.
Replant disease
This is worth noting if you plan to remove an old rose and plant a new one in the same spot. Rose replant disease (sometimes called rose sickness) is a complex of soil-borne pathogens and pests that accumulate around rose roots over time. Planting a new rose into soil where a rose has grown for many years often results in poor, stunted growth.
The solution is either to replace the soil in the planting area with fresh compost and topsoil or to plant your new rose in a different location.
Common rose pruning mistakes to avoid
Over the years of designing gardens and helping people on Garden Rescue, I’ve seen the same rose pruning mistakes crop up again and again. Learning to avoid these will genuinely transform the results you get from your roses, so let’s look at the most common pitfalls and, more importantly, how to sidestep them.
❌ Pruning at the wrong time
Pruning in November or December during a mild spell can trigger new growth that is then killed by January frosts, wasting the plant’s stored energy. Similarly, pruning too late means you’re removing leaf growth the plant has already invested energy in producing.
✅ Prune in late winter (February to early March for most of England and Wales). Watch for swelling buds as your signal, and delay if hard frost is forecast.
❌ Using blunt or dirty tools
Blunt secateurs crush rather than cut the stem cleanly, leaving ragged wounds that are far more susceptible to disease. Dirty blades can spread pathogens from one plant to another during a single pruning session.
✅ Sharpen secateurs before the season, and clean blades between plants with rubbing alcohol or a dilute bleach solution.
❌ Pruning ramblers in winter
This is one of the most common mistakes I see. Rambling roses flower on last year’s growth, so pruning them in winter removes all the flowering wood that would have given you a spectacular summer display.
✅ Prune ramblers immediately after they finish flowering in late summer, and leave them well alone over winter.
❌ Cutting suckers rather than pulling them
Cutting a sucker at ground level stimulates it to regrow with even more vigour. You’ll end up fighting a losing battle against increasingly vigorous rootstock growth that will eventually overtake the grafted rose entirely.
✅ Trace suckers back to their origin, scrape away the soil, and pull them sharply away from the root to remove the growth cells at source.
❌ Cutting flush with the bud or leaving too long a snag
Cutting too close to the bud can damage it and prevent it from shooting. Cutting too far above it leaves a long dead snag that will die back and potentially allow disease to enter the stem.
✅ Cut at a 45-degree angle approximately 5mm above an outward-facing bud — roughly the width of your thumbnail above it.
❌ Not mulching after pruning
The pruning itself is only half the job. Without a good mulch to feed the soil and retain moisture, your freshly pruned rose will struggle to put on the vigorous new growth that produces the best flowers.
✅ Apply a 7–10cm layer of well-rotted horse manure or garden compost around the base after pruning, keeping it away from the stems themselves.
How to tell if a rose is dead
We’ve all wondered if a plant is alive, dead, or just having a year off, and roses are no different! While roses can sometimes appear lifeless after harsh weather or neglect, they are resilient plants that may simply be dormant or recovering.
First, examine the stems and canes. A living rose plant will have pliable and green stems beneath the bark. If the stems are brittle, dry, and brown all the way through, they are likely dead. Start by gently scraping the bark with your fingernail or a small knife to check for a green layer underneath, which indicates life.
In contrast, if the stems appear black, shrivelled, or hollow inside, they are likely deadwood. Check the pith — the pithy centre of the stem — which should be bright white or pale green in a healthy living stem. Brown, dry pith means the stem is dead all the way through and needs to be removed.
Another good way to check is by bending the stems. If they snap and almost crack, leaving brittle, woody edges, they’re dead. But these can be occasional dead branches; unless all the branches are like this, there still may be hope.
Dormancy can also mimic death in rose plants, especially in winter or after transplant shock. If your rose isn’t showing signs of growth during its usual active season, try giving it time, proper watering, and fertiliser to see if new shoots emerge. Roses can sometimes recover from apparent death if even a small portion of the root system or lower stems remains alive.
Before you give up and dig a rose out, give it at least one full growing season after a good renovation prune, and you may well be pleasantly surprised.
When to prune roses in the USA?
The USDA Hardiness Zones divide the United States into regions based on average minimum winter temperatures, helping gardeners determine when to prune roses and other plants. Late winter pruning of roses typically occurs when the risk of hard frost has passed but before new growth begins. Here’s a guide to the zones and when late winter pruning is appropriate:
The best time to prune the majority of roses in the UK is in late winter, typically during February and into early March for most of England and Wales. This is when the plant is dormant but just beginning to stir, meaning your pruning triggers a burst of vigorous new growth as temperatures warm. In northern England and Scotland, wait until mid to late March when the risk of hard frost has passed. The key biological signal to watch for is swelling, reddish buds — when you see those, it’s time to get the secateurs out.
How much should I cut back roses?
For most shrub and bush roses, removing roughly one third of the previous season’s growth is a reliable starting point if you are unsure of the exact variety. Hybrid Tea roses benefit from a harder prune — cut back to around four to six buds from the base — as this forces the most vigorous new growth and produces the best blooms. Floribundas are pruned slightly lighter than Hybrid Teas. Always remove all dead, damaged and diseased stems completely, regardless of variety. The open goblet shape — with a clear, airy centre — is your visual target.
Can I prune roses in autumn?
For most roses, avoid a hard prune in autumn. A light tidy in autumn — removing any obviously dead or damaged growth — is fine, but a hard autumn prune stimulates soft new growth that will be vulnerable to winter frost and cold winds. Climbing roses are the main exception; these are best pruned in autumn after flowering rather than in winter. Rambling roses should also be pruned in late summer immediately after flowering.
What happens if you don’t prune roses?
Unpruned roses gradually become congested, straggly, and increasingly unproductive. Flowering shifts to the very tips of the growth, meaning you get fewer blooms and they are increasingly high up and difficult to enjoy. The congested growth also creates poor airflow, dramatically increasing the risk of fungal diseases such as black spot and mildew. Crossing stems rub and create wounds that allow disease to enter. Over several years, a neglected rose can become a tangled, thorny mess that flowers poorly, though even these can usually be recovered with a careful renovation prune.
Can I prune roses in February?
Yes — February is actually my preferred month for pruning most roses in the UK, and the month I recommend above all others. The plant is still largely dormant, which means it will direct all its energy into vigorous new growth from the moment temperatures begin to rise in late winter and early spring. Just keep an eye on the weather forecast; if a prolonged hard frost is still expected, wait a few more days before you start cutting. In Scotland and the north of England, late February to mid March may be safer.
Should I feed roses after pruning?
Absolutely — feeding after pruning is just as important as the pruning itself. In late March or early April, once the buds are visibly breaking and the worst frost risk has passed, apply a balanced granular rose fertiliser around the base of each plant. Feed again after the first flush of flowers in early summer to support the second bloom. Avoid feeding after the end of July, as this pushes soft new growth that is prone to frost damage as winter approaches.
How do I prune a rose that hasn’t been pruned for years?
A neglected, overgrown rose needs what’s called a renovation prune, and the good news is that roses are remarkably resilient plants that respond brilliantly to being cut back hard. In the first year, remove all dead, diseased and damaged wood completely, then take out the oldest and most congested stems to open up the plant. In the second year, continue to build the open goblet framework you’re aiming for. A full renovation may delay flowering for a season, but the results in subsequent years will be well worth it. Use loppers or a clean pruning saw for older, thick stems.
What is the difference between deadheading and pruning roses?
Deadheading is a summer task that involves removing spent individual flowers as they fade, cutting back to the next set of leaves. This prevents the plant from setting seed and encourages it to produce more flowers through the season. Pruning is a more significant structural task carried out in late winter or after flowering (depending on variety), which involves reshaping the whole plant, removing old stems, and encouraging vigorous new growth. Both are important but they serve completely different purposes and happen at different times of year.
How do I prune David Austin English roses?
David Austin English roses are pruned in late winter (January to February) in much the same way as other shrub roses, but the approach varies depending on the age of the plant. In the first year, prune back to around 30 to 45cm from the ground to encourage strong root development rather than premature flowering. From year two onwards, reduce by up to half and remove any stems that are losing their vigour. Mature English roses can be treated like established shrub roses, though varieties with a naturally arching habit benefit from a slightly lighter hand. The key thing with any David Austin rose is to prioritise an open, airy framework over strict height reduction.
How do I prune a rose in a pot?
Container roses are pruned in exactly the same way as border roses — remove dead, damaged and diseased growth, open up the centre to an open goblet shape, and reduce last season’s stems by a third. What matters more with container roses is what you do around the pruning: feed with a granular rose fertiliser in late March, water regularly throughout the growing season (daily in hot weather), and repot into fresh compost every two to three years in late winter immediately after pruning. Container roses exhaust their compost relatively quickly, so this repotting step makes a significant difference to long-term performance.
Why not consider expanding your plant and garden design knowledge with one of my online gardening courses? My Garden Design for Beginners Course is here to help you transform your garden from average to exceptional with an affordable online course, no matter how little your experience with plants.
This course offers step-by-step guidance from me, Lee Burkhill, award-winning garden designer and presenter on BBC1’s Garden Rescue. In this course, you’ll go from a garden design novice to a confident designer equipped to tackle any green space.
Enrol now for just £199 and start your journey toward garden design mastery!
29
Garden Design Examples for Small Gardens: 30 Design Templates & Planting Plans
Garden Design Examples for Small Gardens: 30 Design Templates & Planting Plans: In this online gardening course, I’ll walk you through 30 fantastic garden designs, explaining the logic behind the layout, the plant choices, and take-home tips for applying them in your own garden.
Weekend Garden Makeover: A Crash Course in Design for Beginners
Learn how to transform and design your own garden with Lee Burkhills crash course in garden design. Over 5 hours Lee will teach you how to design your own dream garden. Featuring practical design examples, planting ideas and video guides. Learn how to design your garden in one weekend!
Garden Design for Beginners: Create Your Dream Garden in Just 4 Weeks
Garden Design for Beginners Online Course: If you want to make the career jump to becoming a garden designer or to learn how to design your own garden, this is the beginner course for you. Join me, Lee Burkhill, an award-winning garden designer, as I train you in the art of beautiful garden design.
So there we have it — my comprehensive guide to pruning roses, whether you know your Hybrid Teas from your ramblers or not! By pruning roses to an outward-facing bud in late winter when they are dormant, you ensure healthy flower buds will emerge come late spring.
After pruning roses, a thick mulch of compost, well-rotted manure, or leaf mould will give your roses the energy they need when flowering in summer, or chicken pellets if you prefer an organic granular option. Don’t forget to feed them in spring, watch for suckers, keep an eye out for black spot, and deadhead through the summer to keep the flowers coming.
It’s all too easy to remove things we don’t immediately like or understand in the garden. I’d urge you to always give a new plant a few seasons before removing it. Getting an established, out-of-shape rose bush to flower is far easier than waiting for a new one to settle in. And remember that roses are far tougher than they look. A confident prune in February is one of the most rewarding things you can do in the garden.
If you have any questions, please drop a comment below or add one to my YouTube channel, where I’m happy to help. You can also check out my Tweet, Facebook or Instagram for more guides and tips.
Your subscription could not be saved. Please try again.
Your subscription has been successful.
Lee Burkhill
Lee Burkhill, known as the Garden Ninja, is an award-winning garden designer and horticulturist with over 30 years of gardening experience and 15 years as a professional garden designer. A qualified RHS (Royal Horticultural Society) professional, Lee specialises in sustainable garden design and practical horticultural advice. He designs and presents on BBC1’s Garden Rescue and in leading gardening publications. Lee combines three decades of hands-on gardening knowledge with professional design qualifications to help gardeners create beautiful, functional outdoor spaces.
I’ve been struggling with how to prune roses for years. I have either ignored them or simply dug them out. Thanks Garden Ninja for such an accessible guide! Ps I love your Youtube channel is so informative! Keep up the great work!!
I came across your blog post on how to prune roses and wanted to thank you for such a helpful post! When I first started gardening about four years ago, I had no idea what a healthy rose bush should look like or how often they needed to be trimmed. Your article was really insightful in that sense – it clarified the different types of roses and showed me where to find more detailed information. Thanks again!


I’ve been struggling with how to prune roses for years. I have either ignored them or simply dug them out. Thanks Garden Ninja for such an accessible guide! Ps I love your Youtube channel is so informative! Keep up the great work!!
Really great information given covering all areas! thanks
I came across your blog post on how to prune roses and wanted to thank you for such a helpful post! When I first started gardening about four years ago, I had no idea what a healthy rose bush should look like or how often they needed to be trimmed. Your article was really insightful in that sense – it clarified the different types of roses and showed me where to find more detailed information. Thanks again!