-
Rose Black Spot: Symptoms, Causes & Treatment UK Guide
 Lee Burkhill: Award Winning Designer & BBC 1's Garden Rescue Presenters Official Blog

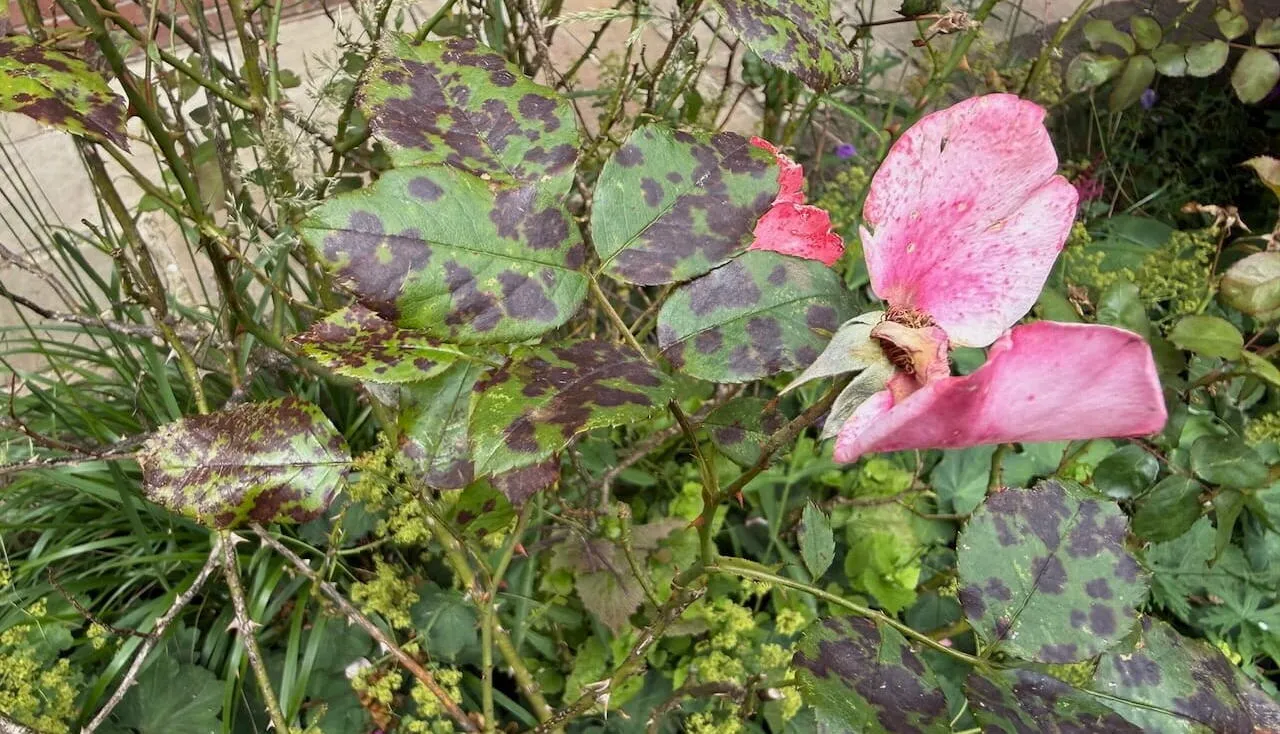
If your rose leaves have started turning up covered in dark, spreading blotches with a slightly fuzzy yellow edge, and you've noticed a fair few leaves on the ground beneath the plant already, you're almost certainly dealing with black spot. It's the question I get asked more than almost any other rose problem, both in my own client gardens and on the Garden Ninja forum, and I'll be honest with you from the start: you are very unlikely to ever fully eliminate it from a UK garden. Black spot is about as native to British rose growing as rain is to a bank holiday weekend.
Quick Answer
Rose black spot is a fungal disease, Diplocarpon rosae, that causes dark circular spots on leaves followed by yellowing and leaf drop. It will not kill an established rose but weakens it over time. Treat it by removing and binning affected leaves, pruning for an open airy shape, watering at the base rather than overhead, and mulching in spring. Fungicides can help but are not essential if you get the cultural care right.
This guide to Rose blackspot will enable you to manage it well enough that it barely troubles your rose’s performance. I’ve got roses in my own garden and in more client gardens than I could count that get a touch of black spot every single summer and still put on a spectacular flowering display, simply because the underlying plant is healthy, well-pruned, and well-fed. Black spot punishes neglect far more than it punishes any particular rose variety, and once you understand that, the whole problem becomes a lot less intimidating.
This guide covers exactly what black spot is, why it turns up, whether you actually need to reach for a fungicide, the cultural techniques I rely on in every rose bed I look after, and which varieties shrug the disease off far more easily than others. If your rose has stopped flowering as a direct result of a bad black spot infection, it’s also worth reading my guide to roses that won’t flower, since black spot is one of the nine causes I cover there in more depth.
Jump To
(This page contains affiliate links (see full details here). If you purchase through these links, I may earn a small commission at no extra cost to you. I only recommend products I personally use and trust at Garden Ninja HQ.)
What Is Rose Black Spot?
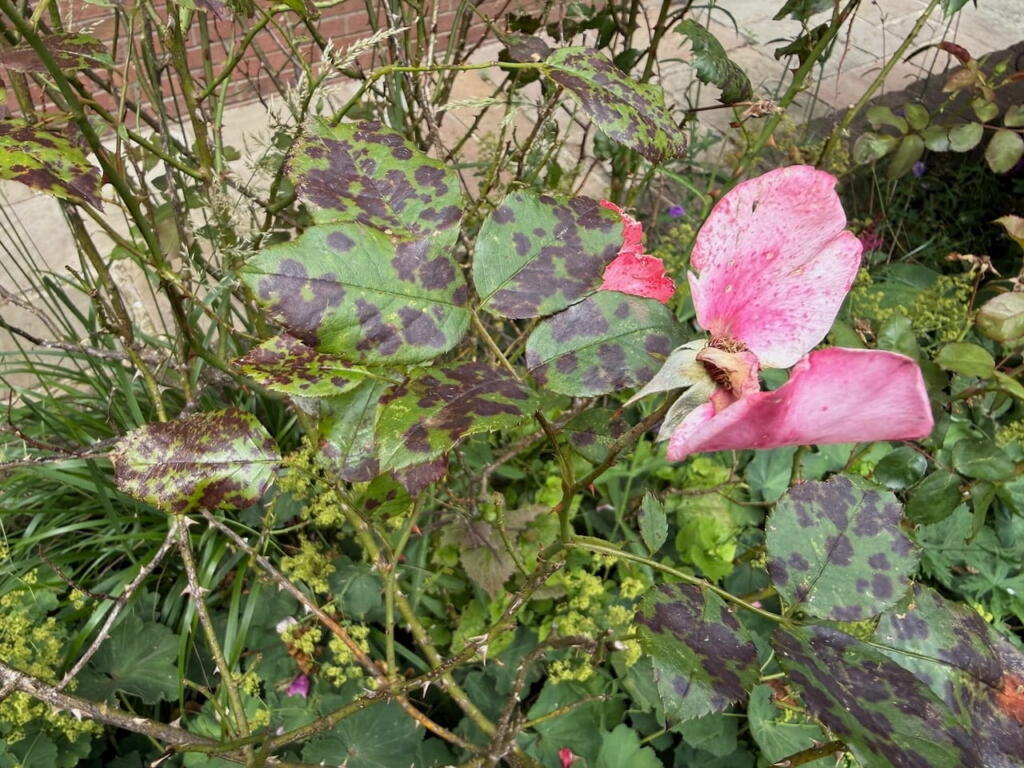
Rose black spot is a fungal disease caused by the pathogen Diplocarpon rosae. It’s easily the most common rose disease in the UK, and if you’ve grown roses for more than a couple of seasons here, you have almost certainly encountered it, whether you noticed the name for it or not. The fungus produces circular black or dark purple lesions on the leaf surface, usually with a slightly feathered or fringed edge rather than a crisp, clean border, and often surrounded by a yellow halo where the leaf tissue around the infection starts to break down.
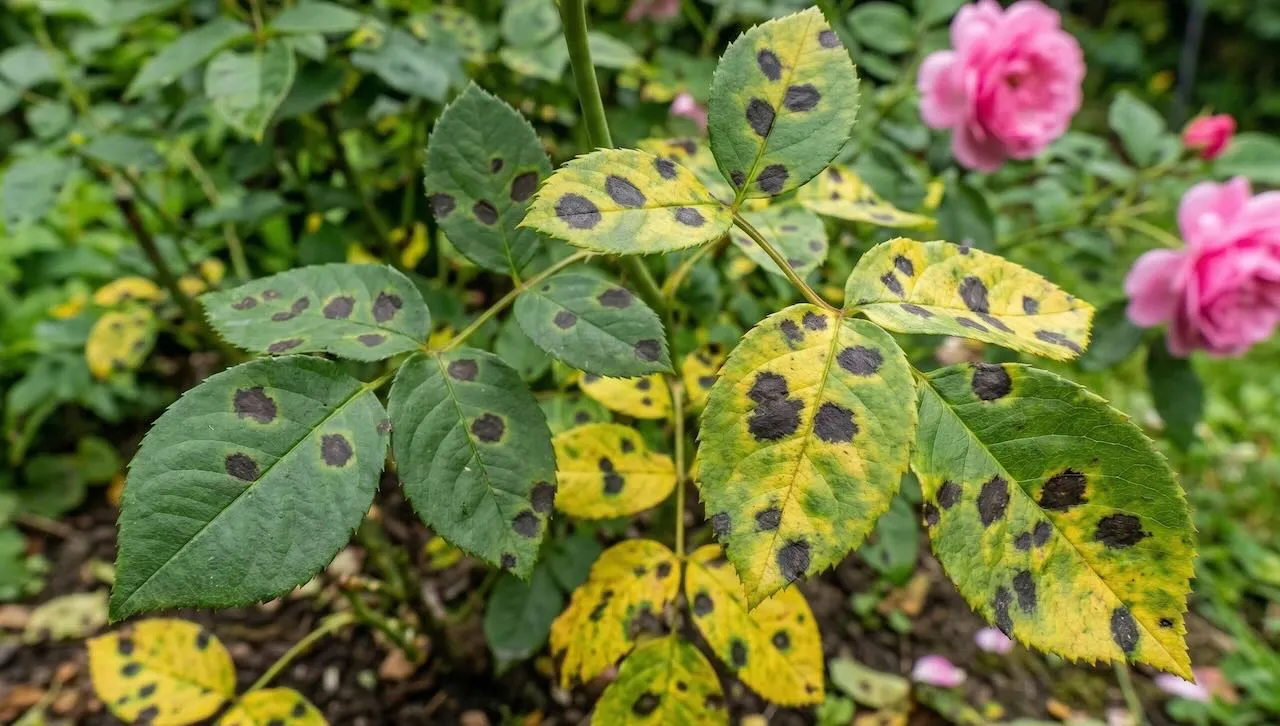
As the infection develops, the whole leaf tends to yellow and eventually drops from the plant, usually starting with the lower, older leaves and working its way up the stem over the following weeks. In a bad year, on a susceptible variety in a damp, still corner of the garden, you can end up with a rose that has lost most of its lower leaves by late summer, looking distinctly sorry for itself with bare stems and foliage clinging on only at the very top.
You’ll sometimes see the fungus referred to by an older scientific name, Marssonina rosae, in older books or in some overseas sources. That’s the asexual stage of exactly the same organism, and Diplocarpon rosae is the name you’ll see used consistently by the RHS and across UK horticultural literature, so that’s what I’ll stick with throughout this guide.
How Black Spot Spreads Through Your Garden
Understanding how black spot actually spreads through your garden is key to managing it properly, because most effective treatments focus on breaking its transmission cycle rather than attacking the fungus directly once it’s established. The spores form on the surface of infected leaves and are spread almost entirely by water. Rain splashing up from the soil onto the lowest leaves is the classic starting point, which is exactly why black spot so often shows up first on the leaves nearest the ground.
From there, further rain, overhead watering, or even heavy dew can splash spores from an infected leaf onto a nearby healthy one, and the fungus needs several hours of leaf wetness to successfully infect new tissue. This is precisely why a wet, mild British summer with plenty of overnight moisture and still, humid air is black spot heaven, and why a hot, dry, breezy summer tends to see far less of it about, even on the same plants in the same beds. It quickly becomes the pain of our gardening lives as its ugly black spots then focus our friends and garden guests cries of ‘what is that on your roses?’ Nobody needs the shame!
The fungus also survives our winters perfectly well. It overwinters in fallen leaves left lying on the ground and in infections that persist on the stems and buds through the dormant season, which then produce fresh spores the following spring to kick the whole cycle off again on the new season’s growth. I mention this now because it’s the single most important thing to understand for prevention, and I’ll come back to exactly what to do about it in the autumn and winter clean-up section further down.
Contaminated secateurs are a less obvious but properly important route of spread too, particularly if you’re working through a bed with several roses in one session. I always clean my blades between plants when I know black spot is present in a garden, and I’ve written more about exactly how and why in my secateurs guide, which covers tool hygiene in more depth.
🛒 Isopropyl alcohol for tool sterilisation on Amazon UK
Will Black Spot Actually Kill My Rose?
This is the question I get asked more than any other, usually from someone standing in front of a rose that’s dropped half its leaves by August and looking thoroughly alarmed. The honest answer is almost always no, not on its own, not in a single season. Established roses are remarkably resilient plants, and losing a good number of leaves to black spot in one summer, while unsightly, very rarely kills the plant outright.
What black spot does do, and this is the bit that actually matters for your enjoyment of the plant, is weaken it considerably. A rose that has lost most of its foliage to disease has lost most of its ability to photosynthesise, which means it has far less energy available to put into flowering, into fighting off other pests and diseases, and into building up the reserves it needs to come through winter strongly and get away well the following spring.
Year after year of severe, unmanaged black spot will gradually weaken a rose to the point where it becomes properly vulnerable to other problems, flowers poorly, and generally looks like a shadow of what it should be. That’s the real risk: a slow decline through cumulative stress rather than a sudden death.
If your rose has already stopped flowering well and you suspect black spot is the culprit, I’d point you towards my full why is my rose not flowering guide, which walks through black spot alongside the other eight most common causes I see in client gardens, since more than one issue is often at play at once.
My Treatment Approach: Cultural Care First
I’ll say this plainly because it goes against what a lot of black spot content online tells you: I don’t reach for a fungicide as my first move, and neither does the RHS recommend that you do. The single biggest factor in how badly a rose suffers from black spot is not which fungicide you use; it’s how well the plant is grown. I have looked after client gardens with roses that get a touch of black spot every single year and still flower their socks off, purely because the fundamentals of pruning, feeding, watering, and airflow are right. Get those right first, and you’ll find the disease becomes a cosmetic nuisance rather than a genuine problem.

Remove Affected Leaves Promptly
The moment you spot black spot on a leaf, pick it off and bin it. Don’t wait for it to fall naturally, and absolutely don’t add it to your compost heap, because the spores survive home composting perfectly well and will simply reinfect your roses the following year when you spread that compost back onto the beds. I keep a small bucket to hand when I’m doing my rounds through a rose bed in summer specifically for this job, and it becomes second nature within a season or two. It feels like a small, fiddly task, but removing infected material promptly does reduce the amount of spore load building up in your garden through the season.
Water at the Base, Never Overhead
Since black spot needs a period of leaf wetness to infect new tissue, the simplest thing you can do to slow it down is to stop wetting the leaves in the first place. Water at the base of the plant, ideally in the morning so any splash that does occur has the whole day to dry off rather than sitting damp overnight. If you’re using a hose or watering can, direct the water straight onto the soil around the root zone rather than showering the whole plant, and if you’re on an irrigation system, drip lines are far kinder to rose foliage than overhead sprinklers.
Pruning For Airflow: The Open Goblet Shape
If I had to pick the single most effective long-term technique for reducing black spot on a rose, it would be pruning for an open, airy centre, what’s traditionally called the open goblet shape. A congested rose with lots of crossing, inward-growing stems creates exactly the still, humid, shaded microclimate that black spot thrives in. Leaves stay damp for longer because there’s no airflow to dry them off, and spores splashed onto one leaf have plenty of neighbouring leaves within easy reach to jump to next.
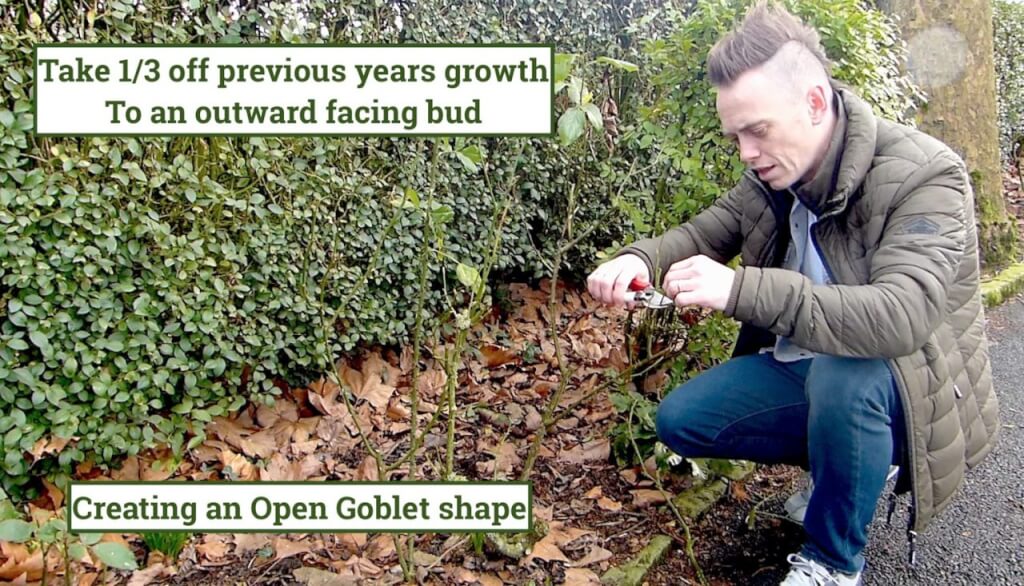
Opening up the centre of the plant by removing crossing and inward facing stems back to an outward facing bud lets air move freely through the whole framework, which means leaves dry out far more quickly after rain and dew has far less chance to sit on the foliage overnight. I go into the full technique, including exactly which stems to remove and when, in my complete guide to pruning roses, but the short version for black spot purposes is this: aim for a shape that looks a bit like a wine glass or goblet from above, with an open centre rather than a dense tangle, and always cut back to a bud facing outward from the plant so new growth heads away from the centre rather than back into it.
Winter is your main pruning window for this, but don’t be afraid to remove the odd badly congested or diseased stem during the growing season too if you spot one causing an obvious airflow problem. I do this regularly on client roses through summer, and it makes a visible difference to how much black spot develops on the plants either side of that stem within a few weeks.
Spacing matters just as much as pruning. If your roses were planted too close together, or nearby shrubs have grown up and started crowding them, no amount of careful pruning within the plant itself will fully solve the airflow problem. I’ve moved more than one rose in a client garden purely to give it breathing room from an encroaching hedge, and the difference in disease pressure the following summer was dramatic.
Feeding and Mulching For Resilience
A well fed rose has far more resources available to shrug off a black spot infection than a hungry one, and roses are properly greedy plants that need proper feeding to perform at their best. I feed my own roses with a balanced granular rose feed in early spring as growth gets going, and again after the first flush of flowering in early summer to fuel the second round of blooms.
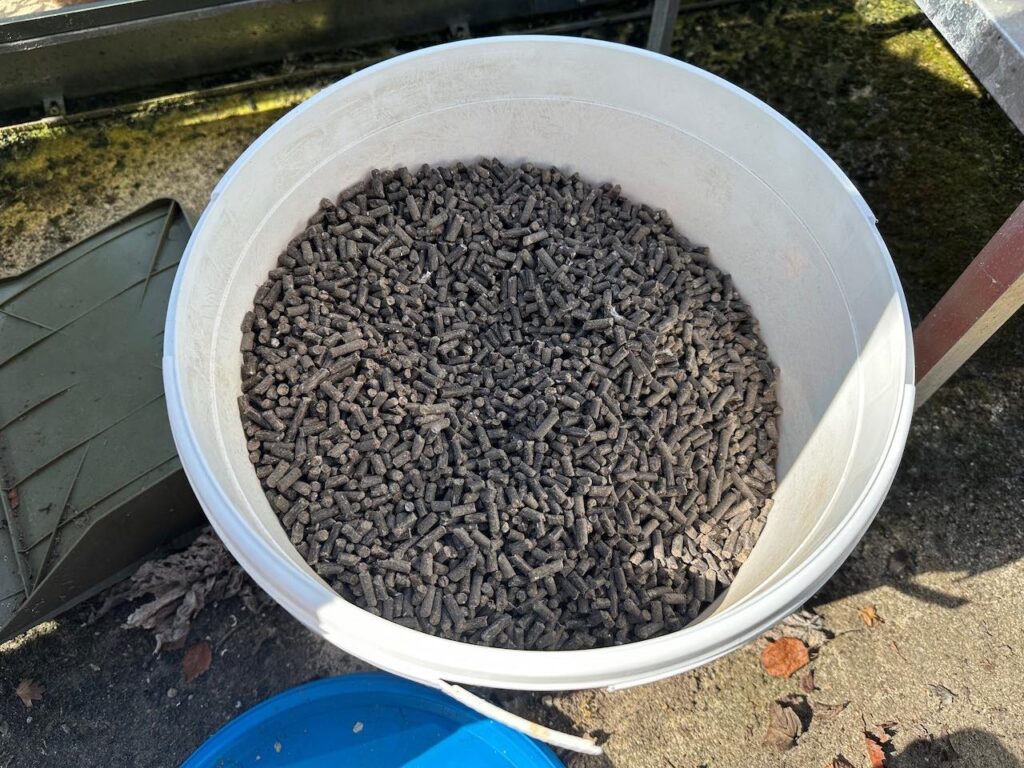
🛒 Granular rose fertiliser on Amazon UK
Potassium in particular supports strong cell walls in the leaves, which gives the fungus a slightly harder job of breaking in compared to a soft, lush, nitrogen-heavy leaf. This isn’t a magic bullet by any stretch; plenty of well-fed roses still get black spot, but it’s part of the overall resilience picture alongside everything else in this guide.
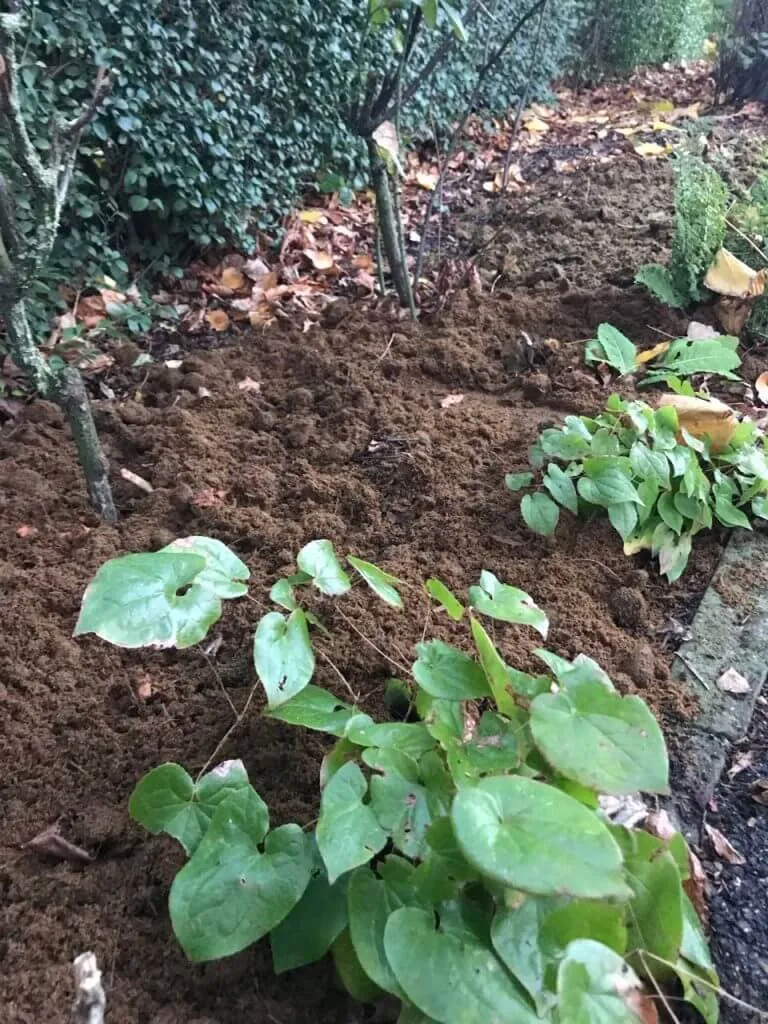
Mulching serves a double purpose here. A good layer of well-rotted mulch, compost, or composted bark applied in spring locks moisture into the soil so your roses are less stressed through dry spells, but it also creates a physical barrier between the soil surface and the lowest leaves. Since so many black spot infections start with rain splashing spore-laden soil particles up onto the bottom leaves, a decent mulch layer really does interrupt that pathway. Aim for around five to seven centimetres, keeping it clear of the main stem itself to avoid rot, and top it up each spring.
🛒 Composted bark mulch on Amazon UK
Should You Use a Fungicide?
Here’s where I’ll probably say something that surprises a few of you. The RHS’s own official position on black spot is that they don’t recommend routine fungicide use, and they’re pretty upfront about why: fungicides, including organic formulations, can reduce garden biodiversity, and a rose treated only with cultural methods, good pruning, good hygiene, decent feeding, will very often perform almost as well as one on a strict spray programme, without the ongoing cost or the impact on the wildlife using your garden.
I broadly share that view, and it’s the same reasoning behind my whole approach to organic pest and disease control across the rest of the garden. Reaching for a spray as the first response to every problem tends to eliminate the beneficial insects and microorganisms that would otherwise be helping keep things in balance, and roses in particular are visited by an enormous range of pollinators through the summer that I’d rather not put at risk for a cosmetic leaf problem that won’t kill the plant.
That said, I’m not going to pretend fungicides don’t work, because they do reduce black spot when used correctly, and there are situations where I understand why a gardener might choose to use one. A treasured, highly susceptible rose in a properly difficult, damp, shaded spot that can’t easily be moved is a reasonable case for it. If you do decide to use one, a few practical points worth knowing.
Available products and their approved active ingredients change fairly regularly in the UK as regulations are reviewed, so it’s always worth checking the current RHS guidance or the product label rather than relying on a specific brand name that might have been withdrawn or reformulated. Fungicides work as prevention far better than they work as cure, so timing sprays to start before symptoms appear in late spring is far more effective than waiting until the plant is already covered in spots. And if you’re using more than one product across a season, rotating between different active ingredients rather than sticking to the same one repeatedly helps prevent the fungus building up resistance, which is a real and documented problem with black spot populations that have been treated the same way for years.
🛒 RHS approved rose fungicide sprays on Amazon UK
Organic Home Treatments Worth Trying
If you’d rather try something a bit gentler before considering a commercial fungicide, there are a couple of home remedies that come up again and again in gardening circles, and which I’ve used myself with reasonable success, particularly as a preventative measure rather than a cure for an infection that’s already well established.
A potassium bicarbonate spray is the one I’d point you towards first. Mix about 1 tablespoon of potassium bicarbonate with a few drops of mild liquid soap into a litre of water, and spray it over the foliage every 10 days to 1 week throughout the main risk period from late spring onwards. The alkaline environment it creates on the leaf surface makes life considerably harder for fungal spores trying to establish themselves.
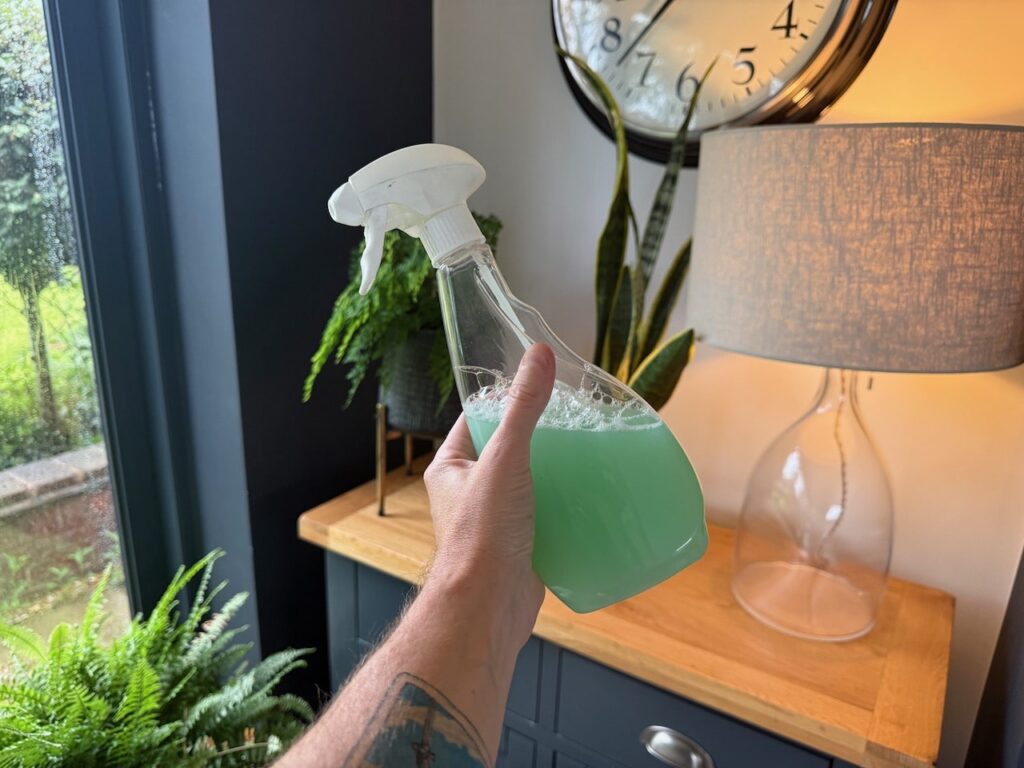
Ordinary bicarbonate of soda works in a broadly similar way, though potassium bicarbonate tends to be gentler on the leaf tissue and less likely to cause any scorch in hot weather. I’ve covered the general principles of building your own sprays, including patch testing and safe application, in far more depth in my organic pest spray guide, and exactly the same good practice applies here.
🛒 Potassium bicarbonate for garden use on Amazon UK
A diluted milk spray is another one worth knowing about, and one I was properly sceptical of the first time a client mentioned it to me, having read about it originally for use on courgettes and cucurbits against powdery mildew. Mixed at around one part milk to nine parts water and sprayed onto the foliage, the proteins in the milk seem to have a mild antifungal effect when exposed to sunlight, though I’d rate it as a supporting measure rather than something to rely on alone against an established infection. Both of these are worth applying preventatively from late spring, before symptoms appear, rather than waiting until the plant is already covered in spots and hoping for a rescue.
Your Autumn and Winter Clean Up Routine
If you only take one piece of advice from this entire guide, make it this one, because it’s the single most effective long term thing you can do to reduce black spot next year. As I explained earlier, the fungus overwinters in fallen leaves and on infected stems, patiently waiting to produce fresh spores the moment new growth appears in spring. Break that cycle over winter and you start the following season with dramatically less disease pressure than a garden where fallen leaves were simply left to rot down where they fell.
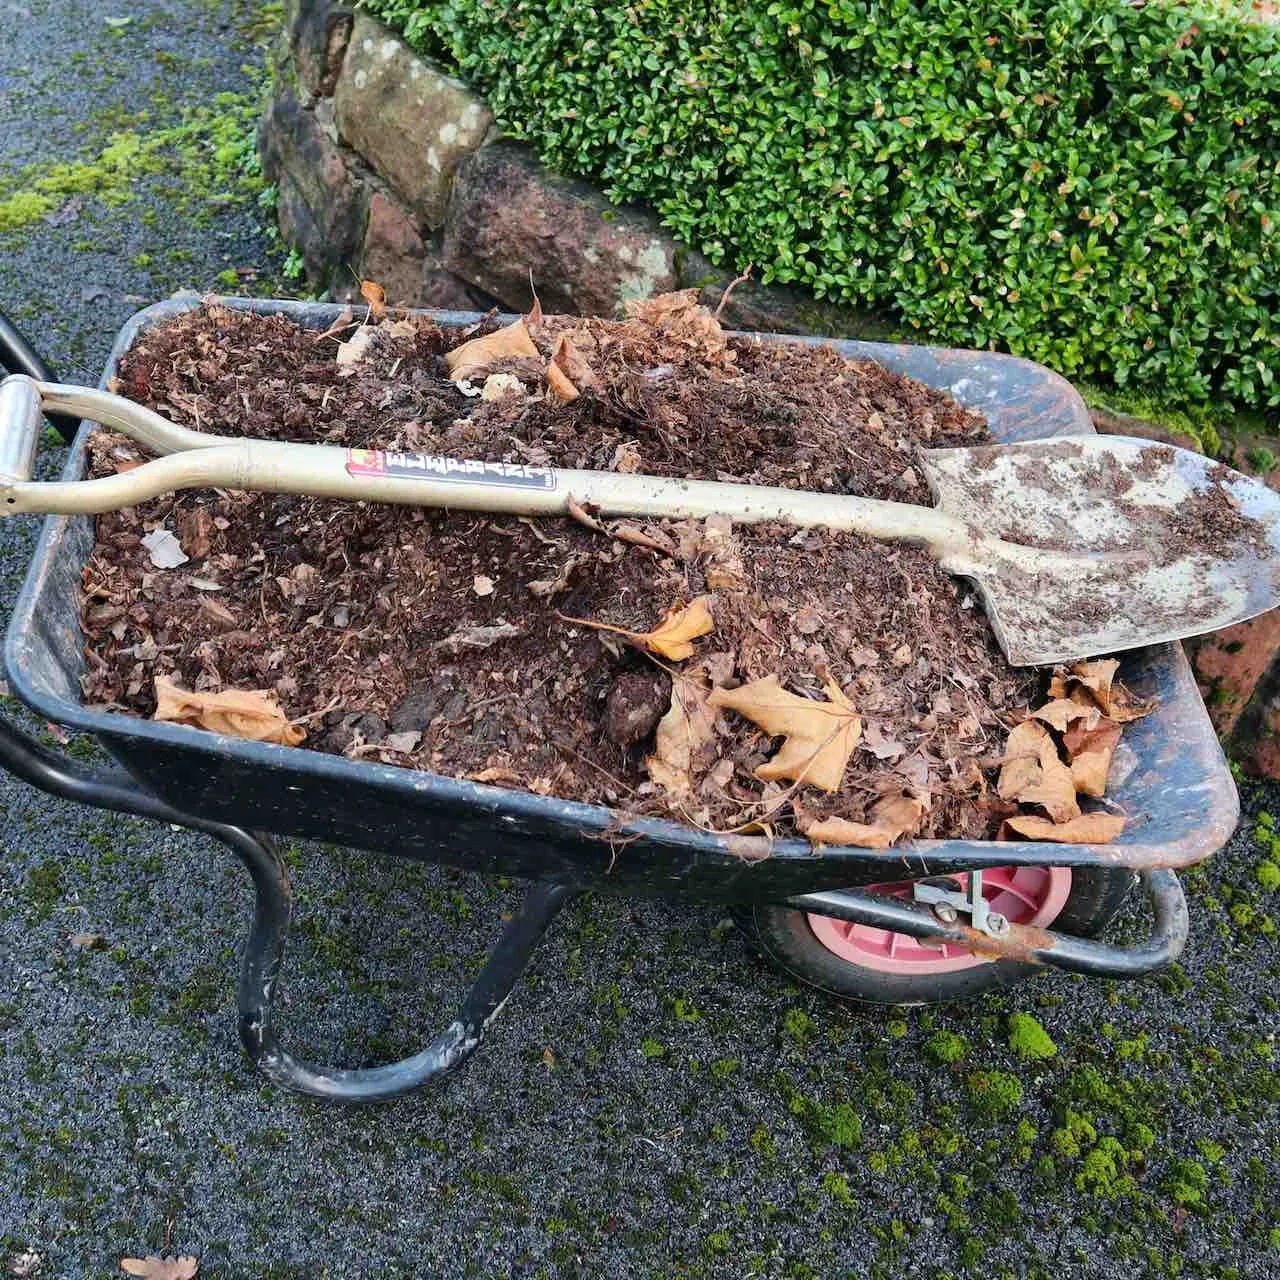
Rake up and remove every fallen leaf from around the base of each rose through autumn, right through to the last leaves dropping in early winter, and keep going right through into late winter, since a surprising number will still be tucked under the plant or caught against the stems. Bag them up and either burn them, if you have a safe way to do so, or dispose of them through your council green waste collection, which reaches high enough temperatures during processing to destroy the spores in a way home composting simply won’t manage. Do not add rose leaves showing any sign of black spot to your own compost heap, whatever else you compost. This is a genuine case where the usual sustainable instinct to compost everything works against you.
🛒 Heavy duty garden refuse sacks on Amazon UK
Once the leaves are cleared, this is also your main annual pruning window, so tie the two jobs together. Cut out any stems showing dark, sunken cankers or lesions back to clean healthy wood, since the fungus can persist on infected stems just as readily as on fallen leaves, and finish by applying a fresh layer of mulch as described above to create that physical barrier before the next growing season starts.
Black Spot Resistant Rose Varieties Worth Considering
If you’re starting a new rose bed from scratch, or you’ve got a particular rose that suffers so badly every single year that it’s simply not worth the aggravation any more, choosing a naturally more resistant variety is by far the least effort, longest lasting solution available to you. It’s worth saying clearly that no rose is completely immune, breeders talk about resistance rather than immunity for good reason, but there’s a real and meaningful difference between varieties that shrug off a bit of black spot without dropping their leaves, and varieties that look dreadful by midsummer every single year regardless of how well you look after them.
As a general rule, older shrub roses, species roses, and ramblers tend to have considerably better natural resistance than many of the modern hybrid tea and floribunda types bred primarily for flower form and colour rather than disease resistance. That’s not a hard rule, breeding programmes have made real progress on disease resistance in recent decades, but it’s a useful starting point if you’re choosing blind.
If you’re weighing up which type of rose suits your garden generally, not just for disease resistance, my types of roses explained guide covers the full range from hybrid teas through to ramblers and climbers, including the maintenance trade offs of each.
Common Black Spot Mistakes I See in Client Gardens
A few patterns come up again and again when I’m called in to look at a struggling rose, and most of them are entirely avoidable once you know what to look for. Composting infected leaves is probably the most common, and I understand why it happens, since composting everything organic feels like the right instinct for most of us, but with black spot it actively works against you and reintroduces the problem the following year through your own compost.
Overhead watering with a sprinkler is another one I see constantly, particularly on newer builds where an automatic irrigation system was installed without much thought given to what’s actually being planted underneath it. If you’ve got roses on an overhead sprinkler system, it’s well worth having it adjusted or moving to drip irrigation for that bed specifically.
Overcrowding is the third big one, roses planted too close together, or too close to a hedge or fence, simply never get the airflow they need regardless of how well you prune the individual plants. And finally, panic pruning severely affected roses in the middle of summer, cutting a plant back hard while it’s actively trying to flower, tends to do more harm than good. Remove individual affected leaves and stems as needed through the season, but save any major structural pruning for the proper winter window when the plant is dormant and can recover without the added stress of losing its flowering display too.
Frequently Asked Questions About Rose Black Spot
Can black spot spread to other plants in my garden?
Diplocarpon rosae is host specific to roses, so it won’t infect your other shrubs or perennials directly. However, other plants such as photinia and hebe get their own, similarly named leaf spot diseases caused by different fungi, which can look confusingly similar from a distance. I cover photinia’s version in my photinia pruning guide if you’re seeing spots on more than one type of plant.
Can I save a rose that has lost most of its leaves to black spot?
Almost always, yes. Remove the fallen and remaining infected leaves, keep the plant watered at the base and fed through the rest of the season, and prune hard in winter as usual. The rose will produce a completely fresh set of leaves the following spring, and with better cultural care through the new season, it should perform considerably better.
Why does my rose get black spot every single year no matter what I do?
Some varieties are simply far more susceptible than others, and if you’re doing everything right, good pruning, base watering, autumn clean up, mulching, and still getting severe black spot annually, the variety itself may just be a poor fit for your specific spot or climate. This is when it’s worth considering replacing it with one of the more resistant varieties covered above.
Is black spot the same as rose rust or powdery mildew?
No, these are three separate fungal diseases. Black spot causes dark circular spots with a yellow halo. Rust causes small orange pustules, usually on the undersides of leaves. Powdery mildew causes a white, dusty coating over leaves, stems, and buds. All three favour similar humid, still conditions and the same cultural treatments, better airflow, good hygiene, base watering, help against all of them, though the specific fungi involved are different.
Should I remove all the leaves from a badly infected rose at once?
No, avoid stripping a rose completely bare in one go during the growing season, since the plant still needs some functioning leaves to photosynthesise and produce energy. Remove clearly infected leaves as you spot them on your regular rounds through the season, and save the complete clear up for the natural leaf drop in autumn and winter.
Does black spot affect rose hips or flowers directly?
Black spot itself primarily affects the leaves, and occasionally young stems, rather than the flowers or hips directly. The impact on flowering is indirect but real, a defoliated rose simply doesn’t have the energy reserves to produce as many blooms, which is why severe cases often coincide with a disappointing flowering display.

Join over 100,000 gardeners on YouTube
Free gardening videos from the Garden Ninja, with 8 million views and counting.
Subscribe on YouTube, it’s freeGetting on Top of Black Spot For Good
Black spot is one of those garden problems that looks far more alarming than it actually is, provided you respond to it with good, consistent cultural care rather than panic. Remove infected leaves as you spot them, prune every winter for an open, airy shape, water at the base rather than overhead, feed and mulch properly, and above everything else, get the autumn and winter clean up right so you’re not carrying the same spore load over into next spring. Do those things consistently and most roses, even the more susceptible varieties, will perform beautifully despite a touch of black spot most summers.
If you’d rather sidestep the problem almost entirely, choosing one of the more naturally resistant varieties covered above when you’re next adding a rose to the garden is by far the lowest effort long-term fix available. And if black spot has already knocked your rose’s flowering about this year, my rose not flowering guide and my rose pruning guide are the two places to head next to get it back on track for next season.
Happy Gardening!




Lee Burkhill
Lee Burkhill, known as the Garden Ninja, is an award-winning garden designer and horticulturist with over 30 years of gardening experience and 15 years as a professional garden designer. A qualified RHS (Royal Horticultural Society) professional, Lee specialises in sustainable garden design and practical horticultural advice. He designs and presents on BBC1’s Garden Rescue and in leading gardening publications. Lee combines three decades of hands-on gardening knowledge with professional design qualifications to help gardeners create beautiful, functional outdoor spaces.
View all posts by Lee Burkhill






Categories
Other posts
-

How to learn Garden Design: most cost-effective learning methods Read more
-
Start here: to begin your gardening journey! Read more
-
Garden Media Guild Awards; all that glitters really is gold Read more
-
Compost vs Mulch: The Difference, Costs and When to Use Each Read more
-
Hardening Off Plants: Why and How to Do It Properly Read more
-
40 Best Pink Flowers for UK Borders and Cottage Gardens Read more
-
Why Is My Hydrangea Not Flowering? The Complete UK Guide Read more