How to take hardwood cuttings: propagating shrubs in winter
Lee Burkhill: Award Winning Designer & BBC 1's Garden Rescue Presenters Official Blog
Beginner level
For beginner gardeners, diving into the world of how to take hardwood cuttings is like unlocking a magical secret where you can grow many more plants for free. Taking hardwood cuttings is one of the easiest ways to multiply your plants and it requires very little skill other than learning the basics. So join me, Lee Burkhill as I show you how to propagate with hardwood cuttings!
Taking hardwood cuttings is a wonderfully straightforward and cost-effective way to grow more plants. Hardwood cuttings require minimal tools and expertise, making them a perfect entry point for those new to gardening. Imagine being able to clone your favourite plants or share them with friends and neighbours, all while everything else is asleep in the garden. Hardwood cuttings allow you to propagate your shrubs in the winter while promoting sustainability and reducing the need for frequent plant purchases or spending a fortune trying to plant up your garden.
In this expert guide, I’ll walk you through the steps to master the art of taking hardwood cuttings to propagate from plants you already have. This will ensure a beautiful garden come spring and take your skills to the next level, Ninjas!
This page contains affiliate links for products I use and love. If you take action (i.e. subscribe, make a purchase) after clicking a link, I may earn some gardening commission, which helps me keep the Garden Ninja Blog free for all.
What are hardwood cuttings?
A hardwood cutting is a section of mature, fully ripened wood taken from deciduous trees and shrubs during their dormant season, typically between late autumn and late winter. This hardwood cutting can be rooted to create new plants that are genetically identical to the parent.
This propagation method represents one of the most straightforward and reliable techniques available to gardeners, requiring no specialist equipment, no heated propagation facilities, and remarkably little skill beyond the ability to make a clean cut with sharp secateurs.
The term “hardwood” distinguishes these cuttings from softwood cuttings, which come from fresh spring growth, and semi-ripe cuttings, which are taken from partially matured summer wood. Hardwood cuttings have fully developed their protective bark and stored sufficient energy reserves to sustain themselves through the rooting process, making them far more resilient than their softer counterparts. What makes them particularly clever from a horticultural point of view is the callusing process.
Over winter, the cut surface at the base of the stem slowly forms a layer of undifferentiated tissue called callus. It is from this callus that roots emerge in spring as temperatures rise. This is why hardwood cuttings are genuinely a process you can set up in December and largely leave alone until March.
Benefits of hardwood cuttings
Hardwood cuttings offer a cost-effective and versatile method for gardeners to propagate a variety of deciduous plants, including shrubs, trees, and fruit-bearing species. This technique harnesses the winter dormancy period, allowing gardeners to clone their favourite plants whilst preserving specific traits and characteristics of these garden shrubs.
Let’s take a quick look at the other benefits of taking hardwood cuttings to bulk up your borders:
i) Cost-Effective Propagation – Hardwood cuttings offer an economical way to multiply plants without the need to purchase new ones.
iii) Ideal for Deciduous Plants – Deciduous shrubs, trees, and certain fruit-bearing plants respond well to hardwood cuttings, making it a versatile method for many species.
v) Minimal Equipment Needed – A pair of sharp, clean secateurs and a pot of gritty compost is genuinely all you need to get started.
vi) Encourages Strong Root Systems – The callusing and rooting process over winter produces robust, well-developed root systems that are ready to support vigorous growth the following spring.
vii) Faster than growing from seed – Using cuttings can drastically reduce the growing time and success rate compared to growing from seed, and you get a plant genetically identical to the parent rather than a variable seedling.
Which plants can I take hardwood cuttings from?
Some plants lend themselves far better to hardwood cuttings than growing from seed or softwood cuttings. As a rule of thumb, you can take a hardwood cutting from any deciduous shrub or climbing plant that has woody stems or branches. This is why the term hardwood is used in this plant propagation method. If it loses its leaves in winter and leaves behind woody stems, it’s a candidate.
The plant categories below cover the full range of what works well. Shrubs are the most popular starting point, but the fruit and climber categories are often overlooked by home gardeners and can be extraordinarily rewarding. Growing your own blackcurrant bushes from cuttings taken off an established plant costs nothing and produces a full fruiting bush within a couple of seasons.
One of the great joys of hardwood cuttings is how little you need to get started. There’s no heated propagator, no specialist growing medium, no misting bench. The list below covers everything I use, from the genuinely essential to the items that give you a meaningful edge on more stubborn species.
🛠 Hardwood Cuttings Tools
Tool
Why You Need It
Essential?
Buy
Sharp Secateurs
A clean cut is everything. Blunt blades crush stem cells and open the door to rot before callusing has a chance to begin.
Taking these cuttings can take around 30 minutes, so it’s genuinely speedy. Get all your tools ready before you start cutting so that once the stems are off the plant, you can get them into compost as quickly as possible.
When to take hardwood cuttings?
The best time to make hardwood cuttings is when the deciduous plant is dormant in late autumn or early winter. This is when the plant or shrub has shed its leaves and has slowed down its respiration. This makes for the perfect time for hardwood cuttings because the plant is under minimal stress and all energy is available for root development rather than leaves or flowers.
The ideal window runs from just after leaf fall in November right through to late February, before the buds begin to swell and break. I personally prefer December in the UK, before the first hard frosts arrive in earnest, because conditions are consistently cool and moist without yet being severe.
Here’s a quick breakdown of why each aspect of this timing matters:
A) Lower Temperatures: The cool, stable winter temperatures in the UK help prevent the cuttings from drying out. Hardwood cuttings are slower to root than softwood cuttings taken in spring or summer, so the slower winter period allows callus to form and roots to establish before new growth demands kick in.
B) Dormant State: Since the parent plants aren’t actively growing, they have a higher tolerance for having sections of stem removed, reducing any stress on the main plant.
C) Less Risk of Disease: With fewer active pests and pathogens in winter, there’s a reduced risk of infection at the cut surface before callusing provides a natural seal.
Once taken, place the cuttings in well-draining compost in a sheltered spot outdoors, where they can slowly callus and develop roots over the winter months, ready to push into growth as spring arrives.
How to take hardwood cuttings
This simple step-by-step guide will help you take hardwood cuttings successfully. Once you’ve mastered the process, you’ll be making hardwood cuttings easily and even be able to show your friends how it’s done!
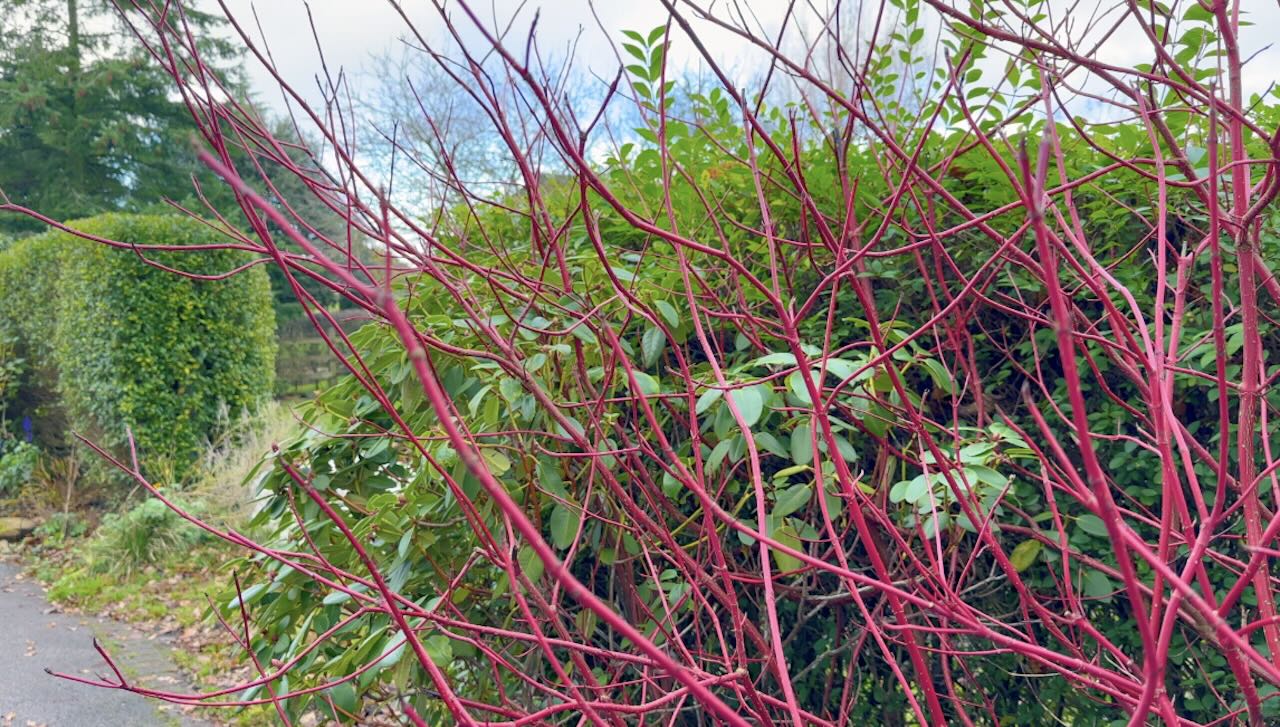
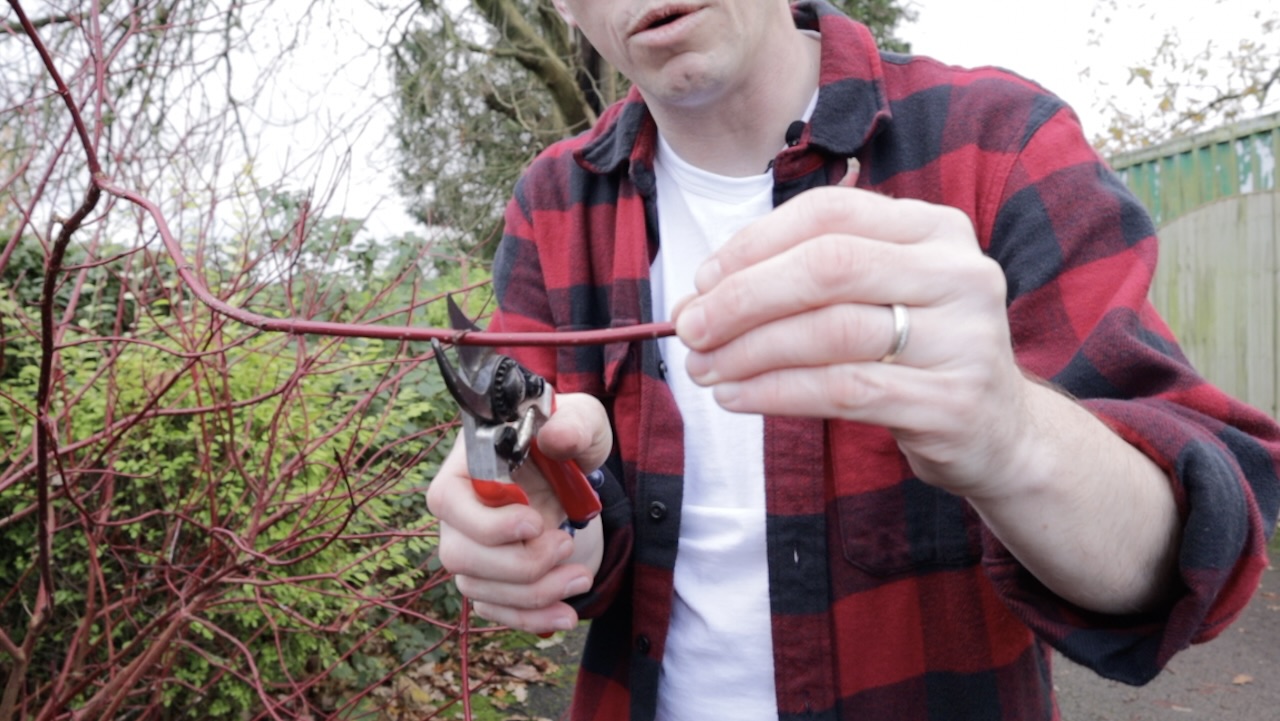
Step 1: Choose your shrub & stem type
Not all stems are equal when it comes to hardwood cuttings, and spending a few extra minutes at this stage makes a genuine difference to your success rate. You’re looking for stems produced in the current growing season: one year old, pencil-thick, healthy, and completely free from any sign of disease, pest damage, or dieback. Hold a candidate stem between your fingers and run them along its length. It should feel firm and solid throughout, with no soft or hollow sections, and the bark should look clean and unbroken.
Avoid stems that are either too thin and wispy or too thick and old. Thin stems lack the stored energy reserves needed to sustain the cutting through the slow winter rooting process, while old multi-year wood has reduced hormone activity and roots much less reliably. The sweet spot is a stem that matches a standard pencil in thickness, taken from growth that appeared this year rather than last. If you’re working with a plant that has produced a lot of new growth, take stems from several different parts of the shrub rather than stripping one branch heavily, which keeps the parent plant looking balanced and healthy.
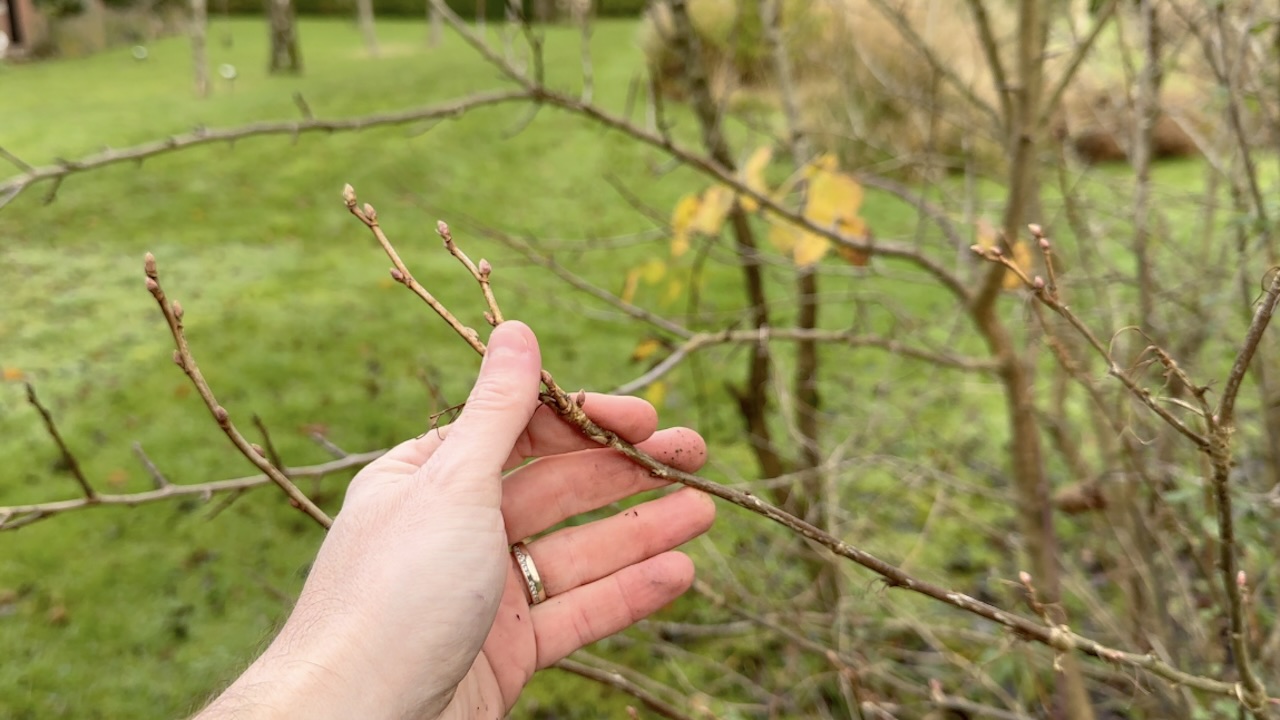
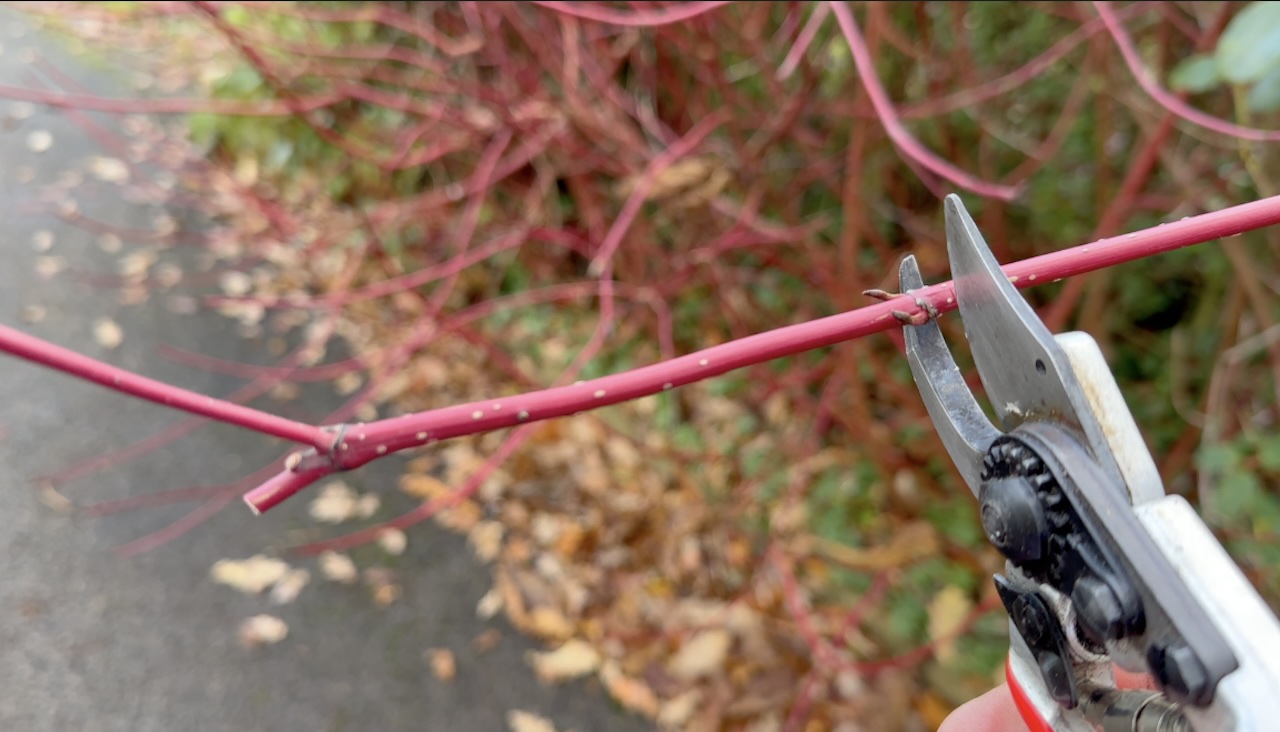
Step 2: Cut lengths from 15–30cm
Identify the tip of the plant with healthy one-year-old growth and work backwards between 15–30cm until you find a bud or leaf node, which is the point on the stem where leaves or side shoots emerge. Then make a clean horizontal cut a few millimetres beneath this node or bud. This is the rooting end of your cutting, because this node is where the plant’s rooting hormones are most concentrated. The closer your cut is to the node, the better the rooting response will be. A cut made several centimetres above or below a node will have far lower hormone activity.
Make sure your secateurs are sharp and properly cleaned before you start. A blunt blade crushes the cells at the cut end rather than slicing through them cleanly, which compromises the callusing response and creates an entry point for rot. If you’re taking cuttings from several different shrubs in one session, wipe the blades with a clean cloth between plants to avoid transferring any disease. It takes seconds and could save the whole batch. From a single long stem, you can often cut three to five individual cuttings of the right length, which is a very efficient use of the material you’re taking from the parent plant.
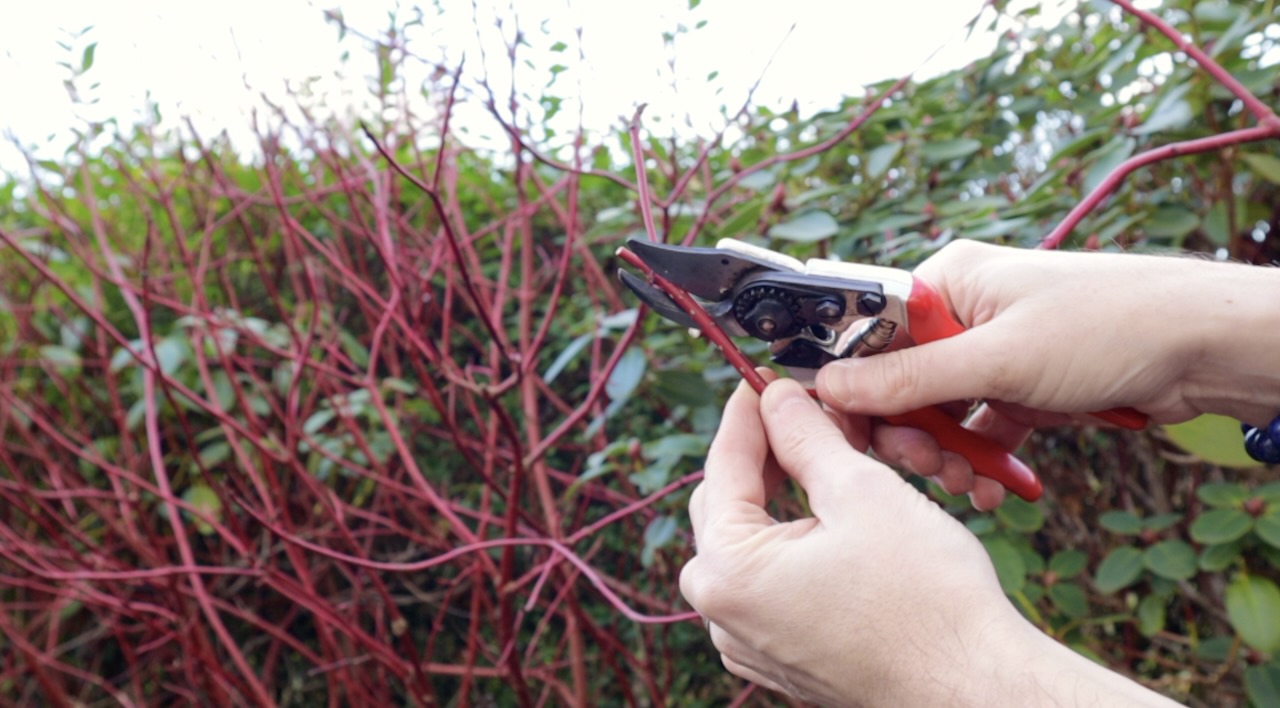
Step 3: Make an angled cut to the top of your cutting
This step is one that many guides gloss over or miss entirely, and it matters more than you might think. Once you have your cutting length, go back to the top end and make a 45-degree angled cut. This serves two purposes.
First, the angle ensures that any rainwater or condensation runs straight off rather than sitting on the cut surface, where it would encourage rot to work its way down into the cutting. A horizontal cut at the top creates a small collecting point where moisture pools, particularly in the wet British winter, and that moisture can cause the top of the cutting to deteriorate before rooting has happened.
The second purpose is physiological. Cutting the top at an angle helps discourage the cutting from directing energy into upward, apical growth before the roots are ready to support it. It also gives you an immediate visual indicator of which end is which when you’re potting up, so there’s no risk of accidentally planting a cutting upside down, which is a surprisingly easy mistake to make when you’re working quickly with a batch of similar-looking stems. Bottom cut horizontal, top cut angled. Simple, but genuinely important.
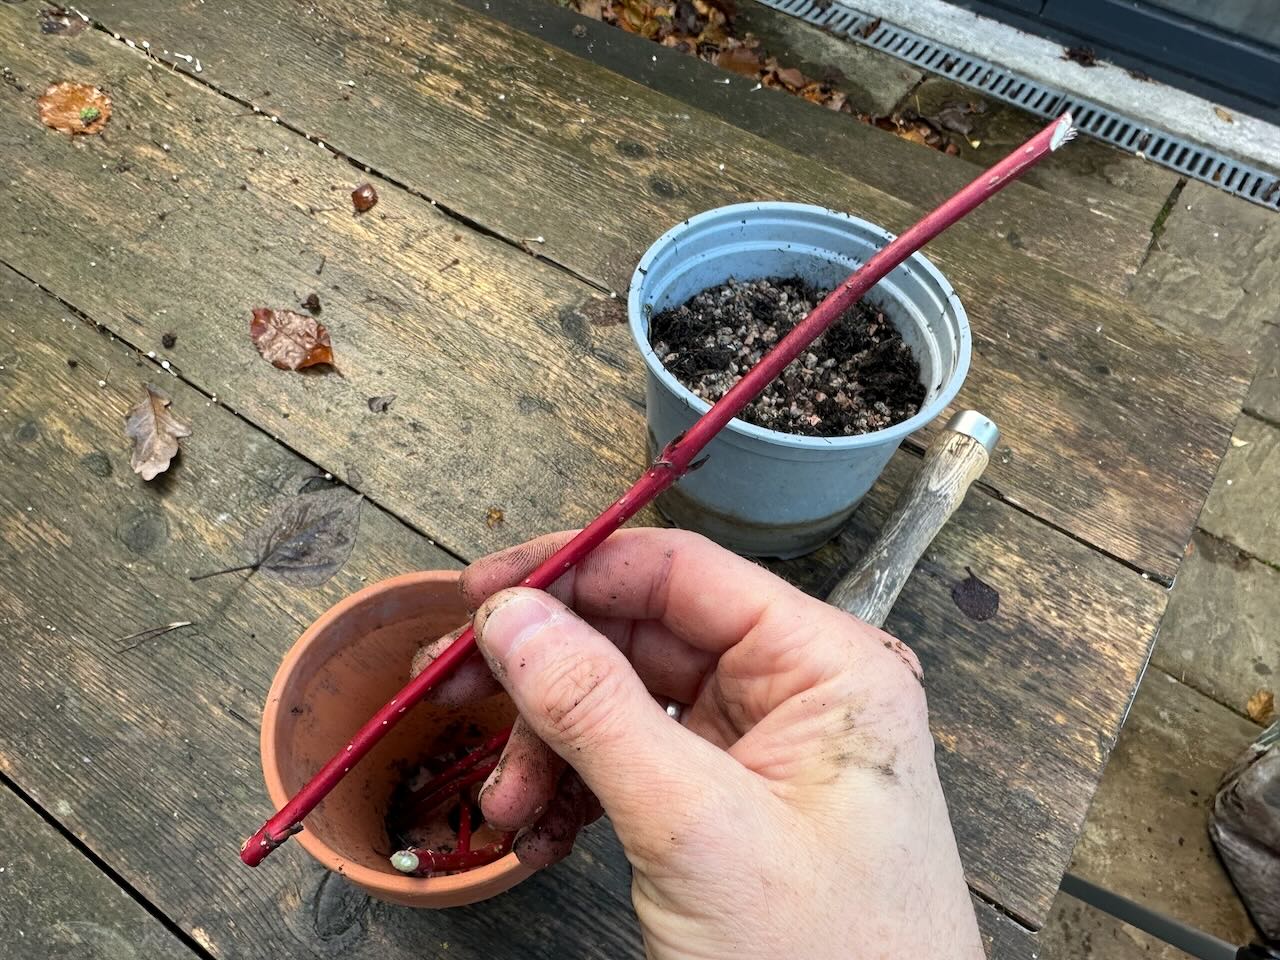
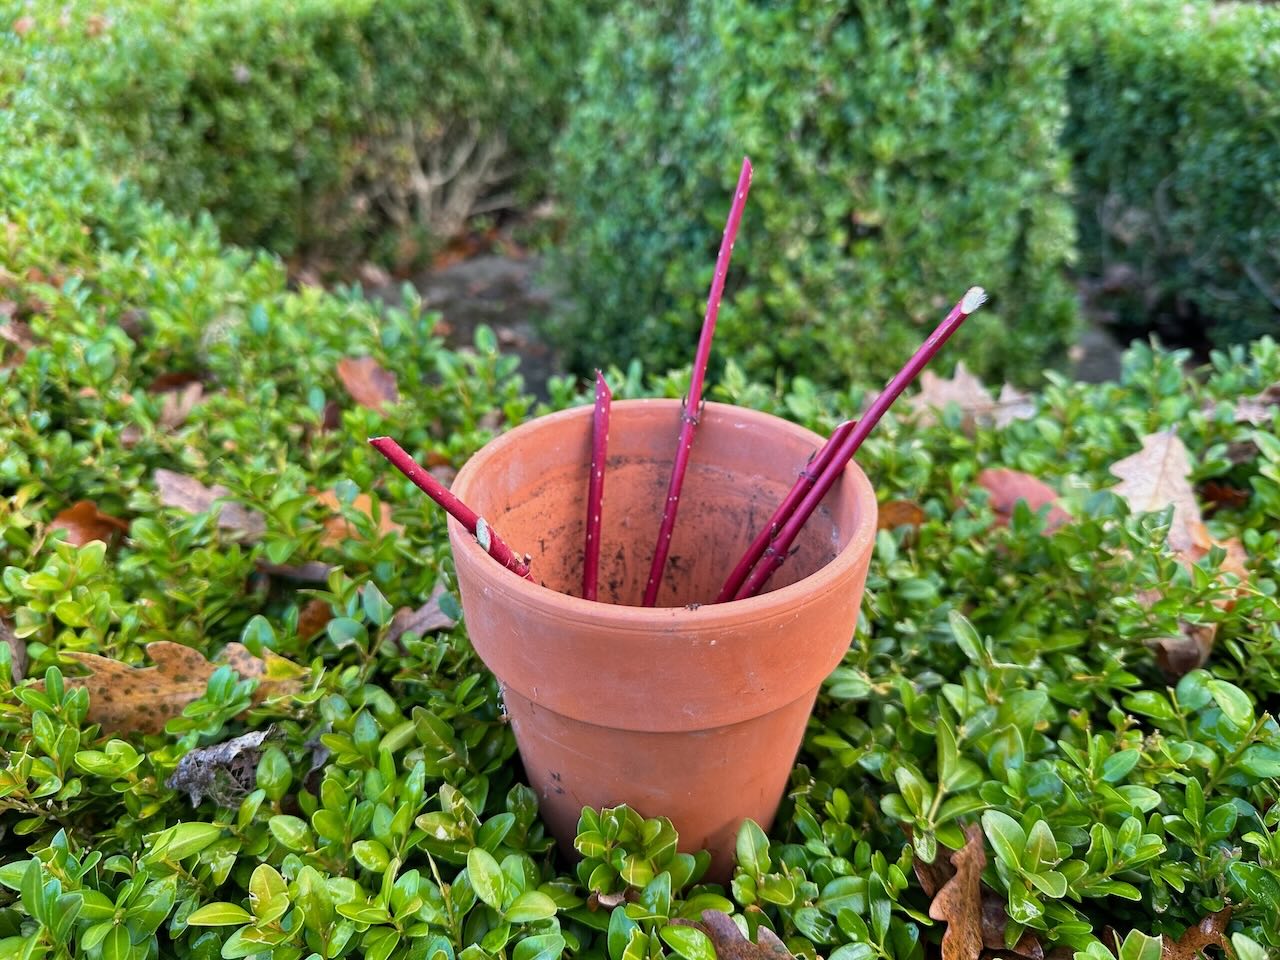
To see an example of the perfect hardwood cutting, have a look at the image below. You will see the horizontal cut at the base and an angled cut at 45 degrees at the top. The cutting is between 15cm and 30cm in length.
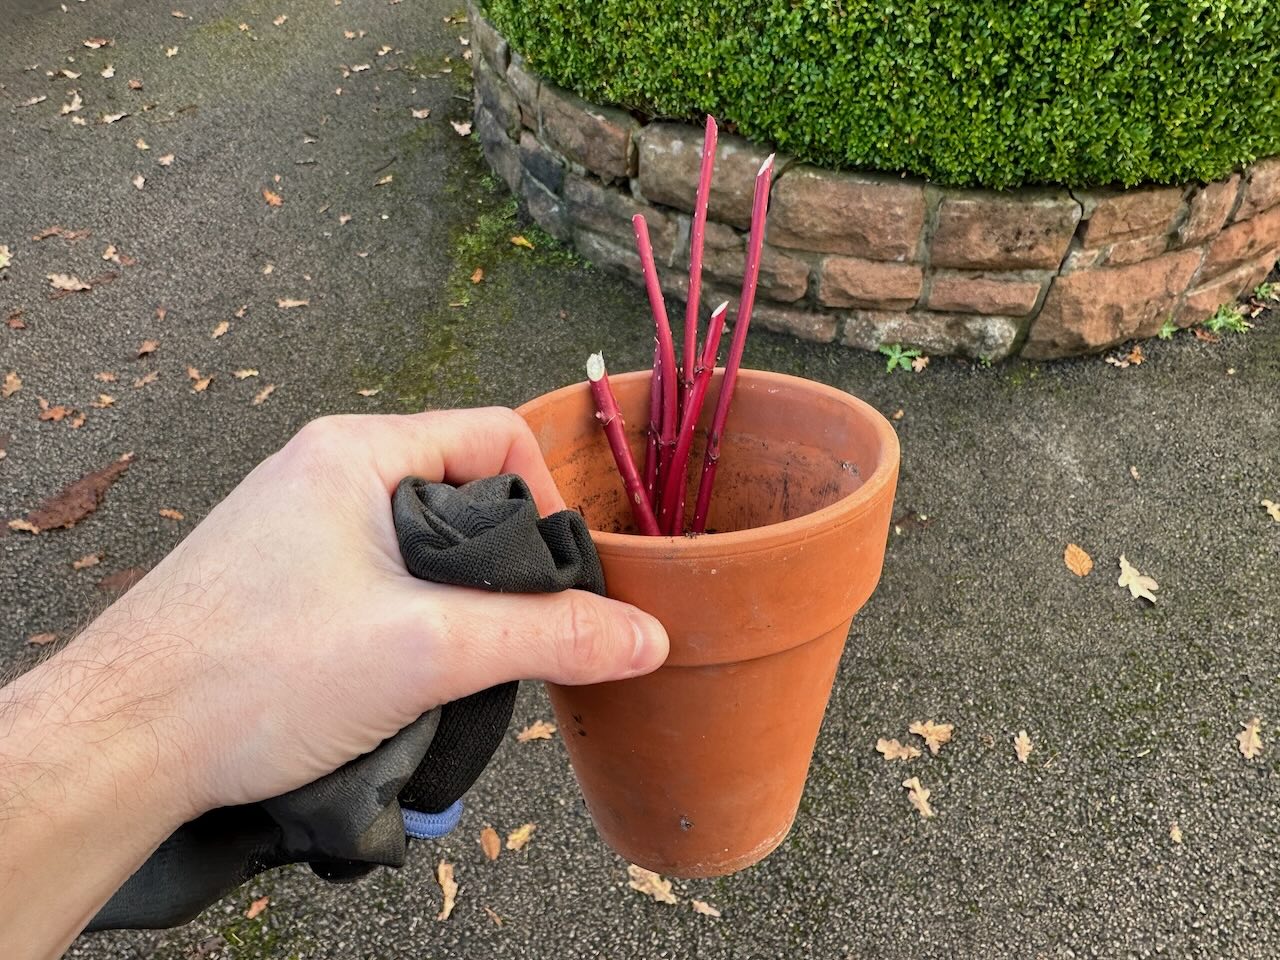
Step 4: Place cuttings in a container the right way up
It sounds obvious, but planting a hardwood cutting upside down is one of the most common mistakes beginners make, and it results in complete failure every time. A cutting inserted the wrong way round will never root, regardless of how perfect the cutting material was or how good the conditions are. The angled top cut from Step 3 is your insurance against this: a flat horizontal cut goes in the ground, an angled cut stays above it. Get into the habit of always checking this before anything goes into the pot.
As you collect your cuttings, lay them all in the same orientation in a bucket or damp plastic bag to keep them from drying out while you prepare your pots. Time spent exposed to dry air is time the cutting isn’t in compost where it needs to be, so work methodically. If you cannot pot them up straight away, a damp plastic bag tied loosely and kept somewhere cool and shaded will buy you a day or two. I always label pots by species and date if doing multiple plants in one session, which saves a lot of confusion come March when they all look alike.
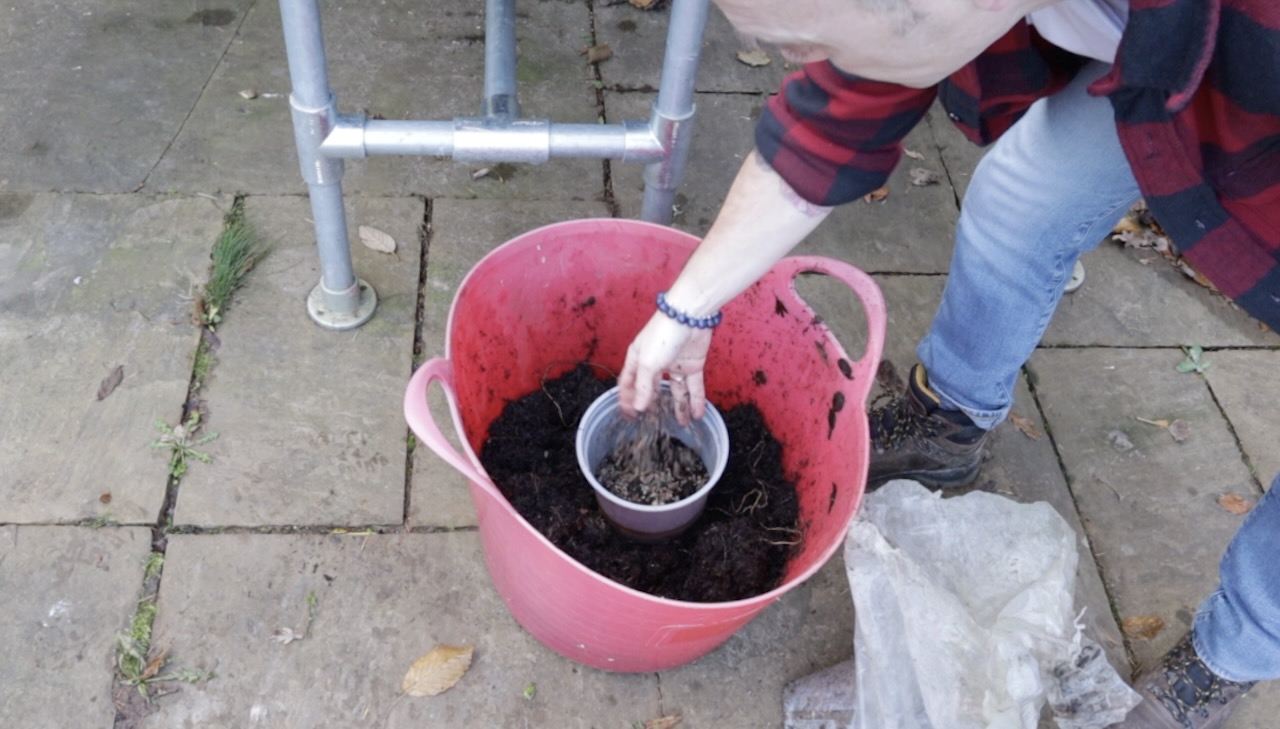
Step 5: Mix your compost & grit
Hardwood cuttings need a free-draining, lightweight growing medium. You can just use normal peat-free compost, but the cuttings can become waterlogged over winter if you’re not careful. I always use a 50:50 mix of peat-free compost and horticultural grit, which aids drainage and keeps the medium open and aerated. Perlite or vermiculite works equally well if you don’t have grit. Avoid sharp sand from a builder’s merchant, as it lacks the right particle size and can compact around the cutting base over winter.
The reason drainage matters so much here is that hardwood cuttings sit in their pots during the UK’s wettest months. A standard multipurpose compost used alone becomes dense and waterlogged in prolonged rain, and waterlogged compost is anaerobic, meaning very little oxygen reaches the base of the cutting. Roots need oxygen to develop. A gritty mix stays open and aerated even after weeks of autumn and winter rainfall. Think of it less as compost and more as a well-drained rooting medium that happens to contain some nutrients.
For easy rooters like Cornus, Willow, and Blackcurrant, rooting hormone is an optional bonus rather than a necessity. For more challenging species like Roses, Holly, Honeysuckle, and Viburnum, it can be the difference between a pot full of successful cuttings and a pot full of rotted sticks by March.
Dip the cut end of each stem into rooting hormone powder, then tap off any excess to leave a light, even coating rather than a thick clump. Too much is counterproductive. For particularly stubborn species, you can also lightly score the bottom 2–3cm of the cutting with a knife blade before applying the hormone, a technique called wounding. This scratches the cambium layer just beneath the bark, exposing undifferentiated cells that respond more readily to the hormone and form callus faster. It sounds drastic, but it’s gentle work and can significantly improve results on difficult plants like Holly.
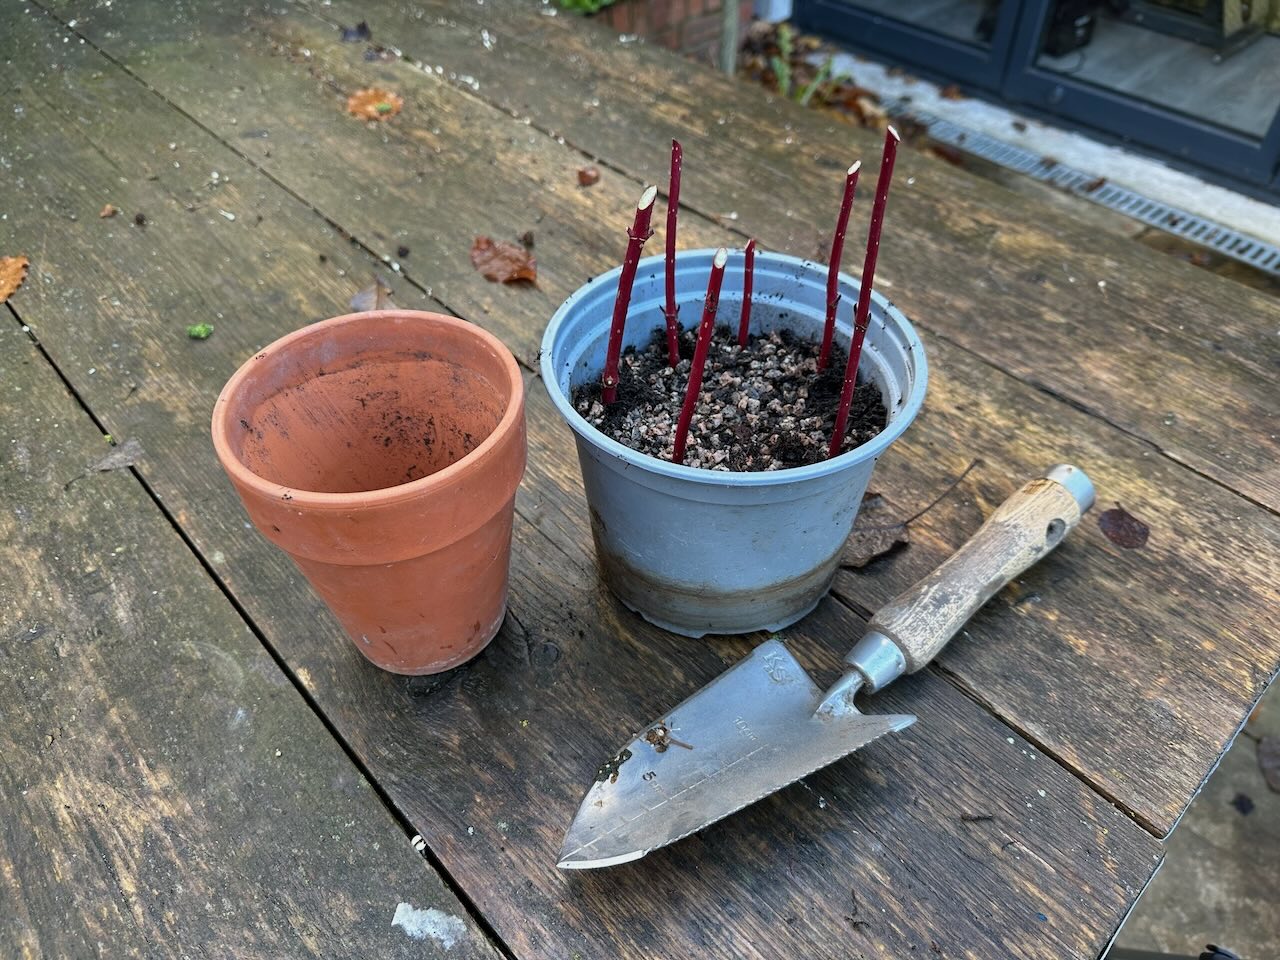
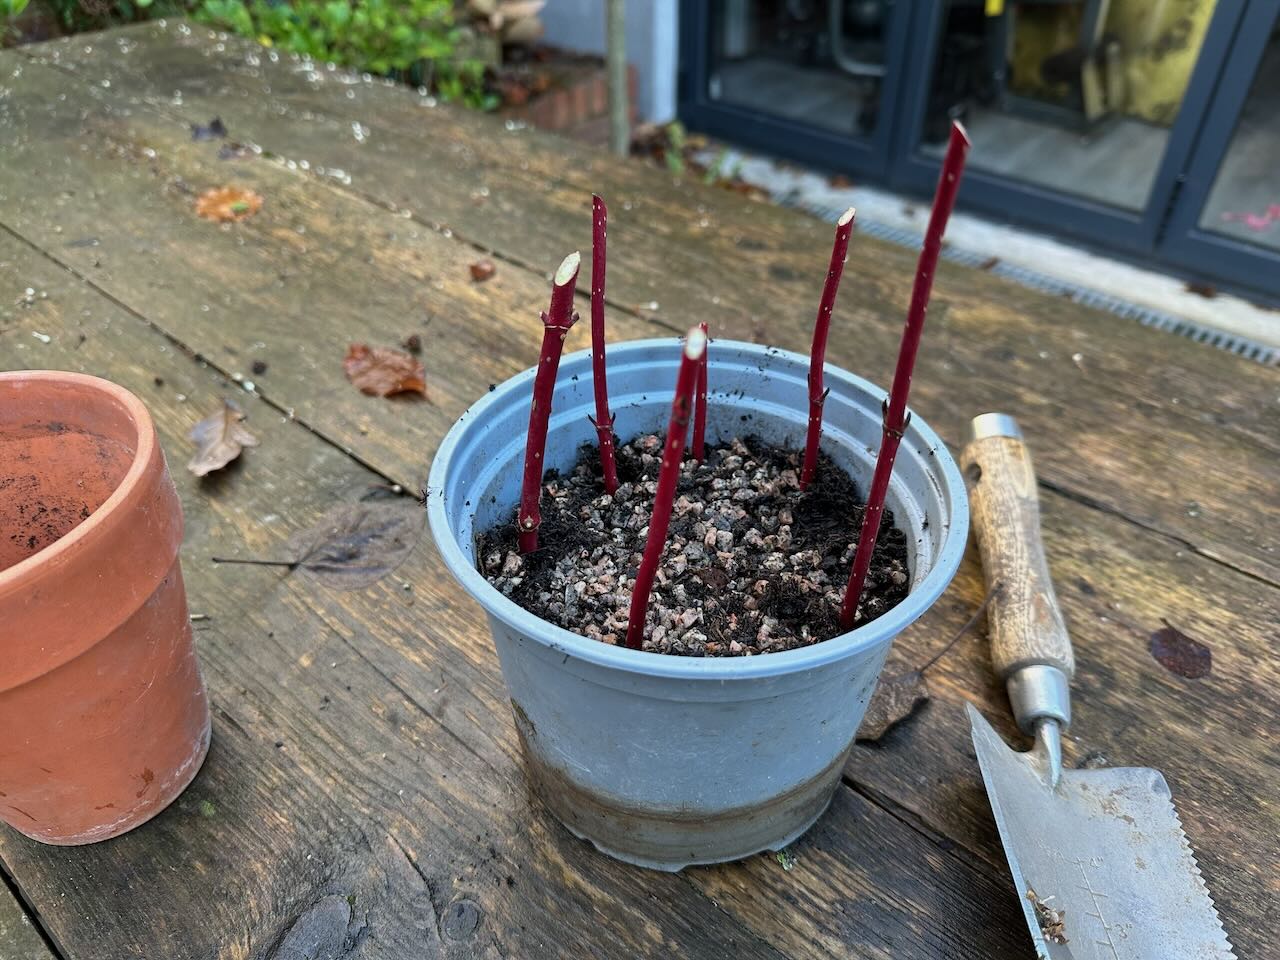
Step 7: Plant your cuttings around the edge of the pot
You may have seen cuttings on TV shows or in magazines placed around the edge of a pot and wondered why they don’t use the middle. The answer comes down to warmth and drainage. The outer rim of a terracotta or plastic pot warms up fastest as temperatures rise during the day, and that warmth encourages callus formation and early root activity even in winter. The edges also drain faster and more consistently than the centre of the pot, which tends to be the densest and most moisture-retentive zone.
Use a dibber or thick pencil to make a hole for each cutting before inserting it, rather than pushing the cutting directly into the compost. Insert each cutting so that roughly one-third of its length is below the compost surface, with the angled top end upwards. Space them so they’re not touching each other, which allows air to circulate and reduces the risk of any rot spreading. Aim for five to seven cuttings per two-litre pot, then start a second pot rather than cramming more in. Water them in well once planted, then allow the compost surface to drain fully before moving them to their winter position.
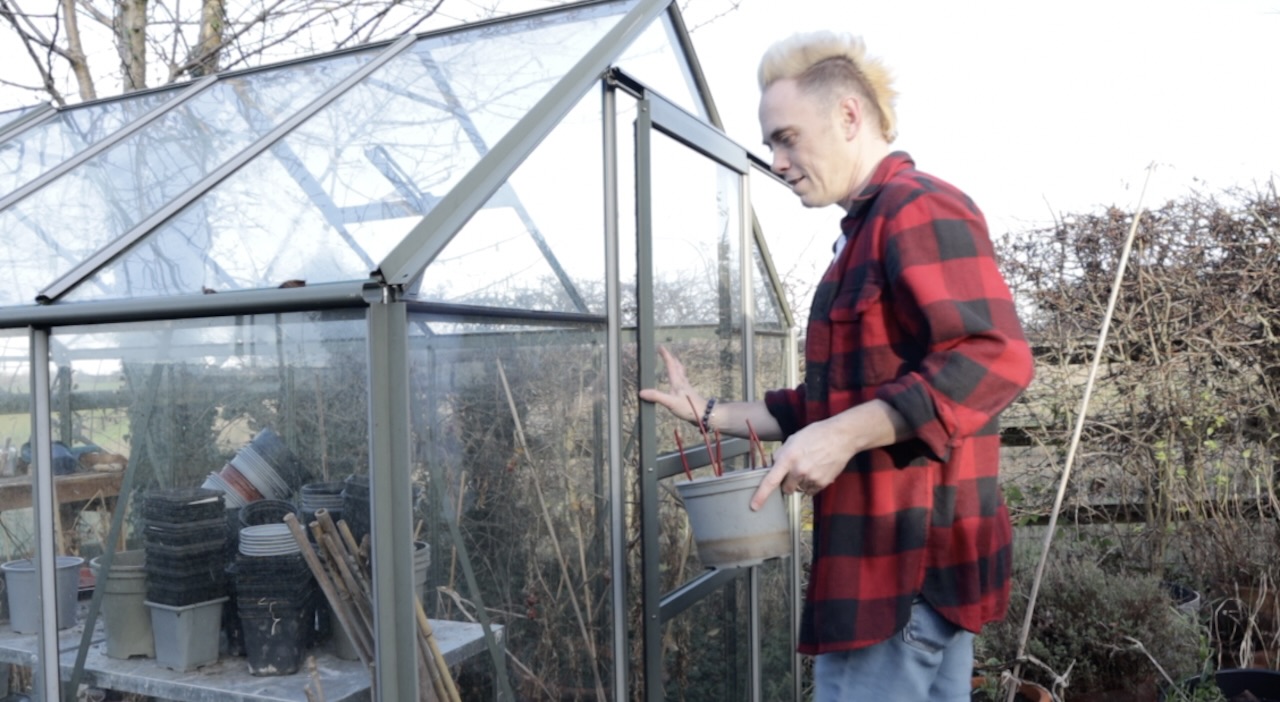
One of the great advantages of hardwood cuttings is that they don’t need a heated greenhouse or specialist equipment to succeed. What they do need is somewhere sheltered from the worst of winter’s extremes. An unheated greenhouse or cold frame is ideal, but a sheltered spot against a south or west-facing wall works perfectly well for most species. The aim is to protect the cuttings from hard, prolonged frosts that could freeze the compost solid for weeks, and from driving winds that would dry out the exposed tops faster than callus can provide a seal.
For robust plants like Roses, Cornus, and Willow, you can also plant cuttings directly into the ground in a sheltered trench in the garden. Dig a narrow trench about 20cm deep, sprinkle a little grit in the base for drainage, push the cuttings in at roughly 15cm intervals with two-thirds below ground, then backfill and firm in well.
Check them after any severe frost and firm them back in if ground heave has loosened them. However, for most beginners, pots in a sheltered position are easier to manage because you can monitor root development, move them under cover if the weather turns severe, and pot them on individually without disturbing a whole row.
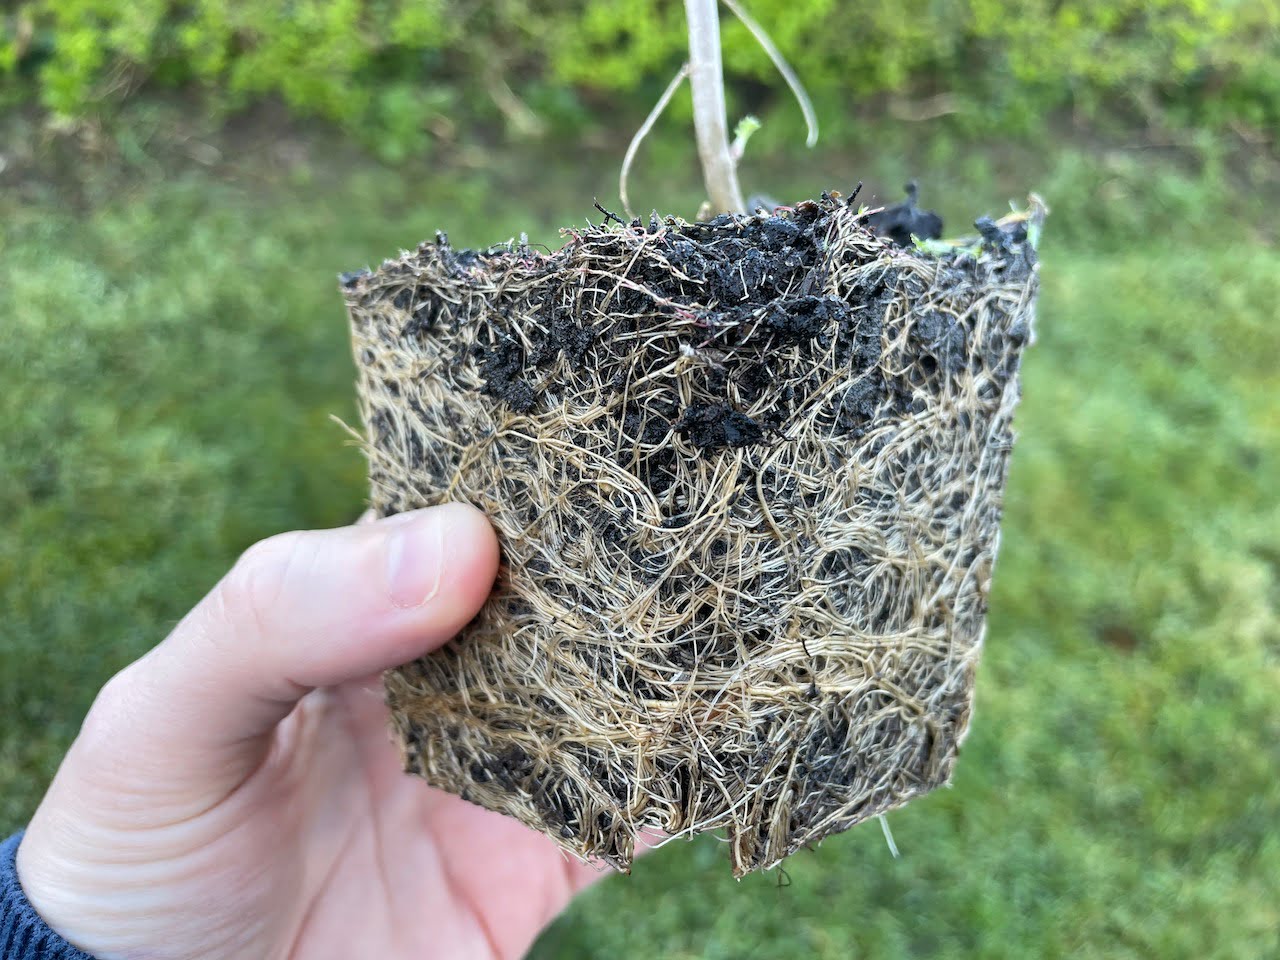
Depending on the species, hardwood cuttings will typically take between six and twelve weeks to root, though some can take the entire winter before showing any signs of life. The temptation to check constantly is strong, but disturbing the cuttings too frequently is one of the easiest ways to set back or completely undo any progress happening underground. The best approach is to check them gently once a month and resist the urge to pull them up to look for roots.
The most reliable sign that a cutting has rooted successfully is new bud or leaf growth appearing at the tip. This tells you the cutting has established enough root to redirect energy upwards, which it cannot do without a functional root system. You can also tip the pot gently on its side and check the drainage holes: visible white roots emerging is a definitive confirmation. A third option is the gentle tug test: hold the stem between two fingers and apply very light upward pressure. A cutting that resists and stays firm has rooted. One that pulls away easily has not. Replace it in the pot and give it more time before drawing conclusions.
Step 10: When to plant out hardwood cuttings
Even once your cuttings have clearly rooted and are showing healthy new growth, resist the urge to plant them straight out into the garden. At this stage, they are still juvenile plants with relatively small, tender root systems that haven’t yet experienced the demands of open ground conditions. Planting them out too soon is one of the most common reasons for losing successfully rooted cuttings, and it’s entirely avoidable with a little patience.
Once rooting is confirmed, pot each cutting up individually into its own pot with good peat-free multipurpose compost and keep it somewhere sheltered through spring and into summer, watering and feeding it as you would any young plant.
Let it grow for a full season in that protected environment before considering planting out. I then plant my hardwood cuttings into the garden the following winter, when the plants are back in dormancy, the soil retains some warmth from summer, and conditions favour establishment rather than demanding active growth. By that point, you’ll have a well-rooted, properly hardened young shrub that will take to open ground with very little fuss.
Common mistakes to avoid with hardwood cuttings
Over twenty years of professional garden design and running hundreds of client workshops, I’ve seen the same mistakes come up time and again. The good news is that every single one of them is easily avoided once you know what to look for.
I’ll never forget visiting a client’s garden in mid-July to find a terracotta pot absolutely packed with what looked like Cornus stems, carefully cut and labelled. She was thrilled with herself. She’d watched a propagation video and decided to crack on, not realising the video was filmed in December. Every single cutting had failed. The wood was still in full active growth, the stems hadn’t ripened, and without dormancy the cuttings had tried to push new leaves before any roots had formed, collapsed, and rotted within three weeks. We had a good laugh about it. But it’s such a common mistake, and a completely disheartening one when you’ve put the effort in. If you’re taking hardwood cuttings, the rule is simple: wait for the leaves to fall. That’s your signal.
Taking cuttings at the wrong time of year is the single most frequent cause of failure. As the story above illustrates, hardwood cuttings taken before dormancy simply will not work. The stems haven’t stored the energy reserves needed, the callusing response is weak, and the cutting tries to maintain active growth, but it has no roots to support.
💡 Lee’s Story: The Upside-Down Rose Cuttings
A few years ago during a workshop I ran for a local gardening group, one participant spent a very focused fifteen minutes carefully preparing a beautiful set of rose cuttings: clean cuts, right length, hormone powder applied perfectly. Then, in their eagerness to get them potted, every single one went in upside down. Flat cut at the top, angled cut in the compost. They were devastated come spring when nothing happened. We dug one out and there was the faintest trace of callus forming on what was now the exposed top. The cutting had genuinely tried to root from the wrong end. It’s a very easy mistake, and it’s exactly why I make the angled cut at the top a mandatory step. That small visual difference between the two ends is the only thing standing between you and a pot of expensive failures.
Planting the cutting upside down is surprisingly common, especially when working quickly with a batch of similar-looking stems. The angled top cut from Step 3 exists precisely to prevent this. Get into the habit of always checking before inserting.
Taking cuttings that are too long or too thick is another mistake I see regularly. Very long cuttings seem like they should root better because there’s more stem, but in practice, they create two problems. The exposed portion above ground loses moisture faster than the cutting can manage without roots, and the buried section is deeper than the hormone-rich zone near the base nodes, so the cutting may callus slowly or unevenly. Keep to the 15–30cm guideline and pencil-thickness, and you’re working with the plant’s biology rather than against it.
Using old or poor-quality wood that comes from multi-year stems rather than this year’s growth is a reliable way to achieve very low success rates. Old wood has reduced hormone activity at the cut surface. Young, current-season wood that passes the pencil-thickness test is almost always the right choice.
Waterlogged compost kills more hardwood cuttings over winter than almost any other factor. The 50:50 grit-and-compost mix is not optional for UK winters. A well-drained medium that stays aerated even after weeks of rain is what the callusing and early rooting process needs. Rich, dense, multipurpose compost used on its own is the wrong choice for this application.
How long does a hardwood cutting take to root?
On average a hardwood cutting will take between 6–12 weeks to show roots and be putting on new growth. The exact timing depends heavily on the species. Cornus and Willow are the fastest rooters, often showing activity within six weeks. Roses and Holly can take the full twelve weeks or slightly longer. This variation is completely normal and reflects differences in callus formation and hormone response rates among plants, so don’t panic if some pots show activity in February while others don’t stir until April.
How do you tell if your hardwood cutting has been successful?
To check if your hardwood cuttings have rooted successfully, look for the following signs:
New Growth: The clearest indicator of successful rooting is fresh, visible growth on the cutting, such as budding leaves or small shoots. New growth tells you the cutting has established enough root to support new tissue development.
Tug Test: After several weeks, gently tug the cutting. If you feel resistance, roots have formed and are anchoring the cutting in the compost. Avoid pulling too hard, as young roots are fragile.
Root Visibility: Tip the pot gently on its side. Visible white roots emerging from the drainage holes at the base are definitive confirmation.
Firm and Healthy Appearance: Successful cuttings remain firm and upright. If the cutting appears shrivelled, blackened at the base, or has collapsed, it has not rooted and should be removed before it affects its neighbours.
Remember, hardwood cuttings take time to root, anywhere from a few months to an entire growing season, so patience is essential. Avoid disturbing the cuttings too often, as they need stable conditions to establish strong roots.
Can I take hardwood cuttings in summer?
Taking hardwood cuttings in summer is generally not a good idea, and the results are usually disappointing even when conditions are carefully managed. Summer is the peak activity period for most woody plants, and a cutting taken during this phase works against the plant’s natural rhythm rather than with it. The stem is directing everything it has into leaf production, flower development, and active shoot extension. None of that energy is available for root development, which is precisely what a cutting needs to survive.
The practical challenges compound the hormonal problem. Summer heat causes cuttings to lose moisture rapidly through their cut surfaces, and without a root system to absorb water, they simply cannot replace it quickly enough. Pests and fungal diseases are also at their most active in warm weather, and a freshly cut stem sitting in compost is exactly the kind of vulnerable target that powdery mildew and other fungal diseases exploit.
If you want to propagate woody plants in summer, the right approach is to use softwood or semi-ripe cuttings rather than hardwood cuttings. Softwood cuttings, taken from fresh spring growth, root quickly under the right conditions and are naturally suited to the active growing season. Semi-ripe cuttings, taken in mid to late summer from stems that have begun to firm up at the base but are still flexible towards the tip, are a good middle ground for many shrubs. Both methods require more careful management than winter hardwood cuttings, but they are genuinely viable for summer propagation in a way that hardwood simply is not.
Common hardwood cuttings questions answered
Do hardwood cuttings need rooting hormone?
Not always. Easy species like Cornus, Willow, and Blackcurrant will root reliably without it. For trickier species like Roses, Holly, Honeysuckle, and Viburnum, rooting hormone powder significantly improves your success rate and is well worth using. Apply a light coat to the cut base, tap off any excess, and insert the cutting immediately to keep the hormone in contact with the wound.
Should I water hardwood cuttings over winter?
UK winters usually provide enough natural rainfall to keep the compost in outdoor pots adequately moist, but do check pots that are under eaves or in sheltered spots where rain may not reach them. The compost should feel consistently damp but never waterlogged. If you’re storing pots in a greenhouse or cold frame, check moisture levels every few weeks and water lightly if the surface has dried out. In late winter as temperatures rise and the cuttings start to stir, increase watering frequency to match their growing demand.
Can hardwood cuttings be left in frost?
Most established hardwood cuttings can tolerate light to moderate frost without harm, particularly once they are properly planted in gritty compost. The concern is prolonged severe frost that freezes the compost solid for weeks, which can damage the delicate callus forming at the base of each cutting. Moving pots into an unheated greenhouse or cold frame during very cold spells is good insurance. Ground-planted trenches are generally more frost-resilient, as the soil mass better buffers temperature fluctuations than a pot.
Why are my hardwood cuttings rotting?
Rotting at the base almost always comes down to two causes: waterlogged compost, or old/diseased cutting material that wasn’t callusing correctly before rot set in. Check that your compost mix contains at least 50% grit or perlite, and that the pot drains freely. If the rot is at the top of the cutting, it’s likely moisture sitting on a horizontal cut surface. Make sure your top cut is angled at 45 degrees so water runs off rather than pooling. Remove any rotting cuttings immediately, as they can spread fungal problems to their neighbours.
How many hardwood cuttings should I take from one plant?
Take at least five to eight cuttings per species as a minimum, even from plants you consider easy rooters. Some will always fail, and having a spread means you end up with several successful plants rather than being devastated by a couple of losses. From a large mature shrub, you can comfortably take fifteen to twenty cuttings across different branches without causing the parent plant any visible harm. Label your pots by species so you have a clear record of what you’ve taken and from where.
Can I take hardwood cuttings from fruit bushes?
Absolutely, and it’s one of the most rewarding applications of the technique. Blackcurrants, redcurrants, whitecurrants, and gooseberries all root extremely reliably from hardwood cuttings taken in November and December. With currants, remove all the buds below the soil line once planted to prevent suckering and encourage a clean-stemmed bush. A single established blackcurrant plant can provide enough cutting material to grow five or six new bushes in one winter, which represents extraordinary value.
Learn How to Design Your Own Garden
Now that you’re a pro at propagating plants via cuttings, why not consider the wider garden with some design training? My Garden Design for Beginners Course is here to help take your garden from average to amazing with an affordable online course, no matter how little your experience with plants.
This course offers step-by-step guidance from me, Lee Burkhill, award-winning garden designer and presenter on BBC1’s Garden Rescue. In this course, you’ll go from a garden design novice to a confident designer equipped to tackle any green space.
Planting Techniques – Select and arrange plants like a pro.
Design Styles & Layout Options – Explore different styles to suit every garden.
Course Features:
20 Hours of Study Time
Flexible Online Learning
Engaging Video Lessons & Quizzes
Real-World Case Studies
Certification upon Completion
Taught by Award-Winning Designer Lee Burkhill
Enrol now for just £199 and start your journey toward garden design mastery!
29
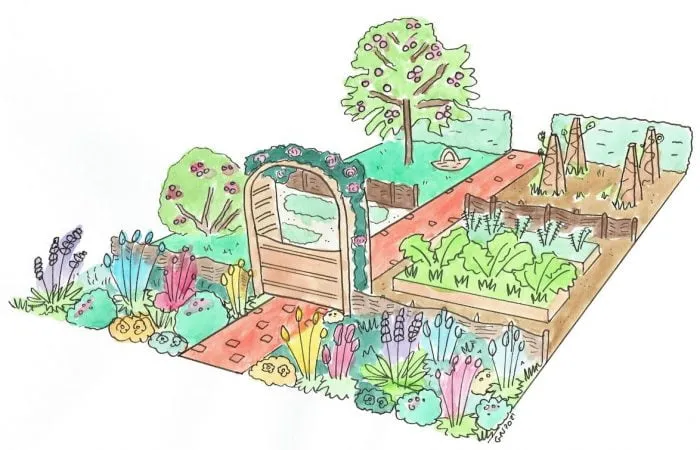
Garden Design Examples for Small Gardens: 30 Design Templates & Planting Plans
Garden Design Examples for Small Gardens: 30 Design Templates & Planting Plans: In this online gardening course, I’ll walk you through 30 fantastic garden designs, explaining the logic behind the layout, the plant choices, and take-home tips for applying them in your own garden.
Weekend Garden Makeover: A Crash Course in Design for Beginners
Learn how to transform and design your own garden with Lee Burkhills crash course in garden design. Over 5 hours Lee will teach you how to design your own dream garden. Featuring practical design examples, planting ideas and video guides. Learn how to design your garden in one weekend!
Garden Design for Beginners: Create Your Dream Garden in Just 4 Weeks
Garden Design for Beginners Online Course: If you want to make the career jump to becoming a garden designer or to learn how to design your own garden, this is the beginner course for you. Join me, Lee Burkhill, an award-winning garden designer, as I train you in the art of beautiful garden design.
Taking hardwood cuttings in winter is a skilled technique that allows gardeners to multiply their favourite plants easily. Wait for dormancy, use pencil-thick current-season wood, make a horizontal base cut and an angled top cut, plant the right way up in a 50:50 gritty compost mix, and then let the British winter do the work for you. The callusing process during those cold months creates the root-ready conditions that make spring such a rewarding reveal.
By selecting the right plants and using these simple cutting techniques, it is easy to succeed with hardwood cuttings in the garden. They take up minimal space and need very little care, making them an excellent beginner gardener propagation technique that even experienced gardeners return to year after year. Happy Gardening Ninjas!
Are you a hardwood-cutting convert? Why not let me know by leaving a comment below or getting in touch with Garden Ninja on social media?
You can also follow me on YouTube where I’ve got plenty of garden guide vlogs to help you make your garden awesome!
Your subscription could not be saved. Please try again.
Your subscription has been successful.
Lee Burkhill
Lee Burkhill, known as the Garden Ninja, is an award-winning garden designer and horticulturist with over 30 years of gardening experience and 15 years as a professional garden designer. A qualified RHS (Royal Horticultural Society) professional, Lee specialises in sustainable garden design and practical horticultural advice. He designs and presents on BBC1’s Garden Rescue and in leading gardening publications. Lee combines three decades of hands-on gardening knowledge with professional design qualifications to help gardeners create beautiful, functional outdoor spaces.