How to Fit a Green Roof: Complete UK Shed Guide (With Costs)
Lee Burkhill: Award Winning Designer & BBC 1's Garden Rescue Presenters Official Blog
Intermediate level
Green roofs are increasing in popularity to the number of benefits they bring, especially in city areas. With the increase in extreme weather patterns, green roofs offer an environmentally friendly way of protecting buildings. They can help offer a home for wildlife to city living and reduce the amount of dull grey concrete when you look out your window. This guide shows you how you can green up your shed with a green roof in just one day!
Quick Answer
A DIY sedum green roof for a garden shed costs roughly £40 to £85 per square metre and takes about a weekend to fit. Build a tanalised timber frame with a 3cm lip, fit a waterproof membrane and protective fleece, add a thin layer of free draining substrate, then lay pre-grown sedum blankets and water well. Always check your shed roof can carry the extra weight before you start.
Green roofs are incredibly versatile and beneficial to any garden. This guide on how to fit a green roof will show you how easy it is to green up your back garden shed. What has caused the increasing popularity of green roofs, though?
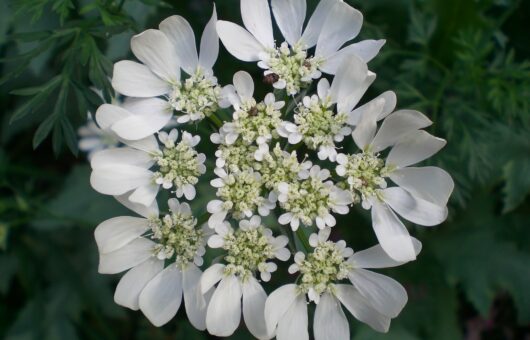
Green roofs can slow down the flow of torrential downpours, enabling sewers to cope better. They are also super drought-tolerant whilst keeping temperatures inside the building cooler. Green roofs can encourage wildlife into your garden and reduce the grey landscape of man-made structures. They also increase the lifespan of your roof by reducing UV damage and temperature extremes. There really is no drawback to a green roof. Let’s start by looking at one of the most common forms of a green roof. The green sedum roof.
This page contains affiliate links (see full details here). If you purchase through these links, I may earn a small commission at no extra cost to you. I only recommend products I personally use and trust at Garden Ninja HQ.
What is a green roof?
Green roofs are made up of a growing ‘living’ layer of plant material on top of a roof. Meaning that the roof of the building is completely covered in plants, which are fantastic for both wildlife and slowing down rainfall or flood risks.
Green roofs have been used for centuries in various cultures around the world. However, their origins can be traced back to ancient times, with some of the earliest examples found in Mesopotamia, where people used mud and vegetation to cover their homes for insulation and cooling purposes. Similarly, ancient civilisations such as the Greeks and Romans also utilised green roofing techniques.
In more recent history, green roofs became popular in Northern Europe, particularly in countries like Germany, Norway and Switzerland, during the 19th century. The modern green roof movement gained momentum in the mid-20th century, with Germany emerging as a pioneer in green roof technology and implementation. The concept spread to other parts of Europe and North America, where it continues to evolve and gain popularity as a sustainable building practice.
Green roofs require adequate drainage and a substrate or growing medium to exist relatively maintenance-free.
Types of Green Roof
There are two types of green roofs.
Extensive – such as a sedum roof, which is low and thin, requires little growing media and preparation. My guide shows the extensive method below.
Intensive – which may be used for growing crops or herbaceous plants. These require more nutrients and growing media, and can require specialist fitting due to their weight.
What is a Sedum green roof?
A sedum green roof is an area of a roof covered with a blanket of closely spaced Sedum plants. The roof will have been prepared to house a substrate layer and then a mat or blanket of sedum. Sedum only requires a very thin layer of substrate and is relatively lightweight.
So a green roof is an excellent choice for domestic settings and is super easy to install. Sedum is incredibly resilient and low maintenance and an excellent choice for a low-maintenance green roof.
How much does it cost to fit a green roof?
This is one of the questions I get asked most often, both on the forum and when I am out filming. For a DIY sedum roof on a typical garden shed, you are looking at somewhere between £40 and £85 per square metre, with the bulk of that cost sitting in the pre-grown sedum blankets themselves at roughly £25 to £40 per square metre, plus the timber for the frame, the waterproof membrane and the substrate. A small shed roof of around 2 to 3 square metres is therefore a properly affordable weekend project, often coming in well under £200 all in.
Fitting one yourself rather than paying for installation saves a significant amount, since professional fitting on a domestic outbuilding typically adds labour costs on top of materials. The trade-off is your own time and the satisfaction of having built it yourself, which, in my experience, is most of the appeal for anyone taking this on for a shed in the first place.
Here is roughly what you are budgeting for on a typical small shed project:
💰 Typical Cost Breakdown (per m²)
Pre grown sedum blanket
£25 to £40
Substrate / growing medium
£5 to £10
Waterproof membrane and fleece
£5 to £15
Tanalised timber frame
£5 to £20, depending on roof size
A few of the tools and materials I reach for on every green roof job are worth having to hand before you start, since stopping halfway through to source something is never fun, especially once your waterproof membrane is exposed to the weather.
This sedum green roof and its components for my video guide were supplied by Green Roofs Direct. They are one of the only suppliers to be fully carbon neutral, cut their Sedum rolls only when ordered and also offer sea-hardened Sedum. They really are the top dogs of green roof supplies!
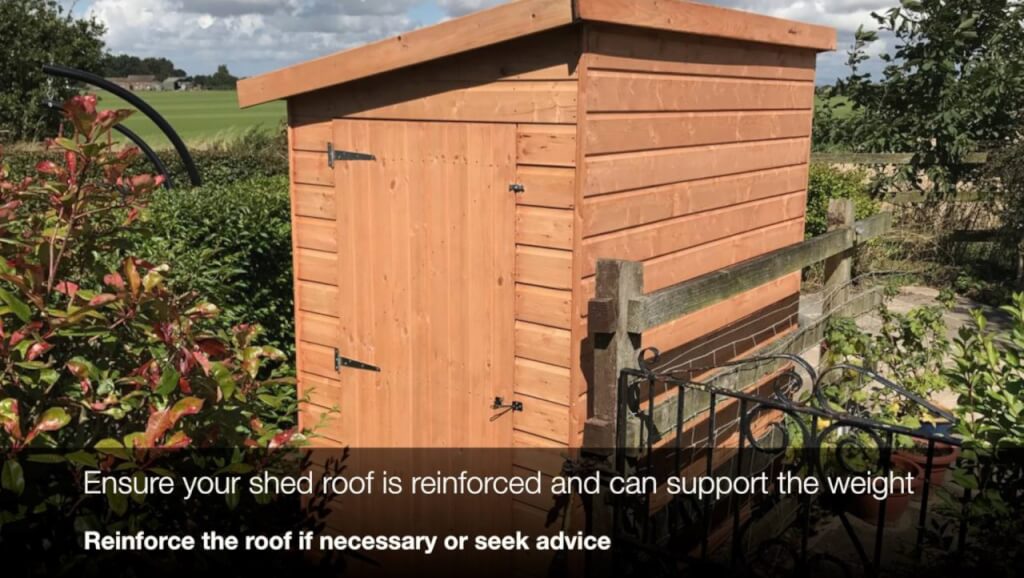
When fitting a green roof to a shed, make sure the shed roof can support the increased load. It is always best to choose a reinforced shed when buying one for this purpose. Alternatively, you can reinforce and brace the internal shed structure and roofing joists before fitting.
Checking your shed can take the weight
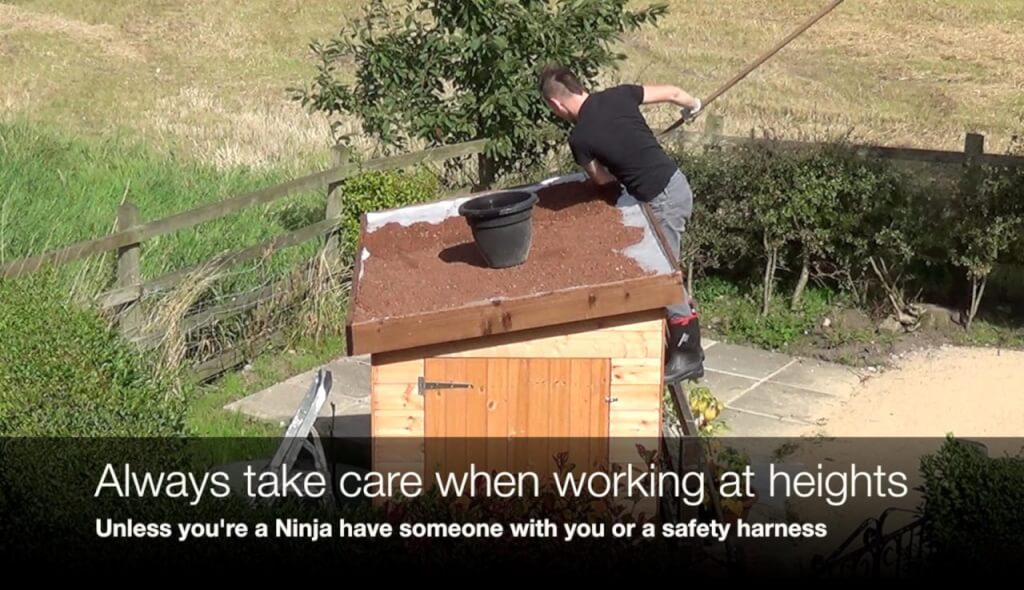
A saturated sedum roof typically weighs somewhere between 60 and 150kg per square metre once fully soaked through after rain, so this is not a weight you want to discover your shed cannot handle after the fact. Before you start, check the roof for any visible rafter sag, split timbers, or corroded fixings, and address any of these before adding the extra load of a green roof.
If your rafters are spaced more than 600mm apart, adding extra noggins or an additional rafter between each existing pair will roughly double the load capacity of the roof, and this is a straightforward weekend job in its own right if you are starting from a standard off-the-shelf shed. It is always better to over-engineer a shed roof slightly than to find out the hard way that it could not take the weight.
Green roof installation Guide
Fitting a green roof to a shed will take you roughly 8 hours of a weekend’s worth of work.
You will need the following tools to fit your own green roof:
A reinforced shed, or a standard shed with the extra noggins covered in the structural check section above
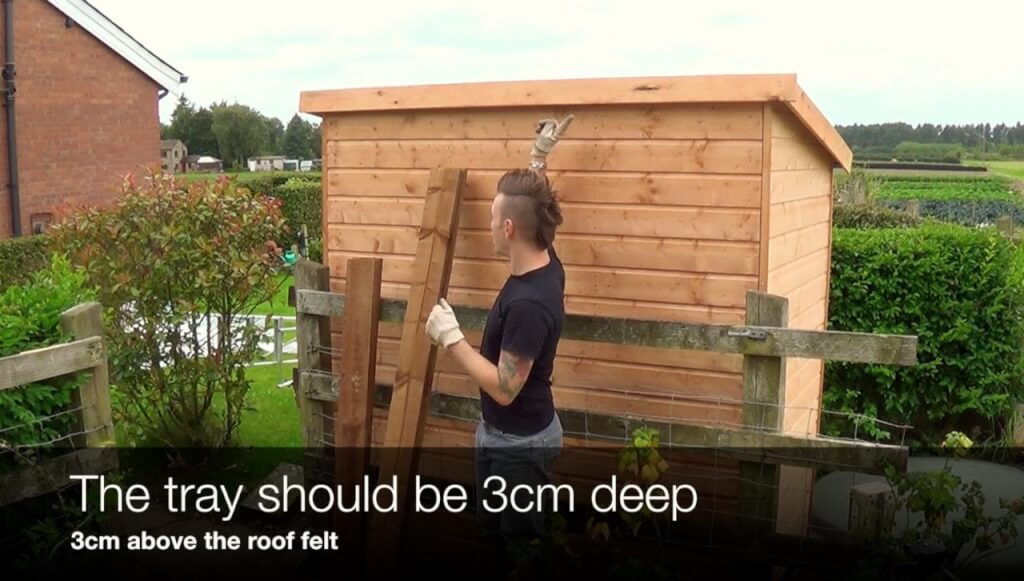
1. Build the tanalised wooden roof frame
You will need to build a tanalised wooden frame for your existing shed roof. In this example, I have used a pent-shed roof, rather than an apex, which is easier to demonstrate. Build the frame so that it provides a 3cm lip around the roof felt for the substrate and sedum blanket to be placed into.
Leave the front lip (the lowest part of the roof) off until you’ve fitted the waterproof membrane.
Mitre the corners of the frame so the timber sits flush, and run a thin bead of exterior sealant along each joint before fixing. This stops water tracking sideways out of a corner gap, which is one of the most common places I see a DIY green roof develop a leak further down the line. If your shed roof has any fall or slope at all, make sure the front lip lines up exactly with the lowest point, since this is where all excess water needs to exit cleanly.
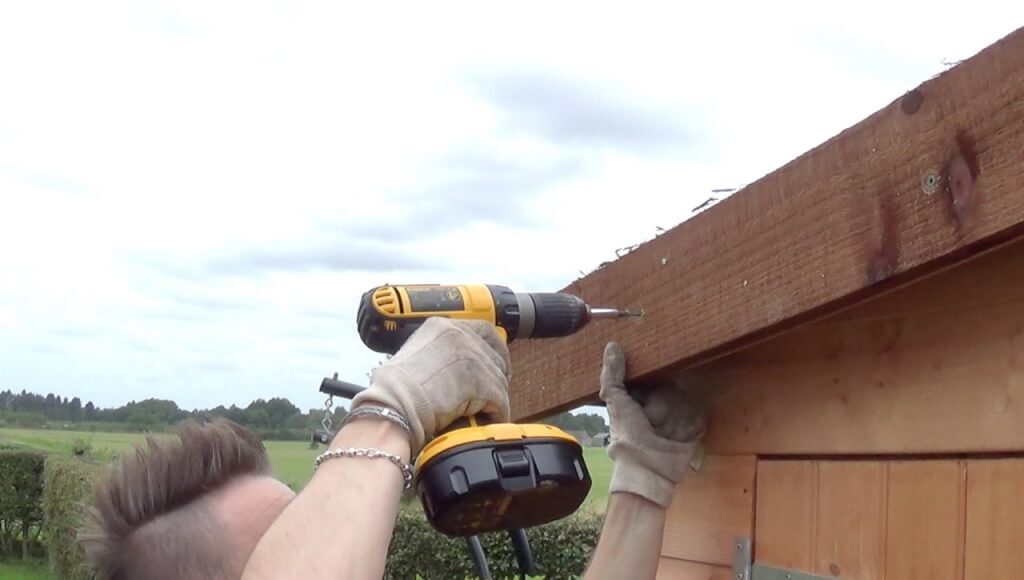
2. Attach the frame with galvanised decking screws
These galvanised screws are rustproof, making them ideal for a water-bearing green roof. Pre-drill pilot holes so you don’t split the wood.
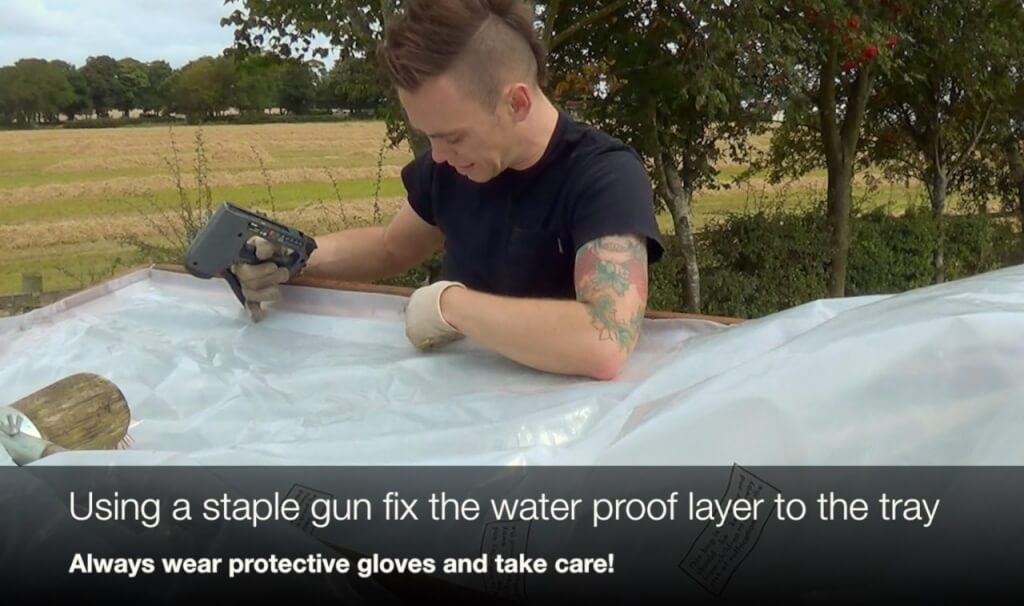
3. Fix a waterproof membrane to the shed roof
Once the frame is attached, measure and cut to size a waterproof membrane or piece of pond liner. This is then attached inside the frame to completely waterproof the existing felt roof.
A heavy-duty staple gun is used to carefully attach the waterproof membrane to the inside of the frame, creating a waterproof frame within the frame. This means that the water that filters through the sedum can drain quickly. If not, the damp Sedum in bad weather can sit wet on the felt and cause it to degrade quickly. Use a staple gun to attach this carefully.
Once the waterproof layer is in place, the final front part of the frame. Ensure you leave the front waterproof membrane overlapping the edge of the roof felt. This allows water to drain off only at this point. So this front point will fold over the roof felt, and the front lip holds it into place.
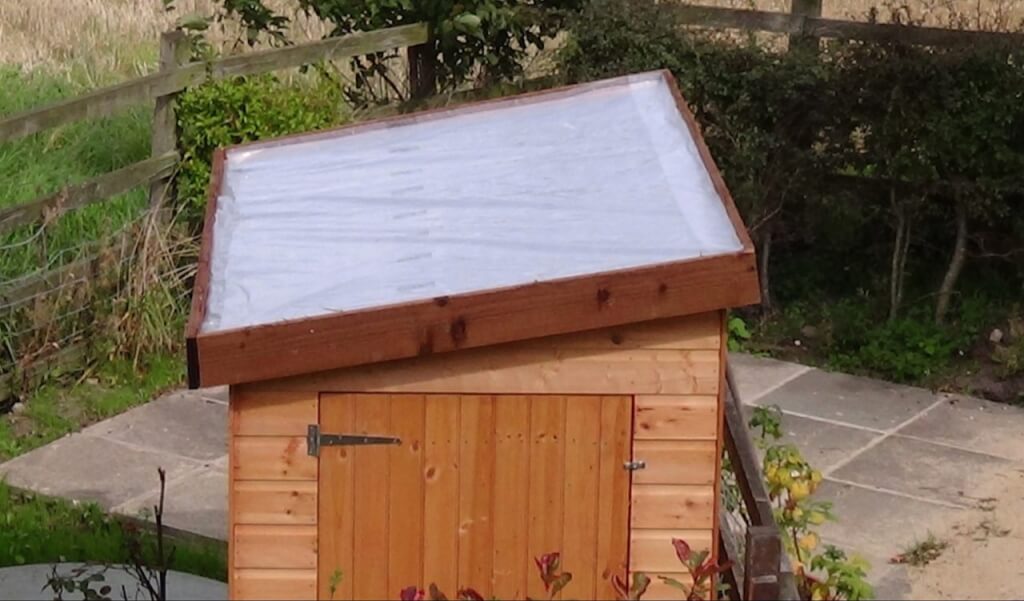
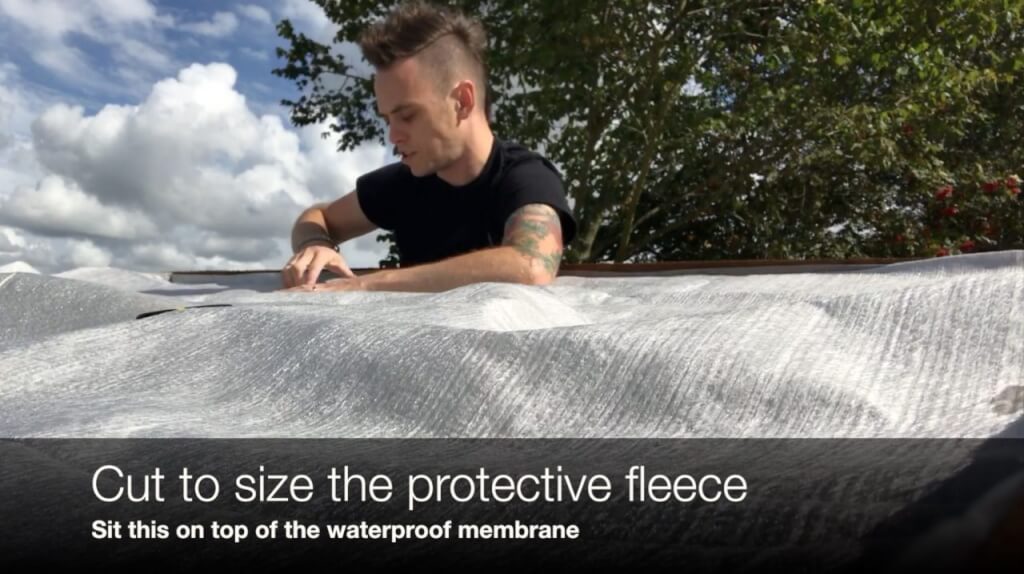
4. Add a layer of protective fleece to the green roof
Then, cut the same size in protective sedum fleece. This acts as a barrier to the sedum as it grows and its roots spread, forming a mat. It’s impermeable to the roots and helps protect the roof and the sedum.
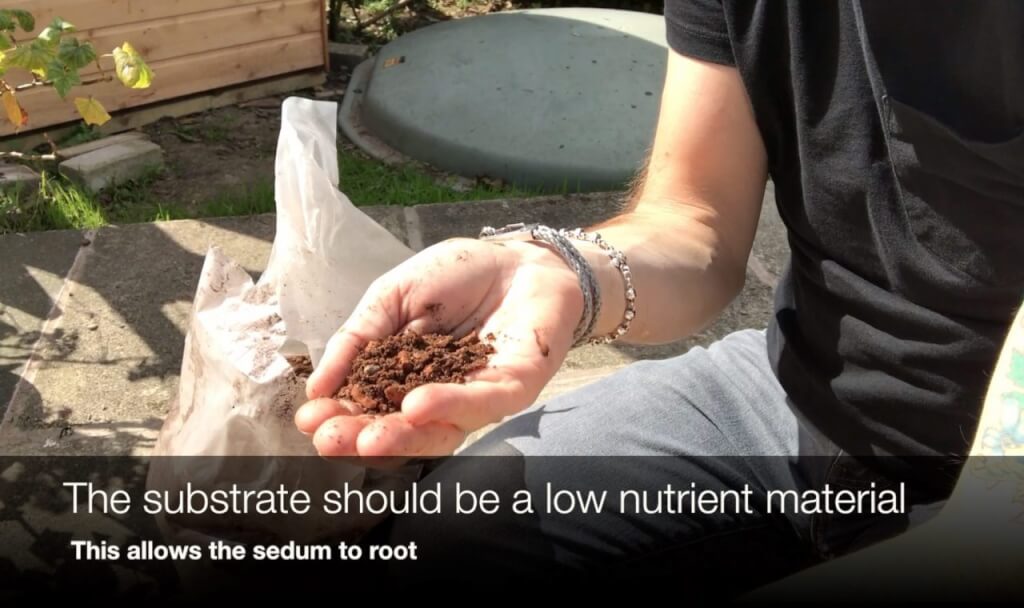
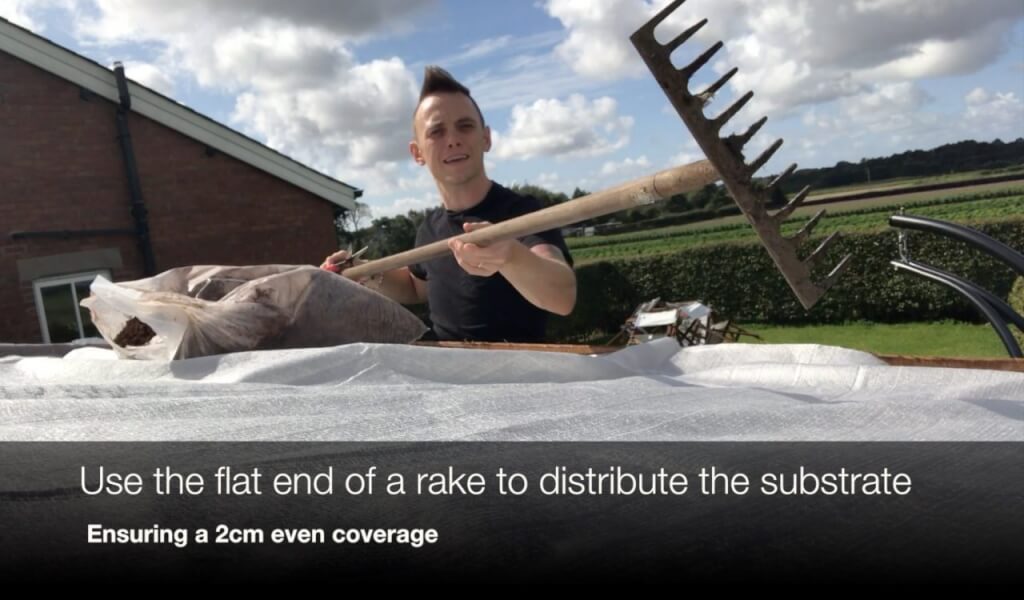
5. Add a layer of growing substrate
Spread out a 2cm layer of growing substrate onto the fleece and frame.
The growing substrate should be low in nutrients, with absolutely no compost or top soil. It should be made from inert crushed rock, sand, and grit so it is free-draining. If in doubt, make the green roof growing media lightweight and free-draining. Perlite, grit and some alpine plant potting mix will work.
Spread this neatly across the roof with the back of a rake for even coverage. A 2cm layer is sufficient.
💡 Top Tip
A 2cm substrate layer is enough to establish a lightweight sedum blanket on a shed, but if your shed structure can comfortably take a bit more weight, going up to 5cm to 8cm of substrate gives the sedum a deeper root run and noticeably better drought resilience through a dry summer. It is a trade off between weight and resilience, so factor your shed’s load capacity into the decision.
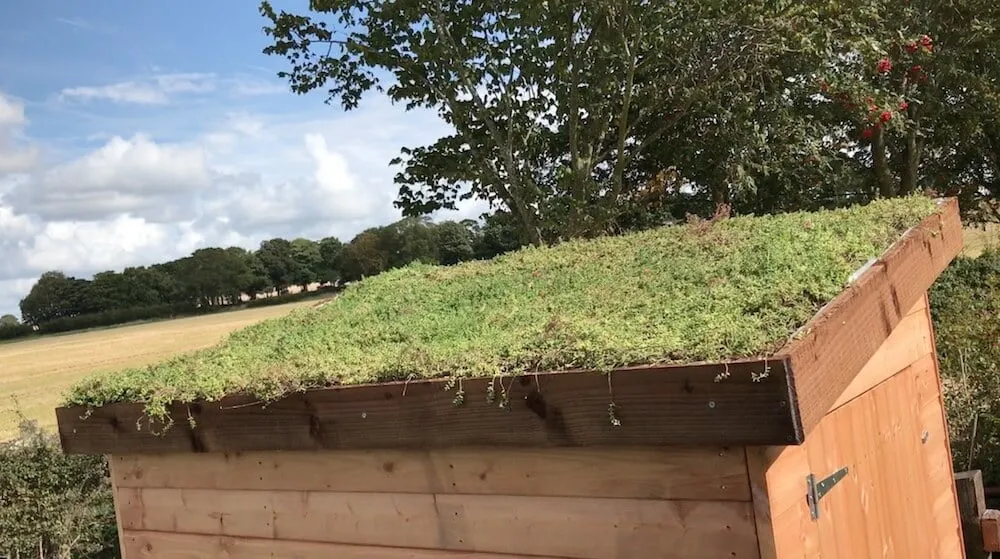
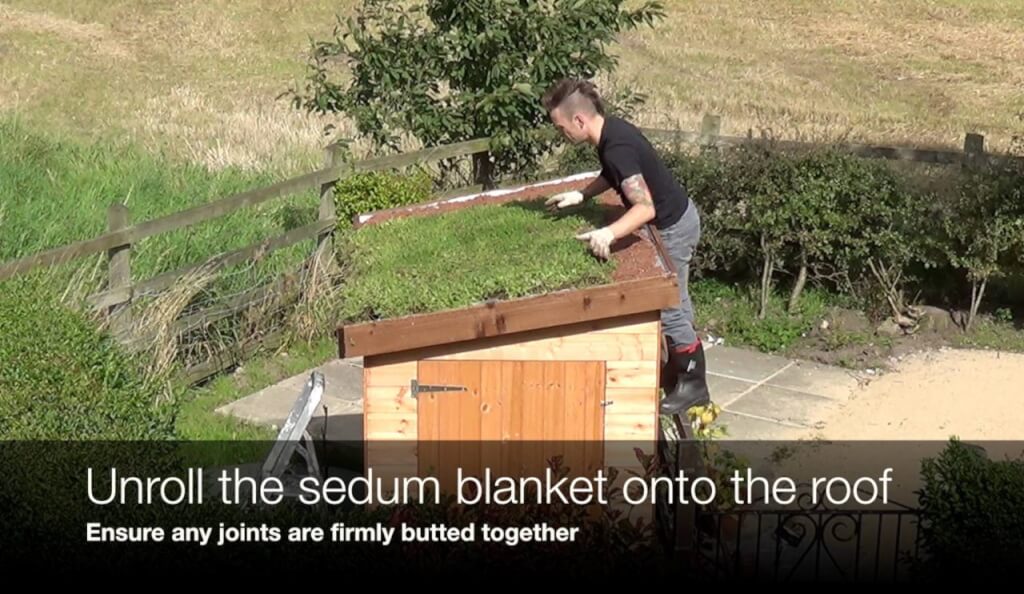
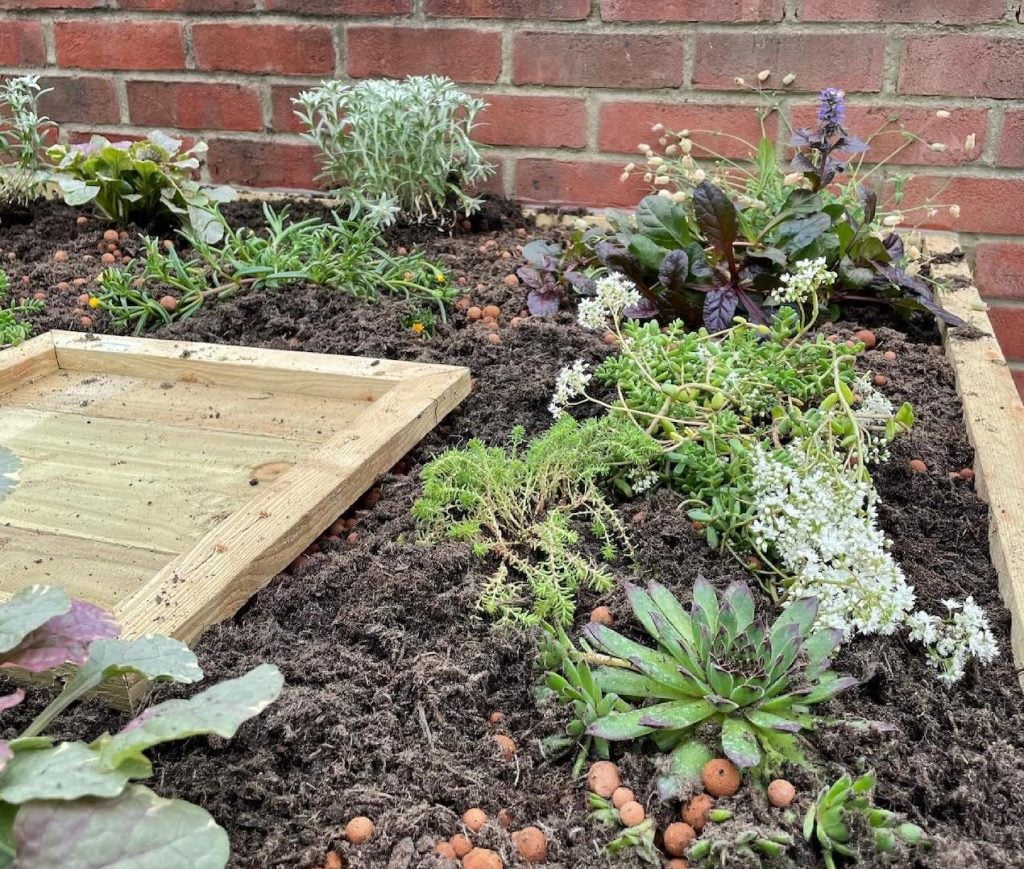
6. Lay your sedum blankets
Cut to size your sedum blankets using a sharp knife or scissors. Water them before you install and then lift and unroll them on the roof. Ensure all joints are butted up tightly. This example uses Sedum album, also known as White stonecrop. It’s a little like laying turf, you can see my guide for that here!
Work from the back of the roof towards the front lip, the same direction you would lay turf in, so you are not kneeling on freshly laid sections as you go. Stagger the joints between rows slightly rather than lining them up in a continuous seam, since this helps the mat knit together as a single piece rather than along visible lines. Around chimneys, vent pipes or any other roof penetration, cut small notch pieces to fit snugly rather than leaving gaps, since gaps are where weeds and self seeded saplings tend to establish first.
7. Water your new green roof
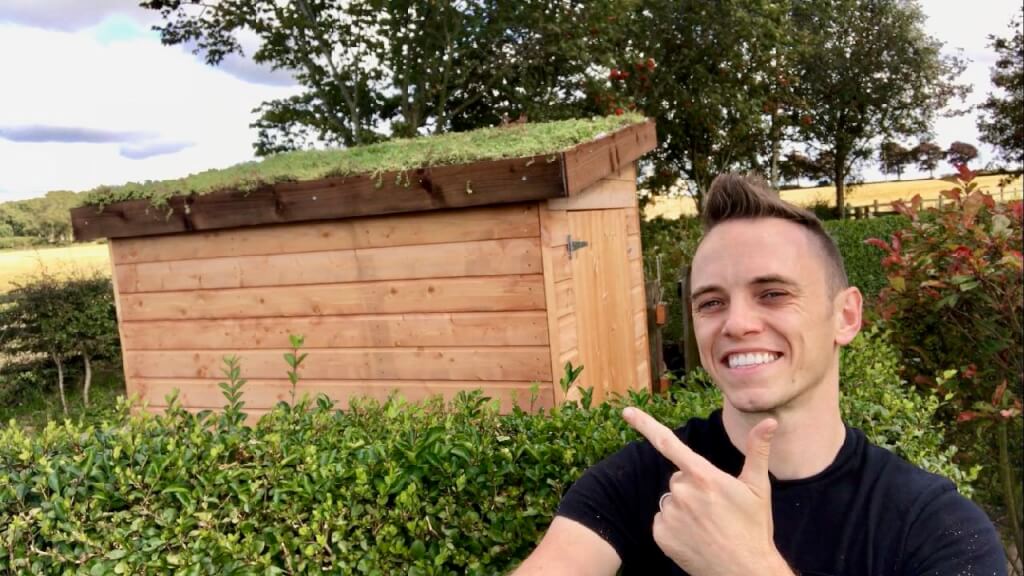
Once installed, give your green sedum roof a good water twice a week for the first few weeks until established. There you have it, a beautiful and ecologically sound green roof!
A gentle rose attachment on a watering can or hose is worth using for this establishment period rather than a hard jet of water, since a heavy stream can dislodge the still loosely rooted sedum plugs before they have bound together with the substrate underneath. Once you start to see new growth and the joints between blanket sections knitting together, usually after four to six weeks, you can drop back to watering only during extended dry spells.
Wildflower turf roofs are becoming more popular, too, especially for substantial buildings like garages or extensions. They are unsuitable for sheds as they hold much more water than a sedum roof.
If you want to fit a turf roof, follow the guide above, but you’ll need to add 30% soil to your growing media. Apply wildflower-rolled turf to the roof and water well.
Please ensure that with wildflower turf roofs, the building is structurally sound for them. Wildflower turf roofs are far heavier than Sedum green roofs.
Fitting a lightweight green roof
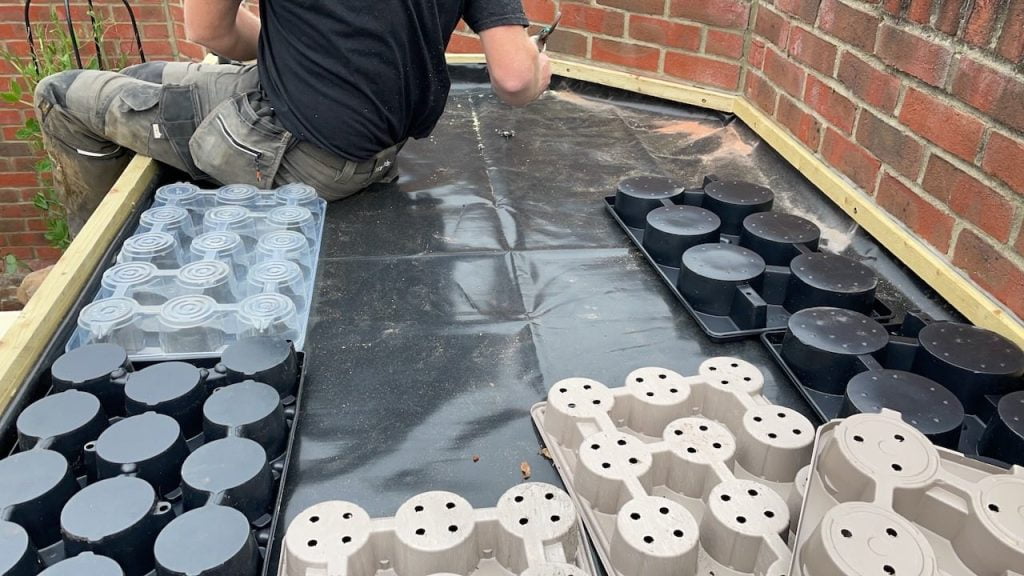
What if you don’t have an extra-strong shed for a green roof? Can you still fit one? Yes, you can! I demonstrated a lightweight green roof on Garden Rescue by using used plant pot holders, which I recycled from a local garden centre.
Build your shed or roof frame as per the guide above, but rather than adding the 2cm of heavy growing media and Sedum blankets, place the pots upside down first. This helps keep the growing area lightweight.
Once you’ve covered the area, add a mix of compost, perlite or LECA. LECA is an acronym that stands for lightweight expanded clay aggregate. It helps keep things light yet moisture-retentive. I then chose to mix individual Sedums and other ground covers like Ajuga. Spacing them out so they can grow and mesh together.
This solution saves money and enables even a bird table to be fitted with a green roof if followed. This is a super lightweight and cost-effective green roof solution!
Benefits of a green roof
Weather adaptable: Sedum, for example, can survive in temperatures from -25 to -40 degrees
Low nutrient requirements
Biodiverse: Green roofs dramatically increase beneficial insects and wildlife
Drought tolerant: Sedum can survive up to 100 days without water
Reduced pollution as green roofs can absorb air pollution
Slowing down the flow of rainwater helps reduce flood risks
Protection for roof surfaces increasing their lifespan
Your green roof should bring you many years of lush green coverage if fitted correctly and looked after with some yearly weeding and feeding.
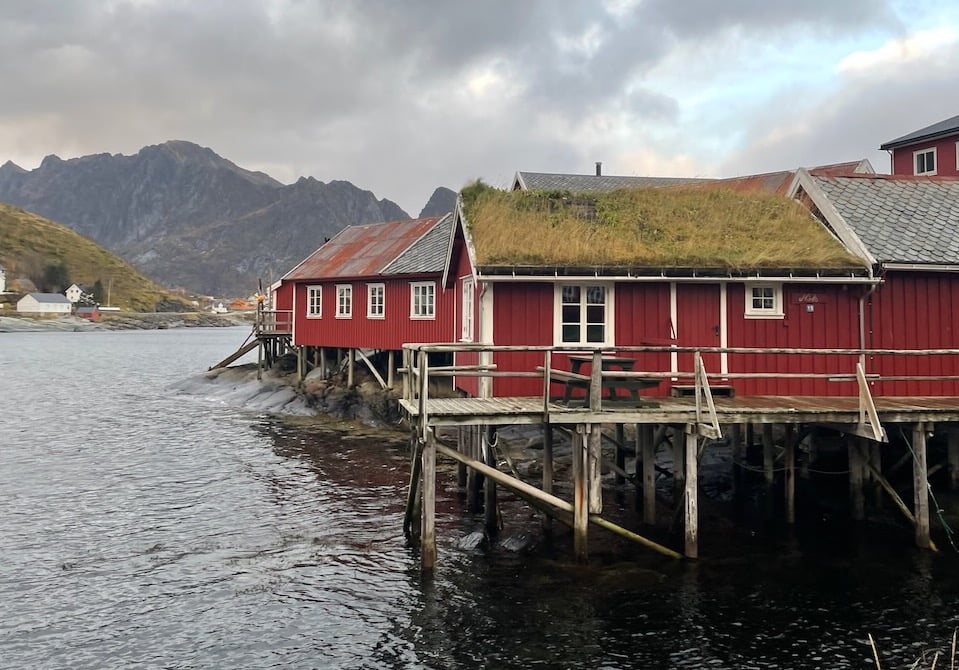
Why are green roofs used in Scandinavia?
On my many travels around the globe, one area stands out for amazing green or living roofs: Norway, Sweden and Finland. If you’re wondering why they have so many of them, let’s look at why green roofs are popular in Scandinavia:
Insulation: Scandinavia experiences harsh winters, and green roofs provide excellent insulation, helping to regulate indoor temperatures and reduce heating costs.
Stormwater Management: Green roofs absorb rainwater, reducing runoff and alleviating pressure on stormwater drainage systems. This helps prevent flooding and erosion, particularly in urban areas with limited green space.
Biodiversity: Green roofs create habitats for various plant species, insects, birds, and other wildlife, promoting biodiversity in urban environments. This aligns with Scandinavian values of environmental sustainability and conservation.
Air Quality Improvement: Vegetation on green roofs helps filter pollutants from the air, improving overall air quality and creating healthier living environments for residents.
Aesthetic Appeal: Green roofs enhance the visual appeal of buildings and urban landscapes, providing a natural and soothing contrast to the surrounding concrete jungle. This aesthetic aspect resonates with Scandinavia’s appreciation for nature and design aesthetics.
Energy Efficiency: By reducing heat gain in summer and heat loss in winter, green roofs contribute to energy efficiency and help mitigate the urban heat island effect, where cities experience higher temperatures than surrounding rural areas.
Noise Reduction: The vegetation and soil layers on green roofs act as sound insulation, dampening noise pollution from traffic, construction, and other urban sources. This is especially beneficial in densely populated areas.
Green roofs align with Scandinavian values of sustainability, environmental stewardship, and quality of life, making them a popular choice for both residential and commercial buildings in the region.
What are the best plants to use on a green roof?
Plants for green roofs need to have a few key attributes and qualities to make them suitable.
Green roof plants need to be relatively low-growing to deal with the wind and exposure. They also need to be relatively drought-tolerant and also able to cope with full sun and wind. Plants that creep, spread slowly and need little soil are the best options for a green roof. If they can cling to a mountainside or be battered by harsh winds and thrive, then they are suitable for a green roof!
The best plants for green roofs in order of suitability are listed below, along with the growing detail you need to choose the right ones for your own roof.
Sedum
Sedum is the classic green roof plant, and for good reason. It is a mat forming succulent that stores water in its fleshy leaves, which is exactly the survival strategy you want on a roof where rainfall drains away quickly and the growing medium is deliberately kept thin and low in nutrients. It is sold either as pre grown blankets, which is the route I take for most shed projects, or as individual plugs if you want to create your own mixed planting pattern rather than a uniform mat.
What makes Sedum so reliable on a roof rather than just in a border is its tolerance of genuine neglect. Once established, it will sit through weeks of drought, full exposure to wind and sun, and the kind of temperature swings a raised roof surface experiences far more severely than ground level soil. Different Sedum species flower at slightly different points through summer, so a mixed blanket gives you colour from several species overlapping rather than one short flush.
🌿 At A Glance
Botanical Name
Sedum spp. (now largely reclassified as Hylotelephium and Phedimus)
Meadow turf is a mix of fine grasses and wildflower species grown together and supplied as a roll, in the same way you would buy ordinary lawn turf. It gives a roof a much softer, more naturalistic look than a uniform Sedum blanket, and it brings a noticeably wider range of pollinators in, since the flowering species within the mix tend to bloom at different points through spring and summer rather than all at once.
The trade off is weight and water. Meadow turf holds far more moisture than a Sedum blanket and needs a deeper substrate to support its root system, which is why I mentioned earlier in this guide that it is unsuitable for a typical garden shed and is better reserved for garages, extensions, or other more substantial structures that can take the extra load.
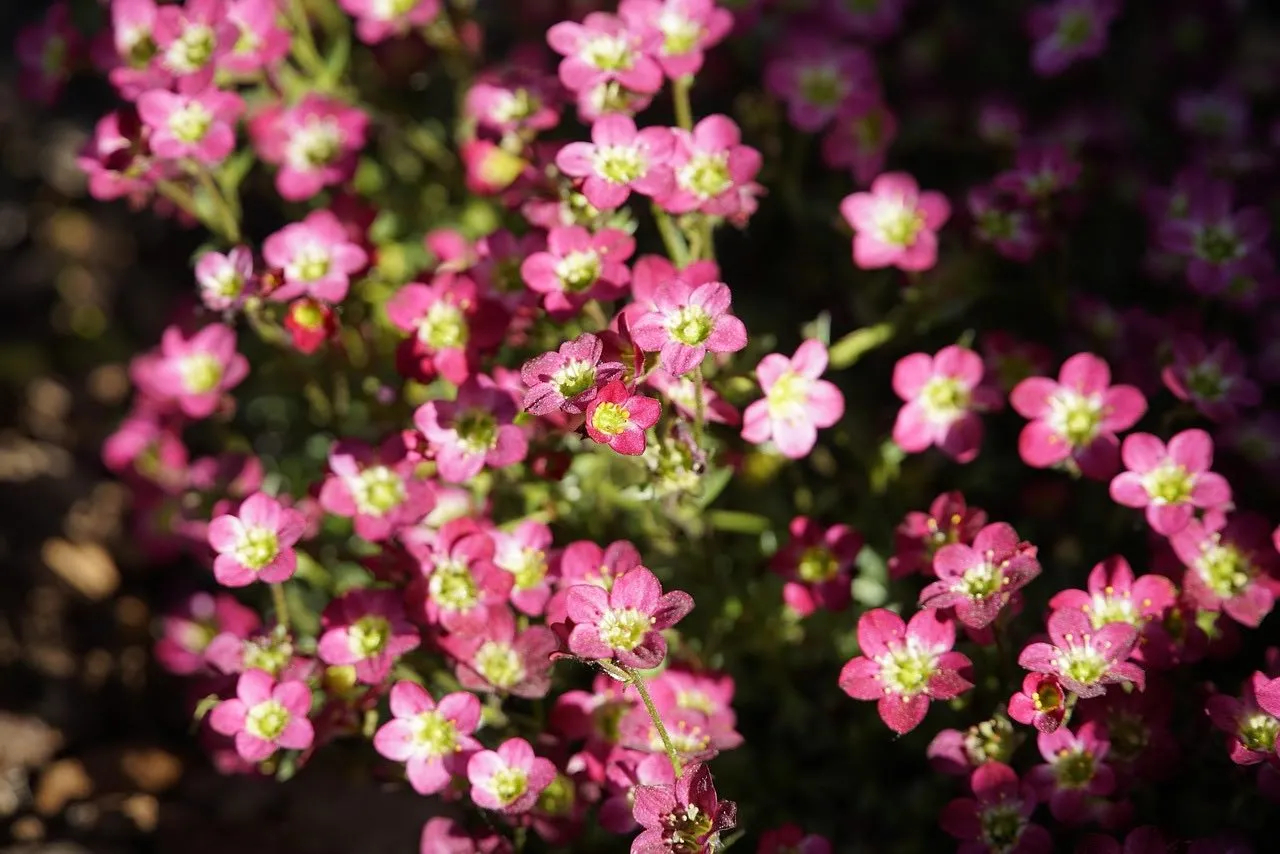
Alpine plants like Saxifraga
Saxifraga is a genus built for exactly the conditions a green roof presents. In the wild it grows wedged into rock crevices on mountainsides, surviving on almost no soil and coping with intense exposure, which makes it a natural fit for a roof substrate that is deliberately thin and free draining. It forms tight, low cushions of foliage that hug the surface rather than growing upright, so it copes well with wind that would flatten taller planting.
Many of the garden varieties sold today, like the ‘Highlander’ series shown here, have been bred specifically for stronger flower colour while keeping the same tough, low growing habit as their wild relatives. Mixing two or three Saxifraga varieties with Sedum gives a roof more textural and colour variation than Sedum alone, without compromising on drought tolerance.
🌿 At A Glance
Botanical Name
Saxifraga spp. and cultivars, e.g. ‘Highlander Red’
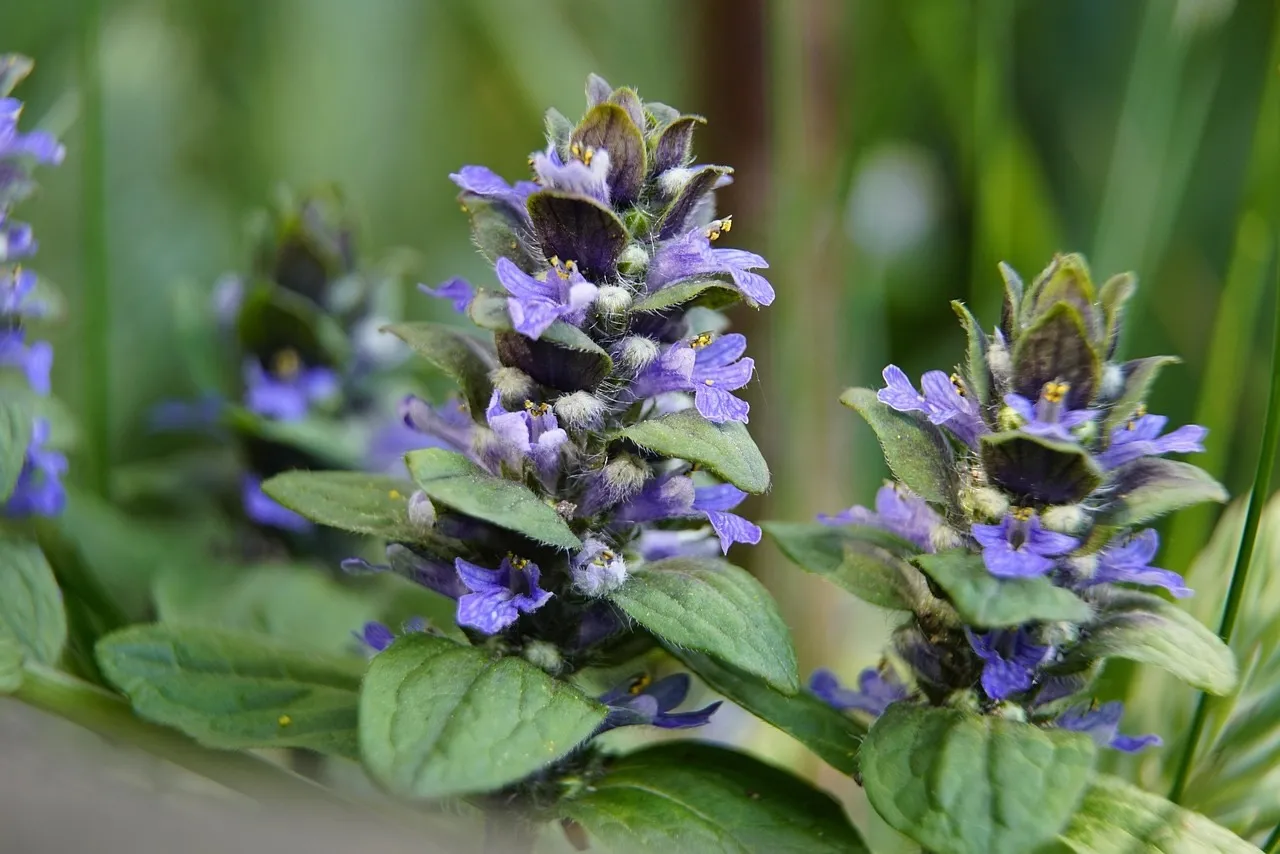
Ajuga reptans, commonly called bugle, is one of the most useful evergreen ground cover plants I specify across all sorts of low maintenance planting, and it earns its place on a green roof too. It spreads by surface runners that root as they go, forming a dense weed suppressing mat fairly quickly once established, and the glossy foliage often takes on bronze or purple tones that add useful colour contrast against the blue green of Sedum.
Ajuga is more tolerant of part shade than most other plants on this list, which makes it a useful addition if your shed or outbuilding sits under the dappled shade of a nearby tree for part of the day, somewhere true sun loving Sedum and Saxifraga would eventually thin out and struggle.
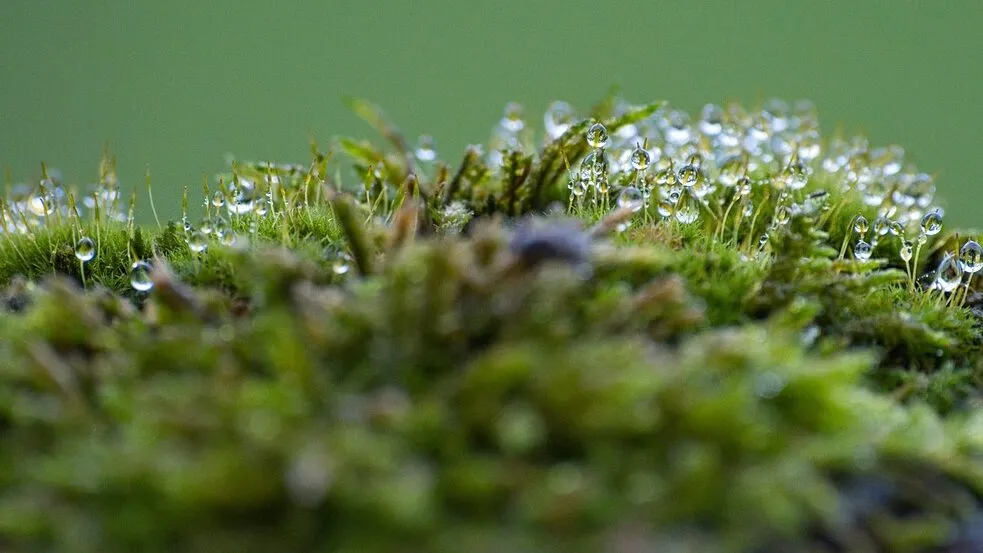
Moss and lichen are often the plants gardeners are actively trying to remove from a lawn, yet on a green roof they are a properly valuable, low effort option. Where shade, exposure or a very thin substrate make even Sedum struggle, moss will often colonise naturally without you needing to plant anything at all. It needs no feeding, no real substrate depth to speak of, and tolerates both deep shade and harsh exposure equally well.
A moss and lichen roof will never give you the colourful seasonal display that Sedum or Saxifraga offer, but for a small, heavily shaded outbuilding roof where almost nothing else will establish, letting moss take hold naturally is often the most realistic and truly sustainable option, rather than fighting against the conditions with plants that were never going to thrive there.
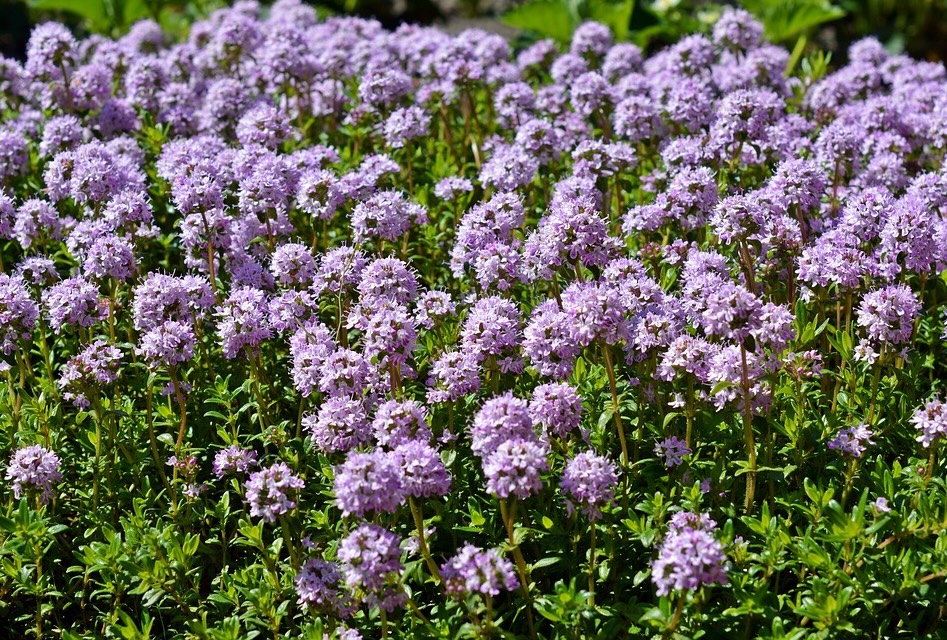
Mediterranean herbs
Creeping thyme in particular is worth considering for a green roof, since it tolerates exactly the same dry, sun baked, low nutrient conditions it would experience growing wild on a Mediterranean hillside. Beyond the practical fit, a thyme roof brings genuine fragrance into the garden whenever it is brushed by wind or rain, and the flowers are excellent for pollinators through the height of summer.
One small practical point worth knowing if you go down this route: thyme dislikes winter waterlogging far more than it dislikes summer drought, so make sure your substrate drains as freely as it would for Sedum, and avoid the temptation to add any extra organic matter to “help it along”, since rich soil is the one thing that will shorten its life on a roof.
🌿 At A Glance
Botanical Name
Thymus serpyllum / Thymus vulgaris
Plant Type
Evergreen aromatic herb, low creeping habit
RHS Hardiness
H5 (hardy to -15°C)
Height / Spread
5cm to 10cm / spreads to form a low mat
Flowering Period
June to August, pink or purple flowers
Growing Conditions
Full sun, free draining substrate, dislikes winter waterlogging
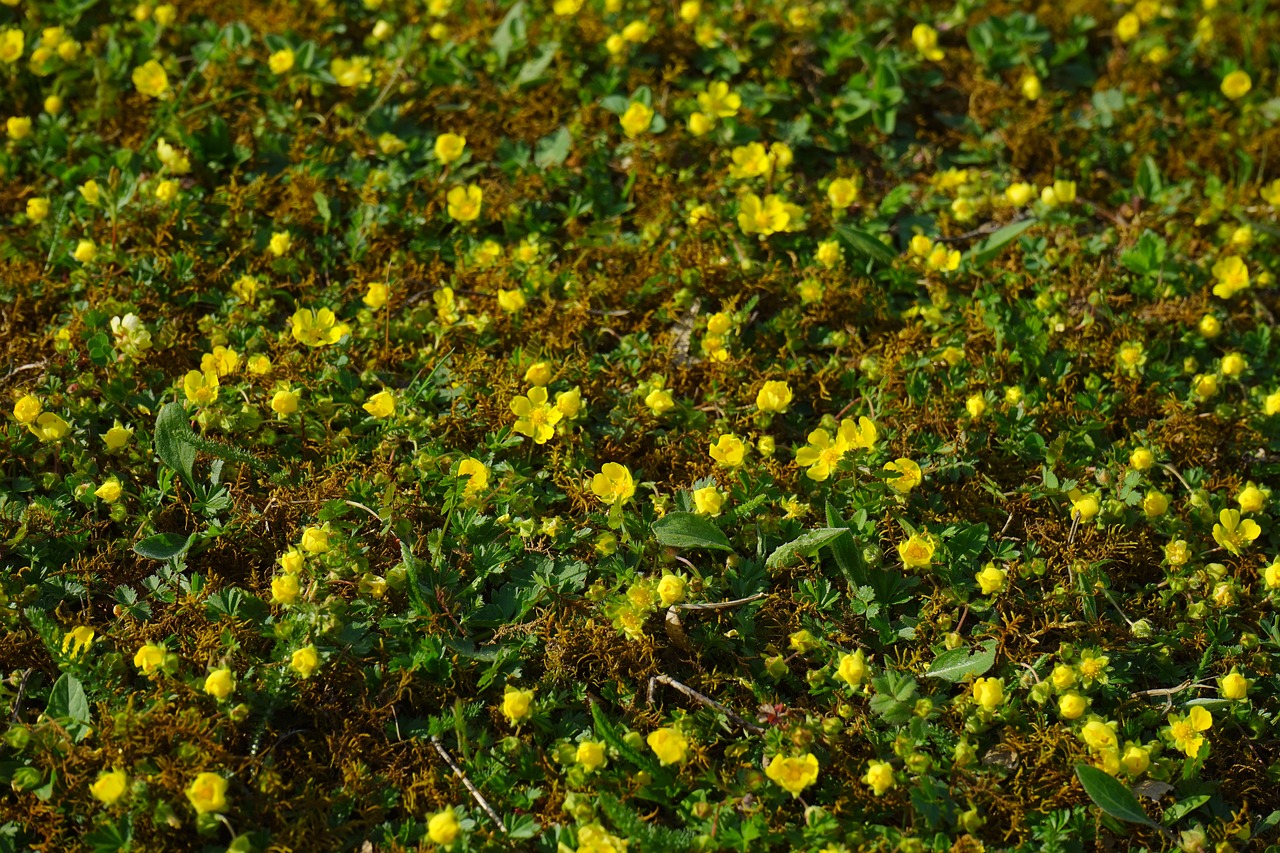
Waldsteinia ternata, commonly known as barren strawberry for its strawberry like foliage and cheerful yellow flowers, is one of the toughest and fastest spreading ground cover plants I recommend for difficult situations, and a green roof is no exception. It forms a dense, weed suppressing carpet remarkably quickly, which makes it a useful choice if you want a roof to look established within a single growing season rather than waiting for Sedum or Saxifraga to slowly knit together.
Be aware that this speed comes with a trade off. Waldsteinia is vigorous enough that it will happily spread beyond where you intended it to grow if left unchecked, so on a roof with a defined edge or lip it is well contained naturally, but mixing it with slower growing Sedum varieties in the same area will usually end with Waldsteinia winning the competition for space within a couple of seasons.
🌿 At A Glance
Botanical Name
Waldsteinia ternata
Plant Type
Evergreen creeping perennial ground cover
RHS Hardiness
H6 (hardy to -20°C)
Height / Spread
10cm to 15cm / spreads vigorously and indefinitely
Flowering Period
April to May, bright yellow flowers
Growing Conditions
Full sun to part shade, tolerant of poor soil, vigorous spreader
It is important twice a year to provide a balanced plant fertiliser in granular form. Chicken pellets can be useful if sparingly scattered. Given that green roofs have little substrate and little chance of taking up any feed from soil, it means that a feeding regime each year is highly beneficial.
A watered-down solution of 1:30 comfrey tea can work well as an organic, homemade plant feed.
Feed your green roof in early spring and autumn to keep it looking fantastic for many years to come.
Do you need to weed a green roof?
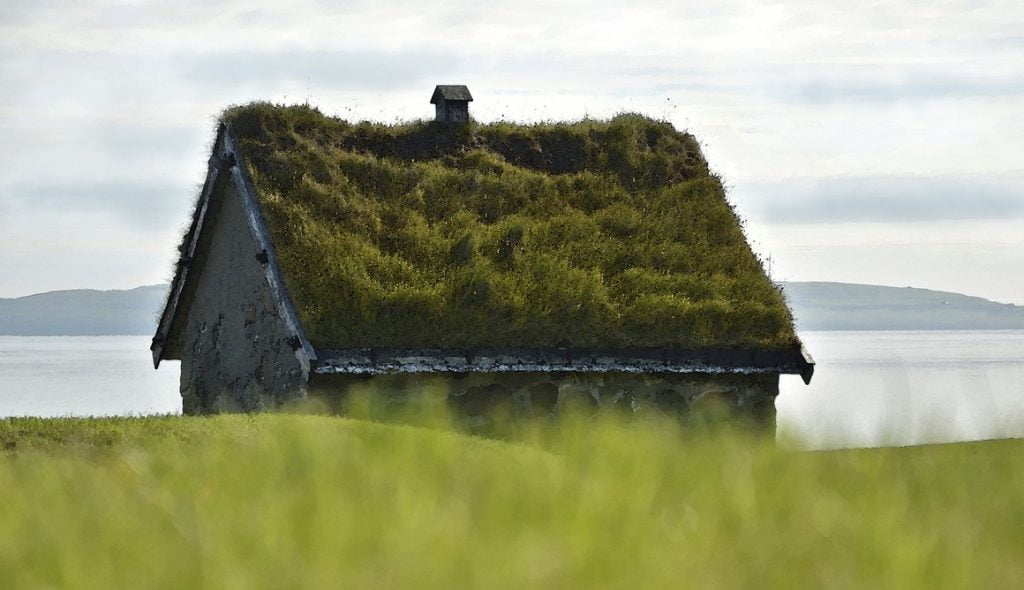
It’s also advisable to check it periodically to remove any weeds that may take seeds there and any spent flowers. You may find tree saplings start to emerge and will need to be removed. What’s interesting is in Norway, the home of the green roof, there are thousands of turf-covered roofs, some with silver birches practically bursting out of them! In this case, the log cabins they are on are sturdy enough to cope with this. In contrast, our common garden sheds are not!
Other than that, it is pretty much maintenance-free!
Frequently Asked Questions
Do I need planning permission for a green roof on a shed?
Most domestic shed green roofs fall under permitted development rights and do not need planning permission, since the shed itself is usually already permitted and the green roof is not normally treated as a separate structure. It is always worth a quick check with your local planning authority if your shed is large, close to a boundary, or in a conservation area.
How heavy is a sedum green roof?
A saturated sedum roof typically weighs between 60 and 150kg per square metre once fully soaked through, depending on substrate depth. This is why checking your shed’s structure and reinforcing it where needed is such an important step before fitting one.
Can I put a green roof on any shed?
Most standard timber sheds need some reinforcement before they can safely carry a green roof, since they are not built with this extra weight in mind as standard. A reinforced shed, or a standard shed with extra noggins or rafters added, will generally cope well with an extensive sedum roof.
How long does a green roof take to establish?
Pre grown sedum blankets typically establish and knit together within four to six weeks of being laid, provided they are watered properly in that initial period. After that, an established sedum roof needs very little watering at all, since Sedum is highly drought tolerant once rooted.
Will a green roof leak?
A properly fitted green roof should not leak, provided the waterproof membrane is installed correctly with no gaps, the edges are sealed properly where water drains off, and the membrane itself has not been damaged during installation. This is the single most important part of the whole job to get right, since every other layer sits on top of it.
Join over 100,000 gardeners
Free gardening videos from the Garden Ninja, with 8+ million views and counting.
Transform Your Entire Garden with Expert Design Knowledge
Ready to take your gardening to the next level? Join thousands of Garden Ninjas who’ve discovered the secrets of stunning garden design through Lee Burkhill’s award-winning online courses. Whether you’re dreaming of redesigning your own outdoor space or considering a rewarding career change, these expertly crafted courses will transform you from a gardening enthusiast to a confident designer.
29
Garden Design Examples for Small Gardens: 30 Design Templates & Planting Plans
Garden Design Examples for Small Gardens: 30 Design Templates & Planting Plans: In this online gardening course, I’ll walk you through 30 fantastic garden designs, explaining the logic behind the layout, the plant choices, and take-home tips for applying them in your own garden.
Weekend Garden Makeover: A Crash Course in Design for Beginners
Learn how to transform and design your own garden with Lee Burkhills crash course in garden design. Over 5 hours Lee will teach you how to design your own dream garden. Featuring practical design examples, planting ideas and video guides. Learn how to design your garden in one weekend!
Garden Design for Beginners: Create Your Dream Garden in Just 4 Weeks
Garden Design for Beginners Online Course: If you want to make the career jump to becoming a garden designer or to learn how to design your own garden, this is the beginner course for you. Join me, Lee Burkhill, an award-winning garden designer, as I train you in the art of beautiful garden design.
Installing a green roof is a great way to help Mother Nature and encourage wildlife in your urban garden. They help slow rainfall, provide much-needed pollen for bees, and soften our harsh, hard landscaping in urban areas.
So why not give Mother Nature a helping hand and reduce rainwater runoff by installing a green roof? Let me know or share if you have found this guide useful.
Your subscription could not be saved. Please try again.
Your subscription has been successful.
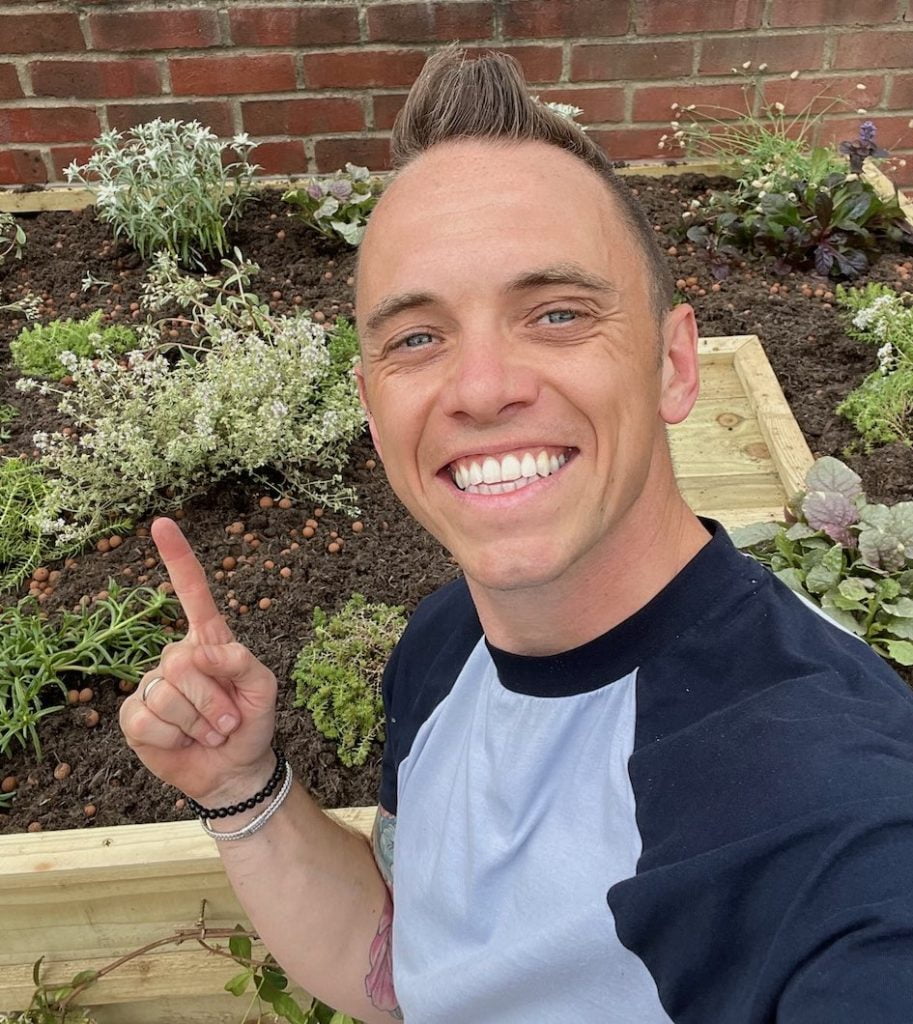
Lee Burkhill
Lee Burkhill, known as the Garden Ninja, is an award-winning garden designer and horticulturist with over 30 years of gardening experience and 15 years as a professional garden designer. A qualified RHS (Royal Horticultural Society) professional, Lee specialises in sustainable garden design and practical horticultural advice. He designs and presents on BBC1’s Garden Rescue and in leading gardening publications. Lee combines three decades of hands-on gardening knowledge with professional design qualifications to help gardeners create beautiful, functional outdoor spaces.