How to Overseed a Lawn: The Complete UK Guide to Thicker, Greener Grass
Lee Burkhill: Award Winning Designer & BBC 1's Garden Rescue Presenters Official Blog
Beginner level
A patchy, thin, or tired-looking lawn is one of the most common problems I come across in UK gardens, and the good news is that it is almost always fixable without digging anything up, laying expensive new turf, or calling in professional help. Overseeding is the process of sowing fresh grass seed directly into an existing lawn, and it is the single most effective way to transform a struggling lawn into something you are genuinely proud of.
I have overseeded dozens of lawns over my career, both in my own garden and on client projects. The results never fail to impress. A lawn that looked beyond saving in March, with bare patches, thin coverage, and that general air of defeat that sets in after a hard UK winter, can look genuinely lush and thick by early summer with nothing more than the right seed, decent preparation, and consistent watering. That transformation is available to every gardener reading this, regardless of how bad your lawn looks right now.
The reason overseeding is not more widely practised is that most gardeners assume a patchy lawn needs to be completely replaced. That assumption costs a great deal of unnecessary time and money. In the vast majority of cases, the existing lawn just needs thickening up from fresh seed sown into prepared soil. The old grass provides structure, the new seed fills the gaps, and within a few weeks, you have a visibly improved lawn that continues to improve with each passing month.
This guide covers everything: when to overseed for the best results, how to prepare your lawn properly so the seed actually germinates, which seed mixtures to choose for different situations, how to overseed the whole lawn versus repairing specific bare patches, aftercare and watering regimes, and the products I recommend based on genuine experience. Whether you are dealing with post-scarification devastation, summer drought damage, pet wear, or simply a lawn that has gradually thinned out over the years, this guide has you covered.
This page contains affiliate links for products I use and trust. If you make a purchase after clicking a link, I may earn a small gardening commission at no extra cost to you, which helps keep the Garden Ninja blog free for everyone.
Quick Answer
Overseed your lawn in early autumn (September to mid-October) or spring (April to May) when soil temperatures are above 8°C and moisture is reliable. Mow short, scarify or rake out thatch, aerate compacted areas, then sow seed at 35g per square metre using a cross-hatch pattern. Keep moist until germination in seven to fourteen days. For bare patches, use a lawn repair kit at 50g per square metre.
1. What Is Overseeding and Why Does Your Lawn Need It?
Overseeding simply means sowing new grass seed over an existing lawn. There is no digging, no stripping turf, no starting from scratch. You are working with what is already there and filling in the gaps with fresh, vigorous new grass plants that thicken the sward, crowd out weeds, and restore the deep green colour that a tired lawn has lost.
Grass plants do not live forever. Even in a well-maintained lawn, individual grass plants gradually age, thin, and die out over the years. In a typical UK garden lawn, a combination of foot traffic, dog wear, drought stress, moss treatment, and general seasonal battering means the grass population is constantly declining unless it is periodically refreshed. Overseeding is how you counteract that natural attrition and keep the lawn dense enough to resist the weeds and moss that are always waiting to move into any available space.
The difference between a lawn that overseeds annually and one that never does is dramatic within just two or three years. The overseeded lawn stays thick, competitive, and colourful. The neglected one gradually develops the familiar patchwork of thin grass, moss colonies, and spreading broadleaf weeds, making it look like a maintenance problem rather than a feature. Overseeding is not a rescue operation. Preventive maintenance keeps you out of trouble in the first place.
The situations that most commonly call for overseeding are: thinning or patchy coverage from general age and wear, bare patches after moss removal or scarification, damage from summer drought or waterlogging, dog toilet areas where the grass has been killed by nitrogen burn, compaction damage in high-traffic areas, and shaded areas where the original seed mix was not well suited to the conditions. Each of these can be addressed with the right seed and preparation, which I cover in detail in this guide.
2. When to Overseed a Lawn in the UK
Timing is the single most important factor in successful overseeding. Sow at the wrong time of year, and even the best quality seed will either fail to germinate or produce seedlings too weak to establish before conditions turn against them. Get the timing right, and germination is swift, establishment is strong, and the new grass becomes a permanent, contributing part of the lawn within weeks.
Early autumn, specifically September to mid-October, is the best time to overseed a UK lawn. The soil is still warm from the summer, retaining enough heat for reliable germination. The air temperature is cooling, which slows competing weed growth and reduces the risk of the seedbed drying out. Rainfall is generally more reliable than in summer. The new grass has several weeks to establish before the cold of winter slows growth, and it enters the following spring as a strong, well-rooted plant ready to compete from the start of the growing season.
Spring overseeding, from April through to mid-May, is the second-best window and the most commercially visible one because it coincides with the post-winter period when lawns look their worst, and the motivation to fix them is highest.
Spring overseeding works well, provided you can maintain consistent moisture through what is often a dry April in the UK. The main risk is a dry spell in the first two weeks after sowing, before the seed has germinated and rooted. If you can commit to watering every day during that window, spring overseeding produces very good results.
🌿 UK Overseeding Season Guide
Period
Suitability
Notes
September to mid-October
Best
Warm soil, reliable moisture, less weed competition. Ideal for whole-lawn overseeding.
April to mid-May
Good
Post-winter refresh. Requires consistent watering if April is dry. Weed competition higher than autumn.
Late May to August
Poor
High drought risk, weed pressure, heat stress on seedlings. Avoid unless you can irrigate daily.
Soil too cold for reliable germination. Seed sits dormant and rots, or is eaten by birds.
The absolute minimum soil temperature for grass seed germination is around 6°C, but at that temperature, germination is very slow and inconsistent. For reliable, even germination, aim for a consistent soil temperature of 8°C or above at a depth of 5cm. A simple soil thermometer is one of the most useful tools you can own for lawn care and costs very little. If you are overseeding in autumn, stop as soon as soil temperatures consistently drop below 8°C, as seed sown into colder soil will simply sit there over winter and germinate poorly the following spring, if at all.
3. Choosing the Right Grass Seed for Overseeding
One of the most common overseeding mistakes I see is gardeners buying the cheapest grass seed available without considering whether it is appropriate for their lawn’s conditions and usage. Grass seed is not a generic product. Different mixes are formulated for different purposes, and using the wrong one means the new grass either struggles to compete with what is already there or produces a visually different result that looks out of place.
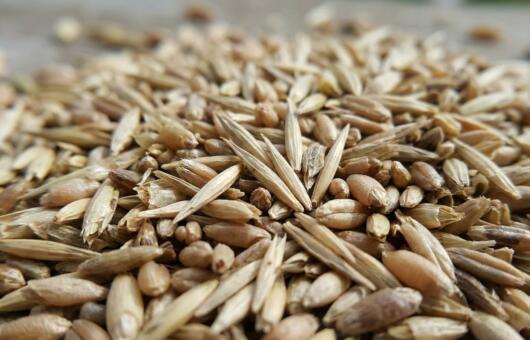
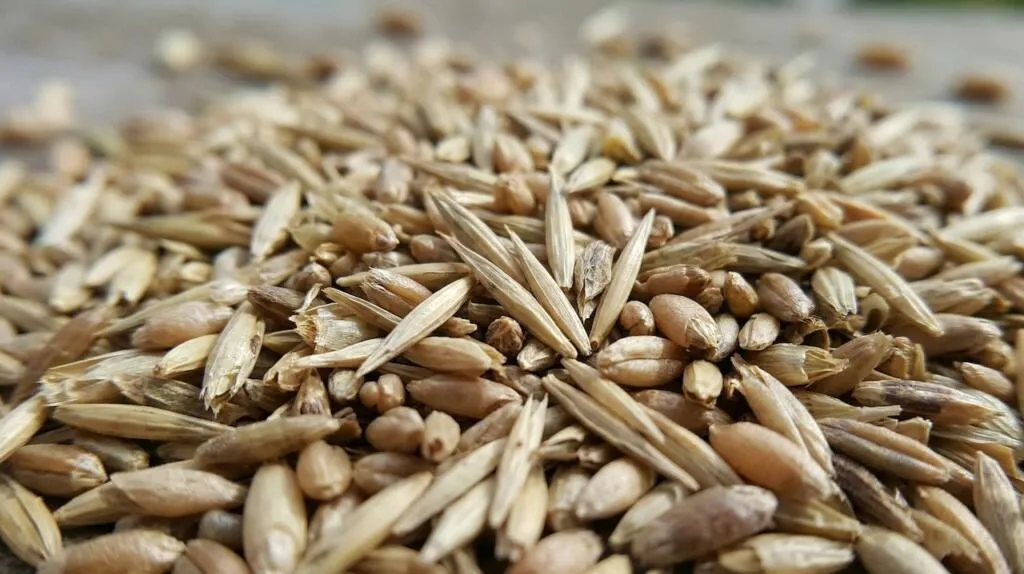
For most UK garden lawns, a general-purpose or hard-wearing mix containing perennial ryegrass and fescues is the right choice for overseeding. Perennial ryegrass establishes quickly, is tough and wear-tolerant, and stays green through most of the year. Fine fescues provide the finer leaf texture and density that makes a lawn look well-kept rather than agricultural. Together, they produce the balance of speed, durability, and appearance that suits the vast majority of domestic gardens.
There are four main seed mix categories to understand. A general-purpose or family lawn mix is the right choice for most gardens where children, dogs, and regular foot traffic are part of life. A luxury or fine lawn mix contains a higher proportion of fine fescues and bents, producing a denser, more manicured appearance but with less tolerance of heavy wear.
Always match the new seed to the existing grass in your lawn wherever possible. If your lawn is a hard-wearing mix and you overseed with a fine lawn mix, the new grass will look and behave differently from the established turf, creating a patchwork effect that can look worse than the bare patches you started with. When in doubt, a general-purpose mix is the most versatile choice and will blend satisfactorily into almost any existing domestic lawn.
💡 Top Tip
Check the ingredient list on the back of any grass seed packet before you buy it. A quality seed mix will list named grass varieties such as perennial ryegrass, slender creeping red fescue, chewings fescue, and browntop bent. Cheap seed bags often contain coarse agricultural ryegrass and unnamed varieties that produce a rough, clumpy, fast-growing lawn that is difficult to manage and looks very different from the fine domestic turf you are trying to improve. You genuinely get what you pay for with grass seed.
Seed-to-soil contact is everything in overseeding. A grass seed sitting on top of a thick mat of thatch, dead moss, and old clippings has almost no chance of germinating successfully, because it cannot reach the soil where moisture and nutrients are available. The most important investment you can make in successful overseeding is time spent on preparation. Rushing straight into sowing seed without properly preparing the surface is the primary reason overseeding fails.
The preparation sequence follows a logical order. Start by mowing the lawn at a shorter height than your usual cutting height, dropping one or two settings on your mower.
You want to expose the soil surface and reduce the competition from existing grass as much as possible. Do not scalp the lawn entirely, as this stresses the existing grass and is counterproductive, but a close cut makes a significant difference to how well the seed can reach the soil.
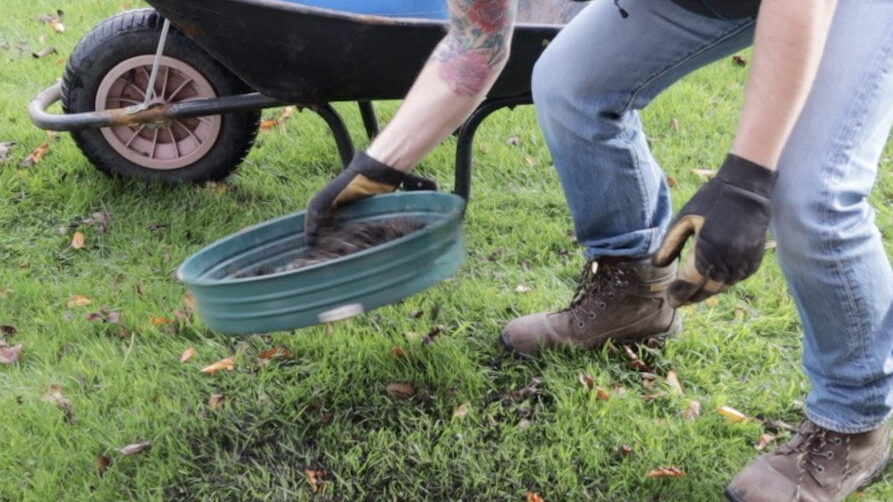
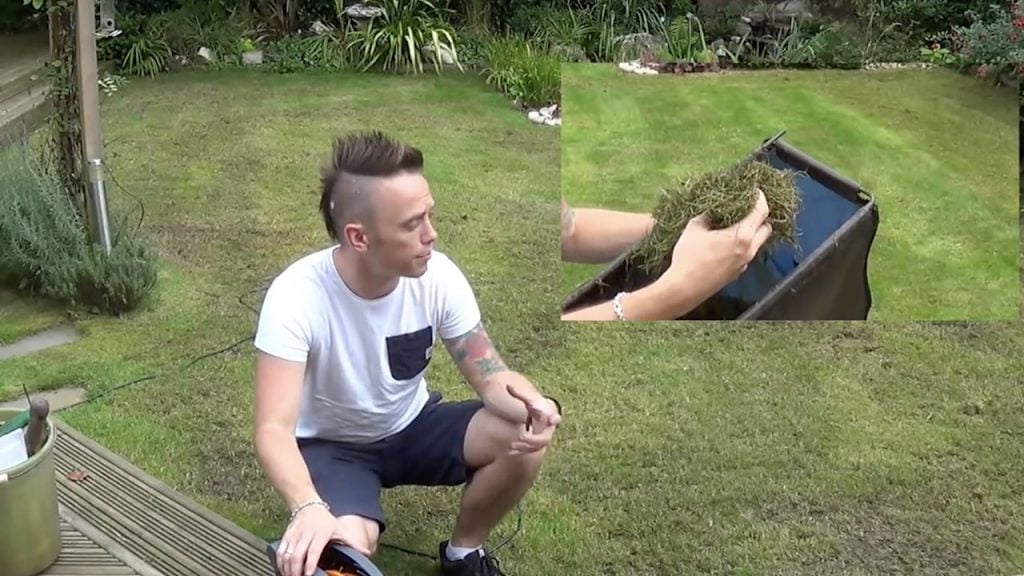
Scarify or rake vigorously after mowing to remove thatch, dead moss, and debris from the lawn surface. This is the step most people skip, and it is the one that makes the biggest difference to germination rates. Thatch is the layer of dead organic material that accumulates between the soil surface and the green grass blades. Even a relatively thin thatch layer of half a centimetre is enough to prevent seed from reaching the soil.
A spring-tine rake pulled firmly through the lawn in two directions will remove significant amounts of thatch from most domestic lawns. For larger lawns or severe thatch build-up, a powered scarifier produces much better results. My complete scarifying guide covers this in detail if you need more guidance on the process.
After scarifying, aerate any areas that feel compacted or drain poorly. Push a hollow-tine aerator or garden fork into the soil at regular intervals across problem areas, creating channels that allow seed, water, and air to penetrate. If the whole lawn feels firm and impenetrable, aerate the entire area. This step makes an immediate and measurable difference to germination rates in compacted soil, which is why it is worth doing even if it feels like extra work.
Finally, lightly top dress the prepared surface with a thin layer of sandy loam or purpose-made lawn dressing. This fills the aeration holes, provides an ideal seedbed medium around the existing grass, and helps to level any minor undulations.
Spread it thinly across the lawn, roughly 2 to 3mm deep, and work it in with the back of a rake or a stiff brush so it sits at or just below the surface of the existing grass. You are not burying the lawn; you are creating a fine contact layer that the seed can settle into.
💡 Top Tip
Water the lawn thoroughly 24 hours before you overseed, then allow the surface to dry slightly before sowing. A damp but not wet seedbed gives the seed immediate moisture contact for germination without the risk of seeds floating or shifting position in waterlogged surface conditions. Sowing into bone-dry soil in warm weather means you are dependent on getting adequate water down immediately after sowing, which is a less forgiving approach.
5. How to Overseed a Lawn: Step by Step
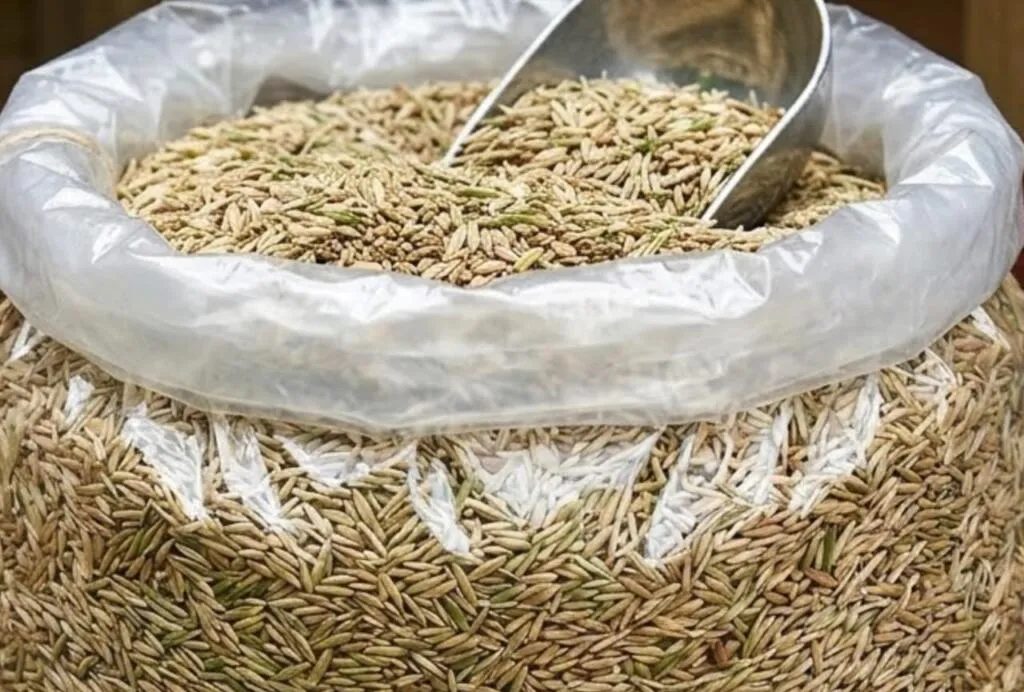
With the preparation done, the actual overseeding process is straightforward. The key is even distribution of seed at the correct rate. Too little and you will not get sufficient plant density to make a visual difference. Too much, and the seedlings compete for resources, producing weak, spindly plants that thin out rapidly as the stronger ones establish.
The standard overseeding rate for an existing lawn is 35 grams of seed per square metre. For very thin or patchy lawns that need more aggressive thickening, you can increase this to 50 grams per square metre. Measure your lawn area before you start and calculate the total seed requirement precisely. Running out halfway through and having to apply different seeds or different rates leaves visible patches in the finished result.
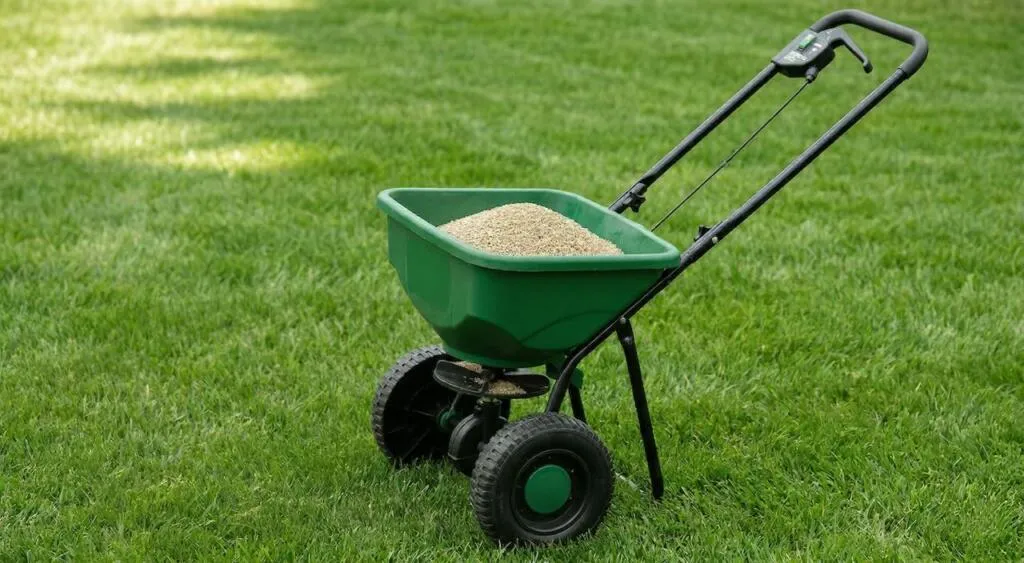
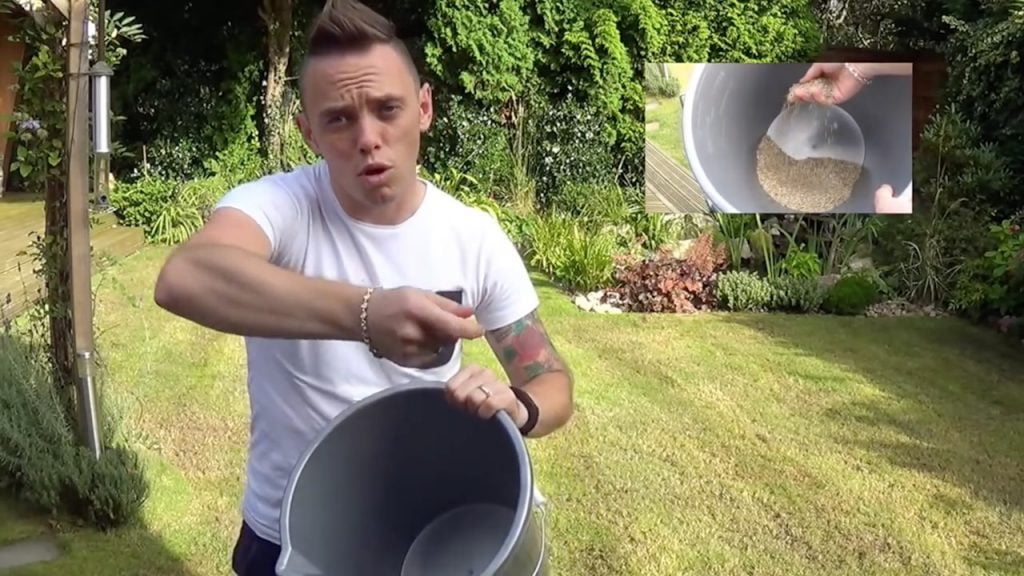
Divide your seed into two equal halves. Apply the first half walking in one direction across the lawn, broadcasting the seed as evenly as possible. Apply the second half walking at 90 degrees to the first pass. This cross-hatch technique is the same method professionals use, and it is remarkably effective at eliminating the stripes and gaps that result from single-direction application. A handheld spreader makes this process significantly easier and more even than broadcasting by hand, and I cover the specific products I recommend in the products section below.
Once the seed is down, rake it very lightly into the surface with a spring-tine rake. You are not trying to bury the seed deeply. Grass seed needs light to germinate and should be no more than 5mm below the surface. The goal of raking is simply to ensure each seed has good contact with the soil rather than sitting on top of old grass blades where it will dry out and die. Finish by firming the seed into the soil with a light roller, or by walking over the area with flat-soled shoes, pressing gently as you go.
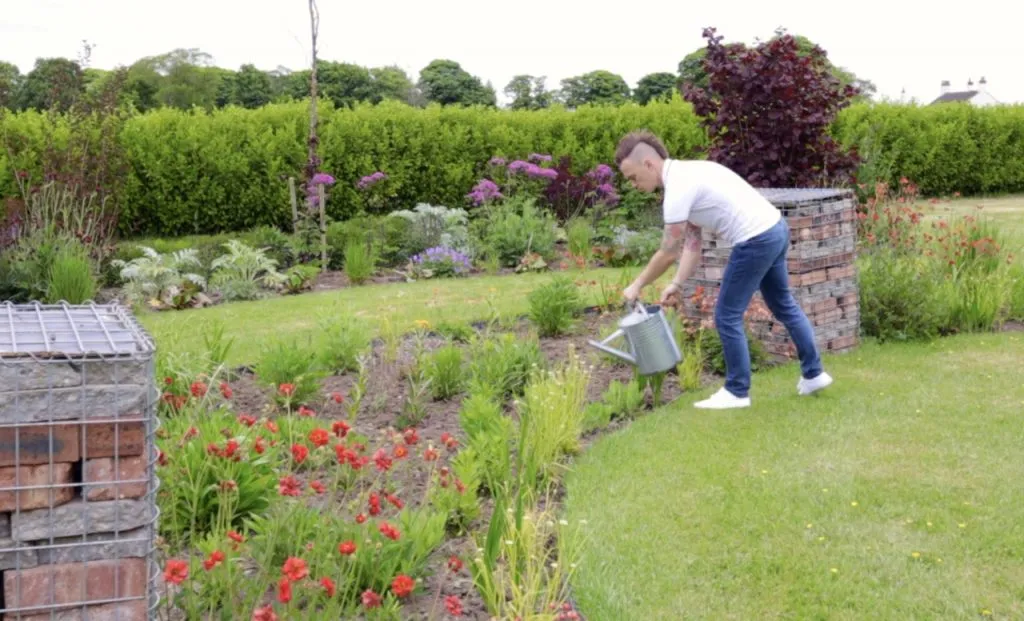
Water the lawn thoroughly after sowing, using a fine sprinkler setting that wets the surface gently without displacing the seed. Then keep it consistently moist until germination. This is the commitment that makes or breaks spring overseeding in particular, and I cover watering in detail in the aftercare section.
6. Repairing Specific Bare Patches
Whole-lawn overseeding and bare patch repair are related but slightly different operations. A bare patch has no existing grass competing for moisture and nutrients, which means seed establishes more easily but also means the exposed soil dries out faster and weeds colonise more aggressively. The preparation and aftercare approach needs to reflect these differences.
Before reseeding any bare patch, it is worth asking why the grass died there in the first place. A dog toilet area is straightforward: the grass was killed by urine nitrogen burn, and the fix is to reseed once the soil pH has recovered, which usually takes three to four weeks of regular watering to dilute the residual salts.
A dead patch caused by heavy foot traffic will simply die again unless you either reseed with a harder-wearing mix or redirect the traffic. A patch under a tree may be caused by root competition, shade, and drip-line moisture variation all at once, requiring a shade-tolerant seed mix to have any chance of success.
Diagnosing the cause before you reseed saves you considerable frustration. I have seen gardeners reseed the same patch three times in a single season because the underlying problem was never addressed. The seed establishes, the same conditions kill it again, and the cycle repeats. Spend five minutes understanding why the patch is bare before you spend thirty minutes preparing and seeding it.
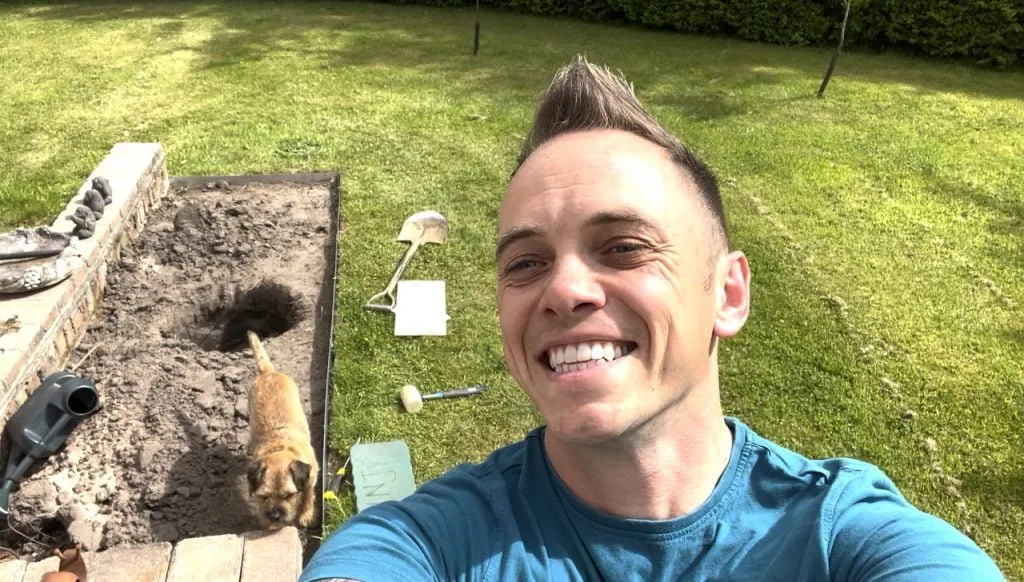
For straightforward bare patches, the repair process is simple. Lightly fork the soil in the bare area to a depth of 5 to 10cm, breaking up any compaction and removing any visible dead root material. Rake to a level surface and firm gently with your foot. Apply a light dressing of topsoil or lawn dressing to improve the seedbed quality, level it, and firm again.
Then sow seed at 50 grams per square metre, rake in, firm down, and water thoroughly. Keep the area moist until germination, which in warm conditions takes seven to ten days.
For very small patches under about 30 square centimetres, it can be quicker and more reliable to cut a small square of turf from an inconspicuous area of the lawn and transplant it into the bare patch. Cut both the donor piece and the receiving hole to exactly the same depth so the transplanted turf sits level with the surrounding lawn, firm the edges down, and water well. This gives an instant repair that looks good immediately and establishes quickly. The donor site can then be reseeded.
7. Lawn Repair Kits: Are They Worth Using?
Lawn repair kits combine grass seed with a coir or compost carrier material and sometimes a small quantity of starter fertiliser, all in a single product designed to simplify the bare patch repair process. Products like Miracle-Gro Patch Magic and Pronto Ultra Patch are the best-selling examples in the UK, and they are genuinely useful in certain situations.
The main advantage of a repair kit over plain grass seed is the carrier material. The coir or compost mix retains moisture around the seed more effectively than bare soil, which makes a meaningful difference in drier conditions or on free-draining soils where the seedbed dries out quickly between watering sessions. This moisture retention is the primary reason repair kits tend to produce more reliable results for small patches than plain seed alone, particularly in spring when dry spells are common.
For patches smaller than one square metre, a repair kit is an excellent and convenient choice that delivers very good results. For larger areas, they become more expensive than using plain grass seed with a separate lawn dressing, and the per-square-metre cost is significantly higher. A good rule of thumb is to use repair kits for individual patches and small repairs, and plain grass seed with top dressing for any overseeding job covering more than a few square metres.
One important caveat: do not use a lawn repair kit if you have recently applied a weed-and-feed product to the lawn. Many weed-and-feed products contain herbicide residues that persist in the soil for several weeks and can prevent grass seed from germinating. Always check the product label and wait the recommended period, typically four to six weeks, before overseeding areas that have been treated with weed killer.
8. Aftercare and Watering: The Make or Break Stage
Grass seed that dries out during germination does not recover. Unlike established grass, which can survive drought stress and bounce back when rain returns, a germinating seed that desiccates at the critical moment when the radicle is pushing into the soil is simply dead. No amount of subsequent watering will revive it. This is why aftercare is arguably more important than any other part of the overseeding process, and it is where the most failures occur.
The overseeding aftercare rule is straightforward: keep the seedbed consistently moist from the moment of sowing until the new grass is at least 3 to 4cm tall and has been mown at least once. In autumn, UK rainfall often does this job for you, which is one of the reasons autumn is the preferred overseeding window. In spring, especially during a dry April or May, you will need to water every day without fail, including at weekends. A fine sprinkler setting is essential to avoid displacing the seed or washing it into low spots.
I learned this the hard way early in my gardening career when I overseeded a client’s lawn in a particularly dry April, watered diligently for the first week, then had a busy schedule that meant I missed three consecutive days of watering in the second week. The germination was patchy and uneven, with good coverage where the soil had retained moisture and almost nothing in the drier areas near the fence where drainage was faster. I had to go back and reseed those sections three weeks later.
Consistent daily watering for the first two weeks is the commitment overseeding in spring requires, and it is worth being honest with yourself about whether you can manage it before you sow.
Once germination is clearly visible, you can reduce watering frequency to every two days, gradually extending the interval as the new grass deepens its roots. After the first mow, established new grass can generally look after itself during normal UK summer rainfall, with supplementary watering only needed during extended dry spells.
Protect the overseeded area from birds during the germination period if possible. Wood pigeons and other birds will eat freshly sown grass seed with impressive efficiency. A temporary criss-cross of garden twine or netting over small areas is usually enough to deter them. For whole-lawn overseeding, this is less practical, but a fine mesh netting pegged over the surface is the most effective solution where bird pressure is significant.
9. Germination, First Mow, and Establishing New Grass
Grass seed germinates at different rates depending on temperature, moisture, and seed variety. Perennial ryegrass is the fastest-germinating grass variety commonly used in UK lawn mixes, typically producing visible seedlings within five to seven days in warm conditions. Fine fescues and bent grasses take longer, often ten to fourteen days. This means that in a mixed seed product, you will often see the ryegrass appearing first while the finer grasses follow a week or so later. This is completely normal and does not indicate any problem with the fescues.
Do not mow new grass until it reaches at least 5cm in height. Mowing too early is one of the most common mistakes, and it can pull shallow-rooted seedlings directly out of the soil, particularly if the mower blades are not razor-sharp. Wait until the new grass is clearly established and growing strongly before you cut it for the first time.
When you do mow, set your blades to their highest setting and remove no more than one-third of the leaf length. This encourages the seedlings to tiller and spread sideways, thickening the sward naturally rather than simply growing upward.
After the first mow and over the following two to three cuts, gradually lower the mowing height back toward your usual setting. This gradual reduction allows the new grass to develop a strong root system before it faces the stress of regular close mowing. Rushing this transition produces weak grass that struggles to compete with established turf.
Apply a light dressing of starter fertiliser or a balanced lawn feed four to six weeks after overseeding once the new grass is clearly established. New seedlings benefit from a nutritional boost at this stage, particularly phosphorus for root development. Avoid high-nitrogen feeds on very new grass as they push rapid top growth before the root system is strong enough to support it.
10. Overseeding After Scarification
Scarification and overseeding are the perfect partnership, and if you are doing one, you should almost always be doing the other at the same time. Scarification removes the thatch layer that prevents seed-to-soil contact and opens up the lawn surface in a way that is genuinely ideal for overseeding. The timing, usually Autumn or spring, aligns perfectly with the two best overseeding windows. It makes complete sense to do both together.
After scarification, your lawn will look genuinely alarming. I cannot stress this enough because I have had clients contact me in a panic after their first scarification experience, convinced they have destroyed their lawn. The lawn will look like it has been put through a shredder. There will be bare soil visible, the grass will look thin and ragged, and it will bear no resemblance to the lawn you were hoping to achieve. This is completely normal and exactly correct. The scarification has done its job.
Overseed immediately after scarifying, within 24 hours if possible, while the soil surface is perfectly prepared. The scarification process has already done the tillage work. The surface is open, the thatch is removed, and the seed has near-perfect conditions for establishment. Sow at 35 to 50 grams per square metre depending on how bare the lawn looks after treatment, water thoroughly, and begin the aftercare programme.
The recovery from a combined scarification and overseeding treatment is remarkably fast in good conditions. Within ten days, you will see new germination. Within three to four weeks, the lawn will be visibly greening up.
By six weeks, it will look substantially better than it did before the treatment, and it will continue to improve through the following season as the new grass matures and thickens. The transformation is one of the most satisfying in all of lawn care.
11. Overseeding in Shade and Other Problem Areas
Shaded areas present a specific overseeding challenge that standard seed mixes cannot fully solve. No grass variety thrives in deep, permanent shade. If an area receives fewer than three to four hours of direct sunlight daily, even a shade-tolerant seed mix will produce thin, weak coverage that requires repeated overseeding to maintain. This is a situation where overseeding buys you time rather than providing a permanent solution.
That said, shade-tolerant mixes containing hard fescue, strong creeping red fescue, and browntop bent perform significantly better in low-light conditions than general-purpose mixes and are worth using whenever overseeding shaded areas. Adjust your management of shaded areas, too: raise the mowing height by one setting, reduce foot traffic as much as possible, and consider lifting the lower branches of any trees that cast shade to allow more dappled light to reach the lawn surface.
Dog damage patches deserve special mention because they are one of the most common bare patch problems in UK gardens. Urine from dogs, particularly female dogs, contains high concentrations of nitrogen and salts that cause localised burning and death of the grass. The patch usually has a dark green ring around its perimeter where the diluted urine has acted as fertiliser before the concentrated centre has killed the grass. Wait three to four weeks after the last damage and water the area thoroughly before reseeding to dilute residual salts. Overseed with a hard-wearing mix at 50 grams per square metre and consider training the dog to use a designated gravel or bark area if the problem is recurring.
Compacted paths and play areas that have been worn bare by foot traffic will reseed successfully only if the compaction is addressed first. Fork the area deeply, add some sharp sand to improve drainage and reduce future compaction, reseed with the hardest-wearing mix available, and then manage access during the establishment period. Without restricting traffic while the new grass establishes, you will simply be repeating the cycle.
12. Common Overseeding Mistakes and How to Avoid Them
Overseeding is a straightforward process, but there are several common mistakes I see gardeners make that either significantly reduce results or cause the whole operation to fail. Here are the most important ones to avoid.
Sowing at the wrong time of year is the most fundamental error. Grass seed sown in December, January, or February is largely wasted. The soil is too cold for reliable germination, and seed sitting dormant in cold, wet soil over winter is vulnerable to rot, fungal attack, and bird predation. Wait for the September window or the April window, do it properly, and the results will be dramatically better than sowing opportunistically whenever you have a free Saturday.
Skipping the preparation is the second major mistake. Sowing seed over thick thatch without scarifying is the equivalent of planting in concrete. The seed has nowhere to go. Spend the time on preparation, and the difference in germination rate is immediately visible. I would rather see a gardener spend 90 minutes preparing and 15 minutes sowing than 15 minutes preparing and 90 minutes wondering why nothing germinated.
Applying too much seed in the belief that more seed equals better results is a persistent problem. Grass seedlings need space to develop. Sowing at twice the recommended rate produces overcrowded seedlings that compete for light and moisture, thinning out rapidly as the weakest die. The recommended rates are calibrated to achieve good plant density without overcrowding, so follow them rather than increasing them.
Mowing too soon is a very common mistake, particularly among gardeners who find the slightly shaggy appearance of establishing new grass aesthetically distressing. Wait for a height of 5cm and a clearly visible, well-established sward before you cut. One premature mow with a blunt blade can pull out weeks of careful establishment work in minutes.
Allowing the seedbed to dry out during germination is the single most preventable cause of overseeding failure. If you cannot commit to daily watering for two weeks in spring, overseed in autumn when UK rainfall is more reliable. There is no shame in choosing the easier timing. The result is a better lawn, and that is the only measure that matters.
13. Products I Recommend for Overseeding and Lawn Repair
These are products I have used or recommended to clients with consistently good results in UK conditions. My recommendations are based on performance rather than brand loyalty or commercial arrangement.
14. Frequently Asked Questions About Overseeding
How long does grass seed take to germinate in the UK?
Under good conditions with soil temperatures above 10°C and consistent moisture, perennial ryegrass seed germinates in 5 to 7 days. Fine fescues take ten to fourteen days. In cooler conditions around 8°C, germination takes longer, typically two to three weeks. If you see no germination after three weeks in apparently good conditions, the most likely causes are insufficient watering, seed sitting on thatch rather than soil, or seed that has been eaten by birds.
Can I overseed in autumn after using a moss killer?
Yes, but you need to wait for the right moment. Apply moss killer, wait for the moss to die and turn black (usually seven to fourteen days), then scarify to remove the dead material, and overseed immediately after scarification. The iron sulphate in most moss killers does not persist in the soil at concentrations harmful to grass seed. However, if you used a combined moss-and-weed killer containing an herbicide, wait 4 to 6 weeks and check the product label for the recommended interval before overseeding. For a full guide to the moss treatment process, see my complete moss removal guide.
Should I fertilise before or after overseeding?
Apply a pre-seed or starter fertiliser either mixed into the top dressing before overseeding, or at the time of sowing. Avoid applying high-nitrogen feeds to freshly overseeded areas, as they can promote excessive top growth before roots are established. Four to six weeks after germination, once the new grass is clearly established and has been mown at least once, apply a balanced lawn fertiliser to support continued development. For full guidance on lawn feeding, see my complete UK lawn feeding guide.
Why is my overseeded grass coming up patchy?
Patchy germination after overseeding is almost always caused by one of four things: uneven seed distribution (use a spreader and cross-hatch technique next time), insufficient seed-to-soil contact from thatch that was not fully removed, inconsistent watering that allowed some areas to dry out during germination, or birds eating the seed in specific areas. If the patchiness is minor, the bare areas will often fill in naturally as the established seedlings tiller and spread. For significant gaps, reseed those areas four to six weeks after the initial overseeding, once conditions have been identified and corrected.
How soon can I walk on overseeded grass?
Avoid walking on the overseeded area at all until the new grass has been mown at least once, which is typically four to six weeks after sowing. Light foot traffic for watering purposes is unavoidable, but minimise it and use a flat-soled shoe to avoid pressing seed into depressions or displacing it. Keep children and pets off the area during establishment. After the first mow, the new grass can tolerate light traffic, and after the second or third mow, it is approaching the wear tolerance of established turf.
Do I need to remove existing grass before overseeding?
No. Overseeding works with the existing grass, not against it. The existing turf provides structure, retains moisture, and gives the new seedlings shelter as they establish. You do need to prepare the surface thoroughly by mowing short, scarifying to remove thatch, and aerating compacted areas, but you are not removing the existing grass. The only situation where removing existing grass and reseeding from scratch makes sense is when more than 50 percent of the lawn is weeds or moss rather than grass, in which case a full renovation is more effective than overseeding.
Learn How to Design Your Own Garden
Now you know how to keep your lawn looking green and healthy, why not consider taking your skills to the next level with some online design training? My Garden Design for Beginners Course is here to help take your garden from average to extraordinary with an affordable online course, no matter how little your experience with plants.
This course offers step-by-step guidance from me, Lee Burkhill, award-winning garden designer and presenter on BBC1’s Garden Rescue. In this course, you’ll go from a garden design novice to a confident designer equipped to tackle any green space.
Planting Techniques – Select and arrange plants like a pro.
Design Styles & Layout Options – Explore different styles to suit every garden.
Course Features:
20 Hours of Study Time
Flexible Online Learning
Engaging Video Lessons & Quizzes
Real-World Case Studies
Certification upon Completion
Taught by Award-Winning Designer Lee Burkhill
Enrol now for just £199 and start your journey toward garden design mastery!
29
Garden Design Examples for Small Gardens: 30 Design Templates & Planting Plans
Garden Design Examples for Small Gardens: 30 Design Templates & Planting Plans: In this online gardening course, I’ll walk you through 30 fantastic garden designs, explaining the logic behind the layout, the plant choices, and take-home tips for applying them in your own garden.
Weekend Garden Makeover: A Crash Course in Design for Beginners
Learn how to transform and design your own garden with Lee Burkhills crash course in garden design. Over 5 hours Lee will teach you how to design your own dream garden. Featuring practical design examples, planting ideas and video guides. Learn how to design your garden in one weekend!
Garden Design for Beginners: Create Your Dream Garden in Just 4 Weeks
Garden Design for Beginners Online Course: If you want to make the career jump to becoming a garden designer or to learn how to design your own garden, this is the beginner course for you. Join me, Lee Burkhill, an award-winning garden designer, as I train you in the art of beautiful garden design.
Summary: How to Overseed Your Lawn and Repair Bare Patches
Overseeding is the most cost-effective lawn improvement tool available to UK gardeners. It requires no specialist equipment beyond a rake, a spreader, and a garden hose. It costs a fraction of the cost of new turf. And when done at the right time of year with the right preparation, it reliably transforms thin, tired, and patchy lawns into something you can genuinely be pleased with. The only investment required is a little patience and the commitment to keep the seedbed moist through germination.
To recap the essentials: sow in early autumn or spring when soil temperatures are reliably above 8°C. Mow short, scarify or rake thoroughly to remove thatch, and aerate any compacted areas before you sow a single seed. Apply at 35 grams per square metre for general overseeding or 50 grams per square metre for bare patches, using a cross-hatch technique for even coverage. Water daily until germination, wait for 5cm height before the first mow, and feed lightly four to six weeks after establishment.
The single most important piece of advice I can give you is to pair overseeding with scarification whenever you do the latter. Scarification opens the lawn surface perfectly for seed, and the recovery from a combined treatment is dramatically faster and more thorough than from either operation done alone. If you are planning to scarify this autumn or next spring, buy your seed at the same time and have it ready to go the same day.
Overseeding works best as part of a complete annual lawn care routine that includes feeding, aerating, and moss management. All of those elements support each other, and a lawn that consistently receives them year after year becomes progressively easier to maintain as the sward thickens and the underlying conditions improve. Take a look at these related guides to build out your full lawn care programme:
Your subscription could not be saved. Please try again.
Your subscription has been successful.
Lee Burkhill
Lee Burkhill, known as the Garden Ninja, is an award-winning garden designer and horticulturist with over 30 years of gardening experience and 15 years as a professional garden designer. A qualified RHS (Royal Horticultural Society) professional, Lee specialises in sustainable garden design and practical horticultural advice. He designs and presents on BBC1’s Garden Rescue and in leading gardening publications. Lee combines three decades of hands-on gardening knowledge with professional design qualifications to help gardeners create beautiful, functional outdoor spaces.