How to divide plants: splitting herbaceous perennials the easy way
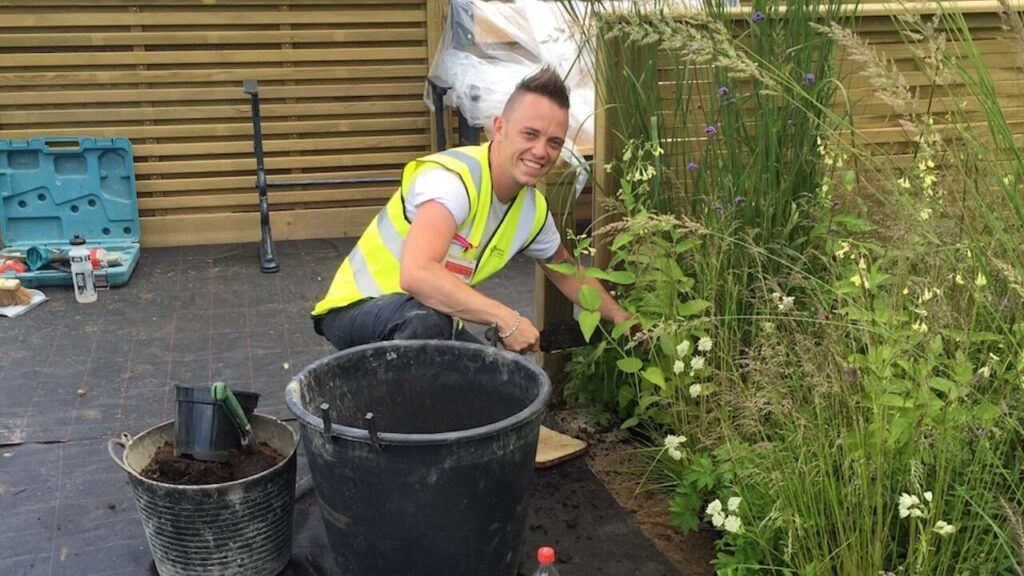
Lee Burkhill: Award Winning Designer & BBC 1's Garden Rescue Presenters Official Blog
Intermediate level
Dividing plants is an easy way to help bulk up your flower beds without spending a penny at garden centres. Splitting and dividing herbaceous plants is also a great way to ensure your garden plants stay healthy and vigorous. Flowering consistently year after year. Dividing plants is relatively easy and can also help you become better acquainted with your garden plants as you get down and dirty with them. So come join me as I show you exactly how to divide plants successfully for fuller flower beds bursting with colour.
Quick Answer
Divide herbaceous perennials in early spring or autumn when plants are not in flower. Lift the clump with a fork, split it by hand, with back-to-back forks, or with a sharp spade depending on root type, and replant divisions immediately with good compost and thorough watering. Most perennials benefit from division every two to three years.
Long before online shopping and plants-by-mail, splitting and dividing plants was one of the best ways to propagate your garden plants. It’s also been used for years to share and spread plants amongst communities without having to grow new plants slowly from seed. Furthermore, by getting down and dirty when dividing plants, you really understand how your plants grow and their preferences.
This page contains affiliate links for products I use and love. If you take action (i.e. subscribe, make a purchase) after clicking a link, I may earn some gardening commission, which helps me keep the Garden Ninja Blog free for all.
What plants can I divide?
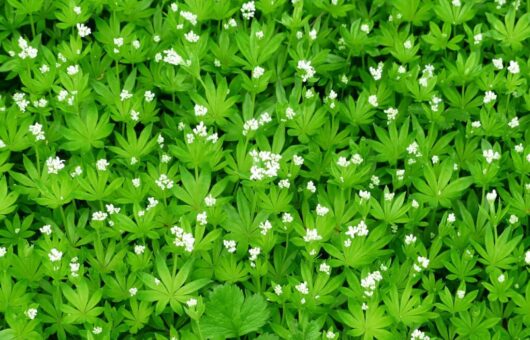
Herbaceous perennials are easily split and multiplied via division. They usually form a set of fibrous roots which can be divided or cut to form a new set of identical plants. Herbaceous perennials are plants that come back year after year and die back to the ground at the end of each growing year. For shrubs, trees and plants that don’t follow this cycle, you’ll need a different method, such as taking a cutting or sowing seeds.
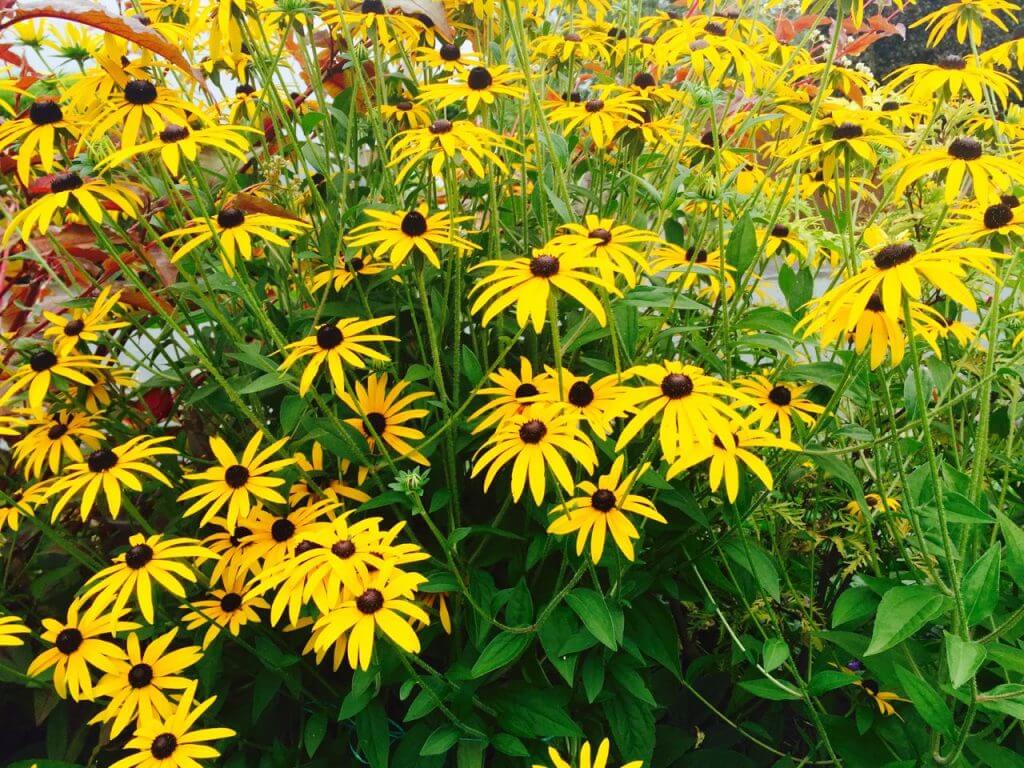
Rudbeckias above are super easy to divide for a riot of colour!
Plants that divide easily
The table below covers the most common herbaceous perennials suitable for division. I’ve noted the best method and optimal timing for each, because a few species have specific needs that catch even experienced gardeners out. Note that some plants on this list, such as Crocosmia and Iris, have corms or rhizomes rather than fibrous roots, so the approach is slightly different.
Hostas look wonderful when planted en masse, so why not split them for even more?
Signs that a plant needs dividing
The most valuable thing I can tell any gardener about plant division is that your plants will actually show you when they need it, if you know what to look for. You don’t need to follow a rigid calendar. You need to read the plant. After twenty years of professional garden design, these are the signals I watch for every autumn and spring:
A bald patch appears in the centre of the clump. This is the most reliable indicator that division is overdue. As a perennial ages, the vigorous young growth migrates outward to the edges of the clump while the original centre becomes woody, exhausted, and eventually dies off completely. You end up with a ring of plants surrounding a weedy, dead middle. This bald-centre pattern is classic in Asters, ornamental grasses, and Helianthus, and it tells you the plant is essentially propagating itself by accident while signalling that it needs your help to do it properly.
Noticeably fewer or smaller flowers year on year. A herbaceous perennial that was producing dozens of blooms two years ago but is now producing a fraction of that, or producing smaller flowers on weak stems, is almost certainly overcrowded. The roots are competing for nutrients and water in a progressively smaller volume of soil, and the plant is showing the strain through its flower production. Division resets this: each new section has fresh access to soil, nutrients, and room to spread.
The clump has expanded well beyond its original planting position. Some perennials are polite about their spread. Others are not. Helianthus, Lysimachia, and vigorous geraniums can colonise far beyond their allocated space within a couple of seasons. If your plant is muscling out neighbours or crossing into paths and lawns, it’s overdue for a reduction.
Stems that flop or need staking where they never used to. Weak, floppy stems on plants that previously stood well can indicate overcrowding and root congestion rather than a staking problem. Dividing the clump often restores the vigour that keeps stems upright naturally.
Why divide plants?
The first obvious answer is that dividing plants multiplies the number of plants you have in the garden for free. Rather than one plant reaching maturity and sitting there, you can encourage multiples of that parent plant to spread out and provide even more interest across your borders.
Dividing plants also keeps herbaceous perennials in far better health. It stops them from becoming unproductive, where plants show a reduction in flowering capacity year on year, and encourages vigorous new regrowth. Each new division gets access to fresh soil, improved airflow around the roots, and better access to nutrients and water. The result is reliably better flowering and stronger, more upright stems. It really is a win-win.
There’s also a third reason that doesn’t get mentioned enough: division can actually save a tired, under-performing plant that you might otherwise dig up and discard. Before you condemn a perennial that isn’t delivering, try dividing it. In my experience, the transformation is often dramatic. An Aster that looked sparse and weak in a congested clump can become a magnificent, floriferous plant within one growing season once it has space to breathe.
Tools you need for dividing plants
Dividing plants is not as daunting as you may think. The right tools make the job considerably easier and reduce the stress on both you and the plant. Here’s what I use:
Essential when dividing multiple species in one session. After a few weeks of growth, divisions look identical and you will not remember what they are.
Recommended
💡 Top Tip
Water the plant thoroughly the day before you plan to divide it. This significantly reduces transplant stress, loosens the soil around the roots for easier lifting, and means the plant is fully hydrated going into what is always a somewhat disruptive process. Dividing a dry, stressed plant is both harder and riskier than dividing a well-watered one.
How to divide plants: step by step
Dividing plants is not as daunting as you may think. Follow these steps, and you’ll be producing new plants quickly and confidently.
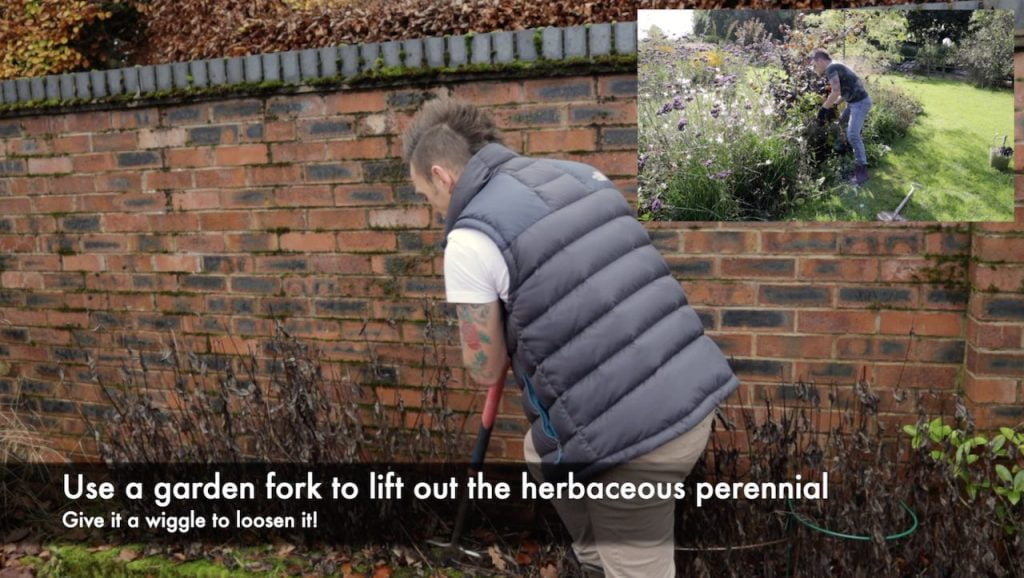
Step 1: Loosen the soil around the perennial
The first thing to do is loosen the soil around the plant you want to divide. Work your fork in a circle around the outside of the clump, ideally at least 10cm further out than the visible spread of the plant, because roots will extend well beyond the foliage. Push the fork in deeply at an angle, pointing inwards, and gently lever upward to break the soil’s grip on the root ball. Work all the way around before you attempt to lift. Rushing this step and trying to prise the plant out before the soil is properly loosened is how roots get torn and damaged.
This hosta is best divided with a spade rather than by hand. It’s quicker and cleaner for the plant, and the hosta will not thank you for the prolonged wrestling match that hand-pulling a large crown inevitably becomes.
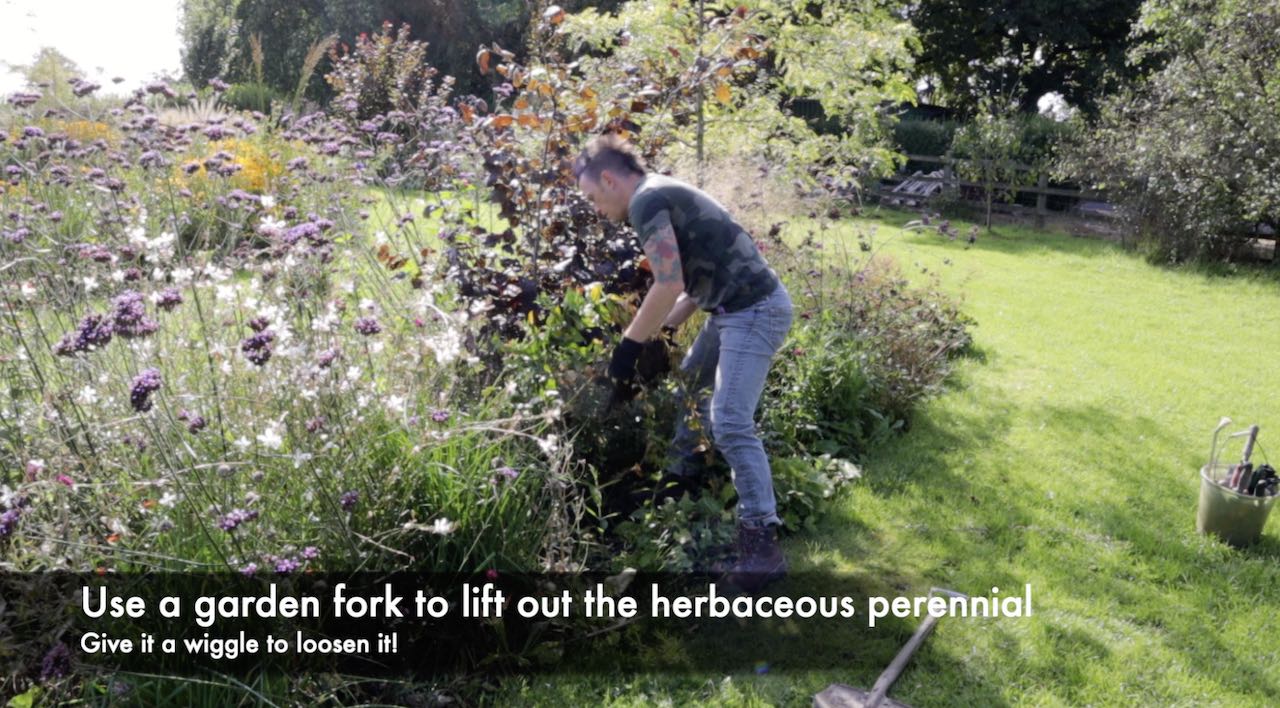
Step 2: Lift the plant and examine the root structure
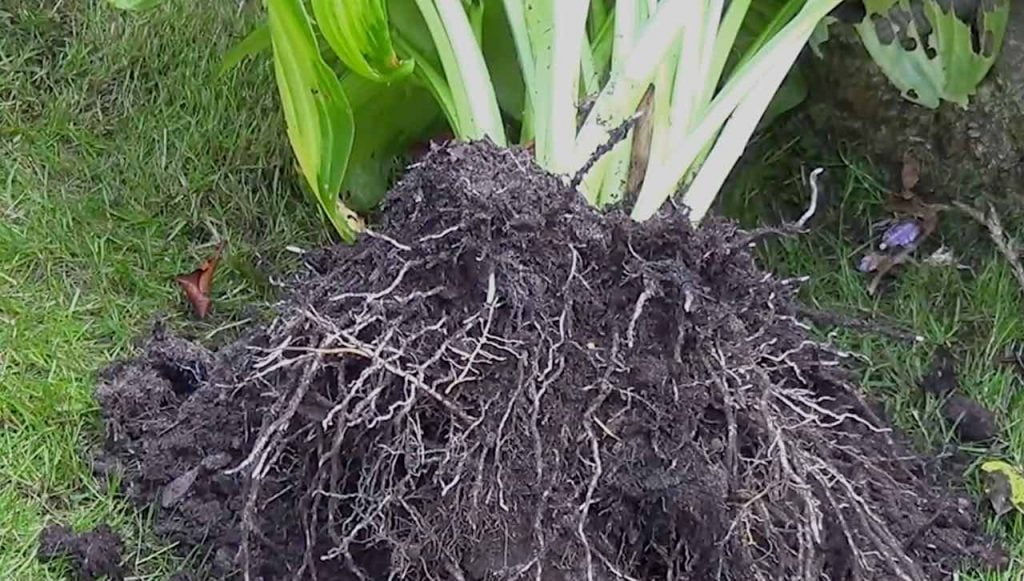
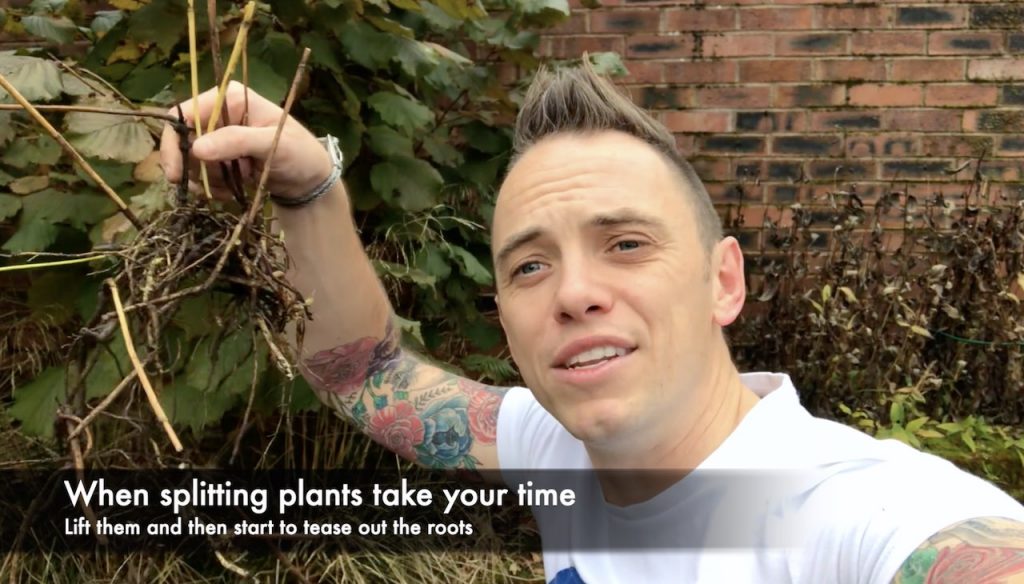
Once the soil is loosened, carefully lever the whole clump out of the ground and lay it on the surface beside the hole. Have a good look at the root structure before you do anything else. Is it congested and tightly knotted, or relatively loose and fibrous? Can you see individual crowns or growth points within the clump? Can you already see where natural divisions might form?
This assessment step takes thirty seconds and tells you which of the division methods below is appropriate. It also lets you check the root health. Remove any sections that are dead, diseased, or obviously rotten before you start dividing.
These Rudbeckia have relatively loose roots, so dividing them by hand or with a sharp knife is the easiest approach.
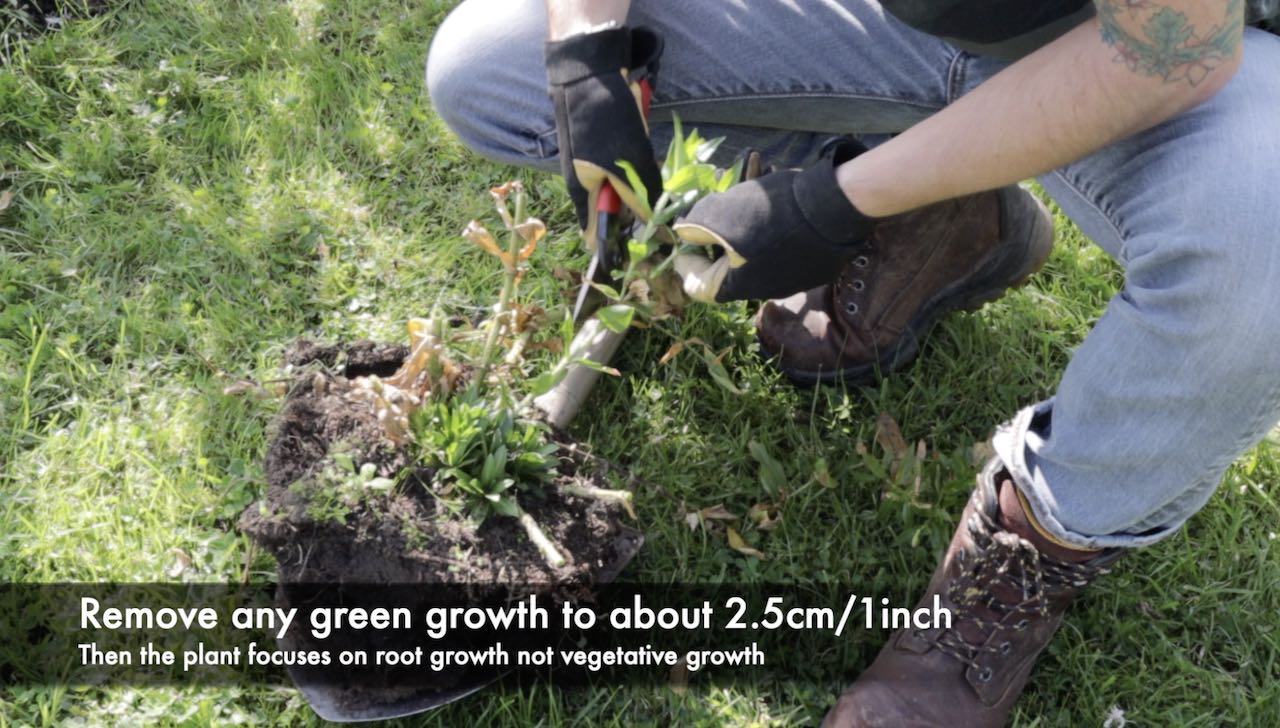
Step 3: Cut back the foliage to about 2–3cm
Before dividing, cut back the current season’s foliage to approximately 2–3cm using secateurs. This focuses all the plant’s energy on establishing new roots rather than supporting existing foliage, and it makes the division process considerably easier because you can actually see what you’re working with. It also reduces moisture loss from the divisions while they’re out of the ground.
This step applies to autumn division more than spring division, where you want to keep the emerging new growth intact, as it helps the plant establish quickly once replanted.
Step 4: Divide the clump using the appropriate method
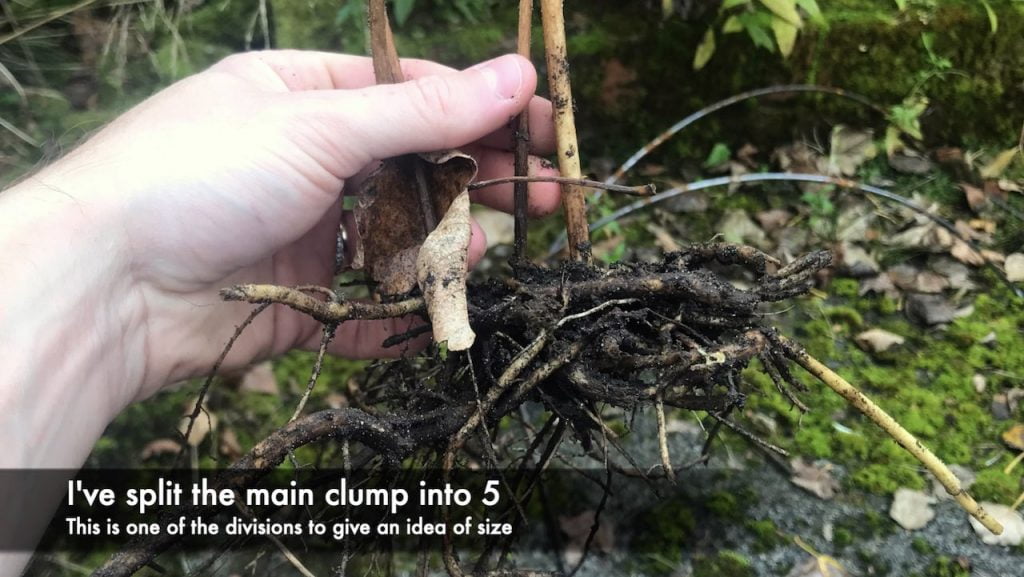
This is where most people hesitate, but it’s important to be decisive. Plants are far more resilient than they look at this stage, and a clean, confident cut is far better for the plant than tentative half-measures that tear and shred the roots. Choose the right method for the root type (see the methods section below) and go for it. Each division should have three to five healthy shoots and a good complement of roots. Avoid making divisions that are too small, as they will take much longer to establish and flower.
Step 5: Choose your best divisions and discard the rest
You may be surprised at how little you need to create a vigorous new plant. The size of division I aim for is something that would sit comfortably in my palm, roughly equivalent to a 1-litre pot’s worth of roots. This ensures a good, healthy division with enough root mass to establish quickly. Keep the divisions from the outer edges of the clump, which are always the youngest and most vigorous.
The woody or dead centre of the clump should be discarded on the compost heap. For most hardy Geraniums, you can be very thrifty with tiny parts of the root, but the plant will take a season longer to reach full size.
Step 6: Replant immediately and water thoroughly
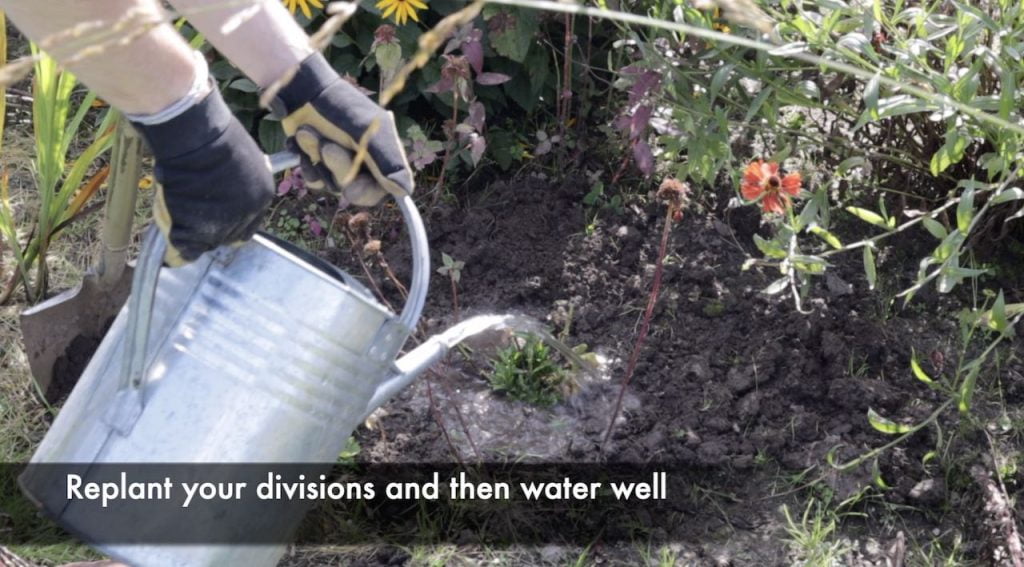
Get your divisions back into the ground as quickly as possible. The clock starts the moment a division is separated from its parent, and exposed roots lose moisture rapidly, especially in any kind of breeze or sun. Improve the planting hole with some peat-free compost if your soil is poor, firm the division in well so there are no air pockets around the roots, and water thoroughly, even if rain is forecast.
Label every new plant, especially if you’re dividing multiple species in one session. Come spring, they will all look very similar when breaking dormancy, and guessing what they are once they’re in the ground is genuinely difficult. I’ve sometimes forgotten to do this and then am kicking myself trying to remember what the plant is!
If you can’t plant divisions immediately, pot them temporarily into compost, keep them in a shaded, sheltered spot, and water regularly until you can plant them out. Sharing divided plants with friends and neighbours is one of gardening’s great pleasures, and potting them first makes transport easy.
Overcoming the fear of dividing plants
I want to address something directly, because it’s the single reason most gardeners put off dividing plants long past the point when they should have done it. The problem is not knowledge or technique. It’s the completely understandable reluctance to take something sharp to a plant you’ve cared for, watched grow, and probably feel protective of. I’ve run enough workshops to know that the moment I hand someone a spade and point them at a beloved Hosta, there’s a very specific look of horror that crosses their face.
Here’s what I tell them. Plants are not fragile. The plants in your border have survived drought, floods, slugs, late frosts, and quite possibly an enthusiastic dog. A sharp spade cut is nothing compared to what the weather subjects them to in a difficult year. The congested, bald-centred, flopping clump in front of you is already in distress. Dividing it is not an act of aggression. It’s a rescue.
💡 Lee’s Experience
I once ran a workshop where a participant spent ten minutes standing over a large clump of Helianthus, spade in hand, unable to make the first cut. She’d grown it from a single plant seven years earlier and felt personally responsible for it. I said: “That plant is trying to die. The bald patch in the middle is it telling you it’s exhausted. You’re not hurting it. You’re giving it a future.” She put the spade in. One firm cut. Three good-sized divisions. By the following autumn, all three were flowering better than the original ever had. She emailed me a photo.
The other thing that holds people back is the worry about making the wrong cut. What if you slice through the crown in the wrong place? What if you end up with a division that’s too small? The reality is that most of these mistakes are recoverable. A division with two shoots instead of five will establish more slowly but it will establish. A cut that goes through a section of root rather than between natural divisions will not kill the plant. Plants regenerate. They have been evolving strategies for dealing with physical damage for considerably longer than we’ve been gardening.
What helps most is deciding clearly before you start: which tool, which method, roughly how many divisions you’re aiming for. Hesitation and repeated tentative cuts do more damage than one decisive action. Once you’ve lifted the plant and assessed the root structure, commit. A clean, confident cut every time. You’ll be surprised how quickly the nervousness disappears after the first successful division. By the third plant, it feels completely natural, and by the end of the session, you’ll be looking around the garden wondering what else needs doing.
This is the section most guides skip, and it’s where inexperienced gardeners most often run into trouble. Not all perennials divide the same way. Using the wrong method for the root type damages the plant unnecessarily and reduces your success rate. Here’s what to use and when:
Hand division (small fibrous-rooted plants)
Suitable for Geraniums, Primula, Rudbeckia, Aster (smaller clumps), Anemone, and other plants with loose, easily separated fibrous root masses. Once lifted, you can often simply tease the clump apart with your hands, working the roots free gently without cutting. If you can feel the roots separating naturally with a little pressure and wiggling rather than tearing, hand division is the right technique. It’s the most forgiving method for the plant, as it preserves more root structure than cutting.
Back-to-back fork method (large or dense fibrous clumps)
This is the technique used for large, densely rooted perennials such as Hemerocallis (Daylily), Helianthus, and mature Asters. Once the clump is lifted, insert two garden forks, back-to-back, tines interlocked, into the centre of the root mass. Then lever the fork handles apart using them as opposing levers. The mechanical advantage of two forks working against each other will split even the most stubbornly congested root ball. Work methodically, repositioning the forks as needed to divide the clump into sections of the right size. Each final division should have three to five vigorous shoots and a good complement of roots.
Sharp spade or knife (woody crowns and tough clumps)
For Hostas, large ornamental grasses, Delphiniums, and other plants with dense or woody crowns that require both hands and forks. A sharp spade driven cleanly and decisively through the crown is the right tool here. The key word is sharp: a blunt spade tears and shreds rather than cuts, which leaves ragged wounds that invite disease. You can also use a large kitchen knife or a purpose-made garden knife for smaller crowns. Don’t be afraid to be firm.
A clean cut heals faster and causes less long-term damage than a prolonged struggle with a blunt implement. For very large ornamental grass clumps that have been in the ground for several years, even a sharp spade may struggle. A saw is sometimes genuinely necessary, and there’s no shame in using one.
Rhizome division (Iris and similar)
Bearded Iris and similar rhizomatous plants need a different approach. After flowering in summer, lift the clump and use a sharp knife to cut sections of rhizome, each about 5–8cm long, that carry a healthy fan of leaves. Trim the leaves back by about half to reduce moisture loss. Discard any rhizome sections that look soft, damaged, or diseased, and replant the healthy sections with the top of the rhizome just visible at soil level rather than buried. Planting too deeply is the most common mistake with Iris and results in poor or absent flowering.
Corm chain separation (Crocosmia)
Crocosmia forms chains of individual corms connected by underground runners, and these chains should be carefully teased apart by hand rather than cut. Dig down at least 25–30cm before attempting to lift, as the corm chains go deeper than you expect and are easily snapped or damaged by a too-shallow fork. Intact chains can be replanted as is, or individual corms can be carefully separated. Note that Crocosmia actually flowers most freely when slightly congested, so resist the urge to divide it too frequently.
What to do with divisions you can’t plant immediately
One of the most underrated pleasures of dividing plants is ending up with more than you bargained for. You set out to tidy a congested Hemerocallis and discover you’ve produced twelve healthy divisions when you only needed four. This is a happy problem, but it does need a quick plan. The answer is simple: pot them up temporarily, and you have weeks rather than hours to decide where they’re going.
Fill any clean pot or container that has drainage holes with peat-free compost, plant the division at the same depth it was growing, firm it in well, and water thoroughly. Place the pot somewhere shaded and sheltered rather than in full sun. A division sitting in a pot hasn’t yet rebuilt the root system it needs to cope with heat and drying wind, so the less stress it’s under while waiting, the better. Check moisture every couple of days, as pots dry out much faster than open ground, particularly in warmer weather.
Most divisions will sit happily in pots for two to four weeks before any real deterioration sets in, as long as they’re kept watered. Hardy perennials like Geraniums and Rudbeckias are particularly forgiving in temporary pots. If you’re heading into autumn, some will cheerfully overwinter in a sheltered position and be ready for planting out in spring, which gives you even more flexibility. The only ones to plant out promptly rather than pot are large divisions of dense-rooted species like Hemerocallis and ornamental grasses, which can dry out rapidly in pots because of their bulk.
Potted divisions also make gifting extraordinarily easy. A handful of labelled pots lined up by the gate is how good plant communities form. I’ve given away hundreds of divisions over the years, and the plants I’ve received in return have filled corners of my garden I’d never have thought to plant. If you belong to a local gardening group or allotment association, surplus divisions are always welcome. A plant swap is a genuinely efficient way to add variety without spending anything.
When should I divide plants?
For most herbaceous perennials, the best time to lift, divide and replant is early autumn (September to October) or spring (March to May). The general principle is this: divide spring and early summer flowering plants in autumn after their foliage dies back, and divide late summer and autumn flowering plants in spring just as new growth is emerging. This ensures the plant never divides at the expense of its flowering, and it gives each division the maximum time to establish before its next flowering season.
There are a few important things to avoid. Never divide plants when they are in active flower, as this is when energy demands are at their highest, and the plant has the least in reserve for recovering from division. Never divide plants into frost, as newly disturbed roots are far more vulnerable to cold than established plants. And avoid dividing during drought or extreme heat, as divisions will lose moisture far faster than they can absorb it from dry soil. An overcast, mild, moist day is ideal.
Autumn division has the advantage that the soil is still warm from summer, which encourages rapid root establishment before winter. Spring division has the advantage that plants are full of growth energy and establish quickly in the warming soil. Both are valid. I personally prefer autumn for most perennials because the cooler conditions mean divisions are less stressed, and because splitting plants in autumn rather than spring means my borders look intentional and established from the very start of the new growing season.
📅 Timing Guide: When to Divide by Flowering Season
It’s advisable to divide most herbaceous perennials every two to three years to maintain plant vigour and flowering performance. That said, if a plant is still healthy, flowering freely, and showing no signs of congestion, leave it alone. Dividing a perfectly happy plant without cause is unnecessary stress on both the plant and you.
Ornamental grasses often benefit from splitting every two to three years, specifically to stop the centre of the plant from becoming unproductive. Unlike most perennials, ornamental grasses can become almost impossible to divide if left too long: I’ve seen clumps of Miscanthus that required a sharp saw and two people to manage. The job is dramatically easier at three years than it is at seven.
Fast-spreading plants like Asters and Helianthus may benefit from division every two years rather than three. Very slow growers like Agapanthus and Hosta are quite happy being left for four to five years between divisions and resent unnecessary disturbance. Peonies and Hellebores are the extreme end of this: they genuinely dislike being moved and can take two to three years to flower properly after division, so they should only be divided when absolutely necessary.
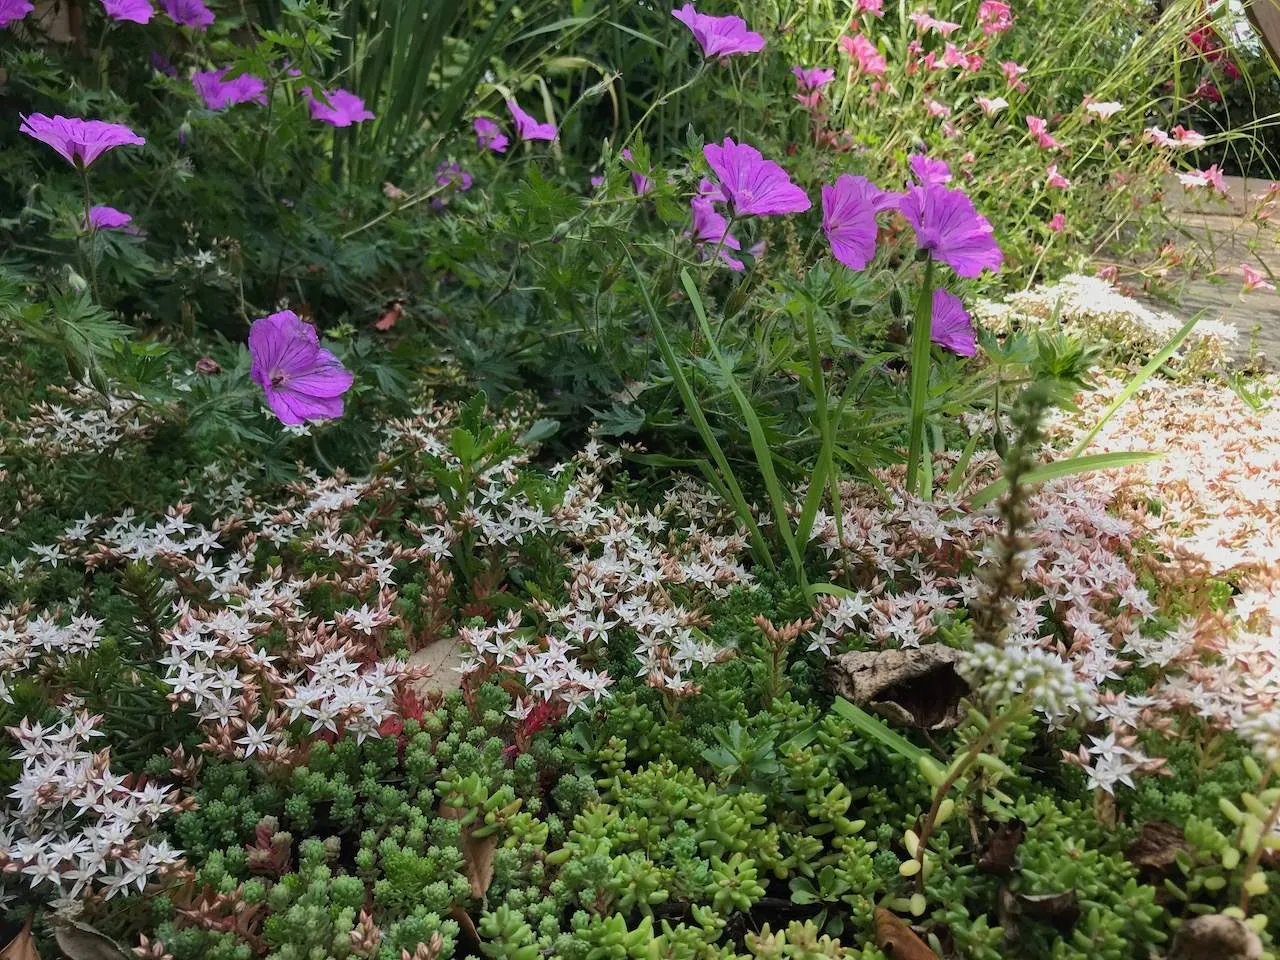
All the plants above, including Geraniums, Sedum, and Luzula, can be divided easily.
Plants that don’t divide well
Not every herbaceous perennial is suitable for division, and attempting to divide the wrong plants is a reliable way to lose them entirely. The following categories are ones to approach with caution or avoid altogether:
Plants with deep taproots, such as Lupins, Hollyhocks, Acanthus, and most Verbascums, are difficult or impossible to divide successfully. The entire root structure is anchored around a single central taproot, and dividing it without a section of that taproot invariably kills the division. These plants are better propagated from root cuttings taken in late autumn or early spring, or by growing them from seed.
Woody-based subshrubs like Lavender, Rosemary, and Perovskia have woody bases that don’t regenerate well when cut. They’re far better propagated from softwood cuttings in spring or semi-ripe cuttings in late summer.
Plants that resent disturbance include Peonies, Hellebores, and Baptisia. These can technically be divided, but they will often sulk for two to three seasons before flowering properly again. Only divide when absolutely necessary, and make the divisions as large as you can manage.
⚠ Warning
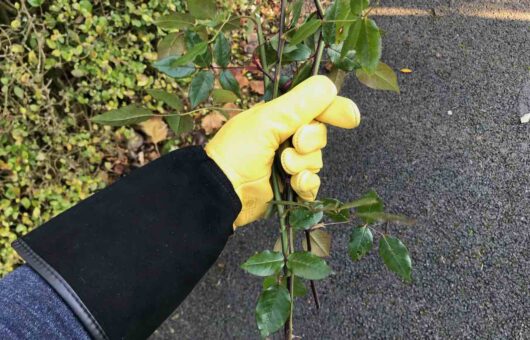
Always wear gloves when handling Euphorbia. The white milky sap that runs from any cut surface is a skin and eye irritant that can cause a burning rash on contact with sensitive skin. Wash any sap off immediately with cold water if it touches your skin, and keep it away from your face entirely.
Aftercare for newly divided plants
Getting the division right is only half the job. What happens in the weeks after replanting determines whether your new plants establish strongly or limp along for a season before giving up. I’ve seen beautifully divided plants fail simply because aftercare was neglected, and I’ve seen rough-and-ready divisions succeed because the gardener looked after them well. Here’s what to focus on:
Water consistently for the first six weeks. Newly divided plants have a reduced root system relative to the amount of foliage they’re trying to support, and they dry out much faster than established plants. Check the soil around new divisions every two to three days in dry weather and water before the soil dries out completely rather than waiting until the plant wilts. A plant that wilts before it has re-established roots is under significant stress, and it may not recover fully.
Mulch around the divisions. A 5–8cm layer of well-rotted compost or bark mulch applied around (but not over) the crown of each division conserves soil moisture, suppresses weeds that would otherwise compete with the young plants, and gradually improves soil structure as it breaks down. This single step significantly reduces your watering needs during the establishment period. Keep the mulch a few centimetres away from the crown itself to avoid encouraging rot at the base of the stems.
Don’t expect full flowering in the first season. A division that has spent its early weeks putting energy into establishing a new root system may produce fewer flowers than you expect in that first growing season, and for slow-growing species, the first season may produce no flowers at all. This is not a failure. It’s the plant doing exactly what it should. By the second season, most divisions will be performing at full capacity, and by the third year, you will often find they’re actually flowering better than the congested parent clump ever did.
Feed lightly in spring. Once the divisions are visibly showing new growth, a single application of balanced granular fertiliser in early spring will support the first full growing season. Avoid feeding immediately after division, as high-nitrogen feeds promote leafy growth at the expense of root development, precisely what the plant needs most. In good garden soil, I often don’t feed at all and rely on the compost worked into the planting hole doing its job.
Protect from slug and snail damage. The emerging shoots of newly divided perennials are particularly vulnerable to slug and snail attack in the first few weeks, especially in damp autumn or spring conditions. Keep an eye on new growth and take action quickly if you see damage, as young divisions don’t have the reserves of established plants to shrug off repeated defoliation.
Monthly division calendar
Not sure whether this month is the right time to divide? Here’s a quick month-by-month guide to what you can be doing in a typical UK garden. This is a guide rather than a rigid rule: an unusually warm October or a cold late spring will shift things slightly, but this gives you a reliable framework to work from.
📅 Monthly Division Calendar
Month
What to Divide
Notes
January / February
Avoid division
Frost risk is high. Ground may be frozen or waterlogged. Wait for March.
Excellent window. Soil still warm, moisture levels rising. Best time for most summer-flowering perennials. Avoid grasses.
November
Hosta (if mild), hardy Geranium
Fine for Hostas in mild conditions. Avoid if ground frost is forecast. Many gardeners prefer to wait for March.
December
Avoid division
Too cold and wet for most perennials. Use the time to plan what you’ll divide in spring.
Common questions about dividing plants
Will dividing plants kill them?
Very rarely, and usually only when the plant is already struggling or the division is done at completely the wrong time. Plants are far more resilient than most gardeners give them credit for. If you divide a healthy plant at the right time of year, plant the divisions at the correct depth, water them well, and keep them moist while they re-establish, the vast majority will bounce back and flower within a single season. The most common reason for division failure is replanting into dry soil without adequate watering, not the act of division itself.
How big should each division be?
Aim for a division with three to five healthy shoots and a root mass roughly equivalent to a 1-litre pot, which is comfortably palm-sized. Smaller divisions will establish, but they take considerably longer to reach flowering size and are more vulnerable in their first season. Larger divisions establish faster but give you fewer plants from the parent clump. Always use material from the outside edges of the clump where growth is youngest and most vigorous, and discard any woody or dead material from the centre.
Should I feed divisions after replanting?
A small amount of slow-release fertiliser worked into the planting hole at division time can be beneficial and gives divisions a gentle nutritional boost as they re-establish. Avoid using high-nitrogen feeds immediately after replanting, as these encourage rapid leafy growth at the expense of root development, which is the opposite of what a newly divided plant needs. A balanced feed or a handful of well-rotted compost in the planting hole is the right approach. In subsequent growing seasons, feeding in spring with a balanced granular fertiliser will support strong flowering performance. However, in my experience in good soil I don’t bother adding additional feed.
Can I divide plants bought from a garden centre?
Absolutely, and it’s one of the best-value gardening strategies available to you. Instead of buying five plants in 9cm pots for a drift effect, buy one plant in a 3-litre pot and divide it into three to five sections before planting out. The divisions are established at exactly the same rate as smaller pot-grown plants and save you a significant amount of money, particularly when you’re planting in quantity for a new border. The key thing is to water the pot well before dividing, plant out the sections quickly, and water thoroughly after.
Can I divide plants in summer?
Most summer-flowering herbaceous perennials are best not divided in the height of summer because they’re using all their energy to sustain flowers and foliage. However, spring-flowering perennials like Iris and Primula are best divided in early to mid-summer, immediately after they finish flowering, when they are putting on new roots and are best able to recover from the disturbance. If you must divide a summer-flowering plant in summer, choose an overcast day, water the day before, cut back all the foliage immediately after dividing, replant in a shaded spot if possible, and water every day until the plant shows signs of re-establishment.
Increase your Garden Design Skills with Garden Ninja’s Courses
Ready to elevate your gardening beyond basic tasks? My comprehensive online courses provide the expertise to transform you from enthusiastic beginner to confident garden creator.
With courses starting from just £29, you gain access to award-winning design knowledge.
29
Garden Design Examples for Small Gardens: 30 Design Templates & Planting Plans
Garden Design Examples for Small Gardens: 30 Design Templates & Planting Plans: In this online gardening course, I’ll walk you through 30 fantastic garden designs, explaining the logic behind the layout, the plant choices, and take-home tips for applying them in your own garden.
Weekend Garden Makeover: A Crash Course in Design for Beginners
Learn how to transform and design your own garden with Lee Burkhills crash course in garden design. Over 5 hours Lee will teach you how to design your own dream garden. Featuring practical design examples, planting ideas and video guides. Learn how to design your garden in one weekend!
Garden Design for Beginners: Create Your Dream Garden in Just 4 Weeks
Garden Design for Beginners Online Course: If you want to make the career jump to becoming a garden designer or to learn how to design your own garden, this is the beginner course for you. Join me, Lee Burkhill, an award-winning garden designer, as I train you in the art of beautiful garden design.
Dividing plants is one of the most economical and satisfying ways to bulk up your borders and share your herbaceous perennials with friends and family. The act of division encourages healthy plant regrowth and can often awaken a tired, underperforming perennial. Read the signs your plants are giving you, choose the right method for the root type, divide at the right time of year, and replant quickly with good water. Plants are tough, and this technique rewards you with more of your favourites for free.
If you’ve just divided some herbaceous perennials, why not Tweet, Facebook or Instagram me with your pictures? You can also follow me on Youtube where I’ve got plenty of garden guide vlogs.
Your subscription could not be saved. Please try again.
Your subscription has been successful.
Lee Burkhill
Lee Burkhill, known as the Garden Ninja, is an award-winning garden designer and horticulturist with over 30 years of gardening experience and 15 years as a professional garden designer. A qualified RHS (Royal Horticultural Society) professional, Lee specialises in sustainable garden design and practical horticultural advice. He designs and presents on BBC1’s Garden Rescue and in leading gardening publications. Lee combines three decades of hands-on gardening knowledge with professional design qualifications to help gardeners create beautiful, functional outdoor spaces.