-
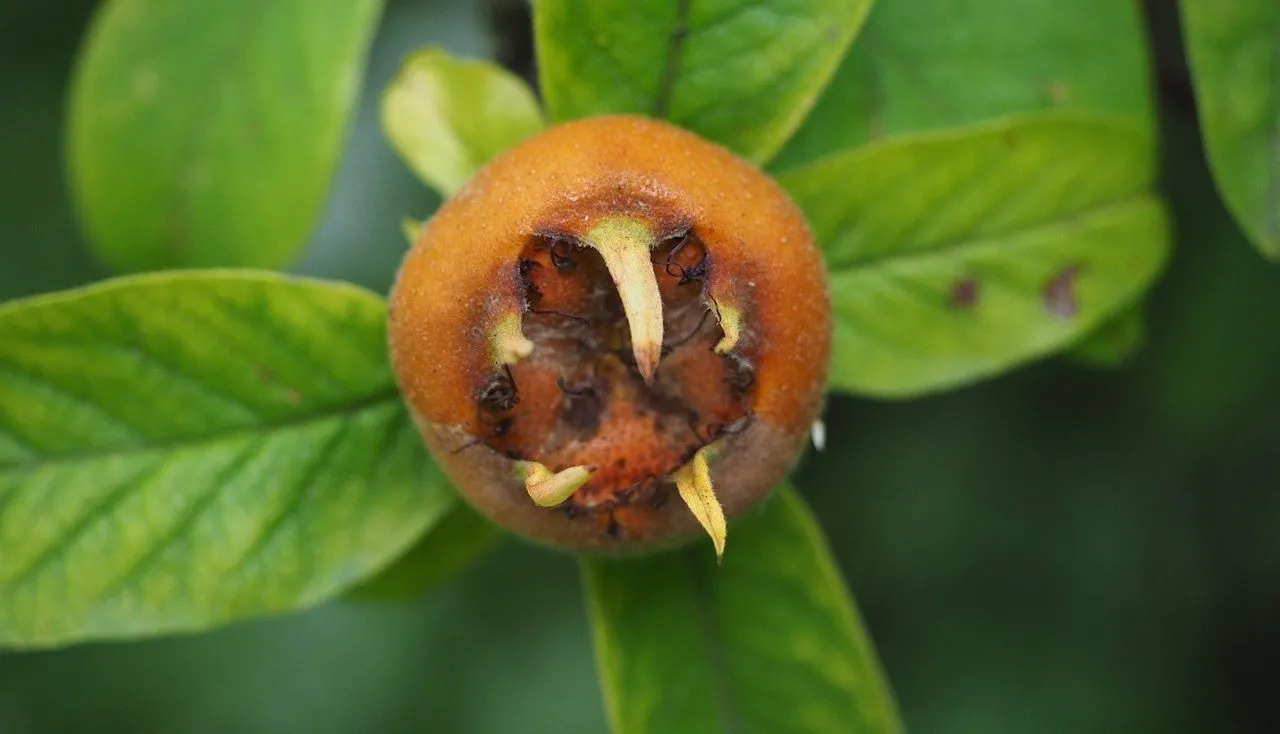
Medlars: How to Grow, Blet and Make Medlar Jelly (UK)
 Lee Burkhill: Award Winning Designer & BBC 1's Garden Rescue Presenters Official Blog

Medlar trees have up to now been a mythical specimen to me as a gardener. I'd heard the rumours, seen a few pictures of their 'ugly' fruit but then moved back to the safety of more familiar fruit trees. However, about 6 years ago I finally acquired a wonderful Medlar tree. Not only are they unique in their appearance but they are probably the only Winter fruiting tree. This guide will show you why you need one in your garden followed by how to make the wonderful Medlar jelly!
Quick Answer
Medlars are an old fashioned, self-fertile fruit tree that is genuinely easy to grow in even a small UK garden, and one of the very few trees that fruits through winter. The fruit needs to be bletted, meaning left to soften and ripen off the tree for two to three weeks, before it becomes properly sweet, spiced and jam like in flavour rather than the sharp, gritty fruit people expect. Once bletted, medlars are wonderful eaten straight with a spoon or turned into jelly.
It’s a real surprise that the mighty Medlar tree isn’t more popular for small gardens. Not only is it a well-behaved small fruit tree, but it is self-fertile. Meaning it produces fruits without the need for a pollinator tree. It’s also one of the only winter-fruiting trees, so why aren’t they more popular?
This is probably down to the dark shadow that follows discussions about Medlars. About how they have to rot before you eat them. The fact they are referred to in France as ‘Dogs arses’. They sound a bit grim based on this description and tricky to grow, and why would anyone want something that looks like a dogs backside? In addition, you don’t see many of them either in urban gardens, so many gardeners simply don’t know of their existence.
Sadly, the Medlar tree is misaligned and often overlooked, leaving it at the bottom of most gardeners’ lists of fruit trees. However, this reputation is completely unnecessary, and Medlars make a wonderful fruit tree for even the smallest of gardens.
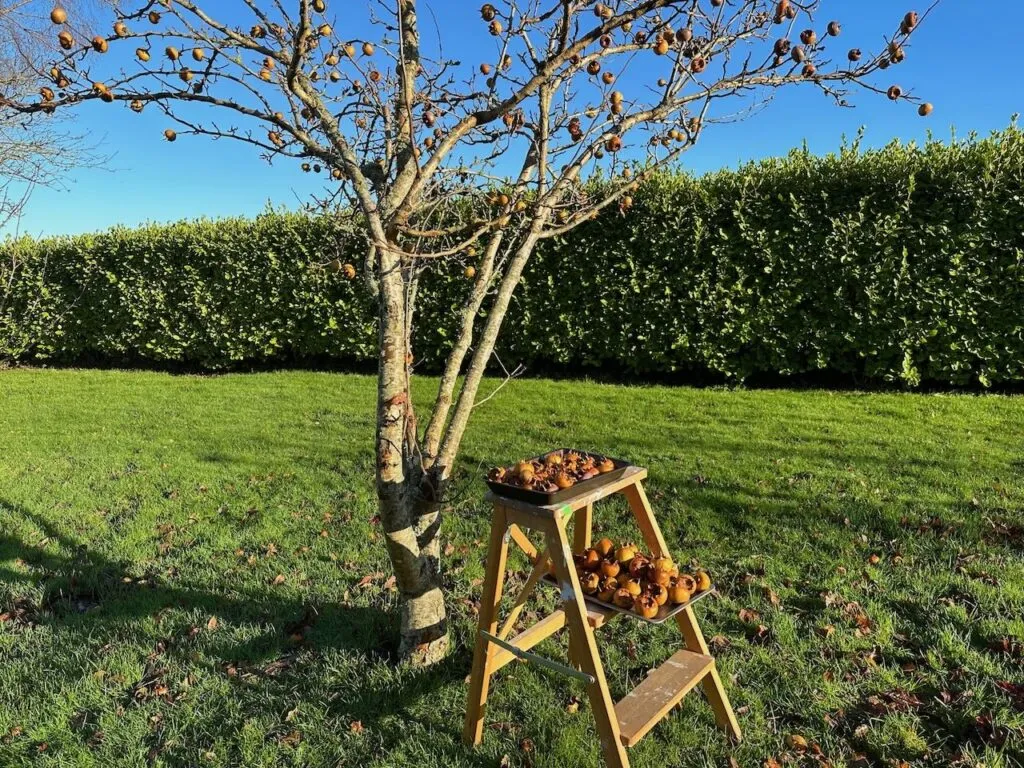
I want to encourage you to look at the Medlar tree’s multiple benefits. It is one of the most trouble-free fruit trees for even the tiniest of gardens and requires little to no pruning. It flowers early in spring, has gorgeous felt-like leaves in summer and can cope with drought from heatwaves.
Got your attention? Great, let us delve deeper into this beautiful specimen.
Jump To
This page contains affiliate links for products I use and love. If you take action (i.e. subscribe, make a purchase) after clicking a link, I may earn some gardening commission which helps me keep the Garden Ninja Blog free for all.
What is a Medlar tree?
Medlars (Mespilus germanica) is one of the oldest fruit trees and is part of the Rosacea family. It’s originally from South-West Asia and South-East Europe, where it grows natively. It’s unusual as its fruits ripen (more on that later on) during winter, so it provides fruit during one of the scarcest fruit seasons.
Originating in Southwest Asia, the medlar found its way to ancient Greece and Rome, where it gained popularity for its unique fruit and ornamental qualities. The scarcity of winter fruit is why the tree was so popular in Roman times as a way to extend the fruiting season when Apples and pears had long been harvested.
In the 17th century, the medlar tree made its way to England, where it enjoyed a surge in popularity as an ornamental plant. Its presence in literature further solidified its cultural significance. Shakespeare’s mention of the fruit in “Romeo and Juliet,” referring to it as “open-arse,” reflects the memorable nature of the medlar and the French nickname ‘dogs arse’.
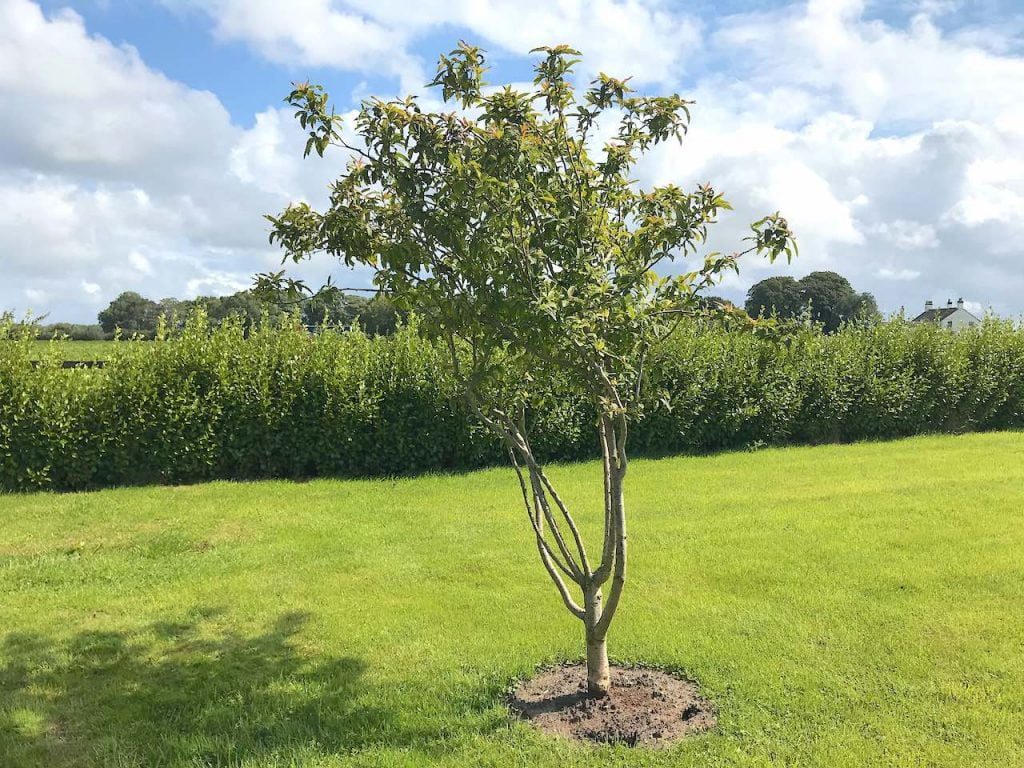
Above is a multi-stemmed, gorgeous Medlar tree ideal for a small garden. It has contorted branches, ideally grown as a multi-stem specimen. It has many spectacular features, especially for a small city garden.
Are Medlars Easy to Grow?
Medlars are one of the easiest garden fruit trees for beginners to grow. There are very few pests and diseases, and the beauty of Medlars is that they are mainly self-fertile. So you only need one to get fruit each winter. Medlars are well-behaved trees that can add a real wow factor to a small garden. Have a look at how I’ve used them in a show garden here for the BBC
Features of a Medlar Tree:
- Its elliptical leaves are a glossy green colour throughout the Spring and Summer
- They then turn a bright orange through the yellow tones in the Autumn before falling
- Prefers full sun
- Can cope with drought
- Tolerates most soils
- Light pruning is usually all they need
How to Plant and Grow a Medlar Tree
Planting a medlar tree is refreshingly straightforward, and this is really where the tree earns its reputation as one of the most forgiving fruit trees you can grow. Choose a sunny position with reasonably well drained soil, since medlars tolerate poor ground far better than most fruit trees but still dislike sitting in waterlogged conditions over winter. Bare root trees are best planted between November and March while the tree is dormant, whilst container grown specimens can go in at any time of year provided you keep them well watered through their first summer.
Dig a hole roughly twice the width of the rootball and no deeper than the tree was previously growing, since planting too deep is one of the most common mistakes with any tree. Work some well-rotted compost or manure into the base of the hole, position the tree so the graft union sits a few centimetres above soil level, then backfill and firm gently with your heel to remove air pockets. A stake driven in at an angle away from the prevailing wind will keep a young tree steady for its first two to three years while the roots establish, after which it can usually be removed.
Space medlar trees around four to six metres apart if you’re planting more than one, though given they’re self-fertile there’s genuinely no need to plant a second tree purely for pollination. Water generously through the first growing season, particularly during dry spells, and mulch around the base each spring to help retain moisture and suppress weeds. Once established, medlars need very little attention beyond an occasional feed.
If you’re choosing a variety, ‘Nottingham’ is the classic UK medlar and the one you’ll find most readily available, prized for its reliable cropping and rounded, well flavoured fruit. ‘Royal’ is a good alternative if you want something a little larger, whilst ‘Large Russian’ produces the biggest fruits of the commonly available varieties if size is what you’re after.
Common Medlar Pests and Problems
Medlars remain one of the most trouble free fruit trees you can grow, but it’s worth knowing what to watch for. As a member of the Rosaceae family, medlars are related to pears, quince and hawthorn, which means they can occasionally be susceptible to fireblight, a bacterial disease that causes blackened, scorched-looking shoots. It’s not common in garden medlars, but if you spot it, prune out affected wood well back into healthy growth and clean your tools between cuts to avoid spreading it further.
In a wet autumn you may also see a touch of brown rot on fruit left too long on the tree, so harvesting promptly once the fruits reach the right stage of ripeness, as covered in the bletting section further down this guide, helps avoid this. Beyond these occasional issues, medlars are refreshingly free of the aphid, canker and scab problems that plague many other fruit trees, which is exactly why I recommend them so often for beginner gardeners and small gardens.
What do Medlars Taste of?
My Auntie Joan always said, ‘taste is subjective, my dear,’ and nothing is truer than Medlar’s tasting notes! There are plenty of descriptions online, from ‘pureed rotten apple’ to ‘aromatic butter’. Don’t let these put you off.
In my experience of eating fresh (after bletting), Medlars taste of a spicy floral apple puree. Very delicate and unusual. Most people shake their heads as they have heard of the bletting or rotting process required before you can eat them, so let’s put that myth to bed.
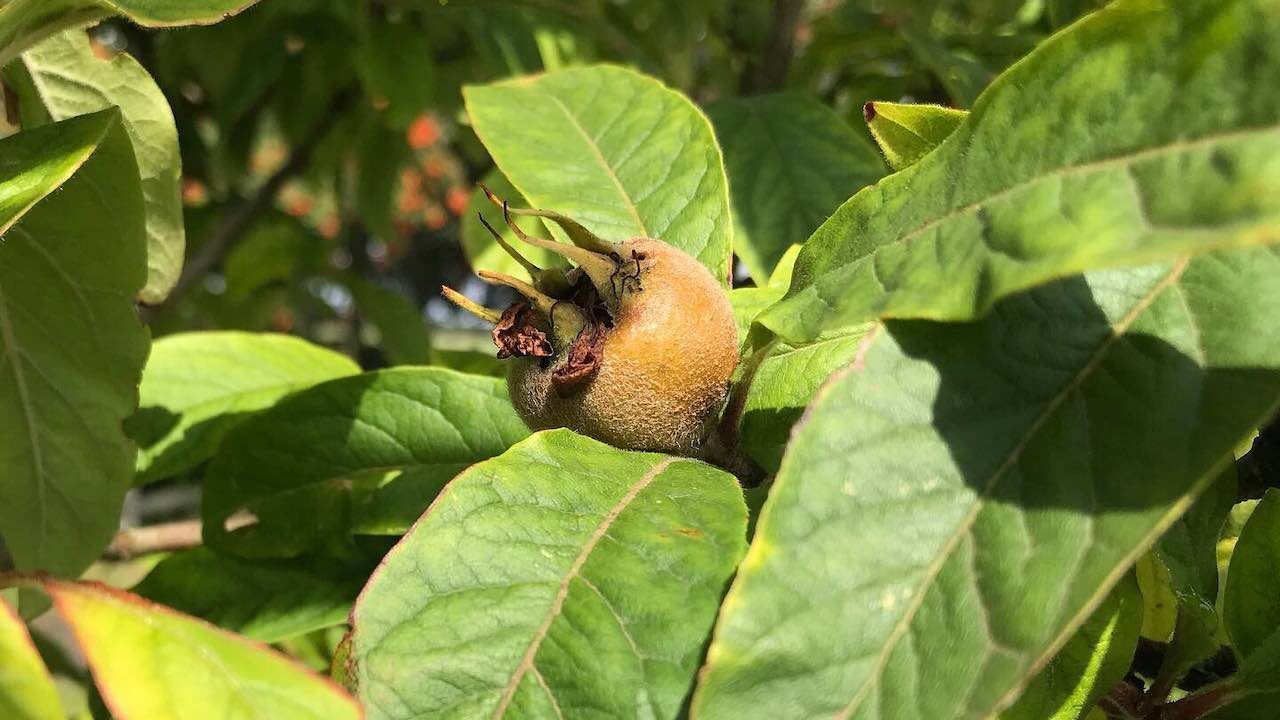
Medlars are slightly smaller than golf balls, with a distinctive Rosehip look about them. Once the medlar loses its leaves in winter, the fruits appear as a mass of small balls decorating the tree, a bit like Christmas tree decorations.
How do you eat a medlar?
Medlars are best eaten once they have been bletted and they have softened. Once bletted, you can either eat the internal soft fruit with a spoon as a delicacy or use the medlars to make jam, jelly or even medlar cheese!
What is bletting of Medlars?
There’s a lot of misinformation about allowing Medlars to rot before you can eat them. Bletting is not rotting. To rot is to spoil, decay and become digested by bacteria. Bletting is a ripening process that softens the fruit, which is completely different. So next time you hear someone talk about rotten Medlars, get your shaky fingers out!
The Medlar fruit is incredibly firm when it is first harvested in December. Like small bullets of hard fruit. Great to collect in a bucket without bruising. Their firmness is partly where the myth that they need to rot comes in.
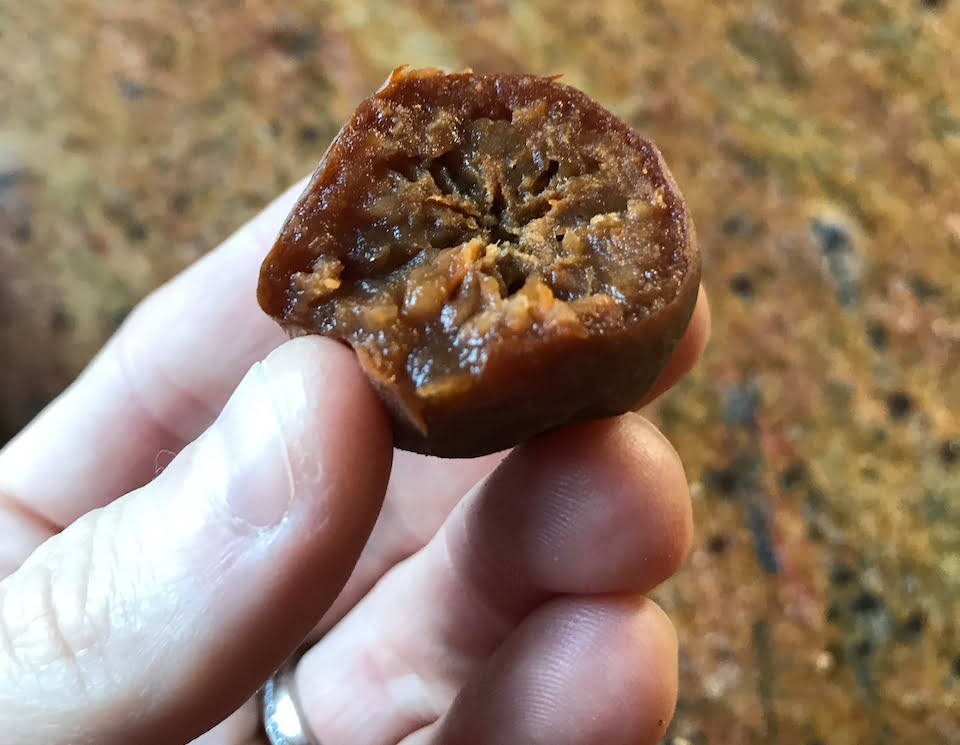
Above is a fully ripe & bletted medlar when cut open
Bletting is the process of letting fruits break down their internal fruit structures and release liquid and sugars. If you’ve ever tried to eat an unripe Pear, you will know that all fruit needs a period of softening to get them at their best.
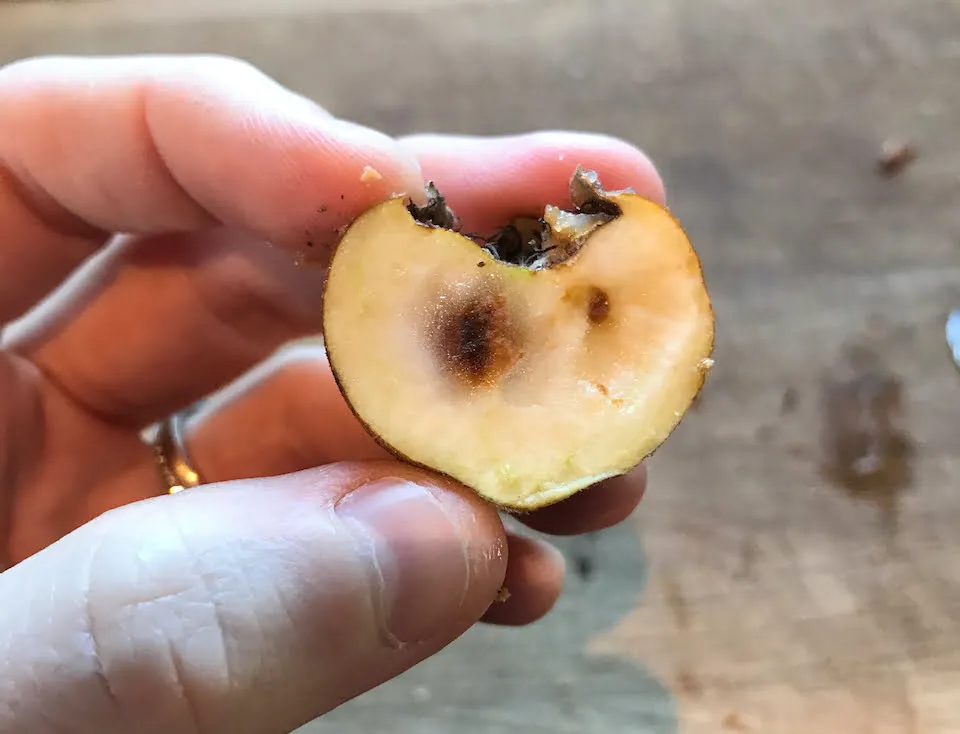
Above is an unripe Medlar. See the brown spots where it is starting to blet? You need to wait until the entire fruit reaches this stage
People often talk about rotting as the transformation these fruits undergo. I must admit they do turn from their unusual Rosehip shape into something a little less appealing. This is as they turn a dark brown and soften, often leaking out clear sugar along the way. If you can set this ugly duckling reverse transformation aside, the Medlar is a delicious delicacy.
How to blet a medlar
Bletting medlars again comes with much confusion. Now we have established that bletting is not the same as rotting; it is essential to know why and how to blet the medlar winter fruits.
Bletting is a process unique to certain fruits, including medlars, that transforms their flavour and texture, making them palatable and enjoyable. Medlars are not typically consumed directly off the tree; instead, they undergo bletting to soften and develop their sweet, aromatic taste. Medlars take a minimum of 2 weeks to blet indoors.
Here’s a step-by-step guide on how to blet medlars:
1. Harvest Medlars at the Right Time:
Bletting begins with harvesting medlars at the correct stage of ripeness. Wait until the fruits are fully developed and have attained a golden-brown colour, usually by the end of November in the UK. It’s crucial not to harvest them too early, or they take too long to blet, or too late in the season once they have started to blet on the tree.
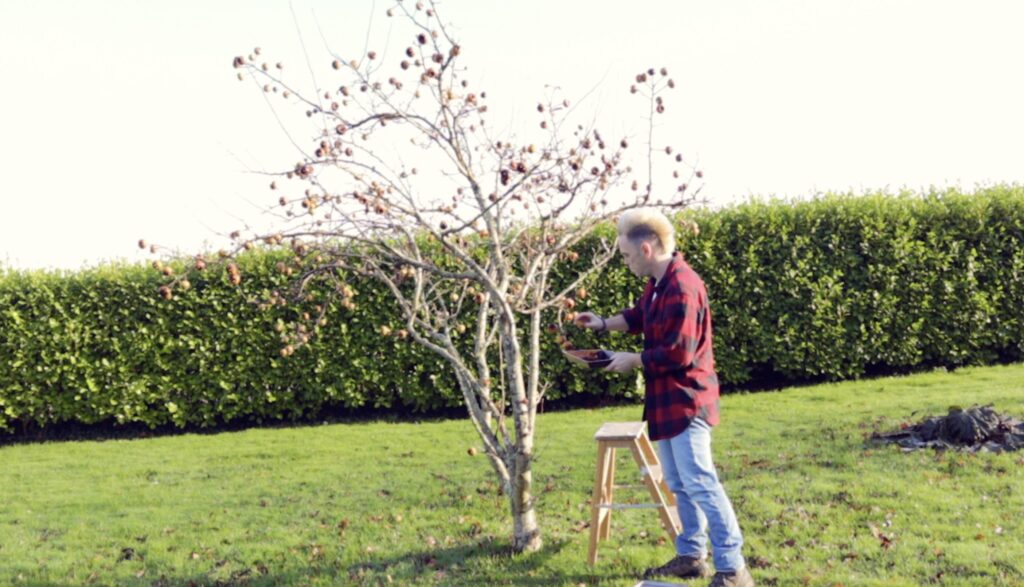
2. Check for Firmness:
Assess the firmness of the medlars. They should feel slightly firm, similar to an unripe pear. If they are too hard, they are not ready for bletting. If they are super squishy, it’s too late. They have already started to blet, but they still can be eaten if not too damaged.
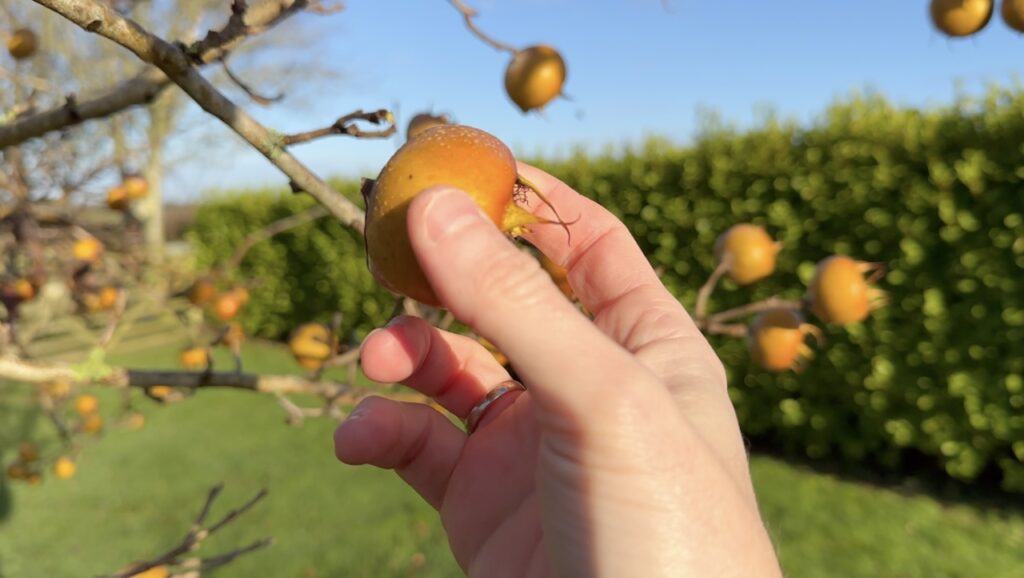
3. Store Medlars in a Cool, Dark Place:
Place the harvested medlars in a cool, dark location, such as an oven tray, paper bag or wooden box. Ensure good air circulation to prevent mould, but keep them away from direct sunlight. Ideally, placing trays of medlars into a larder or in drawers in a kitchen is best for a few weeks
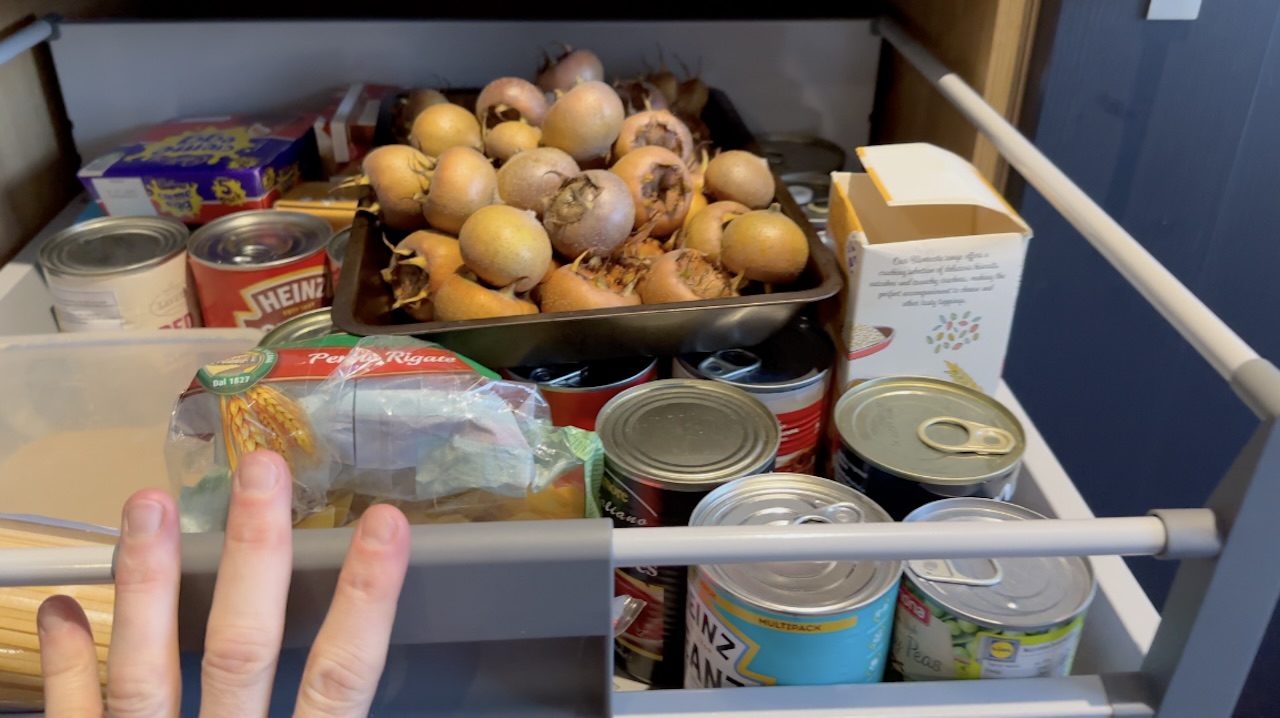
4. Wait for Bletting to Begin:
Bletting is essentially controlled decomposition. As the medlars age and undergo enzymatic changes, they will soften and develop a mushy texture. This process typically takes a few weeks.
Most medlars will take 2-3 weeks to fully blet.
5. Check Regularly:
Regularly check the medlars for signs of bletting. They should become noticeably softer, and the skin may wrinkle. Some medlars may even develop a dark, bruised appearance, a sign that bletting is progressing.
6. How to Know When Medlars are Ready to Eat:
Once the medlars have reached the desired level of softness, conduct a taste test. Bletted medlars should have a sweet, honey-like flavour with a hint of spiciness, like a spicy pear with a butter finish. The flesh should be soft and spreadable. Bletted medlars will have a light brown colouration.
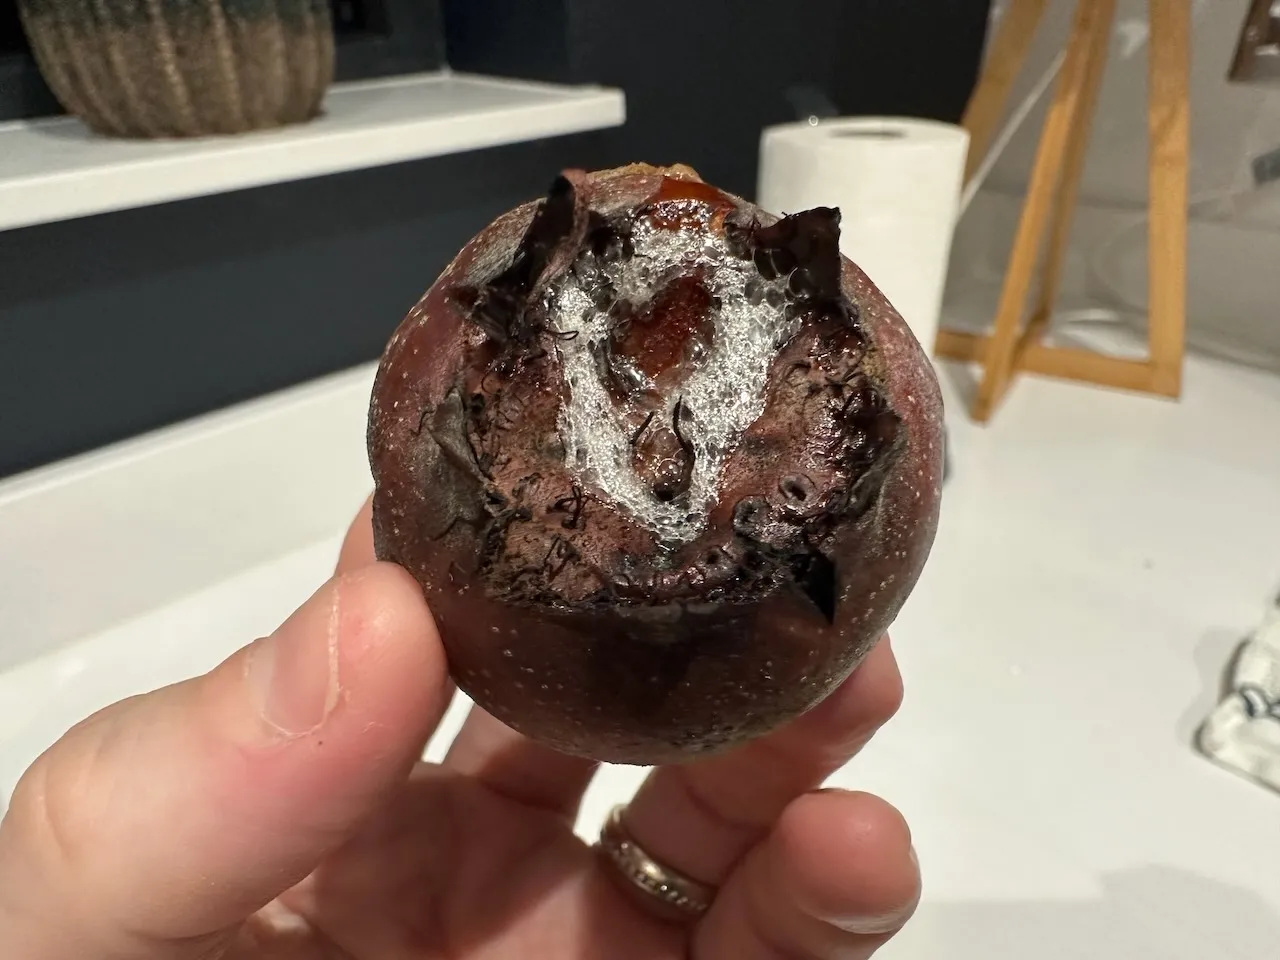
7. Bletting in the Fridge:
If you want to slow down the bletting process, you can refrigerate the medlars. This helps extend their shelf life and allows you to enjoy them for a longer period.
8. Culinary Uses of Medlars:
Bletted medlars are versatile and can be used in various culinary applications. They can be eaten as is, added to desserts, made into jams or medlar jelly, or even incorporated into savoury dishes for a unique twist.
How to Make Medlar Jelly
Making Medlar jelly could not be easier, especially if you use jam sugar with added pectin (this helps the jam set), or add an apple to the jam to increase its pectin levels. If you’ve been following my gardening blog, you’ll know I love making jam with gluts of fruits such as Damsons.
Once you have a mature medlar tree, you’re bound to end up with at least a bucket full of fruit each winter. More than enough to make jelly and cheese from. There are plenty of recipes online for Medlar jelly, cheese and other Medlar delicacies.
If you have a young medlar tree, you’ll probably harvest 500g in years one or two. So I’m going to give you a recipe for one jar; scale it up as you have more Medlars!
Before you start, it’s worth having the right kit to hand, since jam-making is one of those jobs that goes far more smoothly with proper equipment than with improvisation. A good preserving pan gives you plenty of room for the fruit to bubble away without boiling over.
Alongside the pan, a jelly bag or fine muslin makes straining the pulp far less messy than improvising with a tea towel, and a proper jam thermometer takes the guesswork out of hitting setting point, which is the single biggest reason homemade jams and jellies fail to set properly. Finally, a set of sterilised jam jars and some jam sugar with added pectin will make the whole process considerably more foolproof if you’re new to preserving.
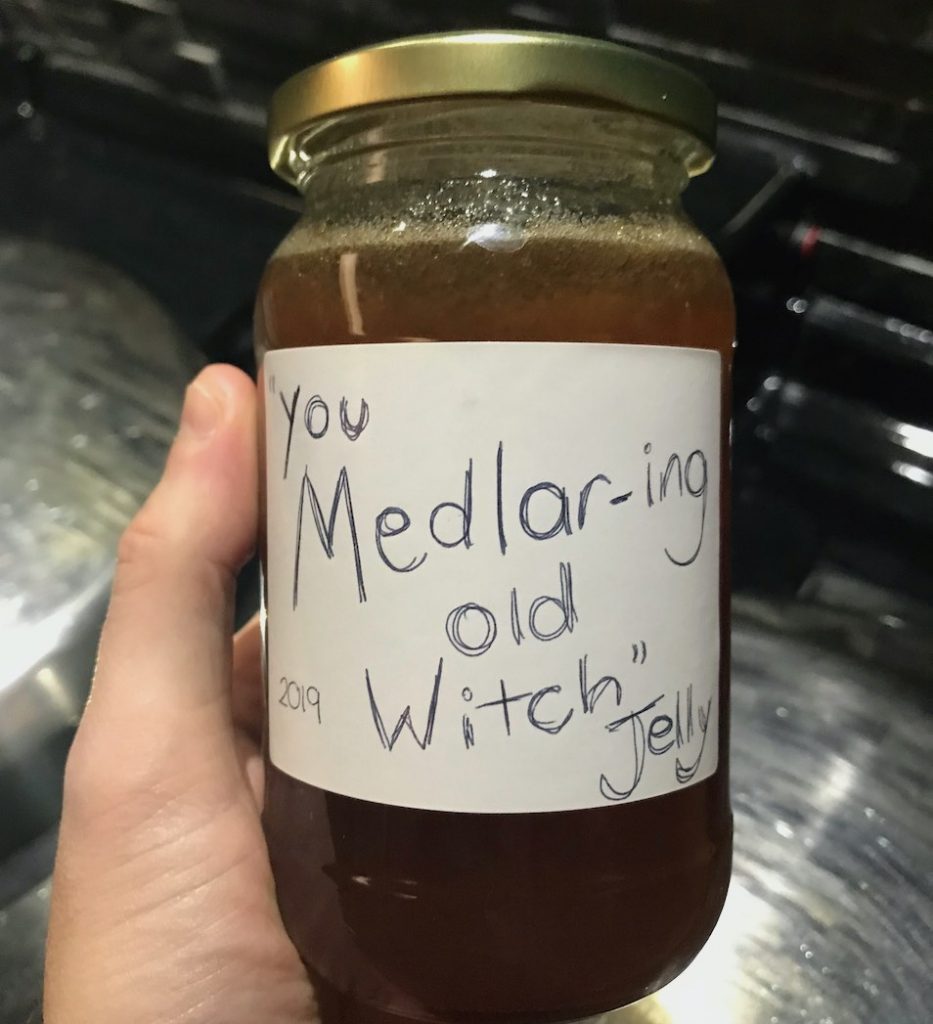
I like to give my jams ridiculous names. It’s a great talking point when people get them out the cupboard and also adds a bit of fun to jam-making.
Ingredients for Medlar Jelly
The ingredients below will make one jar of Medlar jelly. Scale it up depending on how much fruit you have; e.g., 600g of Medlars means doubling the sugar and liquid.
- 300g Medlars (That have been bletted, so are soft and squishy) + a few unripe ones to help with the Pectin levels
- 300g Sugar (jam sugar is best, or if not, caster sugar plus the apple below)
- 1 Small baking apple, if not using jam sugar
- 1 Lime cut into quarters (less in your face compared to lemons, which I find overpower the Medlar)
- 500ml water
Method of Making Medlar Jelly
Step 1: Wash and cut Medlars in half and place in a large pan.
Step 2: Cut the lime into four and add to the pan
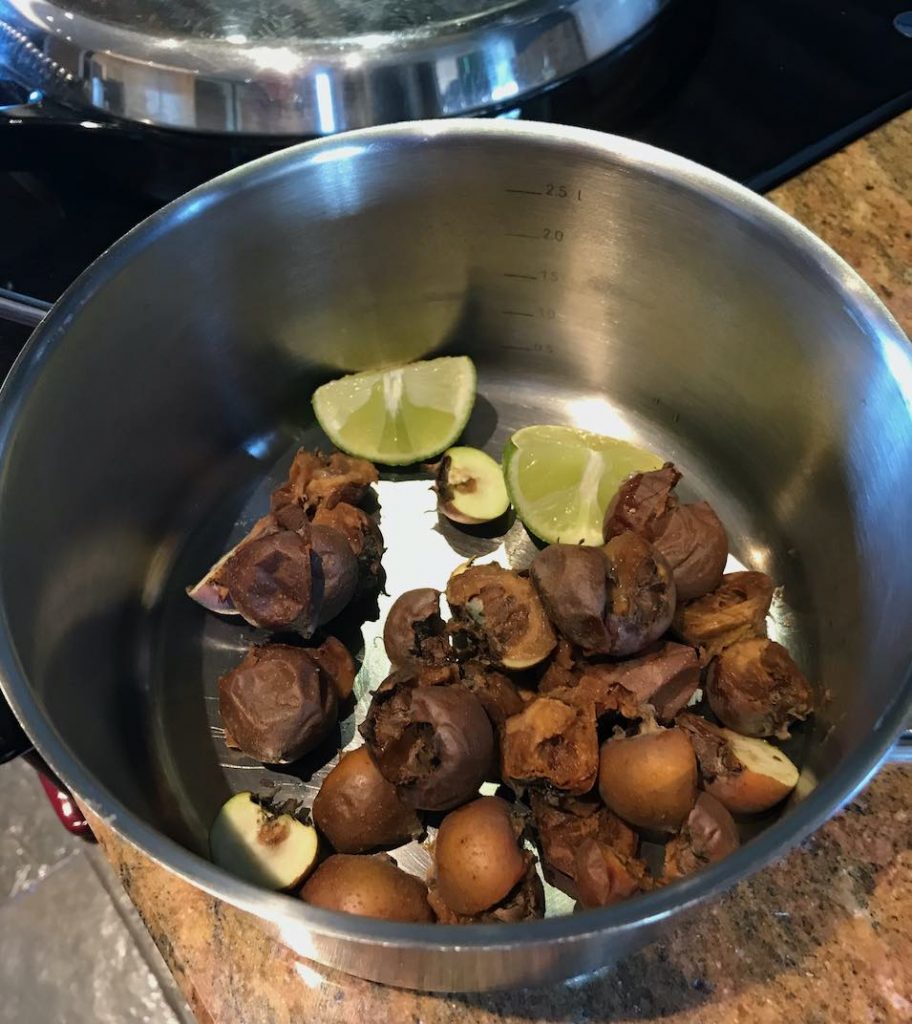
Medlars above are added to a large jam pan.
Step 3: Add 1 small baking apple if you’re planning on using normal caster sugar; leave the skin on, and slice into quarters.
Step 4: Add the water to the pan and bring to a simmer.
Step 5: Cover the pan and leave to simmer for an hour. Don’t let it boil dry; keep checking on it. I like to keep it bubbling by turning the heat down. I stir it delicately once or twice to ensure the Medlars are releasing their goodness! If you mash them too hard, the jelly will be cloudy; it won’t affect its taste, just its appearance.
Step 6: After an hour, take the pan off the heat and then pass the liquid through a jelly bag or piece of clean material to catch all the debris whilst you transfer it to another clean pan. You want the golden-coloured liquid.
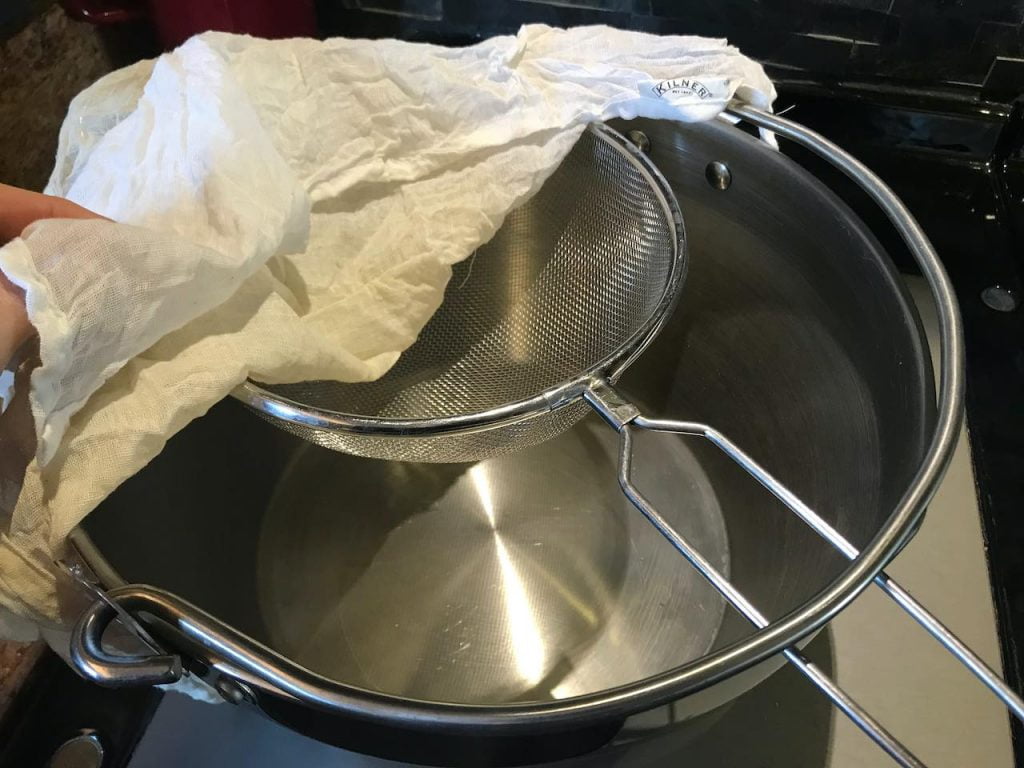
Passing the boiled mixture through a jelly bag to extract the golden liquid, then give it a quick squash to get all the juice out.
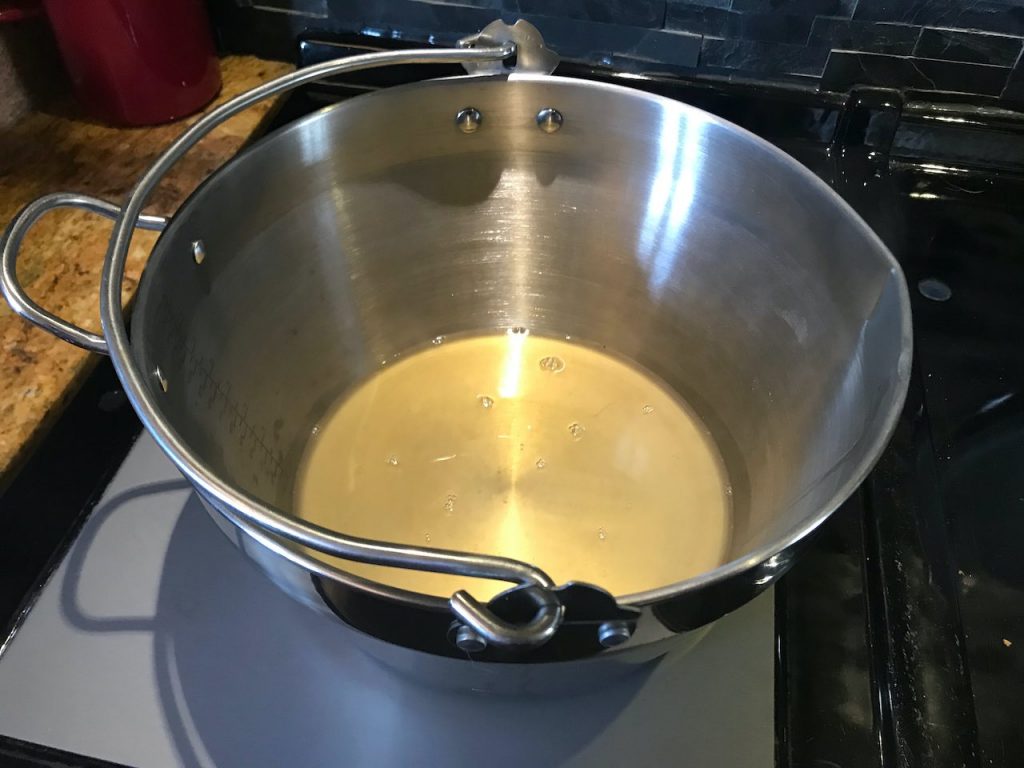
The Medlar liquid will be golden and rather unassuming!
Step 7: Bring the liquid to a boil for 4 minutes.
Step 8: Add the 300g of sugar to the liquid and wait for it to return to a boil.
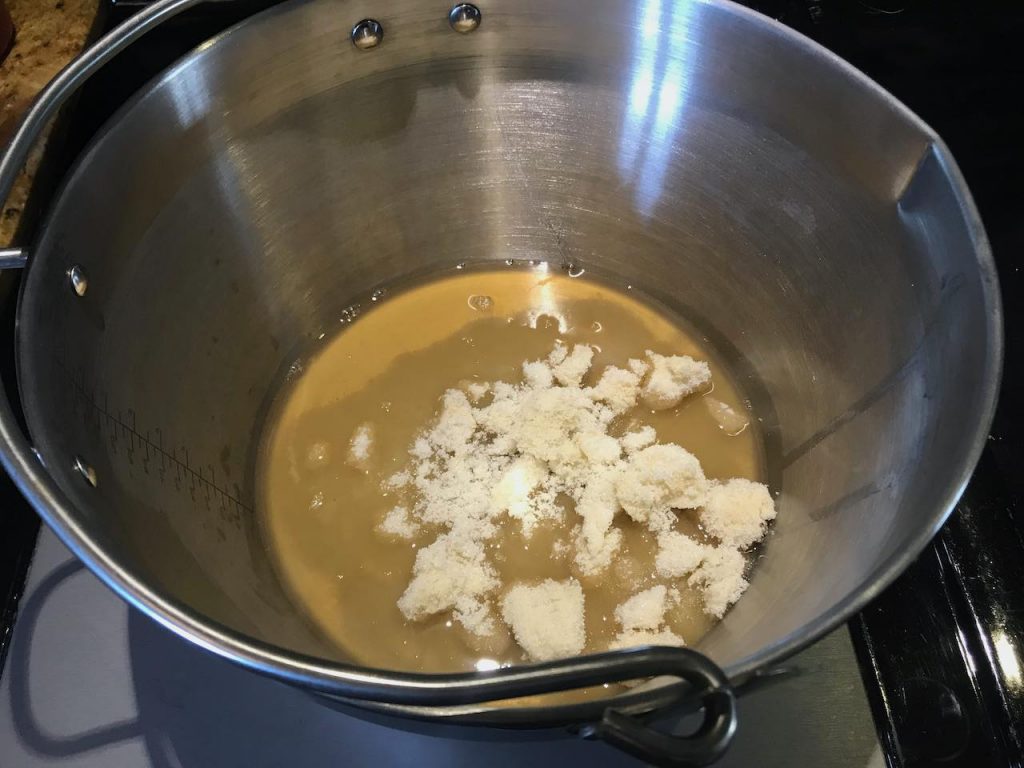
Adding the sugar to the boiling Medlar liquid and bring it back to the boil
Step 9: You want this liquid to reach a setting point. I use a jam thermometer, but you can use the cold plate test: place a small blob on a cold plate out of the fridge, and if it forms a skin, it’s ready. If not, boil it for another 2 minutes.
Step 10: You want t to boil it for around 6 mins for a one-jar quantity of up to 10-15 mins for multiple jars.
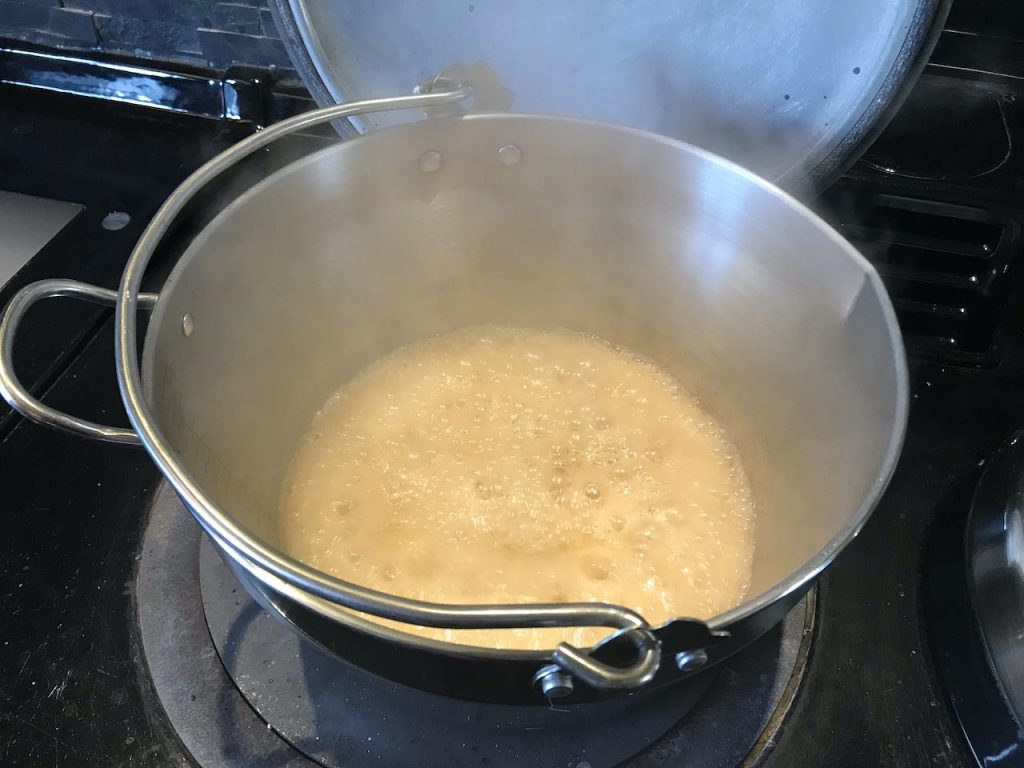
A raging boil will help get you to the setting point, so keep your eyes out and use a jam thermometer to stop it from turning into Medlar caramel!
Step 11: Once ready, decant into a clean sterilised jam jar, allow to cool, then place the lid on.

You now have the most incredible dinner party jelly to impress your friends!
Medlars as a delicacy
Medlars are also prized as a bit of a delicacy, probably down to their rarity and odd appearance. There is more to Medlars than simply blitzing them into jelly. They are actually delicious on their own, eaten with a spoon. I like to cut them in half and serve them as a mini dessert after dinner.
They are delicious with cheese or roasted in the oven with Chicken or Duck. So why not go nuts and see which dishes you can give a taste of the unusual?
Frequently Asked Questions About Medlars
Can you eat medlars raw?
Not really. Raw unbletted medlars are hard, sour and astringent. They only become palatable once bletted, meaning left to soften and ripen off the tree for two to three weeks, at which point they develop their proper sweet, spiced flavour.
Are medlar trees self-pollinating?
Yes, most medlar varieties are self-fertile, so a single tree will produce fruit without needing a pollinator nearby, which makes them ideal for small gardens where there is only room for one tree.
How long does a medlar tree take to fruit?
Medlar trees are relatively quick to establish and typically begin fruiting within three to five years of planting, sometimes producing a handful of fruits even sooner on grafted trees.
What is the best medlar variety to grow in the UK?
‘Nottingham’ is the classic UK variety and the one most commonly available, valued for its reliable cropping and good flavour. ‘Royal’ produces larger fruit with a slightly sweeter taste if you want something a little different.
Are medlars the same as quince?
No, medlars and quince are related, both being in the Rosaceae family, but they are different fruits. Quince ripens on the tree and can be eaten cooked without bletting, whereas medlars specifically need the bletting process to become edible.
Can you freeze medlars or medlar jelly?
Yes, medlar jelly keeps well in sterilised jars for up to a year unopened, and bletted medlar pulp can also be frozen if you want to save a glut for jelly making later in the year.
Do medlar trees need pruning?
Very little. Established medlar trees need only light formative pruning when young to establish a good shape, and mature trees are usually left alone beyond removing dead, damaged or crossing branches.
Are medlars poisonous or safe to eat?
Medlars are entirely safe to eat once bletted. The seeds, like those of many fruits in the Rosaceae family, shouldn’t be eaten in quantity, but the flesh itself is a genuine, safe delicacy.

Join over 100,000 gardeners on YouTube
Free gardening videos from the Garden Ninja, with 8 million views and counting.
Subscribe on YouTube, it’s freeSummary
In conclusion, bletting medlars is a captivating journey that transforms these unique fruits from firm orbs to delectable, honeyed treasures. As we’ve explored the steps to master the bletting process, from harvesting at the right time to savouring the sweet rewards, it becomes evident that the magic of medlars lies in their ability to surprise and delight.
Whether you’re a seasoned gardener or a curious culinary explorer, the experience of bletting medlars opens the door to the world of extraordinary flavours and historical significance. So, embrace the bletting adventure, savour the sweetness, and let the ancient charm of medlars grace your palate and kitchen with its one-of-a-kind allure. Happy bletting!
Are you a Medlar fanatic? Have you grown medlars at home or do you dislike the taste of them and avoid them? Why not let me know by leaving a comment below or getting in touch with Garden Ninja on Social media Tweet, Facebook or Instagram me.
You can also follow me on YouTube where I’ve got plenty of garden guide vlogs to help you make your garden awesome! Happy Gardening.




Lee Burkhill
Lee Burkhill, known as the Garden Ninja, is an award-winning garden designer and horticulturist with over 30 years of gardening experience and 15 years as a professional garden designer. A qualified RHS (Royal Horticultural Society) professional, Lee specialises in sustainable garden design and practical horticultural advice. He designs and presents on BBC1’s Garden Rescue and in leading gardening publications. Lee combines three decades of hands-on gardening knowledge with professional design qualifications to help gardeners create beautiful, functional outdoor spaces.
View all posts by Lee Burkhill






Categories
5 thoughts on “Medlars: How to Grow, Blet and Make Medlar Jelly (UK)”
Leave a Reply
You must be logged in to post a comment.
Other posts
-

Start here: to begin your gardening journey! Read more
-
How to Build a Fire Pit: Easy Reclaimed Brick DIY Guide Read more
-
Top 20 Beginner Vegetables to Grow in Your Garden Read more
-
Using Borrowed Views and Focal Points in Garden Design Read more
-
How to Plant a Flower Bed: Design Tips, Planting Plans and Plant Lists for UK Gardens Read more
-
Why Is My Clematis Dying? Wilt, Collapse and Recovery Explained Read more




Hi Lee. Am very impressed with your incredible knowledge and work. Will buy some Medlars and Damsons and go at it! Thank You for inspiration. Just wonder if You have some tutorials here or maybe on youtube on how to plant this trees the right way? Godbless Sir.
I just heard this delicious jelly mentioned on the British crime drama Midsomer Murders. I do hope I can locate a nice quantity of the fruit here in NYC.
What temperatire for the Jam thermometer please!??
104-105. Raging bubble!!! Happy jam making. Lee
I did a batch last year and had a problem getting it to set. I had to re boil it with some pectin.
This year’s batch (which I am just in the process of filtering) I have put in a cooking apple and a lemon. Will be interesting to see the difference.