Orchid Care guide – How to look after Phalaenopsis moth orchids
Lee Burkhill: Award Winning Designer & BBC 1's Garden Rescue Presenters Official Blog
Beginner level
Orchids are officially the most popular house plant in the UK. They have far surpassed spider plants in bathrooms, the office weeping fig and a whole host of spiky exotics that the 90's super markets brought us. They can flower for up to 6 months at a time and add a touch of the Far East to your home. The care they require is very different to house plants you may be used to and this guide should help you get the most out of orchids.
Quick Answer
To look after an orchid, water every 7–14 days using the soak-and-drain method, never leaving it sitting in water. Position in bright indirect light away from direct sun. Feed monthly with specialist orchid fertiliser. Cut spent flower stems back to a node to encourage reblooming. Repot every two years in fresh orchid bark. Get those four things right and your orchid will reward you with blooms for months at a time.
Orchids are among the most popular houseplants in the UK, and for good reason. They produce extraordinary flowers that last for weeks, come in an almost bewildering range of colours, and are far more forgiving than their exotic reputation suggests. The problem is that most people either kill them with kindness through overwatering, or give up on them after the first flowers drop, not realising that the same plant will bloom again and again for years if you know what it needs.
I have been growing orchids for years, both in my own home and for clients, and I have made every mistake in the book. Too much water, too much direct sun, feeding at the wrong time, and repotting too late. What I have learned is that orchids are far more straightforward to look after once you understand why they need what they need. Everything about orchid care comes back to their natural habitat, and once you picture that, the rules make complete sense.
1. Phalaenopsis orchid at a glance
The orchid you will most likely buy from a supermarket, garden centre, or florist is a Phalaenopsis, commonly known as the moth orchid. This is by far the most widely grown houseplant orchid in the UK and the one this guide is primarily about. Understanding what it is and where it comes from is the foundation of looking after it well.
🌿 Phalaenopsis Orchid At A Glance
Botanical Name
Phalaenopsis spp.
Common Name
Moth orchid
Plant Type
Epiphytic tropical houseplant
Watering
Every 7–14 days. Soak and drain, never sit in water
Light
Bright indirect light. No direct sun
Feeding
Monthly with specialist orchid liquid feed
Temperature
18–25°C. Avoid cold draughts
Humidity
Moderate to high. Mist roots or use a humidity tray
Repotting
Every 2 years in fresh orchid bark
Flowering Period
Typically autumn to spring. Can flower multiple times a year
Toxic to Pets?
Non-toxic to cats and dogs
2. Where do orchids come from?
Phalaenopsis orchids are native to the tropical forests of Southeast Asia, from the Philippines and Taiwan down through Indonesia. In the wild, they grow as epiphytes, plants that live attached to trees, rocks, or tree canopies rather than in the ground. They are not parasites. They use the tree purely as a structural anchor. Their roots are exposed to the open air, absorbing moisture and nutrients from rainfall, humidity, and the organic debris that accumulates on bark.
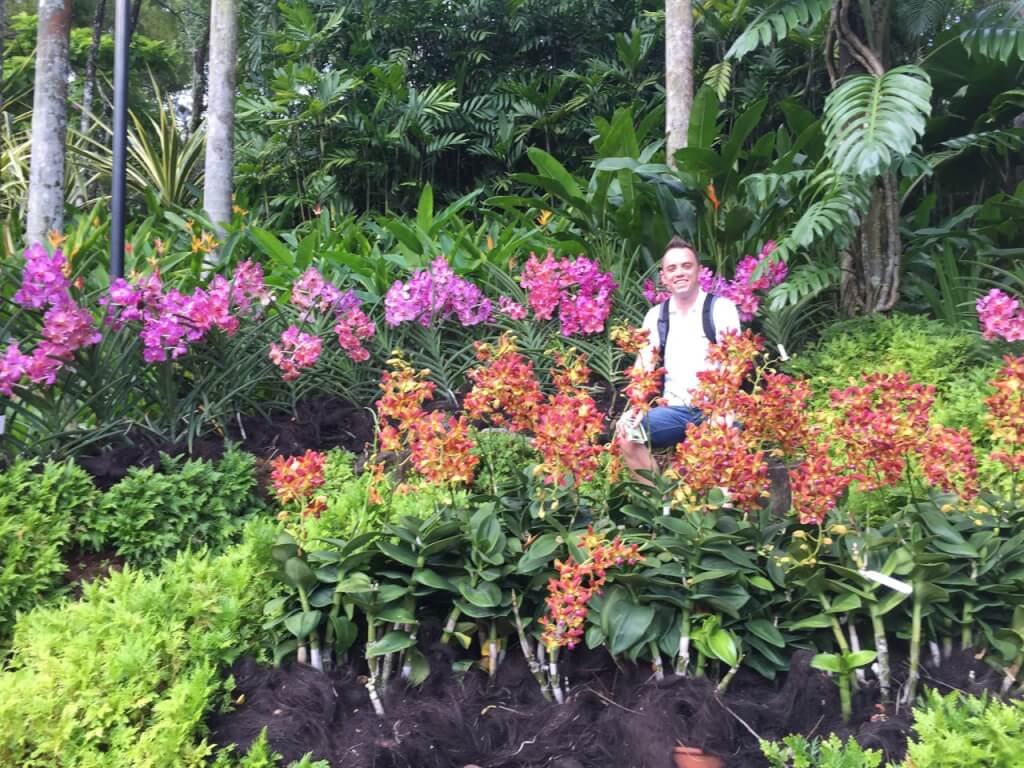
Visiting the Singapore Orchid Garden, the world’s largest orchid collection, gave me a completely new perspective on what these plants actually need
I was lucky enough to visit the Singapore Orchid Garden some years ago, which holds the world’s largest collection of orchids displayed under conditions close to their natural habitat. Seeing them growing on trees, with roots in open air and leaves catching dappled forest light, makes every aspect of orchid care suddenly obvious. They are not plants that evolved in compost in a pot.
They evolved with their roots in moving air, getting drenched by tropical rain and then drying out again quickly, feeding on whatever organic matter washed past them. Once you hold that image in your head, the rules for looking after orchids at home stop feeling arbitrary and start making complete sense.
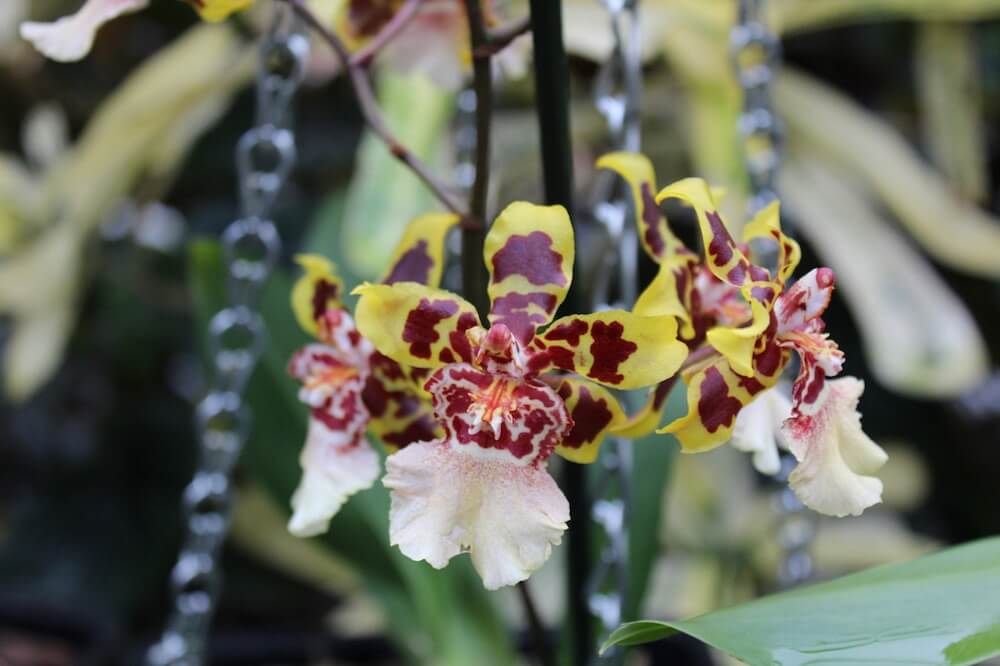
The sheer variety of orchid species on display at Singapore demonstrates how adaptable these plants are across different growing conditions
The UK’s most common houseplant orchid, the Phalaenopsis, has been bred over decades from wild stock to be remarkably resilient and long-flowering. Modern supermarket orchids are raised in industrial growing facilities that produce millions of plants a year. They are tough, but they still carry the needs of their wild ancestors: light, not sun; moisture, not soaking; air at the roots; and a monthly feed rather than constant nutrition.
3. Where to position an orchid
Light is the single most important environmental factor for orchid health, and getting it right is the difference between an orchid that flowers year after year and one that sits in vegetative limbo producing only leaves. The keyword is indirect.
Phalaenopsis orchids evolved in the shade of forest canopies, where light filters down through layers of leaves rather than falling directly from above.
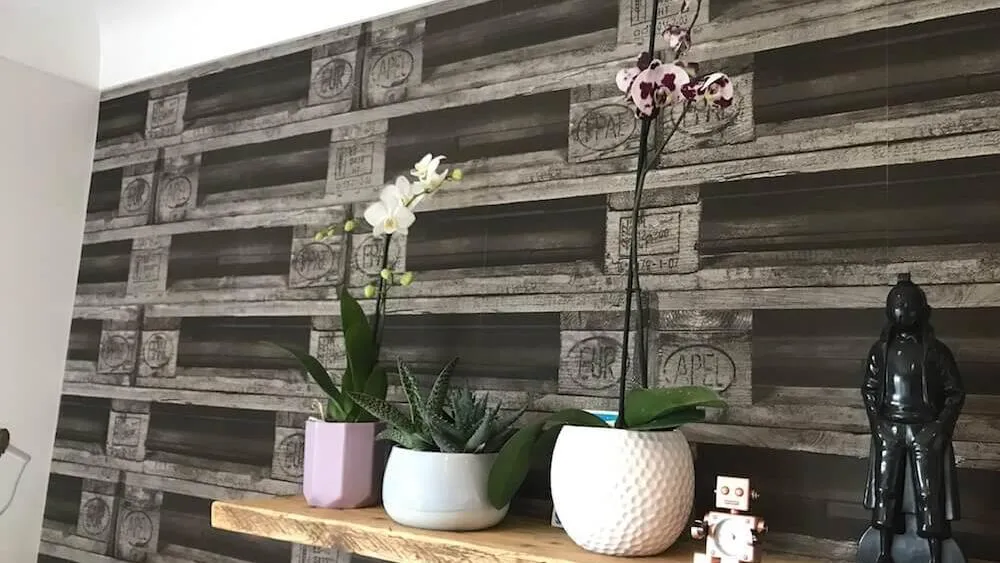
A shelf set back from a bright window is ideal, offering enough light to trigger flowering but protected from the direct rays that scorch leaves
Direct sunlight through a south or west-facing window will scorch orchid leaves very quickly, causing yellow or brown patches that do not recover. You will also see the leaves take on a reddish tinge, which is the orchid’s stress response to excessive light intensity. A north-facing windowsill with frosted or diffused glass is often perfect. On an east or west-facing windowsill, set the orchid back from the glass by 30–40cm so it receives bright ambient light rather than direct rays.
The most common positioning mistake is placing orchids on a south-facing windowsill in summer, when light intensity is at its highest and temperatures behind glass can become extreme. Move them back from the glass or give them light shade during the peak summer months. Equally, placing them in a very dark corner will result in lush, healthy foliage but no flowers. Orchids need good light to produce the energy required for flowering.
💡 Top Tip
Orchids also need some temperature fluctuation to trigger flowering. A drop of 5–10°C between day and night temperatures, such as in a room that cools in the evenings, signals the plant that it is time to produce flowers. This is why orchids sitting in evenly heated centrally heated rooms sometimes go months without blooming. A cooler windowsill in autumn is often enough to trigger the process.
Humidity is the other positional consideration. Central heating creates dry air that is quite unlike the humid forest environment in which orchids evolved. Grouping orchids together helps, as does placing them on a tray of pebbles with a little water in the bottom. The evaporation raises humidity around the plant without ever letting the pot sit in water. Avoid placing orchids directly above radiators, where dry heat rises straight into the foliage.
4. How to water an orchid
Watering is where most orchids meet their end, and almost always through too much rather than too little. An orchid sitting in water will develop root rot within days, and by the time the problem shows in the leaves it is often too late to save the plant. Understanding why they hate excess water explains exactly how to water them correctly.
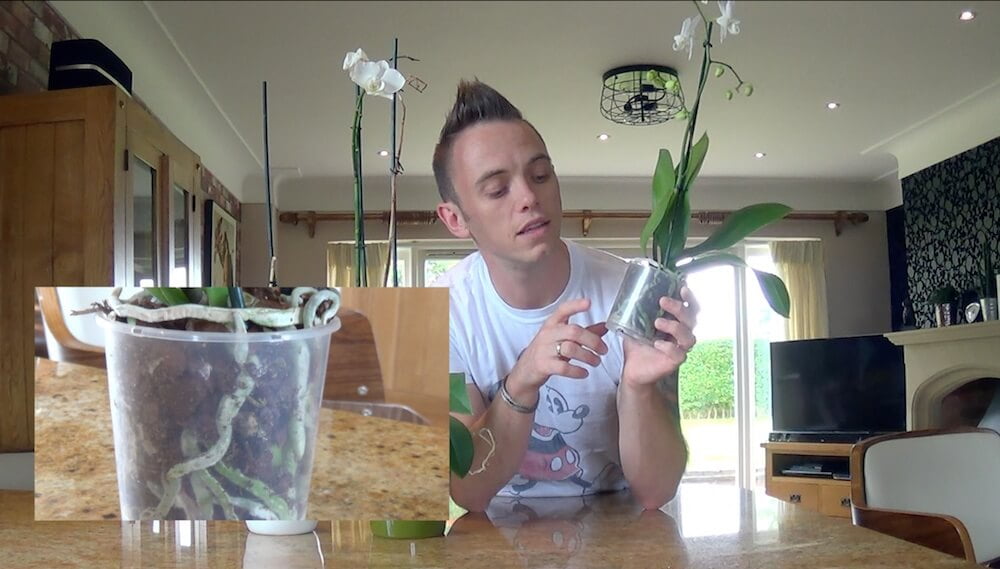
In the wild, a Phalaenopsis orchid clings to a tree. When it rains, the roots are drenched. When the rain stops, the roots dry out quickly in moving air. There is no reservoir of water held around the roots, no compost to retain moisture, just a brief, intense soaking followed by a return to ambient humidity. The orchid’s thick, silvery-grey roots are actually full of a spongy tissue called velamen, which rapidly absorbs water from rain or humid air and slowly releases it to the plant over the following days.
This is why root colour tells you exactly when to water: grey roots indicate the velamen is empty and the plant needs water; green roots indicate it is still full and watering should wait.
The root colour check: grey roots need water, green roots are well hydrated. This simple rhyme saves orchids every day.
My watering rhyme says it all: If it’s green, it’s serene. If it’s grey, water away.
Method 1: The soak and drain method (recommended)
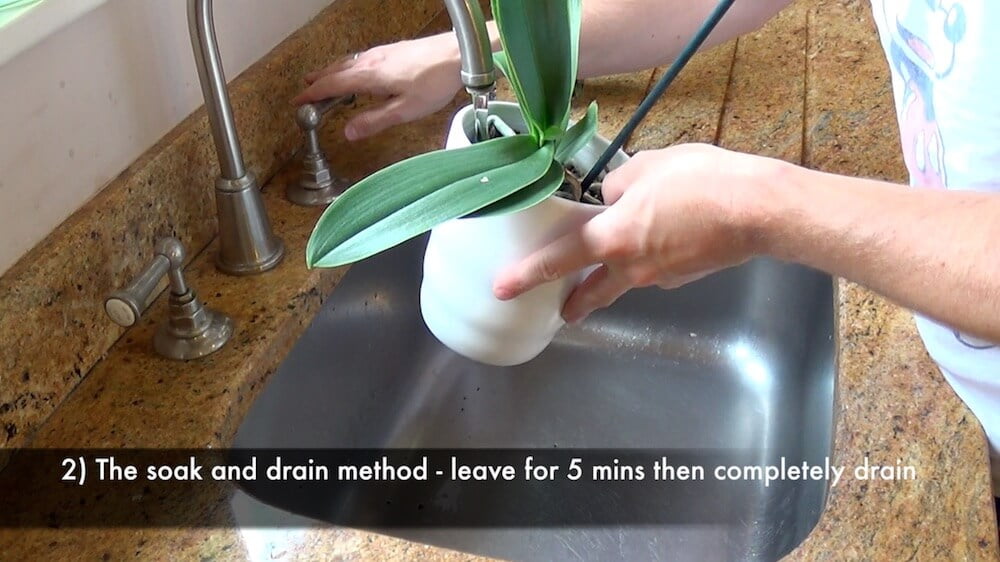
This is the method I use and recommend for most home growers because it most closely mimics a tropical downpour. Take the orchid out of any decorative outer pot, place it in a sink or bowl, and fill with tepid water until the root system is submerged. Leave for five minutes, then lift the pot out and allow it to drain completely before returning it to its position. Every drop of water should drain freely before the pot goes back. This method needs doing every ten to fourteen days in most UK homes.
The soak-and-drain method: submerge for 5 minutes, drain completely, then return to its spot. Never leave water sitting in the outer pot.
The most important part of this method is the drain. After lifting the orchid from the water, tip the clear inner pot to one side and allow any remaining water to run from the drainage holes. If your orchid sits in a solid decorative pot with no drainage, tip it carefully to pour off any water that has collected in the bottom before replacing it. Water sitting around the base of an orchid pot will cause root rot with absolute certainty.
Method 2: The flush method
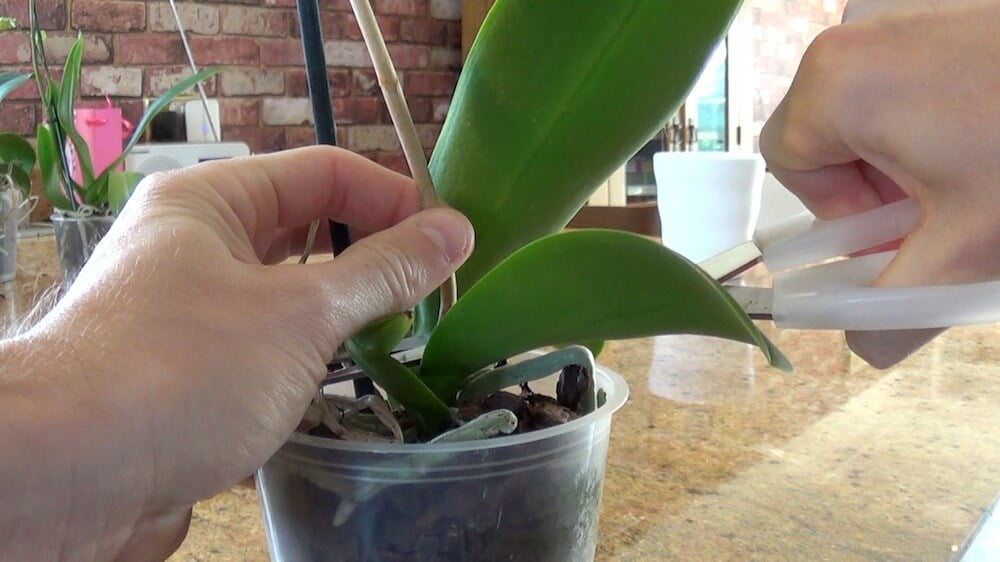
The flush method works well if your orchid is in a transparent pot with good drainage holes. Take it to the sink and pour a steady stream of tepid water through the bark and root system for thirty to sixty seconds, allowing it to run freely out of the bottom. This mimics the effect of rain passing through the tree canopy and washing over the roots. You can add your liquid feed to the water for a combined watering-and-feeding session. Allow to drain completely, then return to position. This method suits more frequent watering every five to ten days.
The flush method: pour water through the pot for 30–60 seconds, allowing it to drain freely. Combine with liquid feed for an efficient weekly routine.
Always use tepid water rather than cold tap water straight from the tap. Cold water can shock the roots and cause spotting on the flowers. If you can, leave a watering can of tap water to stand overnight before using it on your orchids. This allows chlorine to dissipate slightly and the water to reach room temperature. Collected rainwater is even better, though never use water that has been standing in a container for more than a few days, as it can harbour bacteria.
💧 Watering Quick Reference
Method
Frequency
Best For
Soak and drain
Every 10–14 days
Most home growers. Thorough and forgiving
Flush method
Every 5–10 days
Transparent pots with good drainage
Always check root colour first. Grey = water now. Green = leave it.
5. How to feed an orchid
Orchids in the wild do not grow in rich, nutrient-dense soil. They are clinging to bark and tree branches, picking up trace nutrients from decomposing organic matter, rainwater, and atmospheric moisture. This means their nutritional requirements are genuinely modest, and overfeeding is nearly as damaging as overwatering.
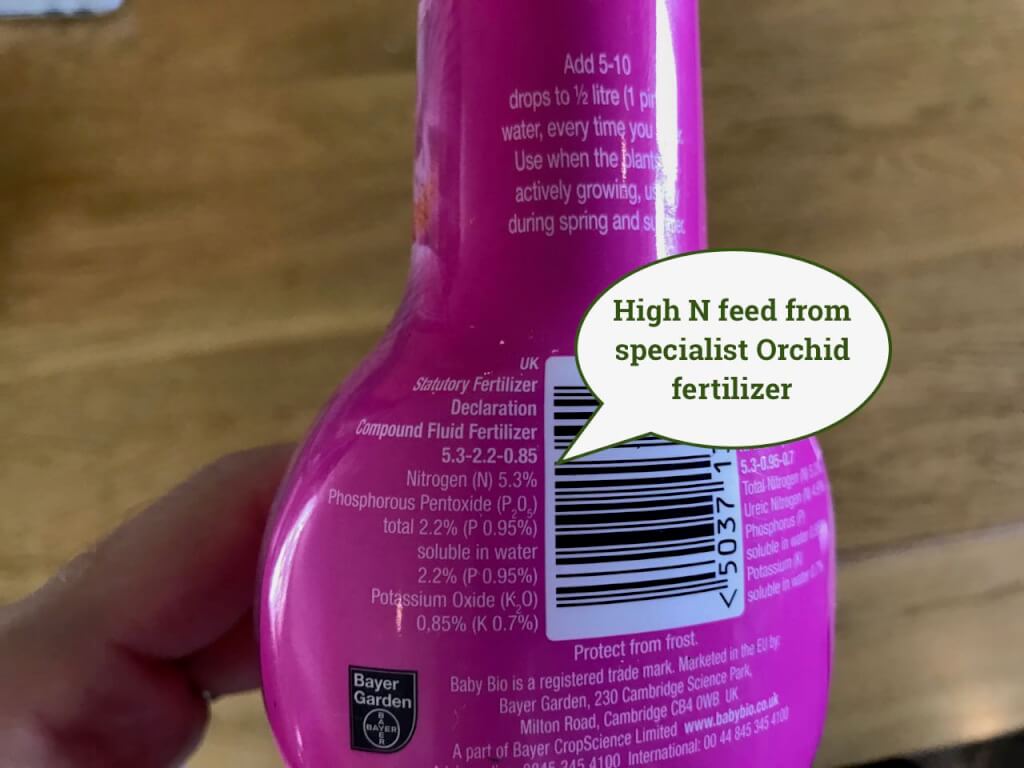
Specialist orchid liquid feed is worth buying. The nitrogen balance is formulated specifically for epiphytic plants in bark compost.
Phalaenopsis orchids do, however, need a slightly higher nitrogen ratio than many houseplants, for two reasons. First, nitrogen is the nutrient most critical for the fleshy green leaves that do the photosynthesis work in an orchid. Those broad, thick leaves are the powerhouse of the plant, and they need nitrogen to stay productive. Second, the bark compost that most orchids are planted in actively consumes nitrogen as it decomposes, effectively robbing the plant of what little is available. A specialist orchid liquid feed balances exactly the right nitrogen level for this growing medium.
Feed once a month, adding the liquid feed to the water at the dilution rate on the label. Never feed more frequently than monthly, and always water the orchid before feeding rather than applying concentrated feed to dry roots, which can cause root burn. During the winter rest period, when growth is minimal, you can reduce feeding to once every six to eight weeks. Resume monthly feeding when you see a new flower spike beginning to develop.
Orchid pruning is one of those tasks that makes people disproportionately nervous, and I understand why. These are plants that cost real money and produce spectacular flowers that you are reluctant to interfere with. But pruning correctly is what keeps the flowering cycle going, and it is much simpler than most people fear.
Pruning the spent flower stem back to the next node encourages a secondary flower spike to develop from that point
Once the last flower on a stem has dropped, you have two choices. The first is to cut the stem back to the nearest node, the small bump along the stem where a lateral shoot can develop. This sometimes, though not always, encourages the plant to produce a secondary flower spike from that node within a few weeks. The second option is to wait until the green stem turns yellow and begins to dry up naturally, then cut it back to the base of the plant. Cutting a dried or yellowed stem back to the base always encourages the orchid to produce a completely new flower spike from the crown.
Keep the stake in place as the new flower spike develops, since orchid stems are heavy once in full bloom and will bend without support
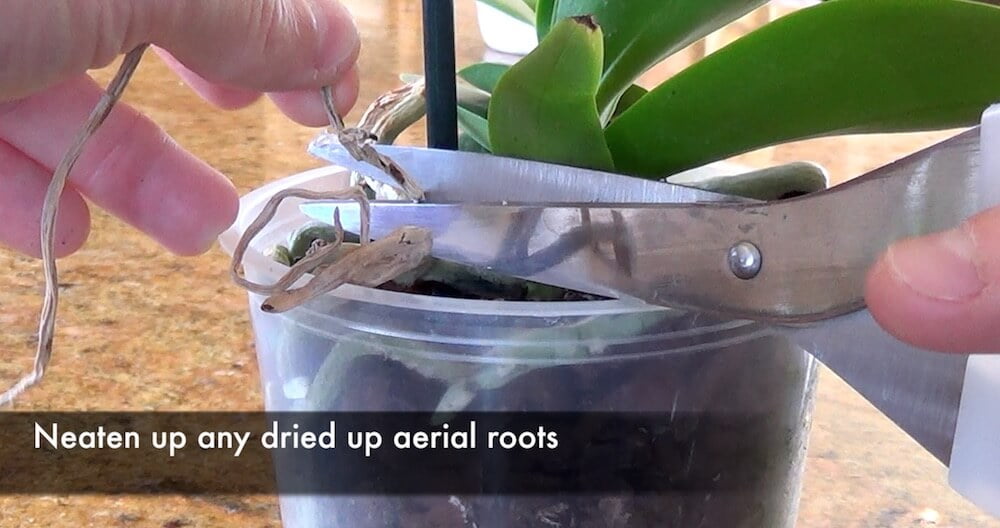
Beyond the flower stem, you can tidy up the plant by removing any dried aerial roots, specifically the ones that project out of the pot rather than growing down into the bark. Living aerial roots are silvery-grey and firm. Dead ones are brown, dry, and papery. Snip dead aerial roots back close to the crown with clean scissors. Damaged or brown leaf tips can be trimmed with scissors, cutting to just inside the healthy tissue. Always use clean scissors or secateurs for any pruning work to prevent transferring fungal pathogens from plant to plant.
Aerial roots that have dried up completely can be removed cleanly. Living aerial roots should always be left in place.
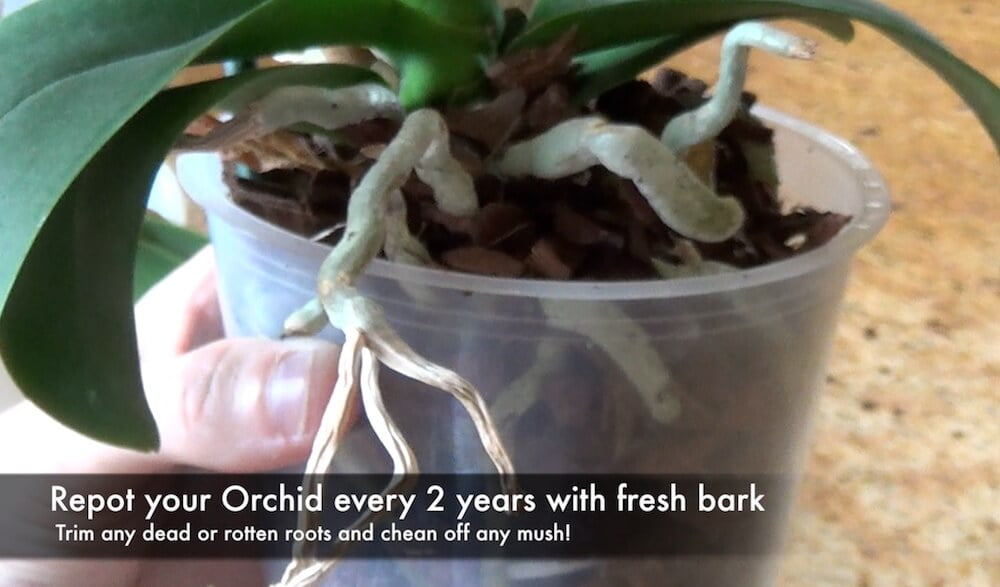
Repotting is something most orchid owners put off for too long, often until the roots are visibly bursting out of every gap in the pot. The general guidance is to repot every two years, regardless of whether the plant looks pot-bound, because the bark compost it lives in breaks down over time into finer, denser material that holds moisture and restricts airflow in a way that fresh bark does not. Even if the roots look fine, the medium they are growing in may no longer be providing the drainage and aeration the orchid needs.
Repotting gives you a chance to inspect the roots, remove any dead or rotted sections, and give the plant a fresh start in new bark
The best time to repot is just after flowering has finished and before new root growth begins, typically late spring or early summer. Remove the orchid from its pot and gently tease away the old bark from around the roots. You will likely find a mixture of firm white or green healthy roots, soft mushy brown roots that indicate rot, and wiry dried-up brown roots that are dead. Remove all the mushy and dead roots with clean scissors, cutting back to firm, healthy tissue. Allow the cut ends to dry for an hour before repotting to reduce the risk of infection.
Repot into fresh orchid bark in a clear plastic pot that is only slightly larger than the root system. Orchids do not like being overpotted. A pot that is too large holds too much moisture around the roots and dramatically increases the risk of root rot. Pack the bark gently around the roots, positioning the crown of the plant just above the bark surface, and stake the flower stem with a bamboo cane and rubber orchid clips if a new spike is beginning to develop. Water thoroughly after repotting and then leave for ten to fourteen days before feeding.
This is the question I get asked most frequently about orchids, and the answer is both simpler and more satisfying than most people expect. A healthy Phalaenopsis orchid can produce new flower spikes two or three times a year, and the same plant can flower for many years if given the right conditions. The flowers have dropped, the stem is gone, and now you have an orchid that looks like nothing more than a few thick green leaves in a pot. Here is how to get it going again.
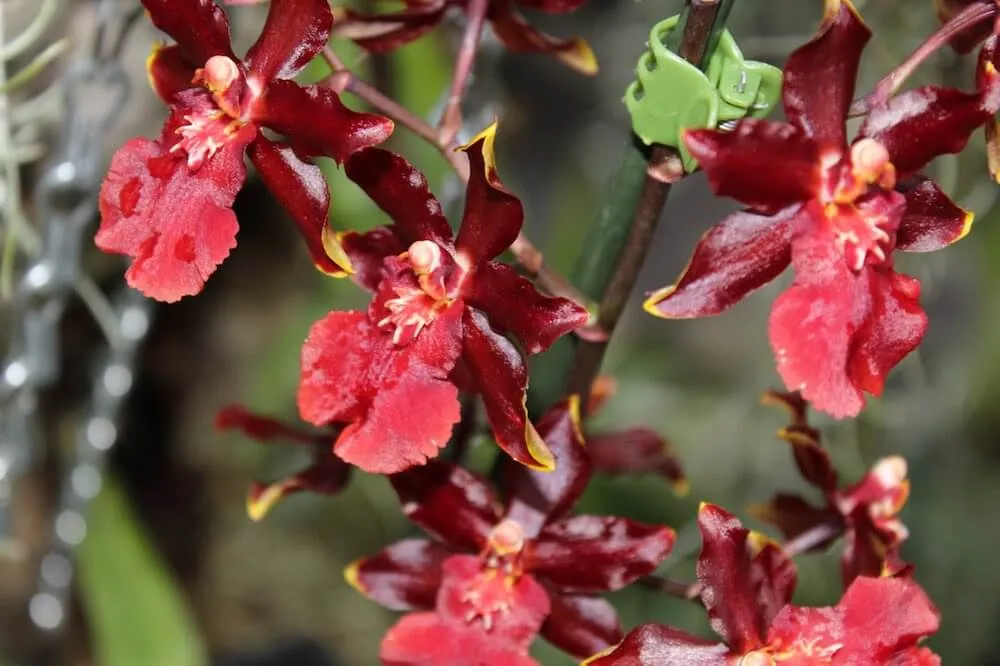
A healthy, well-maintained moth orchid in full bloom. With the right conditions, your orchid can reach this stage multiple times a year.
The single most reliable trigger for reblooming is a temperature drop. A difference of 5–10°C between daytime and nighttime temperatures signals to the orchid that conditions are right for flowering. In practice, this often means moving your orchid to a cooler room or a windowsill that cools more significantly at night during autumn, leaving it there for four to six weeks, then returning it to its usual warmer spot.
Within a few weeks of this temperature treatment, you should see a small green nub appearing from the base of the crown or along an existing stem. This is the new flower spike beginning to develop.
Alongside the temperature trigger, make sure the orchid is receiving adequate light, is being fed monthly, and that the bark in its pot is fresh enough to allow good drainage. An orchid in old, compacted bark that is waterlogged and in a dark corner will not flower regardless of temperature manipulation. Get the basics right first, and the temperature drop will do its job reliably.
Once you can see a new spike developing, support it with a bamboo cane and orchid clips from the start, before it gets heavy. Orchid flower spikes can become surprisingly substantial by the time they are in full bloom, and a stem that has grown unsupported will be difficult to stake later without risking damage.
Orchids communicate their problems through their leaves, roots, and flowers very clearly once you know what to look for. Most problems have a straightforward fix if caught early enough, and almost all of them trace back to water, light, or temperature rather than anything more complex.
Regularly cleaning orchid leaves with a damp cloth removes dust, improves photosynthesis, and gives you a chance to spot pest problems early
⚠ Yellow leaves
The most common cause is overwatering. Check the roots first: if they are brown and mushy, the plant has root rot and needs repotting urgently with all rotten roots removed. If the roots look healthy, yellowing may be caused by too much direct sunlight, which bleaches chlorophyll from the leaves. A single yellow leaf at the base of the plant is normal ageing and nothing to worry about.
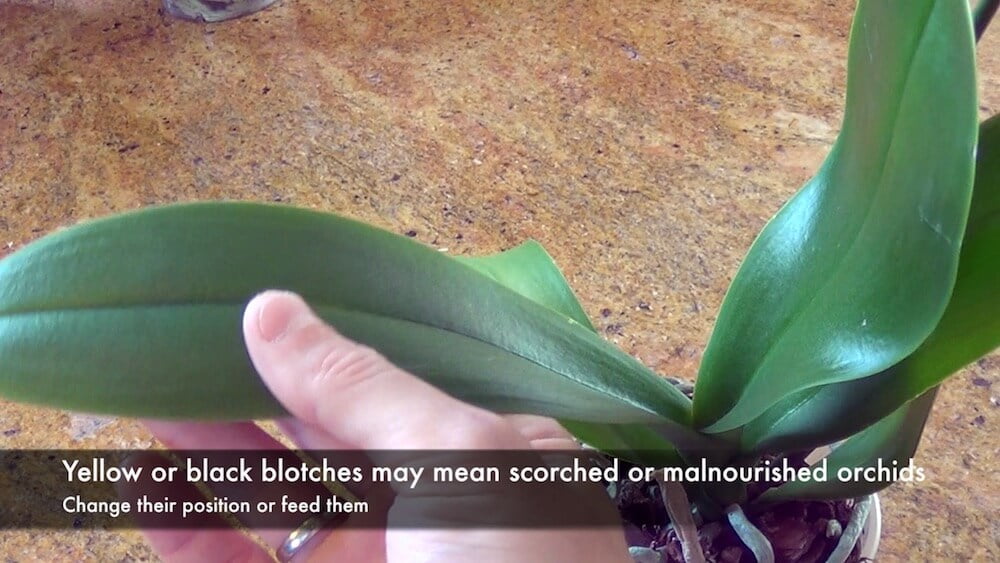
⚠ Black or brown leaf patches
Black or brown necrotic patches are usually caused by direct sunlight scorch or physical damage. Cold draughts from open windows or air conditioning units directly onto the leaves can also cause brown patches. Check the plant’s position and move away from any cold air source. Damaged tissue will not recover but the plant will continue to grow healthily once the cause is removed.
⚠ Flowers dropping prematurely
Sudden flower drop is almost always caused by an environmental shock: a sudden change in temperature, cold draughts, or being moved from one room to another when in full bloom. Ethylene gas from ripening fruit nearby can also cause premature flower drop. Keep orchids away from fruit bowls when in flower, and avoid moving them once flowering has begun.
⚠ No flowers for more than a year
An orchid with healthy leaves but no flowers is usually lacking one of two things: sufficient light or a temperature drop trigger. Check the light levels first and consider whether the plant has ever experienced a cool period. Try the temperature drop technique described in section 8, combined with ensuring the plant is in the brightest indirect light available.
⚠ Sticky residue on leaves or small bumps on stems
Sticky residue combined with small oval bumps on the stems and leaf undersides is a sign of scale insects. Wipe the affected areas with a cotton bud soaked in rubbing alcohol, working methodically over every surface. Follow up with a neem oil spray applied to the whole plant. Isolate the affected plant from other houseplants immediately to prevent spread. See my full guide to houseplant pests for more treatment options.
⚠ Tiny flies around the pot
Small flies around the bark are almost certainly fungus gnats, particularly if you have been overwatering. Allow the bark to dry out more fully between waterings and consider yellow sticky traps to catch adults. For a persistent infestation, nematode drenches or BTI tablets are the most effective treatments. See my complete guide to getting rid of fungus gnats.
10. How to choose an orchid: what to look for when buying
Most people choose an orchid based on flower colour and move on, and while that is a perfectly reasonable way to pick a plant you will enjoy looking at, spending sixty seconds checking a few other things before you buy will dramatically improve your chances of getting a healthy specimen that performs well from day one.
Choosing an orchid when roughly half the spike is still in bud gives you weeks more flowering to enjoy at home
The first thing to check is the flower spike. Ideally, you want an orchid where roughly half the flowers are open, and the other half are still in bud, pointing firmly upward as tight green nubs. This gives you the longest possible display at home. An orchid where all the flowers are already fully open, and the buds are past their peak, will start dropping blooms within days of arriving in your house. Conversely, a spike that is entirely in bud is fine but takes longer to reward you.
Half-open, half-in-bud is the sweet spot.
Next, check the leaves. They should be firm, glossy, and a deep mid-green. Avoid plants with yellow leaves, which indicate stress or the beginnings of root problems, and avoid anything with brown, soft, or shrivelled leaf tips, which suggest the plant has been sitting in poor conditions. A slight reddish tinge to the leaves is a sign of too much light exposure in the shop, which is not ideal, though not necessarily fatal. What you cannot accept is yellowing across multiple leaves.
Look through the clear plastic pot at the roots. Healthy roots should be firm, silvery-grey or green, and plentiful. Brown mushy roots are a serious red flag indicating root rot is already underway. A few dried-up brown roots among otherwise healthy ones is fine, but if more than a third of the visible root system looks brown and soft, put the plant back. It is already compromised and will need immediate repotting before it can settle in.
⚠ Watch Out: Sphagnum Moss Plug Orchids
Many supermarket and discount shop orchids are sold with roots packed in a dense sphagnum moss plug rather than bark. This suits commercial growing conditions but retains far too much moisture at home and almost guarantees root rot over time. If you can see tightly packed green or brown moss rather than open bark around the roots, plan to repot into proper orchid bark within a few weeks of purchase, once the current flowers have finished.
One more check worth making, particularly in autumn and winter: was the orchid displayed near the shop entrance or in a cold area? Phalaenopsis orchids are damaged by temperatures below 10°C, and a plant that has sat in a cold draught near a shop door for a few days will drop its buds within a week of getting home. This is not because you did anything wrong, but because the cold stress had already occurred before you bought it. Always buy orchids from heated indoor displays rather than outdoor market stalls or cold entrance areas.
💡 Top Tip
When you get a new orchid home, resist repotting it immediately even if the bark looks poor. Let it acclimatise for two to four weeks first. Moving a plant to a new environment and repotting it at the same time is a double stress that can trigger bud drop and leaf stress. Wait for the flowers to finish, then repot with fresh bark.
11. Other orchid varieties worth growing
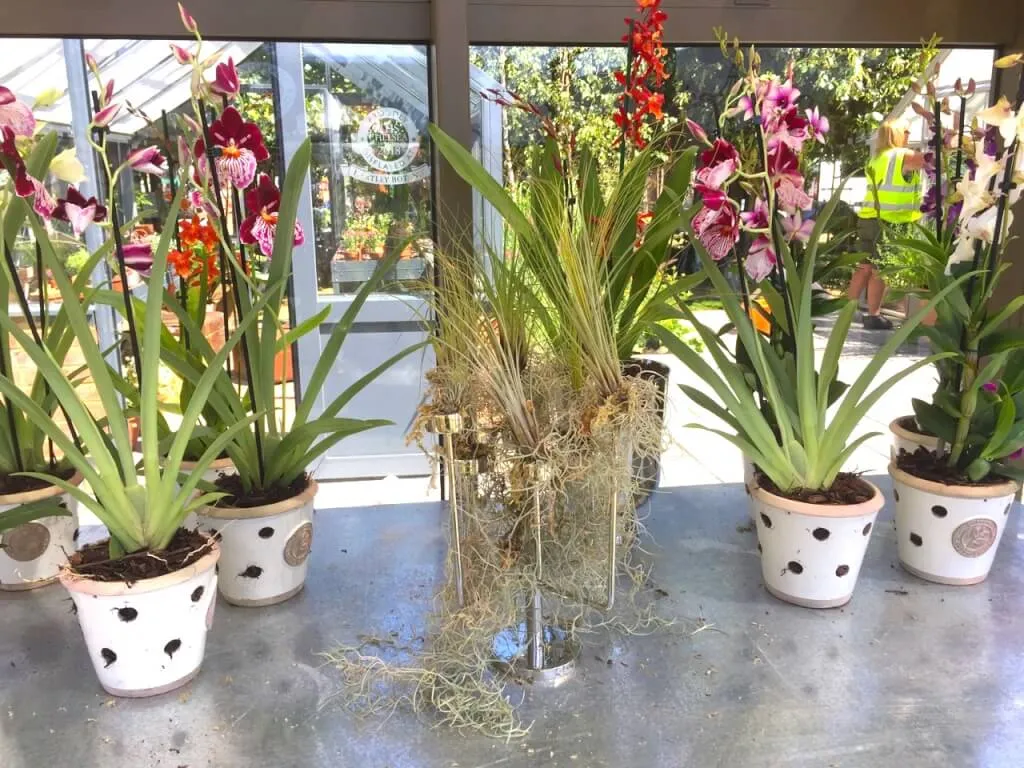
Phalaenopsis is the overwhelming favourite for UK homes, and rightly so. It is forgiving, long-flowering, and widely available. But as your confidence with orchid care grows, it is worth knowing that several other varieties are readily available in UK garden centres and produce equally spectacular results with only slightly different care requirements.
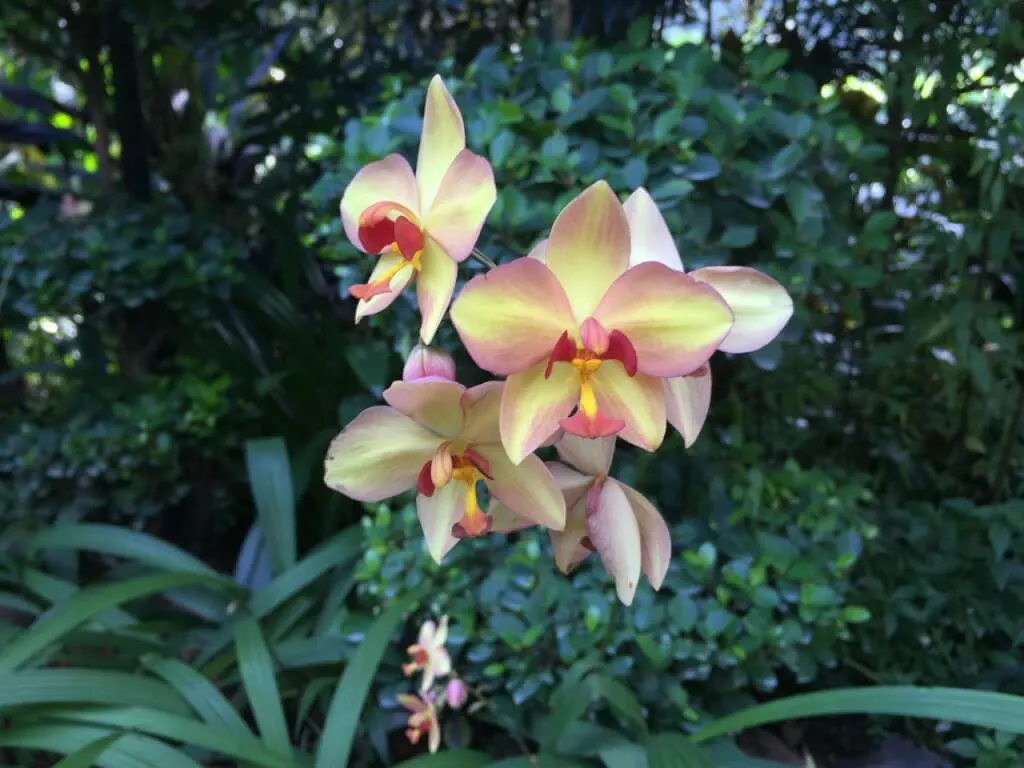
The variety of orchid species available goes far beyond the supermarket moth orchid, and many are surprisingly adaptable to UK home conditions
Cymbidium orchids
Cymbidiums are the orchid you will see in florists and at garden shows. They are tall, structural plants with multiple upright flower spikes carrying dozens of blooms in shades ranging from white and pale yellow through deep burgundy and near-black. They are cool-growing, which makes them ideal for UK homes and conservatories that are not heavily heated.
The critical difference from Phalaenopsis is that Cymbidiums must spend the summer outside, from June to September, to experience the temperature differential that triggers flowering. Bring them back indoors before the first frosts and they will produce their flower spikes from autumn through spring. They need a minimum temperature of 10°C, making them unsuitable for very cold conservatories in winter, but otherwise they are remarkably tough.
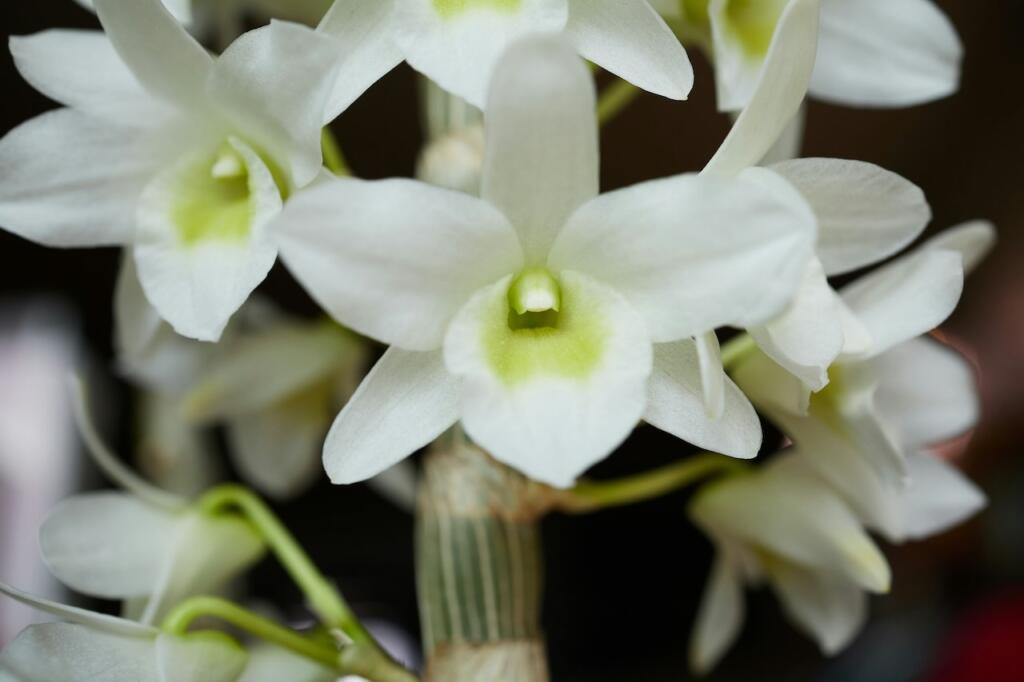
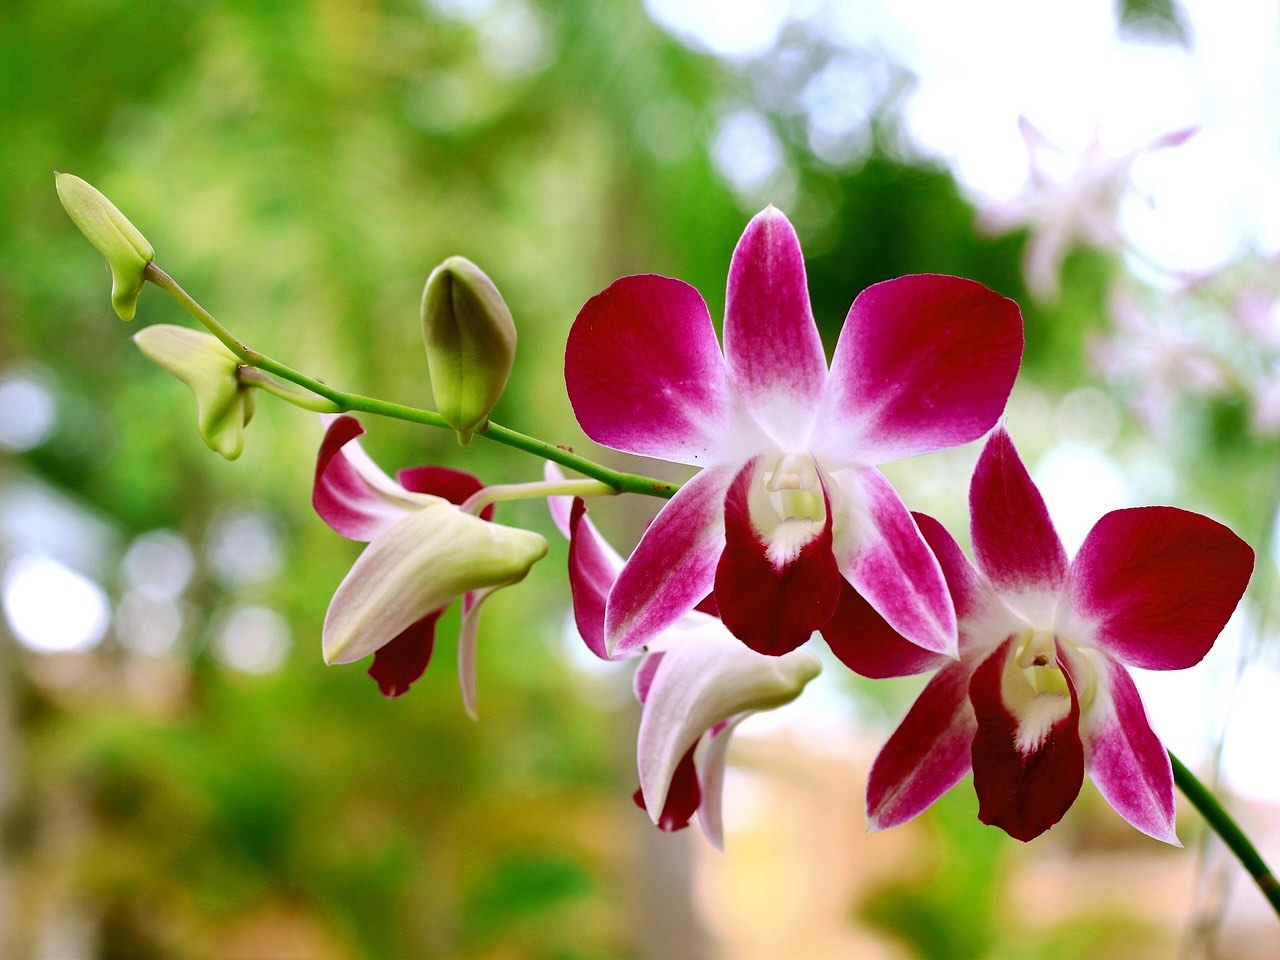
Dendrobiums are increasingly available in UK garden centres and produce beautiful sprays of smaller flowers, typically in white, purple, and pink, along cane-like stems. There are two main types you will encounter: the warm-growing nobile hybrids and the cooler-growing phalaenopsis-type Dendrobiums.
The nobile types need a cool, dry rest period in winter to trigger flowering, which means reducing watering significantly from October to February and keeping them somewhere bright but cool, around 10–12°C. The reward is spectacular flowering in late winter and early spring, exactly when you most need colour indoors. Water and feed as per Phalaenopsis for the rest of the year.
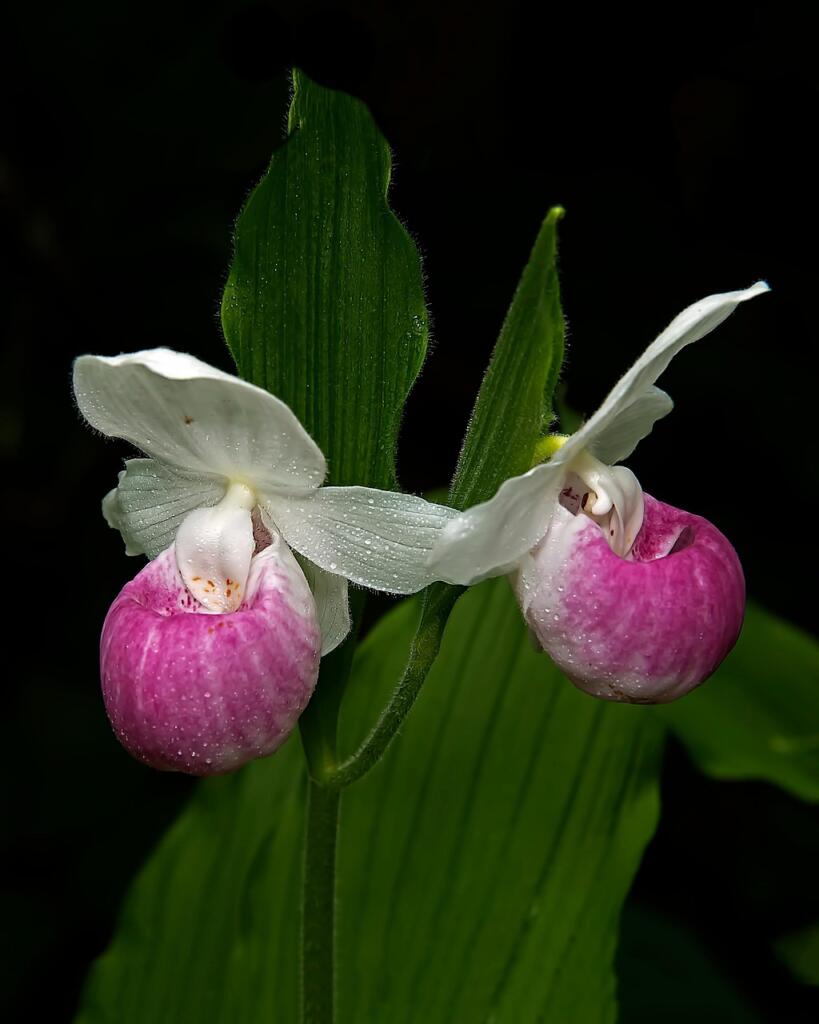
Paphiopedilums, commonly called slipper orchids for their distinctive pouch-shaped lip, are the only orchids in this guide that are semi-terrestrial, meaning they grow in soil and leaf litter on the forest floor rather than on trees. This makes them more tolerant of regular potting compost mixes, though specialist Paphiopedilum bark compost still gives better results.
They are shade lovers that thrive in lower light than most orchids, making them an excellent choice for north-facing rooms where Phalaenopsis would struggle to flower. They are slower to rebloom than Phalaenopsis, typically once a year, but the flowers are extraordinary, often marked with intricate spotting and veining that no other orchid replicates.
Vandas are the orchid world’s drama queens, and I mean that as a compliment. They are sold bare-root with their entire root system fully exposed, hanging in baskets or glass vases with no compost whatsoever. This perfectly replicates their natural growing habit. They grow in open air in tropical forests, their roots absorbing moisture directly from high humidity and frequent rain. In UK homes, this means watering them completely differently: submerge the bare roots in tepid water for around thirty minutes every few days, then allow them to dry in open air. They demand high humidity and warmth, so they suit bright bathrooms or kitchens better than draughty living rooms. Their flowers, in intense blues, purples, and oranges, are some of the most spectacular of any houseplant orchid.
Vanda orchids are often sold bare-root with no compost at all, making their watering requirements completely different to other houseplant orchids
Sold bare-root. Needs high humidity and frequent soaking
12. Seasonal orchid care: adjusting through the year
One of the things that trips up new orchid owners is treating the plant the same way all year round. Orchids have a natural seasonal rhythm: a period of active growth and flowering followed by a quieter rest period. Adjusting your care to match this rhythm makes a significant difference in how often they flower and how healthy they remain in the long term.
Orchid collections at RHS Hampton Court are managed with precise seasonal adjustments that home growers can replicate on a simpler scale
Spring and summer care (March to August)
This is the active growing season for most houseplant orchids. Light levels are higher, temperatures are warmer, and the plant is putting energy into producing new leaves and roots in preparation for flowering. Water regularly using the root colour check as your guide, and feed monthly with specialist orchid feed. This is the time of year when orchids benefit most from good light, so ensure they are as close to a bright window as possible without any direct summer sun reaching the leaves.
Watch for new root growth emerging from the crown during this period. Bright green root tips appearing from the base of the plant are a healthy sign that the orchid is actively growing. Do not cut these new roots, even when they grow out of the pot and in apparently random directions. Aerial roots are normal and beneficial. If repotting is due, late spring is the ideal window, giving the plant the whole growing season to re-establish.
Autumn care (September to November)
Autumn is the most important season for orchid care in UK homes, because this is the window when natural temperature drops trigger flowering. As central heating comes on and rooms warm up for the evening, try to ensure your orchid still experiences some cooling at night, either by positioning it on a windowsill away from the radiator or by briefly opening a nearby window. A consistent 5–10°C drop between daytime and night-time temperatures over four to six weeks is the most reliable flowering trigger available.
This is also the time to start watching for the first signs of a new flower spike emerging from the base of the crown or along the base of a leaf. A new spike looks like a small, flattened, paddle-shaped green nub and can be distinguished from a new root by its shape. Roots emerge as round, pointed tips. Once you can identify a spike, begin staking it immediately with a bamboo cane and orchid clip so it develops with good form from the start.
Winter care (December to February)
Winter brings two challenges for UK orchid owners: lower light levels and the dry air of central heating. Both can be managed with a few simple adjustments. Move the orchid closer to the window in winter to compensate for reduced daylight hours. The risk of direct sun scorching is dramatically lower in December than in July, so a windowsill position that would be too bright in summer is often ideal in winter. In very dark homes or flats without south-facing windows, a dedicated plant grow light used for eight to ten hours a day will maintain healthy growth through the darkest months.
Reduce watering frequency slightly in winter, checking roots more carefully before each water rather than watering on a fixed schedule. Bark takes longer to dry out in cooler, lower-light conditions, so what was a ten-day cycle in summer might extend to fourteen or even sixteen days in December. The risk of overwatering is highest in winter for this reason. Reduce feeding to once every six to eight weeks rather than monthly, as growth is much slower and the plant has less need for nutrition during this rest period.
The dry air from radiators is the other significant winter concern. A humidity tray of pebbles and water placed under the orchid, a light misting of the roots every few days, or simply grouping orchids together all help maintain the moisture in the surrounding air. Never place an orchid pot directly on top of a working radiator or on a shelf directly above one. The rising heat desiccates roots and foliage within days, making it one of the fastest ways to lose an otherwise healthy plant.
A well-cared-for Phalaenopsis orchid can live for decades. The main plant, the crown with its leaves and root system, continues indefinitely if kept in good health. Individual flower spikes last anywhere from six to twelve weeks, but the plant will produce new spikes multiple times a year if conditions are right. It is genuinely possible to have the same orchid flowering in your home twenty years from now.
Why is my orchid not flowering?
The most common reasons are insufficient light, a lack of temperature variation between day and night, or old bark compost that is retaining too much moisture. Check all three. Move the orchid to the brightest indirect light available, ensure it experiences some evening cooling especially in autumn, and consider whether it is due for repotting into fresh bark. Combine all three improvements and most orchids will produce a new spike within four to eight weeks.
Can I use tap water on orchids?
Yes, though tepid tap water that has stood overnight is better than cold water straight from the tap. The main concern with tap water is its temperature rather than its mineral content for most UK water supplies. If you live in a very hard water area, occasional spotting on the leaves can occur from lime deposits, which can be wiped off with a damp cloth. Rainwater or filtered water is ideal but not essential.
Should I mist my orchid?
Misting the aerial roots with water can help in very dry, centrally heated rooms. It increases humidity around the plant, benefiting root health. However, avoid misting directly onto the flowers as this causes spotting, and avoid leaving water sitting in the crown of the plant between the leaves, where it can cause rot. A light mist on the roots and the back of the leaves is beneficial. A drenching mist over the whole plant daily is counterproductive.
What is the best pot for an orchid?
A clear plastic pot with multiple drainage holes is the most functional choice. The transparency allows you to check the root colour without disturbing the plant, which is the best way to know when watering is needed. Terracotta orchid pots with side holes are also excellent, as they allow even more airflow to the roots. Avoid solid ceramic or glass pots without drainage holes, as they make it impossible to gauge moisture levels and almost guarantee root rot over time.
Improve Your Garden Design Skills Online
Why not start shaping a garden that truly works for you? Level up your skills with one of my online gardening courses!
My Garden Design for Beginners course is the perfect next step. Whether you’re completely new to garden design or just need a more structured approach, this affordable online course guides you through the full process from blank canvas to brilliant layout.
I’m Lee Burkhill, award-winning garden designer and presenter on BBC1’s Garden Rescue, and I’ve packed this course with practical advice, insider tips, and easy-to-follow steps to help you design a garden that works in harmony with nature, and keeps ground elder firmly in its place!
Enrol now for just £199 and start your journey toward garden design mastery!
29
Garden Design Examples for Small Gardens: 30 Design Templates & Planting Plans
Garden Design Examples for Small Gardens: 30 Design Templates & Planting Plans: In this online gardening course, I’ll walk you through 30 fantastic garden designs, explaining the logic behind the layout, the plant choices, and take-home tips for applying them in your own garden.
Weekend Garden Makeover: A Crash Course in Design for Beginners
Learn how to transform and design your own garden with Lee Burkhills crash course in garden design. Over 5 hours Lee will teach you how to design your own dream garden. Featuring practical design examples, planting ideas and video guides. Learn how to design your garden in one weekend!
Garden Design for Beginners: Create Your Dream Garden in Just 4 Weeks
Garden Design for Beginners Online Course: If you want to make the career jump to becoming a garden designer or to learn how to design your own garden, this is the beginner course for you. Join me, Lee Burkhill, an award-winning garden designer, as I train you in the art of beautiful garden design.
Orchids are far simpler to look after than their reputation suggests. Keep them in bright indirect light, water every 7–14 days using the soak-and-drain method, feed monthly with specialist orchid feed, and repot every 2 years in fresh bark. Cut spent flower spikes back to a node or the base once they are fully dried, and use a cool period in autumn to trigger reblooming. Get those five things right, and you will have flowering orchids in your home for years to come.
Your subscription could not be saved. Please try again.
Your subscription has been successful.
Lee Burkhill
Lee Burkhill, known as the Garden Ninja, is an award-winning garden designer and horticulturist with over 30 years of gardening experience and 15 years as a professional garden designer. A qualified RHS (Royal Horticultural Society) professional, Lee specialises in sustainable garden design and practical horticultural advice. He designs and presents on BBC1’s Garden Rescue and in leading gardening publications. Lee combines three decades of hands-on gardening knowledge with professional design qualifications to help gardeners create beautiful, functional outdoor spaces.