How to Prune Camellias: The Complete Beginner’s Guide
Lee Burkhill: Award Winning Designer & BBC 1's Garden Rescue Presenters Official Blog
Beginner level
Discover the secrets of successful camellia pruning and transform your garden's most treasured shrubs into spectacular flowering showstoppers! Whether you're wondering when to prune camellias, nervous about making the wrong cuts, or simply seeking the best camellia pruning techniques, you've come to the right place. Learning how to prune camellias properly is far simpler than you might imagine. With the right timing, basic tools, and proven techniques, you can maintain healthy, beautifully shaped plants that reward you with abundant blooms year after year.
Are you staring at your camellia, wondering if you should reach for the secateurs?
Perhaps you’ve inherited some overgrown, straggly camellias that look more like botanical disasters than the elegant flowering shrubs they should be. Maybe you’re nervous about potentially ruining next year’s blooms with an ill-timed snip?
This comprehensive guide will show you exactly how to prune camellias with confidence, transforming even the most neglected specimens into stunning garden shrubs, even if you’ve never pruned a plant before.
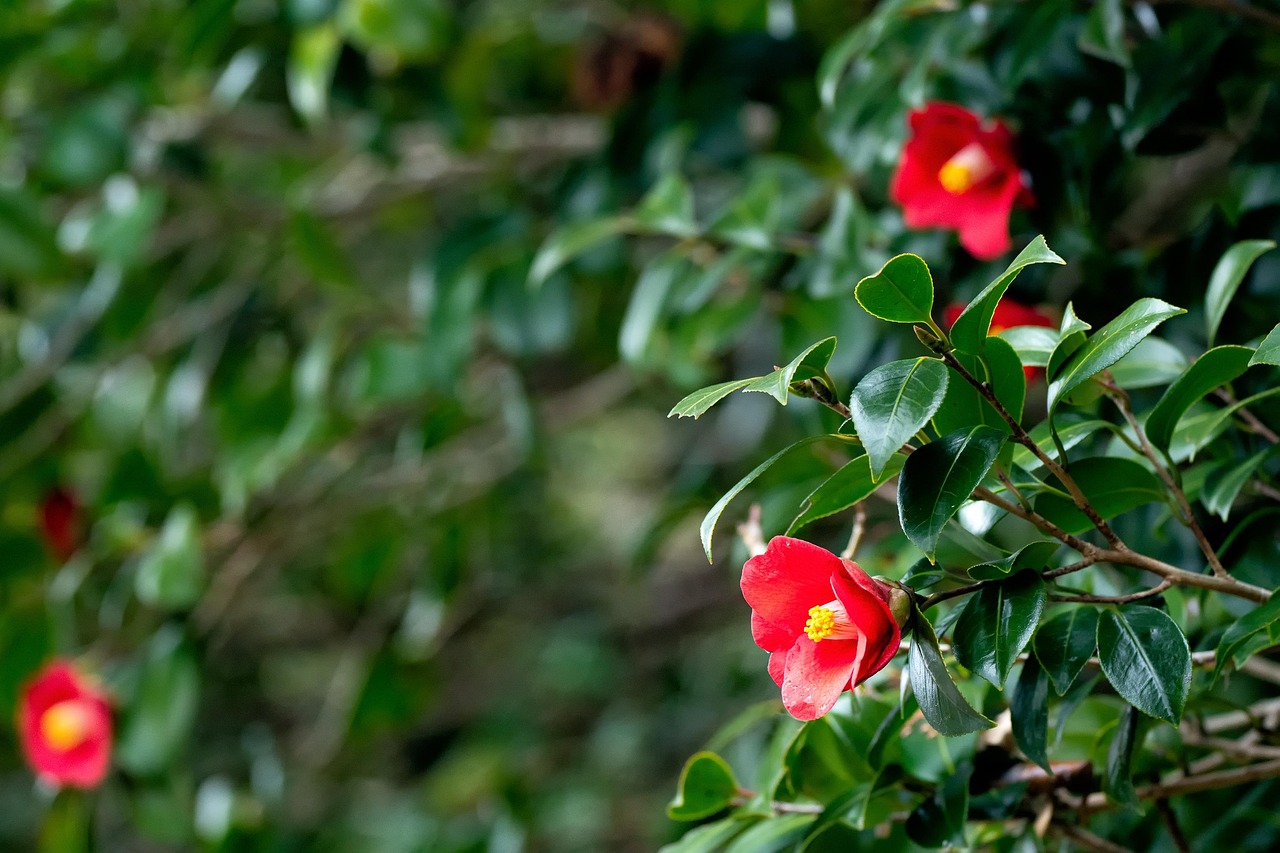
Camellias are amongst the most beloved evergreen shrubs in British gardens, gracing our outdoor spaces with their glossy foliage and spectacular blooms from late autumn through to spring. These magnificent plants, with their rose-like flowers and elegant form, have been captivating gardeners for centuries. However, like many gardeners, you might find yourself confused about when and how to prune these treasured plants. The thought of accidentally removing next year’s flower buds can be enough to put anyone off picking up the pruning shears!
But here’s the truth: pruning camellias is far simpler than most people imagine. With the right knowledge and timing, you can keep your camellias healthy, beautifully shaped, and flowering year after year. This guide will walk you through everything you need to know about camellia pruning, from understanding the different varieties to mastering the techniques that will keep your plants thriving.
This page contains affiliate links (see full details here). If you purchase through these links, I may earn a small commission at no extra cost to you. I only recommend products I personally use and trust at Garden Ninja HQ.
Understanding Your Camellias Before You Prune
Before we dive into the pruning techniques, it’s essential to understand what type of camellia you’re working with. This knowledge will determine your pruning timing and approach, making the difference between success and disappointment. A simple method to identify a camellia is to observe when it blooms, take some pictures, and try to identify it. Even if you don’t know the species or cultivar, knowing exactly when it flowers means you can prune any camellia like a pro.
i) Camellia japonica varieties
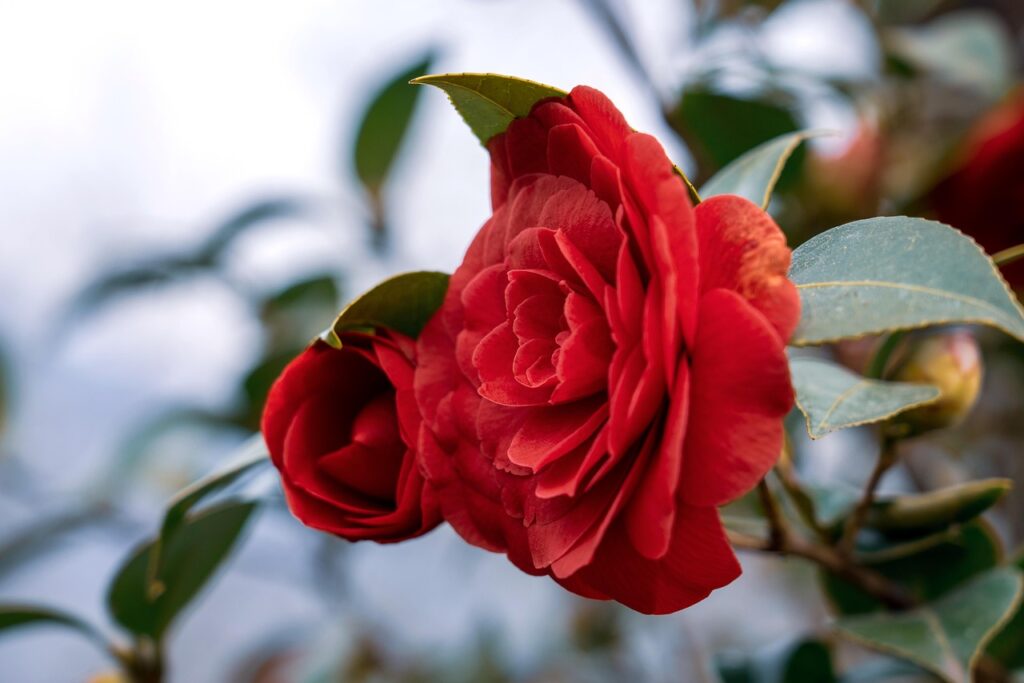
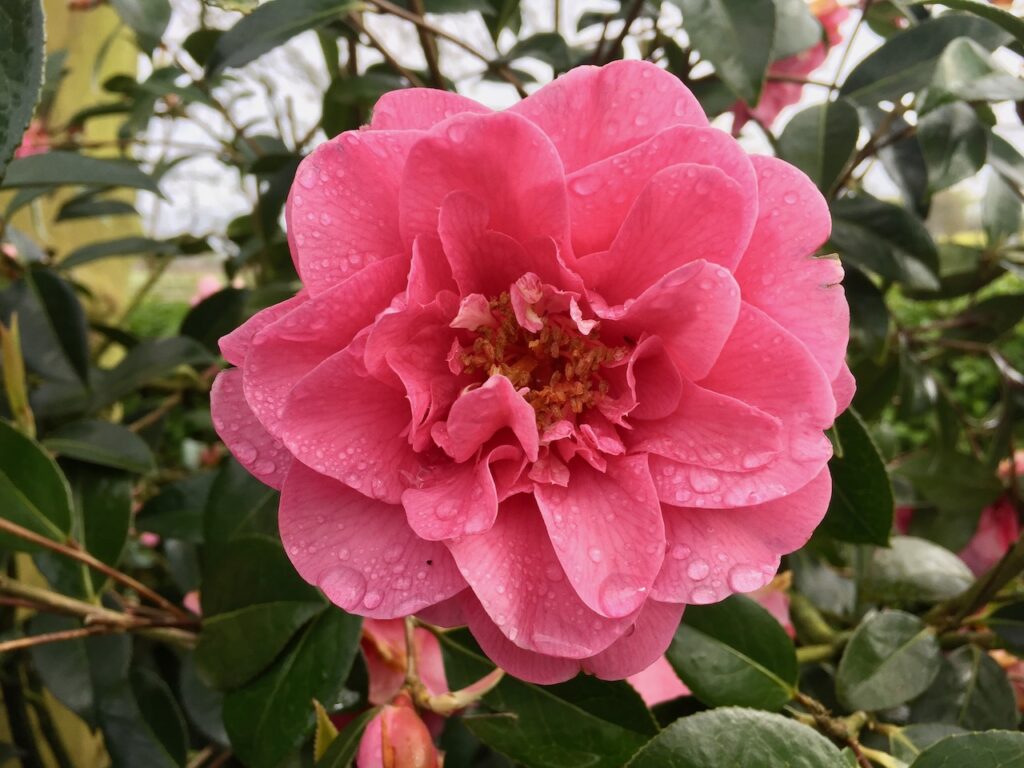
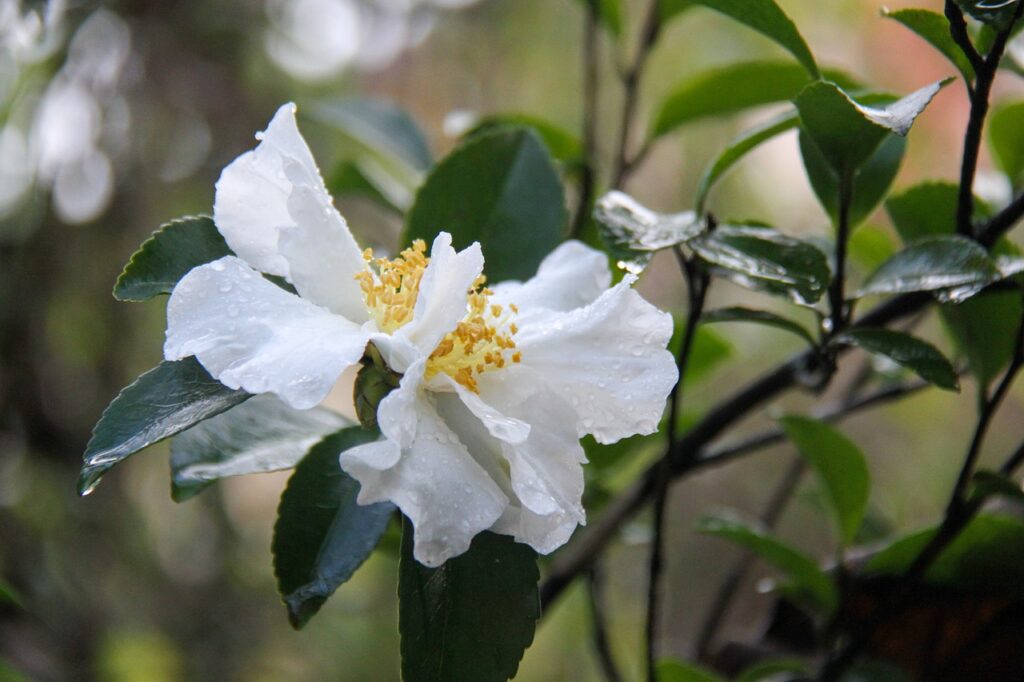
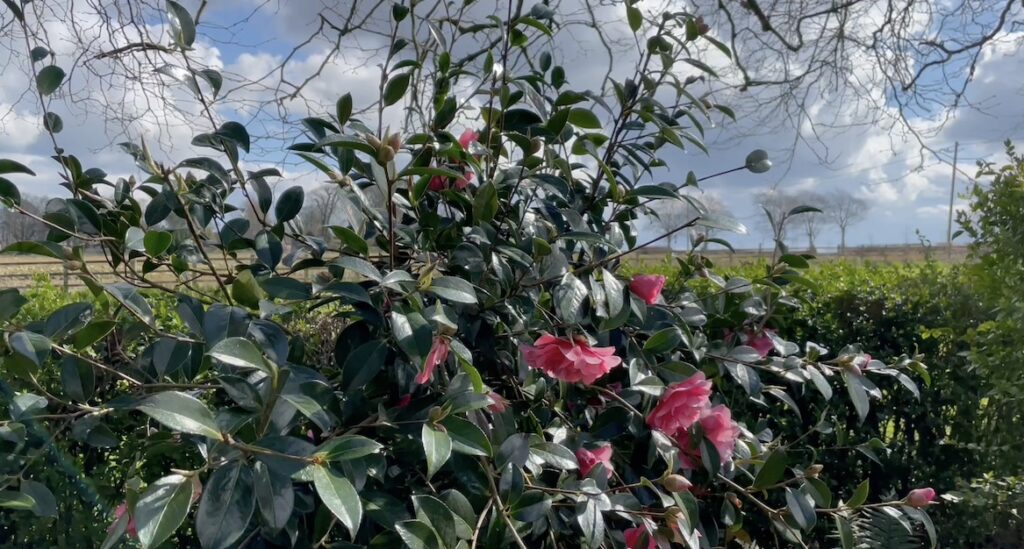
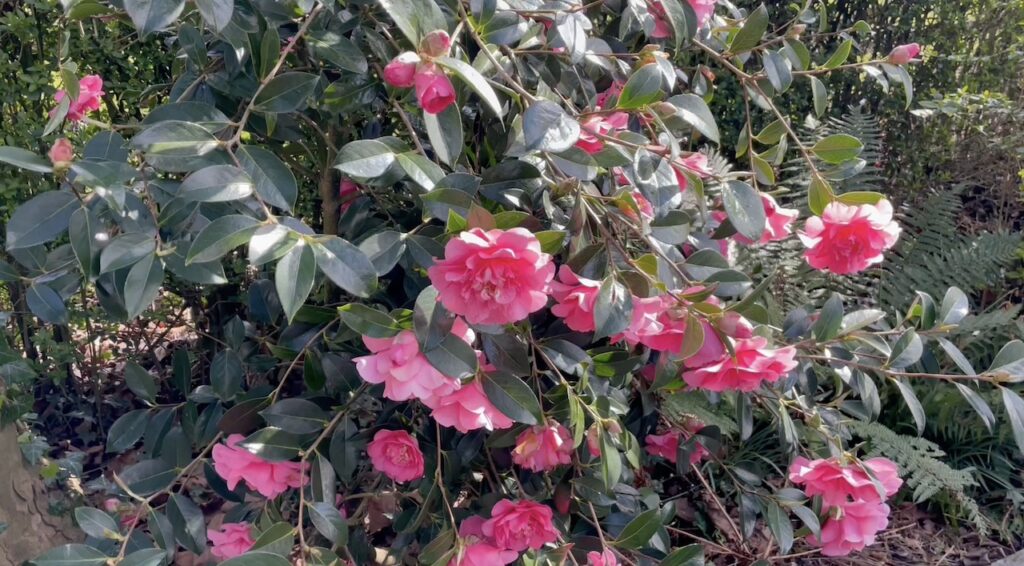
The most common in British gardens is Camellia japonica. These late winter and spring bloomers typically flower from February through to May, depending on your location and the specific cultivar. Their flowers range from simple singles to elaborate doubles in colours spanning white, pink, red, and everything in between.
ii) Camellia × williamsii hybrids
Camellia x williamsii hybrids have become increasingly popular due to their exceptional hardiness and extended flowering period. These robust plants bloom from March through to late April and are particularly well-suited to cooler regions of the UK. They tend to be more compact than japonicas and naturally drop their spent blooms, keeping themselves tidy.
iii) Camellia sasanqua varieties
Sansanqua are the unusual autumn and early winter bloomers, flowering from October through to February. These camellias are slightly more tender than their japonica cousins and may need winter protection in colder areas. Their flowers are often fragrant and have a more delicate, open appearance.
Why pruning after-flowering is crucial with Camellias
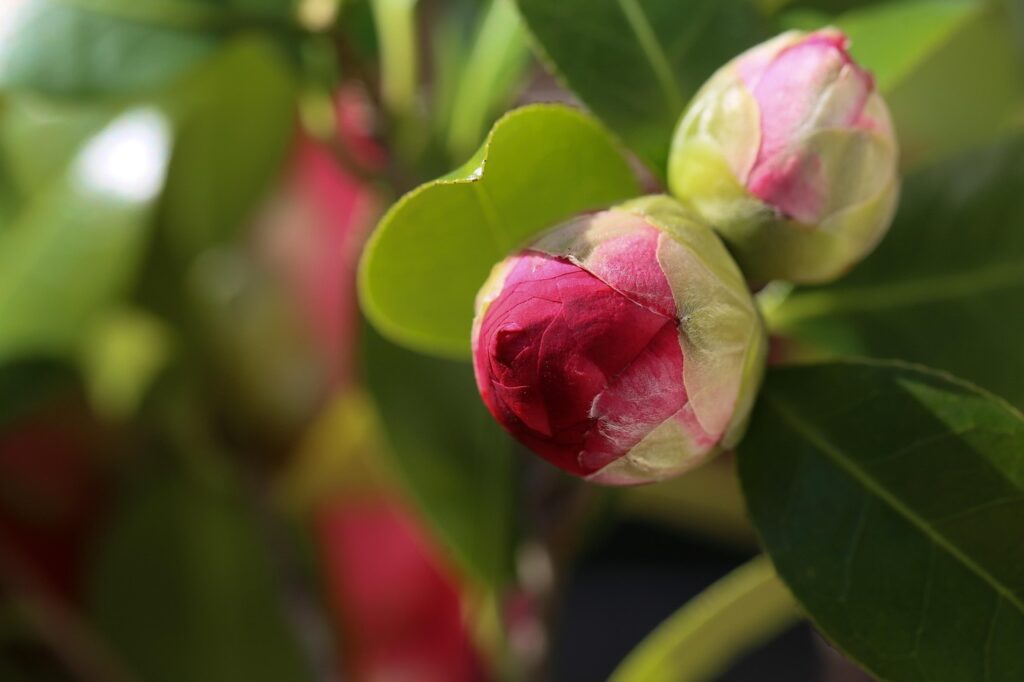
Understanding your camellia’s flowering time is crucial because it determines when you should prune. The golden rule is simple: prune immediately after flowering finishes. This timing ensures you won’t accidentally remove next year’s flower buds, which begin forming shortly after the current season’s blooms fade.
If you prune too early or late, you will sacrifice the next year’s flowers or cause your Camellia to put on lots of leafy growth, leading to very loose, bendy stems, from which the flowers hang awkwardly.
When to Prune Camellias in the UK
Timing is absolutely everything when it comes to pruning camellias successfully. The safest time to prune is right after all of the flowers have faded, as most flowering shrubs should be pruned immediately after blooming to allow the shrub to form new growth and flower buds before the next bloom cycle. Using super sharp, clean secateurs is key, and my old classic Okatsune snips are, in my opinion, the very best.
For Camellia japonica and × williamsii varieties, this typically means late spring pruning in May or June. Wait until every last bloom has finished and the petals have dropped before reaching for your secateurs. This timing allows the plant to channel its energy into producing new growth and setting buds for next year’s spectacular display.
Camellia sasanqua varieties should be pruned in late winter or very early spring, usually February or March, after their autumn and winter flowering period has completely finished.
If you see a branch that looks diseased, is broken, or is heavily infested with pests, feel free to remove it at any time of year, regardless of flowering time. Dead, damaged, or diseased wood should always be removed promptly to maintain plant health.
Cease any pruning of camellias after June to avoid removing the developing flower buds for next year’s display. If you miss your pruning window, it’s better to wait until after next year’s flowering rather than risk sacrificing your blooms.
Here’s a helpful timing table for UK gardeners:
Camellia Type
Flowering Period
Best Pruning Time
Key Points
Camellia japonica
February – May
Late May – June
Wait for all blooms to finish completely
Camellia × williamsii
March – Late April
May – Early June
Extended flowering period may delay pruning
Camellia sasanqua
October – February
Late February – March
More tender; may need winter protection
Emergency pruning
Any time
Any time
Only for dead, diseased, or damaged growth
Why Prune Camellias?
You might wonder whether camellias actually need pruning at all. After all, these are naturally elegant plants that often maintain a pleasing shape without intervention. Camellias can benefit from pruning every few years to stimulate healthy growth and thin out the more twiggy branches, but it’s not always essential.
However, there are several compelling reasons to include camellia pruning in your gardening routine. The most important reason for pruning camellias is to improve the overall health of the plant, as many times, camellias that have not been pruned in a few years will develop dead or degenerative twigs. Removing this unproductive growth allows the plant to redirect its energy into vigorous new shoots and abundant flowering.
A) Rejuvenating overgrown plants
Many times, camellias that have been neglected for a number of years will become infested with insects such as scale, and severely pruning such infested camellias will not only re-invigorate the plant but will also reduce insect problems. A well-timed prune can transform a struggling camellia into a thriving centrepiece.
B) Improving air circulation through the plant
This is vital for preventing diseases such as sooty mould and scale insects. A late spring pruning will also allow sunlight to penetrate the interior of the shrub, creating a healthier environment for the plant and reducing pest problems.
C) Controlling size and shape
This becomes important as camellias mature. These plants can eventually outgrow their intended space, and pruning allows you to maintain them at a manageable size whilst preserving their natural elegance.
D) Encouraging better flowering
Which, let’s be honest, is perhaps the most rewarding benefit! The difference between a plant smothered in colourful flowers and one that is just ho-hum is often the result of pruning. Proper pruning techniques redirect the plant’s energy into flower production rather than excessive vegetative growth.
Essential Tools for Pruning Camellias
Having the right tools makes camellia pruning a pleasure rather than a chore. Quality equipment ensures clean cuts that heal quickly and reduces the risk of damaging your plants or introducing diseases.
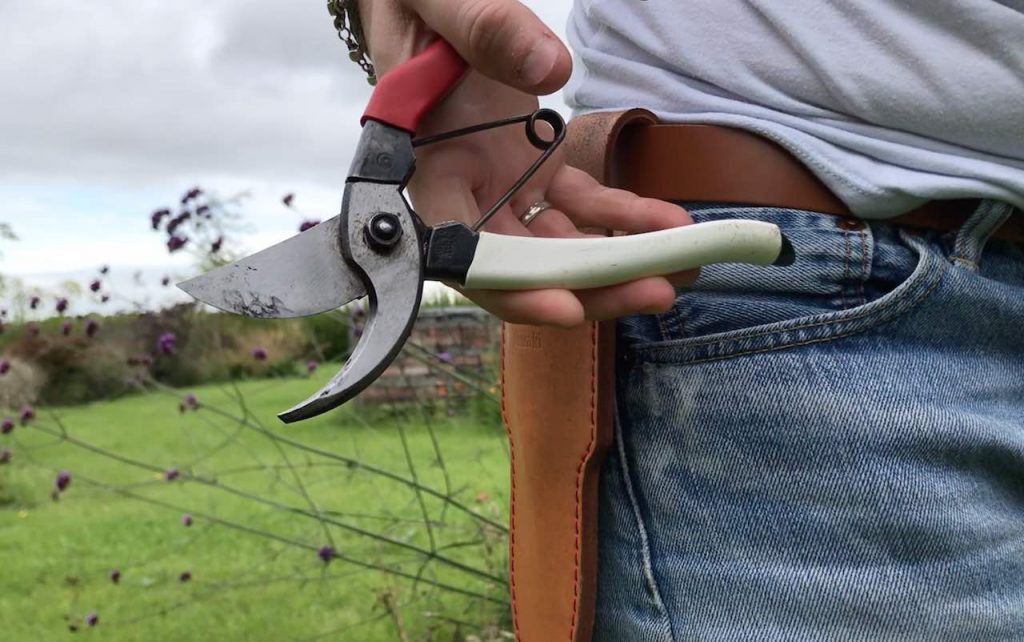
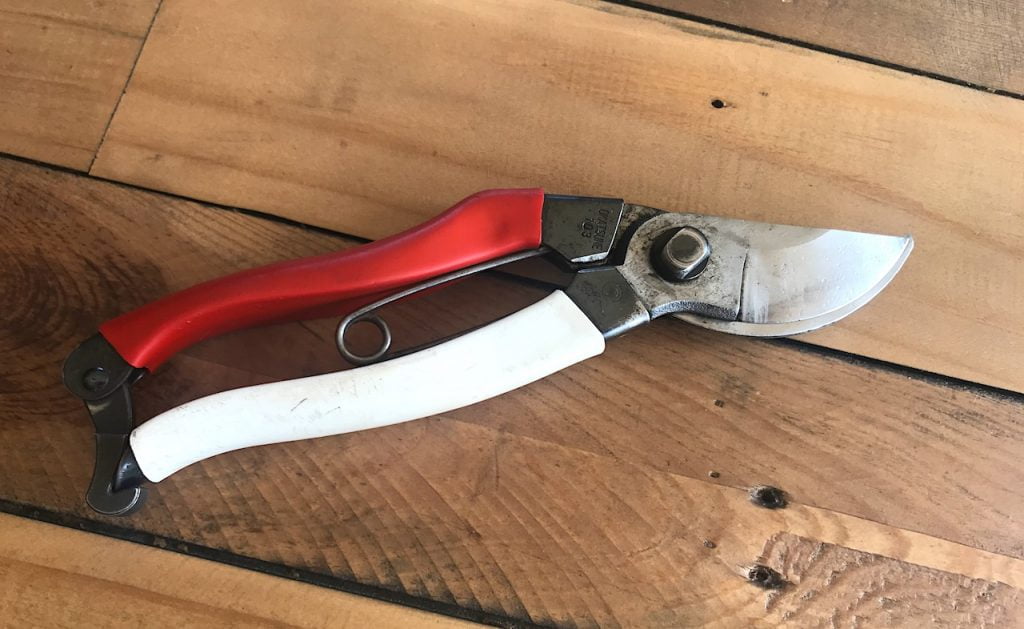
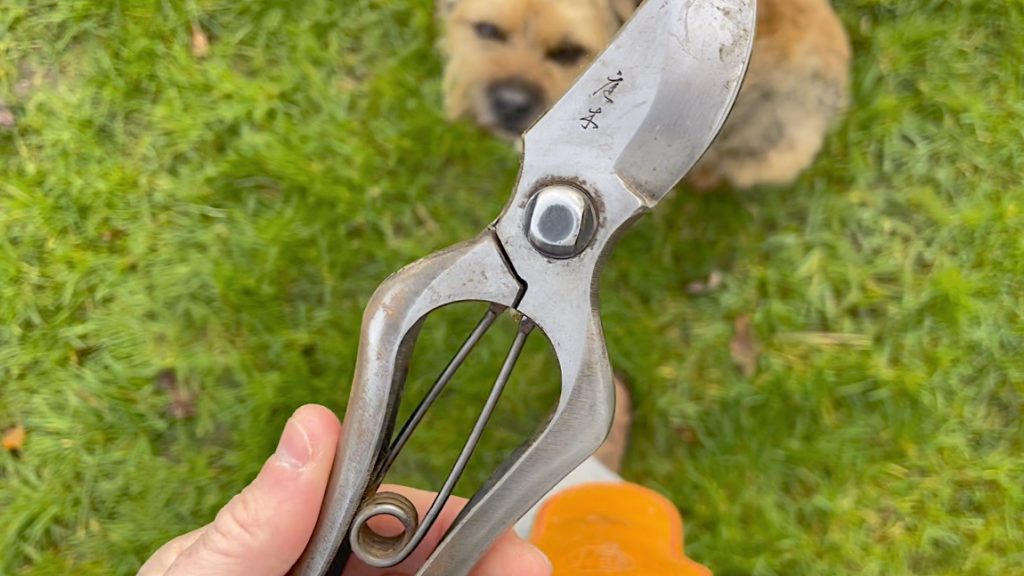
i) Sharp bypass secateurs
Secateurs are your primary pruning tool, and you need a decent pair. Choose a well-made pair with sharp, clean blades that can cut through stems up to about 2cm in diameter. I love these Okatsune Japanese secateurs that I have had for over a decade, and they are brilliant. It is essential to use sharp tools when pruning camellias, as a sharp cut will heal more quickly than a jagged one, which also minimises the likelihood of disease infecting the cut during pruning. I recommend investing in quality secateurs that can be sharpened and maintained over many years.
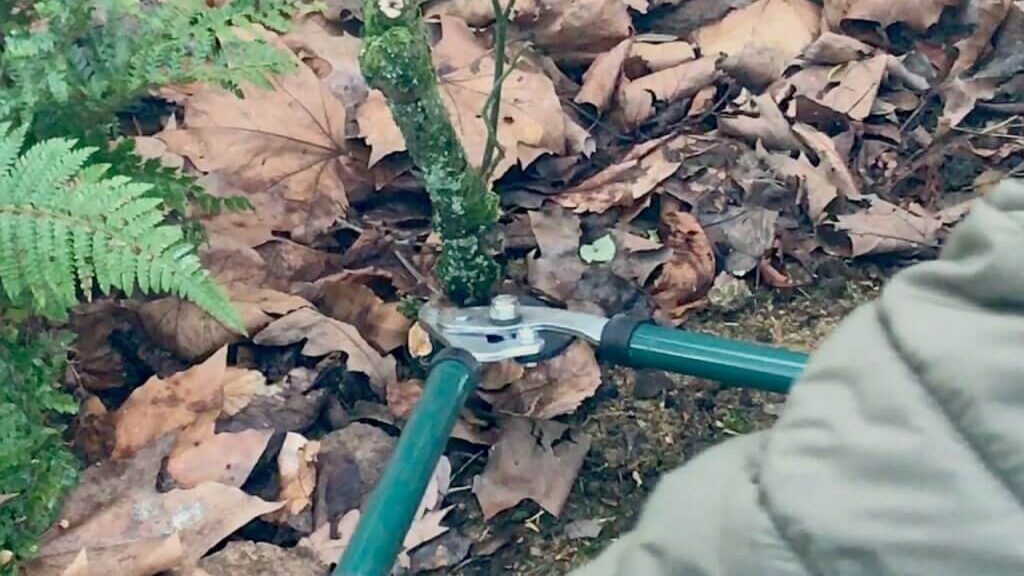
ii) Loppers
Heavy-duty loppers become necessary for larger branches up to 5cm in diameter. Choose lightweight loppers with long handles for better leverage and reach. Bypass loppers are preferable to anvil types as they make cleaner cuts.
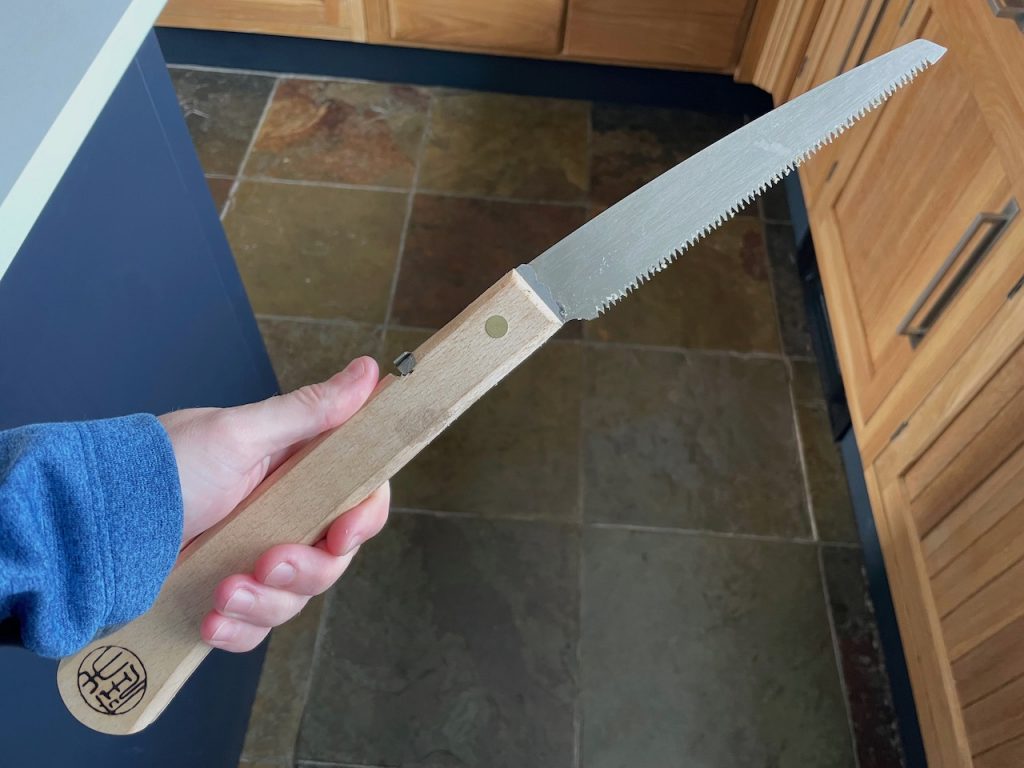
iii) A pruning saw
Pruning saws are essential for any branches thicker than your loppers can handle comfortably. It is generally recommended not to use power equipment such as gas hedgers to prune camellias as they quickly start to chew through more delicate branches, so stick to hand tools for the best results. You can far better control a pruning saw than a chainsaw Ninjas!
iv) Clean cloth and a bucket of disinfectant
Crucial for cleaning your tools between plants. This simple step prevents the spread of diseases and keeps your camellias healthy. Use a mix of 1 part bleach to 10 parts warm water.
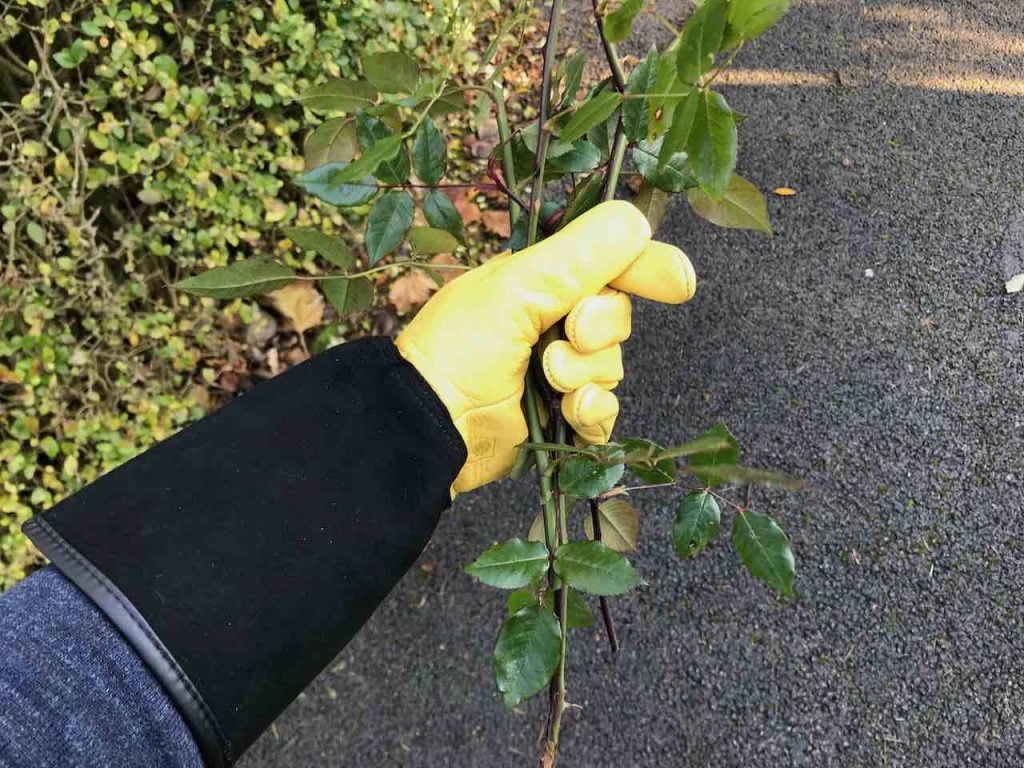
v) Sturdy gardening gloves
To protect your hands from scratches and provide a better grip on your tools. I love Gold Leaf Gloves, which are my go-to choice for all pruning, as they are thorn-resistant and extremely comfortable.
vi) A trug or bucket for collecting prunings
This keeps your work area tidy and makes disposal easier later. Plastic trugs work well to hold all of the above tools as you walk over to your camellia and then hold the clippings. Probably one of my most used garden tools and good value to!
Before you begin pruning, take a few minutes to clean and sharpen your tools. Well-maintained equipment makes the job easier and produces better results for your plants.
The Four-Step Camellia Pruning Method
Pruning camellias successfully doesn’t require years of experience or complex techniques. This simple four-step method will work for virtually any camellia, regardless of age or condition. Think of it as giving your plant a health check and a haircut in one go.
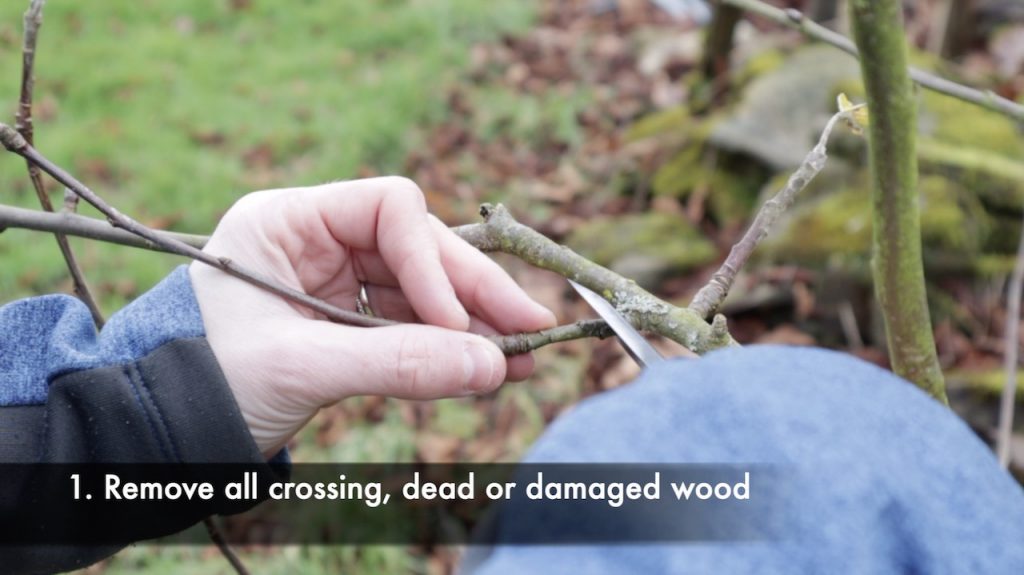
Step 1: Remove the Three D’s
Start every pruning session by looking for dead, damaged, and diseased wood. This fundamental step improves plant health and makes it easier to assess what additional pruning might be needed.
Dead wood appears brown, brittle, or hollow when you scratch the bark with your fingernail. Use bypass pruners to cut off the dead branches from the source, or at least two inches below the damaged point. Don’t be afraid to remove entire branches if they’re completely lifeless.
Damaged wood includes broken branches, splits in the bark, or areas where branches have been rubbing against each other. These wounds can become entry points for diseases, so remove them cleanly.
Diseased wood might show signs of canker, unusual discolouration, or fungal growth. Cut back to healthy, white wood, and clean your tools thoroughly afterwards to prevent spreading the problem.
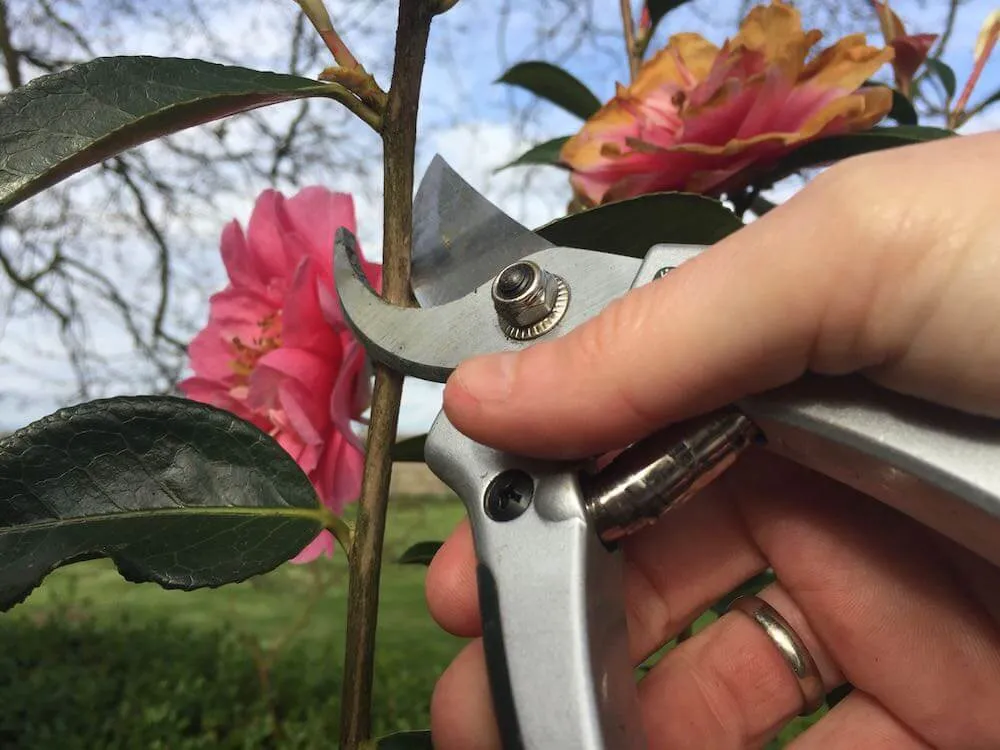
Prune limbs flush to the feeder branches without leaving nubs, as these leftover branches could eventually provide host for disease to enter your camellias. Make your cuts just above an outward-facing bud or back to the main stem.
Step 2: Remove Crossing and Rubbing Branches
To help prevent disease and pests, you need to know how to prune camellias to open up the center of the plant. Look for branches that cross through the centre of the plant or rub against each other. These create congestion and can damage the bark where they touch.
When you find crossing branches, remove the weaker or less well-positioned one. Generally, keep branches that grow outwards from the centre of the plant and remove those growing inwards. This creates the open, vase-like shape that camellias naturally want to achieve.
Removing these branches and foliage clears some space for air and light to reach the foliage growing in the shaded areas of the shrub. Good air circulation reduces the likelihood of fungal problems and creates a healthier environment for your camellia.
Step 3: Shape and Size Control
Now comes the creative part, where you can influence your camellia’s ultimate shape and size. How much you cut off the branches depends on the desired effect.
For light maintenance pruning on healthy, well-shaped plants, trim 1 inch (2.5cm) off the ends of the branches to encourage more growth and produce a taller, bushier shrub. This gentle approach maintains the plant’s natural form whilst encouraging fresh growth.
For more significant size reduction, you can safely remove up to one-third of the current year’s growth. Severe pruning of camellias is generally thought to involve the removal of one-third to one-half of the existing plant, though this more drastic approach is usually only necessary for renovation work.
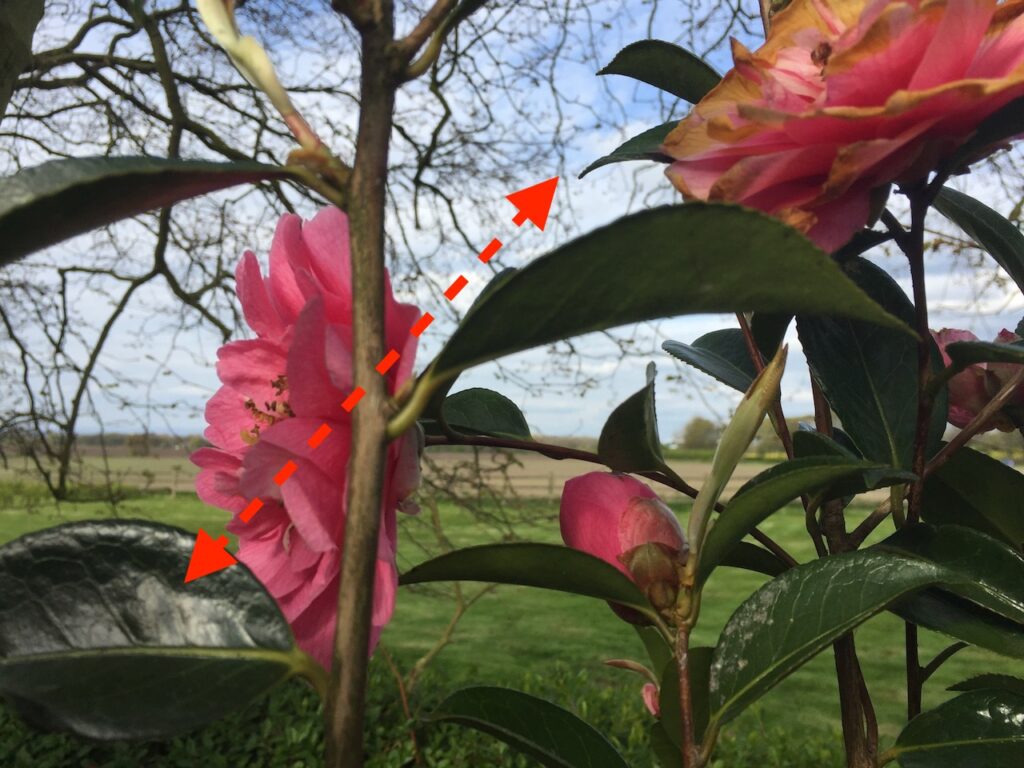
Always cut back to just above an outward-facing bud see the picture above showing the perfect place to make cuttings when pruning camellias. This encourages growth away from the centre of the plant, maintaining that desirable open shape. Make your cuts at a slight angle, sloping away from the bud to help water run off.
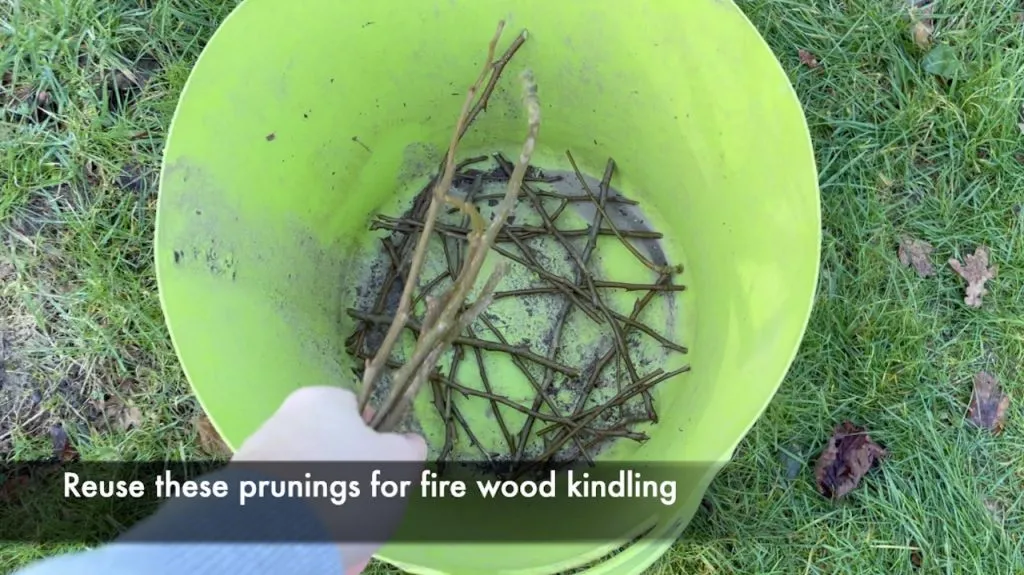
Step 4: Clean Up and Mulch
Don’t forget this vital final step! Collect all your prunings and dispose of them appropriately. While you can compost rose cuttings, I’d be mindful that they take a while to break down – the same applies to camellia prunings, which can be composted but break down slowly.
After pruning, apply a generous layer of mulch around the base of your camellia. Use well-rotted compost, leaf mould, or bark chips, keeping the mulch away from the trunk itself. This feeds the plant as it breaks down and helps retain moisture during the growing season.
Renovating Neglected Camellias
Sometimes you’ll encounter camellias that have been neglected for years and need more dramatic intervention. Don’t despair – camellias are strong plants that usually bounce back well, even after a severe pruning.
Hard renovation pruning involves cutting the entire plant back quite severely, sometimes to just 3 feet tall. This might compromise blooms for the following year, but should encourage new, strong growth and plenty of flowers in the future.
Severe pruning should be done just after the plant has finished blooming. In some instances, where the required pruning would be drastic, it may be done towards the end of February, even if the plant has not finished blooming.
The renovation process works best spread over several years rather than attempting to transform the plant in one go. In the first year, remove the worst of the dead and crossing growth, reducing the overall size by about half. The following year, you can refine the shape and remove any weak growth that has appeared.
Be patient with renovated camellias. During the second season following severe pruning, the camellia should resume normal bud setting, and the plant should have healthier blooms because of the increased vigor in the plant.
A Brief History: How Camellias Came to Britain
After all that pruning, you may start to wonder where the exotic flowering beauty of the Camellia genus came from in the first place. The story of camellias in British gardens is a fascinating tale of plant exploration, mistaken identity, and horticultural passion. Camellias were cultivated in the gardens of China for centuries before they were seen in Europe, with their widespread cultivation tracing back to the Song Dynasty, when 15 varieties of Camellia japonica were recorded in literature. Camellias are native to China, Japan and other parts of Eastern Asia.
It is generally agreed that the Camellia japonica arrived in London aboard a boat of the East India Company. Tea was brought to Europe aboard ships of the East India Company from China. Officials attempted to introduce tea plants to England for propagation, but by mistake or on purpose, Camellia japonica plants were sent by the Chinese instead. James Cunningham, a Scottish surgeon and botanist working for the East India Company, brought back Camellia sinensis and Camellia fraterna. The propagation of these plants to make ‘tea’ did not give the desired result. It is also said that the British had been given ornamental shrubs regardless of the tea species.
The first living camellias seen in England were a single red and a single white, grown and flowered in his garden at Thorndon Hall, Essex, by Robert James, Lord Petre, among the keenest gardeners of his generation, in 1739. Grown from seed, these were single-flowering specimens grown under glass. From then on, further species were brought in by sea, and the obsession with camellias in our British gardens began!
How to crown lift a Camellia
Creating a camellia tree is another renovation option for large, overgrown specimens. Huge old camellias can be renovated into an attractive tree in one year by cutting off all branches from the lower reach of the trunk and cutting out any rubbing or crossing limbs from the remaining upper foliage. This is known as crown lifting.
Watch my video on how to crown lift a fir tree to see a practical example, doing this to a camellia tree is no different!
Pruning Young Camellias
You shouldn’t need to prune a young camellia plant until it’s around 4 years old, except to remove broken or diseased branches. Young plants require time to establish their root systems and develop a strong framework before undergoing major pruning. SO I always recommend leaving young camellias for 4-5 years before any pruning takes place other than dfead heading after flowering.
For newly planted camellias, focus on:
Removing any damaged growth from planting or transport
Pinching out the growing tips to encourage bushier growth
Removing any thin, weak shoots that won’t contribute to the plant’s structure
Young, newly planted camellias can be shaped by cutting back any thin shoots or removing them completely, which will also help to encourage a bushy shrub to form however, pruning should be light touch as camellias are slow growing.
Avoid heavy pruning on young plants as this can delay establishment and flowering. Instead, allow them to develop naturally for their first few years, only intervening to remove obvious problems.
Special Considerations for Different Varieties
While the basic pruning principles apply to all camellias, different varieties have specific characteristics worth noting.
Camellia sasanqua varieties tend to have a more open, informal growth habit compared to japonicas. They often benefit from lighter pruning to maintain their natural grace. Little or no pruning required. Cut out weak stems and prune after flowering if required is often the best approach for sasanquas.
Camellia × williamsii hybrids are generally more compact and naturally well-shaped than japonicas. They drop their spent flowers automatically, so there’s less need for deadheading, and they often require minimal pruning beyond basic maintenance.
Large-flowered varieties may benefit from light pruning to prevent branches becoming too heavy with blooms and breaking under their own weight.
Compact and dwarf varieties usually need very little pruning other than occasional tidying and the removal of any growth that spoils their neat shape.
Common Camellia Pruning Mistakes to Avoid
Even experienced gardeners can make errors when pruning camellias. Here are the most common mistakes and how to avoid them:
Pruning at the wrong time is the cardinal sin of camellia care. It is heartbreaking when people tell me about how their healthy Camellia never flowers, only to find out they are pruning the flower buds off themselves in early spring thinking they are tidying up their shrub. Always wait until flowering is completely finished.
Using blunt or dirty tools leads to ragged cuts that heal poorly and can introduce diseases. Keep your tools sharp and clean throughout the pruning session. Sharpening secateurs is easy when you know how, and a couple of minutes of maintenance can make all the difference when pruning any plant.
Leaving stubs when removing branches creates perfect conditions for disease to enter the plant. Many gardeners apply a pruning sealant or paint to all cut surfaces after pruning, but this practice is generally not necessary, as clean cuts heal naturally.
Over-pruning young plants can delay establishment and flowering. Be patient and allow young camellias to develop naturally. I’d always advocated a hands off approach with any camellia under 5 years old unless its damaged.
Pruning in frosty conditions can damage both you and the plant. No one wants to be out with Jack Frost biting at their fingers. Always wait for a mild day before pruning, which is kinder to your camellias. Remember, they come from tropical climes and won’t appreciate cold shocks!
Ignoring the plant’s natural shape often results in awkward-looking specimens. Work with your camellia’s natural growth habit rather than fighting against it. With the only exception being keeping the top part of the shrub slightly narrower than the base to keep it balanced especially if you live somewhere exposed.
Aftercare Following Pruning
Proper aftercare ensures your newly pruned camellias recover quickly and produce excellent growth and flowering. Think of pruning as minor surgery – the patient needs good post-operative care to thrive.
a) Watering after pruning.
Watering becomes crucial in the weeks following pruning, especially during dry spells. Newly pruned plants put energy into producing fresh growth, which requires consistent moisture. Water deeply but infrequently, allowing the soil to dry slightly between waterings.
b) Feeding helps fuel new growth.
Apply a balanced, ericaceous fertiliser in late spring after pruning. Fertilise well with an acid-plant fertiliser like HollyTone after pruning to encourage healthy growth. Avoid high-nitrogen feeds which can promote soft, disease-prone growth.
c) Mulching to keep water in
Mulching provides a slow-release feed as it breaks down and helps retain soil moisture. Apply a 5-8cm layer of well-rotted compost, leaf mould, or bark chips around the plant, keeping it away from the trunk
d) Protection may be needed for recently pruned camellias in exposed positions.
Strong winds can damage new growth; consider installing temporary windbreaks if necessary. Likewise provide a heavy mulch in very sunny spots to stop your newly pruned camellia from drying out especially in heat waves.
Troubleshooting Common Problems
Even with careful pruning, you might encounter some challenges. Here’s how to address the most common issues:
No flowers after pruning usually indicates that pruning was done too late in the season, removing next year’s flower buds. Keep in mind that if you have to cut the plant back severely, you might not have many flowers in the following year, but it’s necessary for its long-term health. Be patient – flowering will resume the following year.
Weak, spindly growth following pruning often results from insufficient light or poor feeding. Ensure the plant receives adequate light and apply an ericaceous fertiliser to encourage stronger growth.
Die-back after pruning can occur if tools weren’t clean or cuts were made in unsuitable weather. Remove any affected growth cleanly and ensure better tool hygiene for future pruning sessions.
Pest problems on new growth are common as fresh shoots are attractive to aphids and other insects. Regular monitoring and early intervention with insecticidal soap or other appropriate treatments will keep problems under control.
Seasonal Camellia Care Beyond Pruning
While pruning is crucial for camellia health, it’s just one part of comprehensive care that keeps these magnificent plants thriving year-round. Camellia plants are acidic soil-loving tough shrubs, but every now and then they may need a bit of care and attention, mainly in the form of feeding or mulching, especially if in very dry or nutrient-deficient soil. Let me show you my top Ninja care tips to keep your camellia shrubs looking good.
Spring care
Involves applying ericaceous fertiliser after pruning and ensuring adequate watering as new growth begins. This is also an excellent time to check for winter damage and remove any affected growth. I tend to only feed my camellias if they are showing signs of weakness such as yellowing leaves or black spot. They really don’t need huge amounts of plant feed, contrary to what the big garden centres will tell you!
Summer care
I focus on consistent deep watering every few weeks, especially during dry periods. Camellias set their flower buds during summer, so adequate moisture is crucial for next year’s display. Mulching helps retain soil moisture and suppresses weeds.
Autumn care
For tender varieties like sasanquas I apply a final feed of potash-rich fertiliser to help harden growth before winter. But for other camellias I do nothing!
Winter care
Leave your camellias well alone they can tolerate winter surprisingly well for the most part so save your efforts. This is also when you can plan next year’s pruning schedule.
Creating Your Camellia Pruning Schedule
Developing a systematic approach to camellia pruning ensures you never miss the optimal timing and helps maintain all your plants in peak condition.
Create a simple calendar noting when each of your camellias finishes flowering. This becomes your pruning schedule for the following season. Keep notes about what pruning you’ve done and how the plants respond – this builds valuable experience for future years.
I opt for these razor sharp Japangese secateurs but you can pick up a decent off the shelf pair for under £10.
Consider grouping plants by type and flowering time to make pruning sessions more efficient. You might dedicate one weekend to all your japonicas and another to sasanquas, for example.
Don’t feel you must prune every camellia every year. Healthy, well-shaped plants might only need attention every 2-3 years, whilst others may benefit from annual light pruning.
Transform Your Entire Garden with Expert Design Knowledge
Mastering camellia pruning is just the beginning of creating your dream garden! If you’re inspired by the transformation that proper pruning can achieve, imagine what you could accomplish with professional garden design skills.
Ready to take your gardening to the next level? Join thousands of Garden Ninjas who’ve discovered the secrets of stunning garden design through Lee Burkhill’s award-winning online courses. Whether you’re dreaming of redesigning your own outdoor space or considering a rewarding career change, these expertly crafted courses will transform you from a gardening enthusiast to a confident designer.
29
Garden Design Examples for Small Gardens: 30 Design Templates & Planting Plans
Garden Design Examples for Small Gardens: 30 Design Templates & Planting Plans: In this online gardening course, I’ll walk you through 30 fantastic garden designs, explaining the logic behind the layout, the plant choices, and take-home tips for applying them in your own garden.
Weekend Garden Makeover: A Crash Course in Design for Beginners
Learn how to transform and design your own garden with Lee Burkhills crash course in garden design. Over 5 hours Lee will teach you how to design your own dream garden. Featuring practical design examples, planting ideas and video guides. Learn how to design your garden in one weekend!
Garden Design for Beginners: Create Your Dream Garden in Just 4 Weeks
Garden Design for Beginners Online Course: If you want to make the career jump to becoming a garden designer or to learn how to design your own garden, this is the beginner course for you. Join me, Lee Burkhill, an award-winning garden designer, as I train you in the art of beautiful garden design.
Start your garden design journey from just £29 with our expert garden templates course, featuring 30 professional design examples with detailed planting plans. No need for expensive college courses or years of study – learn at your own pace with video lessons, interactive quizzes, and lifetime access to all materials.
From weekend garden makeovers to comprehensive design training, our courses are taught by Lee Burkhill, the Garden Ninja himself and presenter on BBC1’s Garden Rescue. You’ll gain the same expertise that’s transformed gardens across the country, all from the comfort of your own home.
Pruning camellias successfully is far simpler than many gardeners imagine. By understanding your plants’ flowering times, using the right tools, and following the straightforward four-step method outlined in this guide, you can keep your camellias healthy, beautifully shaped, and flowering abundantly for decades to come.
Remember that timing is everything.Prune immediately after flowering finishes to avoid removing next year’s flower buds. Focus on plant health first by removing dead, damaged, and diseased growth, then move on to improving the plant’s shape and size. Work with your camellia’s natural growth habit rather than against it, and don’t be afraid to tackle renovation projects on neglected specimens.
Camellias are strong plants that usually bounce back well, even after severe pruning, so approach your pruning with confidence. The reward of seeing a well-pruned camellia burst into bloom, its flowers perfectly displayed on a healthy, well-shaped plant, makes every careful cut worthwhile.
Whether you’re maintaining established plants or renovating inherited specimens, the principles in this guide will serve you well. Take your time, be observant, and remember that every expert was once a beginner. Your camellias will reward your care with years of spectacular flowering and elegant presence in your garden.
For more detailed pruning guidance on other garden favourites, explore our comprehensive rose pruning guide, learn about winter versus summer pruning, or discover the secrets of fruit tree pruning. Each plant has its own requirements, but the fundamental principles of good pruning remain consistent across the garden.
Now grab those secateurs and give your camellias the attention they deserve. Your future self will thank you when you’re enjoying the most spectacular camellia display your garden has ever produced!