Lee Burkhill: Award Winning Designer & BBC 1's Garden Rescue Presenters Official Blog
Intermediate level
One of the most common questions I get asked, both on BBC Garden Rescue and through the Garden Ninja forum, is what tools and equipment you need to start designing your own garden. The good news is that you do not need an expensive CAD package or a professional drafting table to produce a brilliant garden design. What you do need is the right set of physical drawing and measuring tools, a clear head, and the willingness to spend a few happy hours at a kitchen table with graph paper and a decent pencil.
Quick Answer
To design your own garden you need a handful of affordable drawing tools and measuring equipment. The essentials are A3 graph paper, tracing paper, a 10m tape measure, a compass and quality pencils. A lightbox and pop-up easel make the process considerably more comfortable, and coloured pencils or watercolours let you bring your design to life. Digital tools like SketchUp come later once you have the spatial thinking that hand drawing builds first.
What equipment do I need to design my own garden?
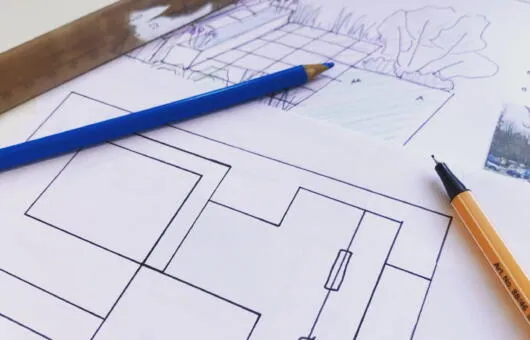
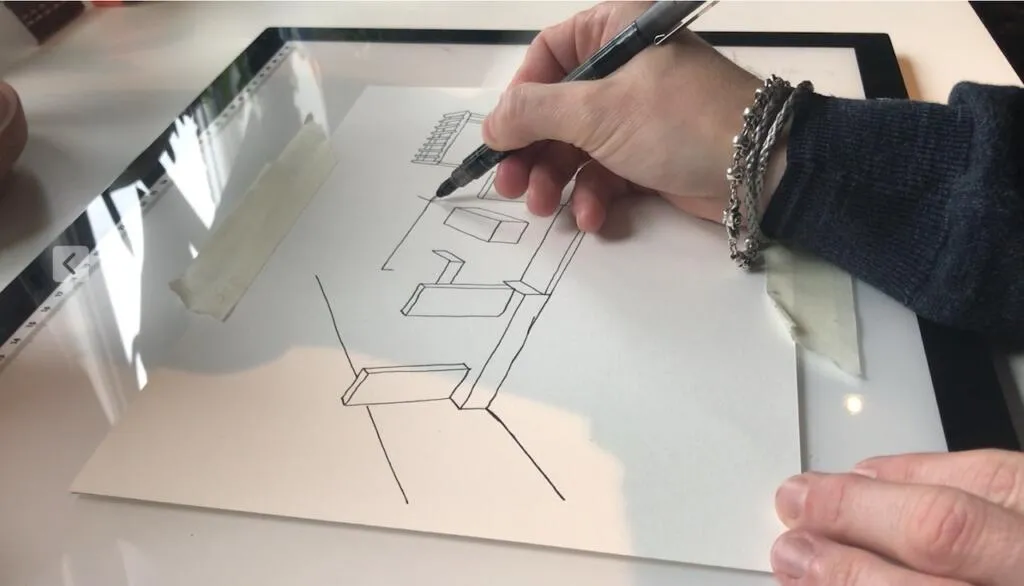
I have been designing gardens professionally for over 20 years, and I still reach for graph paper and a fine liner when I am working through an initial design concept. There is something about the physical act of drawing to scale that forces you to think spatially in a way that clicking around a screen simply does not. So, before we get into the digital tools, let us cover all the physical equipment you need from the ground up.
This page contains affiliate links for products I use and recommend. If you purchase through these links, Garden Ninja earns a small commission at no extra cost to you. I only recommend tools I have personally used or would confidently recommend to my clients.
1. Start with measuring: the foundation of every good design
Before you put pencil to paper, you need accurate measurements of your outdoor space. I cannot stress this enough: a garden design is only as good as the survey it is based on. Guessing distances or pacing them out will leave you with a plan that does not translate to the real garden, and there is nothing more disheartening than discovering your beautiful curved path runs straight into next door’s fence.
Measure twice the entire area and jot these measurements down on your notebook or piece of paper. Mark out every grid, tree, patio, building or feature that already exists. Also mark on where the house meets the garden and the position of the windows, doors and walls.
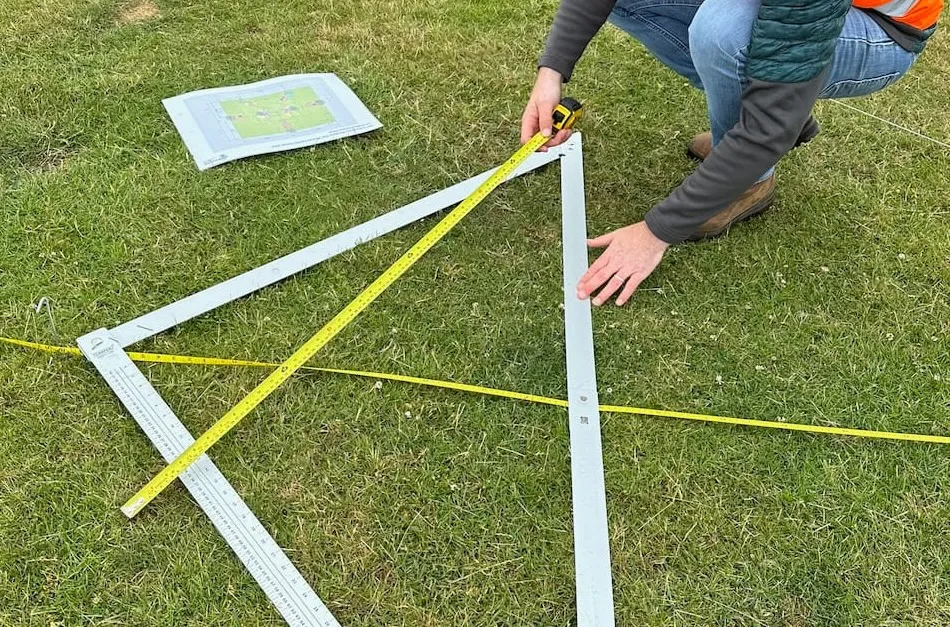
2. 10m tape measure and trundle wheel
A good 10m tape measure is the single most important piece of equipment you will buy. For most domestic gardens, a 10-metre tape covers everything you need, allowing you to measure boundary lengths, set out diagonals, and triangulate fixed features like manholes and drains. Buy a steel tape rather than a fabric one, as steel holds its tension and gives you accurate readings across the full length. A locking mechanism is also worth having so you can hold a measurement while you note it down.
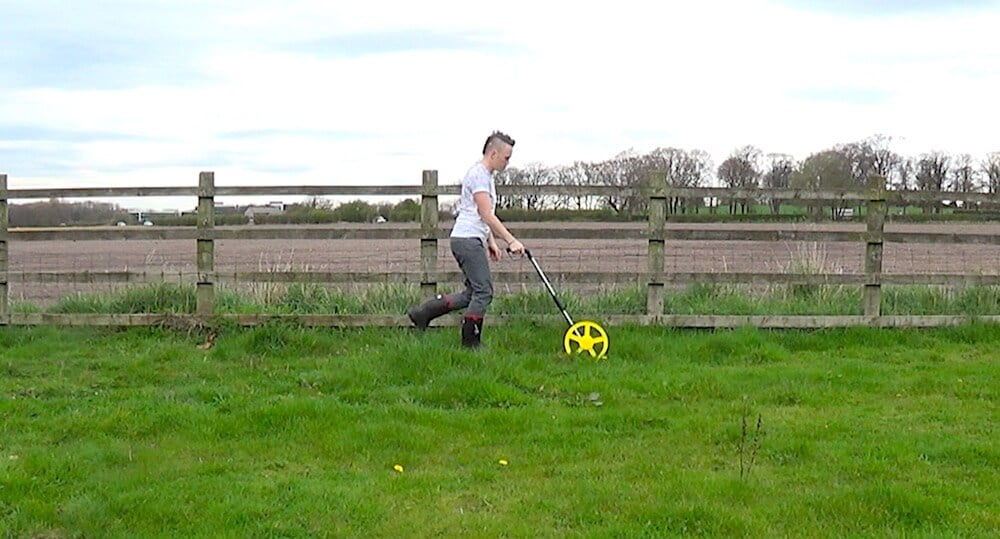
For longer gardens or larger plots, a trundle wheel is a fantastic addition to your kit. These click every metre as you walk, making it very easy to measure long boundaries without a second pair of hands. They fold flat for storage and are far less fatiguing than crawling along a lawn with a tape. If your garden is over 20 metres in any direction, you will thank yourself for having one.
Always measure your garden on a dry day. Wet grass can compress under a tape and add a few centimetres of error over longer distances, which adds up when you are working to scale on paper.
3. Spray line
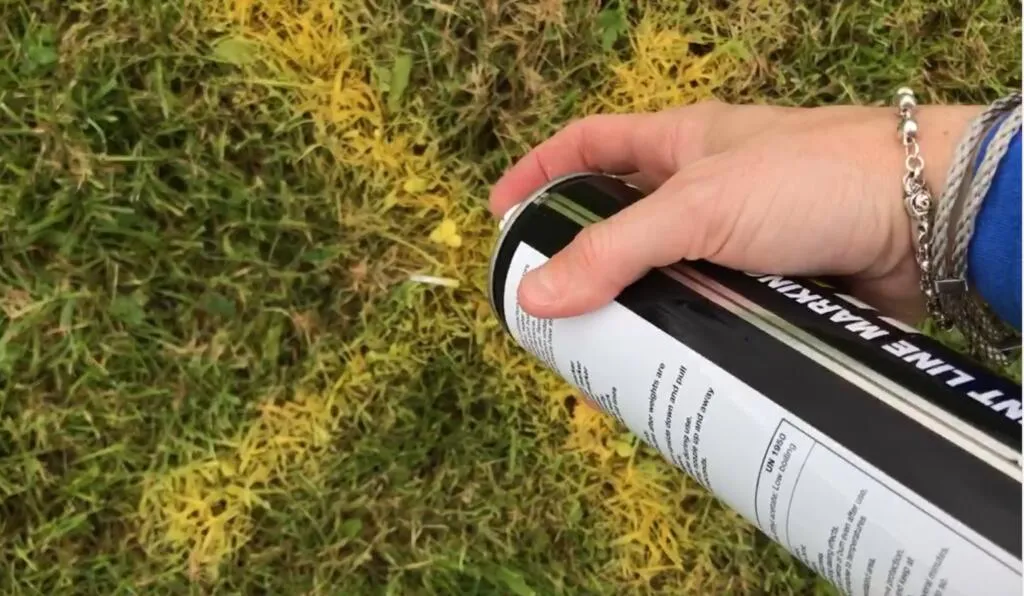
A spray line is something many amateur garden designers overlook, but it is absolutely invaluable when you want to test curves and layout ideas at full scale in the garden before committing them to paper. These are brightly coloured aerosol paint cans specifically formulated to temporarily mark grass and soil. They wash away with rain within a week or two.
The real value of a spray line is that it letsyou walk your design before you draw it. I often sketch a rough idea on graph paper, then take my spray line outside and mark out the proposed path, patio edge, or planting boundary at actual size. Standing in the space and looking at the proportions at full size changes your perception in a way that looking at a plan simply cannot replicate. Curves that look generous on A3 can feel pinched at real scale, and a spray line immediately reveals that.
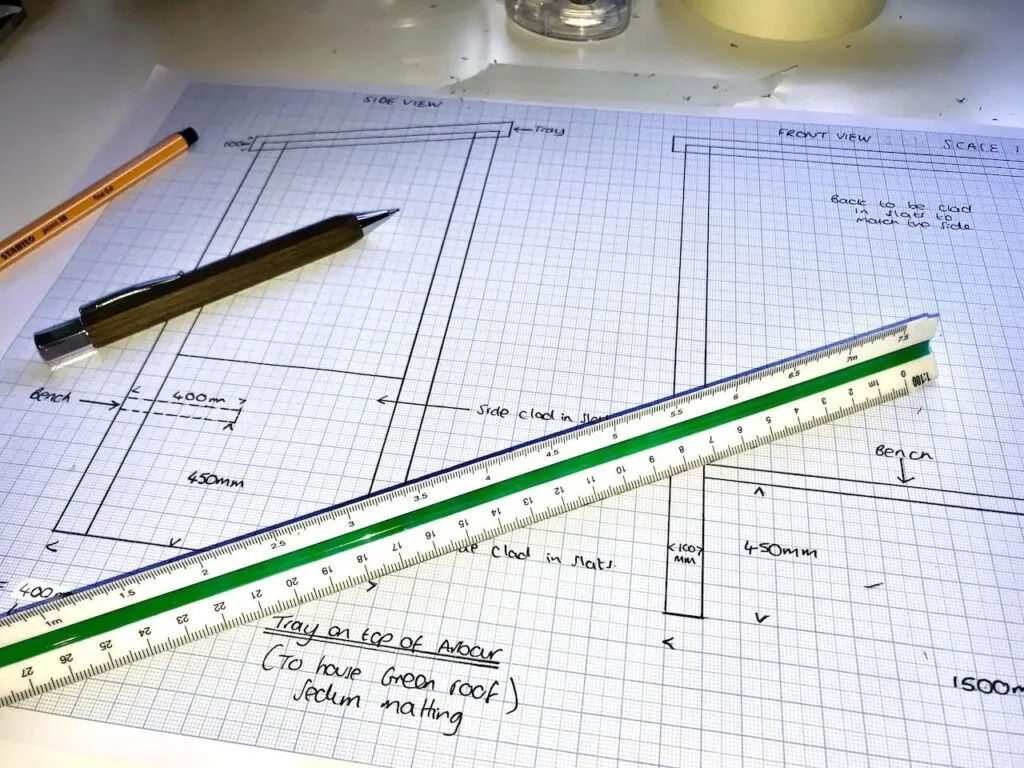
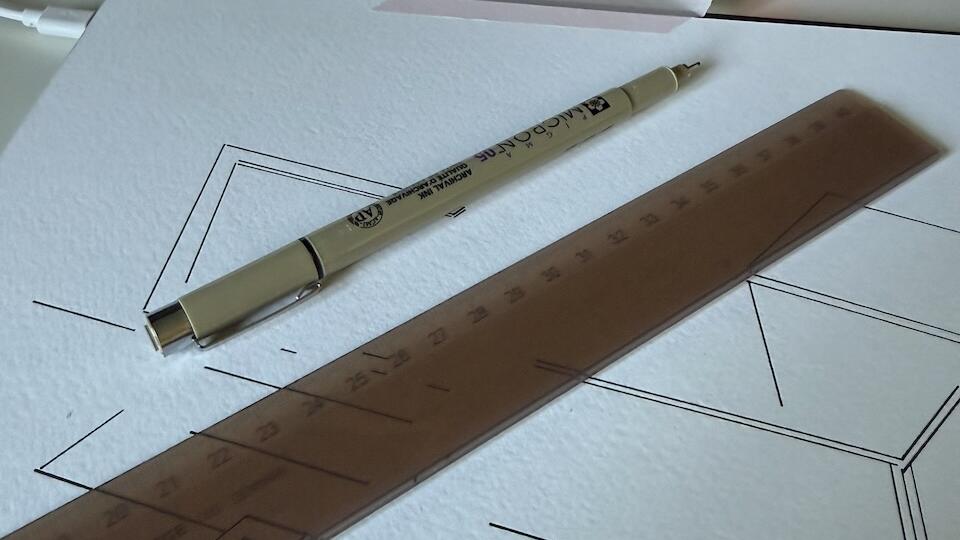
Now that we have our external survey and measurements, it’s time to apply them at scale to your paper. This is where the scale ruler comes in. Scale rulers allow you to reduce the external size of the garden, say 10m long by 5m wide, onto your sheet of paper. Think of it as shrinking your garden down to fit on paper, so your new layout, flower beds, patios, and features are drawn to scale and will fit the garden space.
The most common scales are 1:50 and 1:100, which translate to 1:100 being 1cm per meter and 1:50 being 2cm per meter on paper. So if you draw a 5cm-long patio on your paper, it corresponds to a 1:100 scale for a 5m-long patio, etc.
A3 graph paper is the starting point for your drawn survey and your design. The reason you use A3 rather than A4 is scale. Most domestic gardens at a scale of 1:50 (where one centimetre on paper equals 50 centimetres on the ground) simply will not fit onto A4 without either shrinking the scale so much that detail is lost or splitting the plan across multiple sheets.
A3 gives you a working area of 42 x 29.7 cm, which at 1:50 represents a real-world area of 21 x 14.8 metres. That comfortably covers the vast majority of UK back gardens.
Buy a pad of 5mm grid graph paper rather than 2mm or 10mm. The 5mm squares are the standard for garden design work because each square at 1:50 scale represents 25 centimetres, making it very easy to mark half-metre and one-metre increments. Buy a good-quality pad with 80 gsm or heavier paper so your pencil lines do not ghost through to the sheet beneath when you press firmly.
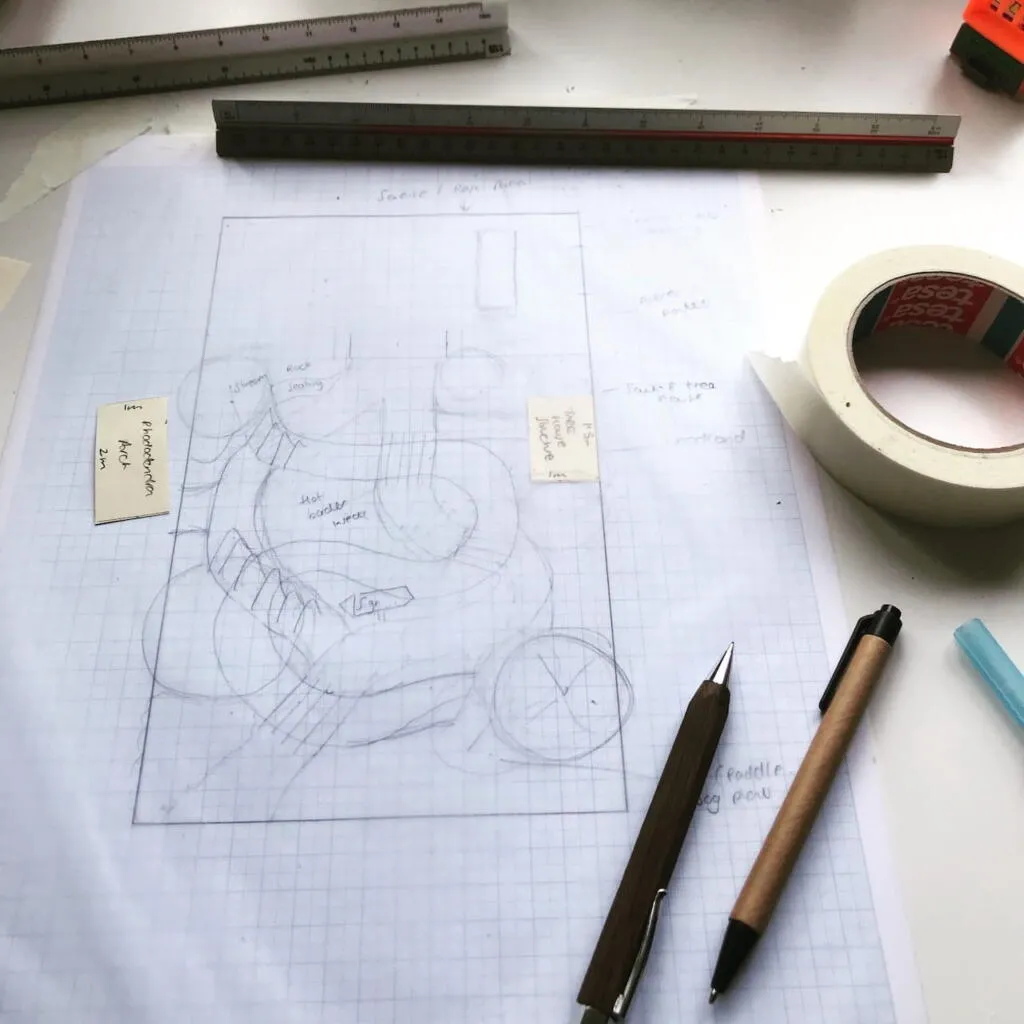
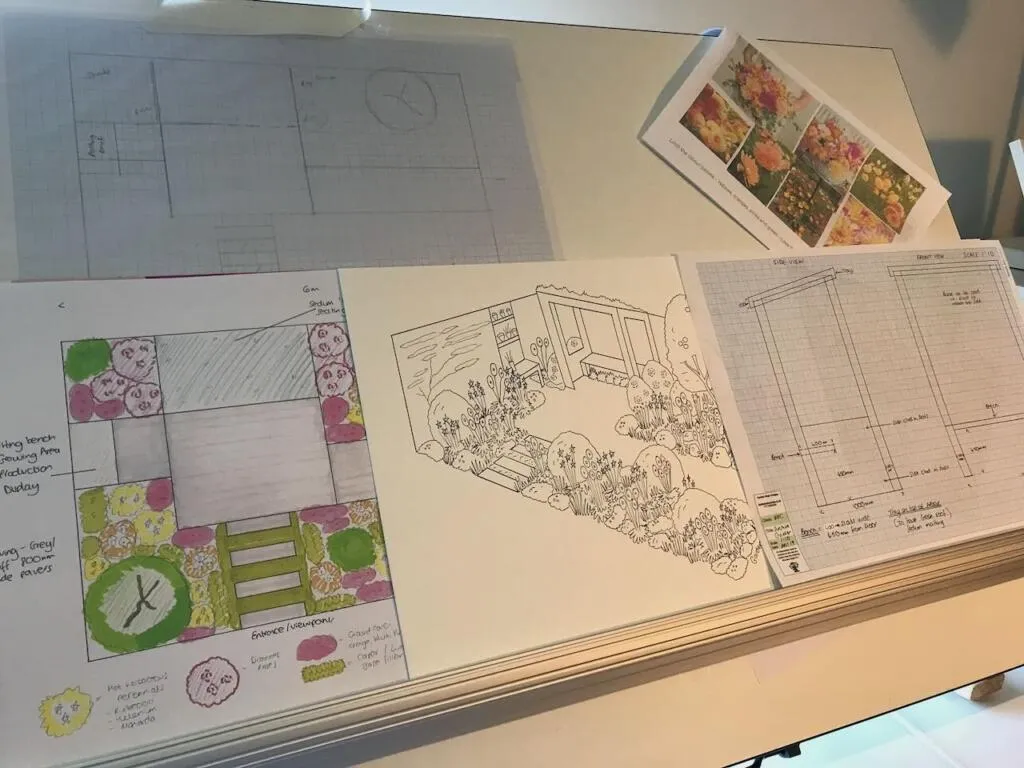
Tracing paper is where garden design gets genuinely exciting, and it is one of those tools that immediately makes the whole process feel much more professional. The workflow is simple: you draw your survey (the existing boundaries, features, and measurements) in pencil on graph paper, then lay a sheet of tracing paper over the top and draw your design ideas on it. This means your survey stays clean and undamaged, and you can try as many design iterations as you like by simply replacing the tracing paper sheet.
I typically go through three or four tracing paper overlays on a single survey before I land on a design I am happy with. The beauty of this system is that each overlay is a complete design in itself, so you can hold them up side by side and compare options without having to redraw the survey each time. This is the professional workflow used in landscape architecture offices, adapted to something you can do at your kitchen table for a few pounds.
Buy a roll rather than a pad if you can, as this lets you cut your tracing paper to exactly the size you need. A 297mm-wide roll (A4 width) is ideal, as it cuts neatly to fit over A3 graph paper with minimal waste.
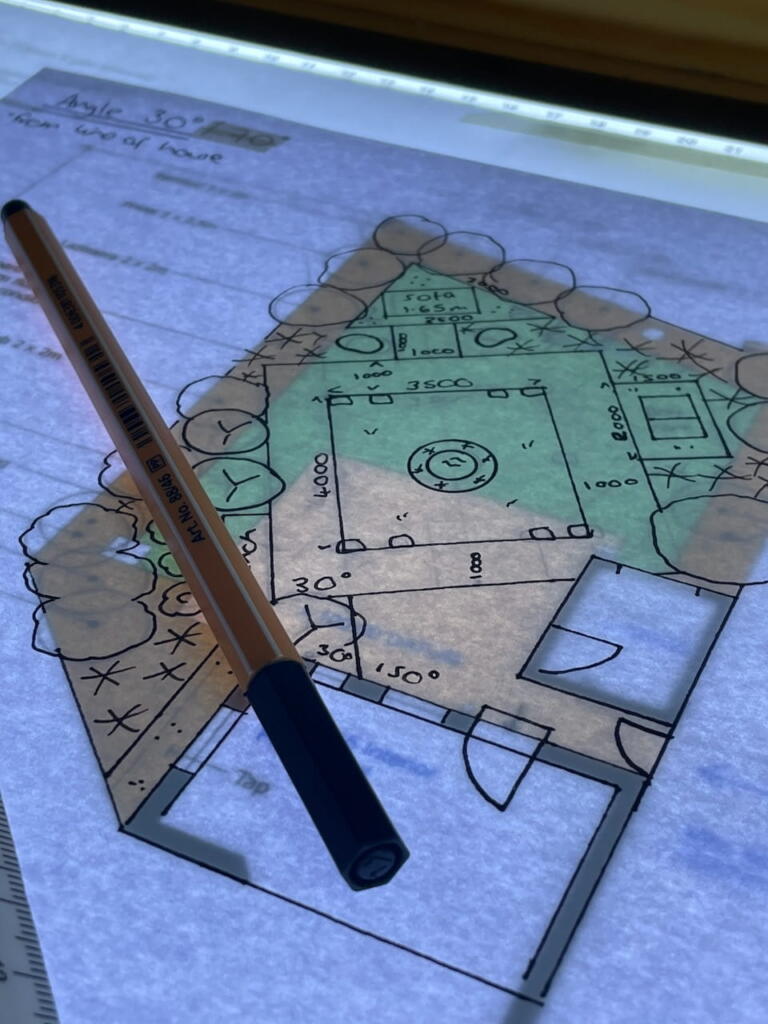
A lightbox is a flat panel that illuminates from below, and for garden design work it is transformative. The challenge with tracing paper overlays is that in normal daylight conditions, you can sometimes struggle to see the graph paper grid lines clearly through the tracing paper, particularly if you are working in the evening or in a room with overhead rather than natural lighting. A lightbox solves this completely by flooding the paper from below with even, bright light so every grid line is crisp and visible.
Modern LED lightboxes are thin, lightweight, and powered by USB, making them easy to pack away when not in use. A lightbox also lets you use thicker, heavier tracing paper without losing the grid beneath, which gives you a better drawing surface for detailed line work. You can also use it to trace and refine artwork, copy plant sketches, and tidy up rough survey drawings before inking them.
You do not need an expensive one. A mid-range A3 LED lightbox with adjustable brightness will do the job well for most garden designers working at home.
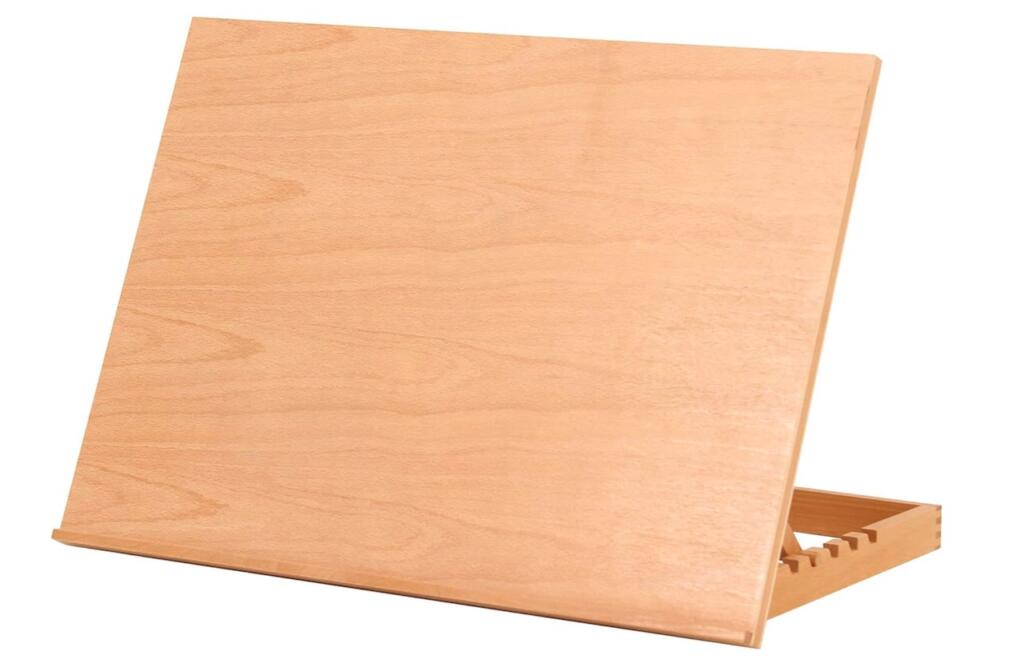
Once you move from the survey stage to the design presentation stage, a pop-up easel becomes a genuinely useful piece of kit. An A2 pop-up easel is a folding display stand that holds your plan upright so you can step back and look at it from a distance, present it to a client, or pin multiple design options side by side for comparison.
Working at a table is fine for drawing, but there comes a point where you need to see your design at arm’s length and from a normal standing perspective. Standing a metre back from your plan and looking at it fresh often reveals proportional issues or missed opportunities that you simply cannot spot when your nose is six inches from the paper.
An easel also lets you present your finished design to whoever you are designing the garden for, whether that is a client, a partner, or a neighbour, in a way that feels considered and professional rather than sliding a crumpled A3 sheet across the kitchen table.
Pop-up versions that fold flat into a carry bag are ideal as they store easily and can be used in the garden itself to show the design in situ.
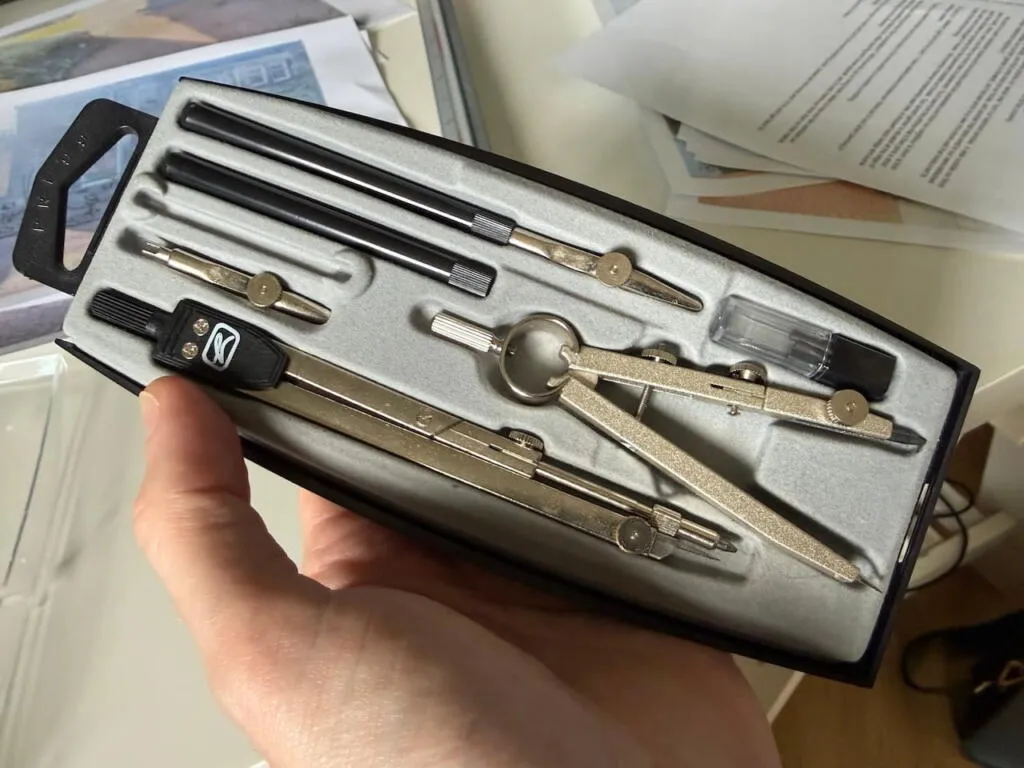
A compass is not just for drawing circles, though it is very useful for that too. In garden design you use a compass for two distinct purposes. The first is drawing curves and arcs to scale on your plan, which is essential for any design with circular lawns, curved paths, or sweeping planting borders. The second is for triangulation during the survey stage, which is how you accurately locate fixed features within your garden by measuring from two known points and drawing two arcs that intersect at the feature’s true position.
Without a compass, drawing a circular lawn or a curved patio edge to an accurate scale is genuinely difficult. You end up with wobbly lines and shapes that do not quite sit right, which then causes problems when you try to set out the design in the real garden. A good quality draughting compass that takes a pencil rather than a ball-point nib gives you clean, precise arcs that you can then ink over with your fine liner.
Buy a metal compass rather than a plastic one, as the plastic hinges loosen quickly and your radius shifts mid-arc, which is infuriating. A set that includes a beam extension for drawing larger radius curves is a worthwhile upgrade.
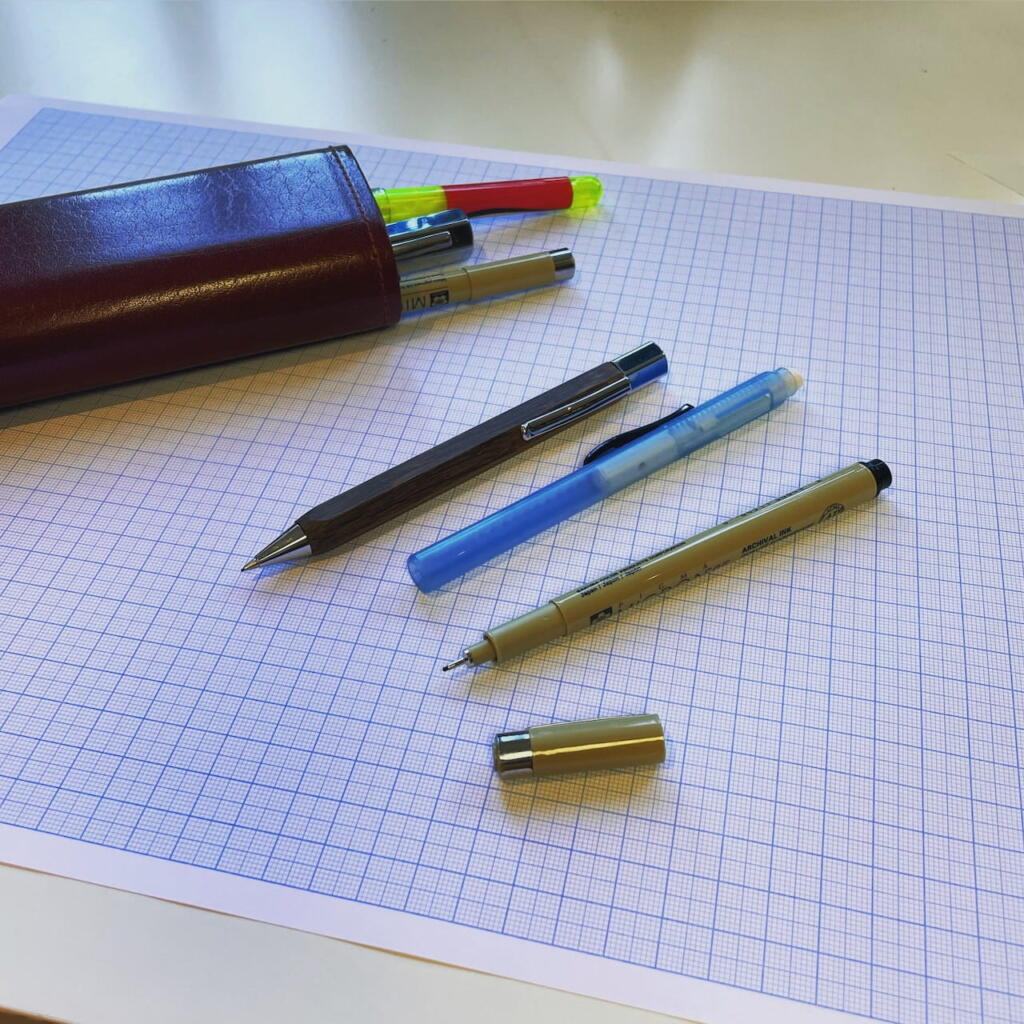
The pencils you use for garden design are not the same ones you use for a shopping list. You want a range of hardness grades, specifically H, HB, and 2B, as these serve different purposes throughout the design process. H pencils are hard and light, ideal for initial survey work and construction lines where you need to be precise but might need to erase. HB is your workhorse for general drawing. 2B gives you a softer, darker line that is good for sketching initial ideas and adding weight to finished lines before inking.
Always keep your pencils sharp. A blunt pencil introduces line-thickness variation that makes your scale work inaccurate, and your finished plan look amateurish. A pencil sharpener on your desk is a very worthwhile investment if you are serious about producing clean drawings, or even better, use a technical propelling pencil instead.
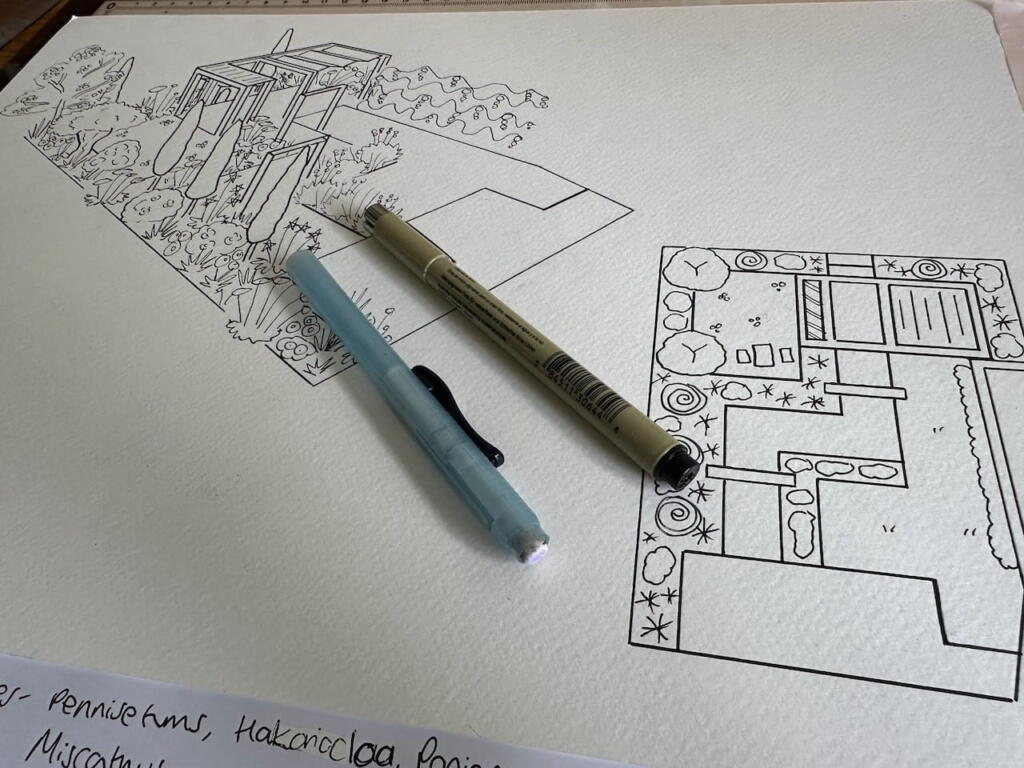
Once your design is finalised in pencil, inking over it with a black fine liner transforms the plan into something you can be proud to show. The single most important property to look for in a fine liner for garden design work is that it is waterproof.
When you apply watercolour washes over your inked plan, a non-waterproof ink will bleed and dissolve into the paint, turning your crisp lines into a muddy blur. Waterproof, pigment-based fine liners will not budge even after multiple wet washes, keeping your linework crisp and your plan legible.
Buy a set with at least three nib sizes: a 0.1mm for detail, a 0.3mm for standard lines, and a 0.5mm or 0.8mm for boundary walls and strong outlines.
When inking your plan, always let the pencil dry for a few seconds after you have drawn a line before going over it in ink. Pencil graphite can contaminate your fine liner nib and cause it to blob or skip, ruining an otherwise clean line.
11. Coloured pencils and watercolours
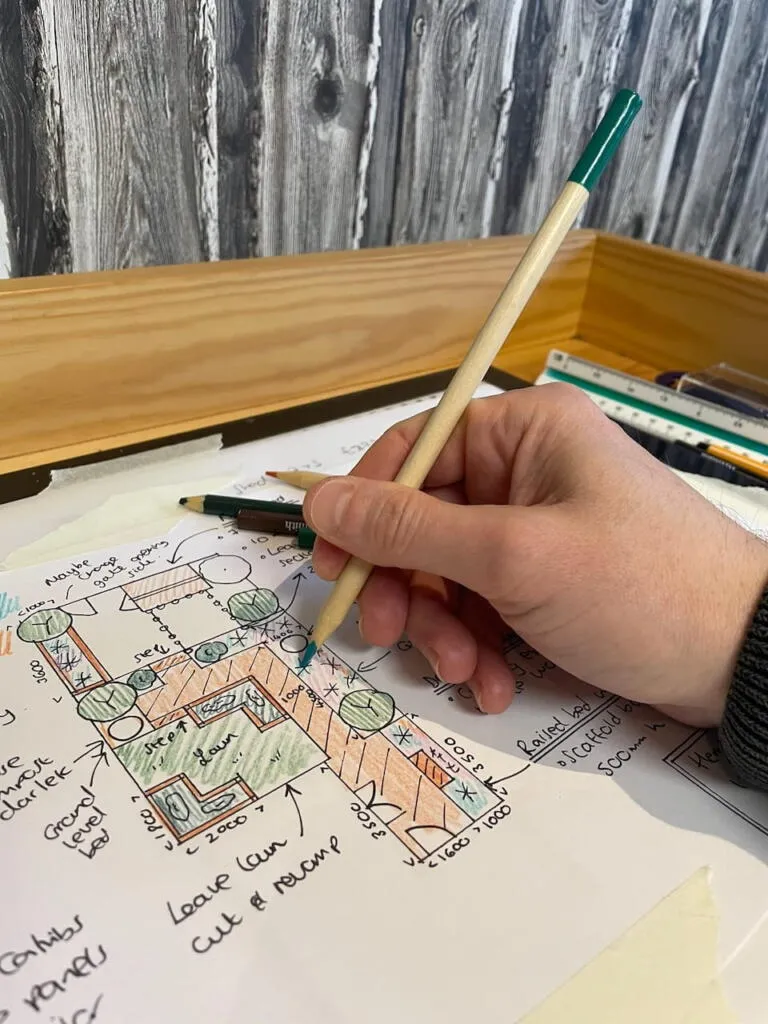
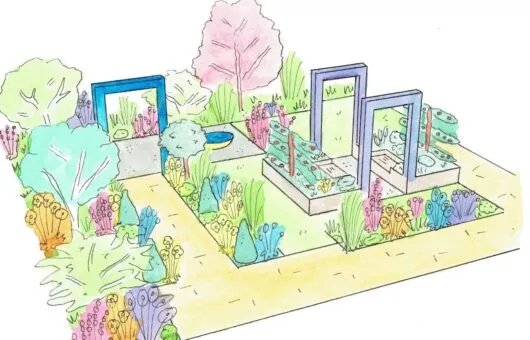
Colour is what transforms a technical plan drawing into a design presentation that people can actually connect with emotionally. When you are showing a garden design to a client, a partner, or even just yourself, a monochrome plan in pencil and ink communicates the layout, but it does not communicate the feeling of the space. Colour is what makes a design come alive.
Coloured pencils are the most forgiving medium for beginners, and they are excellent for rendering planting areas, paving materials, and lawn spaces on a finished plan. The key is to use them lightly and build up colour in layers rather than pressing hard. A gentle hatching stroke in the direction of plant growth works beautifully for borders, while flat, even coverage works well for hard surfaces. Buy a set with a good range of greens and earth tones rather than a set weighted towards bright primaries, as garden design uses a lot of subtle, muted colours.
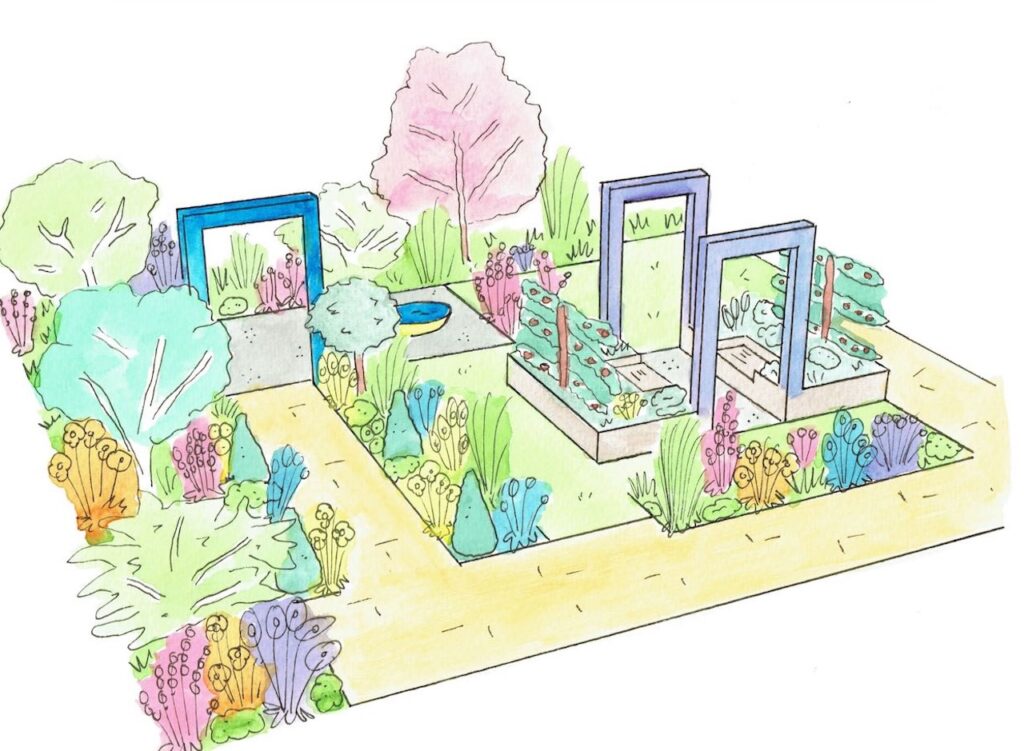
Watercolour takes the presentation to another level entirely and is the medium of choice for professional garden designers who want to produce beautiful rendered plans. You apply a light watercolour wash over your inked plan to add soft, translucent colour, then layer up with coloured pencils over the top for detail. The result is something that looks genuinely impressive and communicates not just the layout of a garden but its atmosphere and character.
You do not need an expensive professional set to begin with. A student-grade pan set of 24 colours will give you all the tones you need, and a few synthetic watercolour brushes in a range of sizes will complete your kit. The most important techniques to learn early are wet-on-dry, where you apply paint to dry paper for crisp edges around hard surfaces and path outlines, and wet-on-wet, for softer, more naturalistic planting areas.
One thing that often catches beginners out is painting on standard graph paper or even ordinary cartridge paper. Watercolour paper is sized (treated to resist water absorption), which means the paint sits on the surface and lifts cleanly rather than bleeding into the fibres and buckling the sheet. For design work, a pad of cold-press A3 watercolour paper gives you the ideal surface for washes over your inked plans. Cold-press has a slight texture that suits garden plans well, holding enough tooth for coloured pencil layering without being so rough that fine line detail is lost. It is one of those upgrades that makes an immediate, visible difference to the quality of your finished render.
12. SketchUp: the best digital tool for garden designers
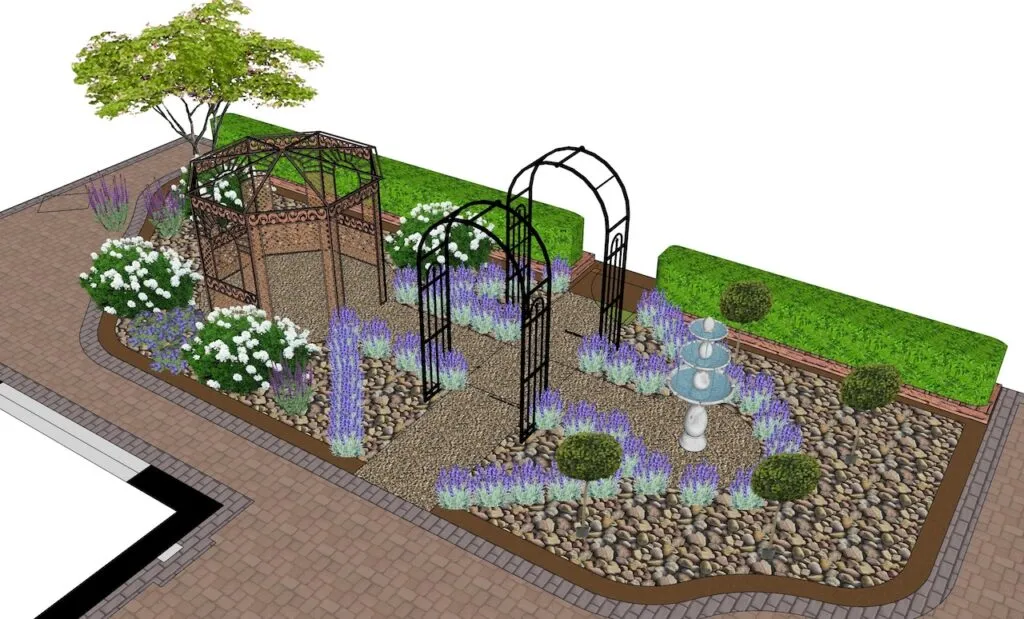
Once you have mastered the basics of hand drawing and feel confident producing a plan to scale, SketchUp is the digital tool I would recommend above any other for garden designers. It is the software used most widely across landscape architecture, garden design, and the broader built environment sector precisely because it is intuitive enough for a beginner to make meaningful progress quickly, while being powerful enough for professional-level work.
SketchUp lets you build a three-dimensional model of your garden, which is something no hand-drawn plan can achieve. You can walk through the space virtually, test how different structures look from different viewpoints, and produce perspective renders that give clients and homeowners a genuinely realistic preview of what the finished garden will look like. The ability to visualise a design in three dimensions before a single spade goes in the ground is one of the most powerful things a garden designer can offer.
SketchUp is sold as an annual subscription through Trimble, the company that now owns it. There are several tiers. SketchUp Go is the web-based version at around £110 per year and does not include the LayOut application for producing professional 2D drawing sets. SketchUp Pro, which is what I would recommend for serious design work, is priced at around £345 to £384 per year, depending on where you purchase it and includes both the desktop application and LayOut.
There is also a completely free browser-based version of SketchUp available at app.sketchup.com that is fine for personal, non-commercial use and a genuinely useful starting point if you want to experiment with 3D modelling before investing in a subscription. The free version has some limitations around file export and extensions, but covers the core modelling tools well.
13. Why hand drawing is easier to learn than CAD and why you should start there
I want to make a strong case for learning to design by hand first, before you ever open SketchUp or any other CAD package. This is not nostalgia or technophobia. It is based on 20 years of professional experience and the observation that almost every designer I know who struggles with spatial thinking started on a computer. Almost every designer I know who developed a strong spatial intuition started with pencil and paper.
The reason is simple. When you draw by hand, you are forced to understand what you are drawing. To draw a circle on graph paper at a radius of 2.5 metres at 1:50 scale, you have to first understand that 2.5 metres at 1:50 is 5 centimetres on paper, set your compass to 5cm, and then draw the arc. That chain of reasoning is doing real spatial work. You are converting between scales, thinking about real dimensions, and making decisions about proportion with your hands. The physical act of drawing instils an understanding of scale and space in your mind that software shortcuts bypass entirely.
By contrast, if you open SketchUp and pull up a rectangle by clicking and dragging, you can resize it in seconds. There is no friction. You can make a patio 10 metres wide as easily as you can make it 2 metres wide, and the program will not tell you that one is ludicrous and the other is practical. The software is infinitely patient and infinitely flexible, which may sound like an advantage, but it actually removes the resistance that hand drawing provides. That resistance is where the learning happens.
Hand drawing also builds confidence in a way that CAD does not. When you sit down with a blank sheet of graph paper and produce a complete garden plan from scratch, you have the satisfaction of having made something tangible with your own hands. The design exists as an object in the world. You can hold it, fold it, or pin it to a wall. That sense of creation and completion is genuinely motivating, and motivation matters enormously when you are learning a new skill.
CAD software has a steep learning curve that is almost entirely about the software itself rather than about design. When you hit a problem in SketchUp, the question you are usually trying to answer is “how do I make SketchUp do what I want?” rather than “how do I solve this design problem?” Those are very different intellectual exercises.
A beginner learning CAD spends their first weeks fighting the interface, and many give up before they even get to the interesting design questions. A beginner learning by hand can produce useful, accurate plans within an hour of picking up a pencil.
There is also the matter of flexibility and spontaneity. A hand sketch takes seconds. You can be standing in your garden, jot a rough idea on a scrap of paper, and immediately test it at scale against your survey drawing when you go back inside. The loop between inspiration and exploration is very short. With CAD, the same process involves opening a laptop, locating your file, loading the software, navigating to the correct view, and making the change. By the time you have done all of that, the spontaneous thought that sparked the idea has often moved on.
My advice is always the same: spend your first three months designing by hand. Get comfortable with scale, learn to read a plan, and develop the ability to visualise three-dimensional space from a two-dimensional drawing. Once you have those foundations, SketchUp or any other CAD tool becomes genuinely powerful in your hands rather than a source of frustration. The two approaches are complementary, not competing. Hand drawing builds the spatial intelligence that makes CAD productive.
💡 Top Tip
If you are keen to progress into SketchUp, spend your first week in the free browser version modelling your existing house outline in 3D. Do not try to design anything. Just practise the push/pull tool, understand how to navigate in 3D space, and get comfortable with the interface. Once you can confidently model a simple building, garden design elements like walls, steps, and raised beds will feel straightforward.
Your complete equipment shopping list
To bring everything together, here is the full list of what I would buy if I were starting from scratch today:
Frequently asked questions about garden design equipment
What scale should I use to draw my garden plan?
For most domestic gardens, 1:50 is the standard scale for design work. This means one centimetre on paper represents 50 centimetres in the real garden. On A3 paper, this gives you a working area equivalent to roughly 21 x 15 metres, which covers the vast majority of UK back gardens. For smaller courtyard gardens or very detailed sections, 1:20 gives more room for detail. For very large gardens over 30 metres in any direction, you may need to scale down to 1:100 to fit the whole site on a single sheet.
Do I need a ruler or set square for garden design?
Yes, both are useful additions to your kit, though I did not include them in the core list as most people have a basic ruler at home. A 30cm clear plastic ruler is essential for drawing straight boundary lines. A set square allows you to draw perfect right angles, which matters when you are setting out rectangular terraces or checking that your plan is true to the grid. A 45/45/90 degree set square covers most situations you will encounter.
Is SketchUp free to use for garden design?
SketchUp offers a free browser-based version at app.sketchup.com for personal, non-commercial use. It gives you access to the core 3D modelling tools and is a good starting point for experimenting with the software. For professional or commercial work, or if you need the LayOut application for producing 2D drawing sets, you will need a paid subscription starting at around £110 per year for SketchUp Go or around £345 to £384 per year for the full SketchUp Pro desktop version. A free trial is available before you commit.
Can I design my garden on an iPad or tablet?
SketchUp Pro now includes a very capable iPad application as part of the subscription, which is worth exploring once you are comfortable with the desktop version. For beginners, I would still recommend starting with physical drawing tools rather than any digital device. That said, apps like Morpholio Trace allow you to sketch over imported photographs on an iPad in a way that has some of the spontaneity of tracing paper, and they can be a useful bridge between hand drawing and full CAD work.
How do I learn to design a garden if I have no training?
My Garden Design for Beginners course covers everything you need to go from a blank sheet of paper to a complete, confident garden design, including how to survey your space, draw to scale, develop a design concept, and present your finished plan. It is designed specifically for people with no formal training who want to design their own garden or start designing for others. You can find it at gardenninja.co.uk alongside the Small Garden Templates pack if you need ready-made layouts to work from.
Garden Design Examples for Small Gardens: 30 Design Templates & Planting Plans
Garden Design Examples for Small Gardens: 30 Design Templates & Planting Plans: In this online gardening course, I’ll walk you through 30 fantastic garden designs, explaining the logic behind the layout, the plant choices, and take-home tips for applying them in your own garden.
Weekend Garden Makeover: A Crash Course in Design for Beginners
Learn how to transform and design your own garden with Lee Burkhills crash course in garden design. Over 5 hours Lee will teach you how to design your own dream garden. Featuring practical design examples, planting ideas and video guides. Learn how to design your garden in one weekend!
Garden Design for Beginners: Create Your Dream Garden in Just 4 Weeks
Garden Design for Beginners Online Course: If you want to make the career jump to becoming a garden designer or to learn how to design your own garden, this is the beginner course for you. Join me, Lee Burkhill, an award-winning garden designer, as I train you in the art of beautiful garden design.
If you’re looking to design your own garden or start out in garden design, this guide shows you the equipment you’ll need to succeed. What I’ve discovered in my career as a Garden Designer is that learning to draw to scale by hand is a foundational skill that enables you to progress as a designer far faster than using software and CAD alone.
Take the time to draw out your gardens in plan and to scale, then get outside and map out the plan on the ground with spray line or garden canes. That way, you can double-check your proportions and test your design layout.
But more of all have fun with the process of creating gorgeous gardens, enjoy the mistakes, redos and learning after all it is part science, part art Ninja! Whether you’re using coloured pencils, water colours, or another medium, make sure your designs stand out and have your own personal hand-drawn flair!
Your subscription could not be saved. Please try again.
Your subscription has been successful.
Lee Burkhill
Lee Burkhill, known as the Garden Ninja, is an award-winning garden designer and horticulturist with over 30 years of gardening experience and 15 years as a professional garden designer. A qualified RHS (Royal Horticultural Society) professional, Lee specialises in sustainable garden design and practical horticultural advice. He designs and presents on BBC1’s Garden Rescue and in leading gardening publications. Lee combines three decades of hands-on gardening knowledge with professional design qualifications to help gardeners create beautiful, functional outdoor spaces.