How to Create a Balcony Garden: The Complete Guide for UK Gardeners
Lee Burkhill: Award Winning Designer & BBC 1's Garden Rescue Presenters Official Blog
Beginner level
Do you live in an apartment or flat with a balcony, but think there's no way you can garden in such a small place? Well, stop there, Ninja. Balcony gardens are a real thing, and this guide is going to show you how to transform your concrete jungle balcony into a thriving green paradise with edible crops and stunning ornamentals, even if you've never grown anything before!
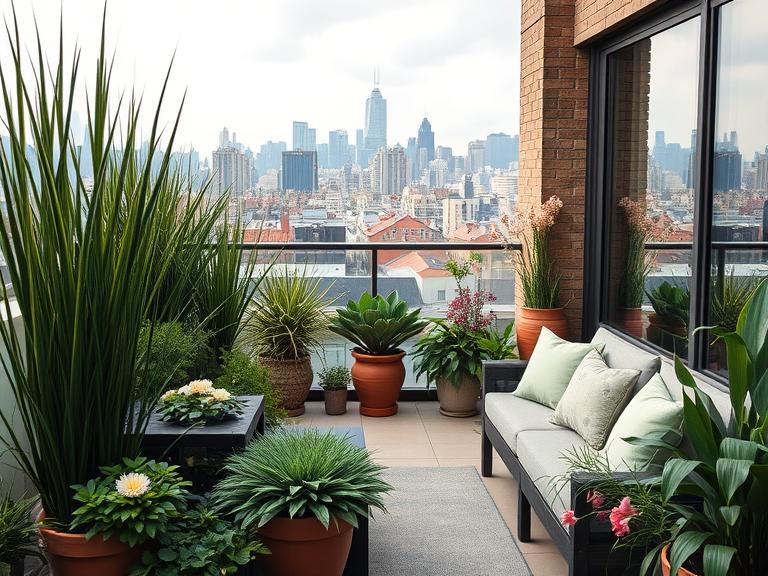
If you’re gazing out at a bare concrete balcony, wondering how you could possibly create a thriving garden in such a small space, believe me when I tell you that no matter how small the space, it can still become an inviting garden (even 13 floors up). After years of designing gardens for clients ranging from country estates to tiny urban terraces, some of my most satisfying transformations have been compact balcony spaces that deliver incredible impact in just a few square metres.
The magic of balcony gardening isn’t about what you can’t grow, but it’s about discovering the incredible creativity that comes from working within limits. When you’re designing with containers and maximising every available inch, each plant selection becomes meaningful and considered, as there is no space to waste.
Every corner of tiny balcony gardens has potential, and the results can be truly spectacular. Whether you’re longing for fresh herbs to elevate your cooking, dreaming of sun-warmed tomatoes that burst with flavour, or simply yearning for a peaceful green retreat above the bustling streets, this guide will walk you through every step of creating your perfect balcony paradise. This page contains affiliate links (see full details here). If you purchase through these links, I may earn a small commission at no extra cost to you.
Why Balcony Gardens Are Brilliant (And Why You Should Start Today)
Before we dive into the practicalities, let me share why balcony gardening has become such a passion of mine. Many balconies are windy and exposed. The main issue is that delicate petals can get ripped from flowers, while moisture is whipped out of leaves, and the depth of balconies provides proportion challenges. These problems often put off new gardeners, but I relish them. There’s a plant for every condition and a design effort for every space; balcony gardens require a bit more thought. These apparent limitations actually force you to make smarter plant choices and create more resilient gardens.
Following the surge of gardeners during lockdown, the RHS has recognised small balcony and container gardens, even at the RHS Chelsea Flower Show, providing perfect inspiration for those lacking outdoor space. This recognition from the horticultural world’s most prestigious event proves that balcony gardens aren’t just making do. Still, they’re a legitimate and celebrated form of garden design in their own right.
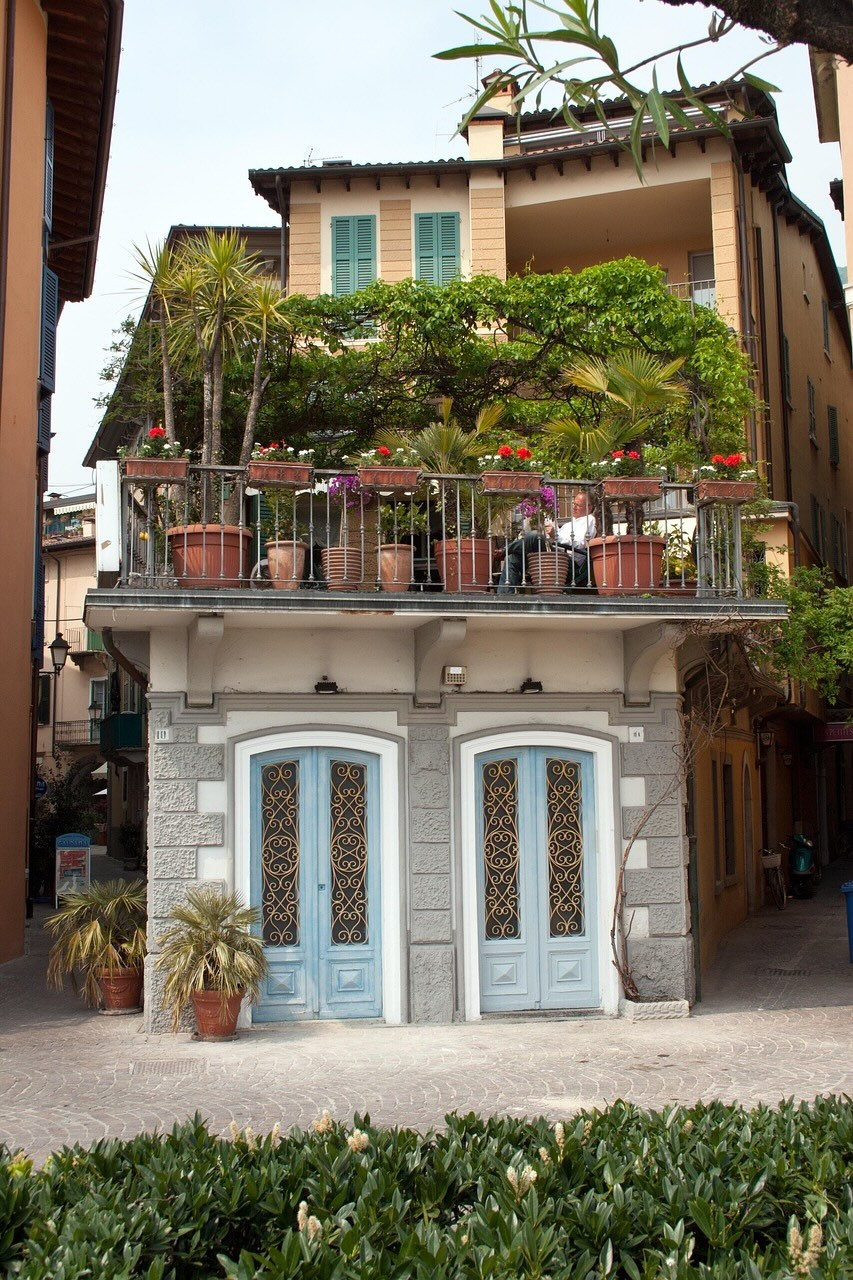
What saddens me as a garden designer is seeing an apartment block with no greenery on the balconies, as shown in the image below. Not only does this look grey and depressing, but it has zero benefits for any local wildlife. Imagine if even 1/4 of these balconies had some form of garden and greenery on them? They would look so much nicer and help Mother Nature, too!
What are the benefits of balcony gardens?
The practical advantages are numerous: very few slugs munching through your lettuce at 3 am, complete control over soil quality, the ability to move plants to follow the sun or escape harsh weather, and harvesting herbs without trudging through muddy garden paths in the rain. Plus, there’s something deeply satisfying about stepping out of your kitchen door onto your private growing space with a pair of scissors to gather tonight’s dinner ingredients! So let me walk you through the steps I take whenever I design a balcony garden here at Garden Ninja HQ.
Step 1: Understanding Your Balcony’s Unique Conditions
Just like any garden design project, success starts with understanding exactly what you’re working with. Your balcony has its own microclimate, which is likely completely different from that of ground-level gardens. Recognising these conditions is absolutely crucial for selecting and positioning plants. As a garden designer, all gardens start with some form of garden survey, and balconies are no exception, no matter how small! Grab a pen and paper, and start surveying your balcony using the list of considerations below.
A) Light Levels: The Balcomnys Aspect & Compass Direction
Full sun is defined as more than six hours of direct sun per day, whilst part shade is also defined as four to six hours of direct sun per day, but most of that should come in the morning hours when the sun’s rays are less intense. Understanding these definitions is crucial because many plants designated for partial sun conditions can tolerate more than six hours of morning or evening sun but show signs of sunburn when exposed to the same amount of midday sun.
Here’s how to assess your balcony’s light conditions properly:
Light Assessment Checklist:
Track sunlight patterns every two hours from 7 am to 7 pm for at least three days
Note which areas receive morning sun versus afternoon sun
Identify any shadows cast by neighbouring buildings, balconies above, or structural elements
Consider seasonal variations – that sunny spot in summer might be shaded entirely in winter
Look for reflected light from glass windows or light-coloured walls, which can boost growing conditions significantly
Quick Light Level Guide:
Full Sun (6+ hours direct sun): Perfect for tomatoes, peppers, herbs like rosemary and thyme, and most flowering plants
Partial Sun/Partial Shade (4-6 hours direct sun): Ideal for lettuce, spinach, begonias, and many herbs
Full Shade (less than 4 hours direct sun): Great for leafy greens, ferns, and shade-tolerant herbs like parsley
B) Wind and Weather Considerations
Strong winds, which are common on balconies and rooftop gardens high above the ground, can quickly dry out the soil, rip the petals off flowers, and knock over tall potted plants. Don’t despair, though, Ninja. This just means we need to be smarter about our approach with plants and designs.
Wind Management Strategies:
Position taller, sturdier plants to create windbreaks for more delicate specimens
Choose plants with flexible stems and smaller leaves that bend rather than break
Use heavier containers or secure lightweight ones to railings to prevent toppling
Consider installing trellis or custom screens for protection
Group containers together to create more stable, sheltered microclimates.
Weight Limitations: The Reality Check
Before you start your balcony garden, it’s essential to be confident about how much weight the balcony can support. Wet compost and stone or terracotta pots can be surprisingly heavy. This isn’t meant to put you off, but it is about safety for you and your neighbours. You need to make informed choices that keep everyone safe whilst maximising your growing potential. Check with your lease, building reports or surveyor for the maximum weight the balcony can hold. Then you need to check the weight of each part of your design, the plants WHEN WET, plus the people on the balcony to keep it under that maximum weight tolerance.
Weight-Wise Container Choices:
Lightweight plastic or resin containers instead of terracotta or stone
Fibreglass containers that look like ceramic but weigh a fraction
Fabric grow bags that are incredibly light, even when planted
Wooden container,s which are attractive and much lighter than ceramic alternatives
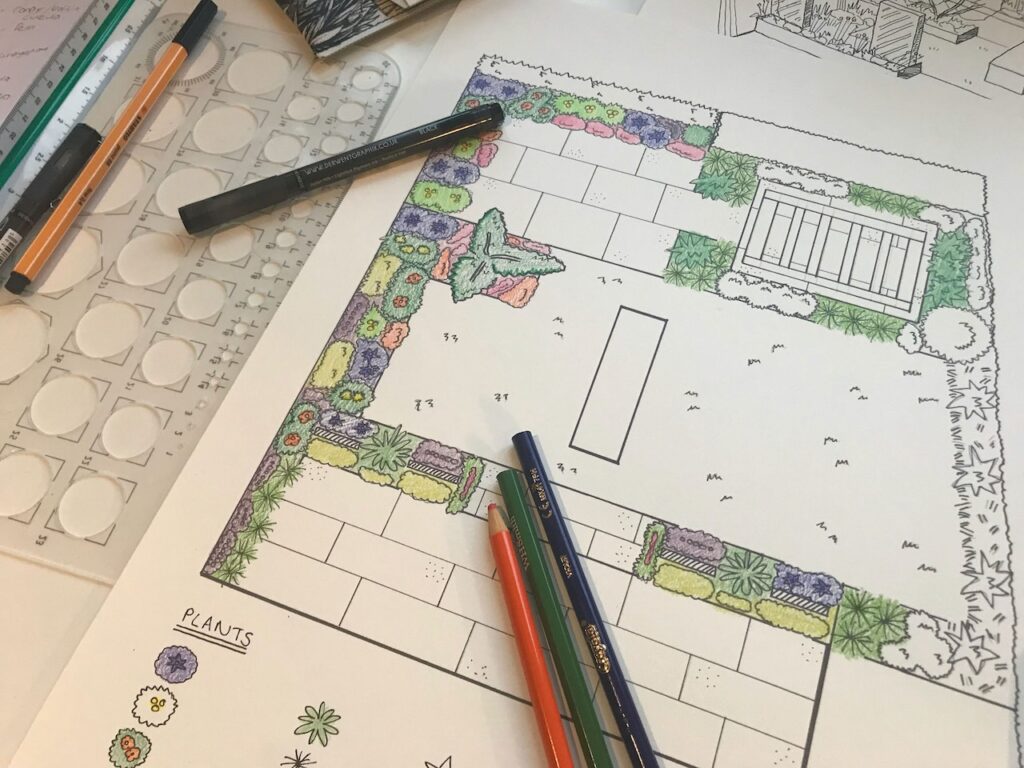
Step 2: How to design your balcony layout
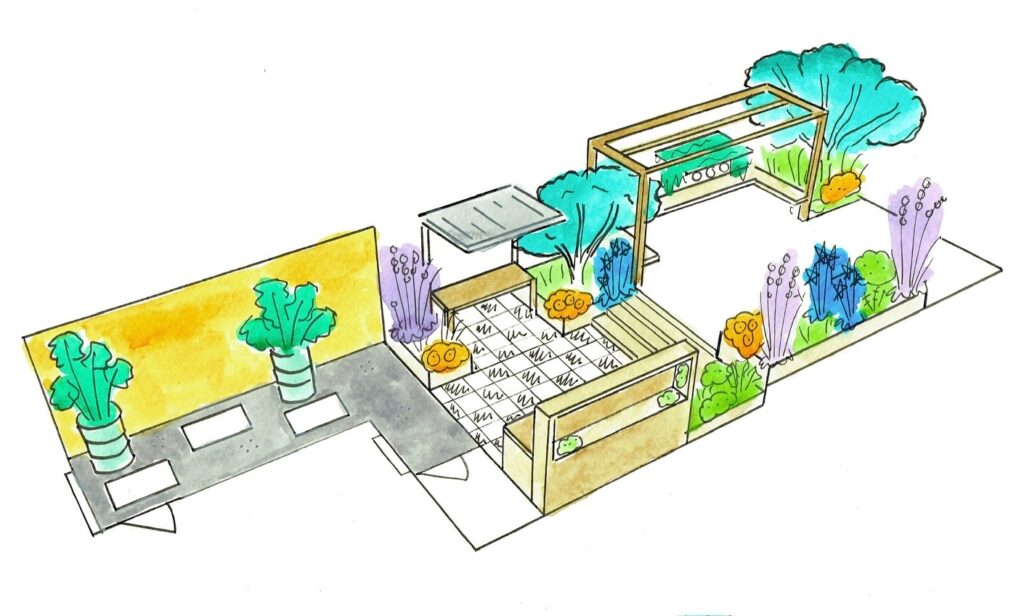
Long, narrow balconies present some of the most exciting design opportunities in urban gardening. Yet, they’re often the spaces that leave people scratching their heads, wondering how to create anything that doesn’t look like a plant-lined corridor. After designing countless linear spaces over the years, I’ve learned that the secret to transforming these challenging proportions lies not in fighting the geometry, but in working with it to create something genuinely spectacular.
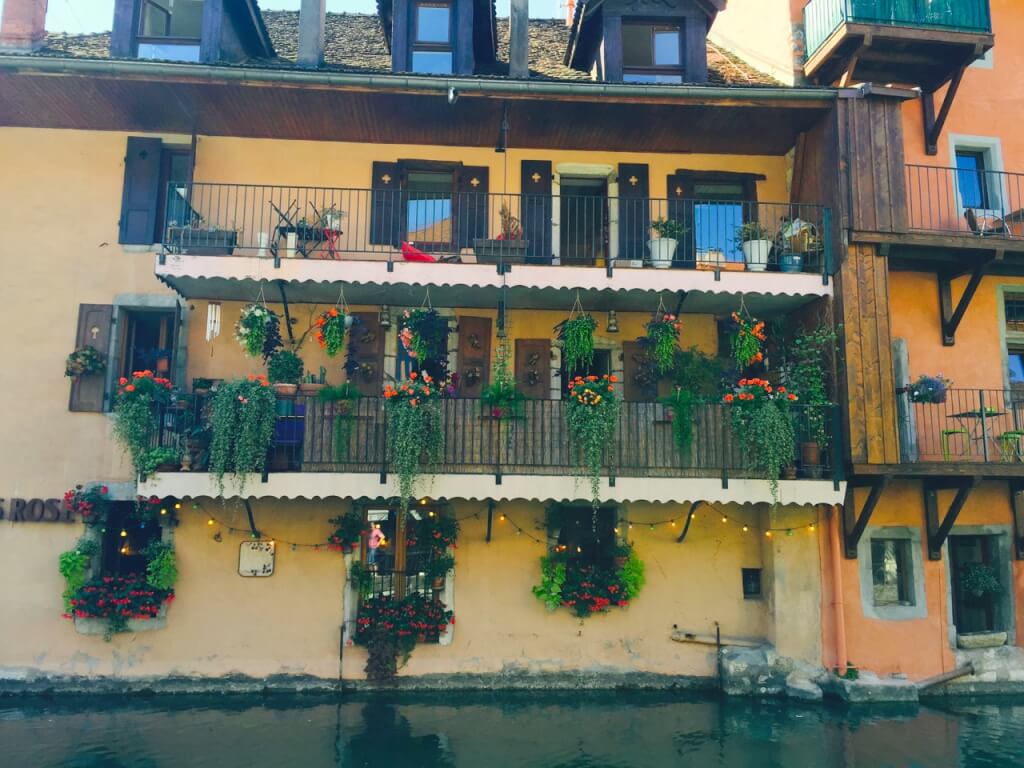
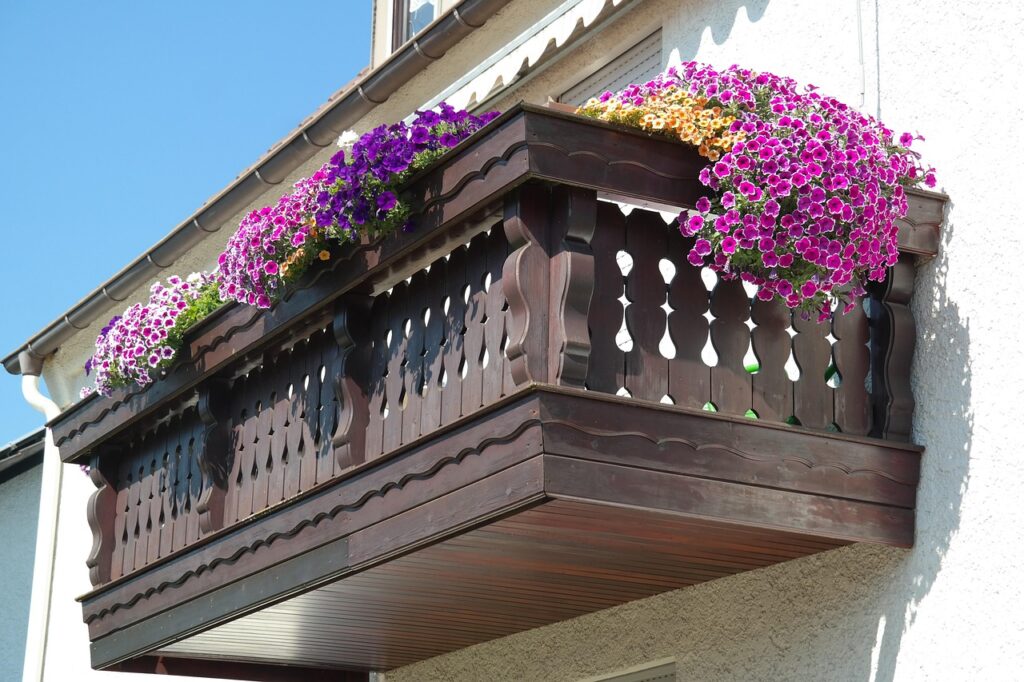
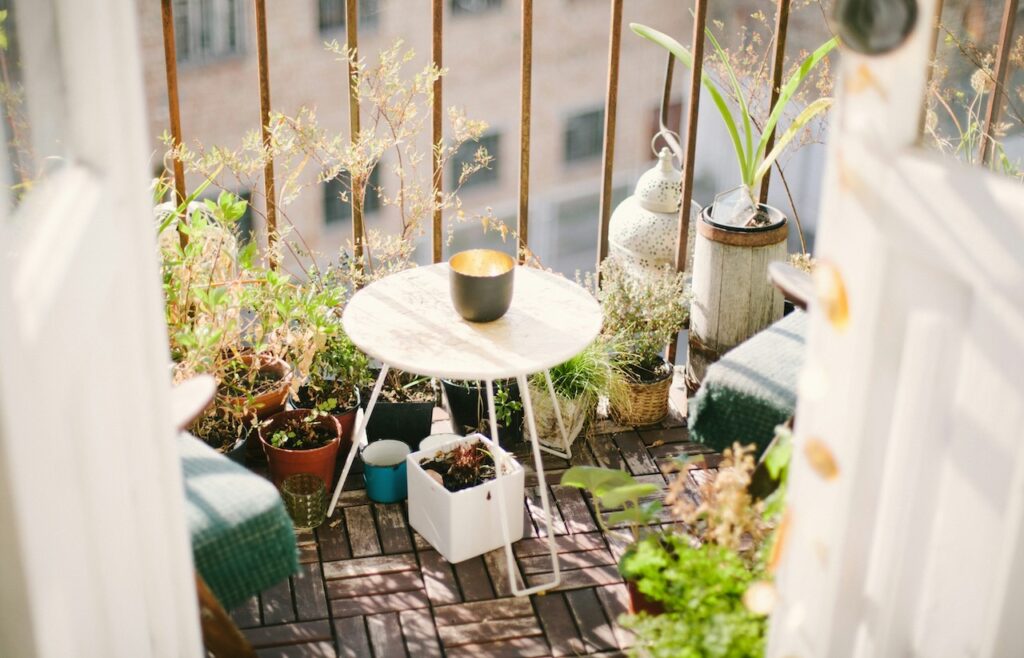
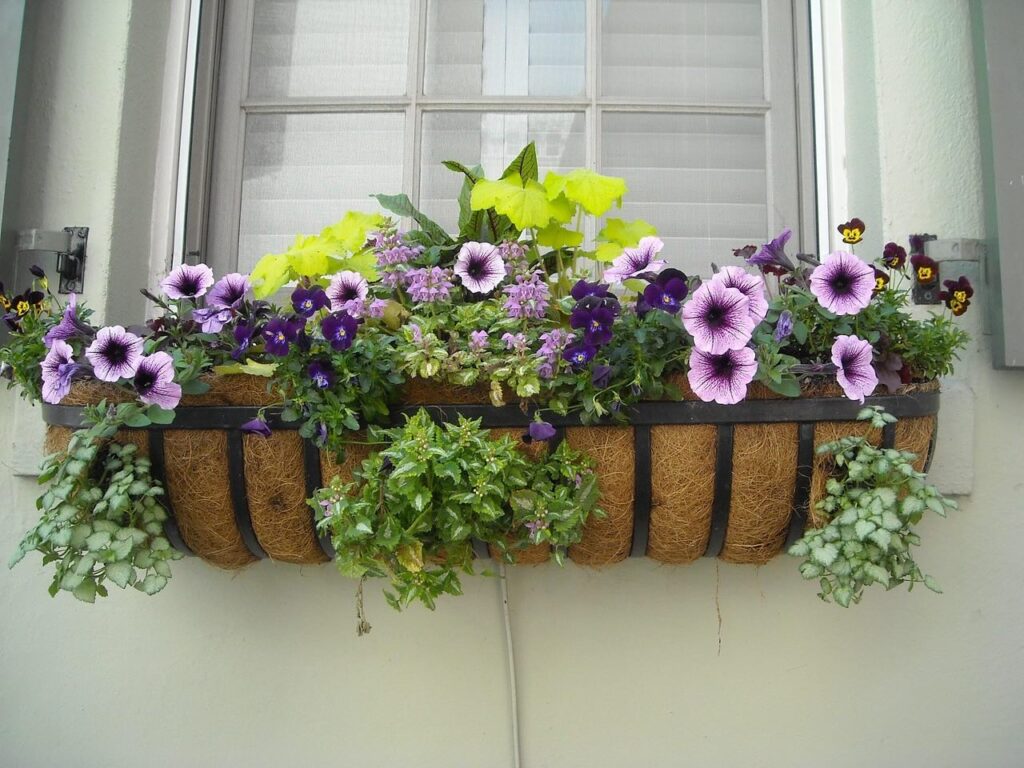
If you’re staring at a balcony that stretches out like a concrete runway, feeling overwhelmed by its awkward proportions, you’re not alone. These spaces are actually gifts in disguise, offering unique opportunities to create flowing, purposeful outdoor environments that feel far larger and more sophisticated than their dimensions suggest. The key is understanding how to work with linear space rather than against it. The other niggle with balconies is where people just plop some pots in railing containers, like below. Lovely for a one-hit wonder, but you can do so much more with your balcony, Ninja!
The mistake most people make with wide but narrow balconies is trying to cram everything against the walls like a horticultural conga line. This approach creates what I call the “garden centre trolley effect” – lots of individual plants lined up with no relationship to each other, no flow, and certainly no sense of journey or discovery. Instead, we need to think about these spaces as outdoor galleries, where each section tells part of a larger story. Using zoning, height and some clever transitional elements, which I’m going to talk you through now.
Understanding the Narrow Space Challenge
The fundamental challenge with long, narrow balconies isn’t the lack of space, but the lack of width /depth that creates visual problems. Your eye travels straight down the length without encountering anything interesting to pause at, creating a sense of restriction rather than the spacious outdoor room you’re trying to achieve. The key is to interrupt this sight line whilst creating distinct zones that each have their own character and purpose.
Think about the most successful long, narrow gardens you’ve admired. The best garden designs rarely show you everything at once. Instead, they create a sense of mystery and progression, with each section revealing itself as you move through the space. This same principle applies brilliantly to balcony design, where the journey might only be a few metres but can feel like a proper garden adventure.
Professional designers understand that the human eye craves variation and rhythm. A space that reveals all its secrets immediately feels smaller than one that unfolds gradually, offering moments of discovery and surprise. Your narrow balcony can become a masterclass in creating spatial interest within confined dimensions.
The Power of Zoning
Rather than treating your balcony as one long space that needs filling, divide it into distinct zones, each with its own function and character. A typical 6 metre balcony might have three 2 metre zones:
A relaxation area near the house for eating
A productive growing zone in the middle
A wildlife area at the far end, or a micro orchard with a chair for one person to unwind.
This approach immediately makes the space feel larger and more purposeful.
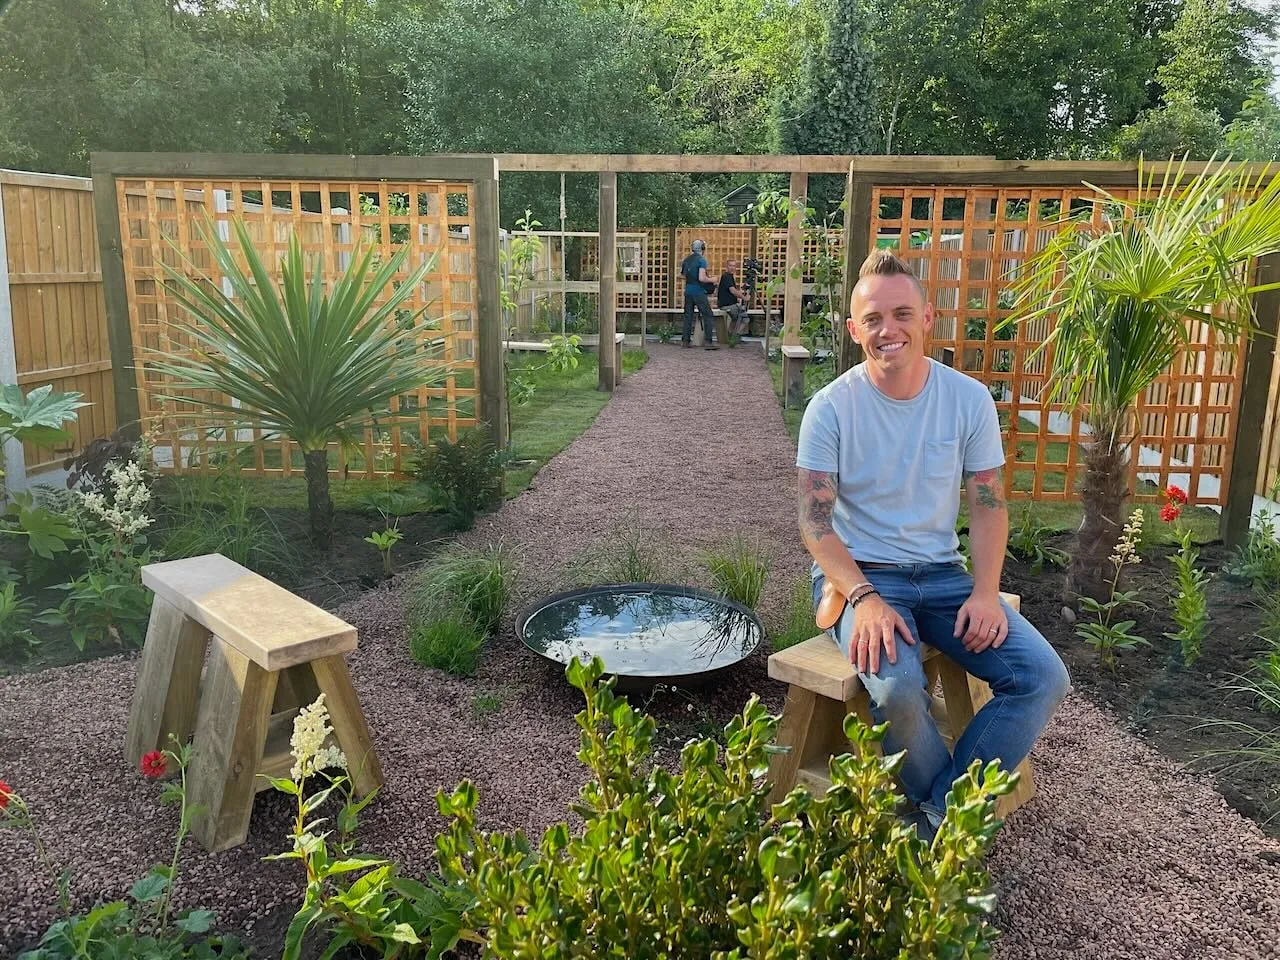
The zones don’t need to be equal in size – in fact, they shouldn’t be. Asymmetrical divisions feel more natural and create more visual interest than mathematical precision. Consider having a generous seating area of 2.5 metres, a compact growing zone of 2 metres, and a smaller contemplation space of 1.5 metres. This variation in scale prevents the monotony that kills narrow space design. See how this long, narrow garden below uses three different zones?
Each zone should have a clear purpose that reflects how you want to use your outdoor space. The seating zone might focus on comfortable furniture that isn’t crammed in and fragrant plants for evening relaxation. Your growing zone could prioritise productive containers and easy access for maintenance. The wildlife area might feature native plants and a water source, such as a small bird bath, to attract beneficial insects and birds.
The transitions between zones are just as important as the zones themselves. Avoid harsh divisions that emphasise the linear nature of your space. Instead, allow zones to blend into each other with overlapping plant heights and complementary colour schemes that create visual flow whilst maintaining distinct characters. Colour is your best friend in balcony gardens, so do check out my guide to the colour wheel below for more on that.
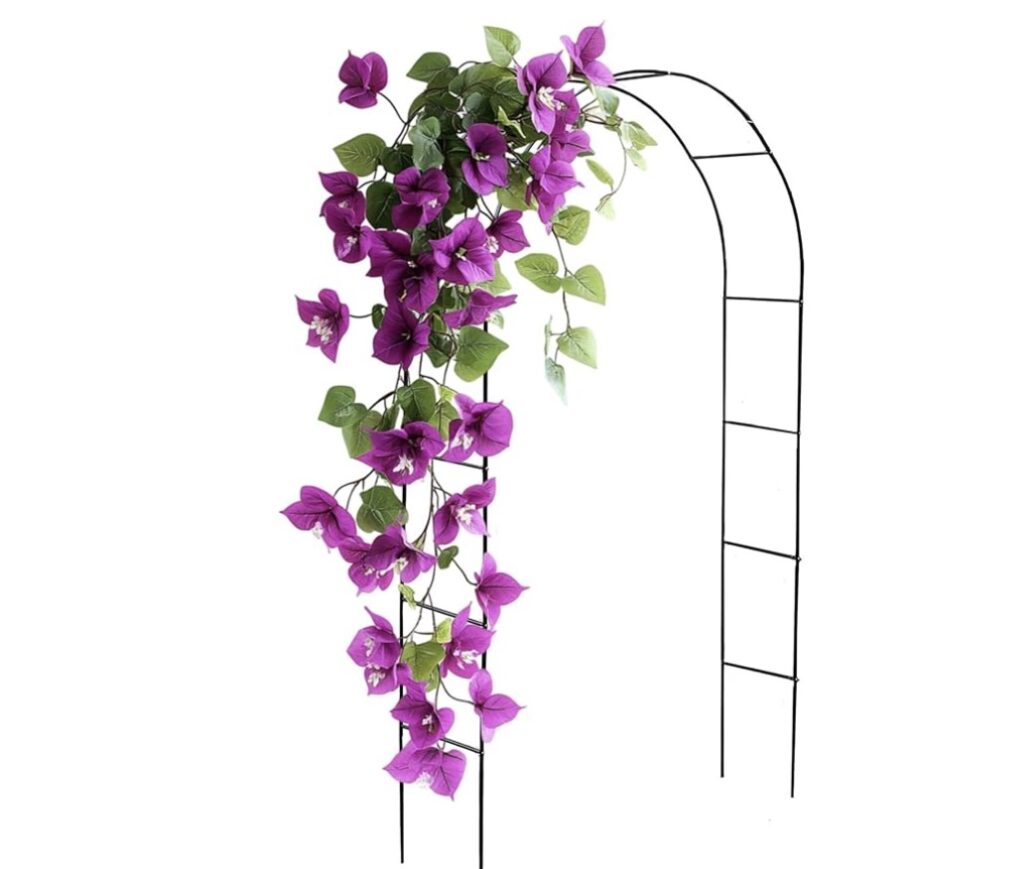
Creating Transitions with Lightweight Metal Arches
One of the most effective tools for breaking up long balconies is the strategic use of lightweight metal arches, which you can buy here very cheaply to add vertical height without weight.These vertical elements serve multiple functions: they create natural divisions between zones, provide support for climbing plants, and add crucial height variation that draws the eye upward rather than just along the length of the space.
The beauty of modern metal arches lies in their engineering, offering lightweight, cost-effective options that are incredibly strong yet lightweight enough to support vigorous climbers like clematis, honeysuckle, or even productive crops like beans and peas. Choose powder-coated steel or aluminium options that can withstand exposed balcony conditions without adding significant weight to your structure.
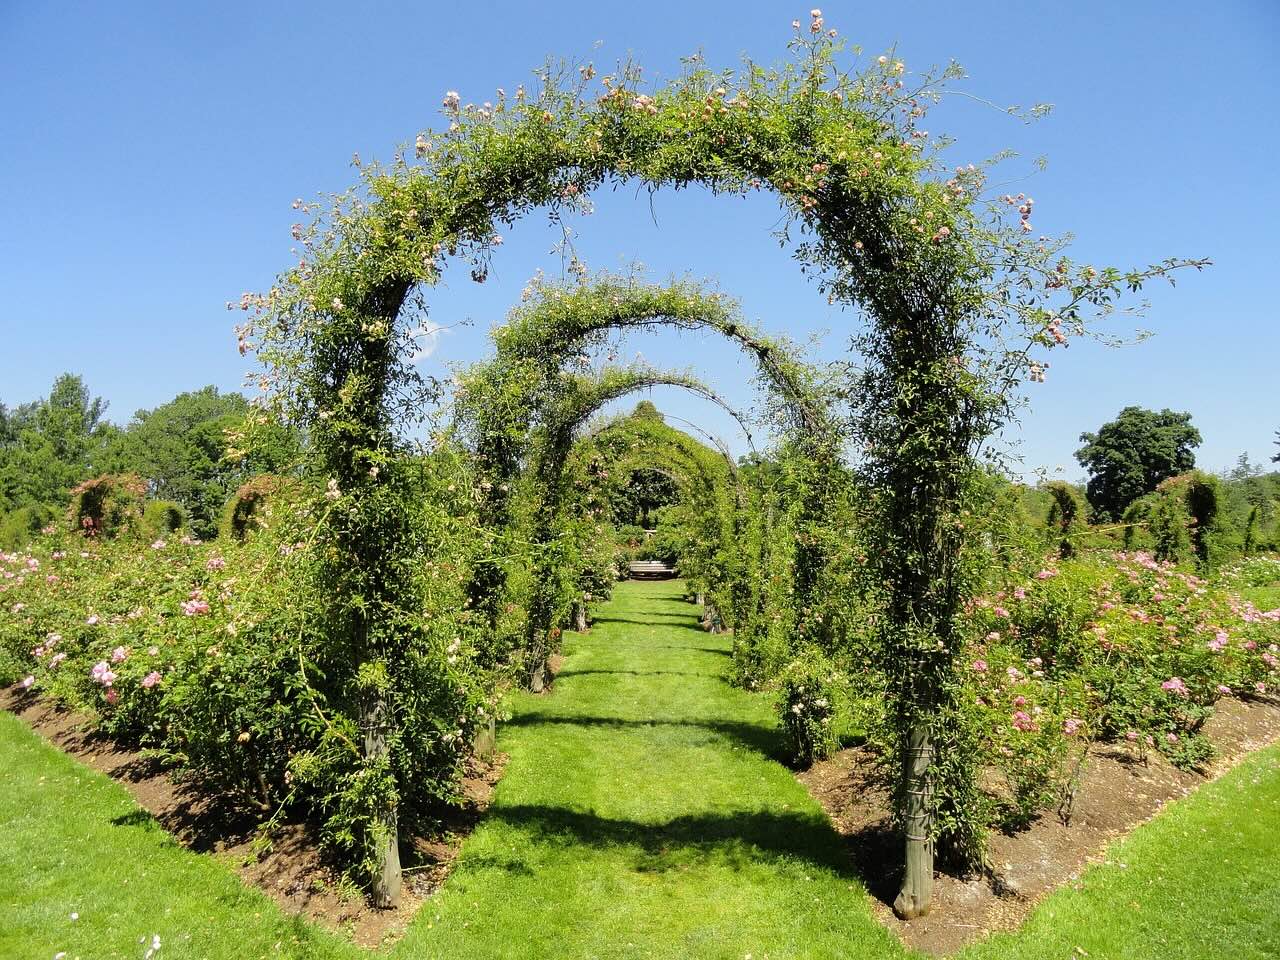
Position these arches at the transition points between your zones rather than at arbitrary intervals. An arch marking the change from seating area to growing zone creates a sense of arrival and purpose. Another arch separating your productive space from a more naturalistic area at the far end reinforces the idea that each zone has its own identity and function. Even though the arches below are in a ground-level garden, they highlight how imposing an arch can be and how to add structure and vertical interest!
The planting on these arches is crucial to bring your eye line upwards and not just out over the railings. Avoid the temptation to grow the same climber on each one. Instead, vary your choices to reflect the character of the zones they’re defining. A fragrant jasmine might mark the entrance to your relaxation area, whilst a productive grape vine or hop could signal the beginning of your kitchen garden zone.
Consider the seasonal performance of your arch plantings carefully. While deciduous climbers provide beautiful seasonal change, including some evergreen options ensures your structural elements maintain their impact year round. A combination of permanent structure with seasonal variation creates the most successful long term design.
The Less is More Philosophy
Here’s where most balcony gardens go spectacularly wrong with new gardeners who believe that more plants automatically means a better garden. In narrow spaces, this couldn’t be further from the truth less is more. A few carefully chosen plants that are allowed to develop their full character will create far more impact than dozens of small specimens fighting for attention and resources.
This restraint requires real discipline because garden centres are designed to make us want everything. But successful narrow space design is about editing ruthlessly and choosing plants that work incredibly hard to earn their place. A single architectural specimen – perhaps a multi stemmed swarf crab apple or a well shaped olive tree – can provide more structure and interest than a dozen smaller shrubs.
The same principle applies to your container choices. Three large containers planted with complementary specimens will create more impact than twelve small pots scattered about. Large containers also provide better growing conditions for your plants, allowing them to develop the impressive scale that makes narrow spaces feel generous rather than cramped.
When selecting your key plants, think about their performance across multiple seasons. A plant that only looks good for a few weeks each year isn’t earning its place in a space where every element matters. Choose specimens that offer structure, seasonal interest, and ideally some practical benefit like fragrance, productivity, or wildlife value.
Quality over quantity extends to your hardscaping choices as well. One beautifully designed water feature creates more impact than several small decorative elements. A single statement piece of furniture makes a stronger impression than multiple smaller items that compete for attention.
The Rule of Three for Maximum Impact
Professional designers have long understood the power of odd numbers in creating visually pleasing designs and planting plans, and nowhere is this more important than in narrow spaces where every element is scrutinised. Groups of three create natural triangular compositions that feel balanced without being symmetrical, whilst avoiding the static ‘formal’ feeling that comes from pairs.
This doesn’t mean you need exactly three of everything; it’s about creating visual groupings that read as unified compositions. Three containers of varying heights planted with a tall architectural plant, a medium bushy specimen, and a trailing element create layers that add depth to narrow spaces. The eye reads this as a single, complex composition rather than three individual plants.
Apply this principle to your furniture choices as well. Instead of a long line of dining chairs, consider a grouping of three different seating elements – perhaps a compact bench, a single chair, and a small stool or side table. This creates a more interesting and flexible seating arrangement that doesn’t emphasise the linear nature of your space.
Even with colour schemes, working in threes creates more sophisticated results. Choose three main colours and repeat them throughout your design in different proportions. This might be the deep green of your structural planting, the warm terracotta of your containers, and the soft white of your flowering plants all repeated in different combinations throughout the length of your balcony.
The rule of three works at different scales within your design. You might have three main zones, each containing three key plant groupings, each group featuring three different heights or textures. This creates natural rhythm and cohesion without feeling formulaic or contrived.
Step 3: Container Selection Mastery
The right containers can make or break your balcony garden. Terracotta plant pots are porous and work well for succulents and other plants that need excellent drainage to avoid root rot however, in exposed balconies with high winds on the top floors of skysc frapers can quickly lose all this moisture as terracotta is porous. Glazed pottery is sealed, making it better suited for plants that require moisture retention. Understanding these nuances helps you match containers to plants perfectly.
A) Container Types and Their Best Uses
Plastic and Resin ContainersPlastic pots work well for most plants, though not so much for succulent plants which need as much drainage as possible. Modern plastic containers have come a long way from the basic terracotta-effect pots of yesteryear.
UV-resistant plastics that won’t crack or fade
Double-walled designs for better insulation
Self-watering systems with built-in reservoirs
Recycled plastic options for the environmentally conscious
Fabric Grow Bags Grow bags may not be the most attractive, but they are great for vegetables. The fabric is breathable and allows air to reach the roots. These are particularly brilliant for balcony gardening because:
They’re incredibly lightweight even when fully planted
The fabric prevents root circling, promoting healthier root systems
They can be folded flat for storage when not in use
Various sizes available, from small herb planters to large vegetable containers
Window Boxes and Rail PlantersPlanter boxes such as window boxes and balcony rail planters come in a variety of materials such as plastic, metal or wood, and typically come with hanging hardware. These are space-savers that can transform railings into productive growing areas.
B) Size Matters: Matching Containers to Plants
Getting container size right is absolutely crucial. Too small, and your plants will be constantly stressed and underperforming as they become rootbound. Too large, and you’re wasting space and adding unnecessary weight and bare earth which never looks as attractive as flowers or foliage. The best way to understand the size of container you need is to use the RHS plant checker or equivilent to see the ultimate height and spread of the plant and source a container that meets those needs.
Step 4: Soil and Compost: The Foundation of Success
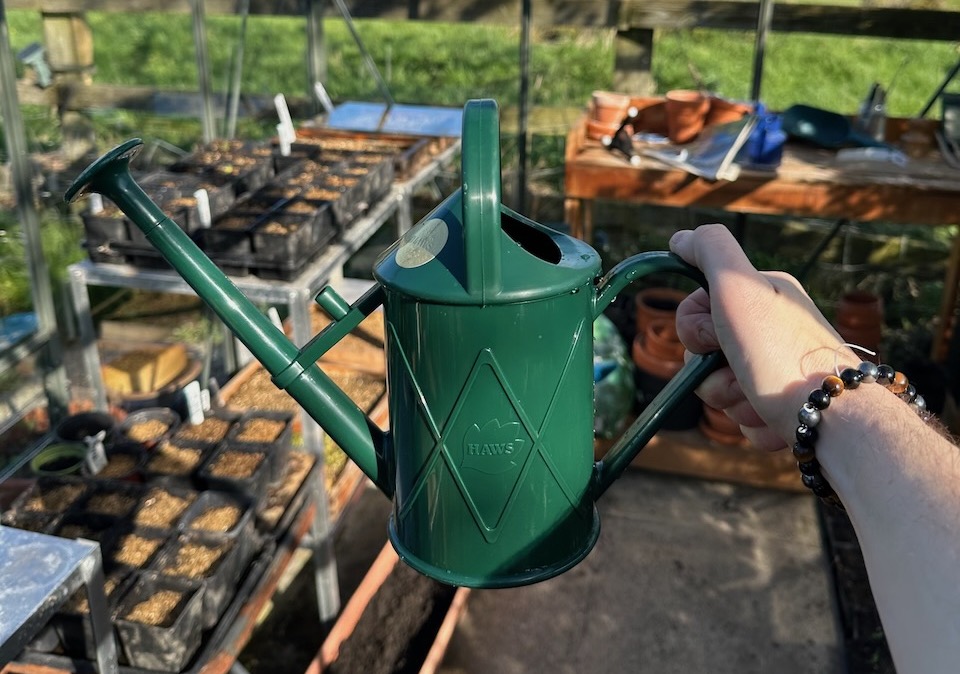
Your balcony garden will rely entirely on you for sustenance. Meaning, if you go away on holiday and don’t set the irrigation or get a neighbour to water, your garden could potentially dry out and, in the worst case, die. Unlike other ground-level gardens, your balcony garden will require more intervention and maintenance, primarily in terms of food and watering.
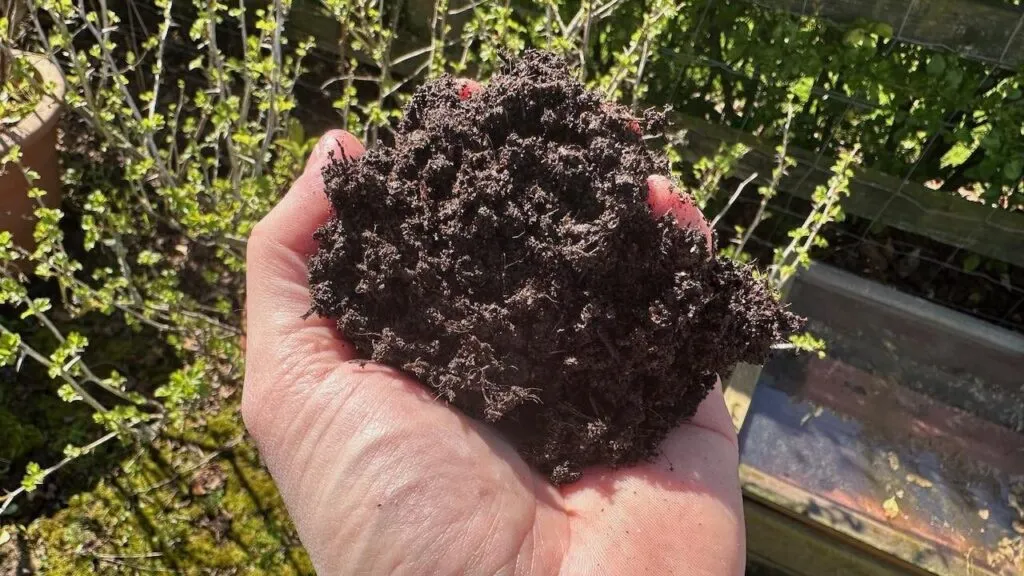
Ensure you use high-quality peat-free compost, preferably one with added loam, to give your plants a strong start. Unlike ground-based gardens, where plants can send roots deep into native soil, container plants depend completely on the growing medium you provide. Compost is far lighter than regular soil, and so helps with the weight limits of your balcony. However, compost will run out of nutrients far faster, so you do need to plan a yearly feeding regime with liquid feeds and compost mulch top-ups to ensure your plants don’t starve in years two and three.
I) Multi-Purpose Peat-Free Compost
Multi-purpose peat-free composts are generally for short-term plants, such as bedding displays and veg crops. It’s vital to choose peat-free composts from an environmental perspective to save our peat bogs. Additionally, there are numerous peat-free alternatives available. Compost is a great lightweight growing medium, but you will need to feed once or sometimes three times a year if growing edibles, as the medium runs out of nutrients quickly. Compost is perfect for:
Annual vegetables like tomatoes, lettuce, and beans
Seasonal flowering displays
Herbs that you’ll be replacing regularly
Quick-growing crops with shorter lifecycles
ii) Soil-Based Composts
Soil-based peat-free composts, such as peat-free John Innes No. 3, are for longer-term plants. However, they are heavier so use with care not to breach the balcony weight limit. Save these for specimen trees or shrubs. These heavier, more nutrient-dense mixes are ideal for:
Perennial herbs like rosemary and thyme
Small shrubs and trees
Plants you want to keep for multiple years
Anything that needs more structural support
iii) Specialist Composts
Such as Alpine or Ericaceous composts are now available in garden centres. A range of high-quality peat-free options is available for acid-loving plants, such as blueberries and rhododendrons. Don’t forget these if you’re growing:
If you want to create your own bespoke growing medium, here’s my tried-and-tested recipe for balcony containers. It’s not too heavy but will last longer than just compost on its own. Again, always triple-check the weight limits.
Lee’s Balcony Blend Recipe:
40% quality peat-free multi-purpose compost
30% well-rotted garden compost or worm castings
20% perlite or vermiculite for drainage
10% quality topsoil or John Innes base
This blend offers excellent drainage (essential for containers), good nutrient retention, and the structural stability that balcony plants require to withstand wind and weather.
Weight-Saving Tip: Adding a straw to the compost mix can help reduce weight and provide roots with a rich, airy layer to penetrate. This is particularly useful for larger containers where weight becomes a significant factor.
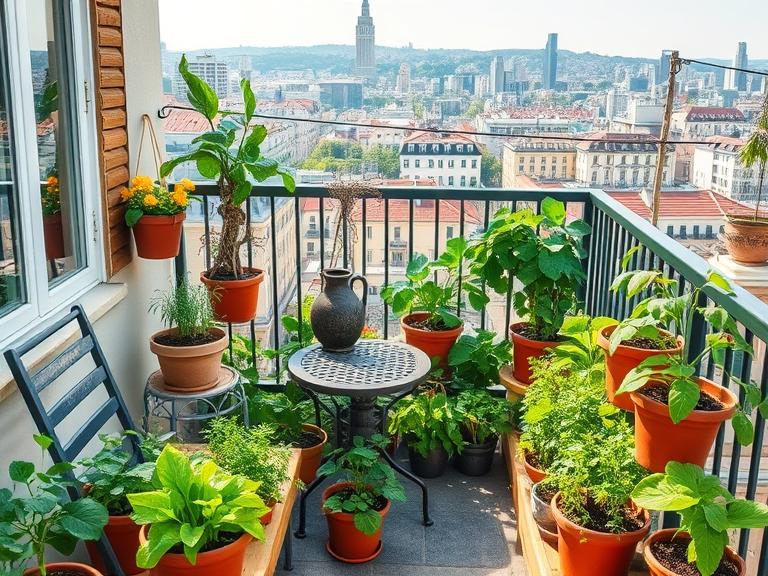
Step 5: Edible Plants for Balcony Success
Now we’re getting to the exciting bit – what actually to grow! The edible options for balconies are far more extensive than most people imagine, and the flavour of homegrown produce from containers often surpasses anything you can achieve in open ground.
A) Quick-Growing Salad Champions
Lettuce and Salad Leaves: Growing lettuce in pots is easy, as it grows quickly, and you will have the opportunity to harvest repeatedly. For growing lettuce, choose a wide planter rather than a deep one.
The key lettuce and salad leaf varieties for balcony success:
‘Little Gem’ – compact hearts perfect for small containers
‘Lollo Rosso’ – frilly red leaves that look ornamental too
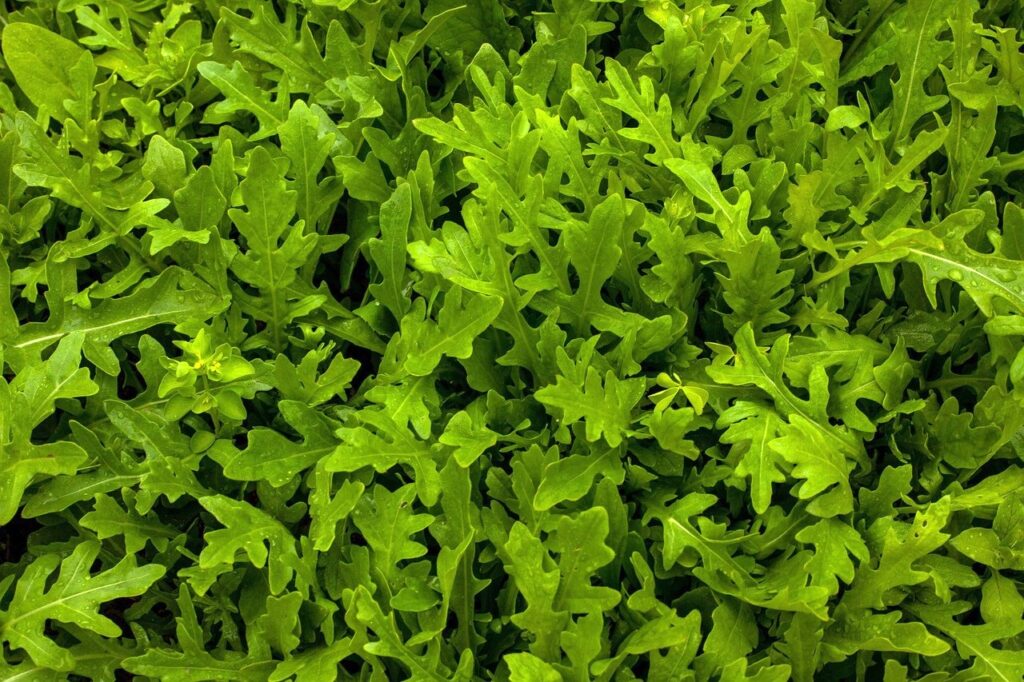
‘Rocket’ – peppery leaves that regrow after cutting
Mixed salad leaves – constant harvest from succession sowings
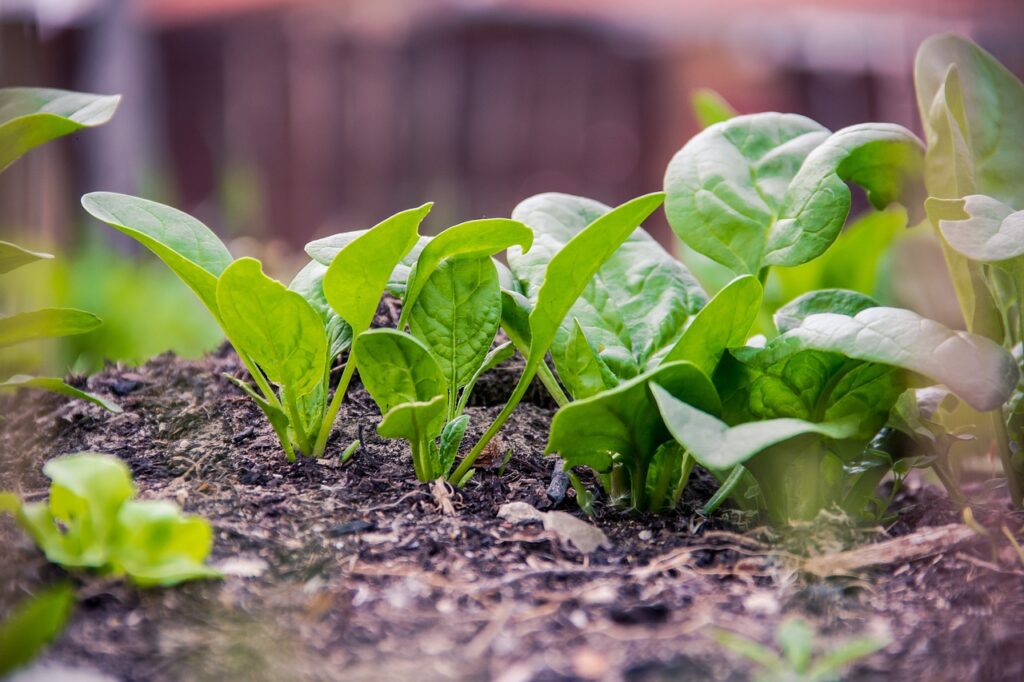
Spinach and Chard: Perfect for partial shade areas of your balcony, these leafy greens are incredibly productive in containers. Swiss chard particularly earns its place with colourful stems that provide ornamental value alongside the edible harvest.
B) Herbs: The Balcony Essentials
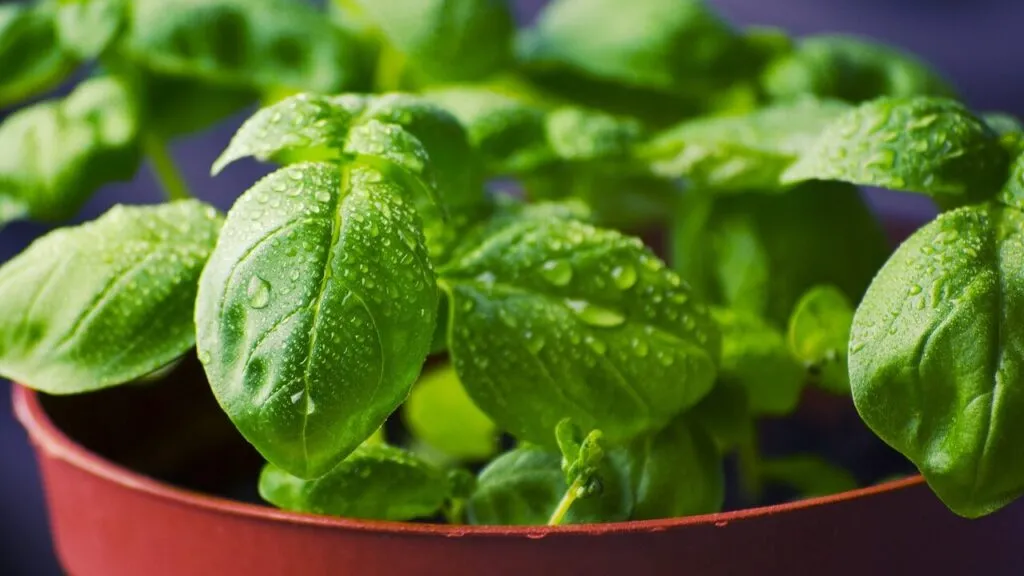
Growing herbs in containers is an excellent way for beginners to learn how to grow some of their favourite kitchen herbs. Herbs are absolutely perfect for balcony growing – most prefer the excellent drainage that containers provide, many are Mediterranean natives that love the warm, sunny conditions, and the convenience of stepping out to snip fresh herbs is unbeatable.
Basil (Ocimum basilicum): Basil is a warm-weather annual herb and thrives when grown in pots and window boxes. Choose from:
‘Genovese’ – classic large-leaf variety for pesto
‘Greek’ – compact bushes perfect for small containers
‘Purple Ruffles’ – ornamental and edible combined
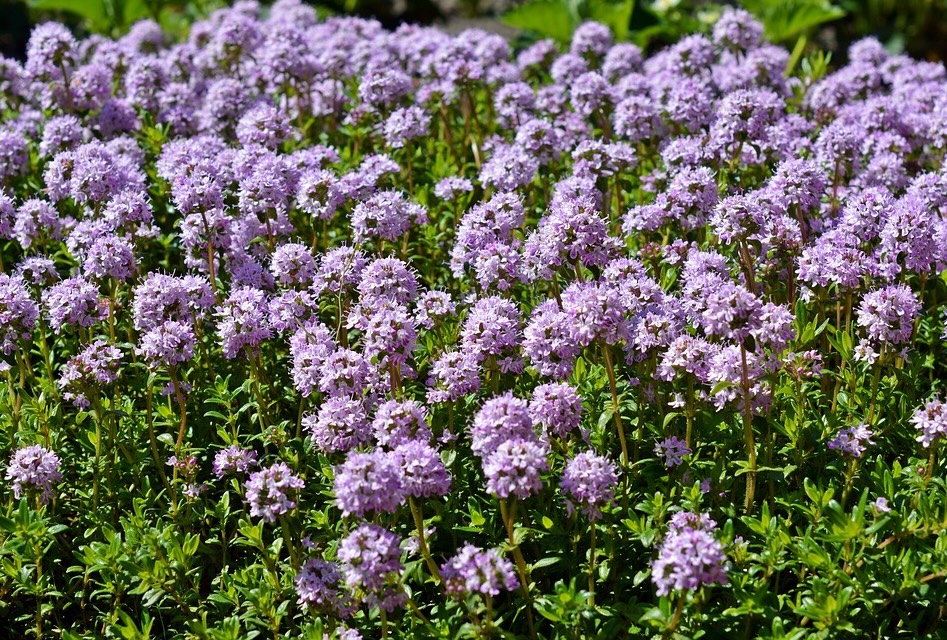
Thyme (Thymus vulgaris): Drought-tolerant and perfect for sunny, exposed balconies. The compact growth habit makes it ideal for small containers, and it’s virtually maintenance-free once established.
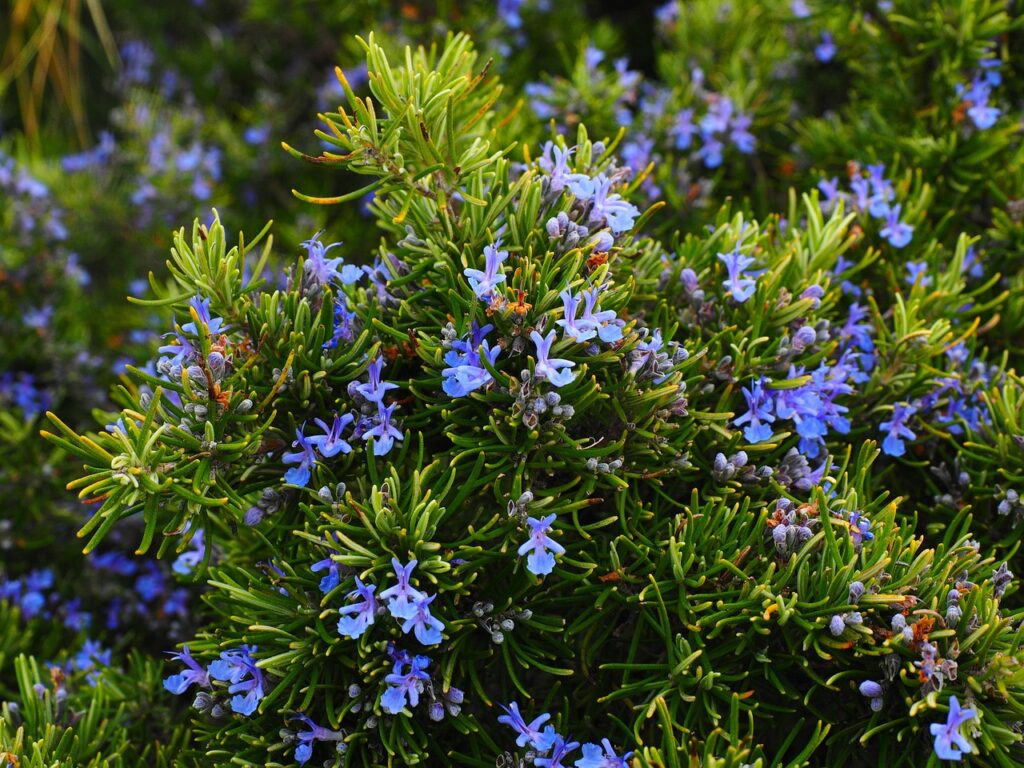
Rosemary (Rosmarinus officinalis): Rosemary is a woody shrub with aromatic, needle-like foliage that adds a welcome depth of flavour to roasted potatoes and chicken dishes. Perfect for year-round harvesting and can be brought indoors in harsh winters.
Parsley (Petroselinum crispum): This Italian flat-leafed parsley has, of course, flat leaves, which distinguish it from the better-known curly-leafed parsley. It is favoured for its deep flavour, which some say holds up better in cooking than curly parsley. Both flat-leaf and curly varieties are excellent in containers.
C) Vegetables for Balcony Gardens
Tomatoes: The Balcony Superstars: Tomatoes are some of the easiest vegetables to grow in containers. As long as you have a location that receives at least five to six hours of sunlight per day, you can easily grow tomatoes in your balcony container garden. The biggest requirement in mid-season is that they don’t dry out!
Best Balcony Tomato Varieties:
‘Tumbling Tom Red’ – perfect for hanging baskets
‘Cherry Falls’ – cascading cherry tomatoes
‘Patio Princess’ – compact plants, full-size fruit
‘Balconi Yellow’ – yellow cherry tomatoes, bred specifically for containers
Peppers and Chillies: After tomatoes, peppers and chillies are the easiest to grow in containers, and they are also the most productive. If you keep the pot in a sunny spot and provide the right soil and fertiliser at the right time, this vegetable will fruit prolifically.
Top Performing Pepper Varieties:
‘Snack Mix’ – small sweet peppers perfect for containers
‘Hungarian Hot Wax’ – medium heat, prolific cropping
‘Basket of Fire’ – compact chilli plants ideal for small spaces
Carrots: Sow the seeds of carrot varieties that are short instead of standard ones, as they require more room to grow their roots. Whilst you may be surprised that you can grow root vegetables, it is possible. The light feathery foliage of carrots works well when companion planted with other suitable plant species.
‘Paris Market’ – round carrots perfect for shallow containers
‘Amsterdam Forcing’ – short, sweet carrots ideal for deep window boxes
‘Rainbow Mix’ – purple, yellow, and white carrots for visual interest
Radishes: Radishes are one of the quickest-growing vegetables and are suitable for container vegetable gardening. They are ready for harvest in 24 to 60 days, depending on the variety. Perfect for succession planting and giving quick results to new gardeners.
E) Fruits to grow on Balconies
Strawberries: These little beauties can be grown as ‘filler plants’ in larger containers if necessary, and will send out runners everywhere, which can then be propagated as new strawberry plants. Those with a smaller balcony could try hanging baskets and ensure to give the strawberries at least 30cm of depth and width to grow.
While edible plants often take centre stage in balcony gardens, ornamental plants provide the structure, seasonal interest, and pure beauty that transform a productive space into a true garden paradise. Believe it or not, you can grow a huge variety of plant types from herbaceous perennials to annuals on balconies.
Full Sun Ornamental Champions
Pelargoniums (Geraniums): These Mediterranean natives are absolutely perfect for exposed, sunny balconies. Modern varieties offer incredible flower power, and many have aromatic foliage that releases fragrance when brushed against.
Lavender (Lavandula species): Plants with silver foliage, like lavender and artemisia, which are better at reflecting sunlight, are a good choice for very sunny, exposed balconies. Choose compact varieties, such as ‘Hidcote’ or ‘Munstead’, for containers.
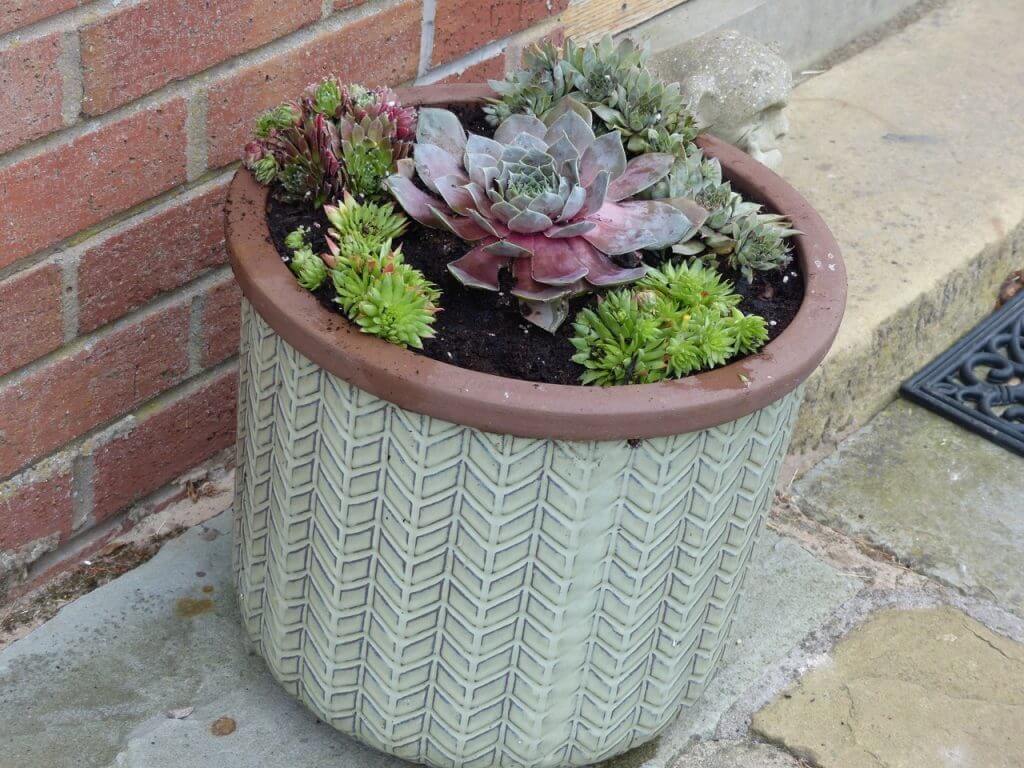
Succulents and Sedums: Perfect for the busy gardener or forgetful waterer. Modern succulent varieties offer an incredible diversity of form, colour, and texture. Create stunning compositions in shallow containers. Sedums are fabulous for balcony gardens, as they require very little attention and can tolerate extremes of heat and cold, provided they are not waterlogged.
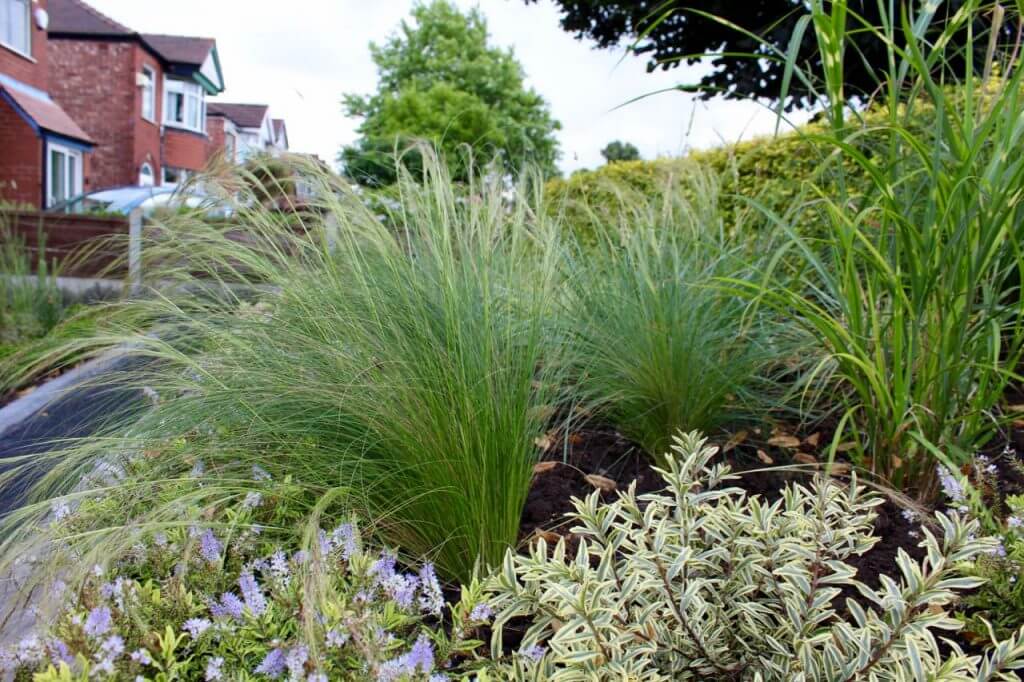
Ornamental Grasses: Fountain grass, feather grass, and compact bamboo varieties provide movement and sound in the wind whilst requiring minimal care once established. The beauty of grasses is that you can leave them throughout the winter, meaning your balcony garden doesn’t end up bare in the winter once all the herbs, vegetables and annuals have finished flowering!
Partial Sun/Shade Ornamental Stars
Begonias: Begonias prefer partial shade to full shade, where they can bloom from spring to October. Modern varieties offer incredible flower power in shades from pure white through to deep burgundy. Don’t knock them as a relic of the 1980s and hanging baskets, there are some super tropical-looking varieties, and they are pretty much bulletproof for balconies!
Busy Lizzies (Impatiens): Busy Lizzies bloom from May to October in shady places. They are relatively easy to maintain and, depending on the variety, even withstand strong thunderstorms. Perfect for adding instant colour to shadier corners.
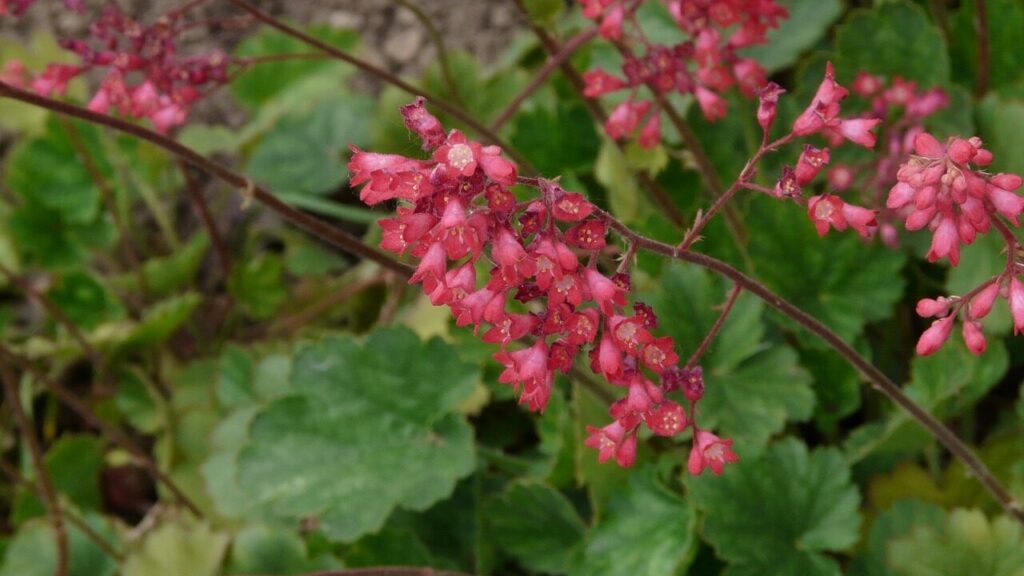
Heucheras (Coral Bells): These perennial beauties provide year-round foliage interest with leaves in shades of lime green, deep purple, orange, and silver. The delicate flower spikes are a bonus in late spring.
Full Shade Ornamental Solutions
Ferns: Create a lush, jungle-like atmosphere with container-grown ferns. Hardy varieties, such as Royal Fern and Lady Fern, will survive UK winters outdoors in containers.
Hostas: While traditionally garden plants, smaller hosta varieties excel in large containers on shaded balconies. The sculptural leaves provide architectural interest, and the flower spikes attract beneficial insects.
Clematis: Many climbing plants will grow happily for two or three years in a large container, and you can train them up a trellis attached to the wall. Clematis varieties offer flowers from early spring through to autumn.
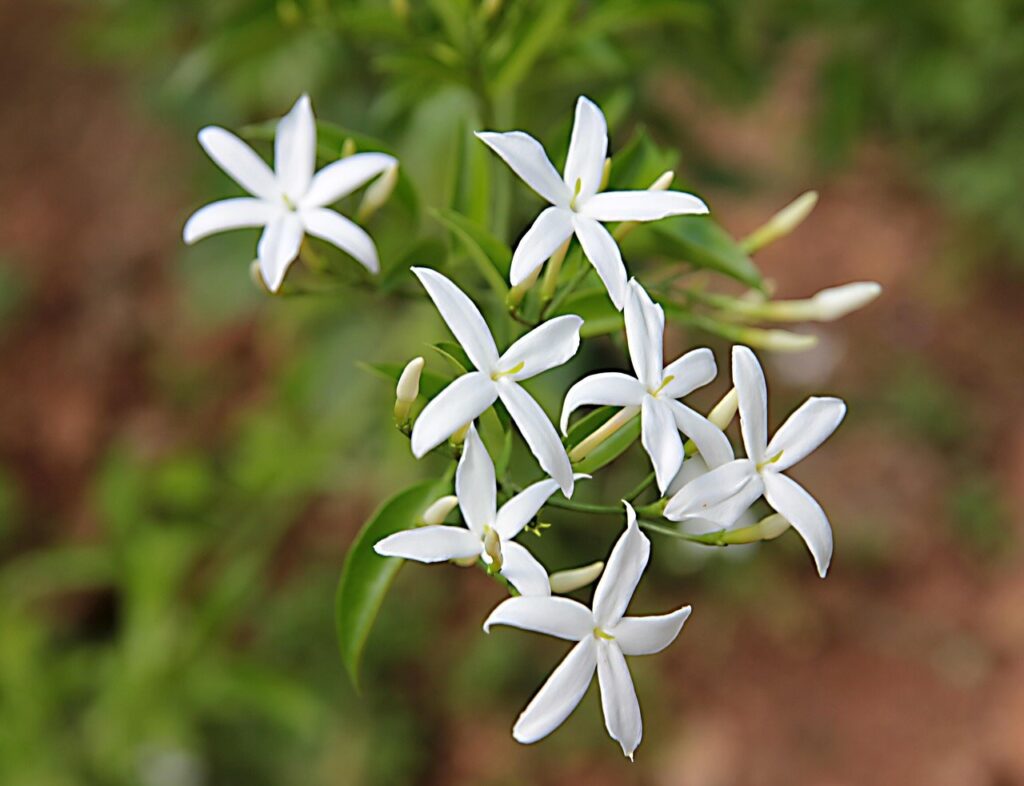
Jasmine: Try a jasmine or honeysuckle for heavenly scent, or clematis for colourful blooms. Evening-scented jasmine is particularly magical for balconies where you sit in the evenings.
Annual Climbers: Sweet peas, morning glories, and nasturtiums provide quick colour and can be changed each year for variety. Perfect for renters who can’t install permanent structures. Sow sweet peas in September, ready for the next spring!
Step 7: Seasonal Care and Maintenance
Balcony gardens require a slightly different approach to maintenance compared to ground-level gardens. The confined root space, exposure to wind, and complete dependence on you for water and nutrients mean that understanding the seasonal rhythm is crucial for success.
Regular harvesting to encourage continued production
Deadheading flowering plants to extend blooming periods
Provide temporary shade during extreme heat waves using shade cloth or strategic positioning
Heat Stress Prevention: For balcony areas that are shaded or only get partial sun, you should opt for plants that tolerate lower light levels, but for very sunny balconies, temporary shade during the hottest part of summer can prevent plant stress and keep productivity high.
Autumn: Harvest and Preparation
September to November Activities:
Plant spring bulbs in containers for next year’s early colour
Sow winter salads and hardy herbs for cold-season harvesting
Force bulbs indoors for winter colour and early spring preview
FAQ on Common Balcony Garden Challenges
Every balcony gardener encounters challenges, but understanding the most common issues and their solutions can save months of frustration and failed plantings.
Q – How do I stop my balcony garden from drying out?
Drying out is a common problem, so ensure a regular water supply to avoid floods and droughts in your watering schedule. Container plants can go from perfectly moist to bone dry in a single hot, windy day. So its more a day to day activity. Perhaps before you go to work, do a quick check on the plants. Place the tip of your finger in the soil/compost, if it comes out clean they are dry, if there is a small amount of compost on your finger they are just right. Other tips to keep your plants from drying out are:
Group containers together to create humid microclimates
Use water-retaining granules mixed into compost
Install simple drip irrigation systems for consistent watering
Choose containers with built-in water reservoirs
Mulch the surface of containers to reduce evaporation
Q- How can I prevent wind damage and exposure?
Strong winds can desiccate plants, snap stems, and topple containers. Climbing plants act like high-rise hedges, slowing down wind speed and screening you and your containers from the sun and pollution. Think about placing larger, more robust grasses and bamboos at exposed edges to buffer plants or use bamboo rolled screening against the railings to diffuse the wind.
Create windbreaks using taller, sturdier plants
Install bamboo screens or trellis panels for protection
Use guy-lines to anchor tall plants securely
Choose flexible plants over brittle ones
Position containers in groups for mutual protection
Q- How can I make the most out of the limited space on my balcony?
Consider growing plants that also add vertical interest, such as small fruit trees or climbers over trellises or metal lattice arches. Other ideas include:
Install wall-mounted planters and green wall systems
Use tiered plant stands to create multiple growing levels
Hang containers from ceiling hooks or wall brackets
Train climbing plants up supports to utilise air space
Use rail planters to transform balcony edges into growing space
Q – How to manage pests and diseases
Container plants can be more susceptible to specific problems, but are also easier to manage when issues arise. This is because they are all in close proximity to each other, so when a pest or disease strikes, it happens fast. This is why weekly checks are necessary to address any issues promptly.
Ensure excellent drainage to prevent root rot
Provide adequate air circulation between plants
Remove dead or diseased material immediately
Encourage beneficial insects with diverse plantings
Use companion planting to deter pests naturally
Advanced Balcony Gardening Techniques
Once you’ve mastered the basics, numerous advanced techniques can transform your balcony garden from good to absolutely spectacular, especially if you start to get creative with your planting combinations and top up your containers with fresh specimens.
i) Succession Planting for Continuous Harvests
Rather than sowing all your lettuce seeds at once and having a glut followed by nothing, sow small amounts every two weeks throughout the growing season. This provides constant harvests and prevents waste. By drip-feeding your seed sowing throughout the spring and summer, you can ensure continuous crops of quick edibles like lettuce, radishes, and greens.
Tomatoes with basil – improved flavour and pest deterrence
Lettuce with radishes – the radishes mature quickly, making space as the lettuce expands
Herbs with roses – many herbs deter aphids and other rose pests
Nasturtiums with cucumbers – nasturtiums act as trap crops for cucumber beetles
Seasonal Container Swapping
Use the mobility of containers to your advantage by moving plants to optimal positions throughout the year. Sun-lovers can be moved to catch winter light, whilst shade plants can be repositioned to avoid scorching summer sun. This is especially good with spring bulbs, which have finished by April, so you can move them out of the way or the back of the balcony whilst other plants take centre stage!
Your Balcony Garden Success Timeline
Month 1-2: Foundation Phase
Assess your balcony conditions thoroughly
Source appropriate containers and compost
Install any structural elements like trellises or irrigation
Begin with easy-success plants like herbs and salads
Month 3-4: Expansion Phase
Add more challenging crops like tomatoes and peppers
Implement vertical growing solutions
Establish feeding and watering routines
Learn to read your plants’ needs and adjust care accordingly
Month 5-6: Optimisation Phase
Fine-tune plant positioning for optimal performance
Begin succession planting for continuous harvests
Experiment with more unusual varieties and techniques
Start planning for year-round growing and seasonal transitions
Year 2 and Beyond: Mastery Phase
Save seeds from your most successful plants
Experiment with challenging crops and advanced techniques
Develop your own unique style and plant combinations
Share knowledge and plants with other balcony gardeners
Unlock Your Balcony Garden with Garden Ninja’s Expert Online Training
Ready to transform your gardening skills beyond just plopping plants in pots on your balcony? Garden Ninja’s expertly crafted online courses will fast-track your development from keen amateur to skilled garden designer in months rather than years. Starting at just £29, you’ll gain access to professional garden design expertise from BBC Garden Rescue’s Lee Burkhill, delivered at a fraction of traditional horticultural education costs.
29
Garden Design Examples for Small Gardens: 30 Design Templates & Planting Plans
Garden Design Examples for Small Gardens: 30 Design Templates & Planting Plans: In this online gardening course, I’ll walk you through 30 fantastic garden designs, explaining the logic behind the layout, the plant choices, and take-home tips for applying them in your own garden.
Weekend Garden Makeover: A Crash Course in Design for Beginners
Learn how to transform and design your own garden with Lee Burkhills crash course in garden design. Over 5 hours Lee will teach you how to design your own dream garden. Featuring practical design examples, planting ideas and video guides. Learn how to design your garden in one weekend!
Garden Design for Beginners: Create Your Dream Garden in Just 4 Weeks
Garden Design for Beginners Online Course: If you want to make the career jump to becoming a garden designer or to learn how to design your own garden, this is the beginner course for you. Join me, Lee Burkhill, an award-winning garden designer, as I train you in the art of beautiful garden design.
Creating a thriving balcony garden isn’t just about growing plants – it’s about transforming your relationship with your living space and reconnecting with the natural world in an urban environment. Every herb you snip, every tomato you harvest, and every flower that brings a smile to your face represents a victory over concrete and a celebration of life’s incredible tenacity.
The key to balcony gardening success lies not in having the perfect space, but in working creatively and intelligently with what you have. Whether you’re blessed with a sun-drenched south-facing balcony or working with a shaded north-facing space, whether you have 50 square metres or just enough room for a few containers, the principles in this guide will help you create something truly special.
Remember, every expert gardener was once a beginner staring at empty containers, wondering what to do next. The difference between success and disappointment lies not in having perfect conditions, but in starting with realistic expectations, learning from both successes and failures, and celebrating every small victory along the way.
Ready to get started? Your plants are waiting, and your balcony is about to become the most productive space in your home. Let’s create some garden magic!
Lee Burkhill, known as the Garden Ninja, is an award-winning garden designer and horticulturist with over 30 years of gardening experience and 15 years as a professional garden designer. A qualified RHS (Royal Horticultural Society) professional, Lee specialises in sustainable garden design and practical horticultural advice. He designs and presents on BBC1’s Garden Rescue and in leading gardening publications. Lee combines three decades of hands-on gardening knowledge with professional design qualifications to help gardeners create beautiful, functional outdoor spaces.