DIY Garden Paths: Materials, Methods, and Mistakes to Avoid
Lee Burkhill: Award Winning Designer & BBC 1's Garden Rescue Presenters Official Blog
Intermediate level
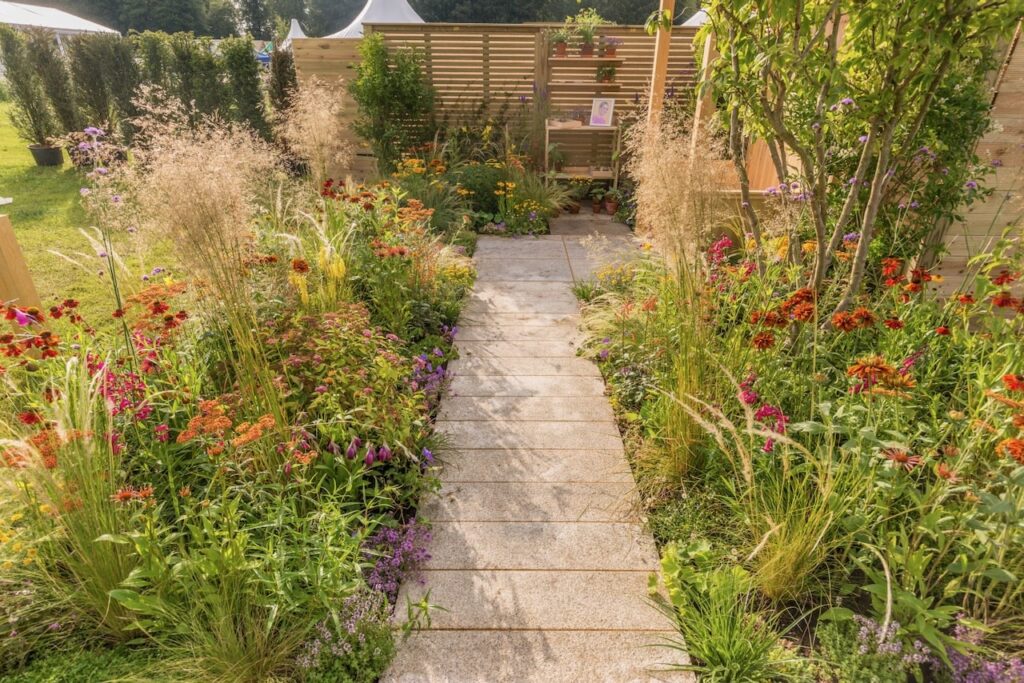
Creating garden paths offers not just an easier way to get around your garden but an opportunity to add some design flare to the flow of your garden and give visitors a journey of your choosing. However, hard landscaping can be notoriously expensive so this guide is going to show you how you can create your own garden path without breaking the bank along with top tips and problems to avoid!
As an award-winning garden designer, I love creating beautiful paths that guide people around their gardens. However, new gardeners often struggle to design or choose the right materials for garden paths. This guide will help you discover the professional secrets to creating stunning garden paths that last for decades, plus the seven costly mistakes that turn DIY dreams into expensive disasters.
Want to create a beautiful garden path that looks professionally designed but won’t break the bank? You’re in the right place! A well-designed path can transform your garden from a collection of separate areas into a cohesive, inviting space that draws you through the landscape.
I’ve designed hundreds of garden paths over my career, from simple gravel walkways to elaborate stone masterpieces. The good news? Many of the techniques I use can be successfully tackled by confident DIY gardeners. The bad news? I’ve also seen plenty of path projects go horribly wrong, costing homeowners thousands in repairs.
As always, I’m here to guide you through it. No jargon, no nonsense, and absolutely no shortcuts that’ll come back to haunt you. Let me share the professional methods, material choices, and critical mistakes to avoid in creating paths that look amazing and last for decades.
Why Garden Paths Matter More Than You Think
Before we dive into the nitty-gritty, let’s talk about why paths deserve serious consideration in your garden design. Paths aren’t just functional, they’re the backbone of your garden’s structure and flow.
Paths create journey and discovery: A well-placed path draws visitors through your garden, revealing planted areas gradually and creating anticipation about what’s around the next corner.
They define spaces and create rooms: Paths naturally separate different garden areas, helping create the “outdoor rooms” that make gardens feel larger and more interesting.
Paths provide year-round structure: When perennials die back and lawns look tired, paths maintain the garden’s bones and keep it looking intentional.
The practical benefits are obvious: dry feet in wet weather, clear access for maintenance, and safe navigation after dark.
Can I fit my own garden path?
The answer is yes, you can, but you do need to plan before jumping straight in. If you want to create your own garden path but have little to no hard landscaping experience, a gravel path is your best option or stepping stones. When you move into laying and cutting stone, along with prepared subbases and levels, it’s nearly always best to get the professionals in!
Choosing the Right Path Material for Your Garden
The material you choose will dramatically impact both the look of your path and your installation experience. Whilst gravel is always a budget-friendly option, it’s not suitable for wheelchair users and can look a bit rustic when used too much in a garden. You’ve got a plethora of paving choices to consider, so let me give you my professional breakdown of the most popular options:
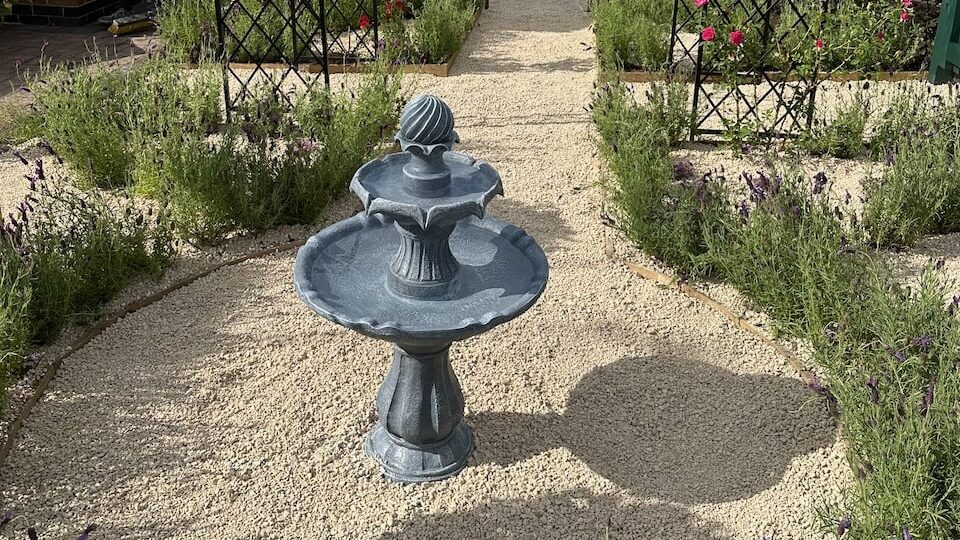
A) Gravel Paths: The Designer’s Friend
Gravel is best for Informal gardens, curved paths, budget-conscious projects, quick installation
Gravel is my go-to recommendation for first-time path builders. It’s forgiving, relatively inexpensive, and incredibly versatile. You have an enormous variety of colours, sizes and price points, making it the most accessible and not to mention the easiest path to create. All you need to do is create a level surface, tamp it down to ensure it’s compacted so you don’t end up with lumps and bumps and add some cardboard to where the path will be, or hessian (never weed membrane, which is bad for the environment). Then lay your gravel down on top. Simple!
Professional Tip: Opt for angular gravel over rounded pea gravel—it locks together more securely and scatters less. My favourite is 10-14mm angular limestone or granite chip, which looks great, especially after it rains, where their colouration changes!
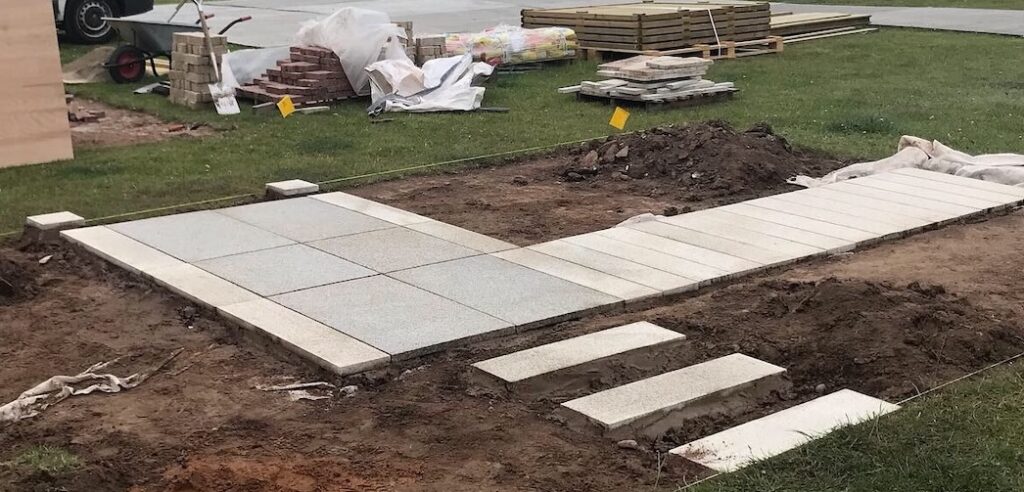
B) Natural Stone: Timeless Elegance
Natural stone paving is ideal for formal gardens, though in my experience it suits any style of garden so don’t think that its price tag and higher laying costs only lend themselves to super strict formal garden layouts. Natural stone is great for high-traffic areas, permanent installations, traditional properties, and stunning modern high-end designs. Nothing beats natural stone for creating paths that improve with age and weather beautifully.
When it comes to creating stunning garden paths that’ll last longer than your mortgage, nothing beats proper natural stone! I’ve been designing stone paths for decades, and let me tell you, the choice can be overwhelming. However, you will need to bring in an expert to lay this kind of stone, it’s not for the amateur have-a-go builder. You need exact levels, hardcore bases in place, proper stone cutting blades and mortar. Please heed my advice and get an expert in!
York stone remains the Rolls-Royce of paving, with its gorgeous honey tones and incredible durability at around £80-120 per m², though your wallet might need CPR afterwards. Indian sandstone offers fantastic value with beautiful colour variations from buff to charcoal at £25-45 per m², and it’s my go-to recommendation for most clients.
For something distinctly British, Cotswold stone brings classic countryside charm with its warm, creamy hues, priced at £60-90 per m². Meanwhile, Welsh slate offers dramatic, dark tones perfect for contemporary designs, priced at £70-100 per m².
Limestone like Portland or Bath stone creates elegant, light colored paths that brighten any garden at £50-80 per m², and granite setts offer incredible longevity with their distinctive texture at £40-70 per m² I’ve seen Victorian granite paths that still look magnificent today! The key is matching the stone to your garden’s style and your budget, because trust me, a well chosen natural stone path isn’t just landscaping it’s an investment that adds serious value to your property.
Sandstone: Warm colours, good grip, moderate price
Limestone: Cool greys, hardens with age, classic choice
Slate: Contemporary look, naturally non-slip, more expensive
Granite: Extremely durable, available in various finishes
C) Block Paving & Clay Paving: Versatile and Practical
Block paving has an awkward reputation, often associated with driveways extending into gardens, but it can be used effectively in modern gardens and is ideal for areas requiring vehicle access. It’s not just manufactured concrete blocks, either; clay paving falls under block paving and provides a fantastic, warm, textured surface that’s great underfoot.
Clay or concrete pavers offer endless design possibilities and excellent durability, along with different layout patterns such as herringbone, basketweave and other linear patterns. Again, you need a level surface and some specific tools to cut the bricks or pavers, along with jointing compound and a brush to apply grout. It’s always best to consult a professional if in doubt.
Pros of Block & Clay Paving:
Wide variety of colours and textures
Strong enough for vehicles
Individual blocks can be replaced if damaged
Allows for creative patterns
Good drainage when properly installed
Cons Block & Clay Paving:
Can look municipal if poorly chosen
Joints need regular maintenance
More expensive than gravel
Requires precise levelling
Design Tip: Stick to two colours maximum and avoid overly busy patterns. Simple designs age better and look more sophisticated.
D) Concrete Paving: The Underrated Option
Concrete paving also gets people shaking their heads and being a bit snobby in garden design circles,. but it offers a cost effective way to pave a garden without breaking the bank. It also comes in a variety of patterns. Modern concrete paths aren’t the grey slabs of the 1970s, and today’s options include attractive textures and colours which can even fool some designers as to whether or not it’s natural stone! Concrete pavers are far easier for the DIY enthusiast to lay themselves. Cutting them is easier and they are cheap to replace if your cuts go wrong or you break them!
Concrete pavers are best for modern gardens, smooth, accessible paths and budget-conscious gardeners. They are available at nearly all DIY and large chain garden centres.
Poured concrete is permanent and difficult to change later
E) Stepping Stones: Natural Movement
One way to pave a garden is to avoid using continuous paths and use stepping stones through flower beds, lawns, and other soft garden areas. Informal paths through planted areas, low-traffic routes, and garden access paths can be softened with stepping stones, which reduces the amount of landscaping and costs. Stepping stones are super easy to lay and don’t require any professional trades to set them!
Individual stones or pavers can create a more relaxed, garden-like feeling and can be mixed with gravel, lawn or soil.
To lay stepping stones in turf, start by positioning the stones where you want them, spacing them about 60cm apart for a comfortable walking pace. Use a spade to cut around each stone’s outline, then lift the turf and dig out soil to a depth slightly less than the stone’s thickness. The stones should sit just proud of the surrounding grass level to account for settling and to prevent them from becoming buried over time.
Place each stone in its recess and check its level using a spirit level, adding or removing soil as needed. Gently firm the stone down and backfill any gaps around the edges with soil. Water the surrounding turf well to help it settle back into place. The stones will naturally bed in over the following weeks, creating a stable and attractive pathway through your lawn.
They key with stepping stones is using some sharp sand under the stepping stone and a spirit level to sure they are evenly laid.
Having the right tools makes the difference between a professional result and a frustrating experience when it comes to laying paths yourself. If you are keen to lay your own path then there are some key tools you will need. If in doubt though, I’d advice that heavy natural stone should always be laid by a professional to ensure a safe surface. Natural stone is incredible heavy and has to be cut in a certain way.
Essential Tools:
Sharp spade for accurate excavation
A mattock for breaking up hard ground
String line and pegs for marking
Spirit level (minimum 1 metre long)
Rubber mallet for laying stones
Plate compactor (or for smaller stepping stones a hand tamper)
A wheelbarrow for moving materials
Landscape rake for levelling
Professional Tools Worth Investing In:
Laser level for long, straight paths
Cut-off saw for cutting stone or blocks
Mechanical excavator for large projects
Step-by-Step Path Installation Method
This method works for most path materials with minor variations:
1. Planning and Design
Mark your route using spray paint or rope laid on the ground. Live with it for a week—walk it daily and observe how it feels. Good paths feel natural and intuitive.
Consider the journey. Where do people naturally want to walk? Fighting natural desire lines creates paths that feel awkward and get ignored.
Plan for drainage. Paths should have a slight cross-fall (1:40 gradient) to shed water, and consider where runoff will go.
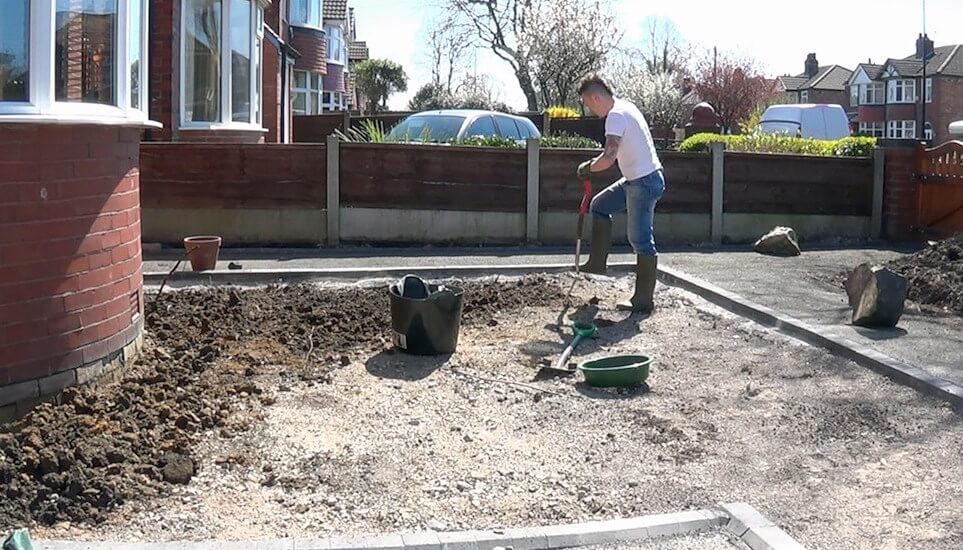
2. Excavation: The Foundation of Success
This is where most DIY projects go wrong. Proper excavation is absolutely crucial for long-lasting paths.
Dig to the correct depth. Total excavation should be:
Gravel paths: 100-150mm
Stone/paver paths: 150-200mm
Concrete paths: 200-250mm
Create clean, straight edges. Use a sharp spade and cut vertically—sloppy edges lead to sloppy-looking paths.
Check for services. Always call utility companies to mark underground cables, gas, or water lines before digging.
Professional Secret: Excavate 50mm wider than your finished path on each side. This gives you room to work and ensures edge support.
3. Sub-base Installation
The sub-base carries the weight and prevents settling—it’s the most important part you’ll never see.
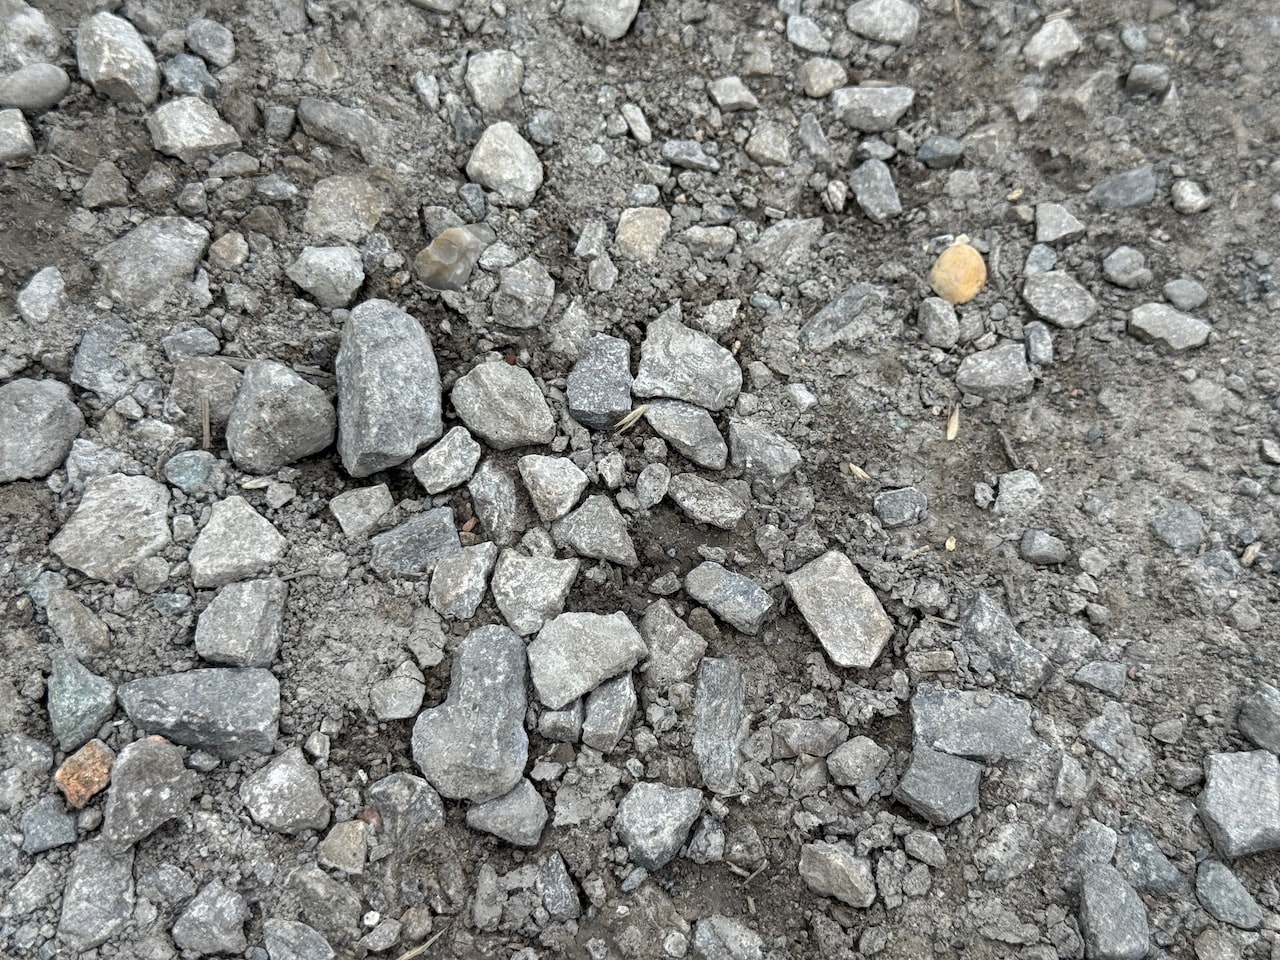
Use the right material. Type 1 MOT (Ministry of Transport) aggregate is the professional standard—a specific blend of crushed stone and fines.
Install in layers. Add sub-base in 50mm lifts, compacting each layer thoroughly. This is crucial for preventing future settling.
Achieve proper compaction. Rent a plate compactor for anything larger than a small path. Hand tamping simply doesn’t achieve adequate compaction for long-term stability.
Check levels constantly. Use string lines and a spirit level to ensure your sub-base follows your planned gradients.
4. Edge Restraints: The Unsung Heroes
Edge restraints prevent your path spreading and keep everything in place—never skip this step.
Concrete haunching (my preferred method): Pour a concrete strip along each edge of your sub-base, below the finished path level.
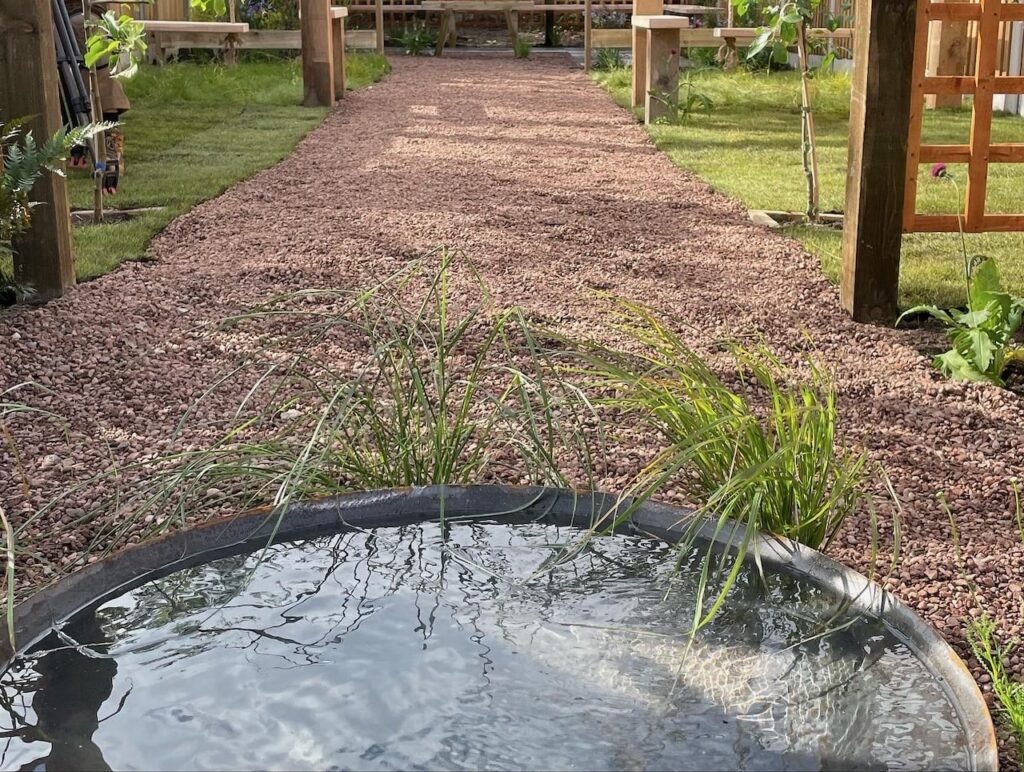
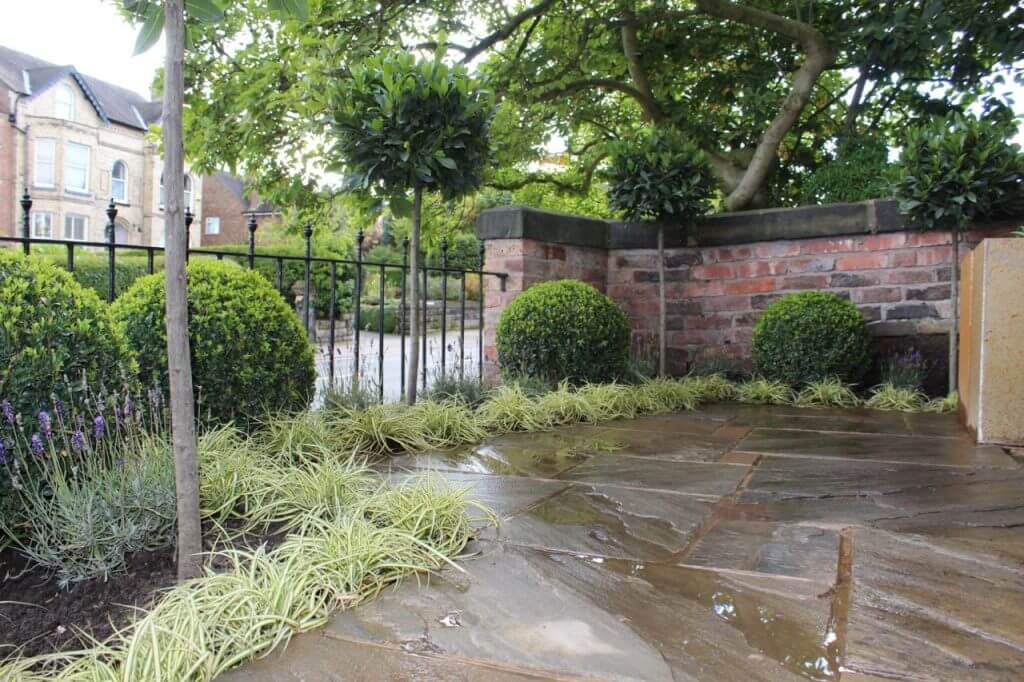
Treated timber edging: Good for informal paths, but ensure it’s below the finished surface to avoid a visible edge. See below for wooden edging against gravel.
Steel or aluminum edging: Professional option that’s virtually invisible when installed correctly.
5. Bedding Layer Installation
This is your final leveling opportunity before laying your chosen material.
Sharp sand for rigid materials (stone, pavers): Provides a firm, stable bed that doesn’t shift.
Soft sand for flexible materials (some natural stones): Allows slight movement and leveling adjustments.
Screed to precise levels. Use screed rails and a straight edge to achieve perfectly level bedding. This determines your final path quality.
6. Laying Your Chosen Material
Work systematically from one end to the other. Don’t jump around—it leads to level problems.
Check alignment constantly. Use string lines for straight paths, or a garden hose for curves.
Maintain consistent gaps. Professional paths have uniform joint widths—usually 10-15mm for natural stone.
Cut materials carefully. Invest in proper cutting tools or have materials cut professionally for clean edges.
7. Jointing and Finishing
Choose appropriate jointing material:
Kiln-dried sand: For pavers and some stone paths
Mortar pointing: For formal stone paths in high-traffic areas
Resin-bound jointing: Modern option that resists weeds
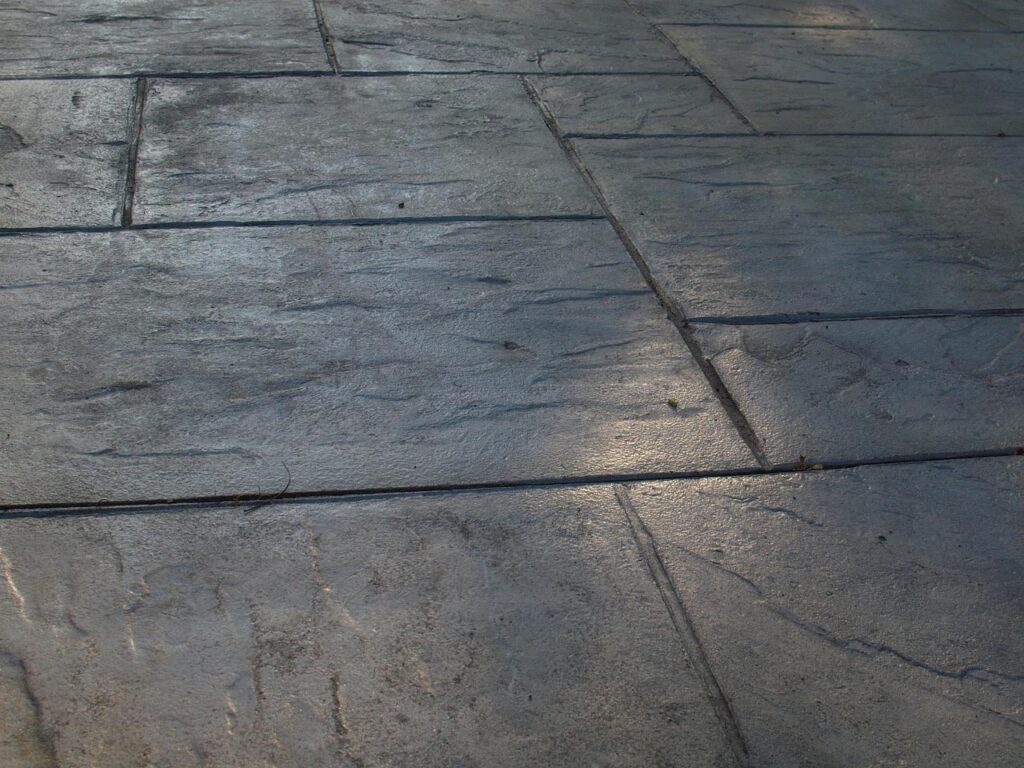
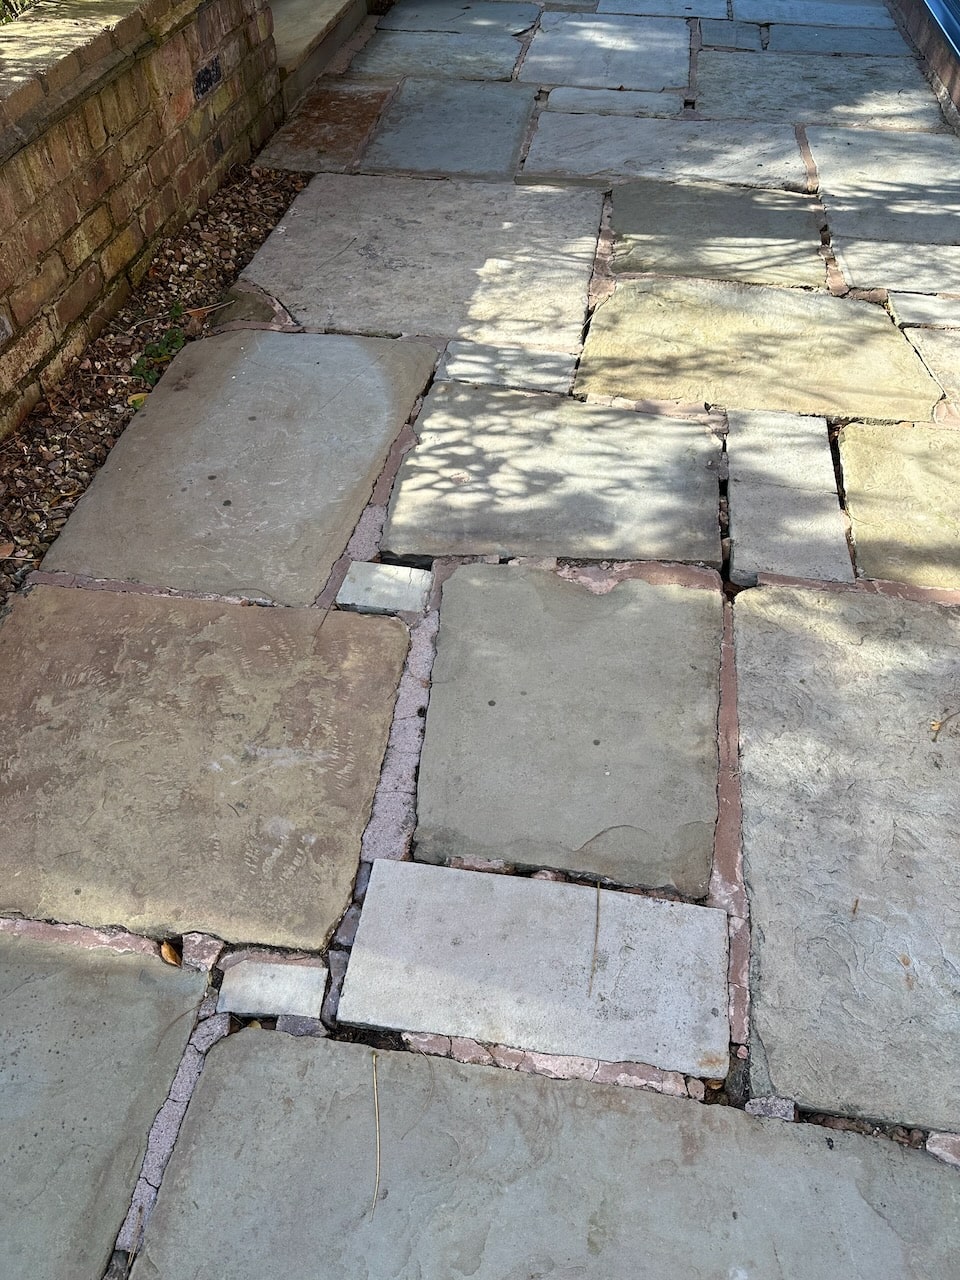
Below is an example of York stone with poor mortar that’s all falling out. It demonstrated why using a professional is key!
Compact and settle. Final compaction settles everything and ensures long-term stability.
Clean surfaces. Remove all jointing material from surface before it stains.
The 7 Costly Mistakes That Ruin DIY Path Projects
After decades of fixing failed path projects, these are the mistakes I see repeatedly:
Mistake 1: Inadequate Excavation
The Problem: Skipping proper excavation to save time and effort almost guarantees future problems.
Why It Fails: Without adequate depth and proper sub-base, paths sink, crack, and develop trip hazards within a few years.
The Fix: Never compromise on excavation depth. It’s hard work, but it’s the foundation of everything else.
Mistake 2: Poor Drainage Planning
The Problem: Installing paths without considering water runoff creates waterlogged areas and undermines the path structure.
Why It Fails: Water is path enemy number one. Poor drainage leads to frost damage, erosion, and unstable foundations.
The Fix: Always plan drainage before you start. Include cross-falls, and consider where water will go when it leaves your path.
Mistake 3: Using the Wrong Sub-Base Material
The Problem: Using builder’s sand, topsoil, or random hardcore instead of proper MOT Type 1 aggregate.
Why It Fails: These materials don’t compact properly, leading to settling, cracking, and instability.
The Fix: Invest in proper MOT Type 1 from a builders’ merchant. It costs more initially but prevents expensive repairs later.
Mistake 4: Insufficient Compaction
The Problem: Hand-tamping large areas or skipping compaction entirely to save time.
Why It Fails: Uncompacted sub-base settles over time, creating dips, cracks, and uneven surfaces.
The Fix: Rent a plate compactor for anything larger than a few square metres. Compact in layers for best results.
Mistake 5: Ignoring Edge Support
The Problem: Laying paths without proper edge restraints because they’re not visible in the finished project.
Why It Fails: Materials gradually spread and shift without edge support, creating gaps and instability.
The Fix: Always install edge restraints, even if they’re hidden. They’re essential for long-term stability.
Mistake 6: Inconsistent Levels and Falls
The Problem: Eyeballing levels instead of using proper measuring tools leads to puddles, trip hazards, and poor drainage.
Why It Fails: Water doesn’t lie—it finds every low spot and causes problems.
The Fix: Invest in a good spirit level and use string lines. Check levels constantly during installation.
Mistake 7: Rushing the Foundation Work
The Problem: Spending time and money on beautiful surface materials while skimping on invisible foundation work.
Why It Fails: Beautiful surfaces can’t compensate for poor foundations. The problems always surface eventually.
The Fix: Spend 70% of your effort on foundation work and 30% on surface materials. The foundation determines long-term success.
Annual Maintenance Tasks
Weed warfare never ends! I can’t stress this enough after watching countless beautiful paths get ruined by neglect. Address weeds the moment you spot them sprouting between joints because trust me, a tiny dandelion seedling is infinitely easier to deal with than a full grown monster with roots like a tree! I’ve seen clients ignore small weeds only to end up with paths that look like they’ve been abandoned for decades.
Joint maintenance is absolutely crucial and something most people completely overlook until it’s too late. That lovely sand or mortar between your stones will settle and wash out over time, leaving gaps that become weed highways and trip hazards. I top up jointing material every spring as part of my regular routine, and it takes minutes compared to the hours you’ll spend later if you ignore it.
Annual power washing transforms even the most neglected paths back to their former glory. I schedule this for early spring when the winter grime has built up but before the garden gets too busy. Just be gentle with natural stone surfaces, especially limestone and sandstone, as aggressive pressure washing can cause damage. Keep those edges sharp and defined throughout the year because nothing ruins the look of a beautiful path like scruffy, overgrown borders creeping inward.
Seasonal Considerations
Autumn leaf management might seem trivial, but it’s absolutely critical for path safety and appearance. I’ve seen too many accidents caused by slippery leaf mould, not to mention the permanent staining that wet leaves can cause on lighter stones like limestone and sandstone. Get out there with your rake or leaf blower the moment leaves start falling, especially after wet weather.
Winter brings its own challenges and I’ve learned some hard lessons about de-icing over the years. Never, ever use regular road salt on natural stone paths, particularly limestone or sandstone, as it can cause serious surface damage and discolouration. Rock salt might be cheap, but the repair costs will make you weep! Instead, use sand for grip or specific stone-safe de-icing products.
Spring inspections are non-negotiable in my book. Winter freeze-thaw cycles can wreak havoc on even the best-built paths, causing stones to shift or joints to crack. I spend a morning each March walking every path in my garden, noting any issues before they become major problems. Summer monitoring focuses on drainage and weed prevention, because addressing these issues before autumn’s heavy rains arrive will save you months of headaches later.
Long-Term Care
Even the most perfectly installed path will settle over time, and that’s completely normal, so don’t panic when you notice slight unevenness after a few years. I typically find that paths need minor adjustments around the 3-5 year mark, especially in areas with clay soil or heavy traffic. It’s far better to address small settling issues promptly than wait until you have major structural problems.
Surface treatments can dramatically extend your path’s lifespan depending on the material you’ve chosen. I seal my Indian sandstone paths every 3-4 years to protect against staining and weather damage, while my York stone paths get a light protective treatment every 5 years. It’s a small investment that pays massive dividends in longevity and appearance.
Replacement planning might seem premature, but trust me, thinking ahead saves money and stress. Well-maintained natural stone paths typically last 15-25 years before needing major renovation, depending on material quality and traffic levels. I always advise clients to start budgeting for replacement around the 10-year mark, not because it’s immediately necessary, but because planning ahead means you can choose the perfect timing rather than being forced into emergency repairs during the worst possible weather!
Path Maintenance: Keeping Your Investment Looking Great
Even well-built paths need regular maintenance to look their best:
Professional Installation vs. DIY: Making the Right Choice
Not every path project is suitable for DIY installation. Here’s how to decide:
Good DIY Projects:
Gravel paths under 20 metres
Simple stepping stone paths
Straight paths with basic materials
Low-traffic garden access routes
Consider Professional Installation:
Paths requiring vehicle access
Complex drainage situations
Expensive natural stone installations
Paths connecting to existing hard landscaping
Large or curved projects
When to Definitely Use Professionals:
Paths requiring planning permission
Installation over services or utilities
Sites with significant level changes
Heritage or conservation area projects
Budget Planning: What to Expect
Path costs vary enormously based on materials and complexity:
Budget Options (£20-40 per m²):
Gravel paths
Basic concrete
Simple stepping stones
Mid-Range Options (£40-80 per m²):
Clay pavers
Reconstituted stone
Textured concrete
Premium Options (£80-200+ per m²):
Natural stone
High-end pavers
Complex patterns or designs
Remember: Foundation work represents 60-70% of total cost regardless of surface material. Don’t economise on invisible work.
Design Tips for Professional-Looking Results
i) How wide should paths be?
Narrow paths (600-800mm): Garden access only
Standard paths (1-1.2m): Comfortable single-file walking
Wide paths (1.5m+): Allow two people to walk side-by-side
ii) Curves and Lines
Gentle curves can look natural and feel comfortable but make sure they are wide enough.
Tight curves are difficult to construct and uncomfortable to use
Straight lines work well in formal gardens but can feel harsh in naturalistic settings
Repeat materials used elsewhere in the garden for cohesion
Consider mature plant sizes when planning path width
iv) Lighting Considerations
Plan for lighting during construction—retrofitting is expensive
Use low-level lighting to define path edges safely
Consider solar options for remote paths without electrical access
Common Questions About DIY Path Construction
Q: How long should I wait before using a newly laid path? A: Gravel paths can be used immediately. Stone and paver paths need 24-48 hours for bedding sand to settle. Concrete paths require 7 days for full cure.
Q: Can I lay a path directly onto existing lawn? A: Never. Grass and organic matter will decompose, causing settling and instability. Always excavate to proper depth.
Q: How do I deal with tree roots in my path route? A: Minor roots can be cut, but major roots may require path redesign. Never cut roots larger than 25mm diameter without consulting an arborist.
Q: What’s the minimum slope for drainage? A: Aim for 1:40 (25mm fall per metre) across the path width. Length-wise falls can be gentler—1:80 is usually adequate.
Q: Can I install paths in winter? A: Avoid working in freezing conditions or when ground is waterlogged. Concrete work is particularly sensitive to temperature.
Tools and Materials Shopping List
For a 10m x 1m Gravel Path:
Materials:
1.5 tonnes MOT Type 1 sub-base
0.5 tonnes angular gravel (10-14mm)
Landscape fabric (optional but recommended)
Edge restraints (timber or concrete)
Tools:
Excavation tools (spade, mattock)
Compaction equipment (hire plate compactor)
Leveling tools (rake, spirit level, string line)
Wheelbarrow and buckets
Estimated Cost: £150-250 including tool hire
For a 10m x 1m Natural Stone Path:
Materials:
1.5 tonnes MOT Type 1 sub-base
1 tonne sharp sand for bedding
10m² natural stone (thickness dependent)
Pointing mortar or jointing sand
Edge restraints
Tools:
As above, plus stone cutting equipment
Rubber mallet for laying stones
Estimated Cost: £400-800 depending on stone choice
The Investment That Keeps Giving
A well-built garden path is one of the best investments you can make in your outdoor space. Unlike plants that may die or trends that change, a quality path provides decades of function and beauty.
But here’s what I’ve learned from years of garden design: the difference between a path that enhances your garden and one that detracts from it often comes down to understanding design principles that go far beyond construction techniques.
Why Professional Design Knowledge Matters
The technical skills I’ve shared will help you build a structurally sound path, but creating a path that truly transforms your garden requires understanding:
How paths create rhythm and flow through garden spaces
The psychology of movement and how people naturally navigate landscapes
Material selection that complements your garden’s style and architecture
Integration techniques that make paths feel like natural parts of the landscape
Proportional relationships between path width, garden size, and planted areas
These are the skills that separate amateur projects from professional-looking results—and they’re exactly what I teach in my garden design courses.
From DIY Builder to Garden Designer
Many of my course students started exactly where you are now—wanting to improve their outdoor spaces but unsure how to create cohesive, professional-looking results. The path-building skills you’re learning here are just the beginning.
In my Garden Design for Beginners course, I’ll show you how to:
Plan garden circulation that feels natural and inviting
Choose materials that work harmoniously with your home and landscape
Create focal points that paths naturally lead toward
Design seasonal interest that makes every garden journey rewarding
Integrate hardscaping and planting for maximum impact
29
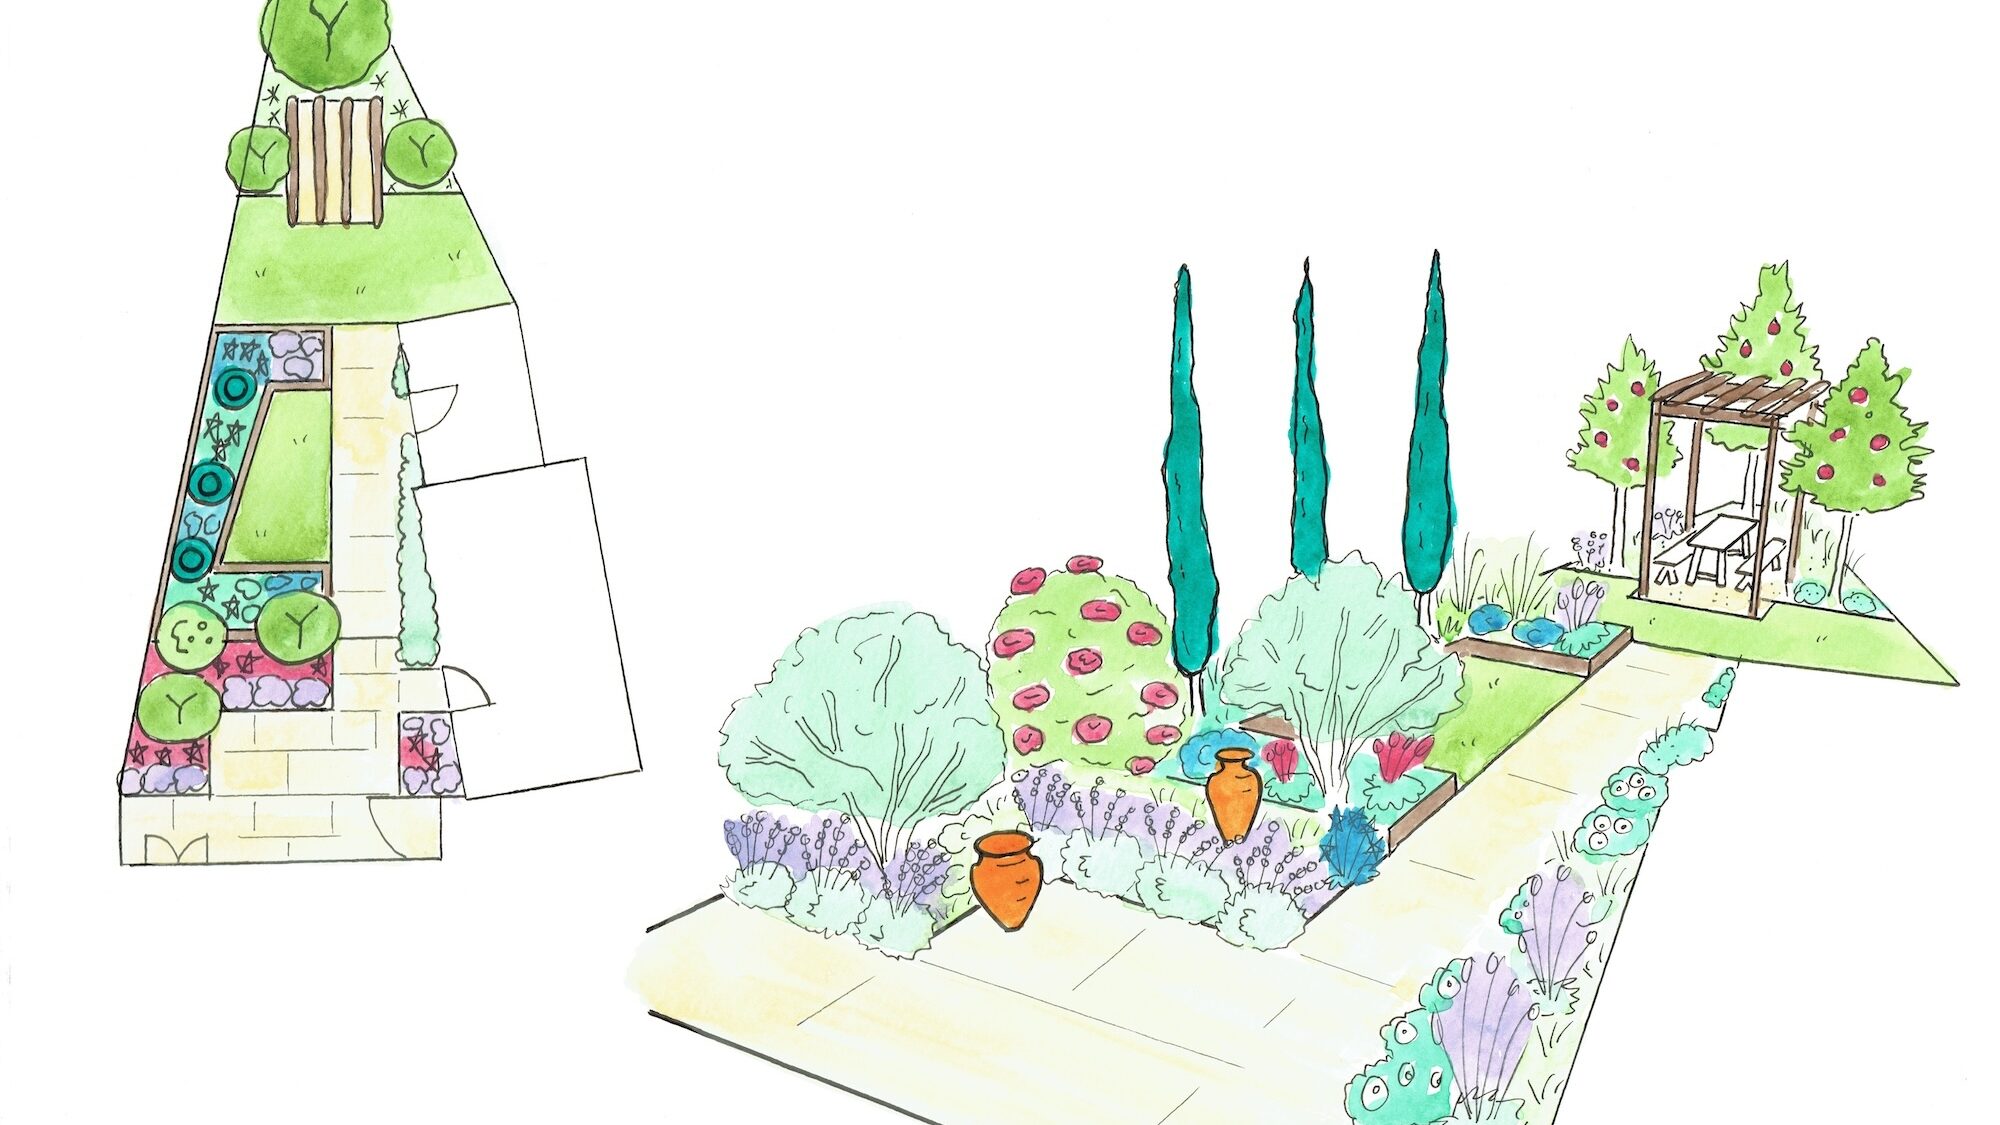
Garden Design Examples for Small Gardens: 30 Design Templates & Planting Plans
Garden Design Examples for Small Gardens: 30 Design Templates & Planting Plans: In this online gardening course, I’ll walk you through 30 fantastic garden designs, explaining the logic behind the layout, the plant choices, and take-home tips for applying them in your own garden.
Weekend Garden Makeover: A Crash Course in Design for Beginners
Learn how to transform and design your own garden with Lee Burkhills crash course in garden design. Over 5 hours Lee will teach you how to design your own dream garden. Featuring practical design examples, planting ideas and video guides. Learn how to design your garden in one weekend!
Garden Design for Beginners: Create Your Dream Garden in Just 4 Weeks
Garden Design for Beginners Online Course: If you want to make the career jump to becoming a garden designer or to learn how to design your own garden, this is the beginner course for you. Join me, Lee Burkhill, an award-winning garden designer, as I train you in the art of beautiful garden design.
My 30 Design Templates course includes detailed case studies showing how professional paths are planned and integrated into complete garden designs. You’ll see exactly how I make decisions about:
Path placement and routing
Material selection and combination
Width and proportion decisions
Integration with existing features
The Value of Getting It Right First Time
Remember my client who spent £3,000 on the wrong plants? I’ve seen similar stories with paths beautiful, expensive materials laid in the wrong places, creating gardens that feel awkward and disconnected.
Ready to master garden design beyond just construction techniques?Explore my online garden design courses and learn to create gardens where every element works together beautifully.
Summary
Remember, creating beautiful garden paths is both an art and a science. The technical skills ensure your paths last for decades, while design knowledge ensures they enhance your garden’s beauty and function.
Take your time, don’t rush the foundation work, and most importantly, enjoy the process. There’s something deeply satisfying about creating permanent improvements to your outdoor space with your own hands.
I’d love to see your path projects, Ninjas! Share your progress and results in the comments below or connect with me on my Facebook or Instagram pages. Whether it’s a triumph or a challenge, we can all learn from each other’s experiences.
Lee Burkhill, known as the Garden Ninja, is an award-winning garden designer and horticulturist with over 30 years of gardening experience and 15 years as a professional garden designer. A qualified RHS (Royal Horticultural Society) professional, Lee specialises in sustainable garden design and practical horticultural advice. He designs and presents on BBC1’s Garden Rescue and in leading gardening publications. Lee combines three decades of hands-on gardening knowledge with professional design qualifications to help gardeners create beautiful, functional outdoor spaces.