11 Plant Placement Mistakes That Ruin Good Garden Design
Lee Burkhill: Award Winning Designer & BBC 1's Garden Rescue Presenters Official Blog
Intermediate level
Discover the 11 critical plant placement mistakes that sabotage even the most expensive garden makeovers—and the simple fixes that transform chaotic plantings into stunning, professional-looking designs.
You’ve chosen beautiful plants, spent good money on quality specimens, and carefully planned your garden design. Yet something’s not quite right. The garden looks off. If this sounds familiar, you’re not alone! Even experienced gardeners can fall into plant placement traps that sabotage their best intentions. Let me, the Garden Ninja, walk you through the most common placement mistakes that can turn a promising garden into a disappointing muddle.
I see these placement blunders time and time again in my garden design consultations. The good news? Most are easily fixable once you know what to look for. Some require a simple reshuffle during the dormant season, while others need a complete rethink of your planting strategy.
As always, I’m here to guide you through it—no jargon, no nonsense, and absolutely no guesswork. Let me explain the plant placement mistakes that are sabotaging your garden design and how to fix them.
1) The “Supermarket Sweep” Mistake: Ignoring Mature Plant Sizes
Picture this: you’re at the garden centre, and that adorable little Cornus (Dogwood) looks perfect for that corner spot. Fast forward five years, and it’s completely swallowed your pathway and is casting shade over your prize roses. Sound familiar?
The Problem: The biggest plant placement mistake I encounter is gardeners shopping with their eyes, not their brains. That innocent-looking shrub often comes with a mature spread that would make a small car jealous.
The Fix: Before you buy any plant, research its mature size—both height and spread. I always tell my clients to visualise the plant at ten years old, not ten weeks. If a shrub will reach 3 metres wide, don’t plant it 1.5 metres from your house!
Pro Tip: Use bamboo canes or even chalk spray to mark out the mature footprint before planting. It sounds excessive, but it’ll save you from expensive mistakes and backbreaking transplanting later.
2) The “Thriller, Filler, Spiller” Trap: Misunderstanding Plant Hierarchy
Many gardeners have heard of the “thriller, filler, spiller” concept from container gardening, but applying it incorrectly in garden borders creates visual chaos.
The Problem: Planting multiple “thrillers” (statement plants) right next to each other creates competition for attention. Your eye doesn’t know where to land, and the overall effect is messy rather than dramatic.
The Fix: In garden borders, use the rule of odd numbers and strategic spacing. Plant one major focal point per view, then support it with smaller plants that complement rather than compete. Think of it like a good conversation—one person leads while others listen and respond.
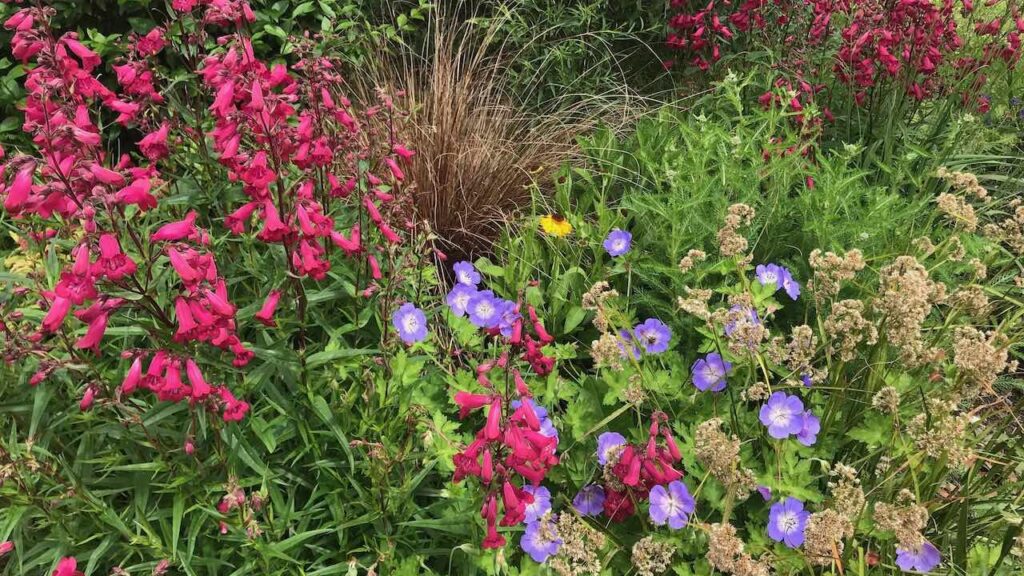
Real Example: Instead of planting three different ornamental grasses in a row, use one as your anchor (like Miscanthus) and surround it with lower plants like Echinacea and Sedum that won’t fight for attention.
3) The “Line ‘Em Up” Mistake: Creating Soldiers Instead of a Garden
Nothing screams “amateur” quite like plants lined up like soldiers on parade. This mistake is particularly common along fence lines and property boundaries. Especially with annual bedding plants like Pansies, Marigolds or Begonias. It’s a surefire way to make your garden look twee and awkward.
The Problem: Uniform spacing and straight lines create a formal, institutional look that rarely works in residential gardens. It also ignores how plants naturally grow and spread.
The Fix: Plant in triangular groups or drifts, varying the spacing slightly. For hedging, this obviously doesn’t apply, but for mixed borders, embrace asymmetry. I often use a 3-5-7 rule: plant in groups of 3, 5, or 7 for natural-looking clusters.
Garden Designer Secret: Stand back and squint at your planting plan. If it looks too neat and predictable, you need to mess it up a bit!
4) The “Colour Confusion” Disaster: Clashing Without Harmony
Walking through some gardens feels like being inside a bag of Skittles—every colour is there, but they’re not playing nicely together.
The Problem: Planting every colour you love without considering how they work together creates visual indigestion. Hot pink next to orange next to purple might work in a sweet shop, but it’s jarring in a garden.
The Fix: Choose a colour palette and stick to it. I often recommend starting with two or three colours maximum, then adding neutrals (whites, silvers, greens) to tie everything together. Hot colours (reds, oranges, yellows) work well together, as do cool colours (blues, purples, pinks).
My Go-To Colour Combinations
Purple and silver with white accents
Blue and yellow with cream
Pink and burgundy with grey foliage
Orange and bronze with lime green
5) The “Texture Blindness” Blunder: Same-Same Plants
Even with perfect colour coordination, gardens can look flat if every plant has similar leaf shapes and textures. I see this a lot when people decide they love a plant, let’s say Ferns, and then they plant only that leaf shape throughout the garden, meaning it all looks flat. With no variance or difference to help draw the eye or add garden interest,
The Problem: Planting lots of similar-looking plants creates a monotonous sea of green. Think of a border filled entirely with hostas—nice plants individually, but boring en masse.
The Fix: Mix leaf shapes, sizes, and textures deliberately. Combine spiky plants (like iris or yucca) with rounded ones (like hebe or lavender) and soft, feathery textures (like ferns or ornamental grasses).
Plant Texture Combinations That Work
Spiky Kniphofia, Heleniums, Sedum and soft Stipa grasses for full sun.
Broad-leafed Bergenia with Hardy Gereniums and ferny Astilbe which love shade.
Glossy Camellia leaves with Stachys Lamb’s ear and architectural Molinia for a mix of sun and light shade.
6) The “Seasonal Suicide” Mistake: Everything Peaks at Once
The Problem: Concentrating all your flowering plants into one season (usually spring) leaves you with months of just green leaves. It’s like throwing all your party decorations up at once—impressive initially, but then what?
The Fix: Plan for year-round interest by choosing plants that peak at different times. I aim for something happening in the garden every month, whether it’s flowers, berries, autumn colour, or interesting bark.
7) The “Proportion Disaster”: Wrong Plant, Wrong Scale
Scale is everything in garden design, yet it’s often completely ignored. If you play it safe with just tiny plants like Geraniums your garden will look like a dolls house, however, if you decide to ignore the ultimate growth of plants you can end up with a jungle instead!
The Problem: Tiny plants get lost in large spaces, while oversized specimens overwhelm small gardens. It’s like wearing a ball gown to buy groceries—technically possible, but completely wrong for the situation.
The Fix: Match plant sizes to your space and viewing distance. Large gardens need bold, substantial plants to create impact. Small gardens need careful scaling to avoid overcrowding.
Scale Guidelines
Small gardens (under 100 sq metres): Focus on plants under 2 metres tall and 1.5 metres wide
Medium gardens: Mix heights from 0.5 to 3 metres for layered interest
Large gardens: Don’t be afraid of substantial plants—they’re needed to fill the space
8) The “Soil Denial” Catastrophe: Fighting Your Conditions
Perhaps the most expensive mistake is trying to grow plants that hate your soil conditions. Understanding your soil type is fundamental to all garden design and garden flower bed planning. Without undertstanding this you’re just guessing what will work and what won’t grow. Guessing is an expensive game in gardening which I never advocate!
The Problem: Forcing acid-loving plants into alkaline soil, or planting Mediterranean herbs in waterlogged clay, leads to weak, struggling plants that never reach their potential.
The Fix: Work with your soil, not against it. Test your soil’s pH and drainage, then select plants that thrive in your specific conditions. Trust me, plants that love your soil will always outperform those you’re trying to force.
9) The “Instant Gratification” Error: Overcrowding Young Plants
Garden centres display plants at their most attractive, but that’s not how they’ll look in your garden initially. Also a lot of the time these garden centre plants have been forced in polytunnels and mass nurseries far away. They are then shipped into allure you to buy them, even though you’bve probably never even read the label to see if they will like your soil condition or gardens aspect!
The Problem: Planting new specimens too close together because you want immediate impact leads to overcrowding as plants mature. What looks full now will be a jungle in three years.
The Fix: Plant for the mature size, even if it looks sparse initially. Fill temporary gaps with annuals or fast-growing perennials that you can remove later.
Professional Trick: Use mulch to define planted areas and make sparse plantings look intentional. A well-mulched, properly spaced garden always looks more professional than an overcrowded mess.
10) The “Maintenance Nightmare” Trap: Ignoring Your Lifestyle
Beautiful gardens that require intensive maintenance become burdens rather than pleasures. Whilst I always advocate away from zero or no maintenance gardens as it kind of eliminates the point of getting involved with nature and plants I do support easy maintenance flower beds and designs. These are gardens that need some interaction but are not just a mass of evergreen boring blobs or the dreaded artificial lawn!
The Problem: Choosing high-maintenance plants because they look amazing in photos, then watching them decline because you can’t provide the care they need.
The Fix: Be honest about your time, skill level, and interest in garden maintenance. Choose plants that match your lifestyle, not your Instagram aspirations.
Low-Maintenance Alternatives
Instead of roses (regular pruning, feeding, disease control), try Potentilla or Spirea
Instead of perfect lawns (weekly mowing, feeding, weeding), consider ornamental grasses or ground cover
Instead of annual bedding (replanting twice yearly), use long-flowering perennials
11) The “Afterthought Path” Problem: Plants Versus Practicality
Gardens need to be functional as well as beautiful, but plant placement often ignores practical considerations such as over planting next to paths so plants spill over and cause a trip hazard, the same with plants casting shade onto the rooms in your house by planting dense heavy shrubs to close to the property.
The Problem: Planting without considering maintenance access, sight lines, or traffic patterns creates beautiful gardens that are impossible to use or maintain.
The Fix: Plan your practical needs first—where do you need to walk, what needs regular access, what views do you want to preserve or block? Then plant around these constraints.
Practical Considerations for Planting Plans
Leave space to access taps, meters, and bins
Consider mature spread when planting near pathways
Think about what you’ll see from the windows year-round
Plan for maintenance access to all plants
How to Fix Plant Placement Mistakes
The secret isn’t about getting everything perfect from day one in your garden planting plans. Trust me, if you’re waiting for that to happen, you’ll never plant anything. It’s about knowing how to assess what’s gone wrong, when to act, and how to move things around without killing half your garden in the process. Because let’s face it, there’s nothing more soul-destroying than successfully relocating a plant only to watch it die three weeks later.
A) Assess Before You Act
Before moving anything, spend a full year observing your garden. Ydes a full year and watch the seasons, sunlight levels and see how your garden aspect is impacted by light and shade. Note problem areas, seasonal gaps, and plants that aren’t thriving. Sometimes what looks like a placement mistake is actually a care or soil issue.
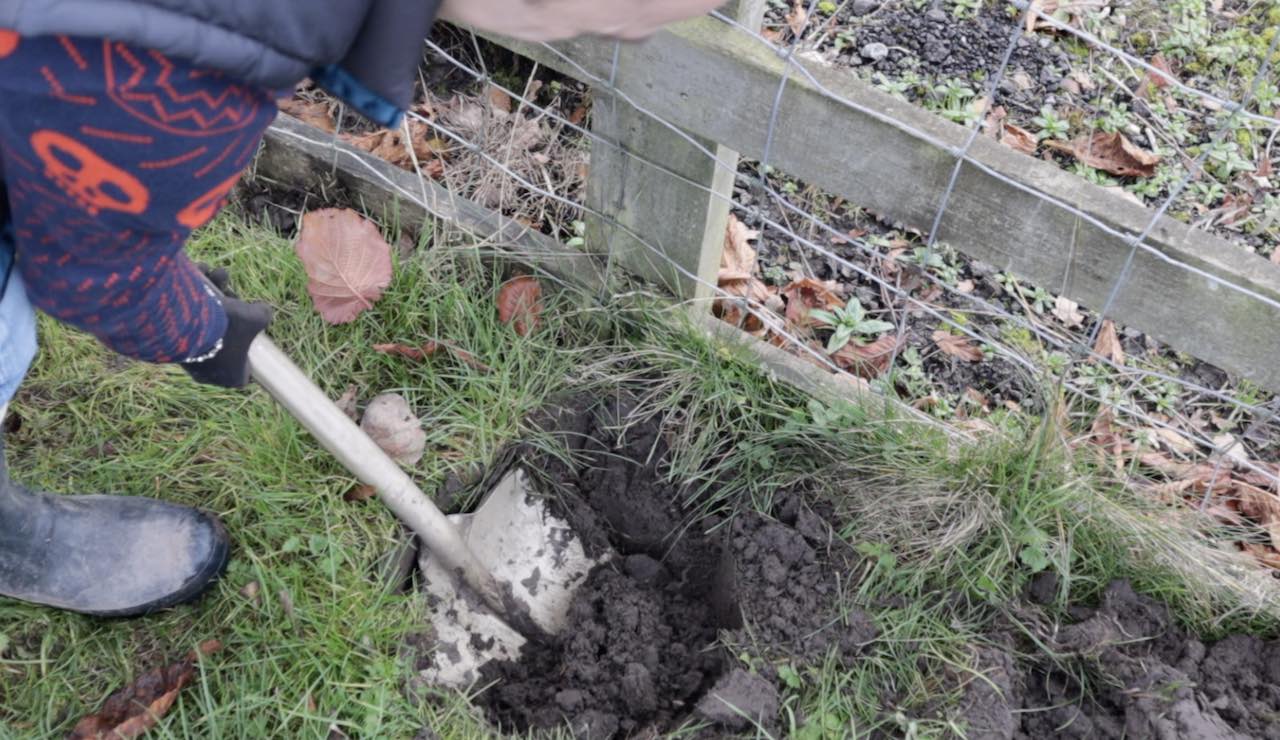
B) Move Plants During Dormancy
The best time to relocate plants is during their dormant period (late autumn to early spring for most plants). Follow my shrub moving guide for the best technique. If you really must move something when its mid season or actively growing, water it the day before thoroughly then lift either early morning and or in the evening and plant immediately in its new location. Water water and water some more!
C)Start Small
Don’t try to fix everything at once. Tackle one area or one type of mistake per season. This prevents overwhelming yourself and allows you to learn from each change. This is one of the best tips when tweakin garden designs and planting plans.
The best approach to plant placement is getting it right from the start:
Research thoroughly before buying plants
Draw a scale plan showing mature sizes
Consider all seasons in your planning
Think about maintenance from day one
Choose plants for your conditions, not your wishes
But here’s the thing—learning these skills properly takes time, and making expensive mistakes while you’re figuring it out can be heartbreaking (and costly). After decades of designing award-winning gardens and presenting on BBC1’s Garden Rescue, I’ve seen these same placement mistakes repeated by gardeners across the country.
The truth is, most of these mistakes are completely preventable with the right knowledge.
Why Professional Training Matters
I’ve watched countless gardeners struggle with plant placement because they’re trying to learn through trial and error. One client came to me after spending £3,000 on plants that were completely wrong for their space—they’d have saved money by investing in proper design knowledge first.
That’s exactly why I created my online garden design courses. Instead of learning through expensive mistakes, you can learn the professional techniques I use to get plant placement right every time.
What You’ll Learn That Prevents These Mistakes
My Garden Design for Beginners course teaches you the fundamental principles that eliminate guesswork:
Plant selection logic that matches the right plant to the right spot every time
Professional spacing techniques that account for mature sizes from day one
Seasonal planning methods that ensure year-round interest
Soil-smart plant choices that thrive rather than struggle
The 30 Design Templates course shows you exactly how these principles work in real gardens, with detailed planting plans you can adapt for your own space.
29
Garden Design Examples for Small Gardens: 30 Design Templates & Planting Plans
Garden Design Examples for Small Gardens: 30 Design Templates & Planting Plans: In this online gardening course, I’ll walk you through 30 fantastic garden designs, explaining the logic behind the layout, the plant choices, and take-home tips for applying them in your own garden.
Weekend Garden Makeover: A Crash Course in Design for Beginners
Learn how to transform and design your own garden with Lee Burkhills crash course in garden design. Over 5 hours Lee will teach you how to design your own dream garden. Featuring practical design examples, planting ideas and video guides. Learn how to design your garden in one weekend!
Garden Design for Beginners: Create Your Dream Garden in Just 4 Weeks
Garden Design for Beginners Online Course: If you want to make the career jump to becoming a garden designer or to learn how to design your own garden, this is the beginner course for you. Join me, Lee Burkhill, an award-winning garden designer, as I train you in the art of beautiful garden design.
Consider this: my courses cost from as little as £29 to £199, which is less than most gardeners spend on a weekend shopping trip to the garden centre. But those impulse purchases often lead to:
Replanting costs when plants are in the wrong spots
Time lost moving established plants
Wasted money on plants that don’t survive
Frustration watching your garden fail to thrive
My course students consistently tell me they’ve saved hundreds (sometimes thousands) by getting their plant placement right from the start, along with other garden design expert tips and hacks.
Learn at Your Own Pace, Apply Immediately
The beauty of online learning with me is that you can:
Study when it suits you—no rushing to evening classes after work
Revisit lessons whenever you need a refresher
Apply techniques immediately in your own garden
Access lifetime updates as I add new content
Learn from real examples rather than theoretical concepts
Success Stories That Prove It Works
Sarah from Manchester wrote: “I was about to rip out my entire border and start again. Lee’s course taught me it was just poor plant placement—I moved three key plants and suddenly everything clicked. Saved me a fortune and my garden looks professional now.”
James from Bristol said: “The seasonal planning module alone was worth the course fee. My garden now has interest all year round instead of just looking good for six weeks in spring.”
              French Fry2  2025-07-25   Trustindex verifies that the original source of the review is Google. What a useful consultation we had with Lee this week. In no time he was able to spark a whole host of new ideas and get us started on our journey to create our new garden. In addition to the great chat, Lee printed the photos I had sent him and annotated them with a basic plan. Thanks Lee!              Joanne Craft-Lane  2025-07-24   Trustindex verifies that the original source of the review is Google. I love Lee's design ideas. Especially helpful was the details on garden path design. I'm currently planning to add a garden path to my garden and this info arrived in my email just in time to help me decide the best choice fir my area and budget! Thanks Lee!              Nicola Cockram  2025-07-04   Trustindex verifies that the original source of the review is Google. I had a fantastic 1-hour garden consultation with Lee! I had a good vision in my head beforehand, but with Lee’s help, I was able to prioritise and make decisions about what would be most suitable for my space. In such a short time, I learned so much. I had plenty of ideas, and Lee was incredibly helpful in narrowing them down and guiding me towards what I truly wanted. He shared so much valuable theory and knowledge, which was exactly what I needed. By the end of the call, I felt fully equipped with a clear vision and ready to dive into my garden project. We also discussed purchasing courses, and Lee suggested the one that would be best suited to me. I’m so excited to get started! I highly recommend reaching out to Lee – I know I would have made a lot of mistakes without his guidance. Save the money and invest in this consultation!              Jim Simmonds  2025-06-03   Trustindex verifies that the original source of the review is Google. I love Lee's style, help and the fact he is always happy to share his knowledge.  No other expert does this so willingly.  Love all the videos tutorials too which is such a help and such a generous thing to do - thank you Lee.              Val Smith  2025-05-14   Trustindex verifies that the original source of the review is Google. I had a one-hour consultation with Lee and during that time he gave me loads of creative ideas and advice for the re-design of my garden which I had been struggling to sort out.  He was engaging, knowledgable and informative and followed up with lots of useful info on email afterwards.  Thank you for the inspiration and can't wait to get started....sorry for the black screen you had to look at due to my technical incompetence..hopefully my gardening skills will be better!!              Sarah Howling  2025-05-02   Trustindex verifies that the original source of the review is Google. We had a one-hour consultation with Lee and it was brilliant. He is as warm, inspirational, knowledgeable, and funny as he is on the TV. We had loads of questions and Lee answered them all and we left with a really clear plan of what to do.
Lee followed up the next day with lots of resources and the sketched out plan of our garden that he drew when we were online. I can't recommend  Lee or the one-hour consultation enough. Thanks, Lee!              caroline barnes  2025-04-06   Trustindex verifies that the original source of the review is Google. The hour we spent with Lee was extremely valuable and helpful. He was friendly, constructive, knowledgeable and genuinely interested in our project. Lots of great ideas and tips - we can’t wait to get started. Would absolutely recommend.              John Barnes  2025-03-27   Trustindex verifies that the original source of the review is Google. Very helpful and genuinely interested in helping with our project. Very worthwhile investment of both time and money.              Sue Prior  2025-03-25   Trustindex verifies that the original source of the review is Google. So engaging and keep learning more about horticulture + hope to continue doing so.  Thanks       Load more        Verified by Trustindex  Trustindex verified badge is the Universal Symbol of Trust. Only the greatest companies can get the verified badge who has a review score above 4.5, based on customer reviews over the past 12 months. Read more
From Mistakes to Mastery
Remember, even professional designers make placement mistakes—it’s part of the learning process. The key is recognising them early and being willing to make changes. But with proper training, you can avoid most of these expensive errors entirely.
My courses take you from making costly guesswork decisions to understanding the logic behind every plant placement. You’ll think like a professional designer, not just an enthusiastic gardener.
Ready to stop making expensive plant placement mistakes?Explore my online garden design courses and start creating gardens that work beautifully from day one.
I’d love to hear about your plant placement adventures, Ninjas. Have you made any of these mistakes? Share your stories and solutions in the comments below or connect with me on my Facebook or Instagram pages. Let’s learn from each other’s gardening journeys!