The Beginner’s Guide to Keeping Bees: UK Gardener Guide
Lee Burkhill: Award Winning Designer & BBC 1's Garden Rescue Presenters Official Blog
Expert level
The honest truth about starting beekeeping in the UK. Keeping bees and creating an apiary is both a rewarding and challenging pursuit. I give you all of my advice as an expert gardener and bee keeper. If you're ready to start your beekeeping journey with realistic expectations and proven strategies this is the guide for you! Let's dive into what it really takes to become a successful beekeeper in the UK.
Right, let’s be completely honest about this from the start. Beekeeping is not what you think it’s going to be. I’ve been keeping bees for four years now, and I can tell you that every romantic notion I had about gentle summer days extracting golden honey while wearing a fetching straw hat has been thoroughly crushed by reality.
I’m an expert horticulturalist and garden designer. I feel like plants, pollen, and the seasons are second nature to me, so how hard can keeping a few hives of honey bees be? Turns out, far more difficult than I anticipated!
I’ve had queens abscond on me twice (once taking half my honey stores with them, the ungrateful little madam), dealt with more bee diseases than I care to remember, and had harvests so pitiful that I’ve genuinely considered buying supermarket honey and pretending I made it myself. But here’s the thing – despite all the disasters, setbacks, and moments of complete bewilderment, I absolutely love being a beekeeper.
If you’re thinking about starting beekeeping, this guide will hopefully save you from some of the more spectacular mistakes I’ve made along the way. And trust me, there have been plenty.
Let’s start with what you’re probably dreaming about versus what you’re actually likely to get. I certainly fell into this trap spectacularly.
What you’re probably hoping for:
Peaceful, well-behaved bees that never sting
Perfect weather for every inspection
Supers overflowing with liquid gold
Enough honey to supply half the neighbourhood
Instagram-worthy hives in a picture-perfect apiary
What you should actually expect:
Bees that range from angelic to absolutely furious, sometimes within the same inspection
The weather seems personally designed to thwart your beekeeping plans
Possibly some honey, but probably not enough to recoup your initial investment
Several “what the hell is going on?” moments per season
At least one complete disaster that makes you question your life choices
The most important thing to understand is that your primary goal for the first season should be getting your bees through winter alive. Everything else – including honey – is a bonus. I learned this the hard way when I lost my first colony in February. All that careful planning and investment, gone because I didn’t understand the basics of winter preparation.
Why keep honey bees?
Keeping honey bees is an ancient practice, dating back thousands of years, which allows us humans to interact, look after, learn from and harvest honey from these wonderful bees.
When bees are looked after compassionately and ethically, it’s a mutually beneficial arrangement.
The honey bees get a safe home, free from disease and assistance when food stocks like nectar and pollen are low and in return, the beekeeper gets to learn about their fascinating life, see them take part in the pollination life cycle of plants and then, if lucky, harvest some honey each year.
In my opinion, as a beekeeper, the husbandry of the bees must come first above all else. These creatures work incredibly hard, and we are lucky that they let us witness their industrious and sometimes miraculous lifecycle so closely. We can learn so much from bees in our own human societies such as cooperation, hard work and patience. The honey really is the icing on the cake -in fact, some beekeepers don’t harvest any, leaving it for the bees!.
How old is beekeeping?
Beekeeping, also known as apiculture, is one of the oldest forms of animal husbandry practised by humans. The history of beekeeping dates back thousands of years. It is believed that humans began collecting honey from wild bee colonies long before they started keeping bees in managed hives.
The earliest evidence of beekeeping can be traced back to ancient civilisations in Egypt, around 4,500 years ago. Egyptian art and hieroglyphics depict scenes of beekeeping and the harvesting of honey from hives. Ancient Egyptians valued honey for its culinary and medicinal properties, and they also used beeswax for various purposes.
The Real Costs of Beekeeping
Nobody talks about this honestly enough, so let me break it down for you. Beekeeping is not a cheap hobby, and anyone who tells you it’ll pay for itself in the first year is either lying or selling something.
Replacement frames and foundation: £30-50 per hive
Association membership: £20-40
Additional equipment (because you always need something): £100-200
Realistic annual costs: £185-360 per hive
Now, about honey income. In my four years, I’ve had harvests ranging from absolutely nothing to about 30kg in a good year. At £8-10 per jar, that’s £240-300 maximum. Do the maths, and you’ll see why I said don’t expect it to pay for itself quickly.
The Honey Bee Lifecycle: A Beginner’s Guide
Right, let’s talk about the bee lifecycle. Something that seems dead simple until you actually start keeping bees and realise you don’t have a clue what’s going on in your hive.
The Basic Cast of Characters in a bee Hive
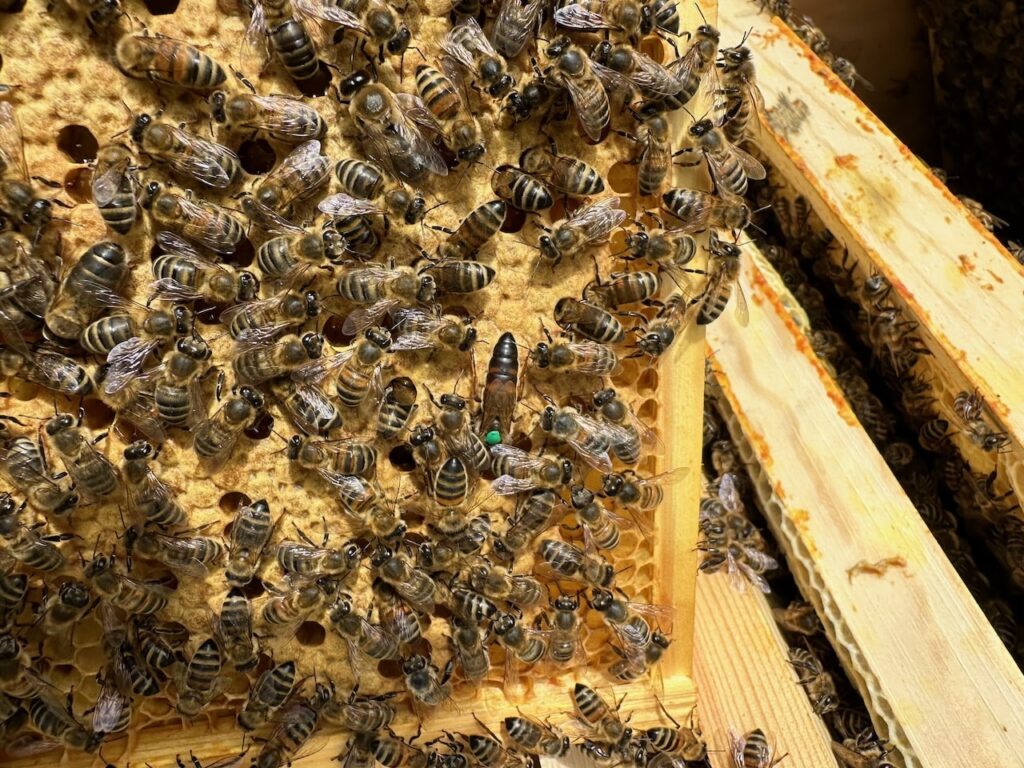
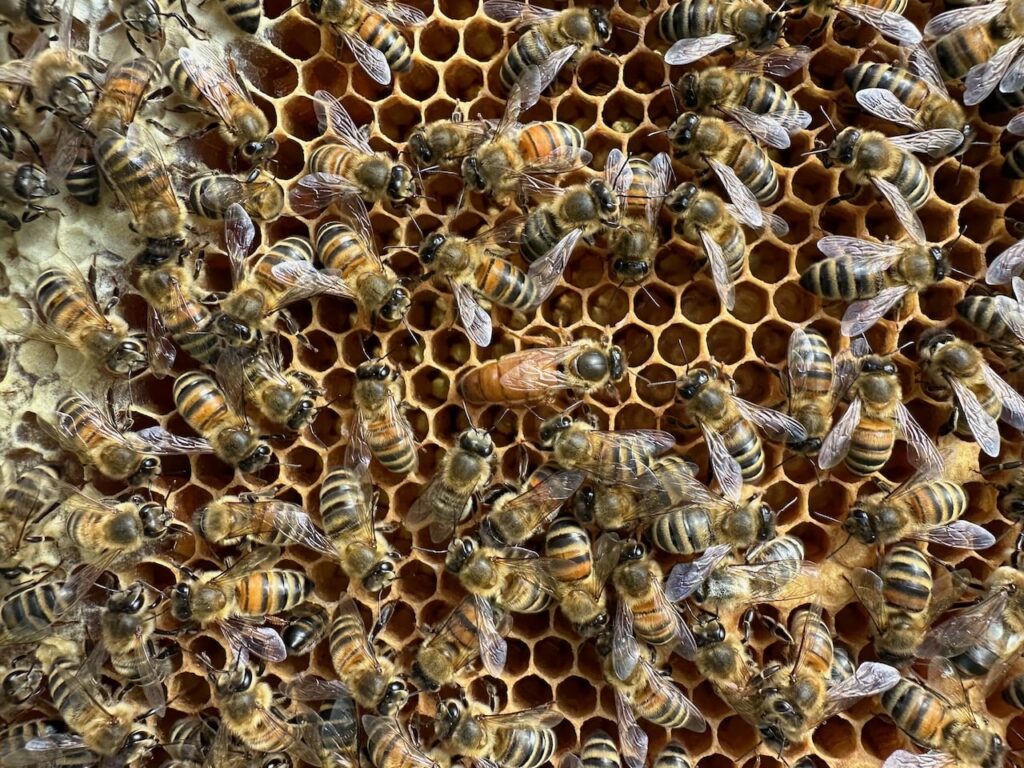
There are three main types of honey bee in a hive, one of which is the queen who is probably the most important, then workers (female) and drones (male).
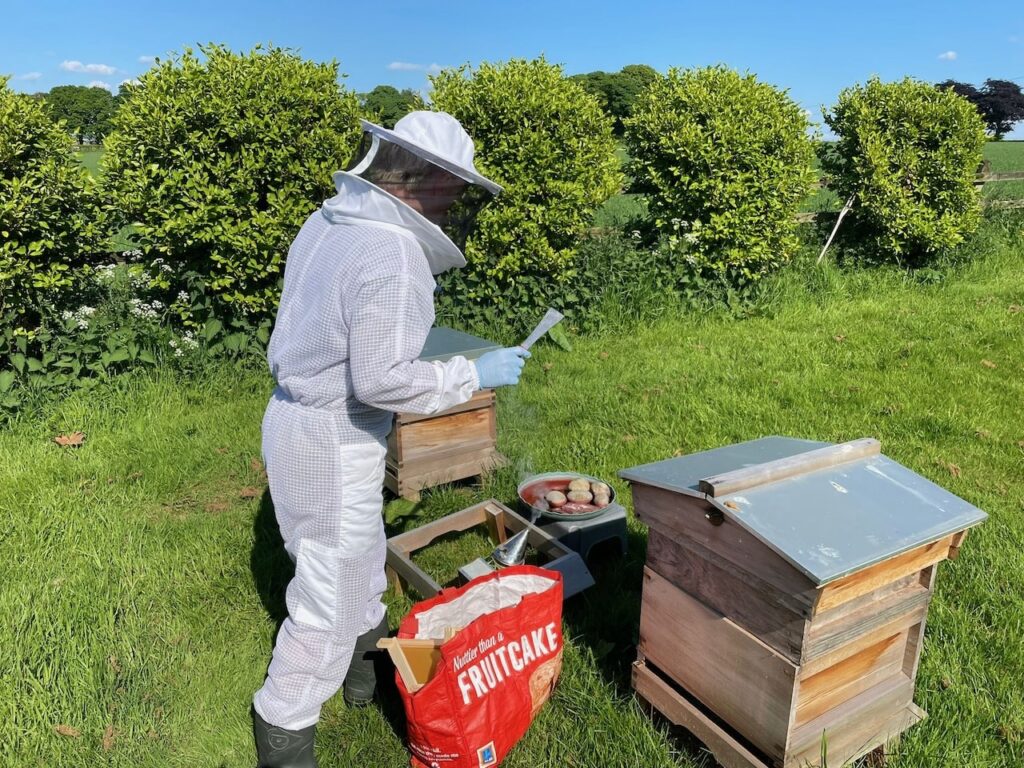
The Queen – One per colony (hopefully), lives 2-5 years, can lay up to 2,000 eggs per day at peak season. She’s basically an egg-laying machine with wings. If she dies or goes missing, your colony is in serious trouble. Most bee keepers mark their queens so you can easily spot her, below is mine marked in green. They can only sting other queens and not humans.
Workers – All female, live 6 weeks in summer (worked to death) or 6 months if they’re winter bees. They do literally everything: nursing, cleaning, foraging, building comb, defending the hive. The backbone of your colony. They can sting.
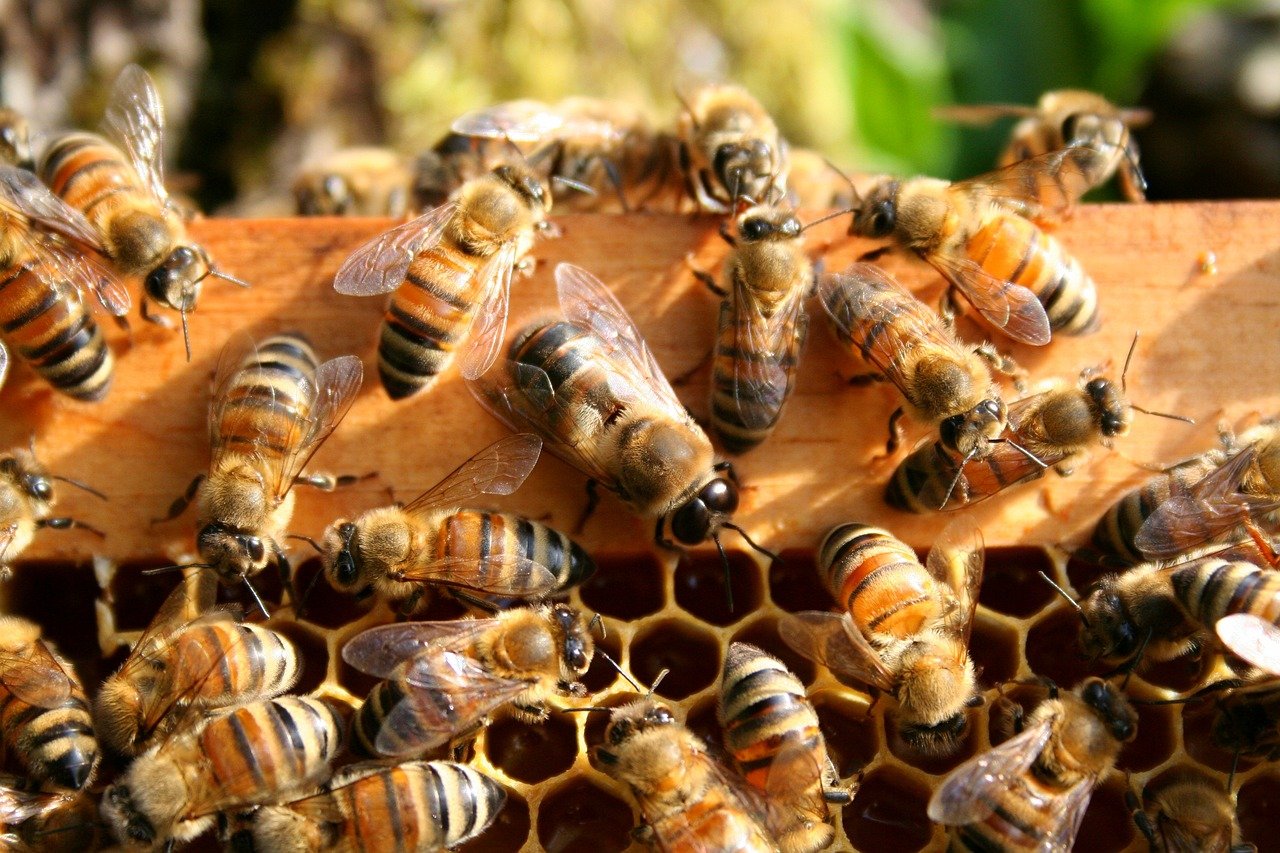
Drones – Males live about 8 weeks in summer, exist purely to mate with virgin queens from other colonies. Think of them as flying sperm with massive appetites. Your colony kicks them out before winter because they’re useless mouths to feed. Drones have massive eyes, see the bigger bee with huge eyes below. They have no stings.
The Development Timeline of Bees
All bees start as eggs (tiny white specks that look like grains of rice), then become larvae (white grubs that get fed constantly), then pupae (sealed under wax cappings while they transform), then emerge as adult bees.
Queen: 16 days total (3 days egg, 5 days larva, 8 days pupa)
Worker: 21 days total (3 days egg, 6 days larva, 12 days pupa)
Drone: 24 days total (3 days egg, 7 days larva, 14 days pupa)
Understanding these timelines is crucial because it helps you work out what’s happening in your hive. No eggs? Your queen might be dead. Loads of drone cells? It could be preparation for swarming. Seeing the different stages of brood tells you your colony is healthy and your queen is doing her job.
The key thing to remember is that everything in a hive revolves around the queen and her egg-laying. No queen = no future for the colony. It’s that simple.
Life Cycles of Honey Bees
The life cycle of honey bees goes through several distinct stages, with each stage serving a specific purpose within the colony. Honey bees are social insects that live in organised colonies, and their life cycle consists of four main phases:
Egg
Larva
Pupa
Adult bee.
Here’s a detailed explanation of each stage of the honey bee’s life cycle:
1.Egg Stage
The life cycle begins when the queen bee lays eggs. A fertile queen bee can lay thousands of eggs in her lifetime. The eggs are tiny, white, and shaped like a grain of rice. The queen typically lays one egg in each cell of the honeycomb, and the eggs hatch into larvae after a few days.
2. Larva Stage
Once the eggs hatch, they become larvae. The larvae are small, grub-like creatures with no eyes and little mobility. During this stage, worker bees feed the larvae with a special substance called “royal jelly” for the first few days. Royal jelly is rich in nutrients and plays a crucial role in determining the fate of the larvae. If a larva is destined to become a queen bee, it will continue to receive royal jelly, resulting in its development into a queen bee. If the larva is destined to become a worker bee or a drone (male bee), it will be switched to a diet of pollen and nectar.
3. Pupa Stage
After a few days as larvae, the bees enter the pupa stage. During this phase, the larva spins a cocoon around itself and undergoes metamorphosis inside the cell. The pupa’s body undergoes significant changes, developing into an adult bee with fully formed wings, legs, and other body parts. The length of the pupa stage varies depending on the type of bee it will become: worker bees spend about 12 days in the pupa stage, drones about 14 days, and queen bees about 16 days.
4. Adult Bee Stage
When the transformation is complete, the fully developed adult bee chews its way out of the cell. Worker bees, which make up the majority of the colony, take on various roles such as foraging for food, nursing the young, cleaning the hive, and protecting the colony. Drones, on the other hand, are male bees whose primary function is to mate with a virgin queen from another colony. After mating, drones die, as their sole purpose is fulfilled. The queen bee’s primary role is to lay eggs and maintain the unity of the colony.
Choosing Your Hive Type
In the UK, you’ve got several options, but for beginners, I’d strongly recommend sticking with what your local association uses. That said, let me break down the three main types you’ll encounter so you can make an informed decision, or at least understand what people are talking about when they start getting technical.
Hives are the homes in which your bees are going to live, it is where the brood (queen, eggs, larvae, bees, honey, food, pollen and stores will be) live and also where your honey ‘supers’ separated from te queen will live (so she doesn’t lay eggs in them!).
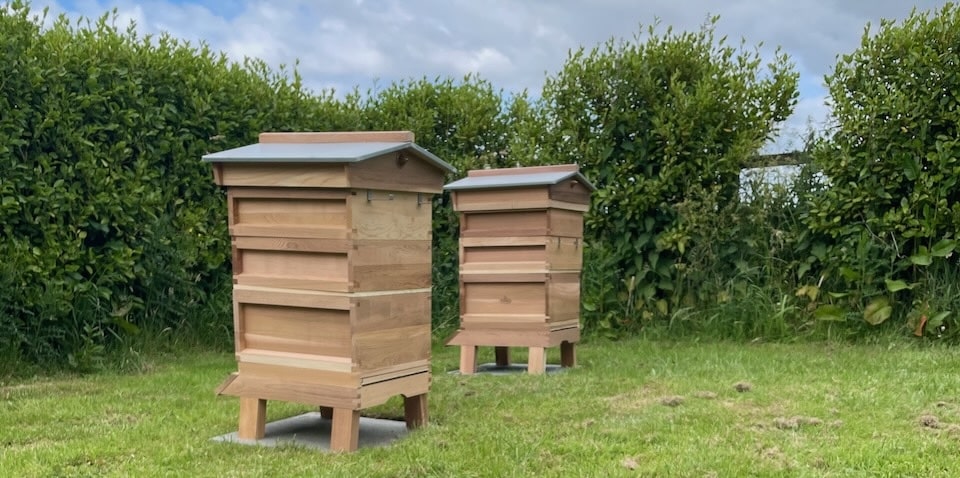
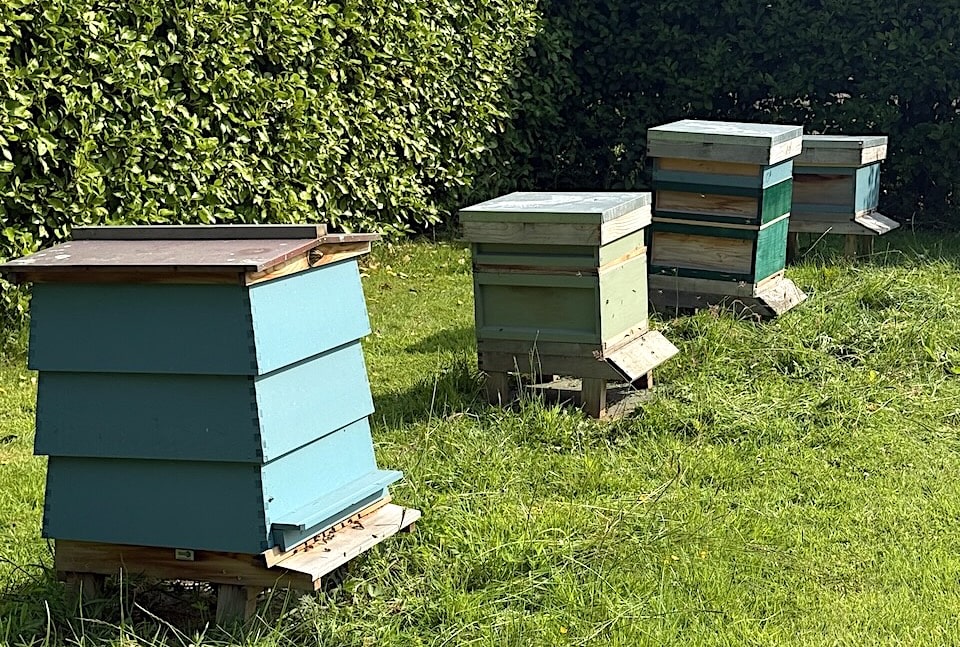
National Hive (British Standard National)
This is the bread and butter of UK beekeeping, and there’s a good reason it became the standard.
A typical National hive setup – simple, practical, and widely supported seen below.
Dimensions:
External: 460mm (18⅛”) square
Brood box depth: 225mm (8⅞”)
Super depth: 150mm (5⅞”)
14×12 brood box option: 318mm (12½”) deep
Frame count: 11 frames per box
Benefits:
Ubiquitous support: Most popular design currently used in the United Kingdom
Great handholds: Grooves that serve as hand grips – genuinely useful when you’re wrestling with a 20kg super
Perfect for climate: Dimensions are generally smaller and notably the brood chamber is shallower than the typical Langstroth hive to suit a less prolific bee strain
Bottom bee space: Makes frame manipulation easier
Square design: The brood and super are square when seen from above. This means that the frames can be put in so that they run parallel with the entrance – “warm way” or at right angles to the entrance slot “cold way”
Drawbacks:
Small brood area: One of the disadvantages of this hive is that the brood box is considered to be too small for modern prolific bees – many run “brood and a half”
More inspections: The smaller space means more boxes to check through
Limited expansion: Less room for really strong colonies
Langstroth Hive
The American classic that’s gaining popularity with UK commercial beekeepers. Note that although this looks similar to the UK national bee hive its far wider and therefore has a larger bee, honey and brood capacity. However, in my opinion it would make more sense for you to stick to the national bee hive but just adopt the deeper brood boxes instead to create more space for your queen if shes very prolific.
Dimensions:
External: 508mm × 413mm (20″ × 16¼”)
Brood box depth: 240mm (9 7/16″)
Super depth: 146mm (5¾”)
Jumbo brood option: 298mm (11¾”) deep
Frame count: 8 or 10 frames per box
Benefits:
Larger brood area: More room for prolific queens to lay
Uniform boxes: All supers the same size, so more flexibility
Commercial efficiency: Popular with professionals for a reason
Strong colonies: Can handle bigger populations without multiple boxes
Top bee space: Some prefer this system
Drawbacks:
Heavier: boxes ranging from 30 – 100 pounds, so they wouldn’t be ideal if you are limited in mobility
Less UK support: Fewer local beekeepers to ask for help
Climate mismatch: Designed for more prolific American bee strains
WBC Hive (William Broughton Carr)
The classic cottage garden hive that looks like something from a children’s book.
The picturesque WBC hive – beautiful but impractical for regular managementas beginner.
Dimensions:
Uses National frame sizes internally
Double-walled construction with outer lifts
Same brood and super depths as National
Multiple external “lifts” covering inner boxes
Benefits:
Beautiful: If you want a couple of hives in your garden and want them to look good, go for the WBC
Extra insulation: The WBC had an outer shell that was fitted over the basic walled beehive. This was intended to insulate the hive from heat in the summer and cold in the winter
Weather protection: Overlapping lifts and gabled roof provide excellent weather protection
Heritage appeal: At the opening of the 20th century the dual-walled WBC hive was the most popular hive type used in the UK
Drawbacks:
Inspection nightmare: The extra time and effort required to remove the outer shell made this hive extremely unpopular with commercial beekeepers who like to examine their hives frequently
Expensive: The WBC hive is expensive compared to National Hives
Complex assembly: More pieces to manage and potentially lose
Amateur reputation: WBC hives are avoided by some beekeepers due to its double-walled design
Then there are the frames that go within these beehives, and where the confusion for beginner beekeepers can really melt your mind! Hold on tight, let me try and explain the beehive frame naming conventions, sizes and which ones you need as a beginner beekeeper.
UK Beehive Frame Sizes and Abbreviations
Right, this is where things get properly confusing for beginners. When I started, I spent weeks trying to work out why there were so many different frame codes, and frankly, the suppliers don’t make it easy. In nutshell there’s the standard DN4 SN4 that all bee hive kits come with and then a whole lot of more confusing sizes, especially if you’re looking on ebay at buying new frames when your bees expand!
Here’s a comprehensive breakdown of all the frame types you’ll encounter:
Frame Code Breakdown Table
Frame Code
Full Name
Hive Type
Depth
Spacing Type
Top Bar Width
Use
DN1
Deep National 1
National/WBC
Standard (216mm)
Requires spacers
Narrow (22.5mm)
Brood box
DN2
Deep National 2
National/WBC
Standard (216mm)
Requires spacers
Wide (27mm)
Brood box
DN4
Deep National 4
National/WBC
Standard (216mm)
Hoffman self-spacing
Narrow (22.5mm)
Brood box
DN5
Deep National 5
National/WBC
Standard (216mm)
Hoffman self-spacing
Wide (27mm)
Brood box
SN1
Shallow National 1
National/WBC
Shallow (140mm)
Requires spacers
Narrow (22.5mm)
Super
SN2
Shallow National 2
National/WBC
Shallow (140mm)
Requires spacers
Wide (27mm)
Super
SN4
Shallow National 4
National/WBC
Shallow (140mm)
Hoffman self-spacing
Narrow (22.5mm)
Super
SN5
Shallow National 5
National/WBC
Shallow (140mm)
Hoffman self-spacing
Wide (27mm)
Super
SN7
Shallow National 7 (Manley)
National/WBC
Shallow (140mm)
Manley self-spacing
Wide (27mm)
Super
14×12
Extra Deep/Jumbo
National/WBC
Deep (305mm)
Usually Hoffman
Wide (27mm)
Large brood box
Commercial & Other Frame Types
Frame Code
Full Name
Hive Type
Dimensions
Notes
16×10
Commercial Brood
Commercial
16″ × 10″
Short lugs, different box design
16×6
Commercial Super
Commercial
16″ × 6″
Short lugs
Lang Deep
Langstroth Deep
Langstroth
19″ × 9⅛”
American standard
Lang Medium
Langstroth Medium
Langstroth
19″ × 6¼”
American standard
What the Numbers Actually Mean
DN stands for Deep National and will fit standard size National and WBC brood bodies. SN stands for Shallow National and will fit standard National and WBC supers
The numbering system works like this:
1 & 2: Straight side bars requiring spacers
4 & 5: Hoffman self-spacing side bars
7: Manley style (wide throughout)
Top bar differences:
1 & 4: Narrow top bars (22.5mm)
2, 5 & 7: Wide top bars (27mm) – more robust
My Honest Recommendations
After four years of dealing with various frame types, here’s what I actually use and why:
For Brood Boxes:
DN4 – Self-spacing, narrow top bars, less propolising than DN5, easier to lift and hold on your own.
For Supers:
SN4 – Self-spacing makes manipulation easier during the honey harvest
Frames I would avoid as a beginner beekeeper
DN1/SN1 – need some sort of spacer or castellation to get the spacing right
Mixed frame types in the same box – you get more bur comb, and it looks odd along with being a nightmare for extraction and inspections, avoid at all costs mixing bee frame sizes!!!
Foundation Sizes
Don’t forget you need the right foundation (wax sheeting which the bees then ‘drawn out’ comb for eggs, brood, honey, pollen and other stores) to match:
Foundation Type
Dimensions
Frame Compatibility
Deep
342mm × 203mm
DN1, DN2, DN4, DN5
Shallow
342mm × 127mm
SN1, SN2, SN4, SN5, SN7
14×12
342mm × 292mm
14×12 frames
A Word of Warning
This confused me a lot when I first started, but I think that you need to see them in action before you make your mind up about what’s best. The frame choice can seem overwhelming, but honestly, pick one type for brood and one for supers, then stick with it. It means all your frames and boxes are interchangeable.
Bottom line: For beginners, I’d recommend DN4 for brood boxes and SN4 for supers. Self-spacing saves hassle, and the narrow top bars get less propolised. Once you’re more experienced, you can experiment with different types if you want.
My Honest Recommendation for Bee Hives
Start with a National. I know that sounds boring, but here’s why:
Local support: When you’re standing in your apiary at 7 AM wondering why your bees are doing something weird, you want to be able to phone someone local who uses the same equipment.
Equipment availability: Every beekeeping supplier in the UK stocks National kit. Need a replacement part? Easy.
Learning curve: The National’s limitations will teach you good habits. Starting with a massive Langstroth can mask problems that will bite you later.
Resale value: If you decide beekeeping isn’t for you, National equipment holds its value.
I started with Nationals because that’s what my mentor used, and I’m glad I did. Yes, I now run some colonies on a brood-and-a-half because the standard brood box is a bit small for my more productive queens, but that’s a good problem to have.
But seriously, start with what your local association uses. Trust me on this one.
Joining Your Local Association
This is absolutely non-negotiable. I don’t care if you’re the most antisocial person on the planet – you need local beekeepers in your corner. They know your local conditions, forage, weather patterns, and most importantly, they’ve made all the mistakes you’re about to make.
Most associations run beginner courses from October to March, costing around £80-120. You’ll get theory, practical sessions, and hopefully a mentor. The mentor bit is crucial – having someone you can phone in a panic when your bees are doing something inexplicable is worth its weight in gold.
My mentor talked me through many of my first nightmare bee situations, such as chronic bee paralysis syndrome (CBPS) over the phone, along with finding me a replacement queen from another apiarist before my colony collapsed!
Getting Your First Bees
You’ve got several options here, and I’ve tried most of them with varying degrees of success.
Nucleus Colony (Nuc)
This is probably your best bet. A 5-frame nuc from a local beekeeper will cost £150-300 but gives you:
A proven queen
Brood at various stages
Some stores
A proper mix of ages
I bought my first nucs from two different beekeepers in my association. It’s expensive, but it’s the best way to start when you have zero bees to begin with. Additionally, the bees were already adapted to local conditions, and he provided ongoing support.
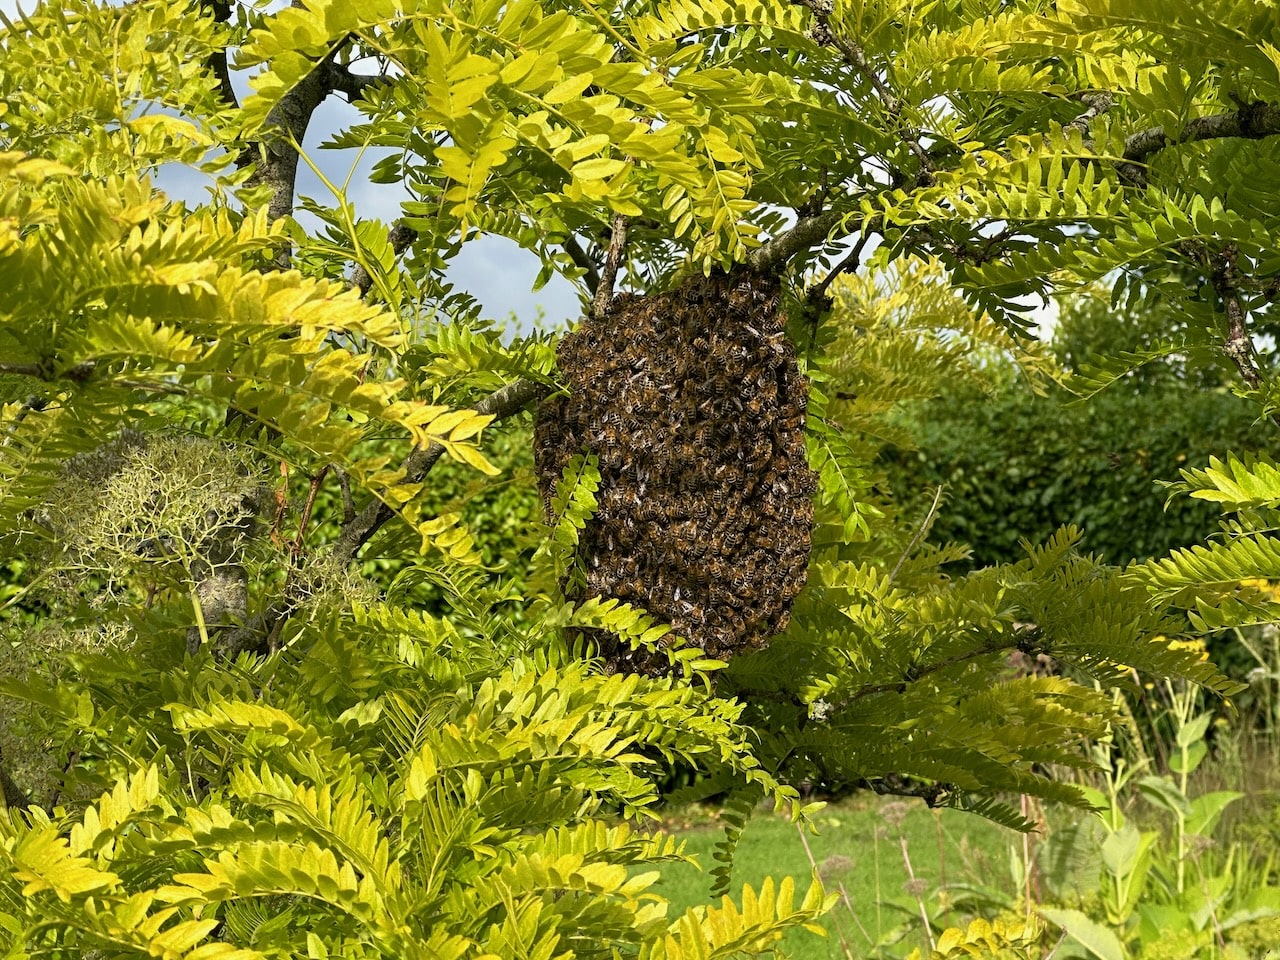
Swarms
Free bees sound great, don’t they? I’ve collected a few swarms over the years, and it’s been a mixed bag. Two settled beautifully, one absconded after a week, and one turned out to be rather aggressive I had to requeen them. It’s a mixed bag. Unless you know it’s a swarm from your apiary, you’re just rolling the dice. However, as a beekeeper, it’s hard not to collect a swarm and give it a new home!
The thing about swarms is they’re essentially homeless refugees. They might be in perfect condition, or they might be carrying diseases, mites, or have a failing queen. You don’t know what you’re getting.
Package Bees
Common in America, less so here. Essentially, loose bees with a queen. I’ve never tried this, but several people in my association have had mixed results.
Essential Equipment Breakdown
Let me talk you through what you actually need versus what bee equipment suppliers want to sell you.
Absolute Essentials
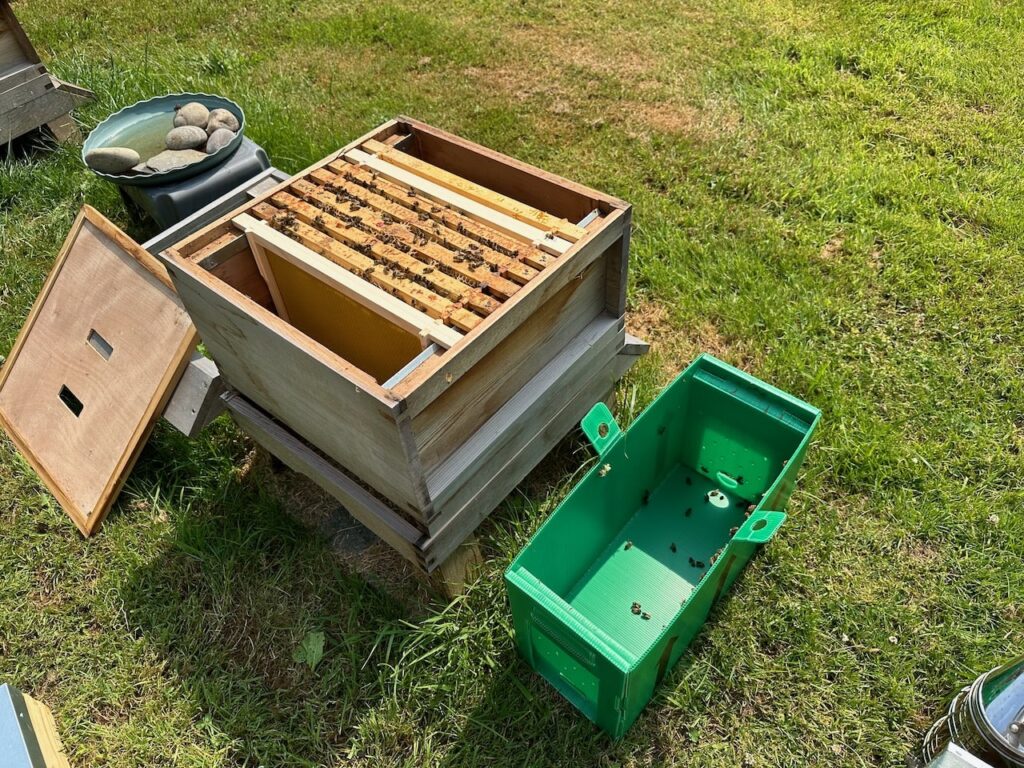
Hive: National hive with one brood box, one super, frames, and foundation. Don’t buy a massive setup initially – you probably won’t need it in the first year.
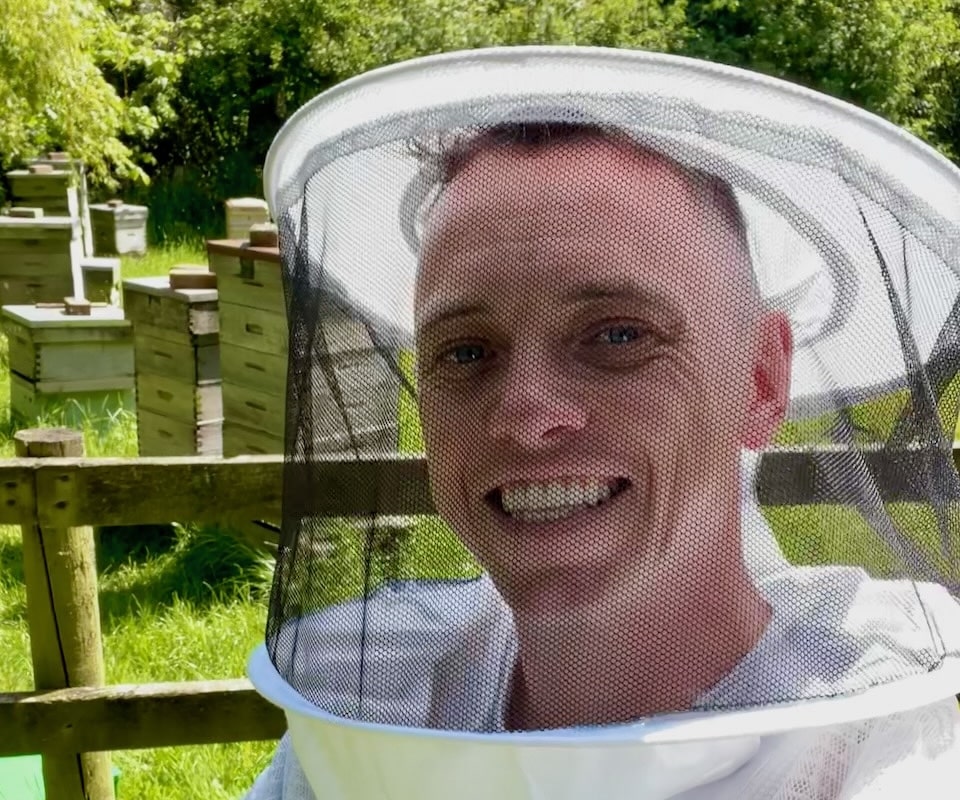
Bee Suit: This is not the place to economise. I started with a £60 suit and got stung regularly. Upgraded to a £120 suit with attached veil, and the difference is night and day. Make sure it fits properly – baggy suits are dangerous.
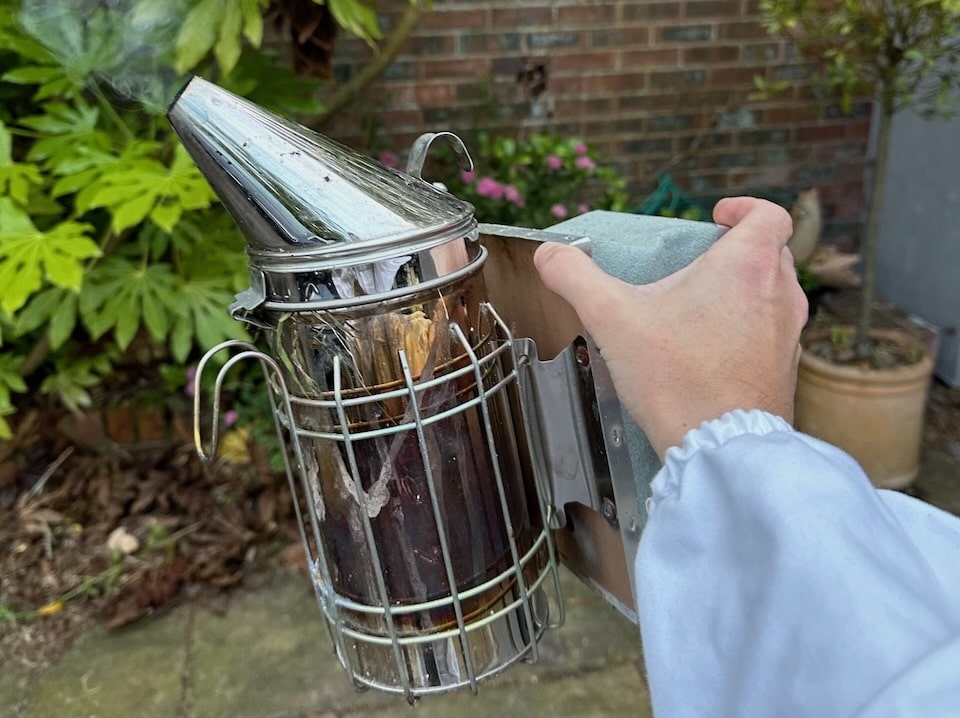
Smoker: Get a decent one with a good bellows. Cheap smokers are frustrating and potentially dangerous.
Hive Tool: You’ll lose these regularly, so buy a couple. The J-hook style is most popular.
Nice to Have (But Not Essential Initially)
Uncapping Knife: You can manage with a kitchen knife for small amounts of honey.
Extractor: Expensive for occasional use. Many associations have one you can borrow.
Queen Excluder: Useful but not essential in the first year.
Your First Year: What to Expect when Keeping Bees
Spring (March-May)
If you’re getting a nuc, this is probably when you’ll collect it. Your first inspections will be nerve-wracking, slow, and you’ll probably make every mistake in the book.
I dropped my first frame of brood, fumbled with my smoker, and spent 20 minutes trying to find the queen who was quite obviously right in front of me. The bees were remarkably patient with my incompetence.
Key tasks:
Weekly inspections (weather permitting)
Check for queen, eggs, and brood pattern
Look for signs of disease
Add super when needed
Learn to spot queen cells
Summer (June-August)
This is when your bees should be building up nicely. You might get some honey, but don’t count on it. My first year yielded exactly 3kg of honey, which was disappointing but apparently quite normal.
Key tasks:
Continue regular inspections
Swarm management (if needed)
Varroa monitoring
Possible first honey harvest (if you’re lucky)
Autumn (September-November)
Time to prepare for winter. This is absolutely crucial – mess this up and you’ll be starting over next year.
Key tasks:
Varroa treatment (essential)
Winter feeding if needed
Reduce hive size
Mouse guards on
Final inspection before winter
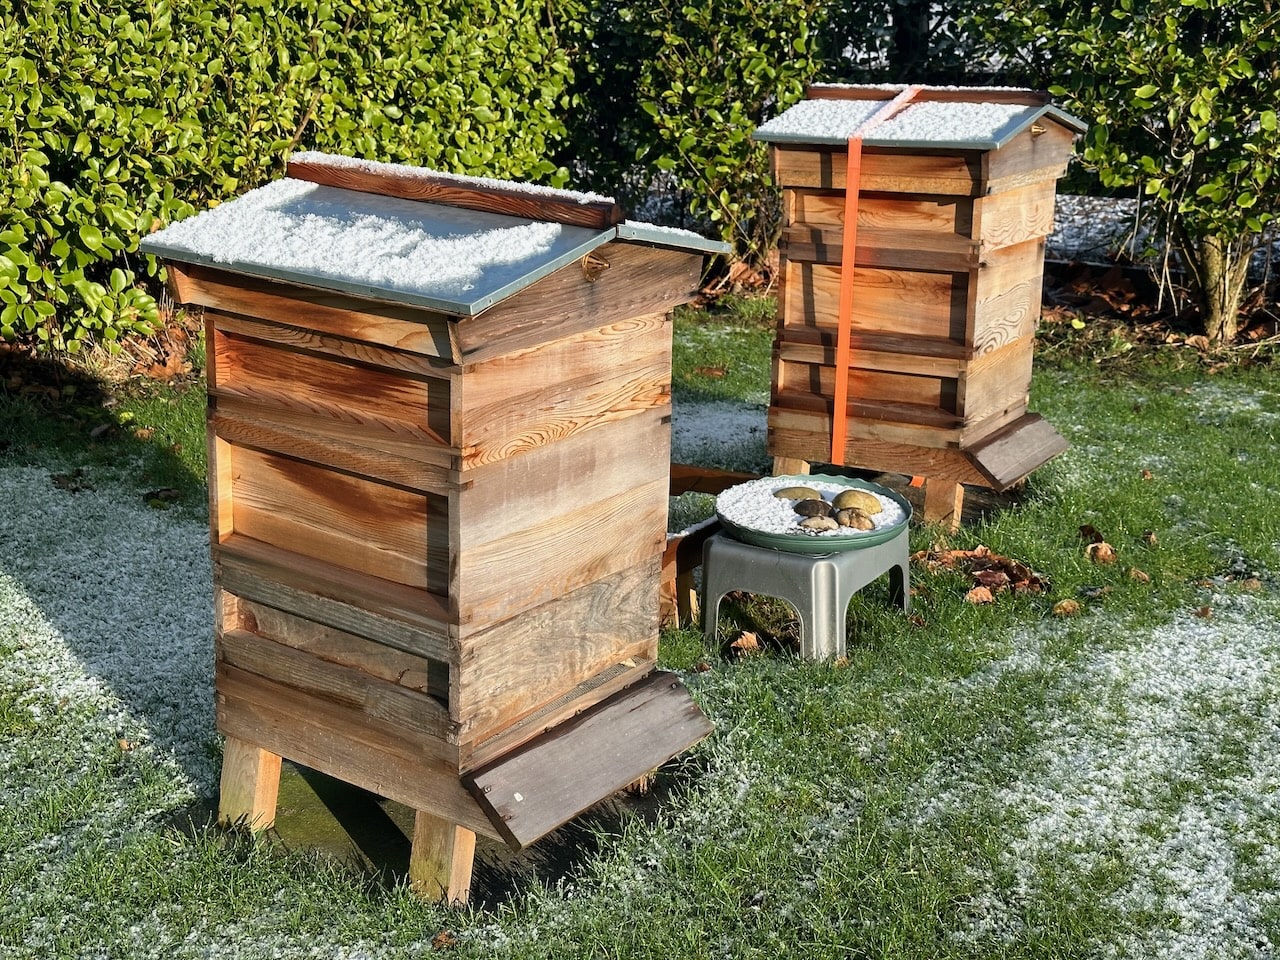
Winter (December-February)
Mostly leaving them alone, but you’ll worry constantly. Every warm day, you’ll be tempted to peek. Don’t. Trust me on this.
Key tasks:
Occasional hefting to check stores
Clear snow from hive entrance
Attend winter lectures
Plan for next year
Common Beginner Mistakes (I’ve Made Them All)
Over-Inspecting
Your bees don’t need checking every few days. Weekly in season is plenty, less in poor weather. Every inspection stresses the colony and can set them back.
Poor Smoker Technique
Learn to light it properly and keep it going. A smoker that goes out mid-inspection is useless and potentially dangerous.
Ignoring Varroa
These parasitic mites will kill your colony if left unchecked. Learn to monitor levels and treat appropriately. I lost my second colony to varroa because I didn’t understand how serious the problem was.
Inadequate Winter Preparation
Colonies need around 20kg of stores to survive winter. If they don’t have enough, you need to feed them. I learned this the hard way.
Buying Too Much Equipment
Resist the urge to buy everything at once. Start with the basics and add equipment as you need it.
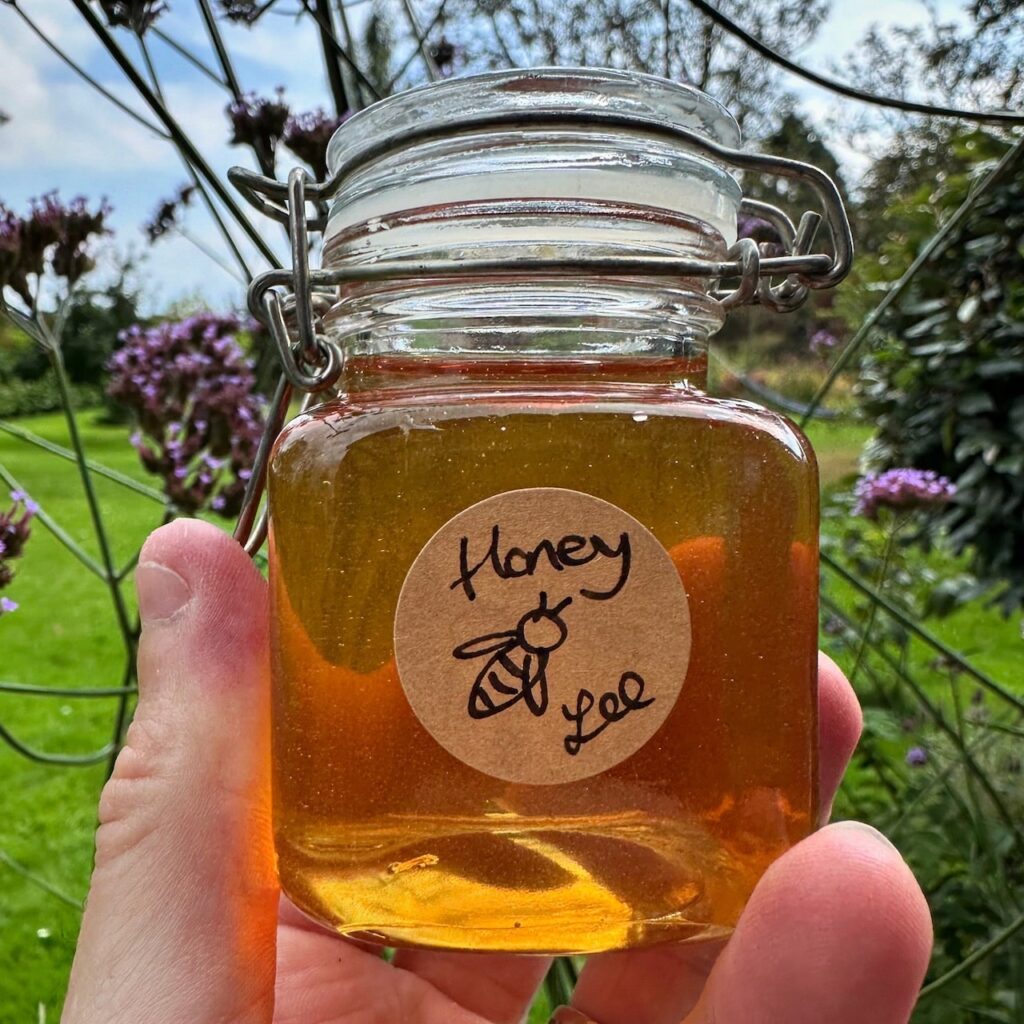
Harvesting Honey (If You Get Any)
Don’t expect much in your first year. I got overly excited about my first 3kg and treated it like liquid gold. Considering the investment, it was essentially what it was.
When to Harvest
Supers should be at least 80% capped
Leave enough for the bees (they need 20kg for winter)
Usually July/August in most of the UK
Extraction Process
Remove supers (easier said than done)
Uncap the honey
Extract (spin or crush)
Strain and settle
Jar and label
Seasonal Management Calendar
Let’s take a high-level view of the beekeeping year. When I first started, I thought it would be a couple of inspections and lots of patting myself on the back. It turns out that looking after even one hive is a year-long process with the majority of the effort starting in March and requiring WEEKLY INSPECTIONS until the end of September!
March
First inspections on warm days
Check for queen, eggs, brood
Clean up winter debris
Assess colony strength
April-May
Regular inspections
Add supers if needed
Monitor for swarm preparations
Varroa monitoring begins
June-July
Peak swarm season
Implement swarm control if needed
First honey harvest possible
Continue regular inspections
August
Final honey harvest
Begin autumn preparation
Varroa treatment window opens
September
Essential varroa treatment
Winter feeding if needed
Reduce hive size
Final brood inspections
October-November
Mouse guards on
Final preparations for winter
Heft hives to check stores
Stop regular inspections
December-February
Minimal disturbance
Clear snow from entrances
Plan next year’s activities
Attend winter lectures
Disease and Pest Management
Right, let’s talk about the bit that keeps most beekeepers awake at night – pests and diseases. When I started, I naively thought that if I provided a nice clean hive and left the bees alone, they’d sort themselves out. How wrong I was.
The harsh reality is that modern beekeeping is essentially pest management with a bit of honey production on the side. Your bees face a constant barrage of threats, from microscopic parasites to fungal infections, and ignoring them isn’t an option. I learned this the expensive way when I lost my second colony to what I later discovered was a completely preventable varroa infestation.
Why pest and disease monitoring of Bees matters
Think of it like this: you wouldn’t ignore a persistent cough or a suspicious mole, so why would you ignore the health of 50,000 bees that you’re responsible for? The difference is that by the time bee problems become obvious, it’s often too late to save the colony.
i) Prevention is cheaper than replacement
A £15 varroa treatment costs a lot less than replacing a dead colony and starting over. Trust me on this one.
ii) Early detection saves colonies
Most bee diseases and pest problems are manageable if caught early. Wait too long, and you’re looking at colony collapse or having to destroy the hive entirely.
iii) Legal responsibilities
Some diseases, like American Foulbrood, are notifiable, meaning you’re legally required to report them. Ignorance isn’t a defence.
iv) Protecting other beekeepers
Diseases spread. Your untreated hive becomes a reservoir of infection that can wipe out neighbouring colonies. It’s not just about your bees.
Understanding normal vs. abnormal – You can’t spot problems if you don’t know what healthy bees look like. Regular monitoring teaches you to read your colony’s health.
The good news is that the vast majority of problems are either preventable or treatable if you know what to look for. It’s not about becoming a bee veterinarian – it’s about developing basic health monitoring skills that will serve you throughout your beekeeping journey.
A) Varroa Mites
Your biggest enemy. These tiny parasites weaken bees and spread viruses, multiplying rapidly in peak season, causing your hives to become weakened and lose vigour. You need to monitor levels and treat accordingly.
Monitoring methods:
Varroa board counts
Alcohol wash (kills a sample of bees)
Sugar shake (non-lethal)
Treatment options:
Apiguard (thymol-based)
Apivar (amitraz strips)
Oxalic acid (various formulations)
B) Nosema
A gut parasite that causes dysentery. Often stress-related and more common in weak colonies. Look out for brown sticky poo trails on the hive landing board or lots of mess and waste on the tops of frames or supers.
C) Chalk Brood
Fungal infection that turns larvae into white chalky masses. Usually indicates poor ventilation or weak colony. Nearly all colonies of bees will have some chalkbrood so its not disterous but if its starting to take over then you have a problem.
D) American & European Foulbrood
The big scary ones. Bacterial infection that’s notifiable and often requires colony destruction. Learn to recognise it, but don’t panic – it’s not that common. If anything smells seriously yucky in your hive, gooey, sunken, greasy, or rank, just get in touch with your bee mentor ASAP and send them pictures to advise.
Why Garden Ninja’s Garden Design Courses Will Transform Your Beekeeping
As a beekeeper, you’ve probably been told to “plant bee-friendly flowers” without anyone explaining which plants actually provide meaningful forage versus those that just look good on Instagram. After four years of keeping bees and watching colonies struggle despite having a garden full of supposedly “bee-friendly” plants, I’ve learned the hard way that good intentions aren’t enough.
Finally understand what your bees ACTUALLY need – not just pretty flowers that do nothing for them
Here’s why my award-winning garden design courses are game-changers for beekeepers:
🌿 Learn Plant SUCCESSION, Not Just Plant Lists Lee’s courses teach you how to use logic to create your planting plan – meaning you’ll understand how to provide continuous forage from early spring through late autumn, not just a brief burst of colour in June when your bees are already sorted.
🎯 Design with PURPOSE, Not Hope Lee walks you through 30 fantastic garden designs, explaining the logic behind the layout, the plant choices – so you’ll finally understand WHY certain plants work together and how to create productive bee forage areas rather than random scattered plantings.
💰 Cost-Effective Learning That Pays Back Priced between £29 and £199, it is an affordable way to learn garden design at your own pace – compare that to the cost of replacing dead colonies or constantly buying plants that don’t work. One successful honey harvest can pay for the course.
⏰ Study While Your Bees Sleep Online garden design courses offer the flexibility to learn at your own pace, allowing you to balance your passion for garden design with other commitments – perfect for busy beekeepers who are already juggling hive inspections and seasonal management.
🧠 Expert Knowledge Without the University Fees Benefit from their insights, experiences, and industry know-how without being limited by your location – Lee’s BBC Garden Rescue expertise applied to creating productive pollinator habitats, not just pretty gardens.
29
Garden Design Examples for Small Gardens: 30 Design Templates & Planting Plans
Garden Design Examples for Small Gardens: 30 Design Templates & Planting Plans: In this online gardening course, I’ll walk you through 30 fantastic garden designs, explaining the logic behind the layout, the plant choices, and take-home tips for applying them in your own garden.
Weekend Garden Makeover: A Crash Course in Design for Beginners
Learn how to transform and design your own garden with Lee Burkhills crash course in garden design. Over 5 hours Lee will teach you how to design your own dream garden. Featuring practical design examples, planting ideas and video guides. Learn how to design your garden in one weekend!
Garden Design for Beginners: Create Your Dream Garden in Just 4 Weeks
Garden Design for Beginners Online Course: If you want to make the career jump to becoming a garden designer or to learn how to design your own garden, this is the beginner course for you. Join me, Lee Burkhill, an award-winning garden designer, as I train you in the art of beautiful garden design.
Most beekeepers fail at creating effective bee forage because they’re gardening by guesswork. Lee’s courses teach you to design with intention, creating gardens that actually support your colonies year-round. Your bees (and your honey harvest) will thank you.
Final Thoughts
Beekeeping is simultaneously more difficult and more rewarding than I ever imagined. You’ll make mistakes, lose colonies, and have moments of complete frustration. But you’ll also experience the incredible satisfaction of successfully managing a complex superorganism and (hopefully) harvesting your own honey.
The key is to start with realistic expectations, get good local support, and be prepared for a steep learning curve. Don’t try to do everything perfectly from day one – it’s impossible. Focus on keeping your bees alive and healthy, and everything else will come with time.
Most importantly, don’t let setbacks discourage you. Every experienced beekeeper has stories of spectacular failures. The difference is that they learned from them and kept going. After four years, I’m still learning something new every season, and I suspect I always will be.
The investment is significant, the learning curve is steep, and the rewards are often intangible. But if you stick with it, you’ll join a community of people who understand the peculiar satisfaction of working with these remarkable insects.
And maybe, just maybe, you’ll get some honey out of it too.