New Build Gardens Design Guide: Transform Your Blank Canvas 2026
Lee Burkhill: Award Winning Designer & BBC 1's Garden Rescue Presenters Official Blog
Intermediate level
So you've just bought or moved into a new house, you look out onto your new build gardens and there it is a completely blank canvas. Sure it has the odd irregular shape and a haphazardly placed grid here and there. It may be turfed or just some paving. The fact is it is yours and you're ready to go all Titchmarsh and make it the most amazing garden space ever. But then you realise you don't know where to start, so I'm going to show you how to design a new build garden.
You’re probably ready to get stuck into creating your dream new build garden oasis. You have this brand-new green space that could become something amazing. It may closely resemble the new build example below. Then it hits you. You have no idea where to start, and every idea you have doesn’t quite work or leaves you scratching your head about what to do with this space.
Frustration and rushing in are the two traits of bad garden design. I can completely relate to the frustration of what to do and just wanting to start something, but trust me, as an expert garden designer with 30 years of horticultural experience under my belt, a little bit of planning goes a long way. This guide to new build gardens will help get you started and remove all of your current doubts. By planning your garden on paper first, you can save yourself endless drama and mistakes.
Before you go into meltdown at all the things you don’t know and decide to pave over your entire garden instead, this handy guide will help navigate you towards that dream garden. All you need is a pen and paper and maybe a brew or two.
This page contains affiliate links for products I use and love. If you take action (i.e., subscribe, make a purchase) after clicking a link, I may earn a gardening commission, which helps me keep the Garden Ninja Blog free for all.
1. How to design a garden for a new build house
You first need to sit down and plan. Yes, it sounds very boring when you’re super enthusiastic and ready to get started, but I can guarantee that a garden that starts without a plan will end up looking way off plan. This super detailed guide will take you through every step to help you plan your own garden and create something beautiful. By the end of the guide, you can also sign up to download my 30 Garden Design Templates from new build gardens I’ve designed over the years.
The dreaded blank canvas of a new build garden can be really off-putting when you start designing. This is why planning can help you avoid mistakes and work out what you want in a new garden.
There are several considerations that any decent garden designer will take you through that need some careful thought. If you follow this guide, you can help avoid pitfalls with new garden design, such as areas that don’t work as intended or plants that fail to thrive. Before that, if you want to watch me in action with a blank canvas, the video guide will give you some food for thought before you start on your own space.
2. Survey your garden
Undertaking a scaled garden survey is essential and is the step that most new build garden owners totally overlook. Before you get carried away with Pinterest boards and plant wishlists, you need to become a surveyor for the week. By missing this vital step, you will end up guessing, overspending, and taking shortcuts as you run out of materials and become increasingly stressed. This is where a garden designer becomes a money and time-saving option!
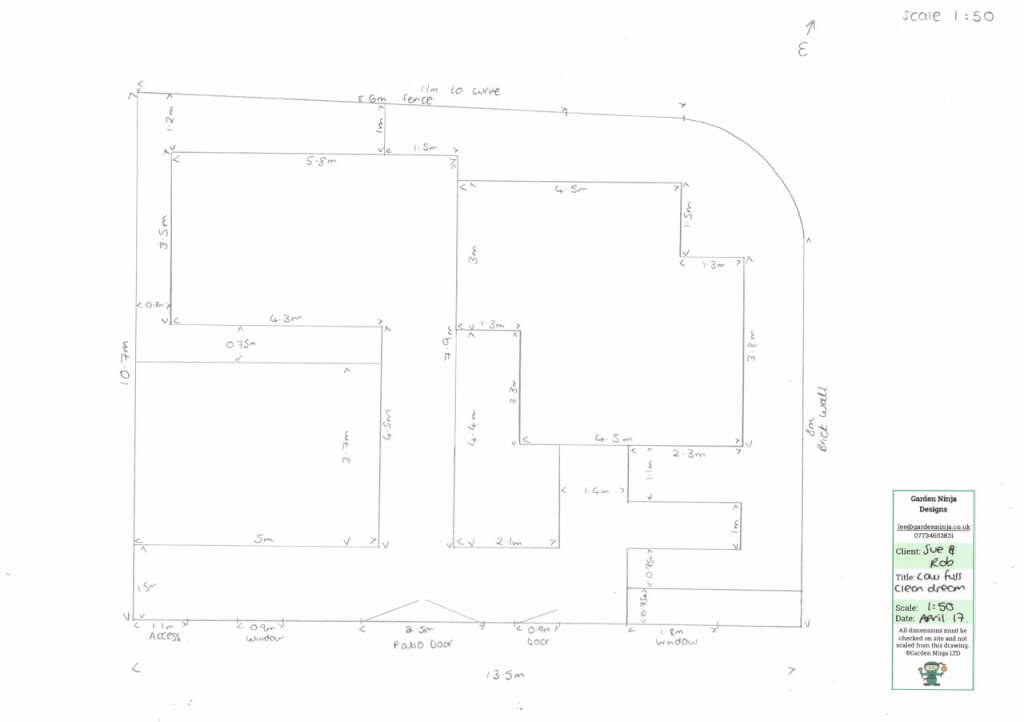
Drawing upa scaled plan for your garden helps you assess the available proportions and plant choices. It’s far better to trial these spaces on paper than to guess on the ground.
Grab your notebook and spend at least a week observing your space at different times of day. Where does the sun hit longest? Which areas stay soggy after rain? Are there any existing features worth keeping or definite eyesores that need addressing?
Create a simple site map on squared paper (2cm to 1 metre works brilliantly).
Mark everything on this plan that you can see:
Manholes or grids
Existing plants
Wet spots
Dry areas
Any slopes or bumps
Lastly, which direction does the garden face, according to a compass?
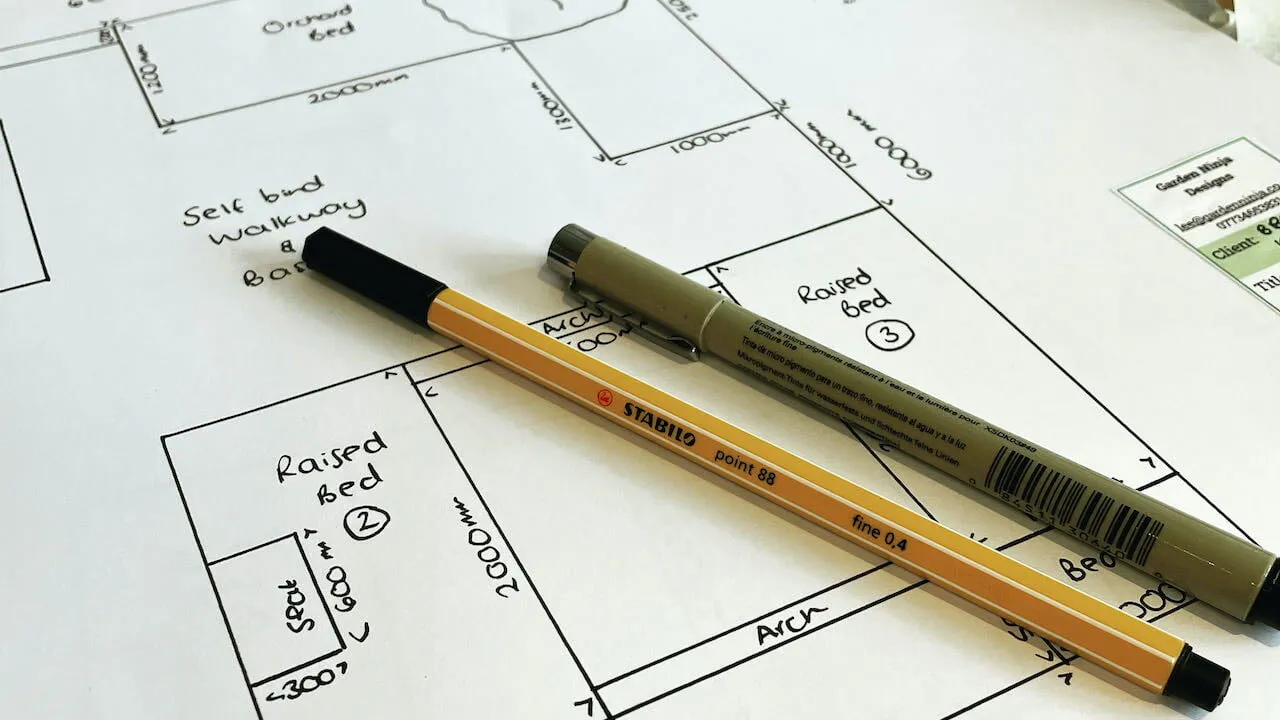
This helps you in understanding your garden’s orientation and determines everything from where you’ll want your morning coffee spot to which plants will actually thrive. An experienced garden designer can take the above and create a blueprint tailored to your specific needs. If you are doing it yourself, however, take a look below at the kind of detail you will need for your design.
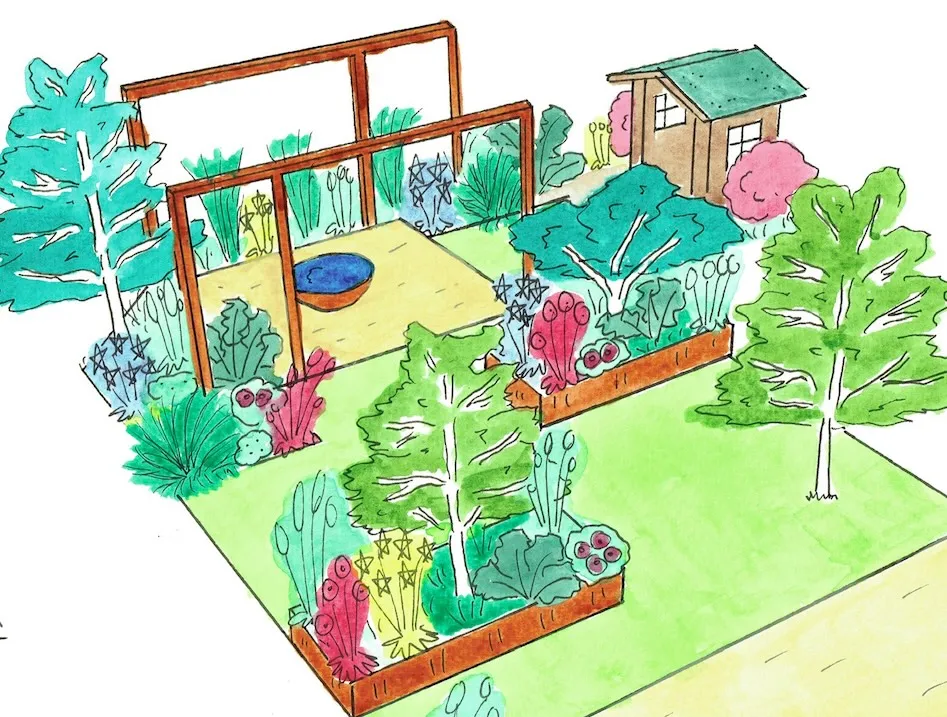
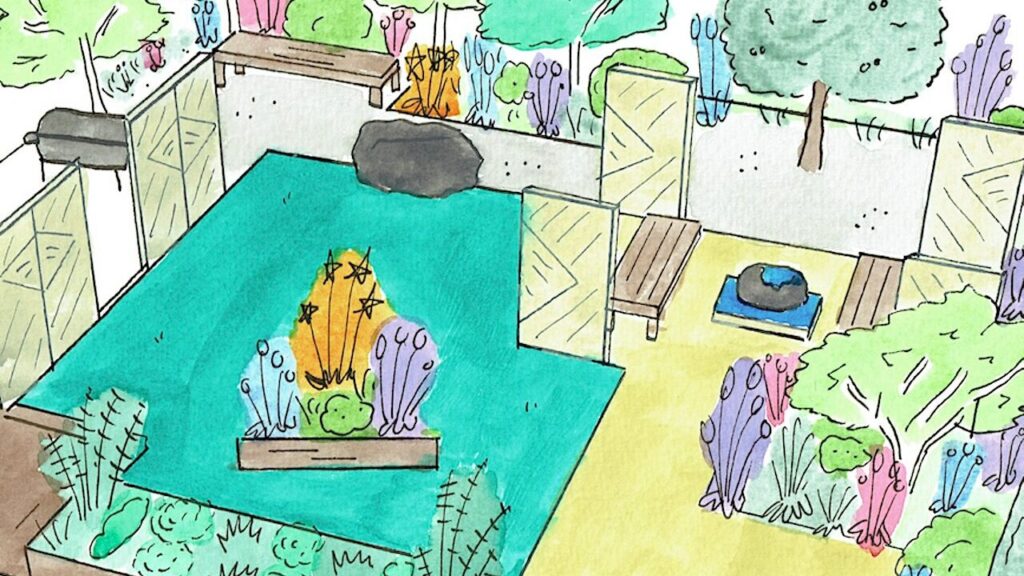
Please note that all proportions, path widths, required plant groupings, aspect, and access have been carefully considered. Below is a finished outline design following numerous consultations and discussions on the functions, features, and required planting. This should never be a 5-minute job!
I’ve seen too many eager new homeowners skip this crucial step and wonder why their carefully chosen plants are looking more like horticultural disasters than the Instagram-worthy displays they’d envisioned.
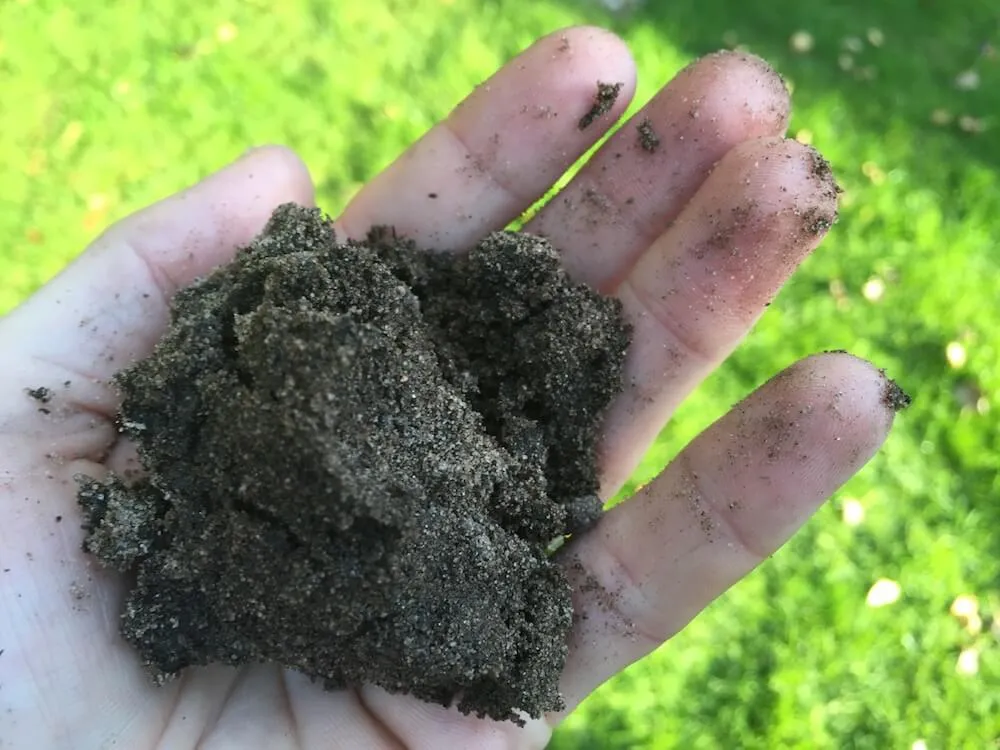
Here’s the uncomfortable truth about most new build gardens: that lovely green lawn might be hiding some seriously problematic soil beneath. Developers routinely strip away the valuable topsoil during construction (it’s worth money, after all), leaving behind compacted clay subsoil that’s about as welcoming to plant roots as concrete. Add to this the inevitable building debris, surplus aggregates, and general construction chaos that gets buried and covered over, and you have a perfect storm of growing challenges.
Understanding Your Soil: The Foundation of Garden Success
Before we tackle the specific problems of new build soil, it is essential to understand what healthy soil actually looks like and how the three main soil types behave. Most gardeners think soil is just “dirt,” but it’s actually a complex living ecosystem that determines whether your garden thrives or merely survives.
The Three Main Soil Types
Soil Type
Main Components
Particle Size
Drainage
Clay
Fine clay particles, aluminium and iron oxides
Less than 0.002mm
Very poor – water sits on surface
Sand
Quartz particles, weathered rock fragments
0.05-2.0mm
Excellent – water drains rapidly
Silt
Medium-sized particles between clay and sand
0.002-0.05mm
Moderate
The holy grail of garden soil is loam – a beautiful balance of roughly 40% sand, 40% silt, and 20% clay, mixed with plenty of organic matter. This magical combination drains well but retains moisture, holds nutrients without becoming waterlogged, and remains workable throughout most of the year.
The Simple Jar Test: Discover What You’re Working With
Want to know what type of soil you have? Here’s my foolproof method that requires nothing more than a jam jar and a bit of patience:
Fill a clean jar one-third full with soil from various parts of your garden
Top up with water, leaving about 2cm space at the top
Add a drop of washing-up liquid to help particles separate
Shake vigorously for two minutes until everything’s thoroughly mixed
Leave to settle for 24 hours undisturbed
What you’ll see is pure soil science magic! The heaviest sand particles settle first at the bottom, creating the bottom layer. Silt settles in the middle, and the finest clay particles form the top layer. Any organic matter will float on the surface.
Measure each layer, and you’ll know your soil composition. If the bottom sand layer is the thickest, you have sandy soil. If the clay layer dominates, you’re dealing with heavy clay. Equal layers? Lucky you – you’ve got loam!
Compaction: When Soil Becomes Concrete
Heavy machinery compacts the subsoil to the point where water can’t drain, and roots can’t penetrate. I’ve seen supposedly “landscaped” gardens where you literally need a pickaxe to break through the surface!
How to Spot Soil Compaction:
Water sits on the surface after rain rather than soaking in
Soil feels rock-hard when dry, impossible to dig
Puddles form everywhere during wet weather
Plants struggle to establish, looking stunted and yellowing
Weeds dominate because they’re tougher than your carefully chosen plants
Soil isn’t just particles; it’s about the spaces between them, called “pore space.”
In healthy soil, approximately 50% of the volume should consist of solid particles, and the remaining 50% should be comprised of air and water-filled spaces. Heavy construction machinery crushes these vital spaces, creating what’s essentially outdoor concrete. Plants need those air spaces for root growth and water movement, which explains why nothing thrives in compacted soil.
The Building Debris Dilemma
Buried bricks, chunks of concrete, and even entire scaffold boards aren’t uncommon finds when I’m working on new build gardens. These create drainage nightmares and root barriers that can stunt plant growth for years.
Common Buried Treasures I’ve Found:
Half-bricks and concrete chunks create underground barriers
Plastic sheeting and cement bags that prevent drainage
Metal reinforcing bars that damage tools and roots
Aggregate and hardcore in random locations
Paint tins, cable offcuts, and general construction waste
These obstacles not only block root growth but also create underground dams that redirect water flow, leading to soggy areas in unexpected places and drought stress in others. I’ve seen gardens where one corner permanently floods whilst plants metres away struggle with drought, all because of buried concrete redirecting water flow.
The only real solution is methodical excavation and removal. Start with areas you want to plant first, digging to at least 45cm depth (60cm for trees and large shrubs). Yes, it’s backbreaking work, but it’s the foundation of everything that follows. Consider hiring a mini-digger for large areas – the cost is often justified by the time and physical effort saved.
Soil pH Explained in New Builds.
Did you know your soil also has its own pH, which determines how acidic or alkaline it is? More importantly, this pH level impacts which nutrients can be taken up in your garden soil. Plants are remarkably clever organisms that have developed preferences for soil pH, so it’s worthwhile to do a quick soil pH test (you can buy a soil pH test kit on Amazon) and then choose plants that thrive in that pH range.
If your soil is acidic, choose plants that can tolerate or thrive in acidic conditions. This soil is usually referred to as ericaceous – Camellias, Skimmias, Rhododendrons, and Trilliums all love ericaceous soil.
pH 7 is usually considered neutral and supports a much broader range of plants. Most alkaline plants are also suitable at this pH level and are less fussy than their acidic counterparts if the pH is slightly lower than they are accustomed to.
4. What are your garden characteristics?
Using a pencil and paper or a tablet, start making notes on the following considerations, which will inform and develop your new build garden plan. It will be a cyclical process as you generate ideas, refine or even reject them. By gathering the information below into notes or a spreadsheet, you will soon uncover the type of garden you already have, and this will then help you define how to design it and what to put where!
Don’t get disheartened; after all, gardening is meant to be fun, and planning gives you the best chance of success!
Size: Measure the garden’s dimensions. Is it small, medium, or large?
Shape: Note whether the garden is rectangular, circular, irregular, or sloped.
Boundaries: Describe fences, walls, hedges, or open edges.
Soil Type: Is the soil sandy, clay, loamy, or chalky? Test for pH (acidic, neutral, or alkaline).
Access: Are paths wide enough? Is the layout easy to navigate?
Utilities: Note water sources, irrigation systems, power outlets, or compost bins.
Maintenance: How much time and effort is needed for upkeep?
Vegetation: List trees, shrubs, perennials, or grass types already in the garden.
Structures: Include patios, pergolas, pathways, or raised beds.
Climate: Identify your region’s climate (e.g., temperate, Mediterranean).
Microclimates: Observe if areas are particularly sheltered, exposed, dry, or damp.
Wind: Is the garden windy, sheltered, or prone to gusts?
Drainage: Are there areas that stay waterlogged or drain quickly?
Focal Points: Note any standout features like ponds, statues, or large trees.
Style: What is the garden’s current vibe? (Formal, wild, minimalist, rustic, etc.)
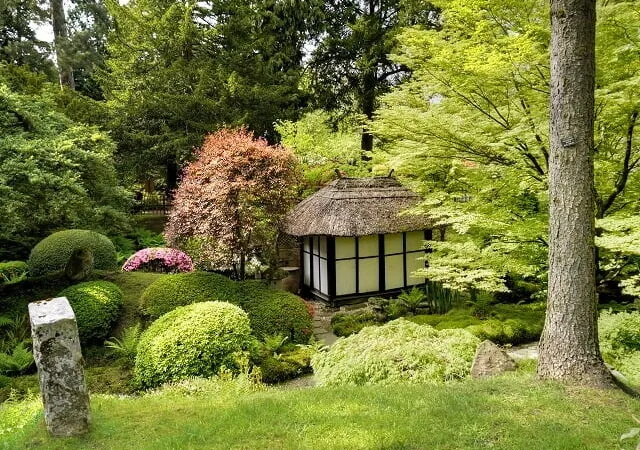
Theme: Are there specific themes you would like, such as Japanese, cottage, or modern design elements
Feelings: What emotions does the garden evoke (peaceful, lively, chaotic)?
Create a concept sketch of your garden, scaled to fit. Make notes on the sizes of the areas, where the sun rises and sets, and the soil type. Then follow the steps below to work out how you’ll design it.
It’s now time to review the position and characteristics of your garden so we know what you’re dealing with. It will help identify the garden’s limitations, benefits and features.
5. Function of the Garden
Before you decide which gorgeous plants to use, whether to use the specimen tree, the raised beds, or the lovely real stone for the hard landscaping, you need to work out the garden’s function. Without this, then, any design you work on will struggle to be functional, let alone cohesive.
The Socialising garden – somewhere to sit, eat and be merry
The Good Life garden – with vegetable patches, fruit trees and maybe chickens
The Horticultural Garden – a feast for the eyes of beauty and style, high maintenance for plant lovers
The Working Garden – featuring outdoor office space and working areas
The Eco Garden – encouraging nature and self-sufficiency
The Therapy Garden – a retreat to relax with easy access
The Family Garden – split areas for parents, children and play areas
With new build gardens, the likelihood is you’re going to have a limited garden, given the trend for squeezing as much house onto new build plots at the expense of the garden.
My advice is to pick a preferred function, i.e., entertaining, and focus on that function rather than an entertaining horticulture, good life, eco, family garden mash-up. They never work on a small scale. It’s better to choose the function of how you will use the garden 99% of the time than a function you use once a year!
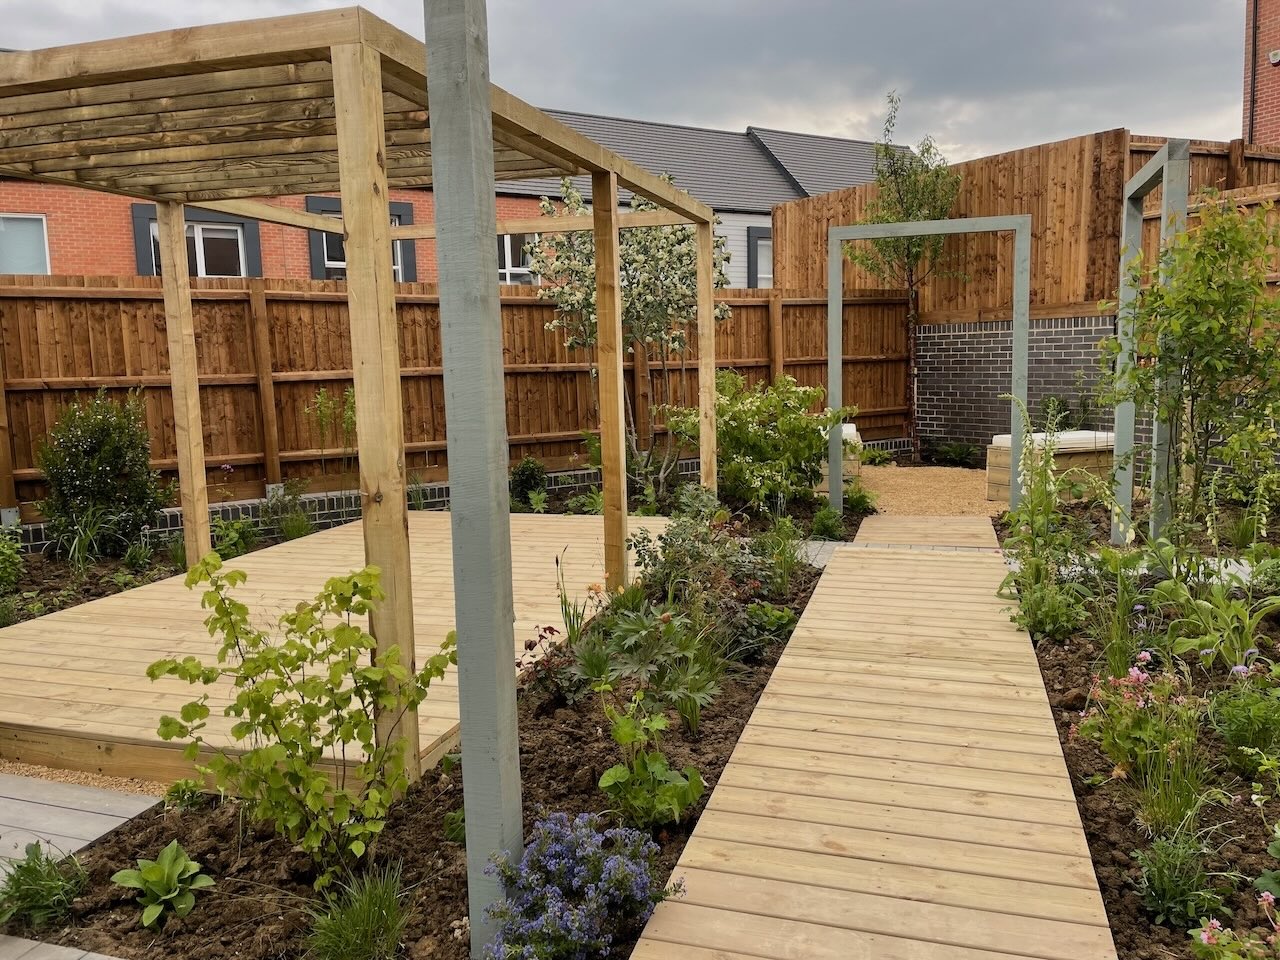
The example above is of a well-structured and functional garden design. It’s a modern adult garden with a sheltered seating area. It’s a very grown-up contemporary garden, pure and simple. Clean lines and mixed heights, with a recycled timber deck walkway throughout. These simple touches and clear function make this one a real beauty. Its simplicity, especially in its consistent, hardy tropical planting scheme, really ties it together.
It’s wise to remember that it’s best to do one thing well than three things badly.
6. Garden Aspect – which way does it face
The aspect of your garden will inform you of the types of planting that will best suit the plot. It shows you where the light will sit during the day. based on the four points of a compass. Understanding this, along with the soil type (as I discuss in my soil type post), are the two requirements for planting success.
Take some notes on the sun in your back garden during the day. Ideally, taking these points at 9 am, 12 pm, and sunset will give you a general idea of where your sunny, shady, and maybe awkward spots are!
If you don’t consider the fact that the beautiful terrace you’ve just spent thousands on may end up as a wet, shady nomad’s land that never gets used. Aspect is also a driving factor in plant selection.
So grab yourself a brew and a book, and relax in your current garden, making notes on the sun, shade spots, warm spots, and general daylight levels in different parts of the garden. This will save costly garden design mistakes down the line.
Many gardens have multiple aspects, or you may be curious about how the approach to planting differs depending on which direction your garden faces. I’ve written comprehensive plant guides for all four aspects so you can make the best possible decisions throughout your whole outdoor space.
7. Maintenance Considerations of New Build Gardens
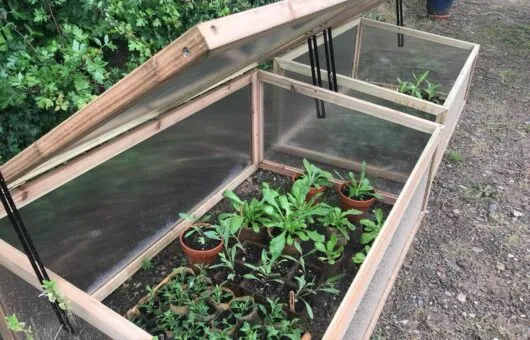
In giddy excitement, many of us eager gardeners have decided that we want a mass of summer flowers, exotic plants, a huge water feature, greenhouses and miles of wooden Scandinavian decking in our garden. This is great if you’re prepared for the maintenance and husbandry that they require!
But here’s the reality check that most new build gardeners need: that Instagram-worthy garden with exotic specimens and high-maintenance features can easily demand 2+ hours of daily care during peak summer. Between watering systems failing during heatwaves, exotic plants sulking in our unpredictable British weather, and decking requiring annual treatments, you might find yourself spending every spare moment just keeping things alive rather than actually enjoying your outdoor space.
It may be more realistic to start with a lower-maintenance garden and then build up to one that may well take up to 2 hours a day to water and prune in the height of summer. Smart new build gardeners understand that creating a beautiful, low-maintenance foundation gives you breathing room to experiment and expand as your confidence and available time allow.
The Low Maintenance Philosophy: Work Smarter, Not Harder
The 80/20 Rule for New Build Gardens: Focus 80% of your efforts on creating a robust, low-maintenance backbone that provides year-round structure and interest, then use the remaining 20% for seasonal flourishes and experimentation. This approach ensures your garden always looks presentable, even when life gets busy.
Start Small, Build Smart: Rather than trying to plant the entire garden in one weekend, spread it out and enjoy the process of allowing the garden to evolve. This phased approach allows you to learn what works in your specific conditions whilst avoiding the overwhelm that leads to garden abandonment.
Lower-maintenance gardens include using slower-growing shrubs and planting that’s less vigorous or that needs less pruning or deadheading—the secret lies in choosing plants that naturally thrive in your conditions rather than fighting against them.
Evergreen Shrubs (60% of plantings): Provide year-round structure with minimal intervention
Choisya varieties for fragrant flowers and glossy foliage
Viburnum tinus for winter flowers and bird-friendly berries
Pittosporum for coastal tolerance and interesting textures
Hardy Perennials (25% of plantings): Return year after year with minimal replanting
Sedum varieties for drought tolerance and late-season interest
Hardy geraniums for ground cover and continuous flowering
Ornamental Grasses (10% of plantings): Movement and texture with minimal care
Miscanthus for height and winter structure
Festuca for compact blue-grey foliage
Pennisetum for feathery flower heads
Seasonal Highlights (5% of plantings): Strategic splashes of colour for maximum impact
Spring bulbs for early season excitement
Selected annuals in containers for flexibility
Smart Maintenance Planning Tools
Sometimes, a useful tool is to create a planting plan that shows which plants suit your aspect and soil, along with their flowering and pruning months. This prevents the common mistake of choosing plants that all require attention at the same time, which can create an overwhelming workload spike.
Annual Maintenance Calendar Template
Season
Essential Tasks
Time Required
Frequency
Spring
Light pruning, mulching, planting
4-6 hours total
Once in March/April
Summer
Watering, light deadheading
30 minutes weekly
Weekly during dry spells
Autumn
Leaf clearing, plant tidy-up
2-3 hours total
Once in October/November
Winter
Planning, tool maintenance
1-2 hours total
Seasonal preparation
It’s often best with a new build garden to start small and build up. So rather than trying to plant the entire garden in one weekend, spread it out and enjoy the process of allowing the garden to evolve.
8. Grids in new build gardens
The trickiest part of any new build garden design is the grids from drainage access to service pipes. These grids are dotted everywhere. It would seem that all the house developers go a bit crazy when planning utility grids and pipelines. I have yet to see a grid that wasn’t positioned in an unavoidable place and at the most bonkers angle.
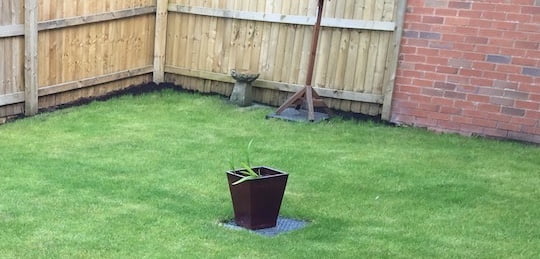
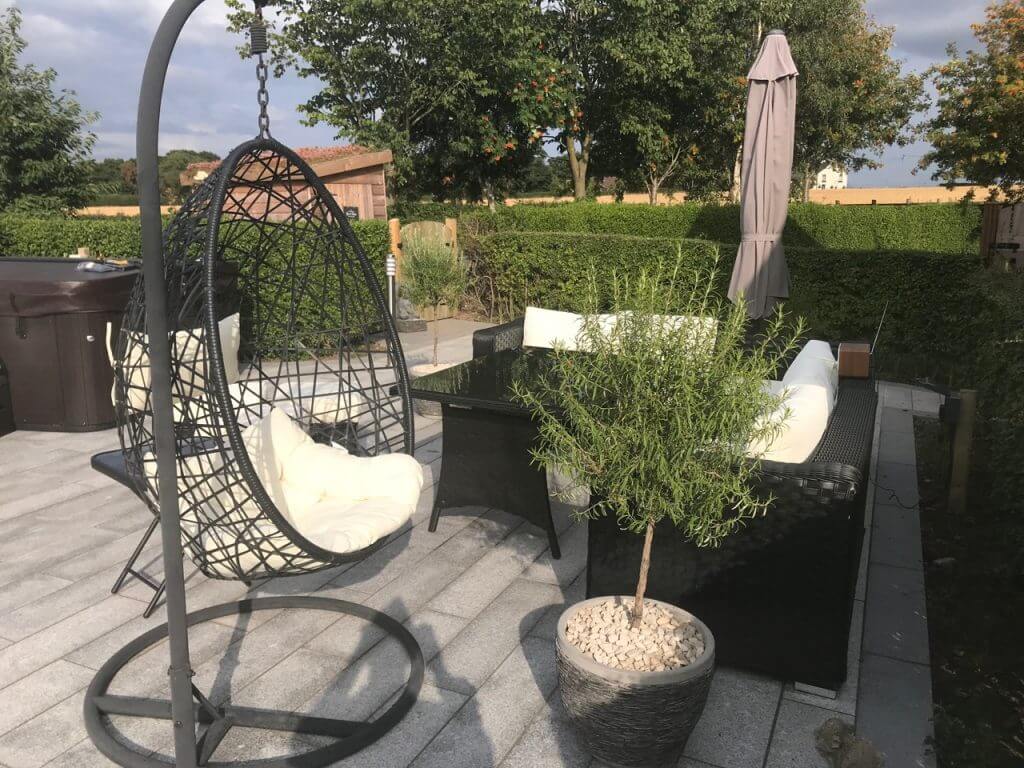
Exhibit A- The awkward grid pot is no disguise!
There is no getting away with the grids. You can’t just pave over them, as you or a utility company may need access in the future. This means you have to hide or disguise them temporarily, but realistically. This isn’t an easy proposition, but Garden Ninja has done this many times with raised beds, removable inserts, and planting schemes that plant around the grids.
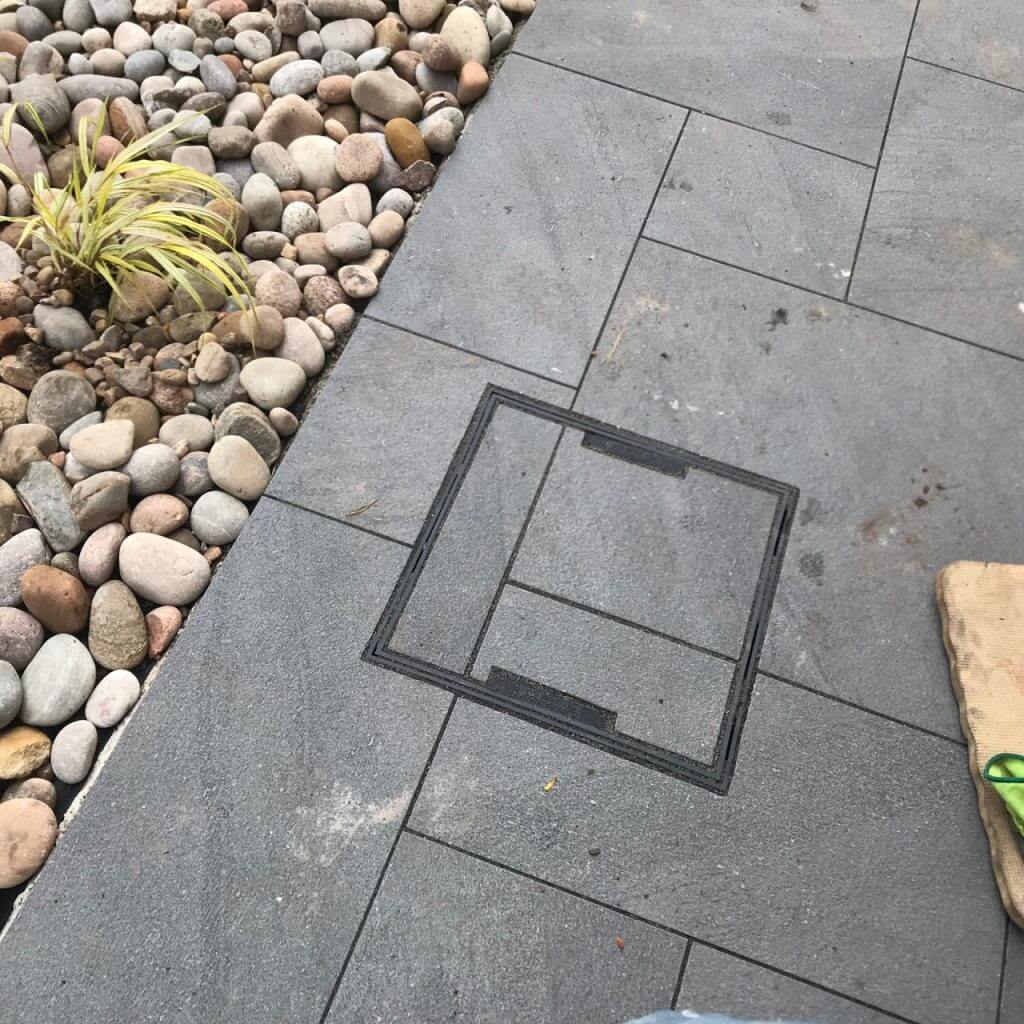
Some paving schemes can allow for grids to be inset with the same stone to help them blend in. These are really quite effective, also. There are several options for disguising grids and building removable structures that can help remove them from the conundrum.
Simply placing a begonia in a terracotta pot on them is usually the least favourable disguise, especially when it’s in the centre of a lawn! Look how sorry and obvious the grid looks above. Grid covers help disguise the grid, and using a paving tray helps blend them into the garden design.
9. Screening off Neighbours & Noises
One of the drawbacks of new build gardens is that they are overlooked, sometimes from every conceivable angle. It’s as if the world’s watching you, and new gardeners instantly head off to B&Q to buy trellis, reed screening, or larger fence panels.
However, larger walls and screens can be counterproductive, making a garden feel smaller and more awkward. It can also cause problems with neighbours and regulations on the height you can extend up to. It is also a really ugly way to gain privacy.
New build estates present unique design challenges that established gardens don’t face. That feeling of being completely overlooked by neighbours, the lack of mature plants for immediate structure, and often awkward proportions, where tiny gardens are squeezed between large houses.
The Privacy Predicament
Nothing quite prepares you for that goldfish bowl feeling when you step into your new garden and realise every neighbour has a perfect view of your outdoor space. The temptation is to install the tallest possible fencing immediately, but this can create a prison-like atmosphere. Instead, think in terms of layered screening that combines structural elements and strategic planting.
The Maturity Gap
Established gardens benefit from decades of plant growth, creating natural height variation and seasonal interest. New builds start from zero, which means you need to be clever about creating immediate impact whilst planning for long-term development.
How to increase privacy in new build gardens
There are two key methods to increase privacy in new build garden houses, and neither involves taller fence panels or outdoor studios, offices, or buildings to hide in! The best methods for increasing privacy are:
Screening / Vertical elements
Planting & Suitable Small Garden Trees/Shrubs
Screening
Screening should be subtle and utilise broken views to create a sense of privacy without feeling like a prison. When I say ‘broken views,’ take a look at the neighbouring properties to see which offer the most obvious viewpoints, and strategically place garden features, plants, or trees there to divert the eye or block the offending view! Clever eh!
Now, a broken view would incorporate either a plant or a subtle structure that diverts this view or provides protection from it. This is not the same as blocking it out completely.
Planting & Trees
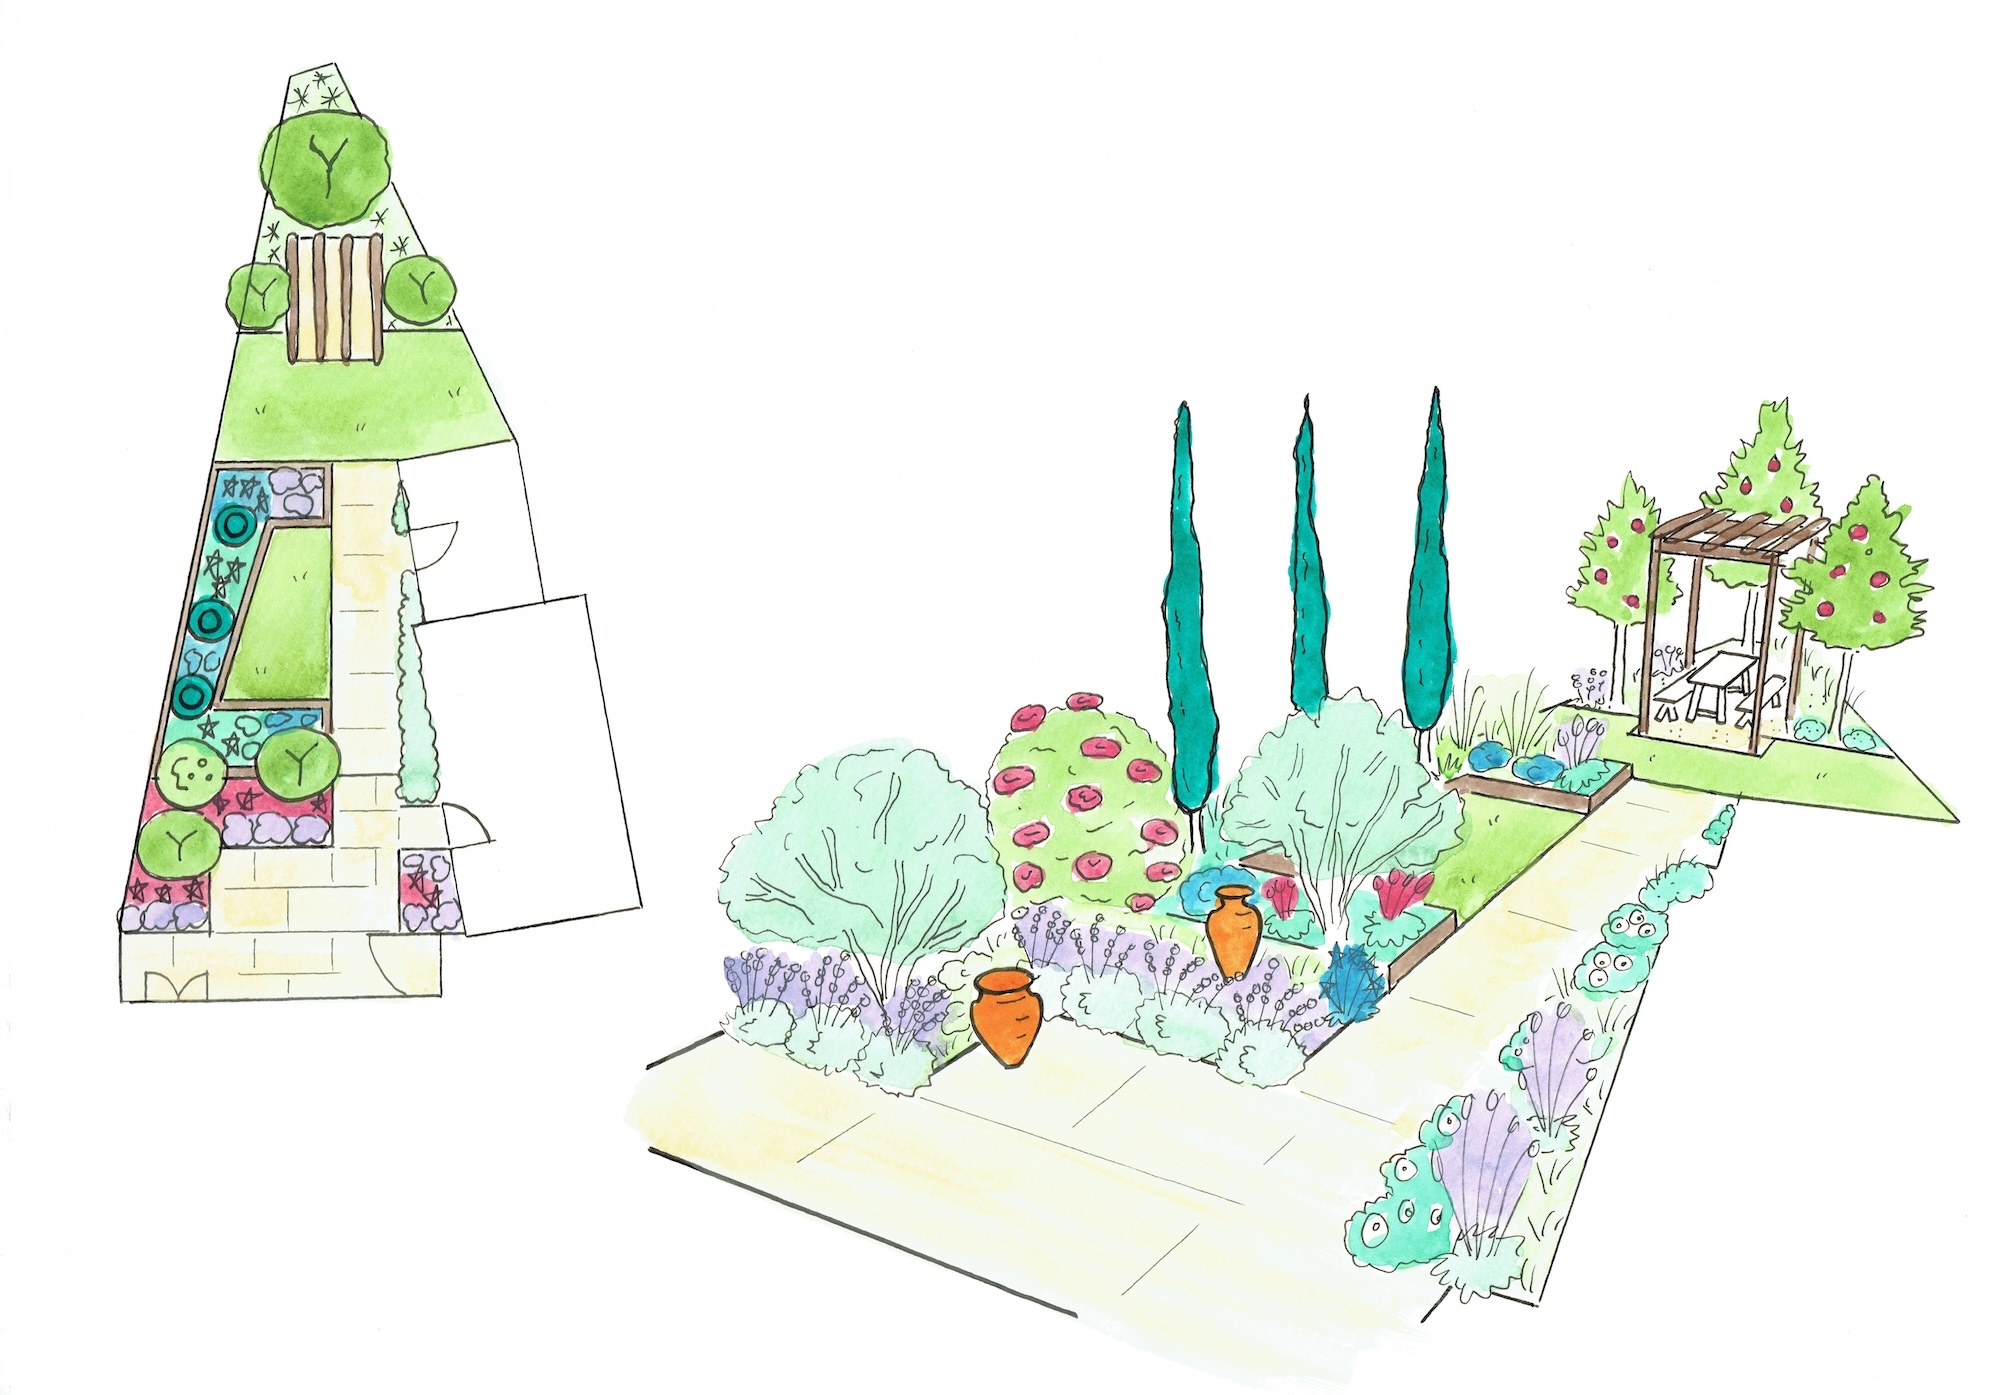
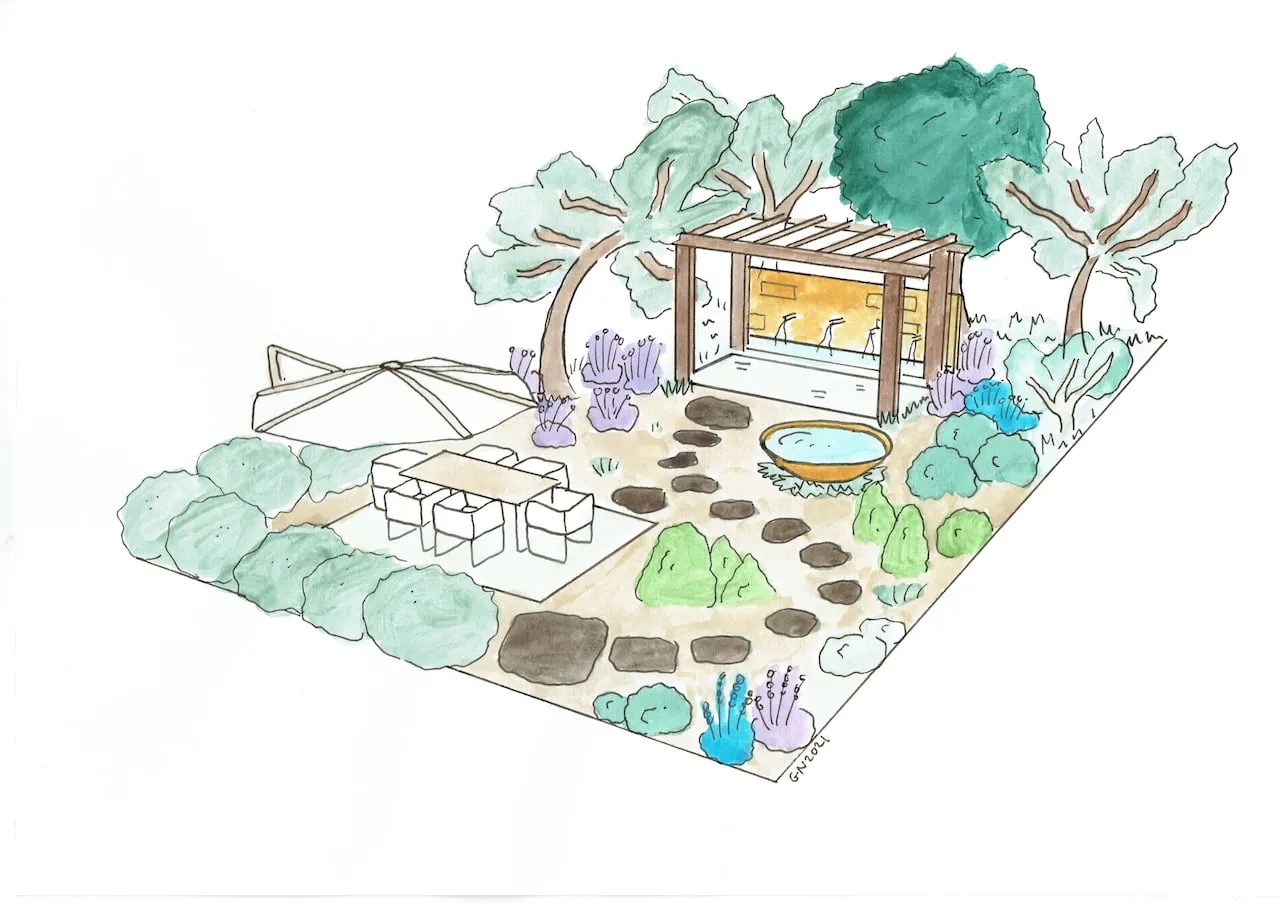
Don’t underestimate the benefits of using suitable small garden trees, shrubs, or tall planting to help provide privacy and diffuse the views of your neighbours’ windows. It may be a set of tall grasses that sway and filter the view; it could be a set of pleached trees that provide some screening while allowing light and wind to pass through; it may mean an enclosed seating area lined with tall, flowering borders. In the picture below, the standard trees in my design here break up neighbouring views.
Using height in a garden with some carefully chosen trees or shrubs can help break these view lines, making you feel less exposed and more nested. It’s a distraction technique that, if done well, can give you a sense of privacy without making you feel like the fence panels are imprisoning you!
Noise can be slightly diffused by planting and some living screens, as well as by using a water feature, such as a blade or moving water. Again, it is the balance between Niagara Falls and a weak trickle that makes you need to go to the loo. A water feature won’t eliminate the noise of a screaming toddler, but it will help mask conversation and other light noises.
10. Plants for New Build Gardens
After years of rescuing gardens from developer disasters, I’ve developed my tried-and-tested four-layer approach, which creates stunning displays while being absolutely bulletproof for challenging new build conditions.
Forget the traditional approach of randomly dotting plants about, hoping for the best. My layering system mimics how plants naturally grow in the wild, creating a self-supporting ecosystem that looks spectacular whilst requiring minimal maintenance. Each layer has a specific job, and when they work together, you get that professional, established look that makes neighbours wonder how you’ve achieved such results so quickly.
Traditional planting often fails in new build gardens because it overlooks the harsh realities of poor soil, exposure, and the absence of established microclimates. My layering approach tackles these challenges head-on by creating a supportive plant community where each layer protects and enhances the others.
The Ground Cover Layerprotects soil from erosion, suppresses weeds, and creates beneficial microclimates for other plants.
The Herbaceous Perennial Layerprovides seasonal colour and structure whilst being tough enough to handle variable soil conditions.
The Shrub Layercreates the garden’s backbone, providing year-round structure and shelter for smaller plants.
The Tree Layerprovides ultimate height, privacy, and a long-term framework while improving soil conditions through leaf drop and root action.
This isn’t just a theoretical concept; I’ve demonstrated it on numerous new build gardens and on BBC1’s Garden Rescue, where I’ve seen this approach transform bare patches into thriving ecosystems within just a couple of growing seasons.
Ground Cover Champions (0-30cm)
Your ground cover layer is the unsung hero of new build gardens. These tough cookies carpet the soil, prevent weeds, retain moisture, and create the perfect foundation for everything else. In challenging new build conditions, ground cover is essential to help prevent weeds and green up those bland, barren gardens!
Ajuga reptans ‘Catlin’s Giant’ (Bugleweed)
This brilliant ground-hugger is absolutely perfect for new build conditions because it naturally thrives on clay soil in the wild. The glossy bronze-purple leaves create year-round structure, whilst the upright spikes of rich blue flowers in late spring provide spectacular seasonal colour. Ajuga reptans ‘Catlin’s Giant’ spreads steadily to form effective carpets but isn’t aggressive enough to become problematic. The 20cm height makes it perfect for underplanting shrubs or filling tricky spots where grass won’t establish.
Why it’s perfect for new builds: Extremely tolerant of compacted clay, thrives in partial shade where many plants struggle, and provides immediate impact whilst establishing quickly in poor conditions.
These glossy-leaved beauties are absolute workhorses for new build gardens. The large, glossy, heart-shaped leaves provide year-round structure and turn magnificent bronze-red in winter for seasonal interest. Pink flower clusters appear in early spring, often before anything else is showing colour. Bergenia cordifolia ‘Heartleaf’ has thick, leathery leaves that are virtually indestructible and create excellent weed suppression.
Why it’s perfect for new builds: Tolerates virtually any soil condition, including waterlogged clay, drought, and neglect. Once established, it’s completely maintenance-free and provides four-season interest.
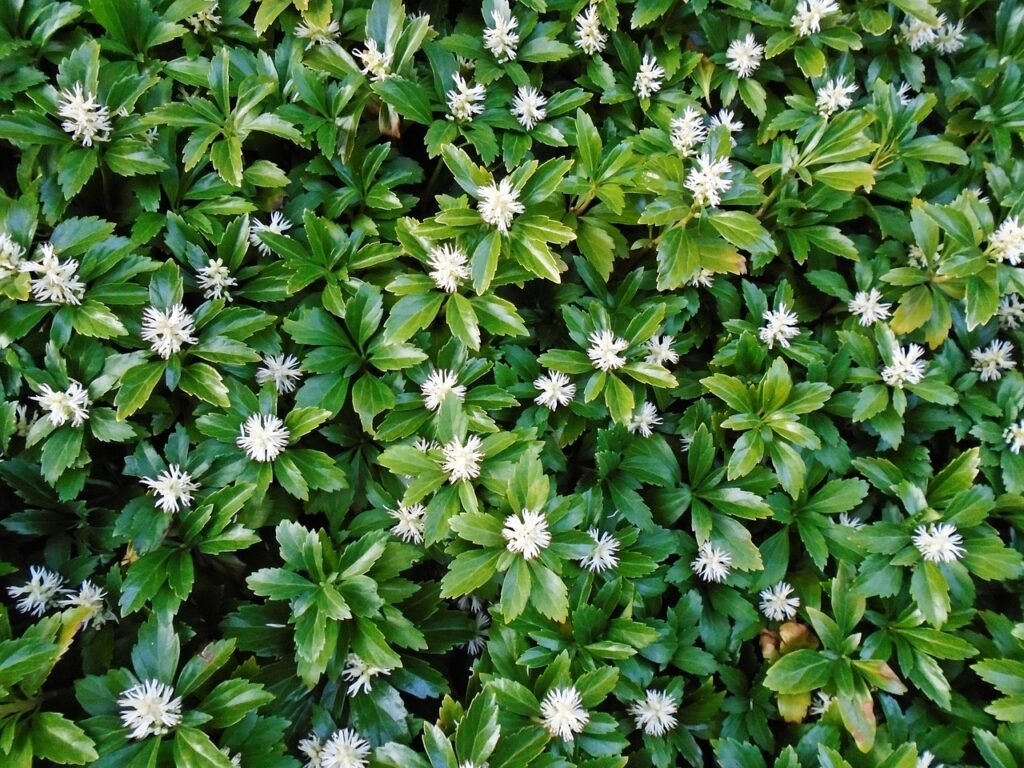
For shady areas where establishing anything seems impossible, this evergreen ground cover is absolutely invaluable. Pachysandra terminalis ‘Green Carpet’ creates dense, glossy green carpets that suppress weeds completely whilst tolerating deep shade and poor soil. Small white flowers appear in spring, but the real value is in the consistent, professional appearance it provides year-round.
Why it’s perfect for new builds: Thrives in conditions where grass fails, tolerates both clay soil and drought once established, and creates that expensive, designed look for minimal investment.
Vinca minor ‘Bowles’s Variety’ (Lesser Periwinkle)
This vigorous spreader is brilliant for covering large areas quickly whilst providing continuous blue flowers from spring through Autumn. The glossy, dark green leaves are evergreen, providing year-round coverage, whilst the cheerful blue flowers brighten even the gloomiest corners. Vinca minor ‘Bowles’s Variety’ is particularly valuable for slopes where erosion might be a problem.
Why it’s perfect for new builds: Extremely vigorous growth covers poor soil quickly, tolerates both wet and dry conditions, and provides continuous colour throughout the growing season.
If I were asked to name one ground cover plant that genuinely thrives where everything else gives up, it would be Epimedium x versicolor ‘Sulphureum’. This extraordinary evergreen perennial can establish itself in dry shade beneath fences, walls, and established trees, conditions that would defeat virtually any other plant on this list.
The heart-shaped leaves emerge in spring flushed with copper and bronze, mature to a rich, glossy green through summer, and then develop beautiful reddish tints as temperatures drop in Autumn. In April and May, delicate sprays of pale yellow flowers rise above the foliage, creating a surprisingly refined display for a plant that asks so little in return. Once established, it becomes almost completely self-sufficient, forming dense, weed-smothering mats that require nothing more than an occasional tidy of the old foliage in late February, just before flowering begins.
Why it’s perfect for new builds: Epimedium is genuinely unmatched for the driest, most difficult shady spots that are so common in new build gardens, particularly along fence lines and beneath boundary trees where the soil is exhausted and compacted. The RHS Award of Garden Merit says it all: this is a plant that performs reliably, year after year, without fuss.
Voted RHS Plant of the Century in 2013, Geranium ‘Rozanne’ is quite simply one of the hardest working plants you can put in a new build garden. Unlike the other plants in this layer, Rozanne is primarily valued for its extraordinary flower power: those vivid violet-blue blooms with white centres keep coming from June all the way through to the first frosts in October or November, making it one of the longest flowering perennials available to British gardeners.
The mounds of attractive, deeply cut foliage spread to cover roughly 60cm, tumbling happily over bare soil, softening the edges of paths, and weaving through the base of shrubs to tie a planting scheme together. It tolerates clay soil extremely well and will grow in full sun or partial shade with equal enthusiasm, making it one of the most versatile choices in this entire guide.
Why it’s perfect for new builds: New build gardens desperately need long-season colour, and nothing in the ground cover category delivers it more reliably than Rozanne. The fact that it tolerates compacted clay, requires virtually no maintenance once established, and provides months of bee-friendly flowers makes it an essential inclusion in any planting scheme starting from scratch.
Want Complete Plant Lists and Professional Design Templates?
Whilst these plant heroes will absolutely transform your new build garden, creating professional-looking combinations requires understanding design principles, seasonal planning, and spatial relationships. That’s exactly what I cover in my comprehensive Garden Design Examples for Small Gardens: 30 Design Templates & Planting Plans course.
Further Plant Colour Guides
Colour is one of the most powerful tools in any garden designer’s toolkit, and once you start thinking about planting through the lens of a single colour, the whole design process becomes so much more intentional and rewarding. Whether you are drawn to cool, calming tones or bold, high-impact drama, there is a dedicated Garden Ninja colour guide to help you make the most of every border, bed, and container in your garden.
As a BBC1 Garden Rescue presenter and award-winning garden designer with over 20 years of professional experience, I have used every one of these colours extensively across hundreds of real garden designs. These guides are not theoretical colour wheel exercises. They are practical, plant-by-plant resources drawn from years of hands-on planting design, so you can be confident that every plant listed genuinely performs in UK conditions.
🌹 Red Flowering Plants
Bold, passionate, and utterly unforgettable, red flowers create the highest-impact borders in any garden. From Crocosmia Lucifer to Rosa Geranium, discover 35 red-flowering plants that thrive in UK gardens.
Purple is the colour of sophistication, mystery, and pollinator paradise. From Alliums to Verbena bonariensis, these 35 purple-flowering plants are among the most reliable and rewarding in the UK garden designer’s palette.
Yellow flowers are sunshine made botanical. Criminally underused by cautious gardeners, these 35 yellow-flowering plants bring warmth, contrast, and irresistible pollinator appeal to borders of every size and style.
True blue is one of the rarest and most coveted colours in the plant world. This guide cuts through the imposters to bring you 35 genuinely blue-flowering plants, from Agapanthus to Ceratostigma, that will transform your borders with cool, calming drama.
White flowers are the most versatile and elegant colour in the gardener’s toolkit, working beautifully with every palette, every style, and every season. From Hydrangeas to Anemones, discover 35 white-flowering plants that bring timeless sophistication to UK gardens.
Each guide follows the same comprehensive structure I use when designing planting plans for my professional clients: trees, shrubs, perennials, ground cover, bulbs, and climbers, all with hardiness ratings, ultimate dimensions, growing conditions, and my personal top tips drawn from real garden design experience. Whether you are starting from scratch with a blank canvas or looking to refine an existing border, these guides give you the plant knowledge to make genuinely confident, well-informed choices.
If you want to take your planting design skills even further, my Garden Design for Beginners course walks you through the entire process of creating a beautiful, cohesive planting scheme from the ground up. Thousands of UK gardeners have already used it to transform their outdoor spaces, and it will change the way you think about plants and colour forever.
11. New Build Garden Budget Guide
One of the questions I get asked most on my forum is this: how much does it actually cost to do a new build garden? It’s a fair question and one that most guides conveniently sidestep. So here’s an honest breakdown, drawn from over fifteen years of designing and building gardens across the UK.
The short answer is that a new build garden transformation ranges from around £2,000 for a basic refresh to £20,000+ for a professionally designed and built space. As a rule of thumb, most garden designers recommend budgeting roughly 5–10% of your property value for a complete garden transformation. For a £250,000 new build, that puts you somewhere in the £12,500–£25,000 ballpark for the full works, though most people do this gradually over several years, which is entirely the right approach.
New Build Garden Budget Breakdown
Budget Level
Approximate Cost
What You’ll Get
Best For
Starter
£1,000–£3,000
Basic lawn prep, simple planting, gravel paths, small patio
Professional design, quality hard landscaping, feature planting, lighting
Long-term investment, entertaining focus
The biggest cost driver in any new build garden isn’t the plants, it’s the ground preparation. Sorting out compacted subsoil, removing construction debris, and bringing in quality topsoil can easily account for 30–40% of your total budget before you’ve bought a single plant or slab. Factor this in early rather than discovering it halfway through a project when the money has already gone on paving.
Where to Spend and Where to Save
After designing dozens of new build gardens, I have a clear view of where your money does its best work and where you can pull back without the design suffering. Hard landscaping materials like paving are worth investing in, as cheap concrete slabs age badly and crack within a few years, whereas quality porcelain or natural stone will still look great in thirty years. The same logic applies to fencing and edging: buy decent once rather than replacing cheap panels every three years.
Plants, on the other hand, are one area where patience pays. Smaller, younger plants establish faster in poor new build soil and cost a fraction of the price of their mature counterparts. A two-litre potted Viburnum tinus at £8 will often outperform a five-litre specimen at £25 within eighteen months, having had less transplant shock and more time to root into its new home. Buy smaller, plant more, and let time do the heavy lifting.
The Phased Spending Approach
The wisest thing most new build garden owners do is resist the temptation to spend everything in year one. A sensible phased approach might look like this: year one focuses entirely on soil improvement, a simple patio or seating area, and the structural shrub backbone. Year two adds your perennial planting and any remaining hard landscaping. Year three is where the finishing touches go: a water feature, raised beds for vegetables, garden lighting, and the decorative details that make a garden feel truly personal. Spreading the investment this way also means you’re designing with real knowledge of how the space performs across seasons, rather than guessing from scratch.
12. Hard Landscaping & Patio Materials for New Build Gardens
I see this mistake time and again: new build homeowners spend months choosing plants and approximately forty-five minutes deciding on paving. Then they wonder why the garden looks unfinished five years later. Hard landscaping (the patio, paths, edging, and any walls or raised structures) forms the permanent skeleton of your garden. Get it right, and everything else works around it beautifully. Get it wrong, and no amount of gorgeous planting will rescue the design.
The golden rule with paving in a new build garden is to keep it simple and keep it consistent. One material, well laid, with clean edges, will always look more sophisticated than a patchwork of different surfaces trying to create interest. Complexity in hard landscaping is usually the enemy of good design, especially in smaller gardens where scale is everything.
Patio Materials Compared
Material
Approximate Cost per m²
Lifespan
Maintenance
Best For
Porcelain Paving
£40–£90
25+ years
Very low – wipe clean, non-porous
Contemporary designs, wet climates
Natural Sandstone
£35–£80
20–30 years
Low – occasional sealing
Traditional, cottage, warm-toned gardens
Concrete Slabs
£12–£35
10–15 years
Medium – algae, cracking
Budget builds, utility areas
Composite Decking
£40–£130
20–25 years
Low – annual clean
Raised areas, contemporary gardens
Gravel / Shingle
£5–£20
Indefinite with top-ups
Medium – weeding, raking
Low-cost infill, paths, drought gardens
For most new build gardens, my go-to recommendation is porcelain paving for the main patio and gravel or decomposed granite for the paths. Porcelain is genuinely low maintenance, doesn’t absorb the green algae that plagues sandstone in wet northern climates, and comes in formats that look genuinely premium. It’s a material that’s kind to busy homeowners, which is exactly what most new build garden owners need.
How Much Patio Do You Actually Need?
This is one of the most common design errors I see: patios that are too small to be genuinely useful. A table for four people with chairs needs a minimum of 3m x 3m to feel comfortable. Once you add a couple of planters, a barbecue, and somewhere to put drinks, you’re already wishing for more space. As a starting point, I’d suggest your patio should be at least one third of your total garden area in a small new build plot. It sounds a lot, but a generous, well-defined patio feels like an outdoor room rather than a postage stamp you’re afraid to put furniture on.
Also factor in path widths from the outset. Paths in a garden should be at least 90cm wide to allow comfortable walking and to allow you to push a wheelbarrow through. Anything narrower feels tight and becomes a source of frustration every time you’re carrying anything larger than a trowel.
Permeable Paving and Sustainable Drainage
Worth mentioning here, because new build estates often have significant surface water drainage challenges: permeable paving options such as resin-bound gravel, block paving with open joints, or cellular grass systems all allow rainwater to drain naturally back into the ground rather than sitting on the surface or overwhelming the drainage system. Given that your soil is likely already compacted and poorly draining, choosing permeable hard landscaping materials where possible is both environmentally responsible and practically smart. It can also remove the requirement for planning permission on front driveways, which is a useful bonus.
Your subscription could not be saved. Please try again.
Your subscription has been successful.
13. Garden Lighting for New Build Gardens
Garden lighting is the finishing touch that most new build homeowners think about last and then immediately wish they’d thought about first. A well-lit garden essentially doubles the usable time you can spend in it, extending warm evenings well past sunset and transforming your outdoor space from a patch of darkness into something genuinely beautiful to look out at from the house. I’d go so far as to say that thoughtful lighting adds more atmosphere per pound spent than almost any other garden feature.
If you’re putting in a new patio or hard landscaping, now is the time to plan for running conduit for electrical cables, even if you don’t install the lights until later. Retrofitting wired lighting into an existing patio means lifting slabs. Plan the infrastructure early and save yourself a significant headache down the line.
The Three Layers of Garden Lighting
Just as with planting, good garden lighting works in layers. Think of it as ambient (the general background glow that makes the space feel warm and inhabited), task (practical lighting for paths, steps, and the barbecue area), and accent (the dramatic uplighting of trees or features that gives a garden its wow factor after dark). A scheme that combines all three layers feels considered and professional rather than simply functional.
Solar lighting has improved enormously over the last decade and is now a genuinely viable option for ambient and path lighting in most UK gardens. The practical advantage is obvious: no wiring, no electrician, no disruption to your new paving. For border edges, path markers, and festoon lights over a seating area, high-quality solar products will deliver reliable performance from spring through Autumn. In the depths of a British winter, or in heavily shaded north-facing gardens, solar performance does tail off, so it’s worth knowing before you rely on it for security lighting or illuminating steps.
Mains-powered low-voltage LED systems (typically running through a transformer) are the professional’s choice for uplighting trees, illuminating steps, and recessed patio lighting. The light quality is consistent and controllable regardless of season. The installation cost is higher, but the result is a step change in quality. If you’re only doing one thing with permanent lighting, make it uplighting a decent tree or specimen shrub; the effect of looking out at a glowing garden from your kitchen window on a dark winter evening is genuinely worth every penny.
A Simple Lighting Plan for New Build Gardens
You don’t need to spend a fortune to create something magical. For most new build gardens, a starting lighting scheme that covers the key bases might involve festoon lights over the main seating area (solar or mains, depending on access), solar spike lights along borders and path edges, one or two LED uplighters directed at your best structural planting or a tree, and a wall-mounted light by the back door for practical security. That covers ambient, task, and accent in one relatively modest investment and will completely transform how the garden feels after sunset.
14. Making Your New Build Garden Wildlife-Friendly
New build estates are, ecologically speaking, a pretty bleak landscape. Strip away the topsoil, cover the ground with concrete and turf, plant a handful of generic shrubs, and you have a space that wildlife largely bypasses. The good news is that even a small new build garden, thoughtfully planted, can become a genuine haven for insects, birds, and small mammals, and it doesn’t require a rewilding project or sacrificing the aesthetics of your design.
I’m passionate about sustainable, wildlife-friendly gardening, and what always strikes me is how little effort it actually takes to make a meaningful difference. A single well-chosen shrub like Viburnum tinus in flower during winter provides nectar at a time when almost nothing else does. A small pond, even just a washing-up bowl sunk into the ground, creates habitat for dozens of species. These aren’t grand gestures; they’re small, considered choices that compound over time.
Quick Wildlife Wins for New Build Gardens
The most impactful things you can do for wildlife in a new build garden require almost no extra budget and fit seamlessly into any design. A log pile tucked into a shaded corner provides habitat for ground beetles, slow worms, and hedgehogs. A bird feeder positioned where you can see it from the kitchen will bring life and movement to the garden within days of installation. Leaving a small section of lawn unmown allows wildflowers and grasses to establish naturally, which is particularly effective in new builds where the lawn seed mix often contains meadow species that just need the chance to flower.
When choosing plants throughout this guide, you’ll notice I’ve included notes on wildlife value alongside ornamental value. This isn’t accidental; choosing plants that provide nectar, berries, or nesting structure significantly increases your garden’s ecological contribution without compromising the design. Native species like Sorbus aucuparia, Betula pendula, and field maple offer wildlife value that their ornamental counterparts simply cannot match, whilst looking every bit as beautiful in a well-designed planting scheme.
Wildlife-Friendly Features to Consider
A small pond or water feature, even 60cm across, provides drinking and bathing for birds, and breeding habitat for frogs and newts
A hedgehog gap in your fence panel: a 13cm square gap at ground level allows hedgehogs to roam between gardens, which dramatically increases their survival odds
A compost bin: turns your kitchen and garden waste into brilliant soil improver whilst providinga warm habitat for slow worms and other invertebrates
Pollinator-friendly planting: lavender, echinacea, alliums, and single-flowered roses all provide accessible nectar; avoid double-flowered varieties where pollinators can’t reach the centre
Nest boxes: a simple blue tit nest box on a north-facing fence takes minutes to install and lasts for decades
15. Your Year-by-Year New Build Garden Plan
The single biggest mistake I see in new build gardens is attempting to do everything at once. Within six months, the homeowners are exhausted, over budget, and surrounded by plants that haven’t established because the soil was never properly prepared. The gardens that consistently look best three or four years in are the ones that took their time. Here is the phased approach I recommend to clients and on BBC Garden Rescue.
Year 1: Foundations
Your entire focus in year one should be on the bones of the garden. Survey the space properly, address soil compaction and drainage issues, remove construction debris, and bring in quality topsoil or a soil improver to a depth of at least 30cm across your planting areas. Install your main hard landscaping, the patio, primary paths, and any raised structures, while the garden is free of plants and easily accessible. Year one is also the time to install any services you’ll need later: conduit for lighting cables, an outdoor tap, aandpower point for the shed. These things are cheap to do during construction and expensive to retrofit later.
Once the hard landscaping is in, plant your structural evergreen shrub layer. These plants need time to establish, and every month’s head start matters. Keep it simple, keep it well-spaced, and mulch generously. The garden will look sparse; that’s fine and entirely correct.
Year 2: Colour and Character
With your structural shrubs beginning to find their feet, year two is where the garden starts to feel like something. Add your herbaceous perennial layer, the rudbeckias, daylilies, astilbes, and echinaceas that will provide seasonal colour for years to come. Spring bulbs planted in Autumn of year one will already be providing their first flush of colour. Year two is also the right time to add any trees, as they benefit enormously from establishment time and will look disappointingly small for the first year or two, regardless of when you plant them.
This is also when you can start filling gaps with annual bedding if you want quick colour, knowing that the perennial backbone is now doing its job beneath.
By year three, your garden should be looking genuinely established. The structural planting has knitted together; you know which spots work well and which need revisiting, and you have a clear sense of how the light moves through the space across seasons. Now is the time for the finishing details that elevate a good garden into a great one: garden lighting, a water feature, raised vegetable beds, a more refined container planting scheme, or any decorative elements that reflect your personality. Investing in these details in year three, when the design is already proven and established, means every pound spent lands exactly where you intended.
Year
Priority Focus
Key Tasks
Approx. Budget
Year 1
Foundations
Soil prep, hard landscaping, services, structural shrubs
60% of total budget
Year 2
Colour & Character
Perennials, bulbs, trees, first annuals
25% of total budget
Year 3
Finishing Touches
Lighting, water features, veg beds, decorative details
15% of total budget
Learn Garden Design with Lee Burkhill
What if you are on a budget and would like to design your own garden? My Garden Design for Beginners course is the ideal starting point! With online courses ranging from £29 to £199, there’s something for every aspiring garden designer.
Join me, Lee Burkhill—award-winning garden designer and BBC1’s Garden Rescue presenter—in my most comprehensive course. I’ll guide you step by step from a complete beginner to a confident garden designer ready to create stunning outdoor spaces.
What You’ll Learn:
Design Principles: Understand the key elements that underpin exceptional garden design.
Planting Techniques: Discover how to choose and arrange plants for beautiful, sustainable gardens.
Design Styles & Layouts: Explore a variety of garden styles to suit every outdoor space and personal taste.
Course Features:
20 hours of in-depth study
Flexible online learning at your own pace
Engaging video lessons and interactive quizzes
Real-world case studies to apply your knowledge
Certification upon course completion
This comprehensive course is available now for just £199. Begin your garden design journey today and gain the skills to confidently create breathtaking gardens
Why not level up your gardening skills with my Garden Design for Beginners course is the perfect place to begin! I offer several courses from £29 to £199 to help you learn the basics of garden design.
29
Garden Design Examples for Small Gardens: 30 Design Templates & Planting Plans
Garden Design Examples for Small Gardens: 30 Design Templates & Planting Plans: In this online gardening course, I’ll walk you through 30 fantastic garden designs, explaining the logic behind the layout, the plant choices, and take-home tips for applying them in your own garden.
Weekend Garden Makeover: A Crash Course in Design for Beginners
Learn how to transform and design your own garden with Lee Burkhills crash course in garden design. Over 5 hours Lee will teach you how to design your own dream garden. Featuring practical design examples, planting ideas and video guides. Learn how to design your garden in one weekend!
Garden Design for Beginners: Create Your Dream Garden in Just 4 Weeks
Garden Design for Beginners Online Course: If you want to make the career jump to becoming a garden designer or to learn how to design your own garden, this is the beginner course for you. Join me, Lee Burkhill, an award-winning garden designer, as I train you in the art of beautiful garden design.
Here are the questions I get asked most often about new build gardens, both through my forum and on Garden Rescue. Hopefully, these save you some head-scratching.
How long does it take for a new build garden to establish?
With good soil preparation and sensible plant choices, you should see a genuinely attractive, well-established garden within two to three growing seasons. Structural shrubs typically take one full season to settle in and begin looking intentional. By year three, a well-planted new build garden often looks as though it has been there for a decade. The temptation to rush this process with large, expensive plants almost always backfires; smaller, younger plants establish faster and ultimately cost less.
What do I do about the terrible soil in my new build garden?
Improving new build soil is the single most important investment you can make in your garden. Start by removing any construction debris you find, then deep-dig the planting areas to break up compaction. Add generous quantities of well-rotted garden compost, mushroom compost, or farmyard manure; a full barrow load per square metre is not excessive. Apply a thick mulch over the surface after planting and let the worms do the rest over the following months. For areas where the soil is genuinely beyond saving, raised beds filled with good-quality topsoil mixed with compost are a legitimate and often more practical solution.
How do I get privacy in a new build garden without spending a fortune?
The most cost-effective privacy solution is well-chosen, fast-growing shrubs and small trees rather than fencing. Bamboo (in root-control bags to prevent spreading), Photinia Red Robin, Viburnum tinus, and pleached trees all provide effective, living screening at a fraction of the cost of replacing fence panels every few years. The bonus is that plant screening improves with age rather than deteriorating, looks genuinely beautiful, and provides habitat for wildlife that fence panels never will.
Can I put a patio right outside my back door on a new build?
Yes, and in most cases this is exactly where your main patio should be. Check the aspect of that area first, though, a patio directly outside a north-facing back door will be in shade for most of the day. If this is your situation, it’s worth considering whether a secondary, smaller seating area at the sunniest end of the garden might give you better quality outdoor time, even if it’s smaller. Most domestic patios don’t require planning permission. Still, if you’re thinking of covered structures like pergolas or awnings, it’s always worth a quick check with your local planning authority before committing.
Should I put artificial grass in my new build garden?
I’m not a fan, and here’s why: artificial grass looks reasonable for the first two or three years and then tends to look tired, faded, and plasticky. It also creates a heat island effect in summer, provides zero habitat for wildlife, introduces microplastics into your soil as it degrades, and cannot be composted at the end of life. For families with young children who just need a durable surface for play, I understand the appeal. Still, I’d encourage you to consider the long-term costs, both financial and environmental, before committing. A simple, well-maintained real lawn with rounded edges is infinitely more beautiful at five years old than artificial grass, and far kinder to the planet.
Do new build gardens come with topsoil?
Technically, yes, but the quality varies enormously. Developers are required to provide a layer of topsoil, but there is no minimum quality standard, and the layer is often thin, compacted, and mixed with subsoil or fill. Don’t assume the lawn you inherit is sitting on good growing medium. Get a spade into the borders early and see what you’re genuinely working with before spending money on plants that will struggle in poor conditions.
Last but not least, don’t be put off by the numerous things you need to consider. If you start with the garden’s function, aspect and soil type and then plan around that, you can’t go far wrong in creating something that will suit your needs. If plants don’t quite work where you have placed them, lift them and move them about.
As the garden develops, it will evolve; what you thought would work may not. The beauty of gardens is in planning, researching, and then playing around with them. Sometimes, looking around at neighbours and seeing what has worked and what hasn’t will also help steer your choices.
Even small spaces can become an oasis of calm in a new build estate. Following this guide will at least set you on the right path and hopefully prevent some easy-to-avoid mistakes. If you need some basic guides for a new garden, why not subscribe to my YouTube channel, where you can watch demonstrations?
Your subscription could not be saved. Please try again.
Your subscription has been successful.
Lee Burkhill
Lee Burkhill, known as the Garden Ninja, is an award-winning garden designer and horticulturist with over 30 years of gardening experience and 15 years as a professional garden designer. A qualified RHS (Royal Horticultural Society) professional, Lee specialises in sustainable garden design and practical horticultural advice. He designs and presents on BBC1’s Garden Rescue and in leading gardening publications. Lee combines three decades of hands-on gardening knowledge with professional design qualifications to help gardeners create beautiful, functional outdoor spaces.
Hi, I saw your work n my friends new build garden which you designed. I’ve always struggled with being over looked at think those square trees are a great idea! What advice would you give with fences? My neighbour has a tiny fence and I was wondering if I spoke to them about increasing the height of it as they do tend to look over when I’m in the garden! Thanks. Anna
Hi Anna, Thanks for getting in touch. Fencing is a tricky one. You need a certain amount of fencing for boundary protection and privacy, but sometimes building up can then lead to a reduction in light and a feeling that the garden is becoming more enclosed. What maybe a good idea is to consider adding trellis to the top of the fence. It doesn’t block as much light and baffles wind better whilst also giving some privacy. It also means you can grow some lovely climbers up there over time too! All the best. Garden Ninja
Hi Lee, I’m currently in the process of pleaching my own photinia marble standards for this very reason. I’ve put up a trellis behind them to protect from harsher winds and as it’s a north facing wall, they reach the sun nicely, leaving room for some clever underplanting. Although I appreciate these are going to take a long time to establish, they are a much more cost effective way of screening. Iw ondered if you had any tips on training them and tying them in to get a nice shape.
I loved the insights in this guide! The tips on incorporating native plants really resonated with me, and I can’t wait to apply them to my own garden. Thanks for the inspiration, Garden Ninja!