How to Prune Box Hedges UK: Timing, Technique, Blight Prevention and Alternatives
Lee Burkhill: Award Winning Designer & BBC 1's Garden Rescue Presenters Official Blog
Intermediate level
Box hedging gives any space an instant formal garden feel. Whether it's a box hedge, topiary or Buxus balls, all forms of Box will need regular pruning from spring to autumn to keep them looking sharp. However, prune at the wrong time or with the wrong tools, and you'll invite in illness or even the dreaded box blight. This guide will help you avoid box disasters and show you my tried-and-tested method for keeping your Buxus looking fabulous!
Quick Answer
Prune box hedges twice a year for the neatest result: once in late May to early June after the first flush of new growth has hardened, and again in late August once the second flush has slowed. Always prune in dry weather with clean, disinfected blades to reduce the risk of box blight. Cut to a battered profile, wider at the base than the top, so light reaches the lower growth and the hedge stays dense at the bottom.
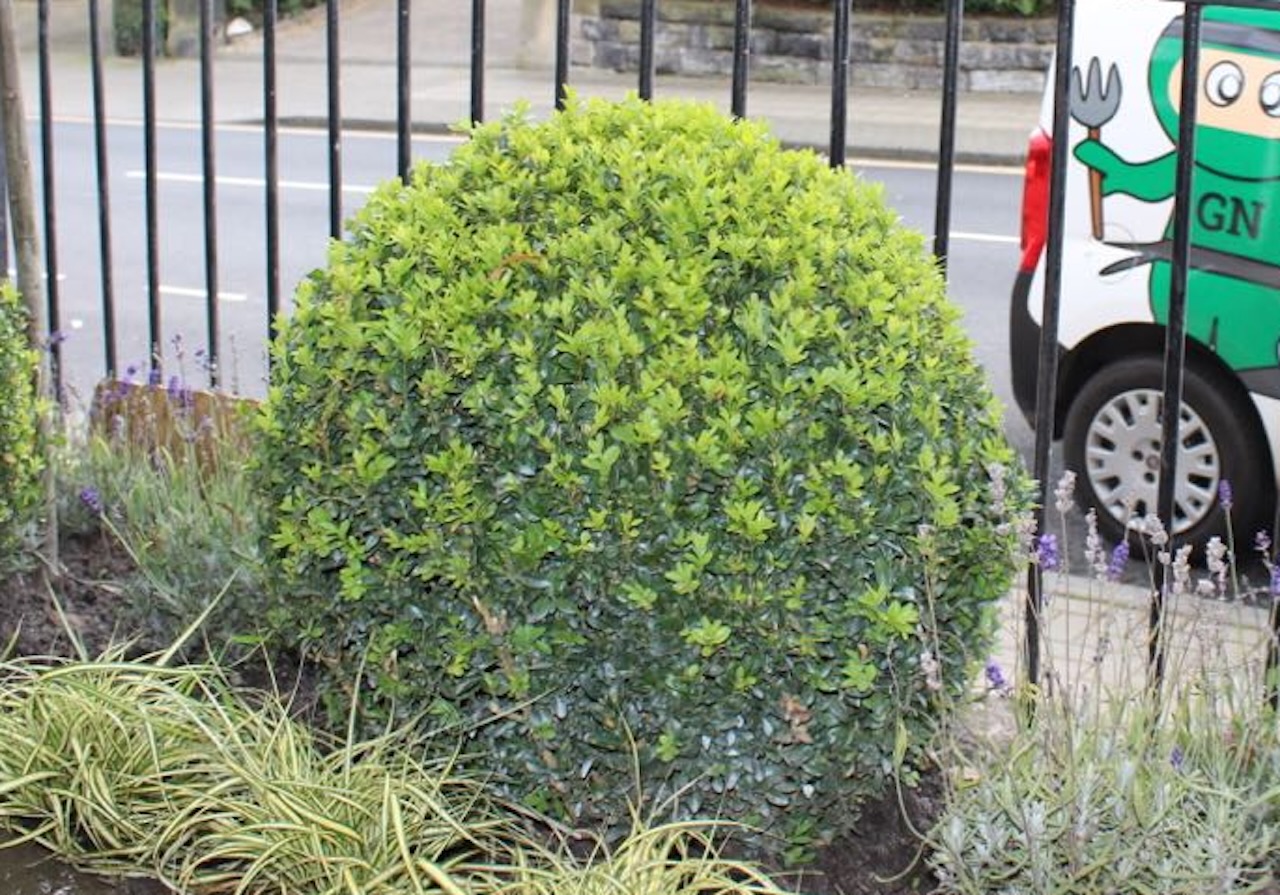
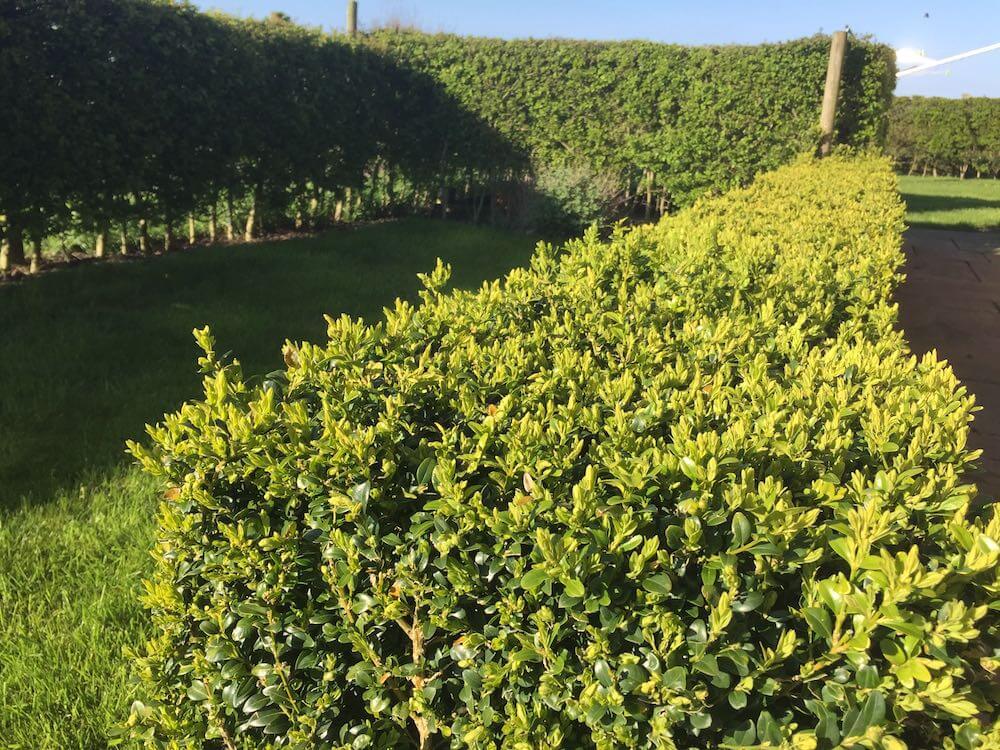
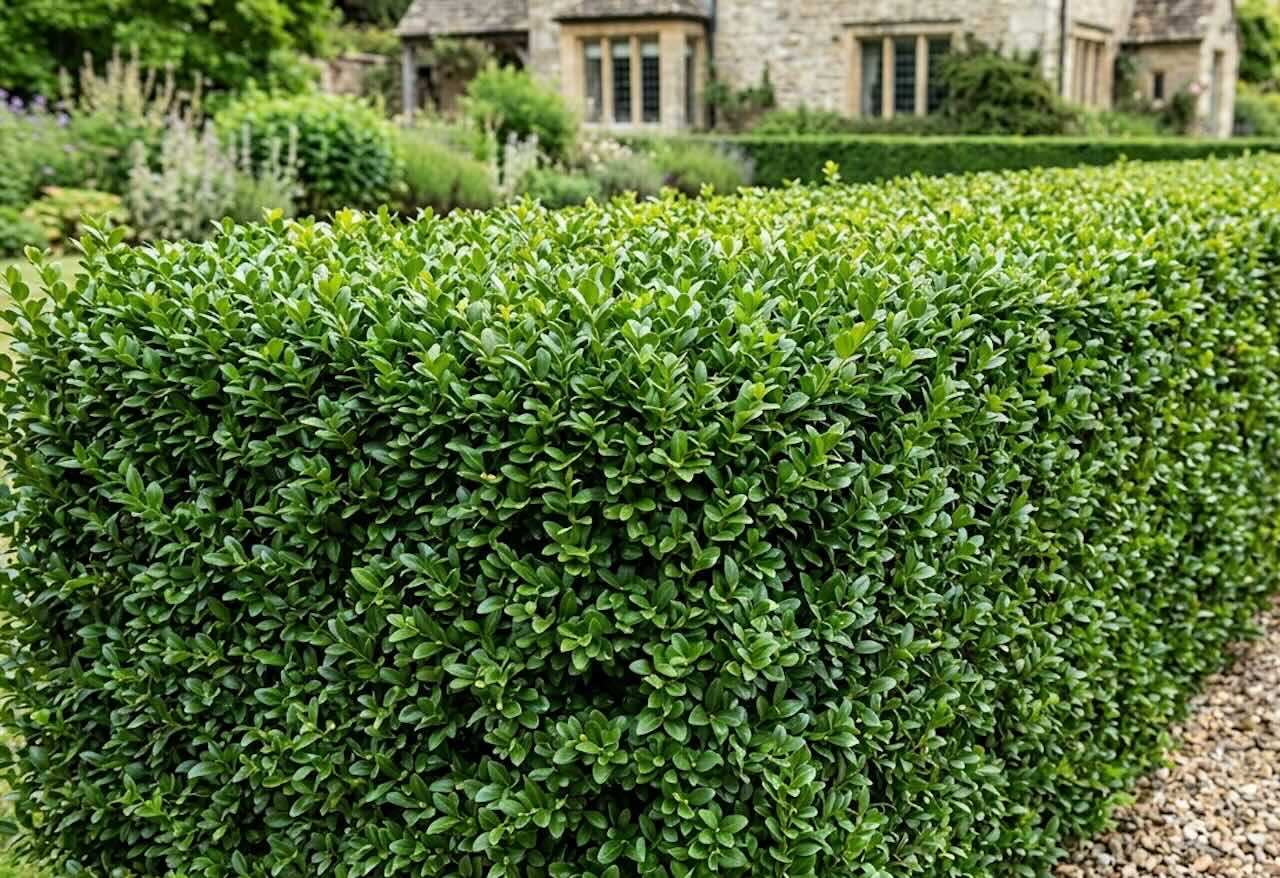
Buxus sempervirens, common box, is one of the most structurally satisfying plants in garden design. That characteristic dense, fine-textured surface that makes a box hedge so useful as a formal boundary, an edging to a path, or a topiary form only exists because of consistent pruning. Left completely unclipped, Box reverts to a loose, open shrub with a very different character from the tight geometric forms that have made it central to formal garden design for centuries. Regular pruning is what creates and maintains the defining quality of a box in a garden.
I use box in professional design work less than I did a decade ago, largely because the combination of box blight and box tree caterpillar has made it a higher-risk planting than it once was. But used well, in the right conditions, and managed with the blight-prevention protocols built into the pruning routine, it remains one of the finest formal hedging plants available for UK gardens. Nothing else produces quite that tight, dark green surface with the same reliability. The key is understanding what the plant needs from the pruning routine and being consistent about delivering it.
2. When to prune box hedges in the UK
The timing of box pruning is more specific than for most hedging plants, and getting it wrong has consequences for both the appearance of the hedge and its vulnerability to disease. The key principle is to prune when growth has slowed or hardened rather than when it is in full active flush, and always in dry weather rather than damp conditions.
First prune: late May to early June
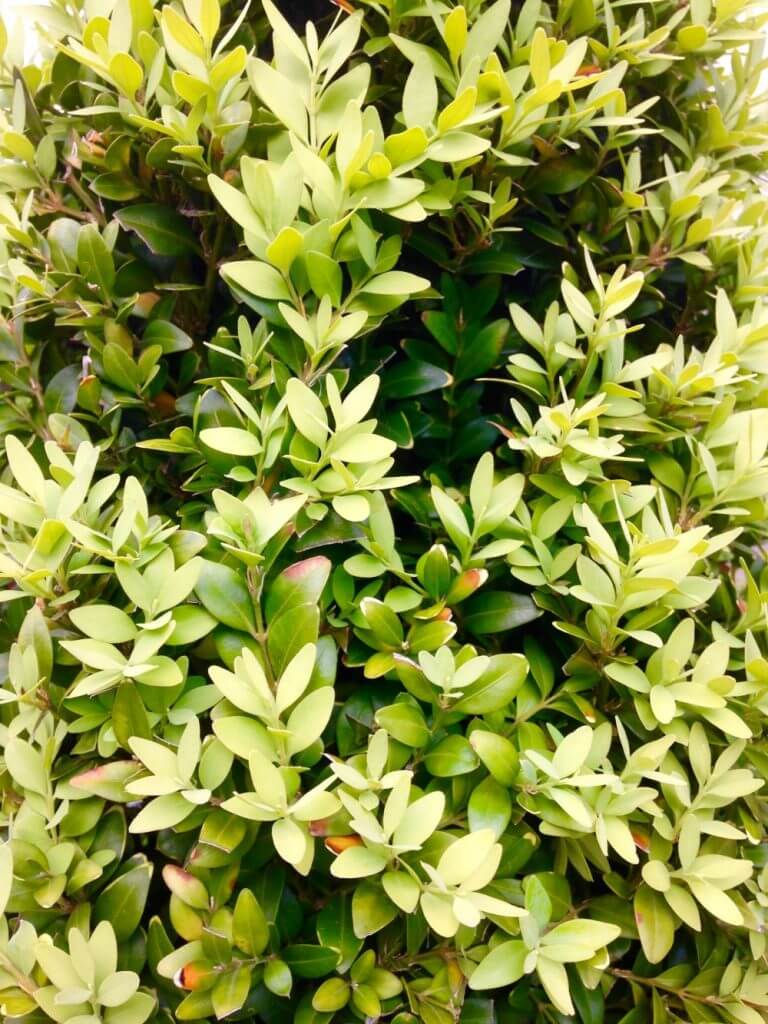
The first pruning of the year should take place once the spring growth flush has hardened off but before it becomes too woody. In most UK gardens, this falls between late May and mid-June. The spring flush of new growth is soft and bright green. Wait until it has begun to lose that bright colour and feel slightly firmer to the touch before clipping, which usually takes around three to four weeks from when growth first appears. Clipping into actively growing soft growth produces a slightly ragged finish and increases the area of fresh wounds available to box blight spores. Clipping once hardened gives a crisper result and heals more quickly.
Second prune: late August
The RHS recommends trimming mature box into its final shape for the year in August, once the second flush of new growth has slowed and hardened. This late-summer prune is the one that determines how the hedge looks through winter, so it is worth taking a little extra time and care with it. Clip in late August rather than September: later pruning leaves fresh wounds exposed to the first Autumn frosts and early damp conditions that favour fungal disease. A hedge clipped cleanly in August will hold its shape through winter and look presentable right through to the following spring flush.
Optional third prune: July
On vigorous established box hedges or topiary where a particularly tight, crisp surface is desired, a light third trim in July is beneficial. This removes the second flush of growth before it becomes too prominent, keeps the profile sharp throughout the summer, and makes the August prune less drastic. Most home gardeners do not need a third prune, but for box edging around formal parterres or for topiary that is on display all summer, it makes a meaningful difference to the tidiness of the finish.
📅 Box Hedge Pruning Calendar
When
What
Notes
May (young plants only)
Formative trim
Cut back by up to a third to encourage bushy growth.
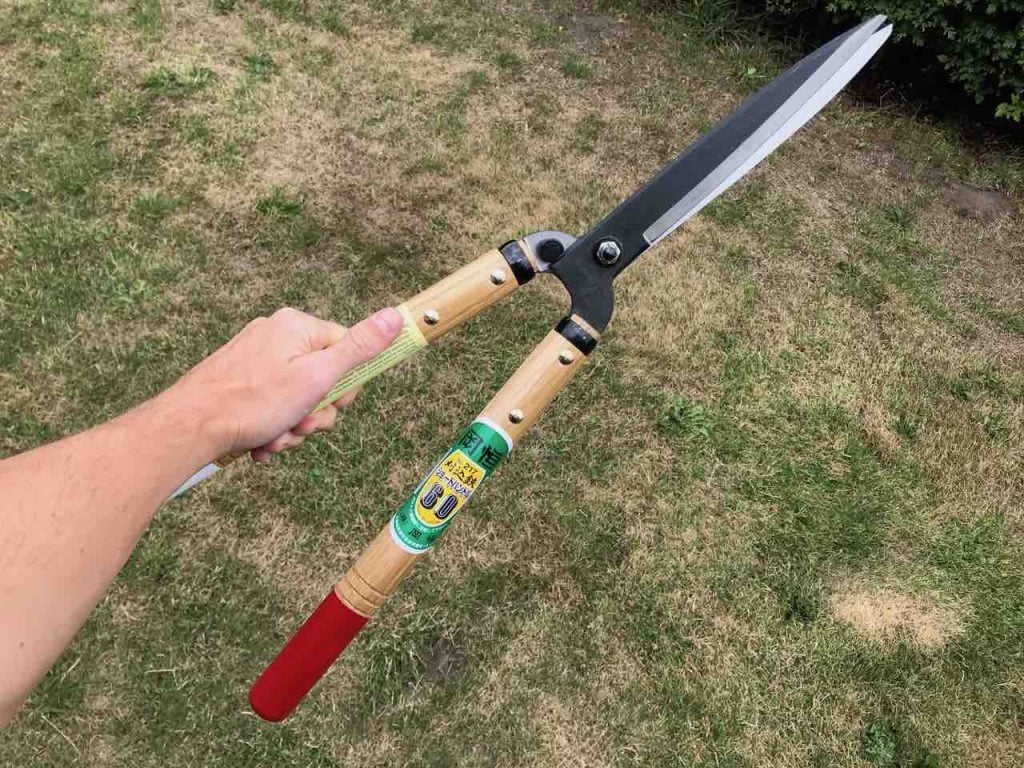
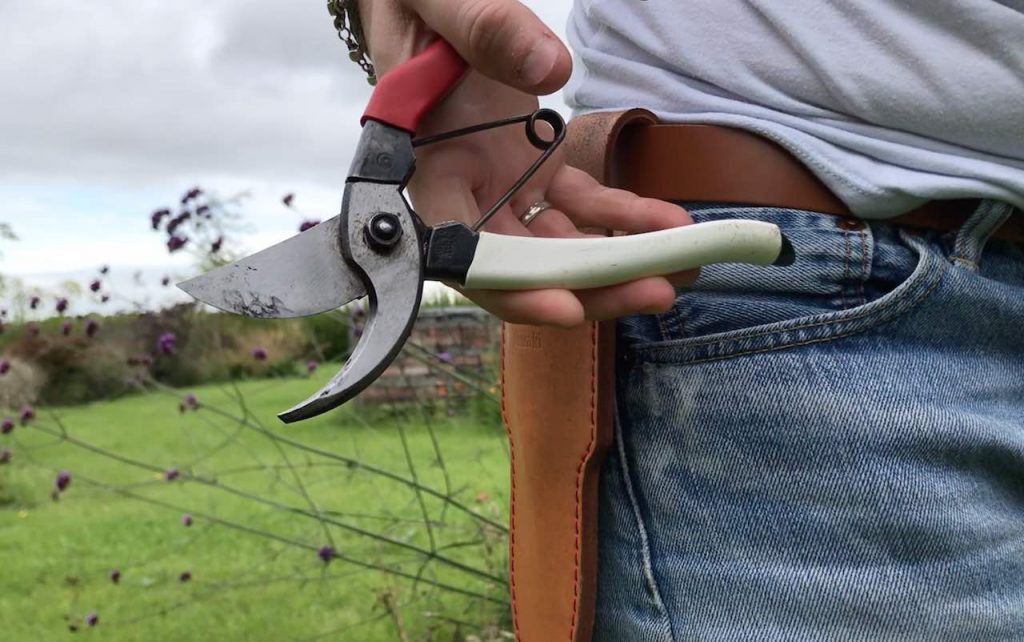
The choice and condition of your cutting tools matter more with box than with almost any other hedge plant, for two reasons. First, box has small, dense leaves, and a blunt blade bruises the foliage rather than cutting cleanly, leaving brown-tipped leaves that detract significantly from the finish. Second, box blight spreads on cutting tools, and a pair of shears moved from a blight-affected plant to a healthy one can spread the infection across an entire garden in a single session.
Shears or hedge trimmer?
Hand shears give the finest finish on box because the blades are lighter and the cuts more precise. For small hedges, topiary shapes, and edging up to about 30 centimetres high, hand shears are the right tool. For a longer run of hedge where the priority is efficiency over perfection, a light electric or battery hedge trimmer with fine blades is faster and produces a perfectly acceptable result. Avoid heavy petrol hedge trimmers on box: they tend to vibrate the stems rather than cutting cleanly, and the finish is noticeably coarser.
This is the single most important preparation step for box, and the one most gardeners skip. Box blight is caused by two fungal pathogens, Cylindrocladium buxicola and Pseudonectria buxi, both of which can be carried on the blades of cutting tools and transmitted to healthy plants in a single pruning session. Before starting work, wipe the blades of your shears or trimmer with a disinfectant solution such as Jeyes Fluid diluted to the manufacturer’s recommendation, or a proprietary blade disinfectant. Repeat between individual plants on a long hedge run, and certainly between completely separate box plantings. It sounds laborious, but it takes less than a minute per plant and is the most effective preventative measure available.
For anything longer than about a metre of hedge, set a string line along the top of the hedge before you start. Tie garden twine between two canes pushed into the ground or held against the hedge at each end, stretched taut at the height you want the finished top to sit. Cutting by eye along a long run almost always produces a slightly wavy line that becomes apparent when you step back. The string line eliminates this entirely. For maintaining the existing height of a hedge, push the canes in at the current height and use the string as a guide rather than a target.
Step 2: Cut the sides first
Always cut the sides of the hedge before the top. Working from the bottom upwards on each side, use smooth, sweeping strokes rather than short jabbing cuts. Cut to the battered profile described below, keeping the base of the hedge wider than the top throughout the run. Collect the clippings as you go by laying a sheet or groundsheet along the base of the hedge before you start: box clippings left on the soil surface can harbour fungal spores and should be cleared promptly and disposed of rather than composted if there is any sign of blight in your garden.
Step 3: Cut the top
Once both sides are trimmed, cut the top flat along the string line. Keep the blade of the shears or the trimmer horizontal throughout and work along the string from one end to the other in a single pass if possible. A second cleanup pass removes any missed stems. On a wide hedge, the top can also be cut with a very slight convex curve rather than dead flat: the RHS notes that a slightly convex top sheds water more effectively than a flat one, which reduces the time the surface remains wet after rain and therefore reduces the conditions that favour blight.
Step 4: clear up immediately
Remove all clippings from the base of the hedge immediately after pruning. Do not compost box clippings if there is any sign of blight in the garden: bag them and dispose of them in the general waste. Even clippings from apparently healthy plants should be collected promptly because they can carry fungal spores before symptoms become visible. Leaving clippings to lie on the soil or on the hedge surface significantly increases the risk of infection.
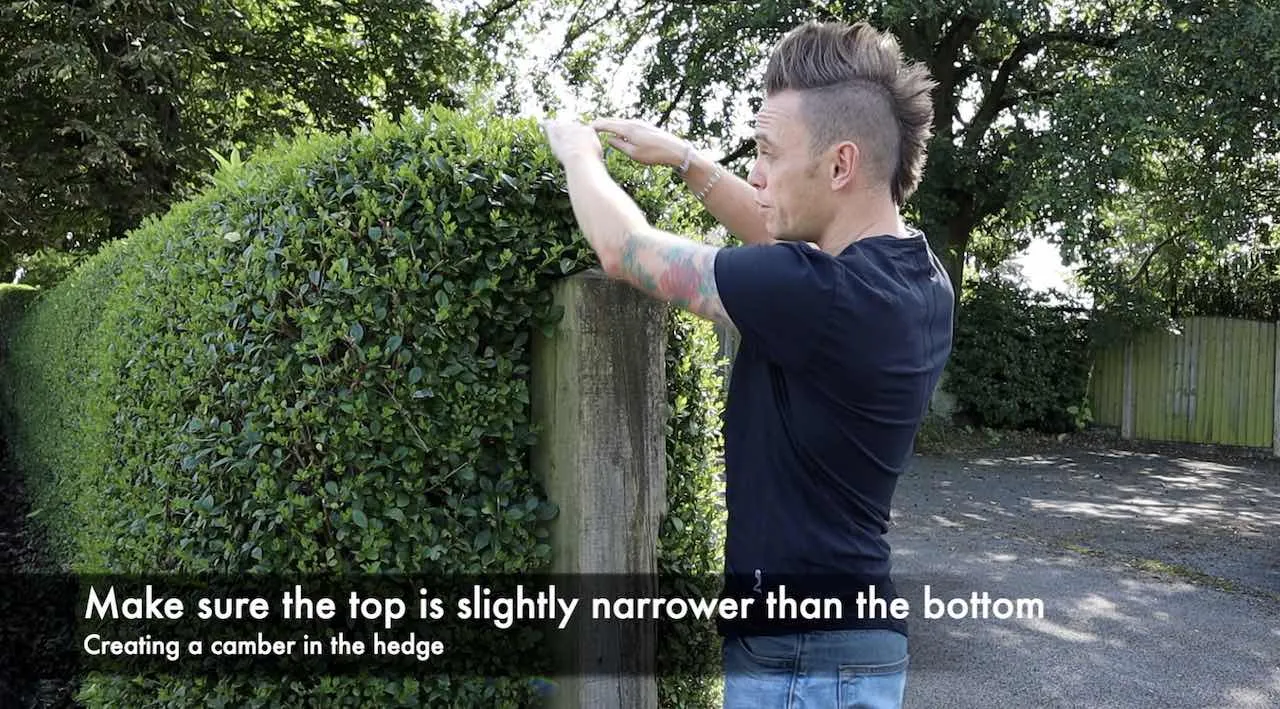
5. The batter profile: why it matters
The battered profile is the most important structural principle in box hedge management and the one most frequently ignored by home gardeners, usually because it feels counterintuitive to make a hedge narrower at the top. The principle is simple: the base of the hedge should be wider than the top, so that the hedge tapers slightly on each side from ground level up to the top. This profile allows light to reach the lower growth rather than being intercepted by the wider upper canopy.
A box hedge cut with a vertical or overhanging profile will inevitably lose its lower growth over several years as the shaded lower stems become increasingly unproductive and eventually bare. Once the base goes bare, it is very difficult to recover because the box does not regenerate from the oldest wood the way many other shrubs do. The battered profile prevents this by keeping the lower growth in reasonable light throughout the hedge’s life. For most garden box hedges, a taper of about 5 to 10 degrees from vertical on each side is sufficient. You do not need a dramatic lean. Even a gentle taper makes a meaningful difference over several years.
💡 Top Tip
If you have inherited a box hedge that has been cut with vertical sides for several years and the lower growth has started to thin, begin introducing a batter gradually rather than making a sudden dramatic cut. Take a few centimetres more off the top than the bottom at each pruning session over two or three years to allow the lower growth to recover in improved light before any dramatic reshaping.
6. Pruning box balls, cones and topiary
Box topiary follows the same timing principles as hedge pruning but requires a different technique. For simple geometric shapes such as balls and cones, the approach I use in design projects varies slightly depending on whether the shape is already established or still being formed.
Established box balls
Hold a pair of topiary shears with both hands and work around the ball with smooth, curving strokes, following the existing outline. The aim is to remove the new growth that has extended beyond the established outline rather than to reshape the plant. Step back frequently to check the overall silhouette from different angles: it is very easy to develop a flat spot or irregular bulge when working close to the plant. For very large established box balls, rotating the plant in its container halfway through the session ensures an even result on all sides.
Creating new topiary shapes
For creating a new shape on a young plant, make the initial cut to define the shape in late spring, then refine and tighten the profile with a second cut in late summer. For complex topiary shapes such as spirals or geometric forms, using a wire frame positioned over or around the plant as a cutting guide is far more reliable than working by eye. As growth extends through the wire mesh, the clip attaches to the mesh surface, and the shape defines itself. This sounds like a professional technique, but it is accessible for any gardener willing to spend a little time making the frame initially.
Also, go easy on yourself if you’re new to pruning. Topiary is a skill in its own right, so start with a box ball first, then move on to spirals and other shapes. Alternatively, look at signing up for a topiary weekend course to teach you the basics, or do what other gardeners do, buy the topiary already shaped and then with hand secateurs just maintain that shape. Simple!
7. Pruning young box hedges in the first three years
The pruning approach for young box plants in their first three years differs significantly from mature hedge maintenance, because the priority is building a dense, bushy structure rather than maintaining an existing one.
In the first year after planting, cut back the young stems by up to one-third in May. This pinching back is counterintuitive for gardeners who want the hedge to grow upward as quickly as possible, but it is the step that produces the dense, branching growth structure that defines a quality box hedge. Unpruned young plants grow upward without branching adequately, producing a thin, gappy hedge that takes far longer to fill in properly than one that was pinched back from the beginning.
In years two and three, continue trimming lightly between May and August to encourage further branching, and begin introducing the battered profile from the outset. The batter is far easier to establish on a young hedge than to introduce retroactively on a mature one. Allow the height to increase gradually over these early years while keeping the surface dense through regular light trimming rather than letting it grow unchecked and attempting to neaten it later.
8. Renovation pruning for overgrown or misshapen box
Box tolerates hard pruning significantly better than many people assume, and a hedge that has been neglected or allowed to grow out of shape can be brought back to a respectable profile over two seasons. The key constraint is that box does not regenerate reliably from very old, thick wood in the way that yew does. It regenerates well from wood of three to five years’ age, but poorly from stems that are more than about ten years old and as thick as a wrist. Hard pruning is therefore most successful on hedges that are overgrown but not ancient.
The two-year renovation approach
In late spring of year one, cut one side of the hedge back hard to within 15 to 20 centimetres of the main stems. Apply a balanced granular fertiliser and a good mulch of compost or bark around the base to support recovery, and water the hedge during dry spells through the summer. The cut side will regenerate new growth through summer and Autumn. In late spring of year two, cut the other side back hard using the same approach. By Autumn of year two, the hedge should have regenerated on both sides and be ready to return to the standard twice-yearly maintenance programme.
Do not hard-prune the top and both sides in the same session. Removing too much growth at once shocks the plant severely and risks a slow recovery or section dieback. Spreading the renovation over two seasons gives each cut area maximum time to regenerate before the next section is addressed.
⚠️ Warning
Do not attempt renovation pruning on a hedge that is showing signs of box blight. Hard pruning a blight-affected hedge spreads the fungal spores across the cut surfaces, creates many new infection points, and typically accelerates decline rather than stimulating recovery. Address the blight first and only consider renovation once the hedge is clean and healthy.
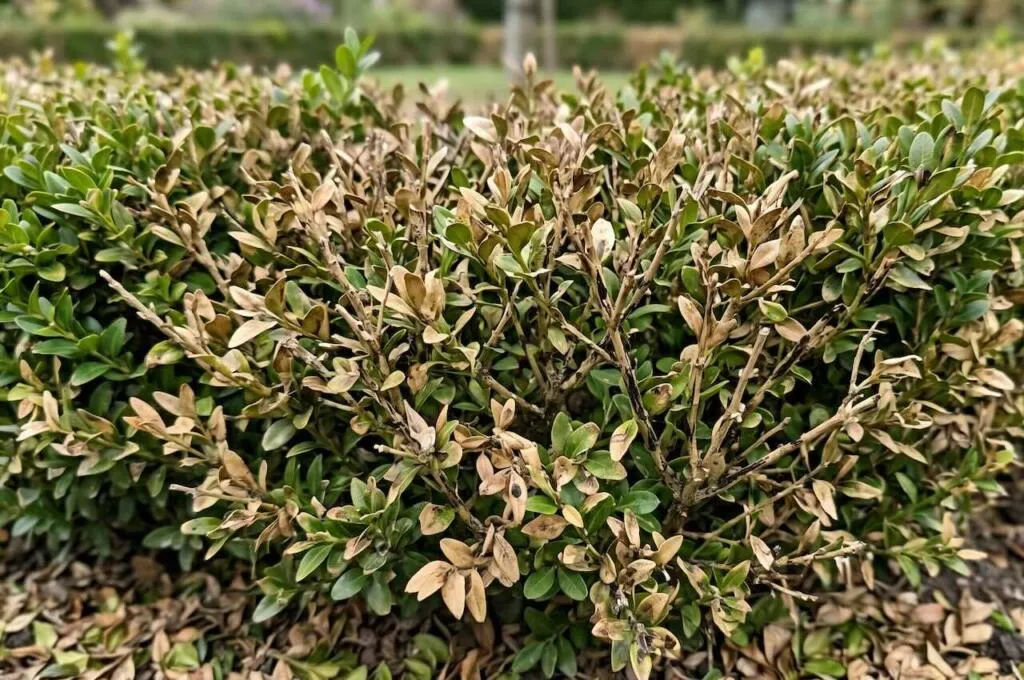
9. Box blight and pruning: what you need to know
Box blight is the most significant disease threat to Buxus in UK gardens and has been present in this country since the late 1990s. It is caused by two fungal pathogens that produce broadly similar symptoms: brown patches on the foliage, black streaking on the stems, and progressive defoliation that can kill sections of the hedge within a single season in severe cases. Wet, warm conditions favour the disease, and the UK’s damp summers make it a persistent challenge in many gardens.
The connection between pruning and blight is direct and important. Every pruning cut creates a wound, and every wound is a potential entry point for the blight pathogens. This does not mean you should stop pruning, but it does mean that the how, when, and with what tools you prune determine your hedge’s vulnerability to infection. The following practices, built into your standard pruning routine, significantly reduce the risk.
Prune only in dry weather
The blight pathogens spread via water splash. Pruning in wet conditions or immediately after rain saturates the canopy with moisture that carries fungal spores from infected plant material into fresh wounds. Wait for a dry spell of at least two to three dry days before pruning and check that no rain is forecast for 24 hours after your pruning session. In a typically wet UK summer this requires some planning, but it is one of the most effective preventative measures available.
Prune less frequently
The RHS notes that less frequent pruning leads to better air circulation through the canopy because dense, frequently clipped growth traps moisture more readily. Pruning twice a year rather than three times, and clipping to a slightly less tight surface than maximum density, both reduce the microclimate within the hedge that favours fungal development. This is a meaningful trade-off for gardeners who have had blight problems: a slightly less crisp finish is a reasonable price for a significantly healthier plant.
Consider a convex top
Cutting the top of the hedge with a slight convex curve rather than perfectly flat improves water runoff and reduces the time the top surface stays wet after rain. The difference is not dramatic in appearance, but the functional benefit is real. On wide hedges where the flat top can hold standing water in heavy rain, this simple modification to the profile is worth making.
If your box hedge is already showing signs of blight, the full diagnosis and treatment guide is in the dedicated why is my box hedge dying guide.
10. Box tree caterpillar and what it means for pruning
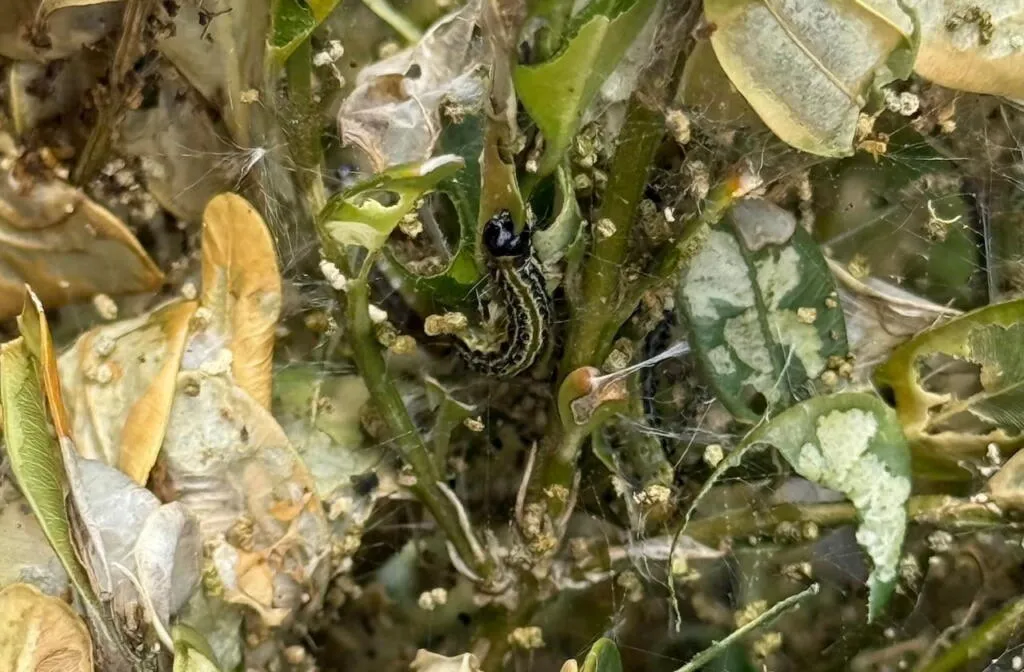
Box tree caterpillar (Cydalima perspectalis) arrived in the UK around 2011 and has spread widely across England and Wales. The larvae of this moth feed voraciously on box foliage, stripping stems and webbing growth together in characteristic silken webs. A severe infestation can defoliate a hedge completely within weeks and, combined with repeated attacks over consecutive seasons, can kill established box plantings.
Pruning a hedge that has active box tree caterpillar colonies is counterproductive because it removes the damaged foliage without addressing the caterpillars themselves, and the disturbance can spread the larvae to previously unaffected sections. Before pruning any box hedge in late spring or summer, check carefully within the canopy for the presence of webbing, green or white-striped caterpillars, and stripped stems. If active colonies are present, treat with a suitable biological control (nematodes or Bacillus thuringiensis products) or an appropriate insecticide before pruning. Clear all webbing by hand first to allow sprays to penetrate. Only prune once you are satisfied the active infestation is under control.
Check within the canopy at each pruning session and again in late summer when a second generation of caterpillars may be present. Catching infestations early, before the larvae have time to build to damaging population levels, makes management significantly more straightforward.
The honest reality of box in UK gardens in 2026 is that blight and box tree caterpillar have made it a more demanding plant to maintain successfully than it was twenty years ago. For gardeners who have lost box hedges to these problems and are deciding whether to replant with the same species or switch to an alternative, here are the options I most often recommend in professional design work.
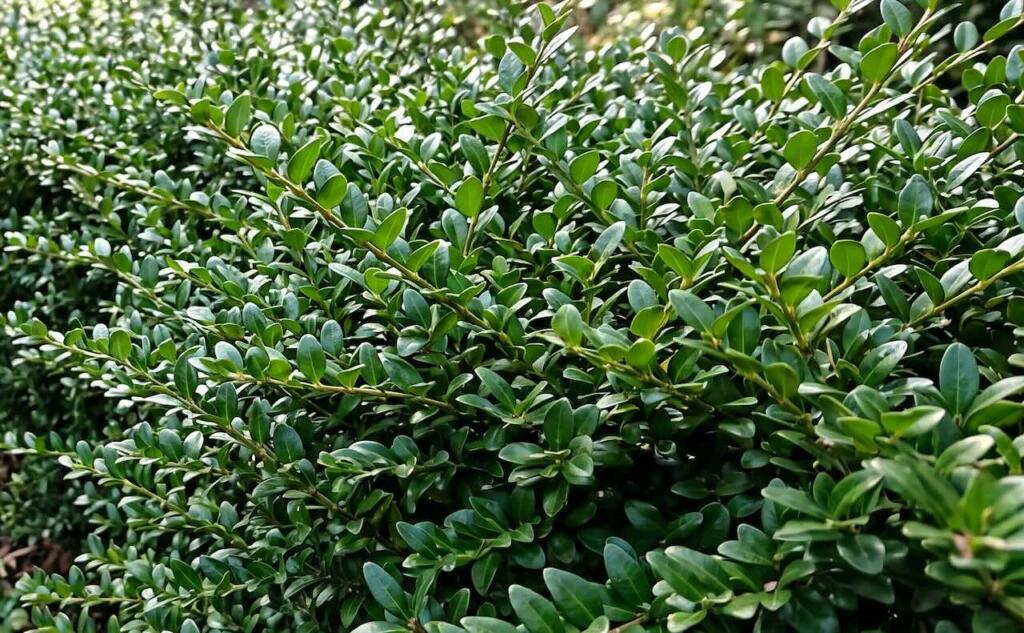
Ilex crenata (Japanese holly)
Ilex crenata is the closest visual substitute for box available in the UK. The small, dark, glossy leaves and dense habit produce a finish that is almost indistinguishable from box at garden viewing distances, and it is completely resistant to both box blight and box tree caterpillar. It is slower growing than box and takes longer to establish a dense hedge, but once established it requires very similar maintenance. The variety ‘Dark Green’ is the most commonly used for formal hedging and holds the RHS AGM. My preference over box for new formal garden schemes where clients want low long-term maintenance risk.
Lonicera nitida is faster-growing than both box and Japanese holly, clips to a dense surface, and is resistant to blight and caterpillar. The leaves are slightly larger than box and the habit slightly less dense when clipped very tightly, but for a formal low hedge where speed of establishment matters, it is a practical choice. It does need more frequent pruning than box, up to three times per year, to maintain a tight appearance, and has a slight tendency to open up in the centre if neglected.
Plant breeders have developed several box varieties with improved resistance to blight, including Buxus ‘Resilience’ and Buxus microphylla ‘Faulkner’. These are not completely immune but show notably better resistance than Buxus sempervirens in trials. If you want to retain the specific character of box rather than switching to an alternative genus, replanting with one of these improved varieties and maintaining the blight-prevention pruning protocols is a reasonable strategy.
12. Box in garden design: how I use it
Box has been central to formal garden design in the UK and Europe for centuries, and in the right context, it remains one of the most useful plants a garden designer has available. The qualities that make it so valuable are its tolerance of clipping to any scale from a five-centimetre edging to a two metre formal hedge, its year-round evergreen presence, its dense fine texture that reads clearly as structure from any viewing distance, and its patience with being shaped over many years into increasingly complex and precise forms.
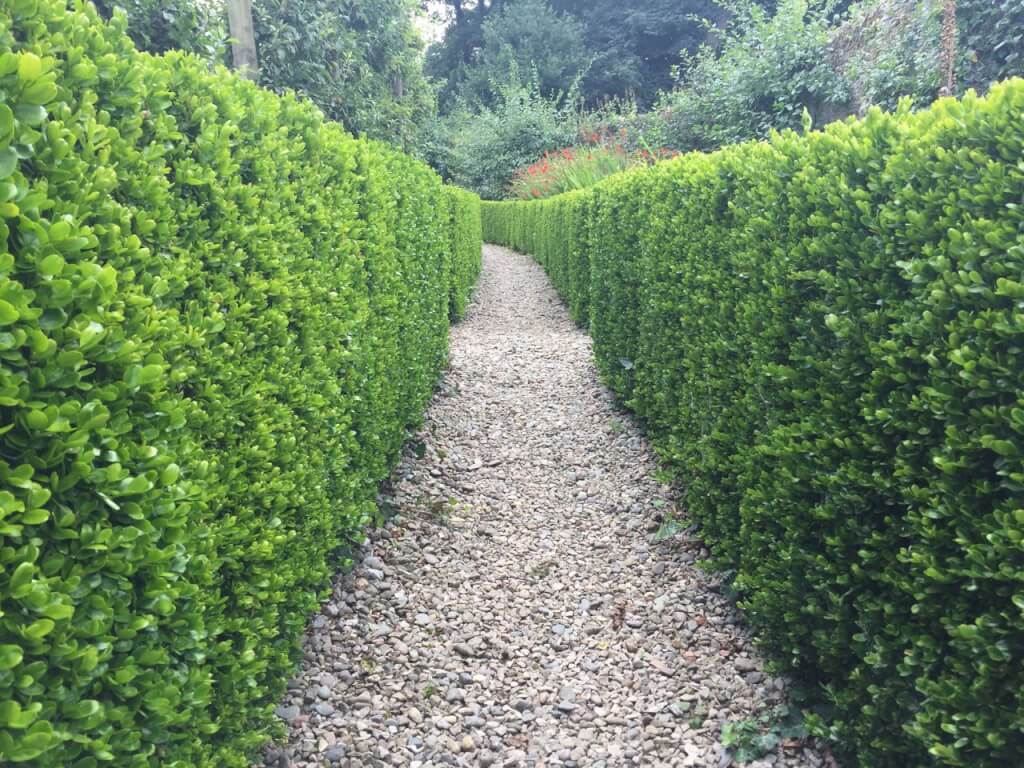
In contemporary design work, I use box most confidently in sheltered urban gardens where air circulation is reasonable, and the plants are accessible for careful management. In exposed or persistently damp rural gardens, the disease pressure is higher, and the alternatives deserve more serious consideration. The best use cases I come back to most often are low box edging along gravel paths and borders where the contrast between the clipped dark green and the paler surface creates clean, clear structure, small box balls in containers flanking an entrance or marking corners of a terrace, and tightly clipped box cubes or forms used as repeating punctuation within a wider mixed planting.
💡 Top Tip
If you are using box in containers, repot every two to three years into fresh loam-based compost and feed monthly with a balanced liquid fertiliser through the growing season. Container-grown box is more vulnerable to drought stress in summer and to waterlogging in winter than border-grown plants, and a stressed plant is significantly more susceptible to blight. Good nutrition and drainage in containers are two of the most effective preventative measures available alongside the pruning protocols.
13. Frequently asked questions about pruning box hedges
When should I prune box hedges in the UK?
Twice a year: late May to early June once spring growth has hardened, and late August for the final shape before winter. An optional third light trim in July suits topiary and parterre hedging. Prune only in dry weather, never when the foliage is wet.
How do I get a flat top on a box hedge?
Set a taut string line at the desired height before starting. Cut the sides first then follow the string along the top with horizontal blade strokes. A single pass from one end to the other gives the cleanest result.
Can I hard prune a box hedge?
Yes, on wood up to about five years old. Spread the work over two seasons: hard prune one side in late spring of year one, the other side the following year. Never hard prune a blight-affected hedge.
How do I prevent box blight when pruning?
Prune only in dry weather, disinfect blades between plants, collect clippings immediately, and consider pruning less frequently to allow better air circulation. Cut the top of the hedge with a slight convex curve to improve water runoff.
What is the best alternative to box hedging?
Ilex crenata ‘Dark Green’ is the closest visual substitute and is resistant to both blight and box tree caterpillar. Lonicera nitida is faster to establish but needs more trimming. Blight-resistant box varieties, including ‘Resilience’, are worth considering if you want to retain box specifically.
How often does a box hedge need pruning?
Twice a year for most garden hedges, three times for very formal or topiary use. The RHS notes that once-per-year pruning in late August produces a slightly looser finish but may reduce blight risk by improving air circulation through less dense foliage.
Ready to stop guessing and start designing with confidence? My Garden Design for Beginners online course takes you from blank canvas to brilliant layout, step by step.
I’m Lee Burkhill, award-winning garden designer and BBC1’s Garden Rescue presenter, and I’ve built this course around the same principles I use for every client garden — practical, honest, and designed to actually work in the real world.
In 20 hours of flexible online study, you’ll cover:
Design principles that make any garden work
How to select and arrange plants like a professional
Styles and layouts to suit every size and shape of space
Video lessons, real-world case studies, quizzes, and a certificate on completion — all for just £199.
Enrol today and start designing your dream garden.
29
Garden Design Examples for Small Gardens: 30 Design Templates & Planting Plans
Garden Design Examples for Small Gardens: 30 Design Templates & Planting Plans: In this online gardening course, I’ll walk you through 30 fantastic garden designs, explaining the logic behind the layout, the plant choices, and take-home tips for applying them in your own garden.
Weekend Garden Makeover: A Crash Course in Design for Beginners
Learn how to transform and design your own garden with Lee Burkhills crash course in garden design. Over 5 hours Lee will teach you how to design your own dream garden. Featuring practical design examples, planting ideas and video guides. Learn how to design your garden in one weekend!
Garden Design for Beginners: Create Your Dream Garden in Just 4 Weeks
Garden Design for Beginners Online Course: If you want to make the career jump to becoming a garden designer or to learn how to design your own garden, this is the beginner course for you. Join me, Lee Burkhill, an award-winning garden designer, as I train you in the art of beautiful garden design.
Box hedges reward consistent, careful pruning twice a year in dry weather with clean, disinfected blades. Cut to a battered profile from the outset, collect clippings immediately, and build the blight-prevention protocols into your routine rather than treating them as optional extras. Done well, box provides some of the finest formal structure available in the UK garden. If blight or box tree caterpillar has repeatedly caused problems, Ilex crenata is a resilient, visually similar alternative that delivers the same formal quality with significantly less disease management.
Your subscription could not be saved. Please try again.
Your subscription has been successful.
Lee Burkhill
Lee Burkhill, known as the Garden Ninja, is an award-winning garden designer and horticulturist with over 30 years of gardening experience and 15 years as a professional garden designer. A qualified RHS (Royal Horticultural Society) professional, Lee specialises in sustainable garden design and practical horticultural advice. He designs and presents on BBC1’s Garden Rescue and in leading gardening publications. Lee combines three decades of hands-on gardening knowledge with professional design qualifications to help gardeners create beautiful, functional outdoor spaces.