How to install lawn edging: metal & plastic garden border edges guide
Lee Burkhill: Award Winning Designer & BBC 1's Garden Rescue Presenters Official Blog
Intermediate level
Lawn edging is one of the easiest ways to reduce garden maintenance Without it, you're left having to edge the lawn every month or so as the grass encroaches into your flower beds. By fitting lawn edging, you can save yourself all this lawn maintenance hassel.
Quick Answer
Lawn edging is a strip of metal, plastic, brick, or timber that creates a permanent barrier between your lawn and flower beds. Installed correctly to a depth of 10–15cm, it prevents grass creeping into borders, eliminates the need for a half-moon edger, and allows a mower to pass over the top without strimming. Metal edging lasts 15–25 years and is the best long-term investment for most UK gardens.
Lawn edging is one of those garden design secrets that separates a truly polished-looking garden from one that always looks slightly unfinished, however well-planted it might be. In my twenty years as a professional garden designer and through my work on BBC’s Garden Rescue, I have specified and installed hundreds of metres of edging across every type of garden imaginable. It is one of the first things I recommend to clients who want to reduce maintenance without sacrificing the look of their garden.
The principle is simple. A permanent barrier sunk into the ground between your lawn and your flower beds means grass cannot creep into the border, and border plants cannot encroach onto the lawn. No more half-moon edger twice a year. No more kneeling with shears trying to get a clean line that will only last six weeks. Install good edging once, and you are largely done with that particular maintenance job for a decade or more.
This page contains affiliate links for products I use and love. If you take action (i.e. subscribe, make a purchase) after clicking a link, I may earn some gardening commission which helps me keep the Garden Ninja Blog free for all.
1. Why use lawn edging?
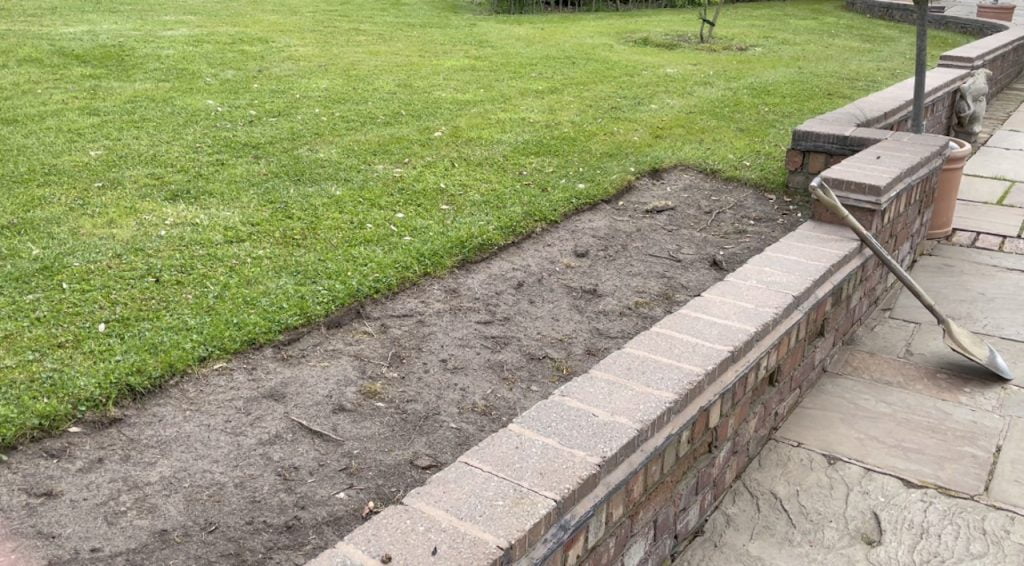
There is a reason I use some form of edging in the majority of gardens I design professionally. A clean, defined edge between lawn and border does something remarkable to the overall perception of a garden. It makes everything look cared for, deliberate, and well-maintained, even when the planting behind it is slightly informal, or the lawn is not perfectly striped. The edge is what the eye goes to first.
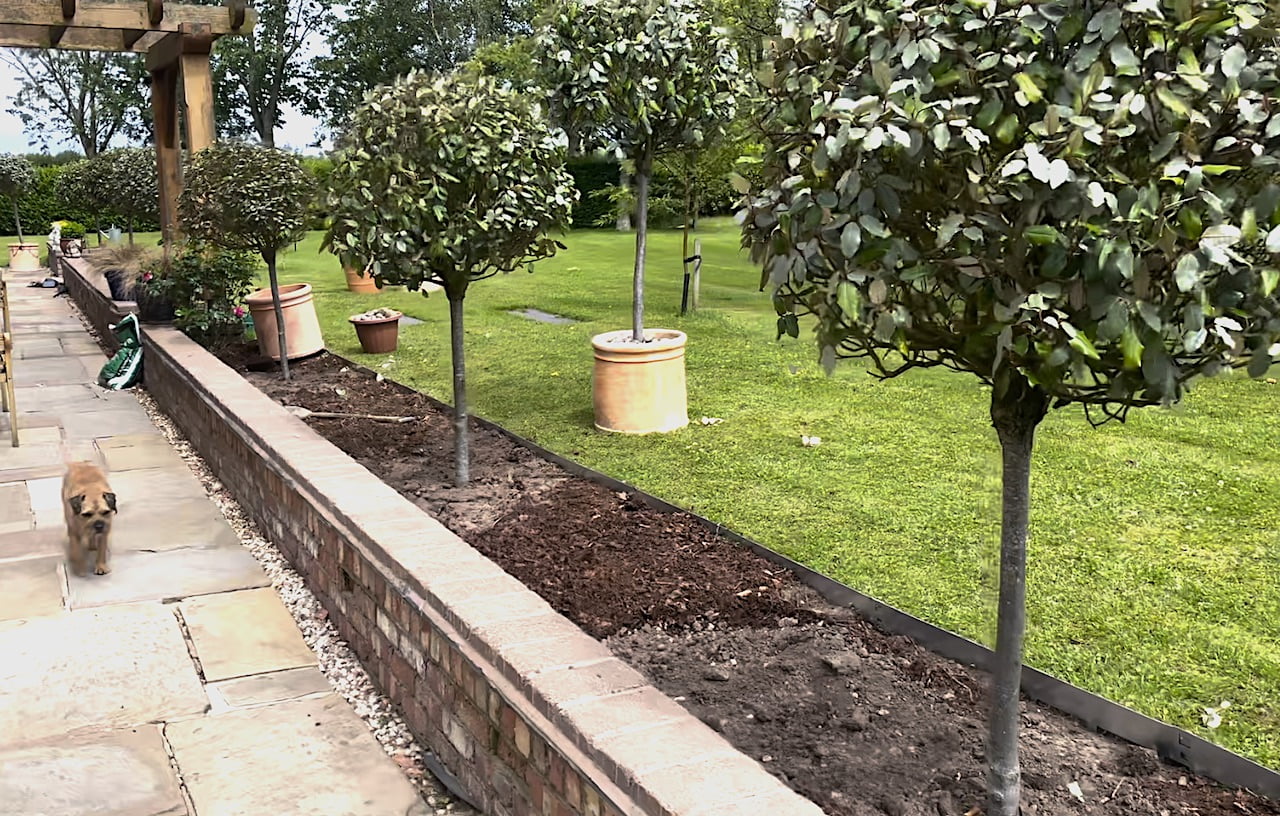
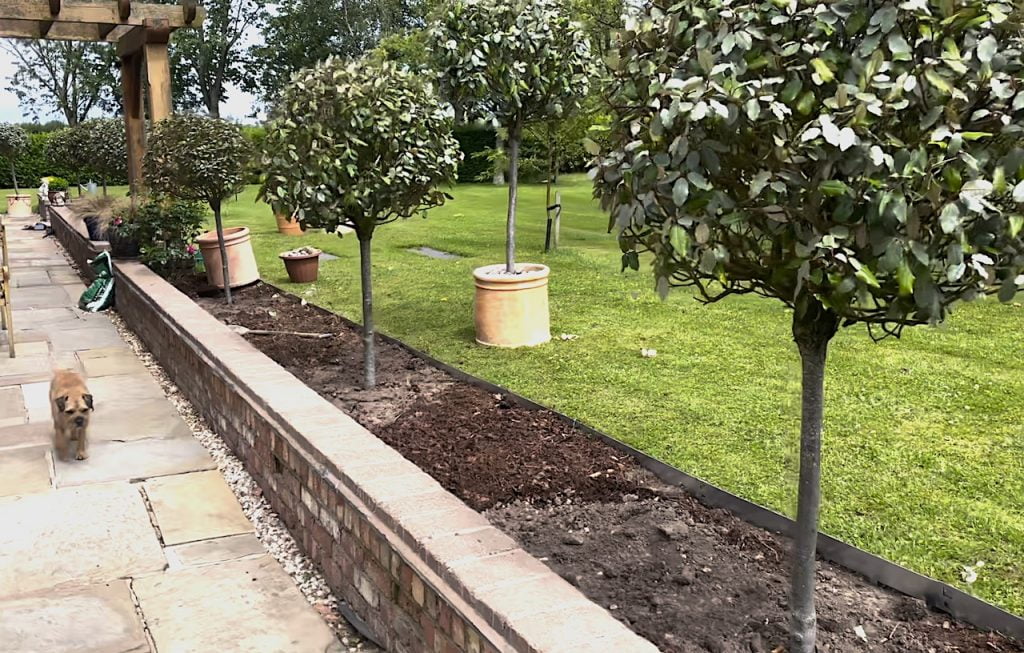
A well-fitted metal edging strip transforms the whole appearance of a garden border
Beyond aesthetics, the practical benefits are genuinely significant. Grass is far more competitive than most gardeners give it credit for. Its rhizomes and stolons spread relentlessly into any nearby bare soil, and once grass has established itself inside a flower bed, it is extraordinarily difficult to remove without disturbing the plants you want to keep. A physical barrier at the correct depth eliminates this problem at the source.
The mowing benefit is equally underrated. Without a fixed edge, you need to strim around every border by hand, which is time-consuming, creates uneven results, and risks damaging plants growing close to the edge. Edging that sits 3mm proud of the turf surface allows a mower deck to pass straight over it, giving you a perfectly clean edge with every cut. Once you have experienced mowing against a good metal edge, going back to strimming feels like a step backwards.
Without permanent edging, you need a half-moon edger twice a year to maintain a clean line. Good edging eliminates this completely.
There is also a less obvious benefit that matters particularly in new builds and gardens with heavy clay soil: edging slows soil creep. In gardens that sit on a slope, soil gradually migrates downhill over time, and the transition between lawn and border becomes increasingly messy. A well-installed metal strip acts as a retention edge, keeping both sides of the divide where you intended them to be.
2. Which lawn edging material is best?
The honest answer depends on your budget, your garden style, and how long you want the solution to last. Having used all of the following options in real client gardens, here is my experience of each.
Metal edging: steel and aluminium
Metal edging is my first recommendation for the vast majority of gardens. Good-quality galvanised steel edging will last fifteen to twenty-five years with no maintenance whatsoever. It is flexible enough to create smooth curves but holds its shape once installed. It looks clean and modern in contemporary gardens, and it sits low enough in the ground to be essentially invisible once the borders are planted up.
Metal edging gives a clean, modern finish and will outlast virtually any other option
The higher upfront cost is the main barrier, but when you work out the cost per year over a twenty-year lifespan, metal consistently comes out cheaper than plastic that needs replacing every five to seven years. CorTen steel is a premium option that develops a rich, warm orange patina over time as it oxidises, making the edging itself a deliberate design feature. For sleek, modern, or formal garden styles, metal edging is close to unbeatable.
Plastic edging is the most affordable option and handles tight curves better than metal edging, making it useful for very sinuous borders. The downsides are real, though. Standard plastic becomes brittle over five to seven years, particularly in cold winters, and it tends to work its way out of the ground if not installed deep enough. It also has a cheaper visual quality that shows in formal garden settings.
Plastic edging is the most affordable option and handles curves particularly well
Heavy-duty recycled rubber edging is a step up from standard plastic. It is more flexible, more durable, and more environmentally sound. If budget is genuinely a constraint, rubber edging is a better compromise. Avoid the thinnest plastic strips entirely. They simply do not have the rigidity to stay in place through a UK winter.
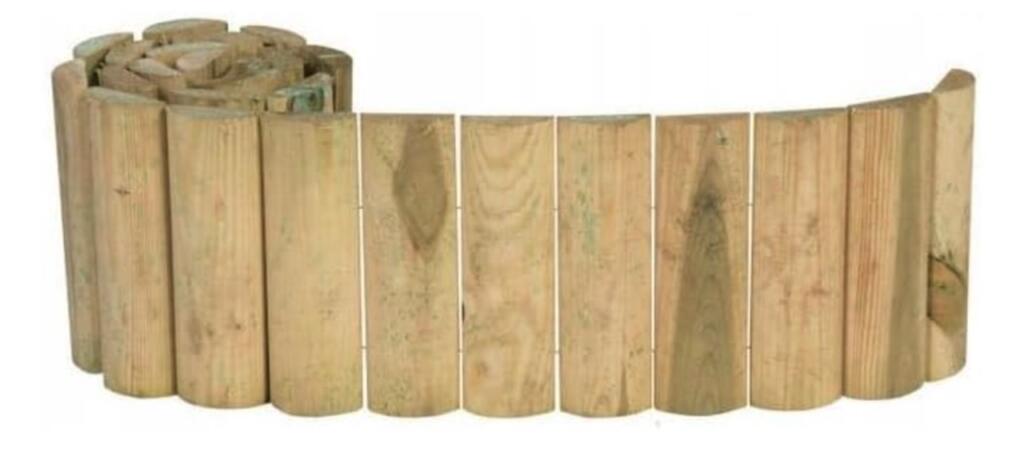
Timber edging suits cottage gardens, kitchen gardens, and any space where a natural, organic aesthetic is the goal. Treated softwood log rolls are inexpensive and easy to install, making them a good choice for raised vegetable beds and informal curved borders. Hardwood sleepers give a much more substantial, architectural feel and can double as a retaining edge on sloped gardens.
The honest limitation is longevity. Even pressure-treated timber in contact with soil will deteriorate over ten to fifteen years. Raising timber edging slightly on gravel or by sitting it on a mortar bed extends its life considerably by reducing direct soil contact. Never use railway sleepers treated with creosote near vegetables or in areas where children and pets play, as the chemicals can leach into the surrounding soil.
Brick and stone edging is the most expensive and labour-intensive option, but it is also the most permanent. A properly laid brick mowing edge will outlast everything else on this list and, in traditional or formal garden settings, looks genuinely superb. The key is to lay the bricks on a mortar bed so they sit flush with the lawn surface, creating a mowing edge that the lawnmower’s wheel can ride along. Done well, it is beautiful. Done badly, it is an expensive and difficult problem to fix.
Dry-laying bricks is a simpler option for DIYers who want the look without the commitment of mortar. It works adequately in low-traffic areas but will shift over time without bedding. For most gardeners, the cost and skill involved in brick edging make metal or timber more practical choices, but if your budget allows and the garden style demands it, brick is the gold standard.
🌿 Lawn Edging Material Comparison
Material
Lifespan
Installation
Best For
Cost/m
Plastic / Rubber
5–10 years
Easy
Budget, curved borders
£2–£15
Timber / Log Roll
8–15 years
Easy
Cottage, rustic gardens
£5–£15
Metal (steel)
15–25+ years
Moderate
Modern, formal gardens
£7–£14
CorTen Steel
30–40+ years
Moderate
Design statement gardens
£15–£30
Brick / Stone
30–50+ years
Difficult
Traditional, formal gardens
£25–£85
3. Tools and equipment you will need
Fitting lawn edging is one of those garden jobs that is genuinely straightforward once you have the right tools. The biggest mistake I see is people attempting it with whatever happens to be in the shed rather than making sure they have the basics.
A blunt spade produces a ragged cut that the turf grows back through quickly. A direct hammer blow without a wood block deforms the metal edging and ruins the top edge. None of the tools required is expensive, and most you will already own.
🛠 Equipment List
Sharp border spade
Essential for a clean initial cut. A sharp blade is the difference between a crisp edge and a ragged one. 🛒 Buy a border spade on Amazon UK
For manipulating connectors between metal edging sections
Line string or spray paint
For marking curved or straight runs before cutting begins
4. How to fit metal lawn edging: step by step
Metal edging is the most satisfying to install because the result is immediately visible and looks genuinely professional from the moment you step back. The process is the same whether you are using EverEdge, generic steel strips, or CorTen edging. Work carefully through each step, do not rush, and you will produce an edge that will still look good ten years from now.
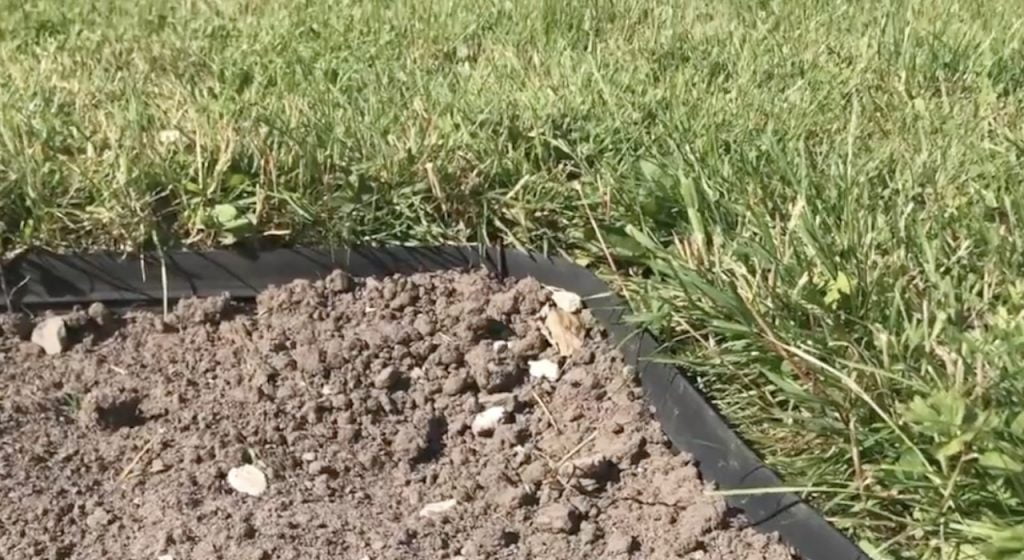
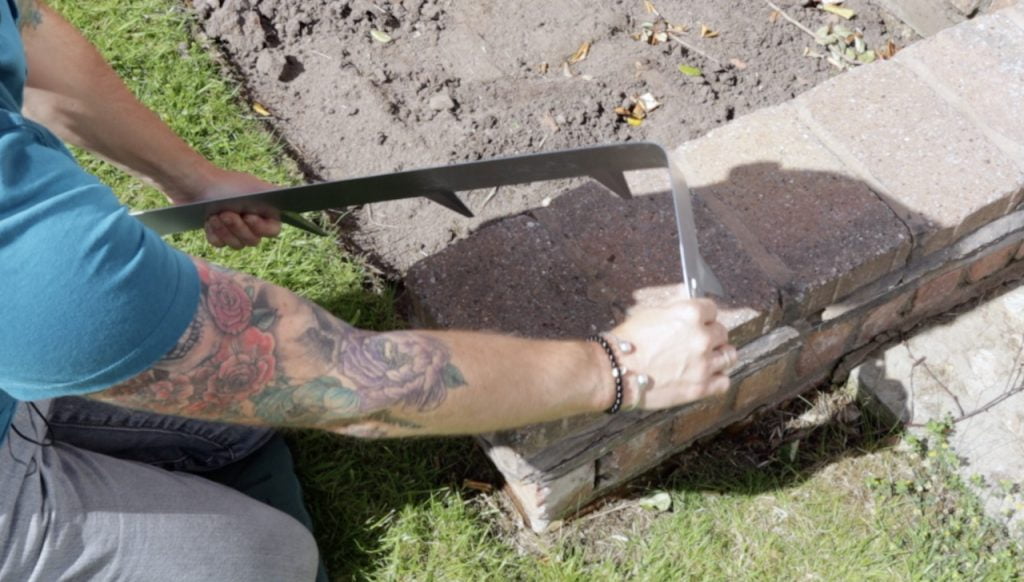
Step 1: Cut a clean initial edge between lawn and border
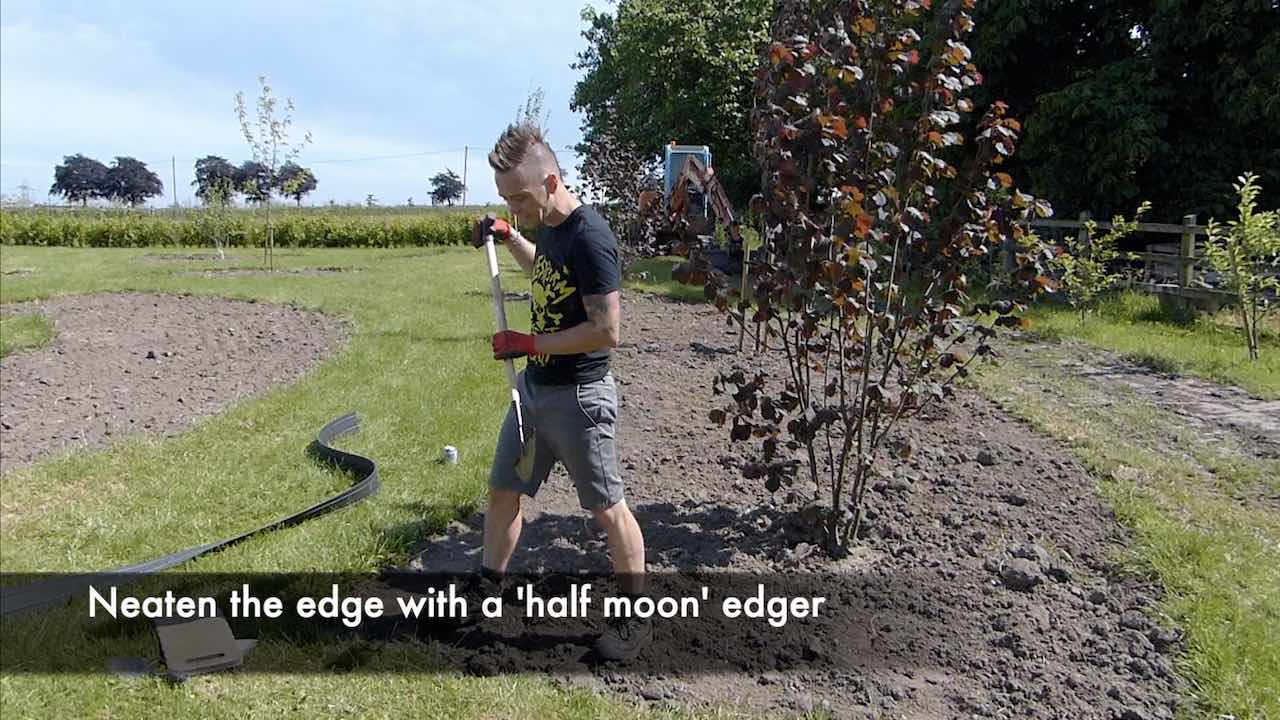
Before any edging goes into the ground, you need a clean starting line. Use a half-moon edger or sharp border spade to redefine the boundary between lawn and flower bed. If the edge has become ragged over the years, now is the moment to correct it. Use a garden hose or a spray paint line to mark curves before cutting, and a taut string line for straight runs. Work steadily along the line, cutting vertically to a depth of at least 10–12cm.
A clean, defined starting edge is the foundation of a good result. Take time to get this right.
Any removed turf should be composted rather than binned. Stack it upside-down in a quiet corner and leave it for six to nine months. It breaks down into beautifully rich loam that is excellent for soil improvement. Never apply removed turf to the compost heap right-way-up, as the grass will simply regrow. Inverted, it rots into something genuinely useful.
Step 2: Measure up and calculate how much edging you need
Measure the total run of your border edge carefully using a tape measure. For curves, measure along the actual curve rather than in a straight line across it. Once you have your total, add 10–15% for overlaps between sections and for any sections you need to discard due to cutting errors or damage during installation. Ordering too little and having to wait for a second delivery partway through a job is genuinely frustrating and entirely avoidable.
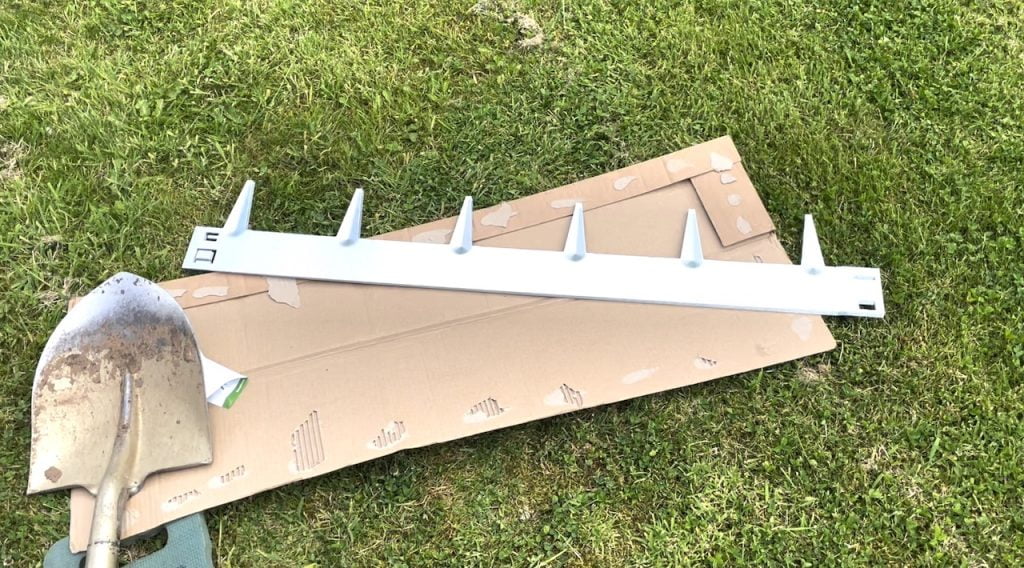
Lay the edging out along the border before starting to install, checking you have enough and that it follows the intended line
Lay the edging out along the run before starting installation, so you can check that it follows the line you want and identify any corners or curves that will need special handling. This five-minute check frequently saves an hour of remedial work later.
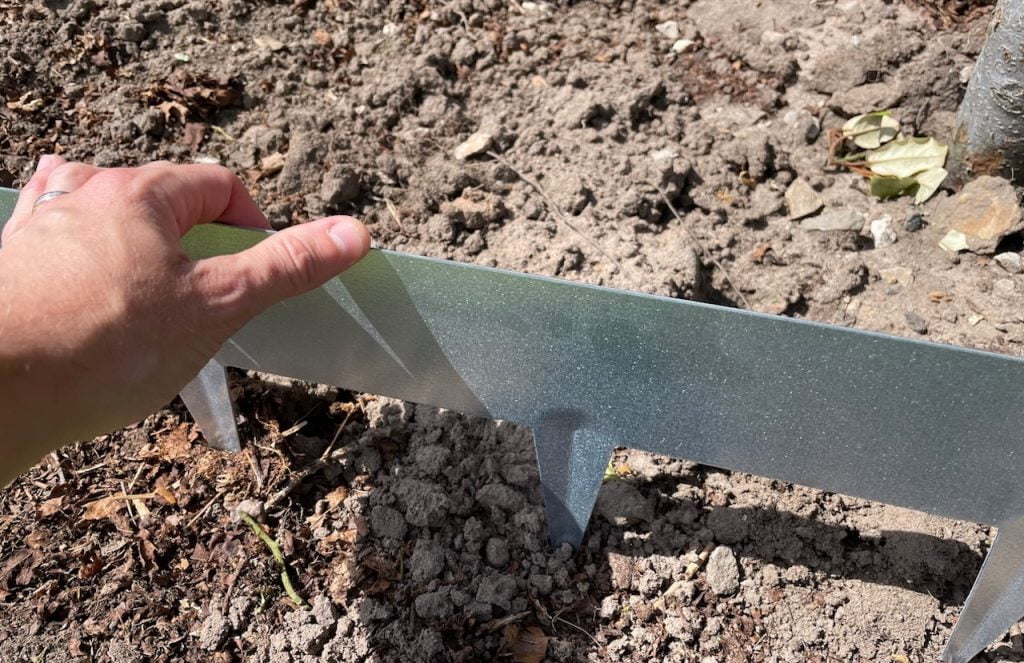
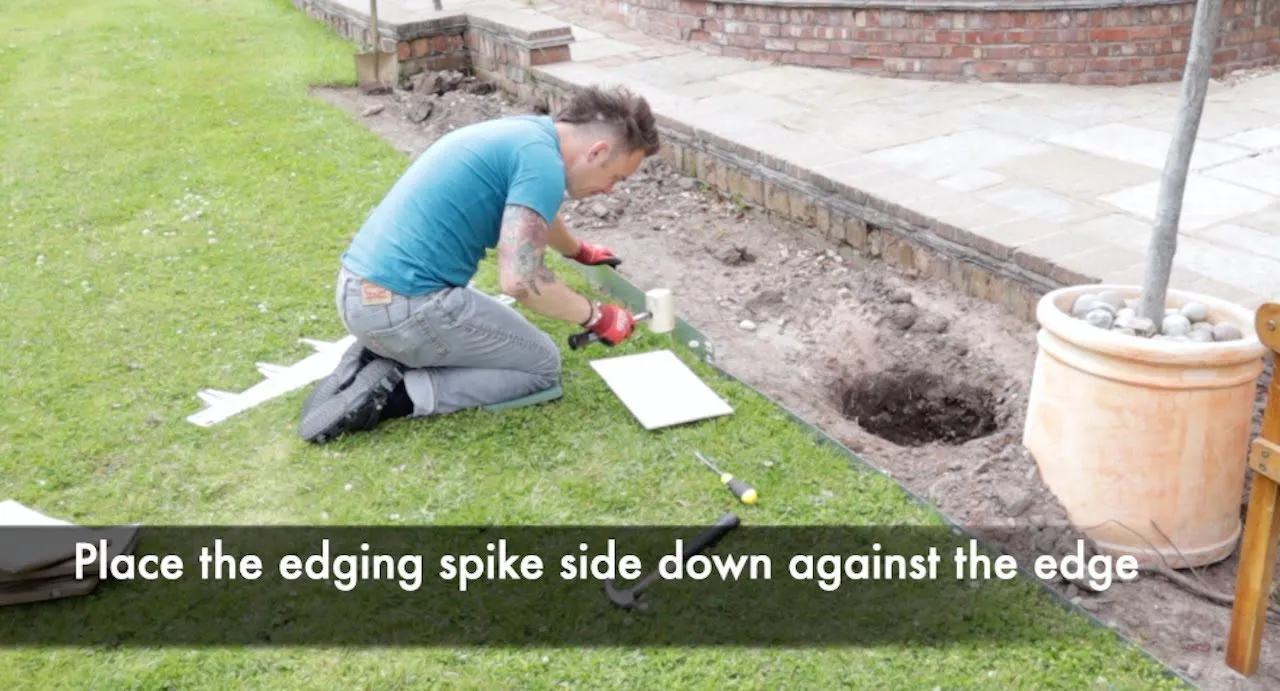
Step 3: Position the edging and push the spikes into the ground
Position the first section of edging right up against the cut turf edge, with the spikes facing downward into the border side rather than the lawn side. The spikes anchor the strip and resist any upward or lateral movement. At this stage, you are just locating the edging in position rather than driving it fully home, so a firm hand push to get the spikes started is sufficient.
Push the spikes into the border-side soil first to locate the strip, then hammer it level in the next step
Work from the border side rather than standing on the lawn. This sounds like a small point, but it is genuinely important. Standing on the lawn while working compacts the soil right at the edge, which damages grass root health and creates a hard zone immediately behind the edging, where you most want the lawn to look good. Standing in the border, which you are about to replant or mulch anyway, keeps the lawn undisturbed.
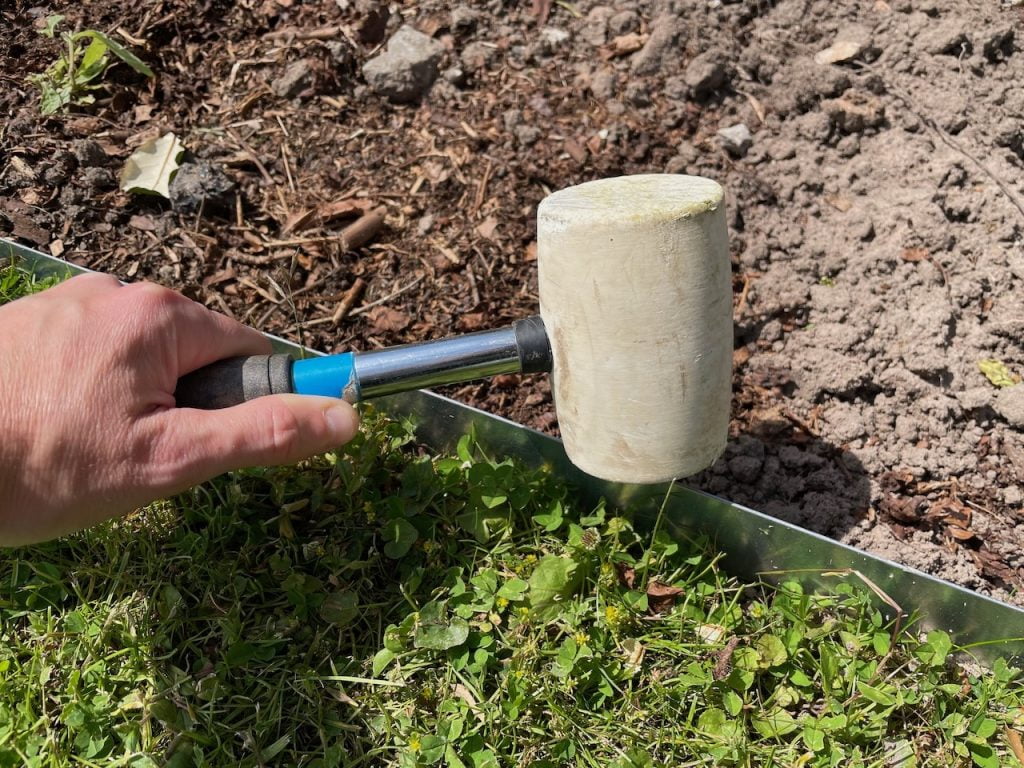
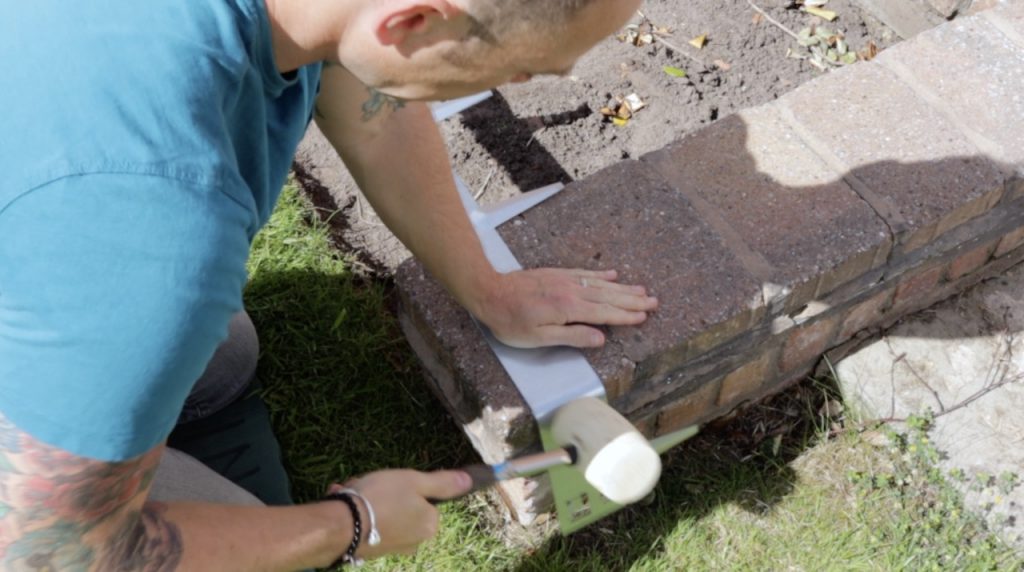
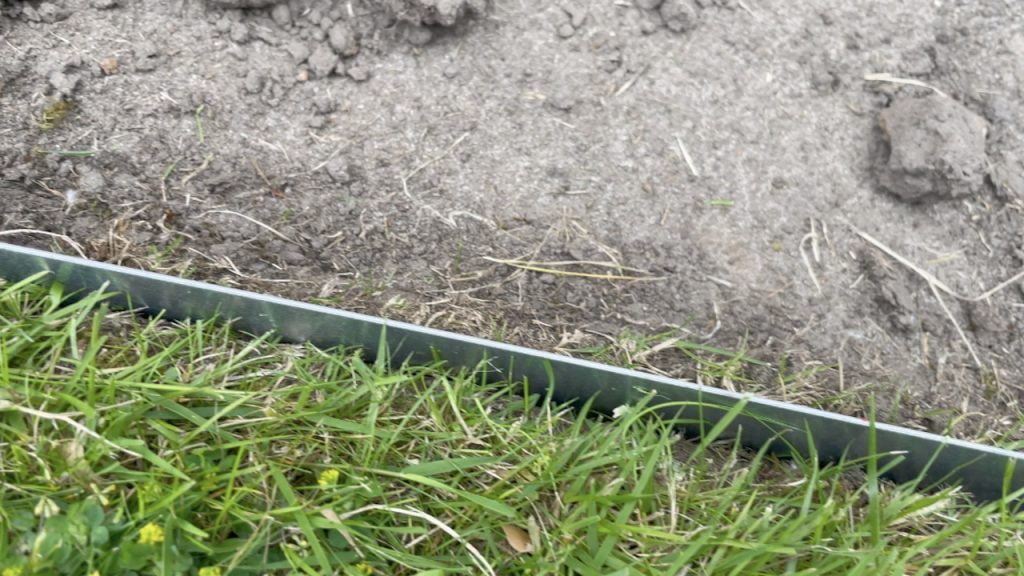
Step 4: Hammer the strip to the correct height
Place your scrap wood block against the upper face of the edging and use the rubber mallet to drive the strip down until it sits 3mm proud of the surrounding turf surface. Work along the strip in stages, moving the wood block forward every 15–20cm rather than driving one section all the way down before moving on. This produces a level, even installation rather than one that dips and rises along its run.
Work along the strip in stages, driving each section down progressively rather than one end first
Check the height every metre or so with your eye along the top edge. The 3mm above turf level target is important: too low and the edging fails to stop grass and becomes invisible; too high and the mower catches it on every pass. If the ground is very hard, pre-soak it the day before with a hose rather than trying to force spikes into dry, compacted soil, where you risk bending them.
Always use a wood block between the mallet and the edging. Direct blows deform the top edge and ruin the finish.
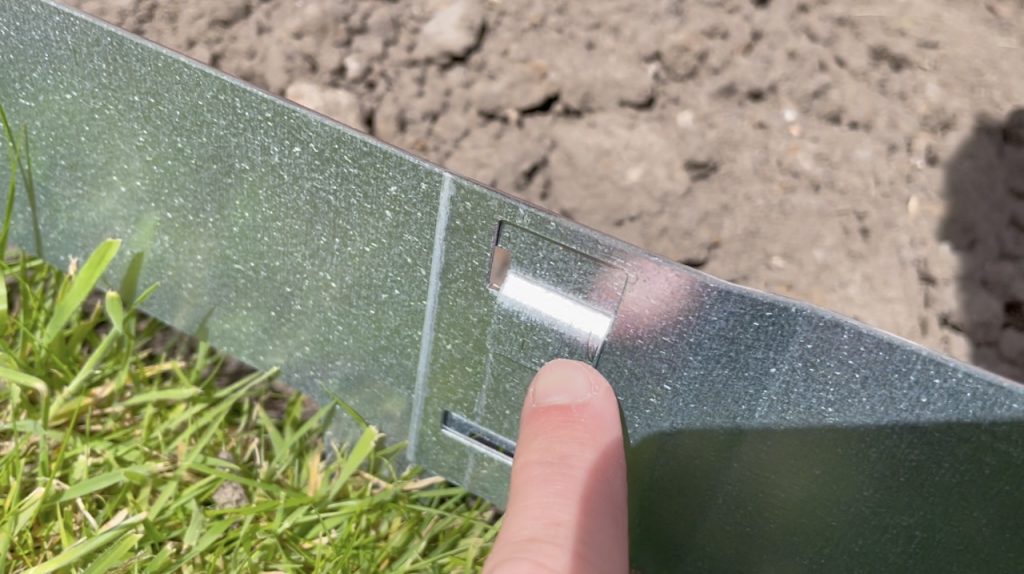
Step 5: Connect sections together
Most metal edging systems use a connector or tab system that overlaps slightly on one side to join sections without visible gaps. Fit these as you go rather than trying to retrofit them all at the end. The screwdriver is useful for manipulating connectors into position when they are stiff. When connected correctly, the join should be invisible from above, and the top edge should run as a continuous, smooth line without steps or misalignment.
Fit connectors as you go rather than all at the end. A well-fitted connector is completely invisible once installed.
Do not neglect this step to save time. Unconnected sections flex apart under soil movement, creating gaps that grass immediately exploits. Every connection point should be firm and gap-free before you move on. Give the joined section another gentle tap with the mallet and wood block to ensure it sits level after connection.
Step 6: Handle corners and curves
Good-quality metal edging is more flexible than it looks and will handle gentle curves without special treatment. For curves with a radius of more than 1 metre, simply flex the strip gradually during installation, and it will follow the line you have cut. For tighter curves, score the back of the edging at intervals with a grinder or cut file to allow more bending without kinking. For right-angle corners, use the mallet to create a controlled fold around a block of wood held at the desired angle.
Use a strong flat surface and the mallet to create a clean corner bend in metal edgingA well-made corner in metal edging looks completely intentional and holds its shape permanently
Corners are one area where it is worth spending extra time to get right. A poorly bent corner that creates a dip or a spike in the edging line will be visible every time you mow, and becomes an irritant you notice constantly. Take an extra five minutes to get a clean, controlled bend, and the edging will look as though a professional installed it.
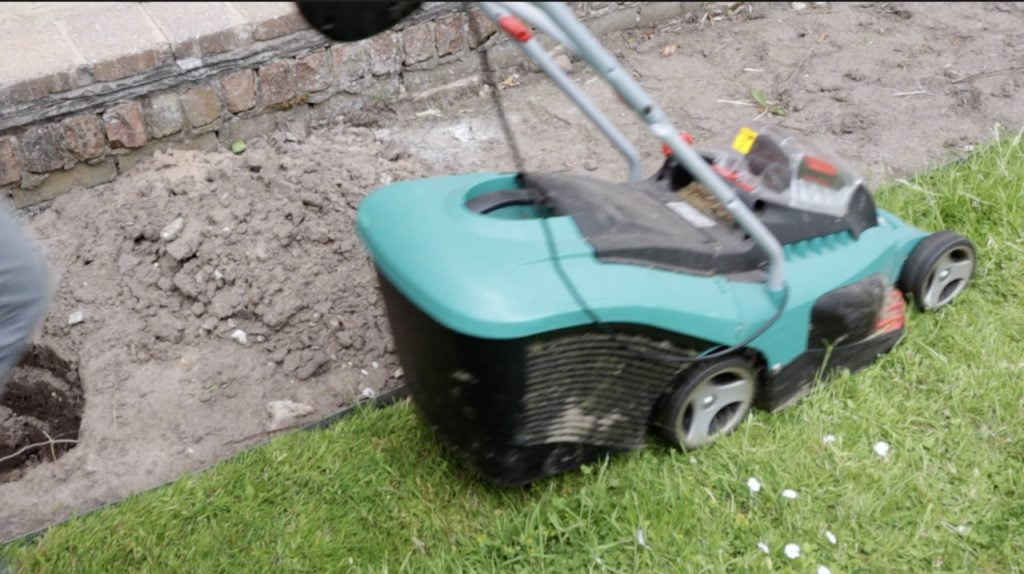
Step 7: Check the mower can pass over cleanly
Before calling the job done, run your mower along the edge at its lowest practical cutting height to check that the deck passes over the edging cleanly without catching or scalping. The edging should be invisible to the mower, and the grass immediately adjacent should be cut to the same height as the rest of the lawn. If the mower is catching, the edging is slightly too high and needs to be driven down another millimetre or two.
The final check: the mower should pass over the edging at setting 3 without catching or scalping
This check takes two minutes and saves months of frustration. Getting the height right at installation means you will never have to think about it again. Get it wrong, and you will be catching the edging every mowing session, which gradually deforms the strip and undoes all the work you have just done.
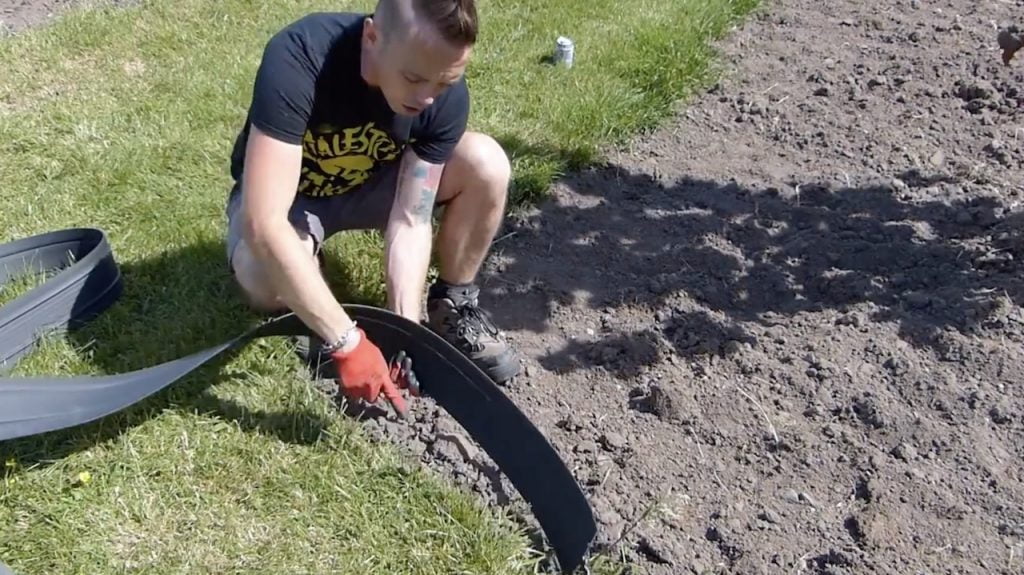
5. How to fit plastic lawn edging
Plastic edging installation follows a similar sequence to metal edging, but with one key difference: most plastic strips lack integral spikes, so they rely on being buried in a trench rather than hammered in from the surface. This makes the process slightly more time-consuming but also more forgiving in stony ground where metal spikes struggle.
Plastic edging requires a trench rather than driven spikes, but handles curves particularly well
Dig a trench 10–15cm deep along the cut edge using a sharp spade. The depth depends on your soil type: heavy clay soil holds plastic edging more securely and may allow 8–10cm, while sandy or free-draining soil needs the full 15cm to prevent the edging from being pushed out over time. Place the plastic strip in the trench and use your heel to backfill the border side firmly, packing soil against the strip to hold it vertical. Do not backfill the lawn side. The pressure of the turf against the edging is part of what holds it in place.
Secure sections together using the supplied pins or tent pegs, which give the strip a firm grip and allow you to connect multiple pieces in one continuous run. Always try to run one piece through a corner rather than joining two pieces at a corner, as joins at bends are where failures most commonly start. Once secured, check the top edge sits just above turf level, backfill any gaps, and firm the surrounding soil with the back of a spade.
💡 Top Tip
For very sinuous, flowing border edges, lay a garden hose in the shape of the curve you want before you start cutting. The hose holds its shape perfectly, you can adjust it until you are happy, then use it as a cutting guide. It is a trick I use on every design project where the border line needs to be genuinely graceful rather than approximated.
6. Fitting lawn edging on slopes and gradients
Slopes present the biggest challenge for lawn edging installation, and it is an area where most DIY guides fall significantly short of useful advice. In twenty years of designing gardens across every conceivable terrain, I have learned that the details that matter on level ground become absolutely critical on a slope, and that a few things that seem irrelevant in flat gardens can become potential causes of complete installation failure.
Gravity creates two specific problems. The first is that soil on slopes is under constant, slow downhill pressure, which forces edging outward over time if it is not installed deeply enough. The second is water. Edging that runs across a slope creates a dam effect, and during heavy rainfall, significant water pressure can build behind the strip. In clay soils, particularly, I have seen edging literally lifted out of the ground by water pressure. The solution to both problems is the same: deeper installation and controlled drainage.
On any slope steeper than approximately 15 degrees, increase burial depth to 15–20cm rather than the standard 10–15cm. This means choosing taller edging strips to maintain the same visible height at turf level. Increase the frequency of anchoring pins or spikes to every 30–40cm rather than the standard 50–60cm. And on metal edging across a slope, cut small relief notches in the lower edge every 2–3 metres with a grinder or metal file. These notches are invisible once the edging is installed but allow water to drain through rather than build up behind the strip.
For slopes steeper than 20 degrees, continuous edging simply will not hold reliably over time. The better approach is to terrace the garden using level platforms separated by small drops, with edging installed on each level section. Each terrace is genuinely level, checked with a spirit level rather than estimated by eye, and the vertical drops between terraces are handled by sleepers, stone, or engineering brick rather than flexible edging strip. This takes more planning and effort upfront but produces results that last for decades without remedial work.
7. What is EverEdge and is it worth it?
EverEdge is a British-designed metal lawn edging system that has been my go-to recommendation for professional installations for well over a decade. I want to be clear that they have not endorsed or sponsored this guide in any way. I recommend EverEdge for its consistent, real-world performance in client gardens over many years, and for the design details that make it better than most alternatives are genuinely worth understanding.
The interlocking tab system is the first smart feature. Each section connects to the next with a male tab at one end and a female slot at the other, creating a joint with genuine mechanical strength by distributing force across the full height of the edging. There are no bolts to align, no separate joining pieces to lose, and the connection takes seconds. Once installed, the joints are completely invisible.
The integral spikes are the second key feature. They project 10cm below the main body and angle slightly forward, which means they bite progressively deeper as you hammer the edging down and resist any upward movement once installed. In stony ground where the spikes hit an obstacle, they fold forward rather than deforming the visible body of the edging, so the top edge remains clean and undamaged even if installation is difficult.
The flush-top design is the detail that matters most in daily use. The top edge sits level with or fractionally above turf, meaning the mower passes straight over it. This eliminates strimming along borders entirely, which saves a significant amount of time over the years of garden maintenance. My own EverEdge installation is fifteen years old and looks virtually identical to the day it went in. That kind of longevity is what makes the initial cost look like a bargain in the long run.
The only significant limitation is in very rocky or rubble-filled soil, typical of new-build gardens, where the spikes cannot be driven in directly. The solution is to pre-dig a narrow trench, position the edging, and backfill. This adds perhaps twenty minutes to the total job but produces the same excellent result.
8. Cost comparison: what does lawn edging cost per metre?
Cost is one of the first questions most gardeners ask, and it is worth being honest that the cheapest option is rarely the best value over time. Here is a realistic breakdown of what you can expect to pay per metre across the main material types, based on current UK market prices.
💷 Cost Per Metre Guide (2026)
Material
Cost Per Metre
Plastic
£2 – £7
Willow / bamboo
£7 – £12
Log roll
£6 – £15
Timber (treated)
£5 – £8
EverEdge Classic 7.5cm
£7 – £10
EverEdge Classic 10cm
£9 – £12
EverEdge Classic 12.5cm
£10 – £14
Generic steel edging
£8 – £20
CorTen steel
£15 – £30
Brick (end to end)
£25 – £35
Brick (side by side)
£65 – £85
Pre-formed concrete
£20 – £30
The numbers that most people focus on are the upfront cost per metre, but the more useful calculation is cost per year over the expected lifespan. Plastic at £3 per metre lasting six years works out at 50p per year. EverEdge at £10 per metre lasting twenty years works out at 50p per year as well. The difference is that EverEdge requires no maintenance, replacement, or adjustment during those twenty years, while plastic will need re-securing, sections replacing, and eventually complete removal and reinstallation. Over a twenty-year period, the true cost of cheap plastic edging is considerably higher than the sticker price suggests.
9. Common lawn edging mistakes to avoid
After installing hundreds of metres of lawn edging in client gardens and rescuing more failed installations than I care to count, I have developed a clear picture of where things go wrong. The frustrating thing about edging mistakes is that they rarely show themselves immediately. Everything looks perfect for the first few weeks, but then a heavy frost or rainstorm reveals the shortcuts taken on installation day.
⚠ Mistake 1: Not going deep enough
This is far and away the most common problem. Edging buried only 5cm deep will be lifted out by frost heave within one winter, and grass roots will find their way underneath within a single growing season. Aim for 10–15cm burial depth, increasing to 15–20cm on slopes. The edging should feel immovable when you try to lift it.
⚠ Mistake 2: Hammering directly onto the edging
Direct mallet blows onto metal edging deform the top edge and damage the protective coating that prevents rust. Always use a scrap piece of timber as a buffer between mallet and edging. This one habit produces a consistently straight, undamaged top edge.
⚠ Mistake 3: Installing in waterlogged ground
Edging installed in saturated soil will shift as the soil settles when it dries out. The trench fills with water making depth impossible to judge accurately, and walking on wet ground causes compaction damage that takes months to recover. Wait for a dry spell of at least two to three days before starting.
⚠ Mistake 4: Not accounting for overlap when ordering
Each connection point requires 5–8cm of overlap between sections. If you order exactly the measured length, you will finish short. Always add 10–15% to your total measured length when placing your order. A spare pack in the shed is an asset; running out mid-installation is a serious irritation.
⚠ Mistake 5: Ignoring drainage on slopes
Edging running across a slope creates a dam. During heavy rainfall, water pressure builds behind the strip and will eventually push it out of the ground. Cut small relief notches every 2–3 metres to allow water to drain through rather than accumulate. These notches are invisible once the edging is installed.
⚠ Mistake 6: Setting it too high for the mower
More than 5mm above turf level and you will catch the edging every single time you mow. Aim for 3mm proud of the surface. Check with the mower before calling the job done. If it catches, drive the edging down another millimetre or two before the concrete sets around your decision.
⚠ Mistake 7: Choosing plastic for heavy clay soil
Clay soil expands and contracts enormously as it wets and dries, and this movement is enough to push plastic edging upward out of the ground over time. Metal edging with deeper integral spikes resists this movement far better. If your garden sits on heavy clay, metal is worth the extra investment.
Your subscription could not be saved. Please try again.
Your subscription has been successful.
10. Frequently asked questions
How deep should lawn edging be buried?
Lawn edging should be buried 10–15cm deep, with approximately one-third to one-half of the total height below ground level. On slopes or in sandy, free-draining soil, increase this to 15–20cm. This depth prevents frost heave during winter, stops grass roots growing underneath the strip, and provides stability against lateral soil movement. The single most common cause of edging failure is insufficient burial depth.
Is metal or plastic edging better?
Metal edging is superior for most applications. It lasts fifteen to twenty-five years compared to plastic’s five to ten, requires no adjustment or maintenance once installed, and handles frost heave and soil movement far better. The upfront cost is higher, but the annual cost over the lifespan strongly favours metal. Plastic is a reasonable choice for curved ornamental beds in sheltered, level gardens where the edging will not be under significant stress.
How do I keep lawn edging in place?
Proper burial depth is the most important factor, followed by the use of integral spikes or supplementary ground anchors at 30–50cm intervals. On slopes, increase anchor frequency to every 30cm and add drainage notches to prevent water pressure from building behind the strip. Metal edging with integral spikes outperforms surface-mounted or short-stake designs in all soil types and is the most reliable long-term option.
Do I need to dig a trench?
For metal edging with integral spikes in soft, unobstructed soil, you can hammer directly in without pre-digging. But pre-digging a narrow trench yields better results in almost every situation: the edging reaches the correct depth more reliably, you can check it is level before the soil is disturbed, and in stony or rubble-filled ground, it is the only practical approach. The trench should be 12–15cm deep and approximately 8–10cm wide.
How long does metal edging last?
Quality galvanised steel edging lasts 15 to 25 years or more in most UK conditions. CorTen steel can exceed thirty to forty years. My own EverEdge installation in my garden is fifteen years old and looks virtually identical to the day it was installed. Powder-coated steel may show some surface coating wear over time, but the underlying steel remains structurally sound. No other edging material comes close to this lifespan in a real-world garden setting.
Can I install edging over existing grass?
No. Always strip the turf first. Installing through grass prevents the edging from reaching the correct depth, allows grass roots to compete with the strip from the start, and produces an untidy visual result. Proper installation requires removing the turf from the installation line, exposing bare soil, positioning and securing the edging, then backfilling. The removed turf should be composted rather than discarded.
Does lawn edging stop grass spreading into beds?
Yes, provided it is installed to the correct depth of at least 10cm below turf level. Shallow installation of 5–6cm will be undermined within a single growing season as grass rhizomes grow under the strip. At the correct depth with a good seal against the soil on both sides, a well-installed metal edge is essentially impenetrable to grass, making it the most effective solution available for eliminating border grass encroachment.
Improve Your Garden Design Skills Online
Why not start shaping a garden that truly works for you? Level up your skills with one of my online gardening courses!
My Garden Design for Beginners course is the perfect next step. Whether you’re completely new to garden design or just need a more structured approach, this affordable online course guides you through the full process from blank canvas to brilliant layout.
I’m Lee Burkhill, award-winning garden designer and presenter on BBC1’s Garden Rescue, and I’ve packed this course with practical advice, insider tips, and easy-to-follow steps to help you design a garden that works in harmony with nature, and keeps ground elder firmly in its place!
Enrol now for just £199 and start your journey toward garden design mastery!
29
Garden Design Examples for Small Gardens: 30 Design Templates & Planting Plans
Garden Design Examples for Small Gardens: 30 Design Templates & Planting Plans: In this online gardening course, I’ll walk you through 30 fantastic garden designs, explaining the logic behind the layout, the plant choices, and take-home tips for applying them in your own garden.
Weekend Garden Makeover: A Crash Course in Design for Beginners
Learn how to transform and design your own garden with Lee Burkhills crash course in garden design. Over 5 hours Lee will teach you how to design your own dream garden. Featuring practical design examples, planting ideas and video guides. Learn how to design your garden in one weekend!
Garden Design for Beginners: Create Your Dream Garden in Just 4 Weeks
Garden Design for Beginners Online Course: If you want to make the career jump to becoming a garden designer or to learn how to design your own garden, this is the beginner course for you. Join me, Lee Burkhill, an award-winning garden designer, as I train you in the art of beautiful garden design.
Lawn edging is one of the highest-value, lowest-effort improvements you can make to any garden. Install it once, correctly, and you are largely free from border-edging maintenance for the next fifteen to twenty years. Metal edging is the best long-term investment for most UK gardens, while plastic or rubber works well for curved or budget-conscious projects. The most important rules: bury at least 10–15cm deep, never hammer directly onto the edging, always work from the border side, and check the mower can pass over cleanly before calling the job done.
Your subscription could not be saved. Please try again.
Your subscription has been successful.
Lee Burkhill
Lee Burkhill, known as the Garden Ninja, is an award-winning garden designer and horticulturist with over 30 years of gardening experience and 15 years as a professional garden designer. A qualified RHS (Royal Horticultural Society) professional, Lee specialises in sustainable garden design and practical horticultural advice. He designs and presents on BBC1’s Garden Rescue and in leading gardening publications. Lee combines three decades of hands-on gardening knowledge with professional design qualifications to help gardeners create beautiful, functional outdoor spaces.


If your borders are more curved rather than having corners will the metal edging still work ? Can it be bent /shaped to follow a curved edge? Thanks