Complete Beginner’s Guide to Container Gardening: Choosing Pots, Compost and Plants
Lee Burkhill: Award Winning Designer & BBC 1's Garden Rescue Presenters Official Blog
Beginner level
Container gardening is ideal for limited space, renters, or new gardeners. However, you may have killed a few plants in pots already and think you've got cursed thumbs, which is why I've written this guide to help you succeed! Join me as I explain how to grow pretty much anything in a container!
Quick Answer
Container gardening works best when you match pot size to plant type, use proper potting compost rather than garden soil, ensure every container has drainage holes, and commit to regular watering and feeding. Most plants can thrive in containers if given enough root space and the right growing conditions. The biggest beginner mistakes are pots that are too small, skipping feeding after six weeks, and overwatering.
Container gardening is absolutely brilliant because it’s accessible, flexible, and honestly, once you understand the basics, it’s actually easier than gardening in the ground. The trick is knowing which pots to use, what to fill them with, and crucially, which plants will actually thrive rather than survive.
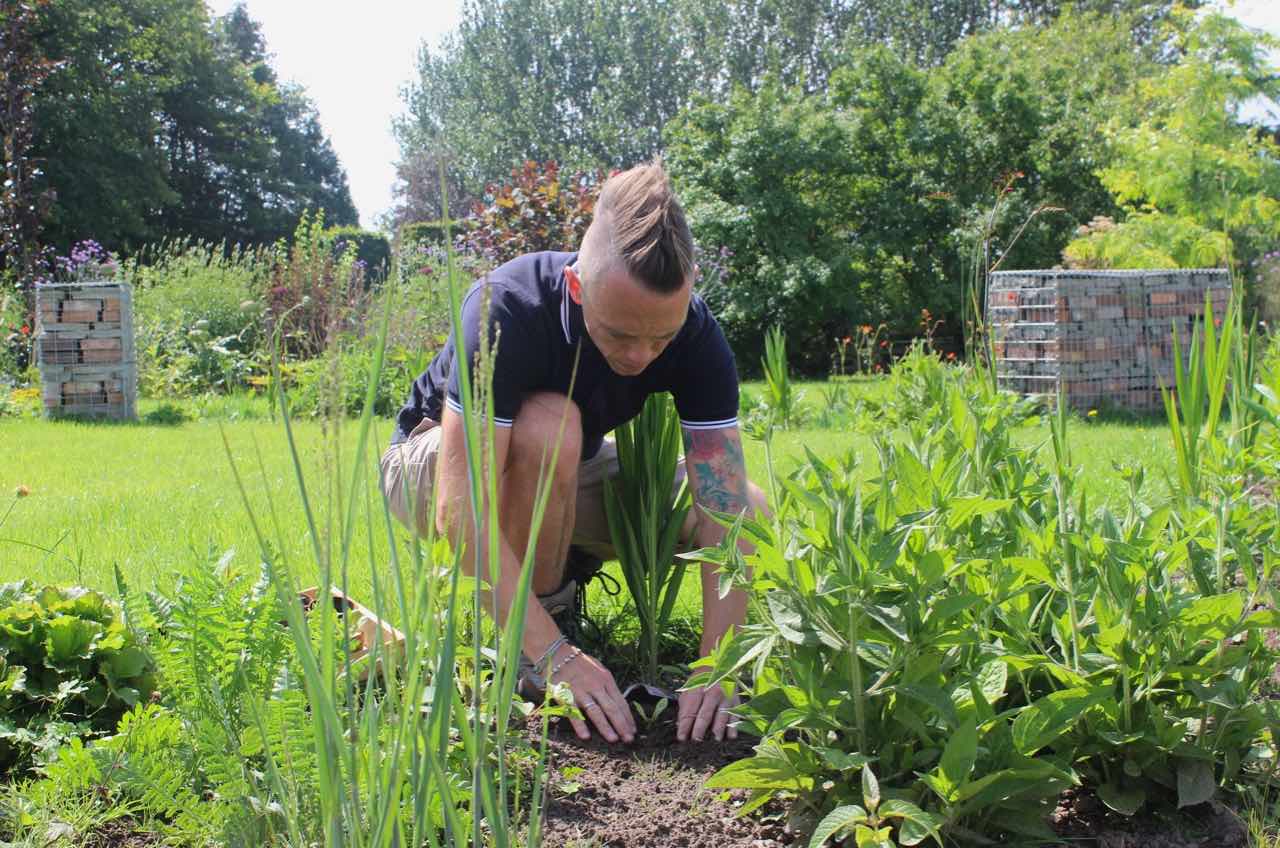
I’ve been growing things in containers for over three decades, and I’ve helped thousands of gardeners who have made every mistake going while learning. It still surprises me when I’m presenting on Garden Rescue how many beginner gardeners and homeowners struggle with planting in pots. The good news is that every single common mistake is completely avoidable once you know what to look for.
Over the years I’ve seen beginner container gardeners drown their plants through kindness, dry them out through forgetfulness, use pots with no drainage that turned into plant coffins, pick the wrong compost which set like concrete after a fortnight, and try to grow plants that were never going to be happy in a pot no matter what they did. Sound familiar? You’re in good company.
Once you understand the fundamentals, container gardening is one of the most rewarding ways to garden. You can move plants around, experiment without commitment, and create stunning displays even if all you’ve got is a balcony or a doorstep.
Why Container Gardening Works (And Why It Sometimes Doesn’t)
Container gardening gives you complete control over your growing environment. You choose the compost, you control the watering, and you decide where each plant lives. This is fantastic if you’ve got rubbish soil in your garden, or no garden at all.
The other beauty of container gardening is that you can garden in the smallest of spaces, such as balconies, or if you’re renting a property, you don’t have to leave all your beloved plants behind when you move. Container gardening is also where most beginner gardeners start off.
I know because it’s where I started, at about 7 years old with a single pot of mint on a sunny windowsill. That one pot of mint turned into a lifelong obsession with growing things. Be warned: once you’ve had a few successes in pots, you will absolutely start eyeing up every patch of bare earth in the garden and wondering what you could plant there next.
Plants in pots can thrive in ways they never would in your actual ground, especially if you’re dealing with heavy clay or chalky soil. That’s because you can choose the exact compost for each pot, which opens up near endless planting choices.
But there is one golden rule to remember when gardening with containers. Plants in containers are completely dependent on you. In the ground, plant roots can search for water and nutrients. In a pot, they’ve only got what you give them.
This means container gardening requires more attention than border planting. You’re essentially keeping plants on life support, and you’re the life support machine. Miss a few waterings in summer, and you’ll have crispy casualties. Forget to feed them, and they’ll sulk and stop flowering.
The biggest mistake beginners make is thinking container gardening is low maintenance. It isn’t. It’s high reward, but it needs regular care. Get that in your head now, and you’ll avoid disappointment later.
Choosing the Right Containers: Size Really Does Matter
Let’s start with pots themselves, because this is where loads of people go wrong straight out of the gate. Walk into any garden centre, and you’ll see hundreds of pots in every size, material, and price point. The choice can feel overwhelming, but there’s really one overriding principle that cuts through all of it.
Bigger is almost always better. A larger pot holds more compost, which means more water retention and more nutrients. It also gives roots more room to grow, which means healthier, happier plants. I see so many beginners buy those dinky little pots because they’re cheap or cute, then wonder why their plants are constantly wilting and looking miserable. Small pots dry out faster than you can blink, especially in summer.
25 to 30cm diameter (10 to 12 inches) 7 to 10 litres capacity
Small varieties only
35 to 45cm diameter (14 to 18 inches) 15 to 25 litres capacity
Hostas prefer wide, shallow pots rather than deep ones. Allow 5 to 8cm space between root ball and pot edge. Miniature hostas can manage in smaller 2 to 3 litre pots.
30cm diameter (12 inches) 10 to 15 litres capacity
Minimum for dwarf varieties
40 to 45cm diameter (16 to 18 inches) 20 to 30 litres capacity
Standard tomatoes need at least 30 litres. One plant per pot. Deeper is better than wider for vegetables with extensive root systems.
Compact Shrubs (Hydrangeas, azaleas, camellias, Japanese maples)
35 to 40cm diameter (14 to 16 inches) 20 to 30 litres capacity
Young plants only, 2 to 3 years maximum
45 to 60cm diameter (18 to 24 inches) 40 to 60 litres capacity
Compact hydrangea varieties need minimum 40cm pots. Standard varieties require 50 to 60cm. For long term growing, bigger is always better. Repot every 3 to 5 years.
Small Trees & Large Shrubs (Dwarf fruit trees, bay trees, ornamental trees)
45cm diameter (18 inches) 40 to 50 litres capacity
Bare minimum, not recommended
60cm+ diameter (24+ inches) 80 to 100+ litres capacity
Dwarf fruit trees on dwarfing rootstocks need minimum 60cm pots (80+ litres). Standard trees are unsuitable for containers long term. Heavy pots essential for stability.
30cm diameter (12 inches) 10 to 15 litres capacity
Temporary only
40 to 50cm diameter (16 to 20 inches) 30 to 50 litres capacity
Climbers have extensive root systems. Deeper pots better than wide shallow ones. Add trellis or support at planting time, not after.
Bulbs (Daffodils, tulips, lilies, alliums)
20cm diameter (8 inches) 3 to 5 litres capacity
5 to 7 bulbs per pot
25 to 30cm diameter (10 to 12 inches) 7 to 10 litres capacity
Layer different bulbs at different depths for extended flowering. Minimum 15cm deep for standard daffodils and tulips. Group bulbs for impact, don’t plant singly.
For annuals like petunias or bedding plants, aim for pots that are at least 20 to 25 centimetres in diameter. Anything smaller and you’ll be watering twice a day in hot weather. For perennials, shrubs, or anything you want to keep long term, go for 30 centimetres minimum, and bigger if you can manage it. Tomatoes need at least 30 centimetres, preferably 40. Fruit trees in pots want 50 centimetres or more.
I know big pots cost more, and they’re heavier to move around. But trust me on this one. A plant in a properly sized pot will give you months of gorgeous growth with relatively little fuss. A plant crammed into a too-small pot will give you nothing but stress and disappointment.
Pot Size
Diameter (Top)
Height
Typical Use
P9 (9cm)
9cm (3.5″)
8 to 9cm
Young plants, herbs, bedding plugs. Small perennials and shrubs in early growth.
1 Litre
13cm (5″)
11cm
Small shrubs, herbaceous plants, climbers. Good for potting on young plants.
2 Litre
17cm (6.5″)
13cm
Standard size for most perennials and shrubs. Best value for money. Plants establish quickly with immediate impact.
3 Litre
19cm (7.5″)
15cm
Larger perennials, established shrubs. Popular garden centre size.
5 Litre
23cm (9″)
18cm
Mature shrubs, small trees, roses. Good instant impact.
10 Litre
28cm (11″)
22cm
Large shrubs, small to medium trees. Good for immediate border filling.
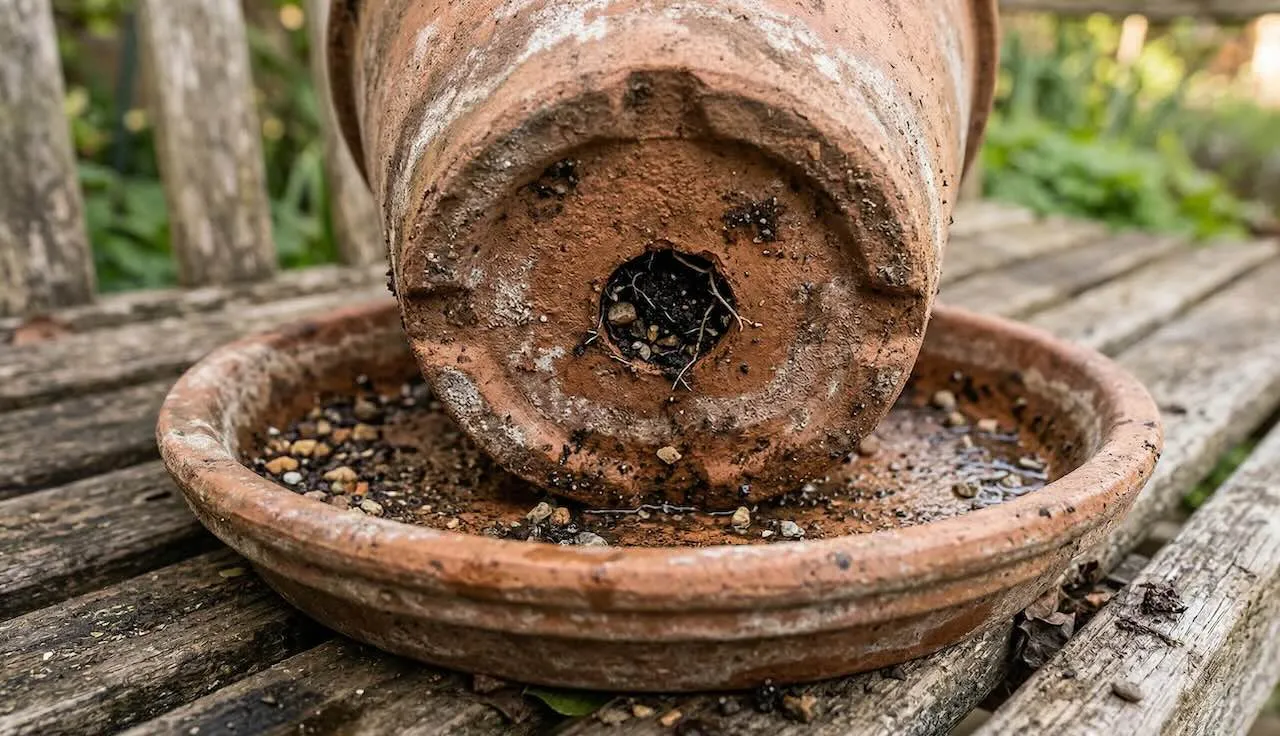
Plants need air around their roots as much as they need water. When you water a pot without drainage, that water has nowhere to go. The compost becomes waterlogged, the roots can’t breathe, and they rot. You’ll lose the plant within weeks, guaranteed. I’ve seen it happen hundreds of times, including on Garden Rescue where I’ve arrived at a property to find an entire terrace of plants in decorative pots with no drainage, all silently dying.
If you’ve fallen in love with a pot that has no drainage, you’ve got two options. Either drill holes in the bottom yourself (works for plastic and some ceramic pots, though be careful not to crack them), or use it as a decorative outer pot with a proper plastic pot with drainage holes sitting inside it. Never plant directly into containers without drainage. It’s one of the biggest killers of container plants, especially for beginners who tend to overwater anyway.
Some pots come with just one small hole. That’s often not enough, especially for larger containers. More holes mean better drainage and healthier roots. If you’re buying new pots, look for several decent-sized drainage holes, not just a token effort.
Pot Materials: What Should You Buy?
You’ve got loads of choices when it comes to pot materials, and they all have pros and cons. I’ve written about them extensively in my guides over the years. As a beginner gardener, you’re going to be faced with the three main contenders: plastic, terracotta, and those bargain 3-for-20-quid ceramic pots at garden centres. Let me break down what to look out for.
i) Plastic Pots
Plastic is lightweight, cheap, and retains moisture well. This makes it brilliant for beginners because you don’t need to water as often. The downside is they’re not the most attractive, though you can get some very decent-looking ones these days. Plastic also degrades in sunlight over time, becoming brittle and cracking. For the price though, they’re hard to beat, and they’re perfect if you need to move pots around regularly.
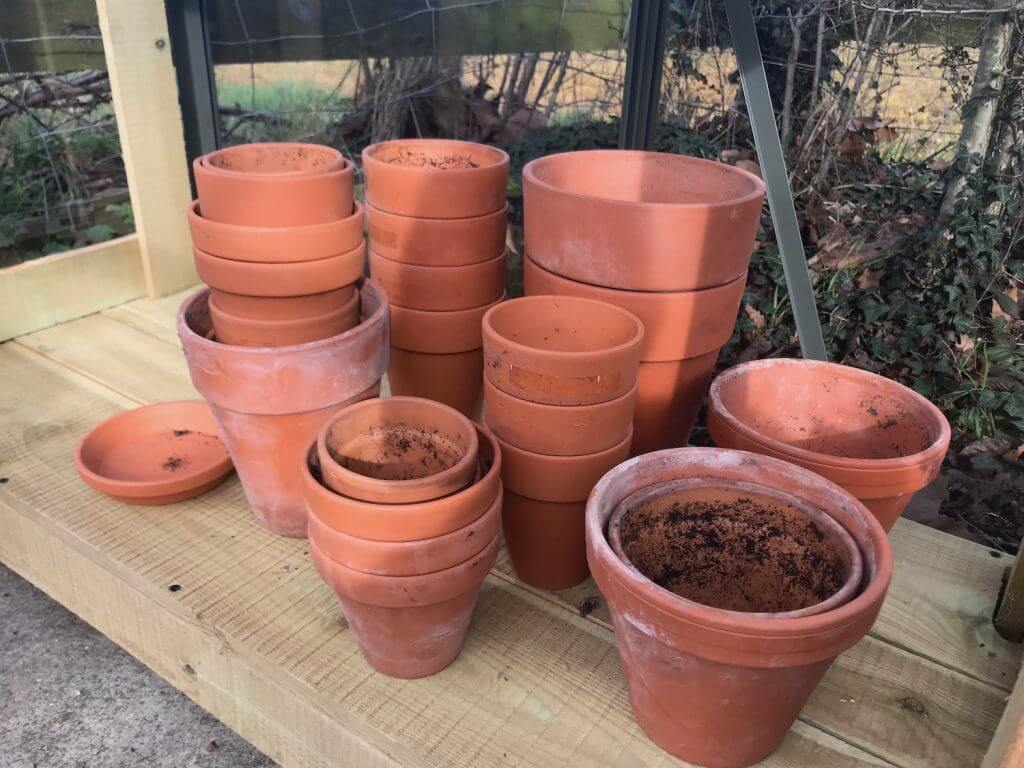
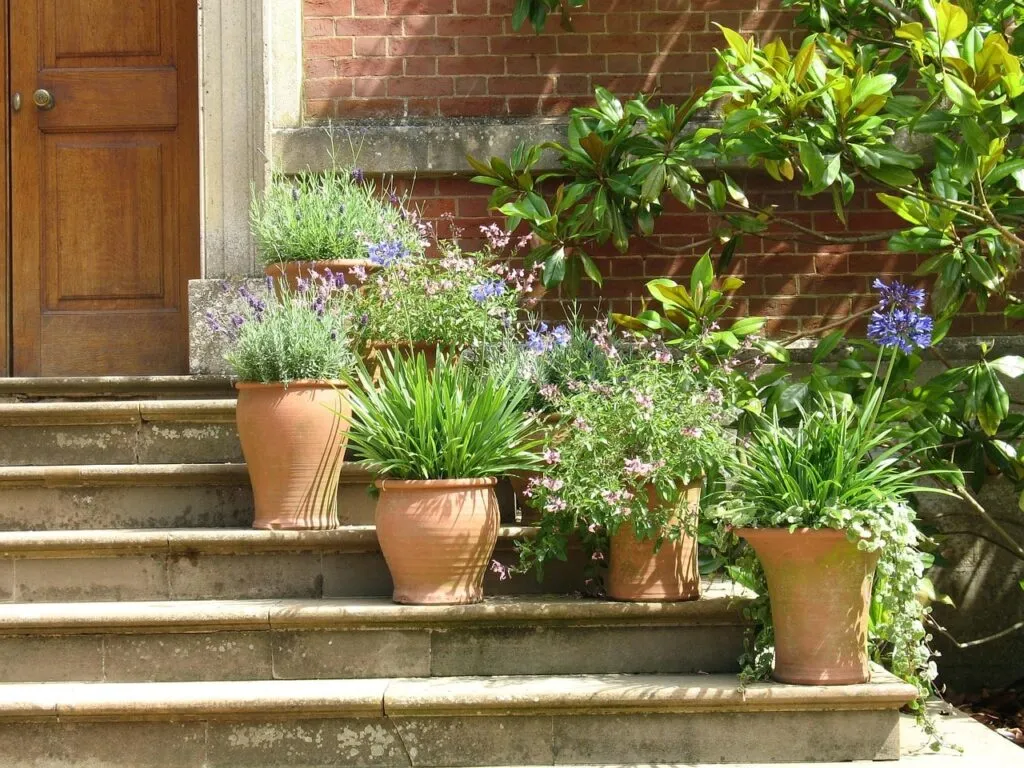
Terracotta looks gorgeous, and it’s porous, which means excess moisture can evaporate through the sides. This is great for plants that hate wet feet, like lavender or Mediterranean herbs. But here’s the thing: terracotta dries out incredibly fast in hot weather. You’ll be watering daily, possibly twice daily in peak summer. They’re also heavy, breakable, and can crack in hard frosts.
I love terracotta for the right plants in the right situations. My own patio has a collection of terracotta pots that I’ve built up over 20 years, some of them rescued from skips and repaired. There’s something really satisfying about a well-weathered terracotta pot that no plastic alternative can replicate. That said, they’re not ideal for beginners who might forget to water.
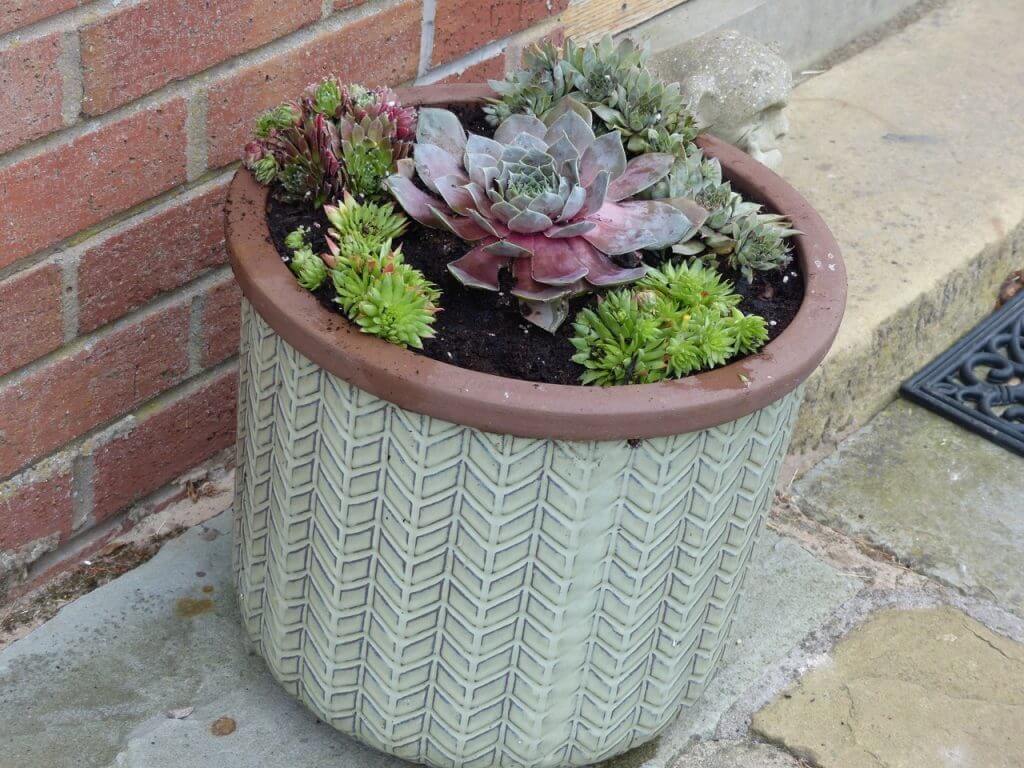
Glazed pots give you the best of both worlds. They look smart, they hold moisture better than terracotta, and they’re more frost-resistant. The glaze seals the ceramic so you’re not losing water through the sides. They’re heavier than plastic and more expensive, but they last for years and they look professional. For a patio or front door display where appearance matters, glazed ceramic is worth the investment.
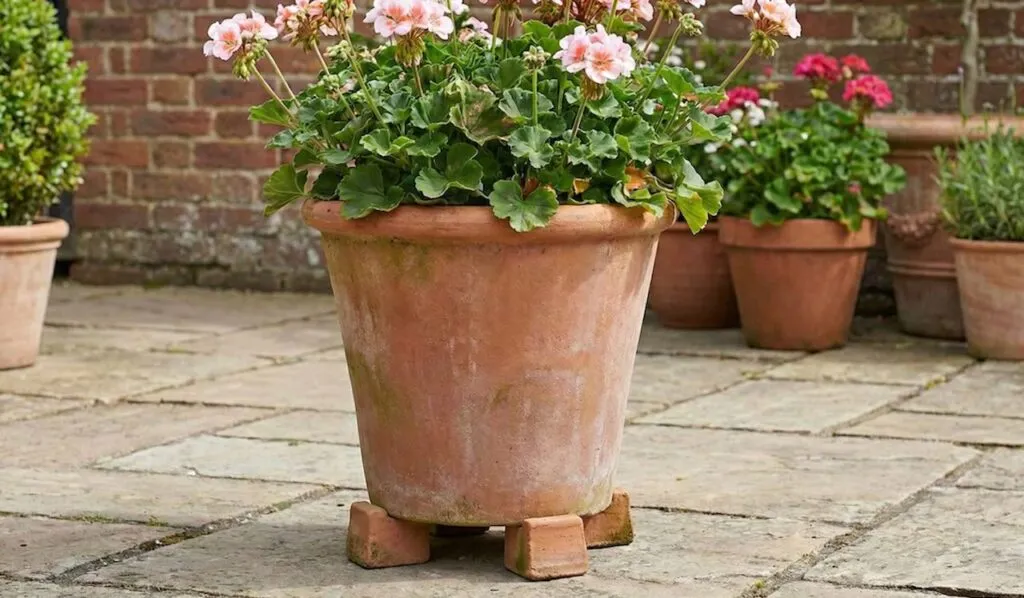
This is something most beginners overlook completely, but it makes a real difference to plant health. Pot feet are small feet you place under containers to lift them slightly off the ground. They might seem like a luxury, but they serve two important purposes. First, they allow water to drain away freely from the base of the pot rather than sitting in a puddle, which can block drainage holes and lead to the very root rot you’re trying to avoid. Second, they create an air gap underneath the pot, which helps regulate soil temperature and prevents frost from transferring directly up through paved surfaces into the root ball.
During a hard frost, the ground beneath pots can freeze and expand, causing terracotta and ceramic pots to crack. Elevating them even a few centimetres with pot feet reduces this risk considerably. I use them on all my terracotta containers as a matter of course.
For large, heavy containers, a pot caddy with wheels is a genuinely life-changing purchase. Being able to wheel a 40 litre pot of Japanese maple from its summer position on the sunny patio to a sheltered spot for winter, without straining your back, is the kind of thing you wonder how you ever managed without.
Saucers are worth a mention too. In summer, placing a saucer under pots can act as a small water reservoir, helping plants last a little longer between waterings. In winter, however, you should remove saucers or tip them out regularly, as standing water can freeze and cause the same problems as poor drainage. Use saucers as a summer aid, not a permanent fixture.
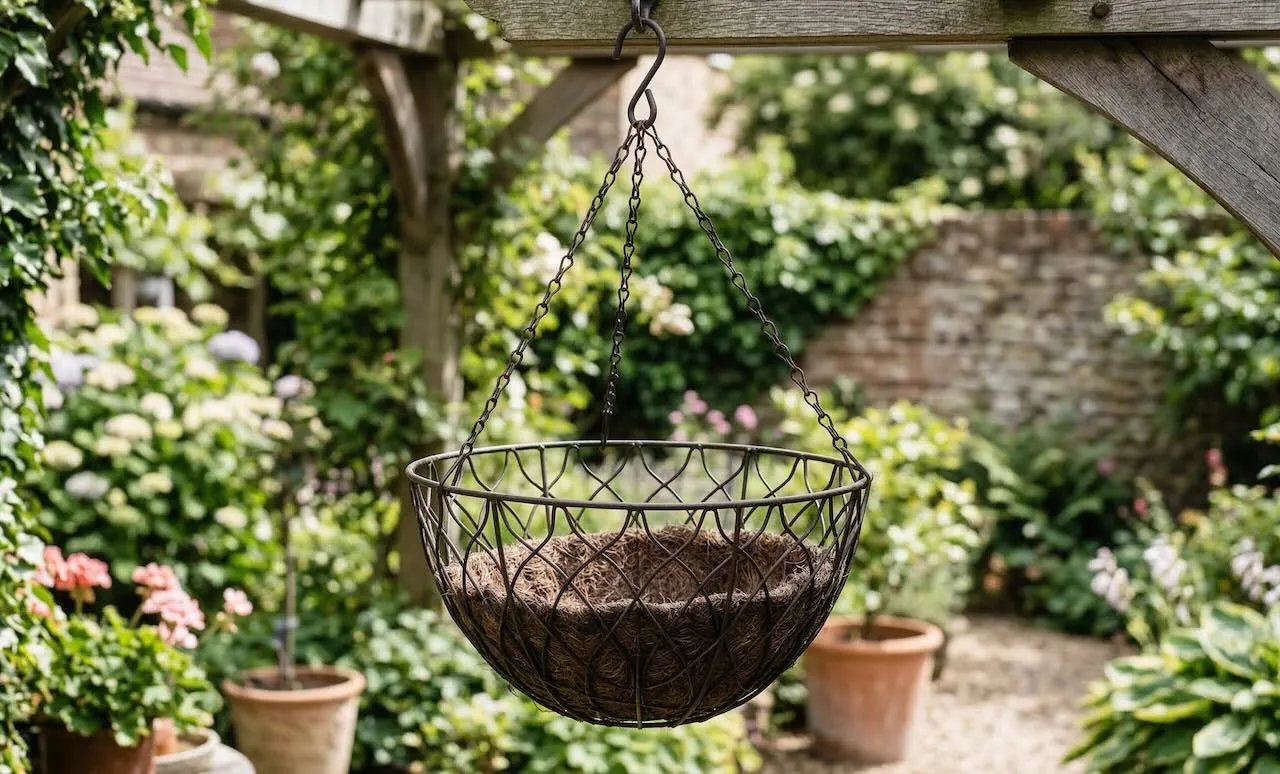
When most people think of container gardening, they picture a pot on a patio. But the world of containers is much broader than that, and three other container types deserve a mention because they unlock completely different planting possibilities. Of the three, hanging baskets are the one that genuinely surprises me most in terms of how underused they are. If you’ve got a bare wall, a front door with a porch, a fence, or even just a bracket attached to a shed, you’ve got somewhere to grow a hanging basket. You don’t need a garden, a large budget, or any previous experience to get brilliant results.
Why Hanging Baskets Are Perfect Even If You Have No Garden
One of the things I love most about hanging baskets is what they do for people who feel locked out of gardening because they don’t have outdoor space in the traditional sense. A rented flat with a south-facing front door. A narrow terrace with no room for pots on the ground. A sheltered courtyard where floor-level light is poor but the upper walls catch the sun for hours. In every one of these situations, a hanging basket gives you a growing space that simply wouldn’t exist otherwise.
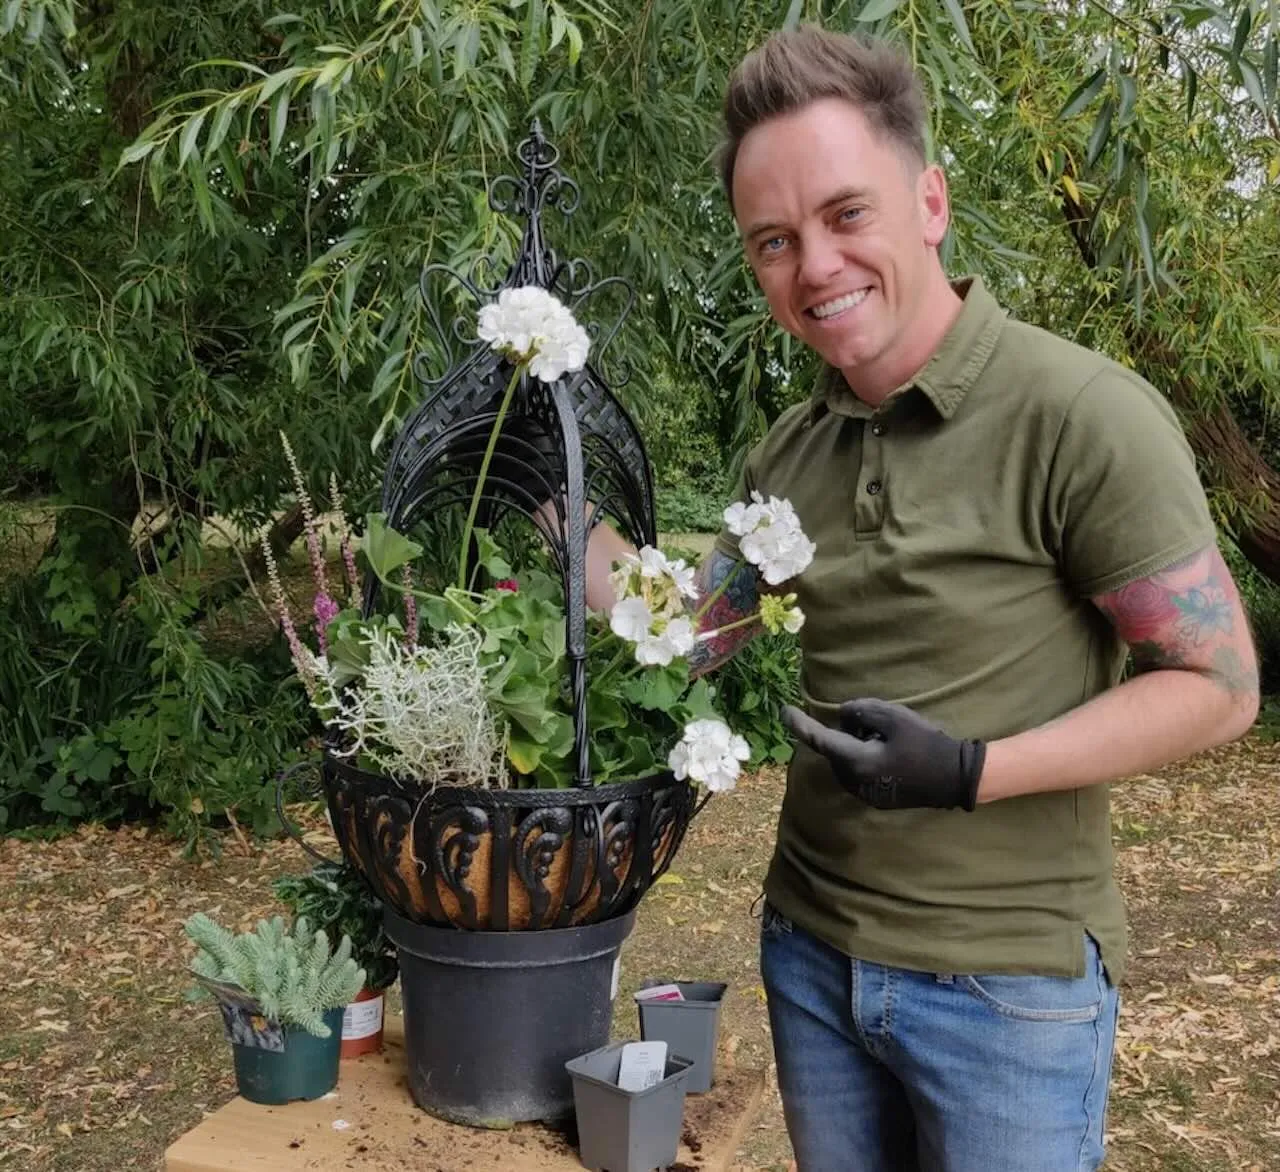
In the photo above you can see me planting up a Victorian cast iron hanging basket, the sort of solid, beautiful frame that genuinely lasts a lifetime if you look after it. Cast iron baskets are heavier than wire ones and the chains need checking each season for rust, but the patina they develop over the years is something no modern basket can replicate.
However a basic wire basket with a coir liner costs just a few pounds. A bag of multi-purpose compost is enough to fill three or four baskets. A tray of mixed trailing plants from a garden centre in May costs less than a round of drinks. For somewhere between ten and fifteen pounds total, you can have a full, lush, flowering display that carries on until the first frosts in October or November. That is why I always recommend baskets to anyone who tells me they want to start growing things but can’t afford to do much.
Hanging baskets are one of the most effective ways to add height, colour, and drama to a garden or front door. They’re perfect for trailing plants like fuchsias, trailing petunias, lobelia, and ivy-leaf geraniums. The catch is that they dry out even faster than regular pots because they’re exposed to wind on all sides, so they need watering at least once a day in summer, sometimes twice. Line baskets with coir rather than moss where possible, as it retains moisture better. I also always mix in water-retaining granules when planting up baskets in late spring, as it genuinely halves the watering workload.
Types of Hanging Basket: Which One Should You Choose?
Walk into any garden centre between March and June and you’ll see hanging baskets in every possible style, material, and price point. The choice can be bewildering, but each type has a specific strength. Here’s my breakdown of what works for what.
🌿Wire Hanging Basket with Coir Liner — The Classic Choice
The traditional open wire basket is the most versatile option and the one professional gardeners like me reach for most often. The open structure allows you to plant through the sides as well as the top, giving you a full 360-degree sphere of colour when done well. The wire frame typically comes with a coir liner, which holds compost in, retains moisture better than moss, and is kinder to the environment. Sizes range from 25cm (10 inches) for a small porch display up to 40cm (16 inches) or larger for a really dramatic statement. For a proper, full display go for at least 35cm. Anything smaller and you’ll be fighting a losing battle with drying out.
Best for: Front doors, pergolas, brackets. Full planting on sides and top for maximum impact.
Watch out for: Dries out quickly. Daily watering in summer is essential. Mix water-retaining gel into the compost before planting.
💧Solid Plastic Hanging Basket — Best for Beginners
If you’ve killed hanging baskets before through forgetting to water them, a solid plastic basket is your solution. The closed sides and base retain moisture far more effectively than open wire frames, meaning you can get away with watering every other day rather than daily in moderate summer weather. Many plastic baskets also have a built-in water reservoir or drip tray at the base, which acts as a small buffer on hot days. They don’t look quite as traditional or lush as a well-planted wire basket because you can’t plant through the sides, but for a reliable, colourful, low-maintenance summer display they are genuinely excellent. They’re also the most affordable option, so they’re ideal if you want to start with three or four baskets around a front garden.
Best for: Beginners, anyone who forgets to water, sheltered spots with less wind exposure.
Watch out for: Planting is top-surface only, so the display is less full than a wire basket. Colours fade in UV over a few seasons.
⏱️Self-Watering Hanging Basket — For Busy Gardeners
Self-watering hanging baskets have an integrated water reservoir that the plant draws from via capillary action, exactly like self-watering pots on the ground. You fill the reservoir every few days rather than watering every single morning, and in cooler or overcast weather you can stretch this to every three or four days without the plants suffering. For anyone who works long hours, travels regularly, or simply finds daily watering a chore rather than a pleasure, these are brilliant. The trade-off is that they tend to be slightly more expensive upfront and the look is more contemporary than traditional, which suits some gardens more than others. I’d particularly recommend them for anyone who wants baskets by the front door because it means you can go away for a long weekend without coming home to a basket of crispy casualties.
Best for: Busy people, anyone who travels, front-of-house displays where daily watering is inconvenient.
Watch out for: Reservoir can overflow in very heavy rain. Empty it out if a long wet spell is forecast in autumn.
🏡Flat-Backed Wall Basket — Maximum Space Efficiency
A flat-backed wall basket is half a basket with a flat rear panel that sits flush against a wall, fence, or gate. They’re perfect for narrow passages, covered porches, or any situation where a full round basket would be a head hazard or would stick out too far. Because they sit directly against the wall rather than hanging on a chain, they’re also considerably more stable in windy conditions, which makes them ideal for exposed front gardens and coastal locations. A pair of flat-backed baskets flanking a front door at either side of the frame is one of the most classic and effective displays in British garden design, and it genuinely costs very little to achieve. Line them with coir, fill with a good multi-purpose compost mixed with water-retaining gel, and plant with trailing lobelia, ivy-leaf geraniums, or a compact fuchsia, and the results will stop people in the street.
Best for: Walls, fences, narrow passages, exposed or windy locations.
Watch out for: Shallower depth than a full round basket means less compost volume and more frequent watering.
🌸Hayrack Trough Basket — Brilliant Along Fences and Railings
A hayrack basket is a long, trough-shaped wire frame that fixes directly to a fence rail, balcony railing, or wall, and these are one of the most underused options in UK gardens. Because they’re elongated rather than round, they allow you to create a continuous ribbon of colour along a fence or balcony edge that looks really designed rather than just a collection of individual pots. They come in various lengths from 30cm up to 90cm or more, and the longer versions can comfortably hold six to eight trailing plants for a really full display. Line them with coir sheets (sold separately in rolls for exactly this purpose), fill with compost, and plant with a mix of trailing and compact upright varieties. A 90cm hayrack along a sunny fence with a mix of trailing petunias, calibrachoa, and diascia will be one of the most commented-on parts of your garden all summer.
Best for: Balcony railings, fence tops, low walls. Creating a ribbon of colour rather than individual focal points.
Watch out for: Being long and shallow, these dry out very quickly. Water-retaining gel in the compost is particularly important here.
What Equipment Do You Need to Plant a Hanging Basket?
Planting a hanging basket for the first time feels more daunting than it actually is. Once you’ve done one, you’ll wonder why you waited. Here’s everything you need to do it properly.
🧰 Equipment You Need to Plant a Hanging Basket
The basket itself
Choose your basket type from the options above. For a first attempt, a 35cm wire basket with a coir liner gives you the most planting flexibility and the best-looking result.
Most wire baskets come with a coir liner included, but if yours doesn’t, or you’re using a hayrack, buy rolls of coir liner sheet and cut to size. Coir retains moisture better than moss and is a more sustainable choice. Pre-formed basket liners are also available in common sizes and save time.
A good quality multi-purpose compost is all you need for hanging baskets. A 40-litre bag will fill three or four standard baskets. Don’t use garden soil or John Innes No. 3 for baskets as both are too heavy and will strain the bracket and chain.
Mix a tablespoon of water-retaining gel granules into the compost for each basket before planting. They swell with water and release it slowly as the compost dries, genuinely extending the time between waterings. This is probably the single best thing you can do to improve basket survival rates in summer. I’ve used them for years and they make a real, measurable difference.
Mix slow-release fertiliser granules into the compost at planting time and they feed your basket for the entire season without any weekly liquid feeding required. For a basket with a mix of flowering annuals, this makes a tangible difference to how long and how heavily they bloom. Osmocote or similar slow-release products are available from garden centres and online.
A bucket or basket stand to hold the basket while you plant
Trying to plant a round wire basket while it wobbles around on a hard surface is an exercise in frustration. Sit it in an empty bucket of the right diameter, or use a purpose-made hanging basket stand that holds it steady at a comfortable working height while you plant through the sides and fill the top. A hanging basket planter stand also lets you display the finished basket at ground level before hanging it, which is surprisingly useful.
A solid, well-fixed bracket is not somewhere to cut corners. A mature basket planted with trailing petunias and well-watered can weigh 7 to 10kg or more, and you want absolute confidence that the bracket can hold it. Use wall plugs and screws rated for the weight, and fix into masonry or solid timber rather than soft wood or cladding wherever possible. Brackets with a longer arm (30cm or more) allow the basket to hang clear of the wall and catch more light on the upper foliage.
If your baskets are hanging at head height or above, a standard watering can means balancing on a step to water them every day. A long-reach lance that attaches to a hosepipe and curves upward to reach baskets from below is genuinely transformative for anyone with baskets at height. You can water every basket from ground level in seconds. It’s one of those pieces of kit that once you own, you can’t imagine having managed without.
For a classic summer basket, the thriller filler spiller principle applies perfectly. One compact upright plant such as a standard fuchsia, a calibrachoa, or a compact pelargonium goes in the centre. Three mounding plants like spreading petunias or begonias fill out the middle. Three to five trailing plants like trailing lobelia, ivy-leaf geraniums, or Bacopa go around the edges and through the sides to spill down and soften the whole basket. Buy plants from a garden centre in late May once the risk of frost has passed in your area.
💡 Top Tip
Don’t hang baskets outside permanently until after the last frost date for your area, which is typically mid-May in most of the UK and later in Scotland and elevated areas. Plant them up in a greenhouse or frost-free porch from early May and let them establish before hanging them in their final position. You’ll get a fuller, more established display earlier in the season and avoid losing young plants to a late frost.
Window boxes bring container gardening to anyone with a windowsill or wall-mounted brackets, and they’re fantastic for herbs, compact annuals, and trailing plants. They follow the same rules as any other container: drainage holes are essential, compost quality matters, and size makes a difference. A window box that’s at least 20cm deep will give you far better results than those shallow 10cm ones that dry out in an afternoon.
Grow bags are one of the most underrated container options for vegetable growing. They’re inexpensive, disposable, and purpose-designed for tomatoes, peppers, aubergines, and cucumbers. The classic grow bag approach of cutting holes in the top is perfectly effective, though you can also stand grow bags upright in a frame to give more rooting depth. If you’re new to growing your own food, a couple of grow bags on a sunny patio with two tomato plants in each is one of the most rewarding things you can do.
This is where a lot of beginners come unstuck. You cannot use garden soil in containers. It compacts, it doesn’t drain properly, and it often contains pests and diseases. You need proper potting compost, and there are different types for different jobs.
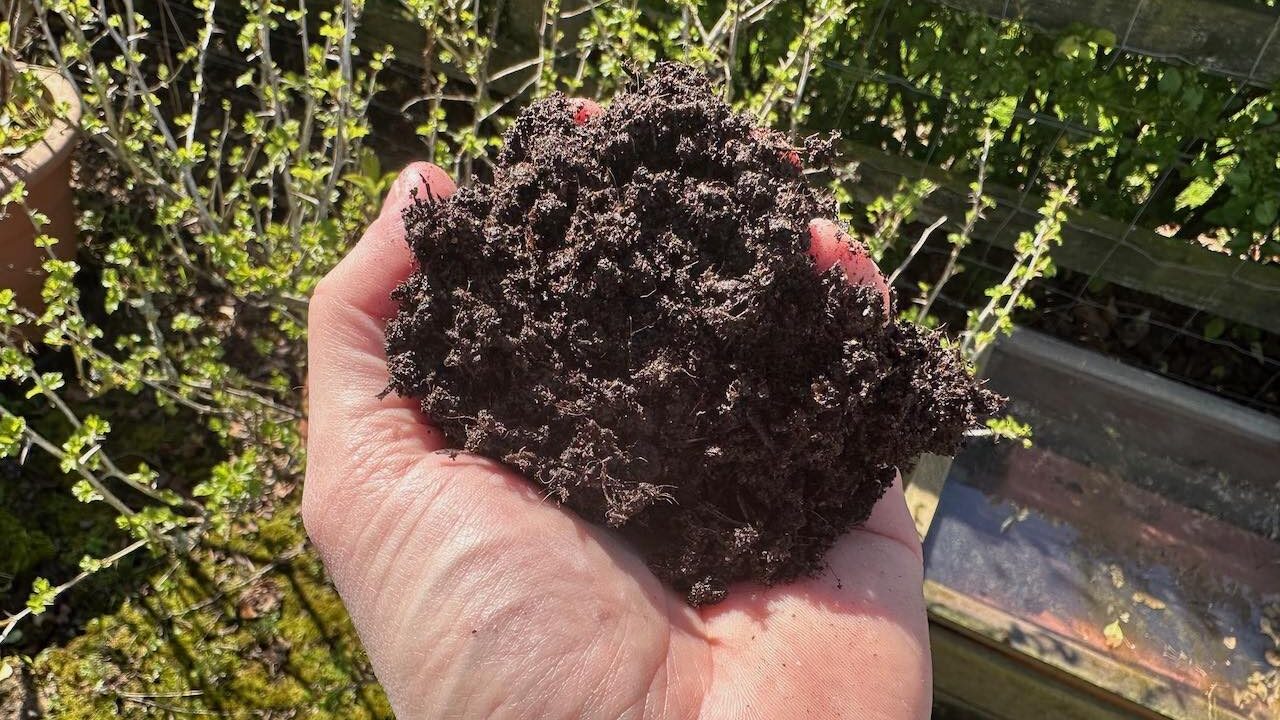
A) Multi-Purpose Compost (Peat Free)
This is your standard, everyday compost that works for most container plants. It’s relatively cheap, widely available, and does a decent job for annuals, bedding plants, and vegetables. Multi-purpose compost is peat-free these days across most of the major brands, which is better for the environment. Peat-free versions can dry out faster and be harder to re-wet once they’ve dried completely, so watering little and often is even more important. For beginners on a budget, multi-purpose is absolutely fine for most things.
A quick note on the peat-free transition: the UK is phasing out peat in amateur gardening products, with a ban on retail peat sales expected by 2030. The quality of peat-free composts has improved enormously in recent years, and some of the coir and wood fibre-based mixes are genuinely excellent. Don’t be put off by early bad experiences with peat-free products if you tried them a few years ago. The current generation is much better.
John Innes is a loam-based compost that comes in different strengths. Number 1 is for seedlings, Number 2 is for general potting, and Number 3 is for mature plants and shrubs. It’s heavier than multi-purpose, which means pots are less likely to blow over, and it holds nutrients better over time. Loam is essentially a well-balanced soil, so this compost is far denser than multi-purpose. It’s more expensive but lasts longer and is much more forgiving if you miss a watering.
I always use John Innes Number 3 for anything that’s staying in a pot long term, like shrubs, perennials, or fruit trees. It costs more than a multi-purpose, but for permanent plantings it’s absolutely worth it. Many professionals use a mix of 50% John Innes No. 3 and 50% multi-purpose compost as a good all-round container mix.
You’ve also got ericaceous compost for acid-loving plants like rhododendrons, azaleas, and blueberries. These plants will either struggle or eventually die in regular compost because they need acidic growing conditions to take up key nutrients. There are also specialist blends for bulbs, orchids, cacti and succulents, and seed sowing. Don’t overthink it though. For most container gardening, you can get by with a multi-purpose mix for annuals and John Innes Number 3 for everything else. Ericaceous compost is the only specialist one that genuinely cannot be substituted.
There are loads of debates about whether you should add crocks or gravel to the bottom of pots to improve drainage. Honestly, if your pot has good drainage holes and you’re using decent compost, you don’t need it. The drainage holes do the work, not a layer of stones. In fact, adding gravel can sometimes create a perched water table where water sits above the gravel layer rather than draining away, which is the opposite of what you want.
That said, if you’re using very shallow pots or you’ve got a plant that absolutely hates wet roots, a thin layer of gravel or broken terracotta crocks can’t hurt. Just don’t fill a quarter of your pot with stones thinking you’re helping. You’re just reducing the space available for compost and roots.
Self-Watering Solutions: Buying Yourself Time
One of the biggest challenges in container gardening is keeping up with watering, particularly through the summer months. If you go away for a week or simply have a busy life, the constant attention that containers need can feel overwhelming. Thankfully, there are some genuinely useful products that can help.
Self-watering containers have a built-in reservoir at the base that the plant draws from via capillary action. You fill the reservoir every few days rather than watering every day, and the plant takes up moisture as it needs it. They’re excellent for tomatoes, peppers, and herbs in particular. Brands like elho and Lechuza make good quality self-watering planters that last for years. The initial cost is higher than a standard pot, but the reduction in watering stress is absolutely worth it, especially for anyone who travels regularly or tends to forget.
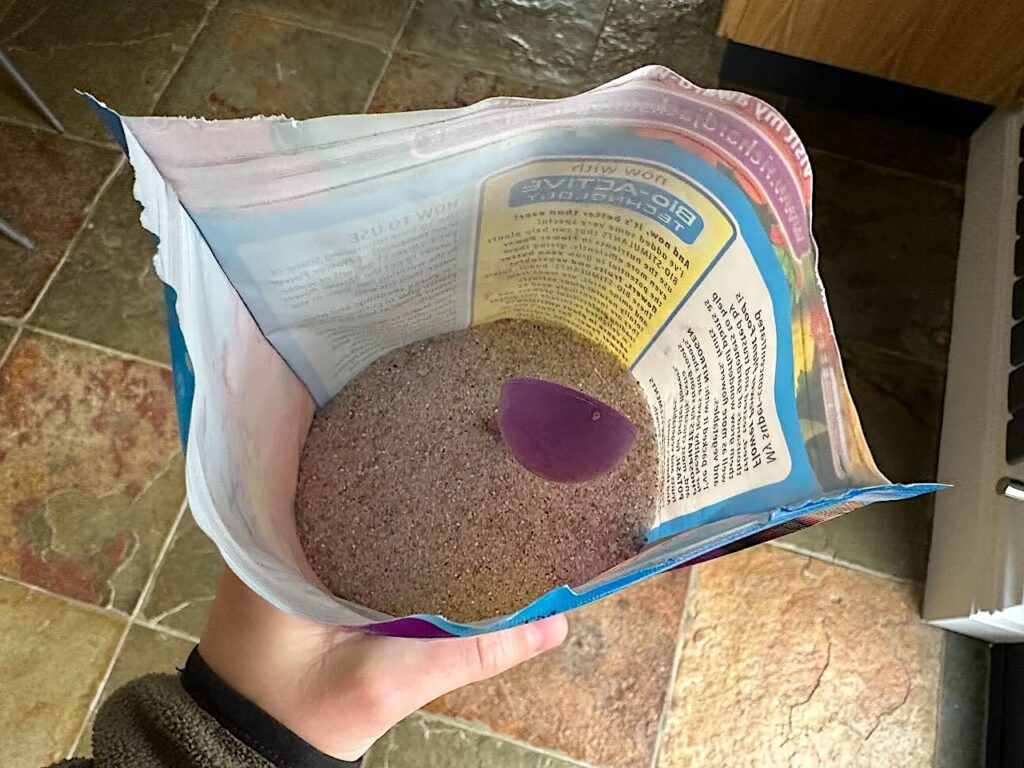
Water-retaining gel granules are another useful tool. You mix them into your compost before planting, and they absorb water and release it slowly as the compost dries. They won’t turn a thirsty container into a drought-proof one, but they genuinely do extend the time between waterings in hot weather. I always use them in hanging baskets where the drying-out rate is most extreme.
A moisture metre is a really useful gadget for beginners who aren’t yet confident about when to water. You push the probe into the compost and it tells you whether the soil is wet, moist, or dry. It takes all the guesswork out of watering decisions and can save a lot of plants in their first season.
Let’s get to the fun bit. What should you actually grow? The good news is that most plants can grow in containers if the pot is big enough. The bad news is that some plants genuinely thrive in pots while others will always struggle, and knowing the difference saves you a lot of heartache and wasted money.
Plants That Love Container Life
There are some plant types that were born to live in containers. Mainly plants that are annuals or tender perennials that need our help in the form of shelter or warmth to survive UK winters. Tomatoes are container superstars. They thrive in pots, produce heavily, and can be moved to the sunniest spot. Peppers and chillies are the same. For vegetables, salad leaves, radishes, spring onions, and dwarf beans all work brilliantly, which is why so many container gardeners start with edibles.
Herbs are probably the easiest container plants for beginners. Basil, parsley, coriander, thyme, and rosemary all do well, though remember that Mediterranean herbs like rosemary and thyme prefer drier conditions and prefer terracotta over plastic. Strawberries love containers too and make for both beautiful ornamental plants and productive fruiting ones. A row of strawberry pots on a sunny step is one of the most cheerful sights in early summer, and children absolutely love picking them.
Plant Name
Why It’s Great for Beginners
Minimum Pot Size
Tomatoes (Cherry varieties)
Prolific producers, easy to grow, incredibly satisfying. Just need regular watering and feeding.
30 to 40cm (12 to 16 inches)
Basil
Fast-growing herb. Perfect for sunny windowsills and thrives with regular picking.
20cm (8 inches)
Lettuce & Salad Greens
Easy from seed. Harvest leaves as you need them and they keep producing.
15 to 20cm (6 to 8 inches)
Petunias
Flower for months, tolerate heat brilliantly, and come in loads of colours. Very forgiving.
25cm (10 inches)
Radishes
Ready in less than a month. Great confidence booster for new gardeners.
15cm (6 inches)
Peppers (Sweet & Chilli)
Thrive in containers with good drainage. Compact varieties are perfect for beginners.
25 to 30cm (10 to 12 inches)
Geraniums (Pelargoniums)
Drought tolerant, long flowering, and virtually indestructible. Perfect for hot spots.
20 to 25cm (8 to 10 inches)
Hostas
Stunning foliage, love shade, and easier to protect from slugs in pots. Very low maintenance.
30cm (12 inches)
Begonias
Brilliant for shade. Flower continuously and need minimal fussing.
20 to 25cm (8 to 10 inches)
Mint
Grows vigorously (which is why pots are perfect to contain it). Tolerates sun or partial shade.
20cm (8 inches)
Lavender
Loves containers, especially terracotta. Drought tolerant once established. Smells amazing.
Gorgeous foliage in sun or shade. Modern varieties are incredibly easy and colourful.
20 to 25cm (8 to 10 inches)
Bush Beans
Compact, productive, and don’t need staking. Ready to harvest in weeks.
25cm (10 inches)
For flowers, petunias, geraniums (pelargoniums), begonias, fuchsias, and busy lizzies are all reliable container plants that flower for months. Dahlias in pots are absolutely spectacular if you deadhead them regularly. Lavender works well in containers, especially in terracotta, as long as you don’t overwater. For more flowering options, check out my red flowering plants guide and cottage garden perennials article for container-suitable varieties.
Hostas are brilliant in pots because you can protect them from slugs more easily. Japanese maples look stunning in containers and actually prefer the root restriction, but you do need a good 20 litre pot and above for them to be happy. Shrubs like hydrangeas, camellias, and pieris all work well in very large pots. Small fruit trees, especially those on dwarfing rootstocks, can produce really well in 50-centimetre pots on wheels.
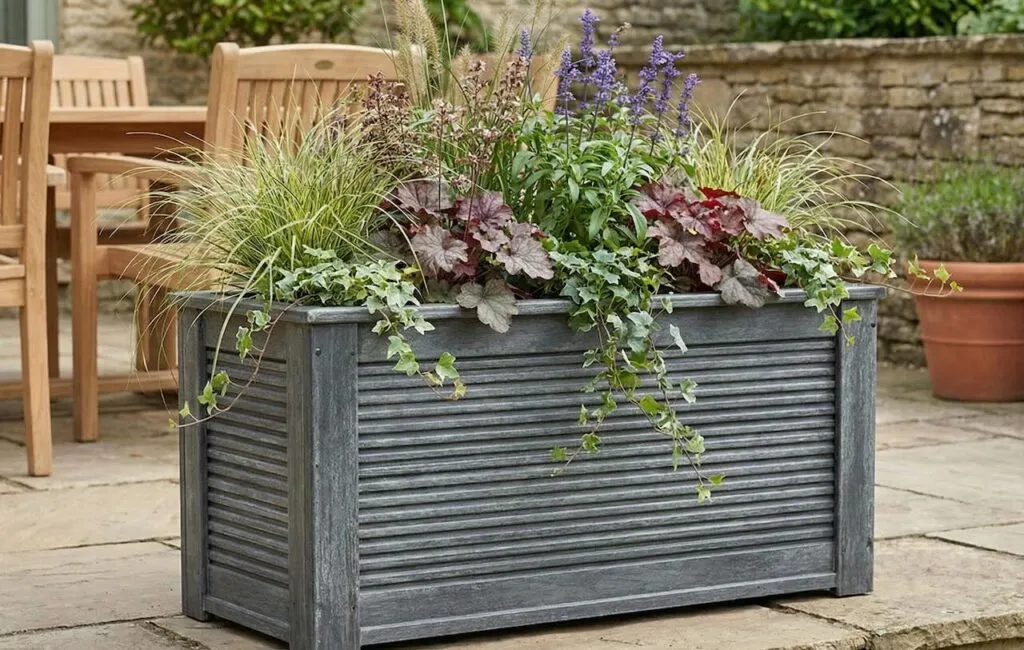
The Thriller Filler Spiller Method: How to Design Container Displays
Once you’ve got your pot and your compost sorted, the next question is how to arrange plants together to create something that looks genuinely designed rather than just a random jumble. This is where a classic design principle called thriller, filler, spiller comes in, and it’s something I use constantly when designing container displays on Garden Rescue.
The concept is beautifully simple. The thriller is a tall, dramatic plant that provides height and a focal point. Think a spiky phormium, a tall grass, a standard fuchsia, or an upright cordyline. It goes in the centre or back of the container and draws the eye. The filler is a bushy, mounding plant that fills out the middle of the container with foliage or flowers. Think petunias, begonias, geraniums, or compact heuchera. And the spiller is a trailing plant that tumbles over the edge of the pot, softening the transition between container and surface below. Think ivy, trailing lobelia, bacopa, or cascading petunias.
💡 Top Tip
For a classic summer container, try an upright cordyline or small phormium as the thriller, three geraniums as fillers around it, and trailing ivy or lobelia as spillers at the edges. Match all three to the same aspect (all sun-lovers or all shade-tolerant) and you’ll get a container that looks professionally designed without the professional price tag.
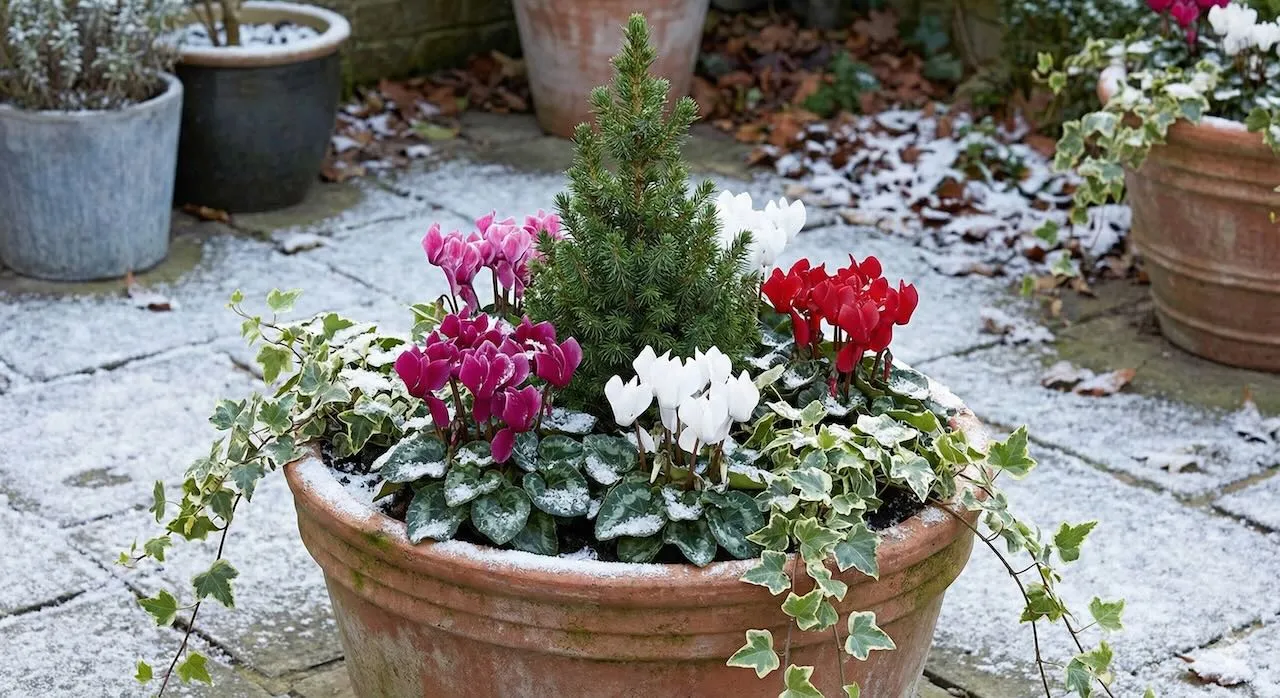
The thriller filler spiller formula works in every season. In winter, a small ornamental conifer or skimmia makes a brilliant thriller, heathers or violas fill the middle, and trailing ivy spills over the edge. In spring, a tall tulip or standard narcissus rises from a bed of pansies with trailing aubretia at the rim. Once you start thinking in thrillers, fillers, and spillers, you’ll never approach a container display the same way again.
Plants That Struggle in Containers
Deep-rooted plants like carrots and parsnips need really deep containers to develop properly. They’re possible, but tricky for beginners. Large shrubs and trees that aren’t specifically bred for containers will eventually outgrow even big pots and become stressed. Anything that needs constant moisture, like astilbes or gunnera, will drive you mad in containers because they dry out too fast.
Plant Name
Why It Struggles in Containers
What to Do Instead
Peonies
Deep taproots can’t develop in shallow pots. They refuse to flower and become stunted when confined.
Plant in a permanent sunny border where they can stay undisturbed for decades.
Delphiniums
Heavy feeders and drinkers needing cool, moist soil. Pots heat up too fast and they become top heavy.
Plant in deep, fertile garden soil where you can keep them consistently moist and cool.
Lupins
Long taproots hit the bottom of containers and have nowhere to go. Stunted growth and few flowers result.
Give them a permanent spot in well-drained garden soil where their taproots can dive deep.
Asparagus
Needs huge underground space for its extensive root system. Container-grown asparagus produces tiny, pathetic spears.
Plant in raised beds or deep trenches in the garden. Wait two years for first harvest but well worth it.
Sweet Corn
Grows too tall, needs to be planted in blocks for pollination, and has massive root systems.
Plant in garden beds where you can grow several plants together for proper pollination.
Pumpkins & Winter Squash
Massive spreading vines need loads of space. Heavy feeders that exhaust container soil quickly.
Grow in garden beds where they can sprawl properly. Save containers for compact bush varieties.
Full Sized Carrots & Parsnips
Long taproots need deep soil to develop properly. Shallow containers produce stunted, deformed roots.
Either grow in very deep containers (45cm minimum) or stick to round varieties like Parmex.
Don’t have enough root space to produce fruit properly year after year. Decline quickly in containers.
Only grow dwarf cherry varieties on Gisela rootstocks in very large pots (60cm minimum).
Rhubarb is a classic mistake I see new kitchen gardeners make. It’s so hungry and its root system so expansive that it often looks lacklustre and eventually declines after a few years in a container, so it’s always best planted in the ground where it can put on a proper show.
Common Beginner Mistakes and How to Avoid Them
Let me save you some heartache by running through the mistakes I see all the time, on Garden Rescue, in my forum, and from my own garden in my early years.
Mistake 1: Overwatering
This kills more container plants than anything else. Beginners think they’re being kind by watering every day, but most plants don’t need it, especially in spring and autumn. Stick your finger in the compost. If it’s moist two centimetres down, you don’t need to water yet. Only water when the top few centimetres are dry. Different plants have different needs, but as a general rule, it’s better to underwater slightly than overwater.
Mistake 2: Using Pots That Are Too Small
We’ve covered this, but it bears repeating. Small pots are a false economy. You’ll spend more time watering, your plants will be stressed, and you’ll get poor results. Go bigger from the start.
Mistake 3: Forgetting to Feed
Compost contains enough nutrients for about six weeks. After that, you need to start feeding. Use a liquid feed every week or two during the growing season. Tomato feed is brilliant for flowering plants, not just tomatoes. Plants in containers can’t search for nutrients like plants in the ground can. If you don’t feed them, they’ll stop growing and flowering. An alternative to liquid feeding is to mix slow-release fertiliser granules into the compost at planting time, which provides a steady supply of nutrients over several months with no weekly effort required.
Not all plants suit all locations. Sun-loving plants like petunias and tomatoes need at least six hours of direct sun. Shade lovers like fuchsias and hostas will scorch in full sun. Match your plants to your available light. Don’t try to force sun lovers into shade or vice versa. The beauty of containers is that you can move them if something isn’t thriving, so if a plant is struggling, try it in a different spot before you give up on it entirely.
Mistake 5: Using Last Year’s Compost
Old compost is exhausted, compacted, and often full of pests and diseases. Always start the season with fresh compost. You can add old compost to borders or your compost heap, but don’t reuse it in containers. Your plants deserve better than spent, nutrient-depleted growing medium.
Watering Container Plants: Getting It Right
Watering is the single most important task in container gardening. In summer, large pots might need watering daily. Small pots might need it twice a day. The key is to water thoroughly when you do water. A little sprinkle on top does nothing. Water until it runs out of the drainage holes, ensuring the entire root ball gets moist.
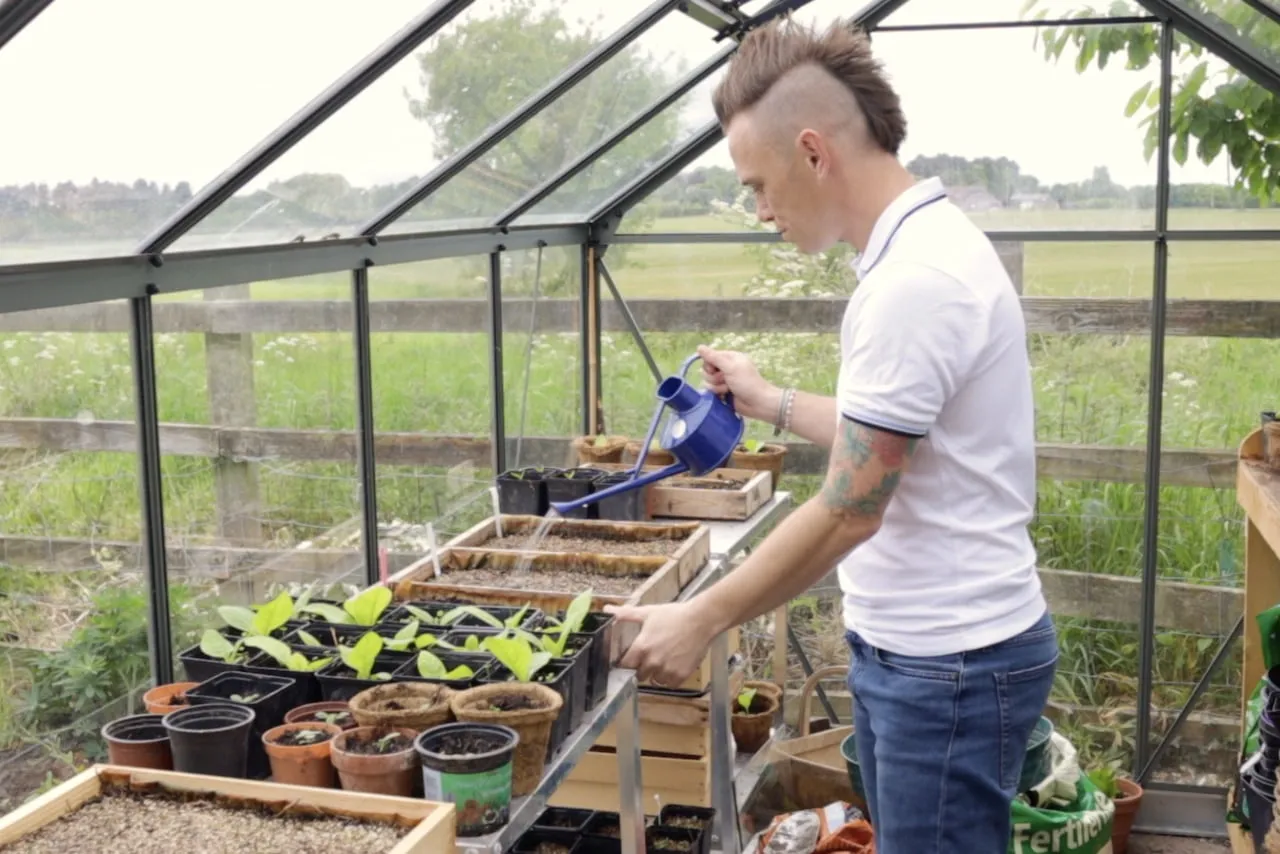
Early morning is the best time to water. The plants have all day to use the moisture, and less water is lost to evaporation. Evening watering is fine too, though it can encourage slugs. Avoid watering in the heat of the day as you’ll lose loads to evaporation, making it inefficient and a waste of resources. Only water pots in the midday sun if they look as though they have wilted and need immediate help.
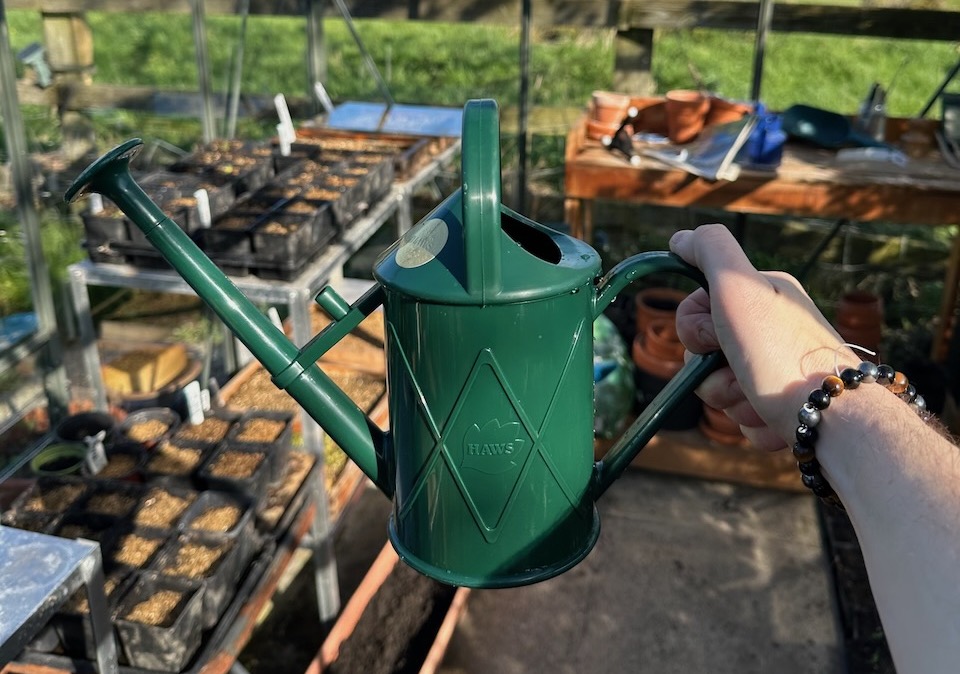
Consider getting a watering can with a rose, which is the sprinkler-style head. This distributes water gently and evenly without blasting the compost or disturbing roots. For lots of containers, a hose with a spray gun attachment saves time and your back considerably. A good hose spray gun with multiple settings is one of the most useful bits of kit a container gardener can own.
Feeding is the other crucial task that beginners often neglect. Start feeding about six weeks after planting, and continue every one to two weeks through the growing season. Use a balanced liquid feed for general growth, or a high potassium feed like tomato food for flowering and fruiting plants.
Follow the instructions on the bottle or the dry feed packet. More is not better when it comes to feeding plants. Overfeeding can burn roots and cause more problems than underfeeding. I use half-strength liquid feed weekly rather than full-strength fortnightly. This gives a steadier supply of nutrients and reduces the risk of accidentally overdoing it.
Stop feeding in autumn as plants slow down for winter. Feeding encourages soft growth that’s vulnerable to frost damage, so the kindest thing you can do for your plants as the days shorten is to ease off the feed and let them harden up naturally.
Pests and Diseases in Container Plants
Container plants are generally less prone to pest and disease problems than garden plants because you control the growing conditions so closely. But there are a few problems that container gardeners encounter regularly, and knowing what to look for means you can deal with them before they become serious.
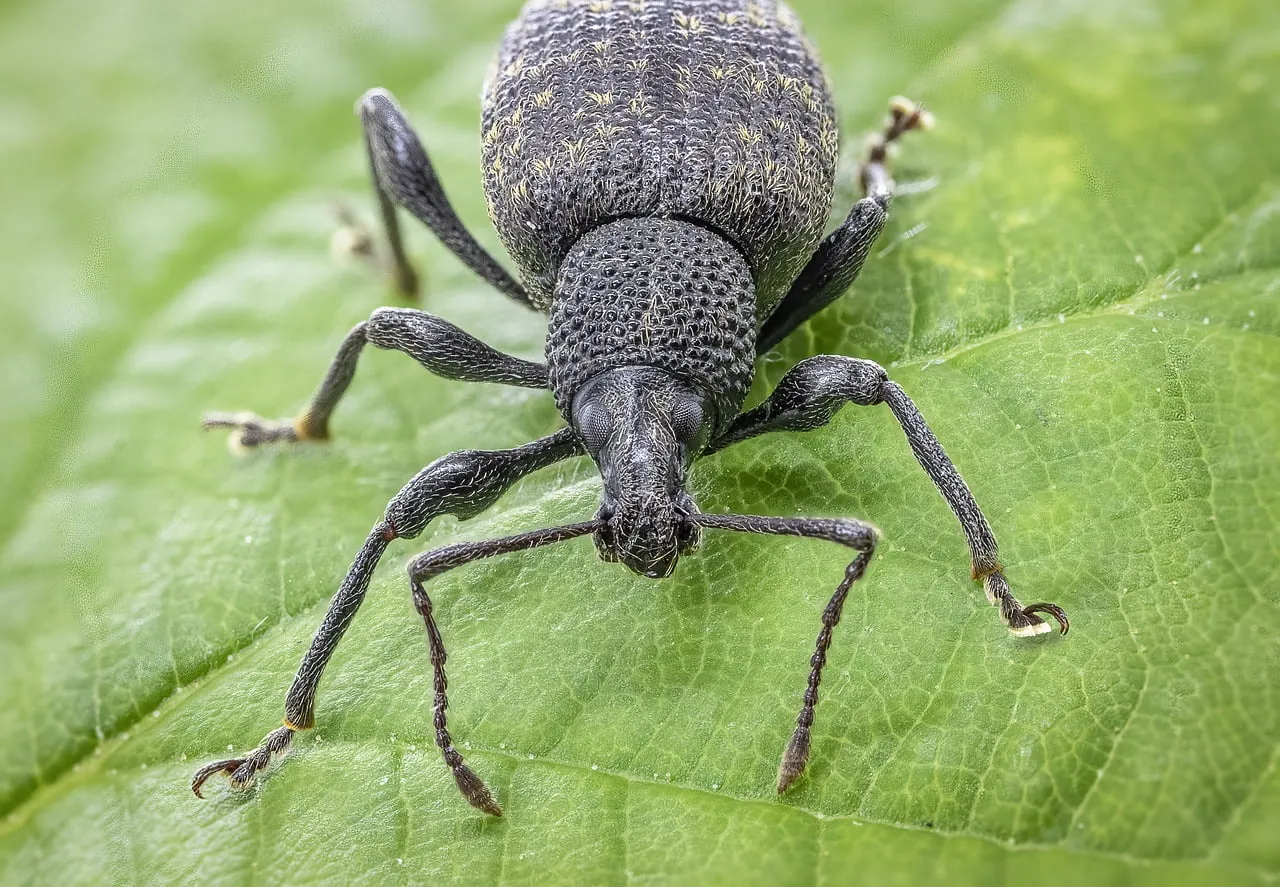
Vine weevil is the single most damaging pest for container plants in the UK. The adult beetles notch the leaf edges of plants like hostas, fuchsias, and begonias, which is unsightly but not fatal. The real damage comes from the grubs, which live in the compost and eat plant roots from below. You’ll often only know you’ve got a problem when a plant suddenly collapses and you tip it out to find a mass of white, C-shaped grubs in the compost with no roots left. Biological controls (nematodes applied to moist compost in late summer) are the most effective and environmentally sound treatment, and I’d use them as a precautionary measure on any pots containing hostas or fuchsias.
💡 Top Tip
When repotting any plant, always check the root ball for vine weevil grubs. They’re unmistakable: creamy white, plump, and curled in a C shape, about 1cm long. If you find them, remove all the compost from the roots, wash the roots gently, treat with nematodes, and repot into fresh compost. Many plants recover well if caught early enough.
Aphids are common on tender new growth, particularly on roses, nasturtiums, and broad beans. A strong jet of water knocks most of them off, and they rarely cause serious long-term damage to healthy plants. Powdery mildew appears as a white, powdery coating on leaves, most commonly on courgettes, cucumbers, and roses in dry conditions. It’s largely cosmetic but can weaken plants over time. Good air circulation around pots and watering at the base rather than over the foliage reduces the likelihood of it developing.
Slugs and snails are more manageable on container plants than in the border because you can apply copper tape around the rim of pots as a deterrent, and because raised containers on pot feet are harder for slugs to access. Hostas in particular benefit hugely from being grown in pots rather than the ground for exactly this reason.
Overwintering Container Plants: Keeping Them Safe Through Frost
This is the section of container gardening that catches most beginners out, because many plants that survive a UK winter perfectly well in the ground will struggle or die in a container. The reason is that the pot is exposed on all sides, meaning the root ball can freeze solid in a hard frost even when the plant itself would be fine if planted in the ground. The roots are the most frost-sensitive part of most plants, not the top growth.
The first rule is to know your plants. Hardy plants rated RHS H5, H6, or H7 can generally stay outside all winter in containers in most of the UK, particularly if you move them to a sheltered spot against a wall or fence. The wall provides both shelter from wind and some residual heat. Tender or half-hardy plants rated H1 to H3 need to come indoors or into a frost-free greenhouse before the first frosts arrive, typically in October or November depending on where you are in the country.
For hardy plants that you want to leave outside, wrapping the pot itself in hessian, bubble wrap, or horticultural fleece provides meaningful insulation. Wrap the pot, not the plant, as it’s the roots you’re protecting. Pot feet become particularly important in winter as they prevent the container from sitting directly on frozen ground. Moving pots to a shed or unheated garage during the hardest frosts is always an option if you can manage the weight.
Spring is planting time. Use fresh compost, feed after six weeks, and water as needed. Summer is all about watering and feeding consistently. Check plants daily in hot weather and deadhead flowers regularly to keep them blooming. Autumn is when you need to think about winter protection. Tender plants need moving to frost-free locations. Hardy plants can stay outside but might need moving to sheltered spots and wrapping if a hard frost is forecast. Winter watering is minimal but don’t let pots dry out completely, especially for evergreens which continue to transpire even in cold weather.
Container Gardening FAQ
Here are the questions I get asked most often about container gardening, both through my forum and from viewers who get in touch after watching Garden Rescue.
What is the best compost for pots and containers?
For most container plants, a good quality peat-free multi-purpose compost is perfectly adequate for annual bedding, herbs, and vegetables. For anything that will stay in the pot for more than one season, such as shrubs, perennials, and fruit trees, I recommend John Innes No. 3 or a 50/50 mix of John Innes No. 3 and multi-purpose compost. For acid-loving plants like rhododendrons, azaleas, and blueberries, use ericaceous compost rather than standard potting compost. Never use garden soil in containers as it compacts and drains poorly.
How often should I water container plants?
There is no single universal answer because it depends on the plant, the pot size, the material, the weather, and the season. The best approach is to push your finger into the compost to a depth of about two centimetres. If it feels moist, don’t water. If it feels dry, water thoroughly until it runs out of the drainage holes. In summer, most containers need watering daily and small ones twice daily. In spring and autumn, every two to three days is often sufficient. In winter, most containers barely need watering at all.
Is peat-free compost good for containers?
Yes, modern peat-free composts are very good and have improved enormously in recent years. The UK is phasing out peat in amateur gardening products, and most gardeners have now made the switch successfully. The main difference to be aware of is that peat-free composts can dry out faster and may be harder to re-wet once bone dry, so keeping on top of watering is even more important. They also tend to have slightly different nutrient profiles so regular feeding is important. Brands like Miracle-Gro, Westland New Horizon, and SylvaGrow are all well-regarded peat-free options.
Can I reuse compost from last year’s containers?
I wouldn’t recommend it for containers. Used compost is nutrient-depleted, often compacted, and can harbour pests and diseases from the previous season’s plants. You can add old container compost to garden borders or a compost heap where it will still provide some organic matter benefit, but for containers always start fresh each season. Fresh compost is one of the most cost-effective investments you can make for healthy container plants.
What are the easiest plants to grow in pots?
For absolute beginners, I recommend starting with herbs (basil, mint, parsley), salad leaves, radishes, and geraniums (pelargoniums). These are forgiving, fast-growing, and give you quick results that build confidence. Radishes are particularly satisfying because they’re ready to harvest in less than a month from sowing. Once you’ve had success with these, cherry tomatoes and petunias are excellent next steps.
How do I protect container plants in winter?
Move tender plants (anything rated RHS H1 to H3) into a frost-free location before the first frosts. For hardy plants staying outside, move them to a sheltered spot against a south-facing wall, raise them on pot feet, and wrap the pot (not the plant) in hessian or bubble wrap to insulate the roots. Clay and terracotta pots are most vulnerable to frost cracking so keep them drier in winter and wrap them or move them under cover if a severe frost is forecast. Reduce watering significantly in winter but don’t let evergreens dry out completely.
Do containers need drainage holes?
Without exception, yes. Every container used for planting must have at least one drainage hole, and preferably several. Without drainage, water has nowhere to go, the compost becomes waterlogged, the roots rot, and the plant dies. If you have a beautiful decorative pot without drainage holes, use it as an outer sleeve around a plain plastic pot that does have drainage. Never plant directly into a container that cannot drain.
What size pot do I need for tomatoes?
Cherry tomato varieties need a minimum of 30cm diameter and 30 litres capacity to produce well. Standard indeterminate varieties like Moneymaker need at least 40cm diameter and 30 to 40 litres. The larger the pot, the better the results, as bigger pots hold more water and nutrients and keep the root system cooler on hot days. Always use one plant per pot for tomatoes and stake them securely from the beginning rather than trying to add a support once the plant is already sprawling.
Moving on From Pots & Containers
Growing in pots and containers is one of those beginner gardening skills that builds your confidence and gets you hooked on growing your own. Once you’ve mastered the basics covered in this guide, you’ll find yourself expanding your garden and probably boring your friends with tales of your pots.
If you want to really get to grips with garden design and create an amazing garden, my Garden Design for Beginners online course covers everything from planning beds to plant selection. Prices start from £29, and I’ll show you exactly how to design gardens that are both gorgeous and productive, just like the award-winning designs I create on BBC Garden Rescue. You can find out more about my online garden design courses here.
29
Garden Design Examples for Small Gardens: 30 Design Templates & Planting Plans
Garden Design Examples for Small Gardens: 30 Design Templates & Planting Plans: In this online gardening course, I’ll walk you through 30 fantastic garden designs, explaining the logic behind the layout, the plant choices, and take-home tips for applying them in your own garden.
Weekend Garden Makeover: A Crash Course in Design for Beginners
Learn how to transform and design your own garden with Lee Burkhills crash course in garden design. Over 5 hours Lee will teach you how to design your own dream garden. Featuring practical design examples, planting ideas and video guides. Learn how to design your garden in one weekend!
Garden Design for Beginners: Create Your Dream Garden in Just 4 Weeks
Garden Design for Beginners Online Course: If you want to make the career jump to becoming a garden designer or to learn how to design your own garden, this is the beginner course for you. Join me, Lee Burkhill, an award-winning garden designer, as I train you in the art of beautiful garden design.
Container gardening is one of the most accessible ways to start gardening. You don’t need loads of space, expensive equipment, or years of experience. You just need the right pots, decent compost, appropriate plants, and a commitment to regular watering and feeding.
Start small. Get a few good-sized pots, fill them with quality compost, choose plants that suit your light conditions, and water them properly. Once you’ve got a few successes under your belt, you’ll gain confidence to try more ambitious projects.
The mistakes I’ve made over 35 years have taught me more than the successes ever did. Don’t be discouraged if you lose a few plants. Every gardener has. Learn from it, adjust your approach, and try again. Before long you’ll be creating stunning container displays in no time.
Lee Burkhill, known as the Garden Ninja, is an award-winning garden designer and horticulturist with over 30 years of gardening experience and 15 years as a professional garden designer. A qualified RHS (Royal Horticultural Society) professional, Lee specialises in sustainable garden design and practical horticultural advice. He designs and presents on BBC1’s Garden Rescue and in leading gardening publications. Lee combines three decades of hands-on gardening knowledge with professional design qualifications to help gardeners create beautiful, functional outdoor spaces.