Best Lawn Spreaders for Fertiliser and Grass Seed: UK Buying Guide
Lee Burkhill: Award Winning Designer & BBC 1's Garden Rescue Presenters Official Blog
Beginner level
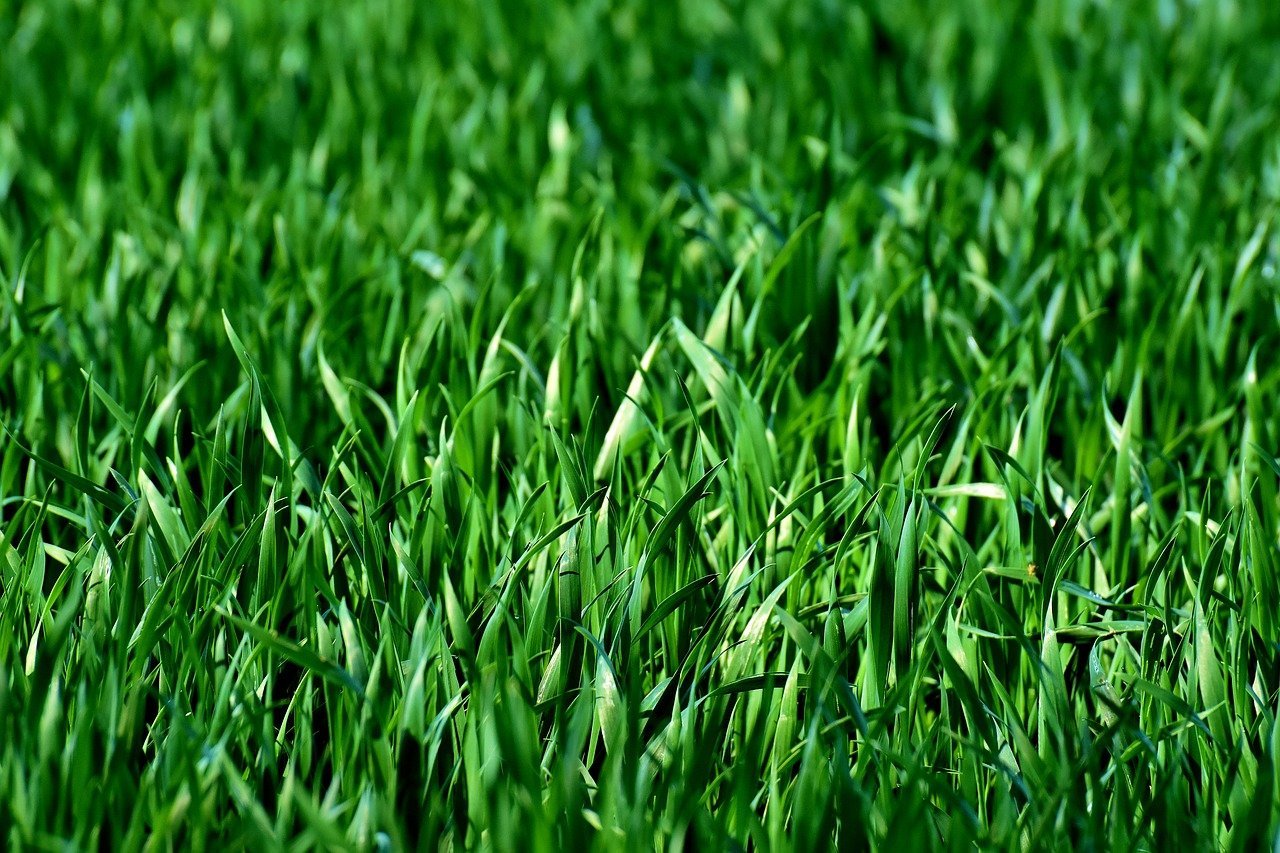
If there is one piece of lawn care equipment that genuinely divides the results between a patchy, uneven outcome and a thick, uniform finish, it is a spreader. I have watched gardeners spend good money on quality grass seed and premium lawn feed, then scatter it by hand across their lawn and wonder why the results are inconsistent. Uneven application is almost always the reason. Too much in one pass, too little in the next, clumps where you hesitated, gaps where you moved too fast. A spreader eliminates every single one of those problems at a cost that is lower than most people expect.
I started recommending spreaders to every client asking about lawn care about ten years ago, after watching too many autumn lawn renovation projects produce disappointing results when clients were scarifying or de-mossing their lawns but not overseeding. Once I made a spreader part of the standard recommendation alongside the seed and feed, the difference was immediate: lusher, greener lawns! The lawns treated with a spreader came back thicker, more uniform, and without the burned or patchy areas that hand application produces.
Quick Answer
For lawns up to 100 square metres, a handheld rotary spreader such as the Gardena M is the most practical and affordable choice at around £20. For medium lawns from 100 to 250 square metres, a push rotary spreader such as the Einhell GC-SR 12 or Crystals 12L gives faster, more consistent coverage. For larger lawns, step up to the Scotts EasyGreen or Gardena Spreader L for the best results with the least effort.
This guide covers everything you need to make the right choice: the difference between rotary and drop spreaders; handheld versus push spreaders; which type suits which lawn size and soil type; how to calibrate and use a spreader correctly; and which specific products I recommend for every budget level. Whether you are overseeding a tired lawn, applying spring feed, treating moss, or spreading autumn fertiliser, there is a spreader on this list that will do the job properly.
This page contains affiliate links for products I use and love. If you take action (i.e. subscribe, make a purchase) after clicking a link, I may earn some gardening commission which helps me keep the Garden Ninja Blog free for all.
1. Why Use a Spreader? The Case Against Hand Broadcasting
Broadcasting lawn feed or grass seed by hand looks simple enough. You grab a handful, walk across the lawn, and scatter as evenly as you can. The problem is that humans are not calibrated instruments. Your walking speed varies. The amount in your hand varies. The wind pushes granules where you did not intend them to go. You slow down at the edges, speed up in the middle, and concentrate without realising it on the areas you can see clearly and rush through the bits you cannot.
The result is almost always striped, patchy, or burned in places. Areas with too much fertiliser turn brown or yellow from nitrogen scorch. Areas with too little remain thin and pale. Grass seed sown unevenly germinates in clumps separated by bare patches, and the bare patches fill with weeds and moss before the seed has a chance to spread. What should be a simple improvement job becomes a problem you spend the following season trying to correct.
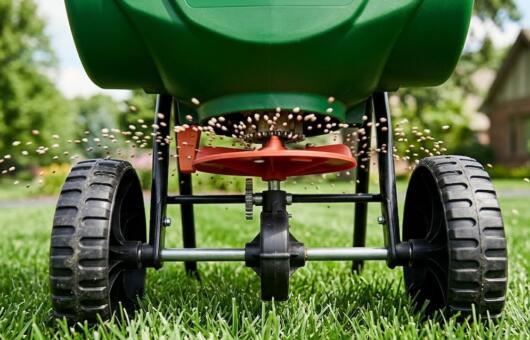
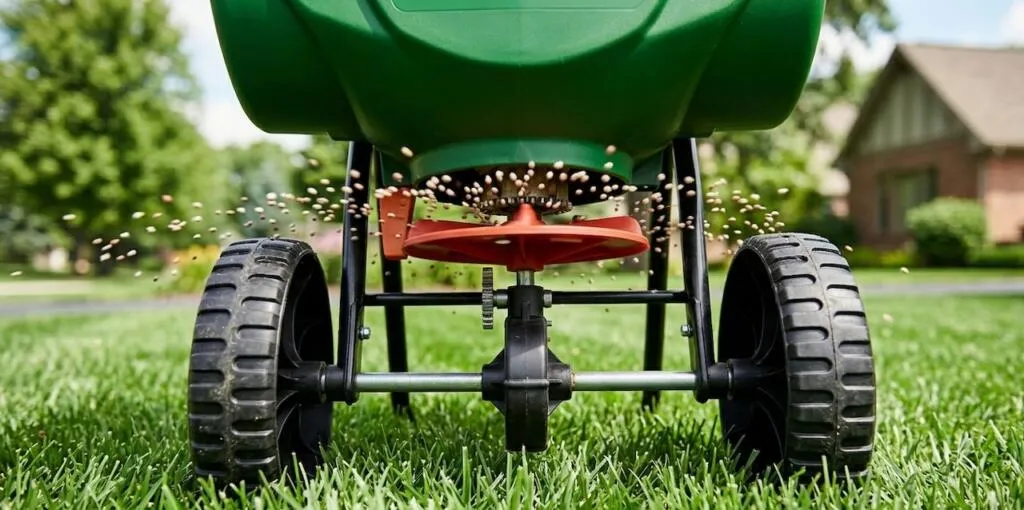
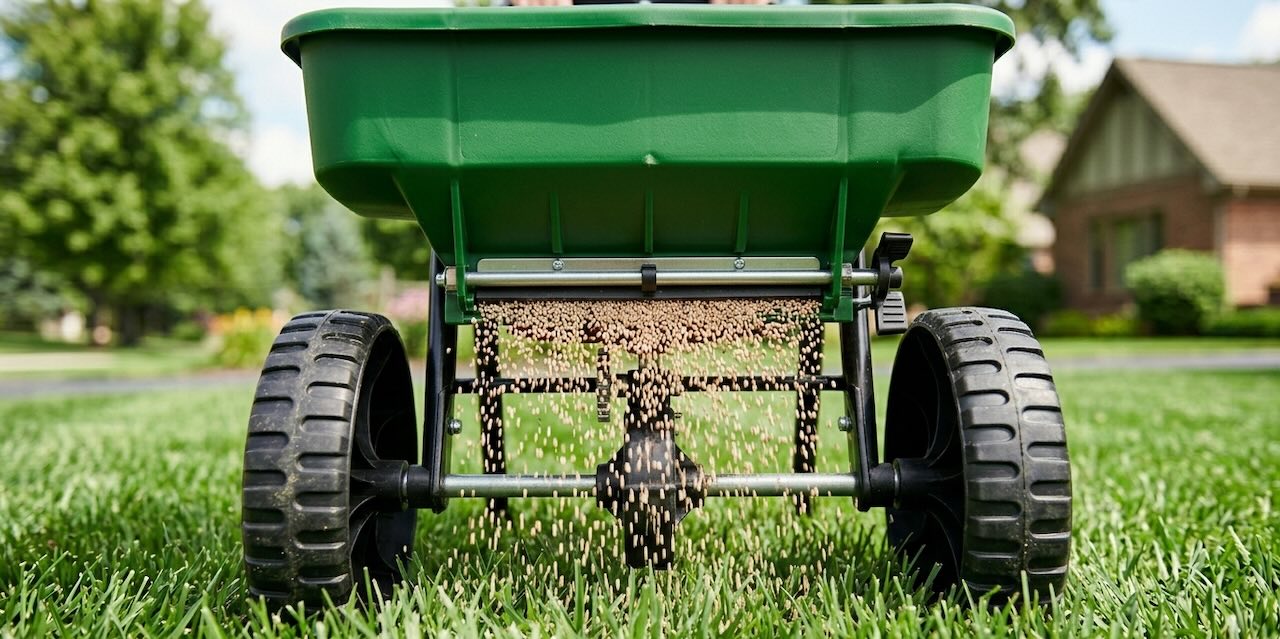
A spreader applies material at a consistent, calibrated rate across the entire lawn surface, regardless of variations in your walking speed or lapses in concentration. The cross-hatch technique, applying half the product walking one way and half at 90 degrees, distributes everything so evenly that striping becomes essentially impossible. The difference in outcome between hand application and a basic spreader is not vast. The hand method usually results in thicker waves of new grass with bare patches, whereas the applicator method gives a uniform, thicker grass finish, and it’s less work!
There is also a safety argument. Fertiliser applied in uneven, heavy doses can sit as concentrated granules on grass blades in warm, dry conditions and cause contact scorch within hours. A spreader distributes granules so consistently that this risk is almost entirely eliminated. The investment in a spreader is genuinely one of the best returns in the entire lawn care toolkit, and the entry price starts at around £15. So it’s just not worth the faff or throwing it by hand and hoping for the best!
2. Rotary vs Drop Spreaders: Understanding the Difference
There are two fundamentally different ways a spreader delivers product to your lawn, and understanding which principle suits your situation will save you from buying the wrong tool.
A rotary spreader, also called a broadcast spreader, uses a spinning disc at the base of the hopper to fling granules outward in a wide arc as you walk. The distribution width is typically 1.5 to 6 metres, depending on the product and your walking speed, meaning each pass of the spreader covers a much wider swath than the spreader itself. Rotary spreaders are fast, practical, and well-suited to most domestic lawn applications.
Rotary lawn spreaders handle:
Fertiliser granules
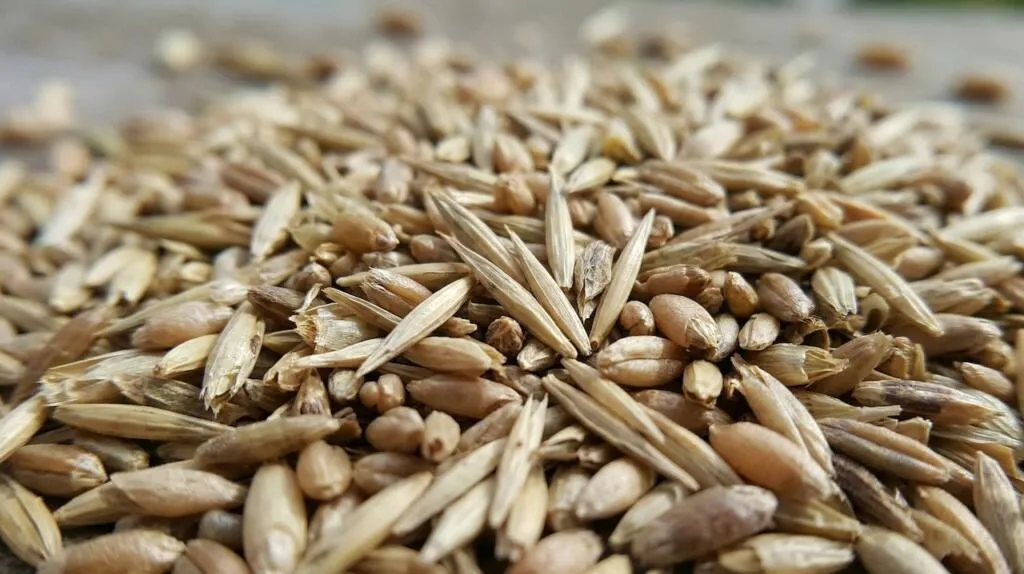
Grass seed
Iron sulphate
Grit
A drop spreader releases product directly downward through apertures in the base, dropping it in a controlled strip exactly as wide as the spreader itself. This gives you a very precise application with no risk of product landing on borders, paths, or areas you do not want to treat. Drop spreaders are slower than rotary types because you need more passes to cover the same area, but for lawns with intricate borders, narrow sections, or where accuracy matters more than speed, they are genuinely the better tool.
🌿 Rotary vs Drop Spreader: At A Glance
Rotary (Broadcast)
Drop
How it works
Spinning disc flings product in a wide arc
Drops product directly beneath in a controlled strip
Spread width
1.5 to 6 metres depending on product and speed
45 to 55cm (same as spreader width)
Speed
Fast. Fewer passes needed.
Slower. More passes needed for same area.
Precision
Good. Can spread near borders with care.
Excellent. No product beyond the strip width.
Best for
Most domestic lawns, all lawn products
Narrow strips, complex borders, maximum precision
Wind sensitivity
Can drift slightly in strong wind
Minimal. Product falls straight down.
For most UK domestic garden lawns, a rotary spreader is the right choice. It is faster, covers irregularly shaped lawns more easily, and the range of products available means there is always an option at the right price. Drop spreaders earn their place on lawns that are heavily bordered, narrow, or where the gardener is particularly concerned about product landing on adjacent planted areas.
3. Handheld vs Push Spreaders: Matching the Tool to the Lawn
Within the rotary category, you have a further choice between handheld and push (wheeled) designs. Both use the same broadcast principle, but they are suited to different lawn sizes and different levels of physical effort.
A handheld rotary spreader is a compact device you hold in one hand and crank with the other while walking. The hopper capacity is typically 1.5 to 2 litres, which translates to enough fertiliser for around 50 to 100 square metres per fill, depending on the application rate. They are lightweight, inexpensive (£15 to £25 for quality models), easy to store, and genuinely effective on smaller lawns. The limitation is that you need to refill more frequently on larger lawns, which disrupts the application rhythm and can create uneven patches at the refill point if you are not careful.
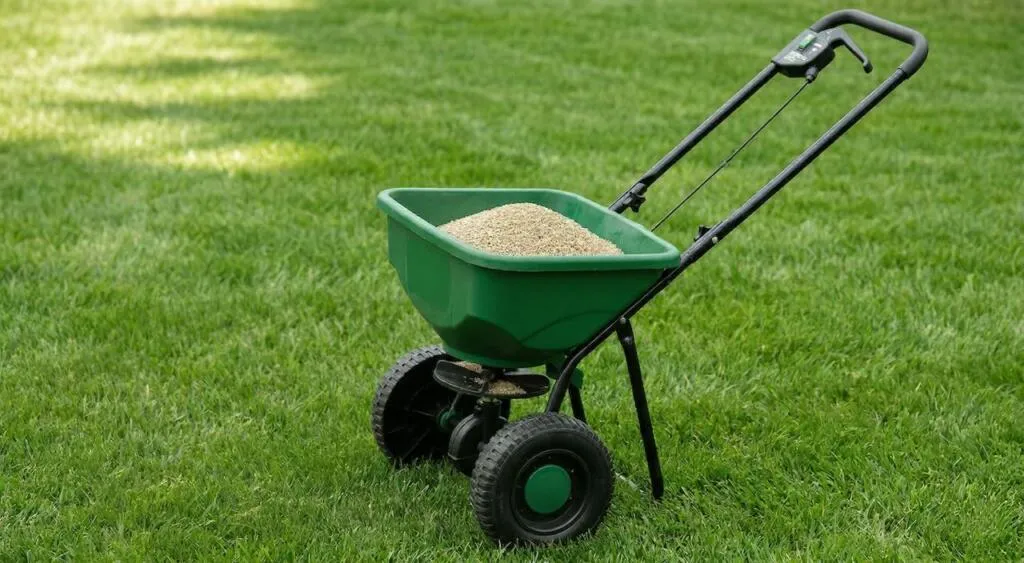
A push spreader (also called a wheeled or trolley spreader) has a much larger hopper, typically 10 to 15 litres, and distributes product as the wheels turn rather than requiring you to crank a handle. You simply push it across the lawn at a steady walking pace, and the mechanism does all the work. Push spreaders cover lawns of 150 to 500 square metres in a single fill, making them dramatically more practical for medium and larger gardens. They are heavier and bulkier to store, but the improvement in consistency and coverage speed on anything larger than a small domestic lawn is significant.
4. Which Type of Spreader Do You Actually Need?
The answer depends on three things: the size of your lawn, the products you plan to apply, and how much you want to spend. Here is the straightforward decision framework I use when recommending spreaders to clients.
🌿 Which Spreader for Which Lawn?
Lawn Size
Recommended Type
Why
Up to 50m²
Handheld rotary
Lightweight, inexpensive, easy to store. One fill per application.
50 to 150m²
Handheld rotary or small push rotary
Handheld works with 2 to 3 fills. Push gives better consistency on the larger end.
150 to 300m²
Push rotary spreader
Covers the full lawn in one or two fills. Much more practical than handheld at this size.
300m² and above
Large push rotary or Scotts EasyGreen
High-capacity hopper essential. Fewer refills, better consistency, less fatigue.
Complex borders, narrow lawn
Drop spreader
Precision placement. No product flung onto borders or paths.
💡 Top Tip
You can use the same spreader for grass seed and lawn fertiliser, with the caveat that grass seed’s much lower density means you get through the hopper faster than with granular feed. The setting dial on most spreaders handles both materials, but always test the flow rate on a hard surface before applying to the lawn. A minute of calibration testing avoids the frustration of realising halfway through that your setting is wrong.
5. How to Use a Lawn Spreader Correctly
Owning the right spreader matters. Using it correctly matters just as much. These are the steps that make the difference between a good result and an excellent one.
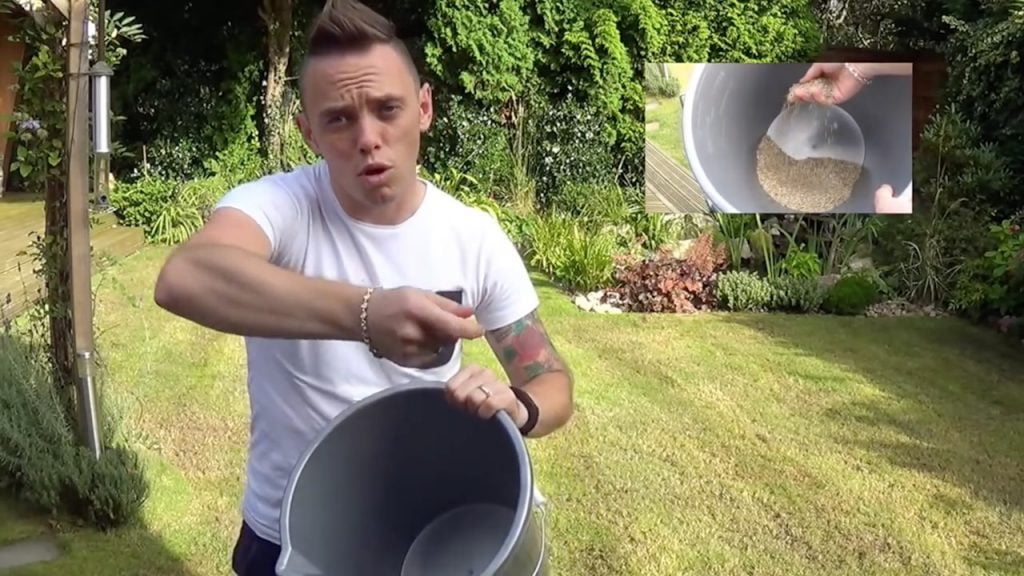
Always calibrate before you start. Pour a small amount of your product onto a hard surface, such as a path or patio, and make two or three passes at the setting recommended on the bag. Count the granules per square foot or simply look at the distribution density and compare it to the product application rate. Adjust the aperture up or down as needed. This takes five minutes and eliminates over- or under-application entirely.
Measure your lawn before you fill the hopper. Calculate the area in square metres (length multiplied by width) and weigh out the correct quantity of product for that area at the manufacturer’s recommended rate. Divide that quantity in half. Apply the first half walking in one direction across the lawn. Apply the second half walking at right angles to the first pass. This cross-hatch technique is the professional standard, and it produces more uniform coverage than single-direction application. No more awkward stripes or patches!
Always close the hopper when you stop, turn, or pause. The most common cause of nitrogen burn and seed clumping is the hopper remaining open at the end of rows while the operator turns and repositions. The granules pile up at the turning points, scorching the grass or creating dense clumps of seedlings. Most spreaders have a lever or handle mechanism to instantly close the flow. Make using it at the end of each row an instinctive habit.
Apply to damp grass, never to dry grass in sunshine. Granules sitting on dry grass blades in direct sun act as tiny magnifying lenses and can cause contact scorch within hours, leaving brown stripes and patches. Either apply in early morning when dew is present, on an overcast day, or water the lawn lightly the day before. After application, water in thoroughly if no rain is forecast within 24 to 48 hours.
Overlap each pass by about 10 to 15 centimetres to avoid visible gaps. With a push spreader, track your previous wheel marks and overlap slightly on each successive pass. With a handheld, walk close enough to the previous pass that the outer edge of the broadcast arc covers the inner edge of the next row. For full guidance on the complete lawn renovation programme that a spreader enables, see my complete UK lawn feeding guide and my complete overseeding guide.
6. Best Handheld Spreaders for UK Lawns
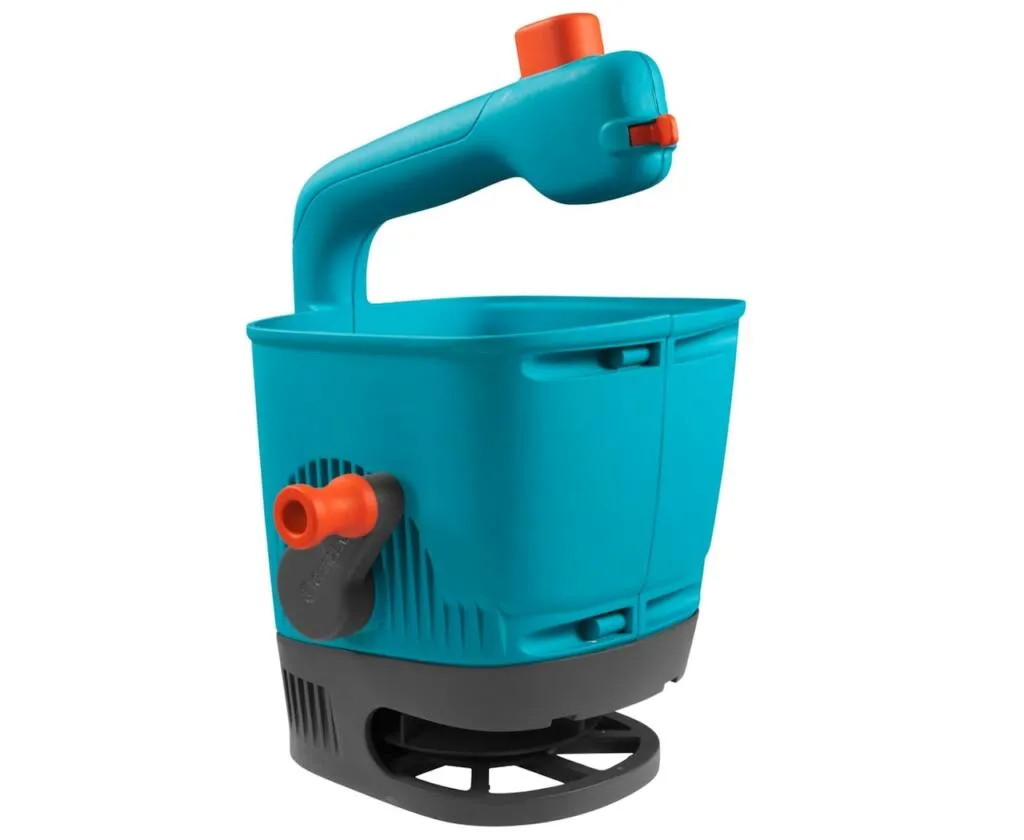
Gardena Handheld Spreader M
Around £18 to £22. Capacity: 1.8 litres. Covers up to 100m² per fill (fertiliser).
The Gardena M is the handheld spreader I recommend first to any gardener with a small to medium lawn. Gardena’s build quality is a clear step above the budget alternatives: the housing is break-proof, the aperture dial is precise and stays where you set it, and the mechanism distributes consistently across the full 1 to 4 metre broadcast range. I have been using Gardena garden tools for well over a decade, and they consistently outperform similarly priced competitors in terms of durability. This spreader will still be working reliably in five years, whereas cheaper alternatives will have cracked or jammed.
The four-level quantity setting on the handle is genuinely intuitive, the open-and-close thumb button is responsive, and the ergonomic grip means you can cover a small lawn without your hand tiring. At 1.8 litres, it holds around 1.65kg of fertiliser or 1kg of grass seed. For a 60 to 80 square metre lawn, you are looking at two fills for seeding and one to two fills for feed, which is entirely manageable. The only limitation is capacity: on a lawn over 100 square metres, it starts to feel repetitive.
Best for
Lawns up to 100m². Fertiliser, grass seed, iron sulphate, moss killer granules. Best overall quality in the handheld category.
Around £25 to £30. Capacity: 3 litres. Covers up to 200m² per fill (fertiliser).
If you have a lawn in the 100 to 200 square metre range and want to stay with a handheld rather than step up to a push spreader, the Gardena L is the logical upgrade. Same excellent build quality and precision as the M model, but with a significantly larger hopper that reduces the number of refills on medium lawns. The spreading width of 1.5 to 5 metres gives you more coverage per pass than the M, noticeably speeding up the job on larger areas. The forearm support reduces hand fatigue compared to the standard M, which matters when you are carrying a heavier, fuller hopper for longer.
Best for
Medium lawns 100 to 200m². Gardeners who prefer handheld but need more capacity than the M provides.
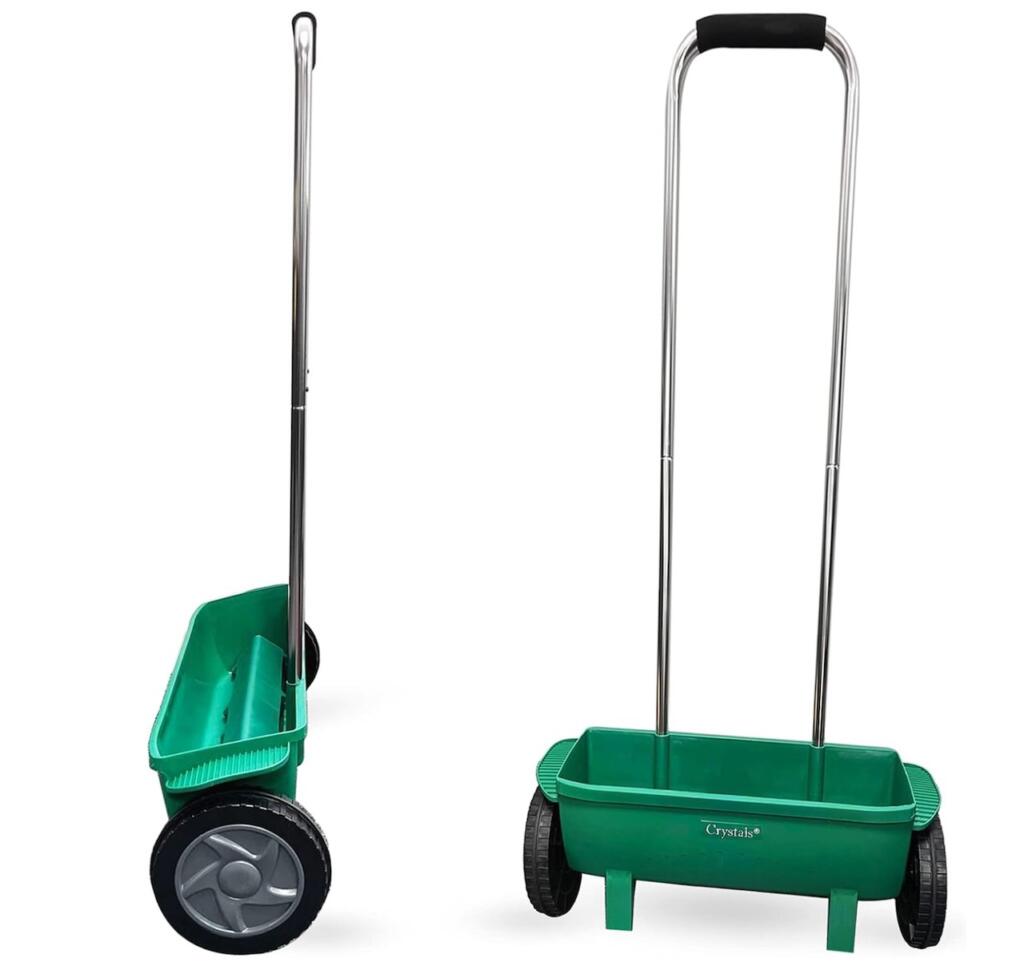
Around £15 to £22. Capacity: 12 litres. Adjustable settings with large wheels.
The Crystals spreader is the budget-friendly push option that consistently receives excellent reviews from UK buyers and offers surprisingly good build quality at its price point. The large wheels are a genuine advantage on slightly uneven or soft lawn surfaces, and the adjustable setting handles all standard lawn products well. I love this spreader as it’s super light, so great for people who don’t want to be lifting heavy equipment. It also doesn’t take up much space in the garage or shed and can be hung up.
It is lighter than the Einhell model, which makes it easier to manoeuvre in tighter gardens. For gardeners who want the benefits of a push spreader at the lowest possible entry cost, the Crystals is a reliable choice that will not disappoint. It’s not fancy, but it does exactly what you need it to do without spending more than is necessary.
Best for
Budget buyers wanting a push spreader. Medium lawns up to 200m². Good for occasional use rather than weekly treatments.
Around £40 to £55. Capacity: large hopper. Broadcast width up to 340cm.
The Scotts EasyGreen is the spreader I recommend for gardeners with a larger lawn who want a tool they will still be using happily in a decade. The broadcast width of up to 340cm means dramatically fewer passes compared to budget models, the calibration settings are noticeably more precise, and the overall build quality places it in a different class from the entry-level options. Scotts’ proprietary EdgeGuard technology also allows one-sided distribution when spreading near borders, preventing product from landing on planted areas or paths. It’s a fabulous bit of kit, feels very well made and is built to last. It also won’t chip or crack as easily as some of the other plastic drop spreaders, as it’s narrower, so less chance of dropping a rake on it in the shed!
For lawns over 250 square metres, the Scotts EasyGreen will pay for itself in time and product savings within a single season. The wider broadcast width means you cover the lawn in fewer passes, using less product per square metre through better distribution consistency. It handles grass seed, all granular fertilisers, moss killers, and lawn sand equally well. If you are serious about your lawn and intend to follow the full autumn renovation programme of scarify, aerate, overseed, and feed, this is the spreader that makes that programme genuinely enjoyable rather than laborious.
Best for
Larger lawns 250m² and above. Serious lawn care enthusiasts who want professional-level results. Long-term investment that outlasts budget alternatives.
Around £45 to £60. Capacity: 12.5 litres. Spread width: 1.5 to 6 metres.
The Gardena push spreader L is the premium alternative to the Scotts EasyGreen, and for many gardeners it comes down to brand preference and handle ergonomics between these two. The 12.5 litre hopper with a spread width up to 6 metres covers large lawns efficiently, the stainless steel spreading disc outlasts the plastic alternatives, and the cover plate for edge spreading is a practical detail that makes a difference near borders. Gardena’s build quality shines here: the materials feel genuinely robust and the mechanism is smooth from the first use. Where the Scotts has slightly more precise calibration settings, the Gardena wins on overall feel and long-term durability.
It has a bigger ‘stop foot’ too making it less likely to fall over, get blown over or knocked over as you’re rennovating your lawn! Somethinbg which has caught me out a number of times and left me trying to remove excess seed or feed as my blumsy self has walked backwards into it knocking it over!
Best for
Larger lawns 200m² and above. Gardeners who already use Gardena tools and value brand consistency. Premium build quality for long-term use.
Ok, time for some other advice on how to avoid cheap spreaders that literally crack and fall to bits after year one, which are a complete waste of time. You may see spreaders advertised for £9.99 or on sites like Temu or other dropshipping sellers. Then you think, ‘Great, what a bargain!’ However, most of the too-good-to-be-true lawn equipment bargains, like spreaders, use non-UV-resistant plastic that will turn brittle, dry out, and crack within a year or so.
The issue with this is that they then usually break either in the shed or on the lawn, sending tiny shards of ofrever plastics into the environment. They then need to be replaced, costing you twice as much in the long run. With all gardening tools and equipment, I’ve always believed in paying a bit more for quality tools that last and can be repaired. Lawn spreaders are the same. So use your judgement, Ninjas, and opt for tools that will last and are robust enough to take the odd accidental knock!
Best for
Avoid cheap bargain sites, drop shippers, importers, or ‘too good to be true’ gardening tool sites. They break down much more quickly and just end up in a landfill. As ethical gardeners, it makes more sense to buy fewer quality tools than lots of disposable items.
9. Common Spreading Mistakes and How to Avoid Them
The spreader does the hard work, but there are still consistent mistakes that undermine the results. Here are the ones I see most regularly and how to sidestep each one.
Leaving the hopper open at turning points is the single most common cause of burned or clumped patches after spreading. At the end of every row, close the hopper before you stop, turn, and reposition. Open it again only when you are walking at a steady pace in the new direction. This habit takes about three passes to become automatic, and it makes a visible difference to the uniformity of results.
Spreading in windy conditions significantly undermines rotary spreaders. On a breezy day, the broadcast arc drifts unpredictably, product lands on paths and borders, and coverage becomes patchy regardless of your technique. If conditions are windy, either postpone the job or switch to a drop spreader, where the product falls straight down with minimal wind effect.
Using the wrong setting without calibrating first produces inconsistent results, even with the best equipment. The settings printed on product packaging are reference points, not guarantees. Different granule sizes, different hopper wear, and different walking speeds all affect the actual delivery rate. Five minutes of calibration testing on a hard surface before you start is time genuinely well spent.
Filling the hopper on the lawn rather than on hard ground means that any spillage from the fill point lands in a concentrated pile directly on the grass, which will burn. Always fill your spreader on a path or patio, sweep up any spillage, then wheel it onto the lawn to begin spreading. This is a simple habit that prevents patchy burn marks from inexplicably appearing in the same spot every season.
Not cleaning the spreader after use is the maintenance error that shortens tool life. Fertiliser granules are corrosive and will attack plastic and metal components if left in a damp hopper between sessions. After each use, empty any remaining product back into the bag, rinse the hopper with clean water, and leave it to dry with the aperture open before storing. A spreader cleaned and stored properly after every use will last years longer than one left dirty. So don’t rush the final step of cleaning them Ninjas!
💡 Top Tip
After the autumn lawn renovation season, store your spreader with a light spray of WD-40 or similar water-displacing lubricant on any metal parts, including the spinner disc, axle, and aperture mechanism. This takes two minutes and prevents the corrosion that makes spreaders difficult to use the following spring. Gardena spreaders in particular reward this kind of care with many years of reliable service.
10. Frequently Asked Questions About Lawn Spreaders
Can I use the same spreader for grass seed and fertiliser?
Yes. All the spreaders on this list handle both grass seed and granular fertiliser. The key difference is the required aperture setting, as grass seed is much lower in density than fertiliser and requires a different flow rate. Always calibrate on a hard surface before starting, adjusting the setting to deliver the correct quantity per square metre for whichever product you are applying. Clean thoroughly between uses if switching from one product to another.
What spreader setting should I use for lawn feed?
Check the packaging of your specific lawn feed product first, as manufacturers include spreader settings for the major brands. As a general starting point, most granular lawn feeds apply at settings between 3 and 6 on a standard domestic spreader dial. Always do a calibration pass on a hard surface and adjust until you are achieving the manufacturer’s stated grams per square metre. Never assume the printed setting is correct without testing it first on your specific spreader.
How do I avoid burning my lawn with a spreader?
Four things prevent fertiliser burn: apply to damp grass rather than dry, close the hopper at the end of every row before turning, fill the spreader on hard ground rather than on the lawn, and calibrate the setting before starting to ensure you are not applying at too high a rate. If you follow all four, nitrogen burn from spreader application is extremely rare. The burns people experience are almost always caused by one of these four errors rather than the product itself.
Is a push spreader worth it for a small lawn?
For lawns under 50 square metres, a handheld spreader is perfectly adequate and more practical to store. A push spreader on a very small lawn can be harder to manoeuvre in tight spaces, and the larger broadcast width risks the product ending up on borders with every pass. Save the push spreader investment for lawns of 100 square metres and above, where the larger hopper capacity and wider spread genuinely earn their keep.
Can I use a spreader for moss killer and iron sulphate?
Yes, granular iron sulphate and moss-killer products work well with a rotary spreader. Iron sulphate is highly corrosive, so rinse the hopper, disc, and all metal parts thoroughly with clean water immediately after use, then dry fully before storing. Do not leave iron sulphate residue in any spreader overnight. For liquid iron sulphate formulations, use a pressure sprayer or watering can rather than a spreader. For my complete guide to tackling moss using the right products and tools, see my complete moss removal guide.
How do I store a lawn spreader over winter?
Empty all products from the hopper, rinse with clean water, leave the aperture open to dry fully, then apply a light lubricant to any metal components, including the spinner disc, wheel axles, and aperture mechanism. Store indoors or in a dry shed rather than leaving it outside. A spreader stored correctly over winter will be ready to use in spring without any stiffness, corrosion, or aperture blockage. One that is put away with damp granules still in the hopper will be a frustrating, corroded mess by March.
Ready to stop guessing and start designing with confidence? My Garden Design for Beginners online course takes you from blank canvas to brilliant layout, step by step.
I’m Lee Burkhill, award-winning garden designer and BBC1’s Garden Rescue presenter, and I’ve built this course around the same principles I use for every client garden — practical, honest, and designed to actually work in the real world.
In 20 hours of flexible online study, you’ll cover:
Design principles that make any garden work
How to select and arrange plants like a professional
Styles and layouts to suit every size and shape of space
Video lessons, real-world case studies, quizzes, and a certificate on completion — all for just £199.
Enrol today and start designing your dream garden.
29
Garden Design Examples for Small Gardens: 30 Design Templates & Planting Plans
Garden Design Examples for Small Gardens: 30 Design Templates & Planting Plans: In this online gardening course, I’ll walk you through 30 fantastic garden designs, explaining the logic behind the layout, the plant choices, and take-home tips for applying them in your own garden.
Weekend Garden Makeover: A Crash Course in Design for Beginners
Learn how to transform and design your own garden with Lee Burkhills crash course in garden design. Over 5 hours Lee will teach you how to design your own dream garden. Featuring practical design examples, planting ideas and video guides. Learn how to design your garden in one weekend!
Garden Design for Beginners: Create Your Dream Garden in Just 4 Weeks
Garden Design for Beginners Online Course: If you want to make the career jump to becoming a garden designer or to learn how to design your own garden, this is the beginner course for you. Join me, Lee Burkhill, an award-winning garden designer, as I train you in the art of beautiful garden design.
A spreader is not glamorous lawn care equipment. It does not have the satisfying visual drama of a scarifier pulling up clumps of thatch, or the immediate visible impact of a moss killer turning a mossy patch black within days. What it does is remove the single most common cause of disappointing lawn renovation results: uneven application. And it does that reliably, every time, at a cost that starts at around £15 for a quality handheld model.
The decision framework is genuinely simple. If your lawn is under 100 square metres, buy the Gardena M and be done with it. If your lawn is 100 to 250 square metres, the Einhell GC-SR 12 or Crystals push spreader gives you the capacity and consistency you need at a very reasonable price. If your lawn is larger or you are committed to a thorough annual renovation programme, the Scotts EasyGreen or Gardena L is a long-term investment that will still be delivering excellent results years from now. If precision near borders is the priority, the Scotts EvenGreen drop spreader is in a category of its own.
Whichever spreader you choose, the most important thing is to use it consistently. A spreader bought and used once in spring for the seed is only doing a fraction of the job it is capable of. Feed in spring, overseed in autumn, apply iron sulphate in November: every one of those applications benefits from even distribution. Make the spreader a standard part of your lawn care routine rather than an occasional tool and the cumulative improvement in your lawn over two or three seasons will be striking.
For the complete lawn renovation programme these spreaders are designed to support, take a look at these related guides:
Your subscription could not be saved. Please try again.
Your subscription has been successful.
Lee Burkhill
Lee Burkhill, known as the Garden Ninja, is an award-winning garden designer and horticulturist with over 30 years of gardening experience and 15 years as a professional garden designer. A qualified RHS (Royal Horticultural Society) professional, Lee specialises in sustainable garden design and practical horticultural advice. He designs and presents on BBC1’s Garden Rescue and in leading gardening publications. Lee combines three decades of hands-on gardening knowledge with professional design qualifications to help gardeners create beautiful, functional outdoor spaces.