How to Build Raised Beds: Complete DIY Guide for Beginners (2026)
Lee Burkhill: Award Winning Designer & BBC 1's Garden Rescue Presenters Official Blog
Beginner level
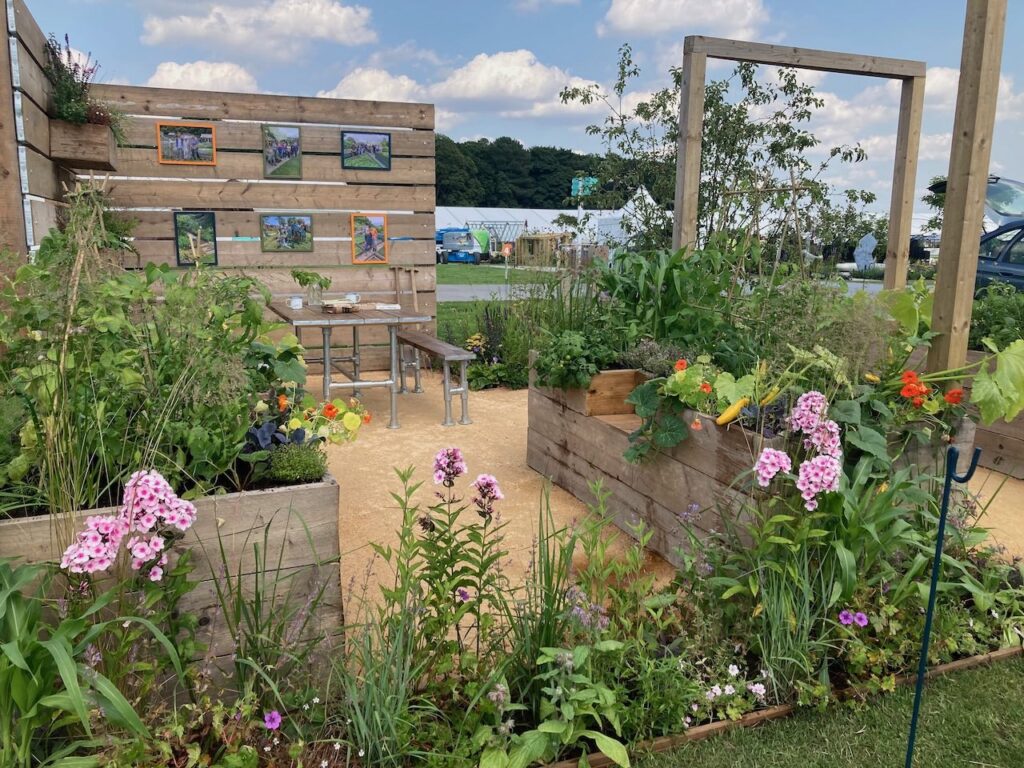
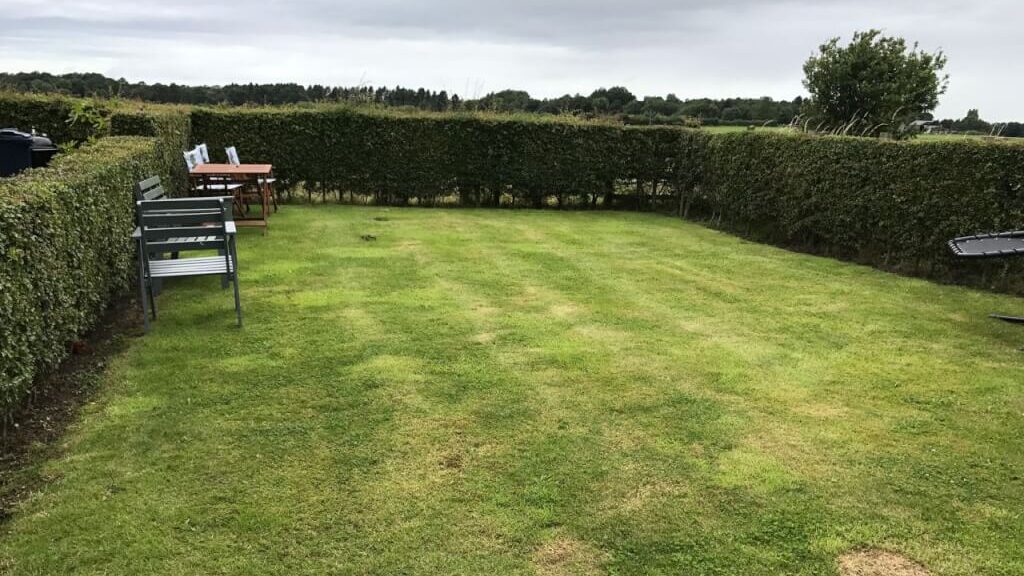
Raised beds are quite a hot topic at the moment in the gardening world for instant gardening appeal. Raised beds provide an easy way to garden practically anywhere! You can forget the woes of heavy clay soil or that poor soil that is compacted and simply build up with raised beds. This guide shows you how to build raised beds for amazing cost-effective planters for any sized garden.
This raised bed guide will explain exactly when and how to build raised beds for successful gardening. Raised beds can be used in nearly all gardens, regardless of the condition of your existing soil. They let you build up away from poor, stony ground and choose the soil you need for the types of plants or vegetables you want to grow.
Raised beds are easy to maintain and can take your garden from bland and boring to truly incredible. I have been designing and installing raised beds for clients and in my own garden for over 20 years, and they remain one of the single best investments you can make for your growing space. Whether you are on heavy clay, compacted ground, or you simply want to bring plants up to a comfortable height, raised beds are the answer.
Quick Answer
To build a raised bed, cut pressure-treated timber to size, drill pilot holes and screw the boards together using 75mm stainless steel screws with internal corner braces for strength. Place the frame in position, line the base with cardboard to suppress weeds, then fill with a 50/50 mix of good topsoil and peat-free compost. A standard 240cm x 121cm x 40cm bed takes roughly one bulk bag of soil and can be built in an afternoon.
A raised bed, or raised bed gardening, is where the soil is lifted above ground level and contained within a structure. The bed is usually created by building a frame or container filled with soil and organic matter, such as compost or leaf mould. Depending on the desired height, the bed is typically raised several inches to a few feet above the existing ground level.
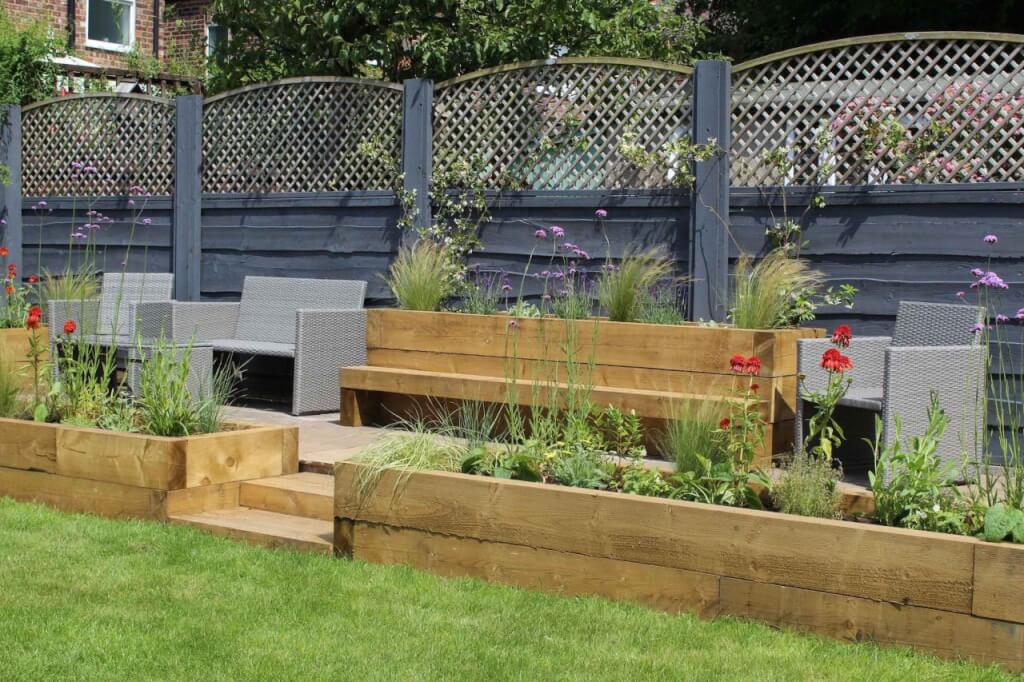
This could be using a wooden box, stone sides, or scaffold boards. Think of a simple rectangle that can be planted into, or other shapes depending on the material you choose. In my years designing gardens, raised beds have transformed more difficult or uninspiring spaces than almost any other single element, because they give you complete control over your growing conditions from day one.
This reduces backache and bending when gardening. It also means you can avoid undertaking a lot of hard landscaping, because you do not need to excavate huge amounts of soil or debris first. You simply build the bed, fill it with soil, and you are good to go. There is also no real need to bring in a builder or construction team in most cases. The hardest part is filling them with soil, which requires some manpower, but you can do that in stages.
Benefits and drawbacks of raised beds
There are many benefits to gardening with raised beds, many of which relate to accessibility and the freedom to improve soil quickly for growing vegetables. In my professional experience, the benefits far outweigh the drawbacks for the vast majority of gardeners.
✅ Benefits of Raised Beds
Ease of access
Eliminates bending and stooping. Beds at 60cm height suit wheelchair users perfectly.
Less soil compaction
You never walk on the bed, so the soil stays loose and well-structured for roots.
Better temperature control
Raised beds warm up 2 to 3 weeks faster than ground level in spring, giving crops a real head start.
Easier weeding
Weeds are at a higher level and far more accessible, especially combined with a cardboard base.
Grow anywhere
Works over paving, tarmac, poor clay, rubble. You control the soil completely.
Slugs must cross a dry timber edge to reach plants, reducing damage significantly.
Deep root growth
Excellent for root vegetables like carrots and parsnips that need loose, deep, stone-free soil.
⚠ Drawbacks to Consider
Upfront cost
Timber, screws, and quality soil add up. Budget around £150 to £300 for a standard timber bed filled with good compost mix.
Increased watering
Raised beds drain faster than ground level, especially in summer. A water butt nearby is highly advisable.
Timber maintenance
Even pressure-treated wood eventually degrades. Budget for replacement in 10 to 15 years for softwood, longer for hardwood.
Soil needs topping up
Organic matter breaks down over time. Add a mulch of compost each spring to maintain levels and fertility.
Best timber for raised beds
The type of timber you choose makes a significant difference to how long your raised bed will last and how much ongoing maintenance it requires. After building hundreds of raised beds over the years, here is my honest assessment of each option available to UK gardeners.
🌳 Timber Comparison Guide
Timber Type
Lifespan
Cost
Verdict
Pressure-treated softwood
10 to 15 years
£
Best value for most gardeners
Oak sleepers
25 to 40 years
£££
Beautiful, long-lasting, heavy
Larch / Douglas Fir
15 to 25 years
££
Naturally rot-resistant, excellent mid-option
Cedar
15 to 20 years
£££
Lightweight, naturally rot-resistant, premium
Untreated softwood
3 to 5 years
£
Short-lived, only worth it as a temporary fix
Scaffold boards (reclaimed)
7 to 12 years
£
Budget option, check for treatment chemicals
💡 Top Tip
Always check that any reclaimed scaffold boards or old railway sleepers have not been treated with creosote, which can leach toxins into your soil and harm plants. Modern pressure-treated timber uses copper-based preservatives that are food-safe for vegetable growing. If in doubt, line the inside face of the boards with heavy-duty polythene sheeting before filling.
My personal recommendation for most Ninjas is 38mm x 150mm pressure-treated softwood at 40cm height. It strikes the right balance between cost, ease of cutting, weight and longevity. 🛒 Find pressure-treated timber for raised beds on Amazon UK
Raised bed materials overview
Wood is not the only option. Raised beds can be made from a wide range of materials, each with its own character and suitability for different garden styles. Here is a rundown of the most popular options available to UK gardeners in 2026.
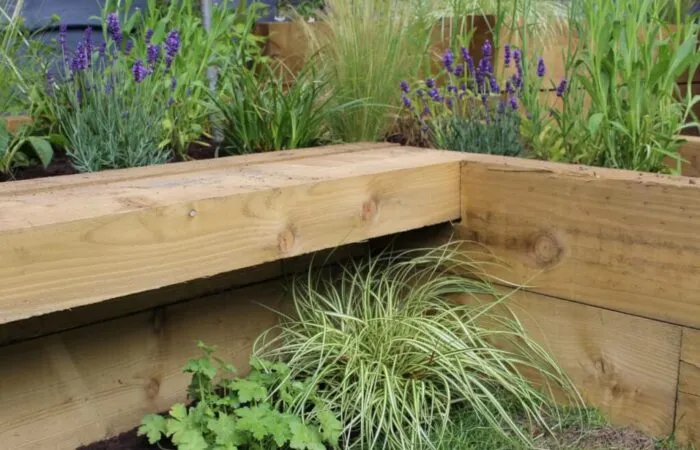
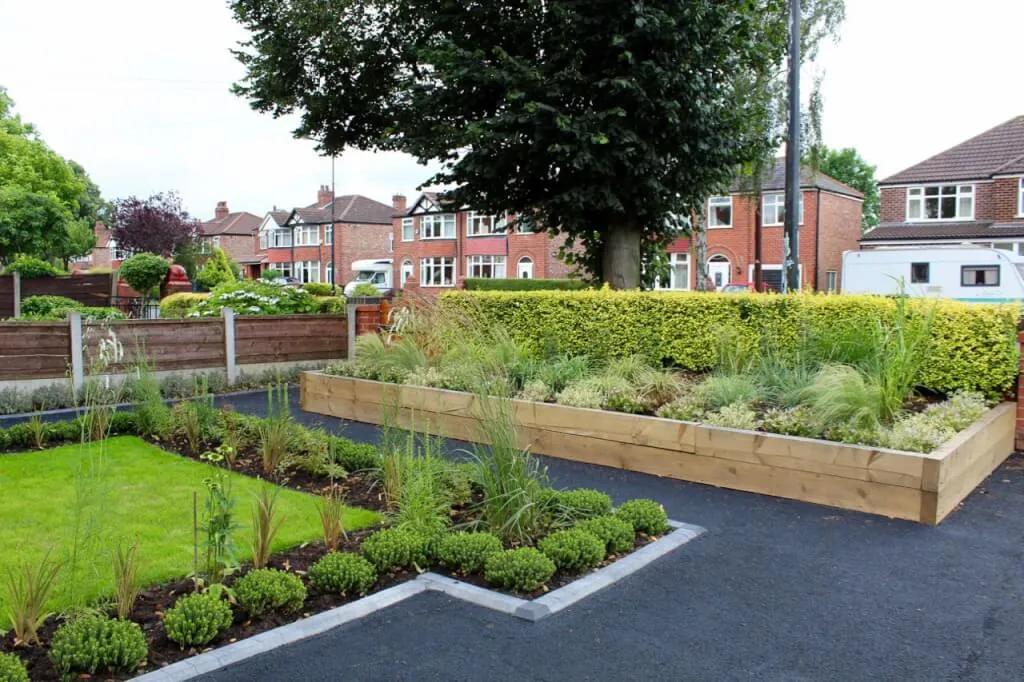
Timber raised beds
Wood is by far the most popular material for raised beds in the UK, and for good reason. It is relatively affordable, easy to cut to size without specialist tools, and it blends naturally into almost any garden setting from a formal kitchen garden to a relaxed cottage plot. Wooden raised beds warm up quickly in spring and require the least skill to construct. My preferred choice for beginners.
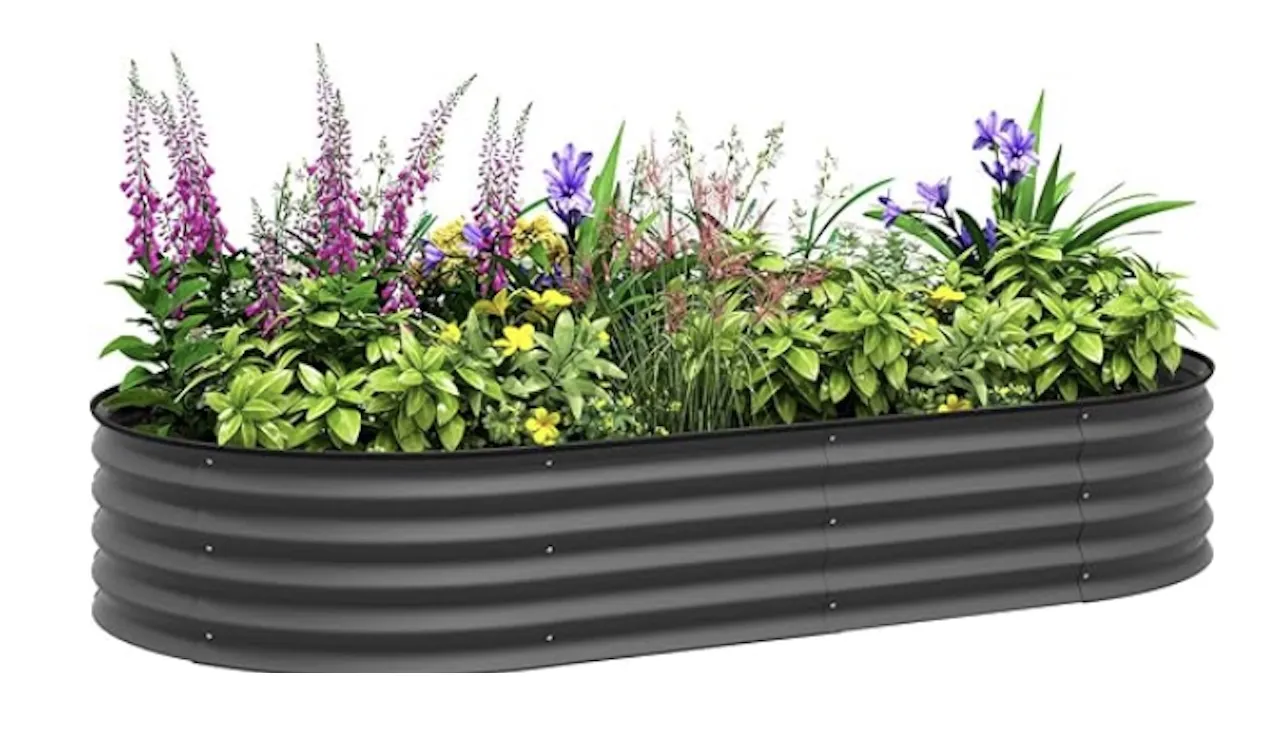
Galvanised and powder-coated steel beds have become increasingly popular over the last few years and I can see why. They look superb in a modern or contemporary garden, they are incredibly durable lasting up to 25 to 30 years, and they heat up quickly in spring. The corrugated metal style in particular adds a real design statement. The one consideration worth noting is that metal conducts heat, so in extreme summer conditions the soil near the edges can warm up more than in a timber bed, though this is rarely a significant problem in the UK climate.
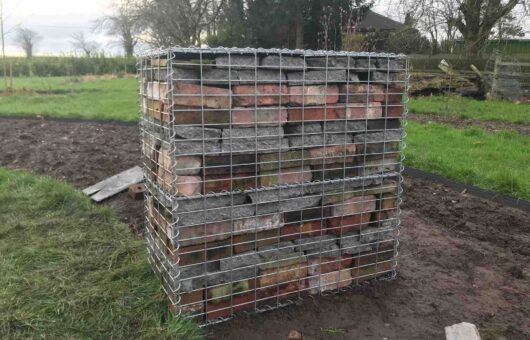
Raised beds can also be made from paving slabs laid on their sides, timber sleepers stacked and screwed at each end, stone blocks or old rockery stone, breeze blocks staggered and mortared together, and composite materials made from recycled plastic and wood fibres. The latter are particularly durable and require virtually no maintenance. If you are considering brickwork or stone, bear in mind that the mortar used can leach lime into the soil over time, which is worth considering if you plan to grow acid-loving plants. I have a separate detailed guide to the best raised beds to buy if you would prefer a ready-made option.
Can you make a raised bed without timber?
Yes, and it is a surprisingly effective budget option. In Scotland, mounded soil beds are used in some allotments to create raised growing areas without any frame at all. These sloping mound beds are great if you are on a tight budget or want a more natural, wildlife-friendly appearance. They also reduce slug problems because there are no damp timber edges to harbour them.
There is also the Hugelkultur approach, where logs, old plant waste, and organic matter are piled up into a mound and slowly decompose to create a deep, nutrient-rich growing medium for vegetables and herbaceous plants. It is a fantastic way to recycle garden waste and reduce the volume of expensive topsoil you need to import.
How to build a raised bed: step by step
Making a raised bed is not difficult, though it involves careful measuring and preparation. The standard size most gardeners start with is the 8ft x 4ft bed, which translates to 240cm x 121cm in metric. This dimension works perfectly with standard timber lengths, which means minimal waste and lower cost. I have included a full cut list below.
Tools you will need
Wood saw (heavy-duty or fine, depending on the thickness of the timber)
Cut list for a standard 8ft x 4ft raised bed (240cm x 121cm x 40cm)
📏 Cut List: 38mm x 150mm Treated Timber (Two-Board Height)
Piece
Quantity
Length
Purpose
Front and back panels
4 (2 per board row)
240cm (8ft)
Long sides
Side panels
4 (2 per board row)
121cm (4ft)
Short ends
Corner braces
4
300mm (12in)
Internal corners
Centre brace
1
121cm (4ft)
Prevents bowing
This bed will need approximately 0.97 cubic metres of soil to fill, which is roughly 48 x 20kg bags or one bulk bag delivered. The soil calculator further down this guide will give you an accurate figure for any size bed.
💡 Money-Saving Tip
The 8ft x 4ft size is the most economical because it uses standard 8ft timber lengths with virtually no waste. Any other dimensions will mean more offcuts and higher material costs. If you need a longer bed, simply build two 8ft x 4ft beds side by side rather than commissioning a single 16ft run.
Step 1: Measure up
Once you have decided on your dimensions, mark out the area where the raised bed will sit and double-check that it fits. An ideal size is 240cm in length by 121cm deep, which allows you to reach the centre from either side without needing to step into the bed. Keep paths between beds at least 45cm wide, and ideally 60cm if you need to get a wheelbarrow through.
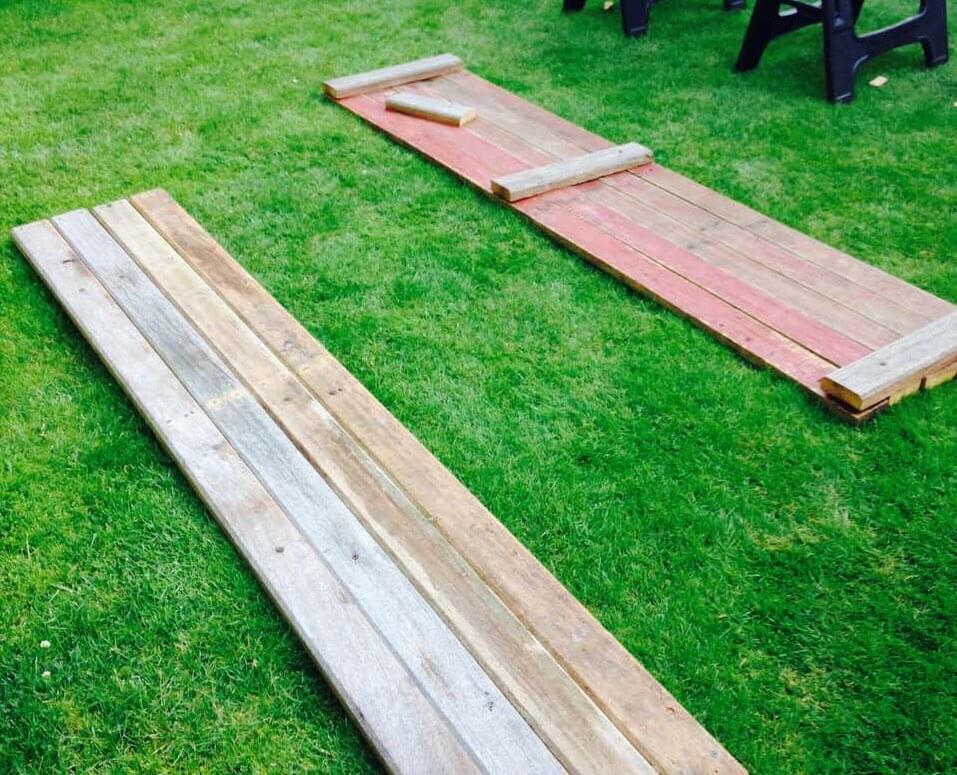
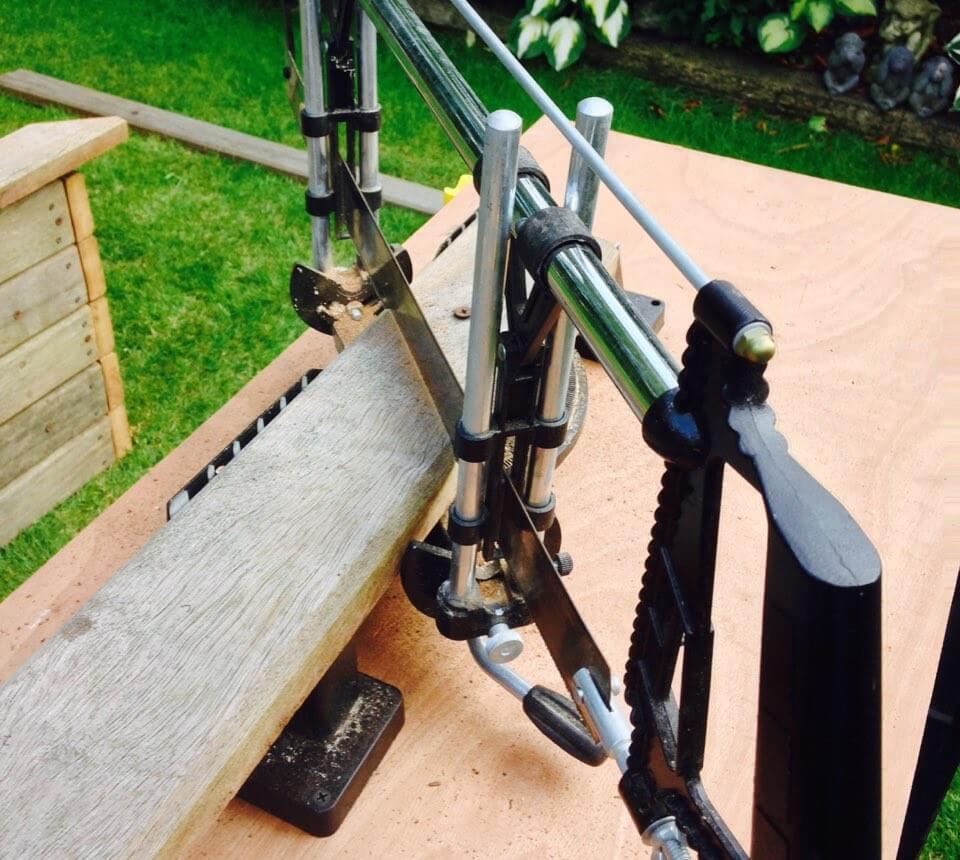
Step 2: Cut your boards to length
Using your wood saw, cut the boards to your required lengths. For the standard 40cm height using 150mm wide boards, you will need two boards per side. Multiply the board width by the number of boards to confirm your final height before cutting. A mitre saw will give the cleanest cuts, but a handsaw works perfectly well.
Step 3: Cut the side panels
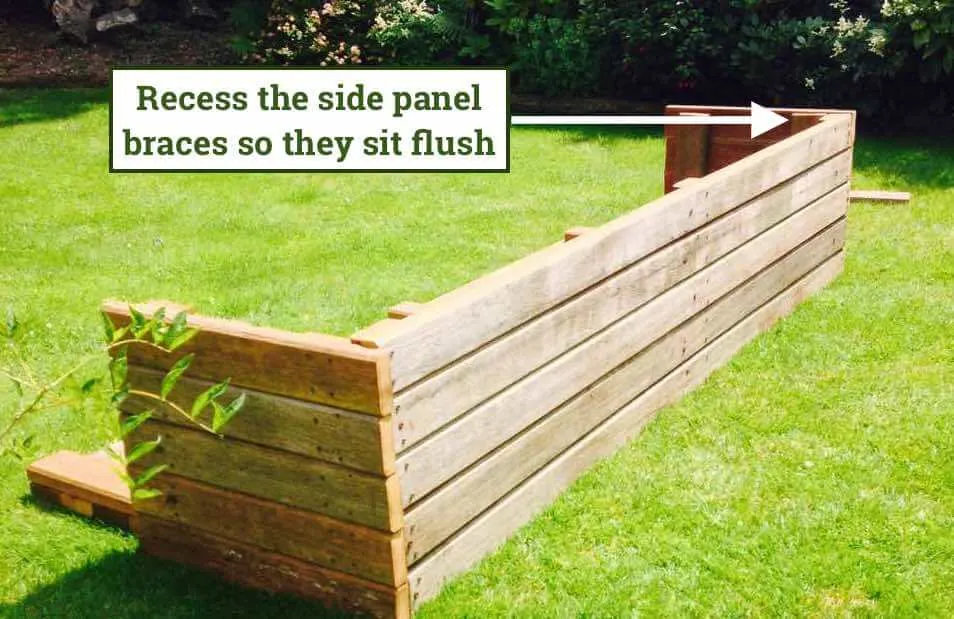
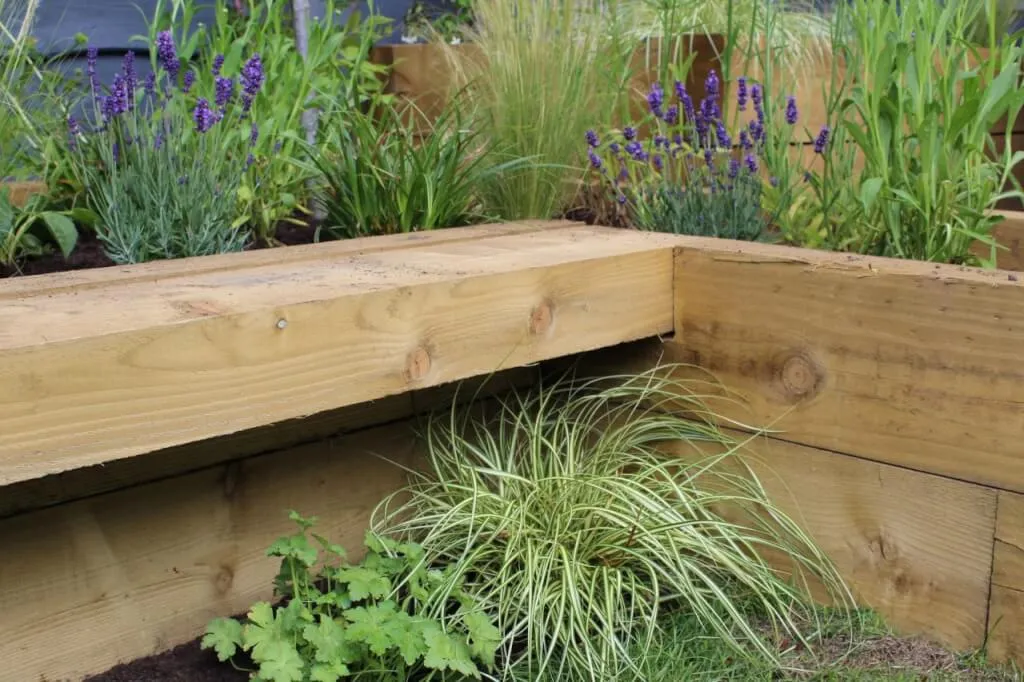
Cut the boards for the short ends of the bed at 121cm. Cut enough boards to achieve the height you want. Make sure the internal corner braces on the side boards are set back from the edge by the thickness of the front and back boards. If they sit flush with the very end of the side panel, they will prevent a clean joint when the corners are assembled.
Step 4: Cut and attach the corner braces
Cut four corner braces to match the full height of your bed. Drill pilot holes and screw the braces from the outside face inwards using your 75mm screws. Use a minimum of two screws per board row. I usually use three fixings per brace for extra strength, particularly if the bed is going to be filled with heavy, wet soil.
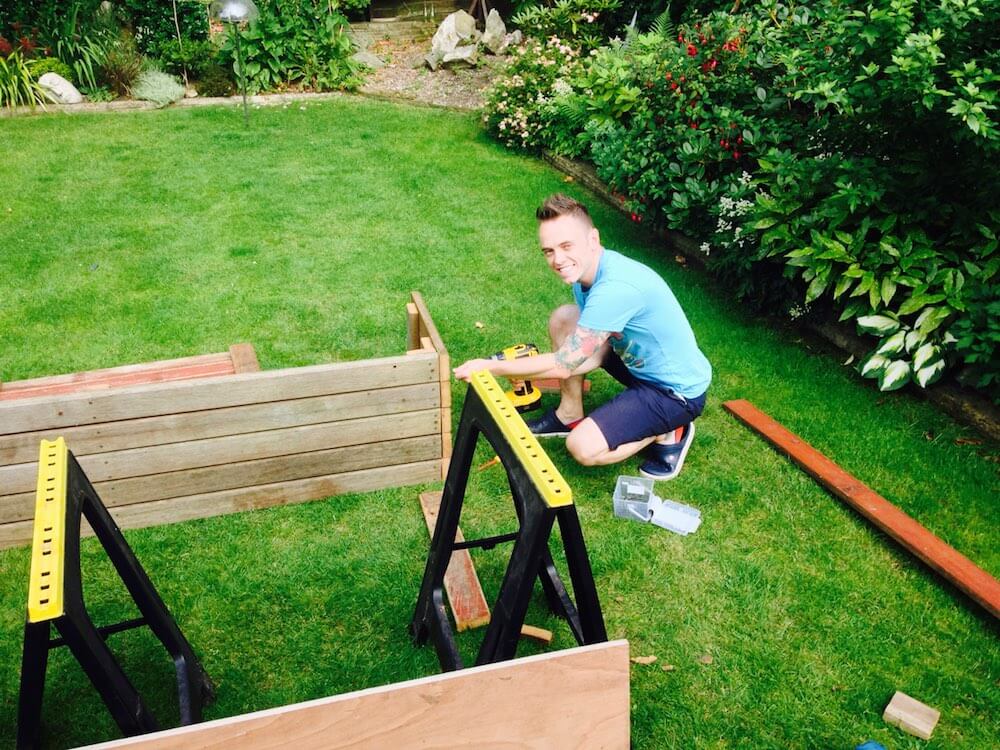
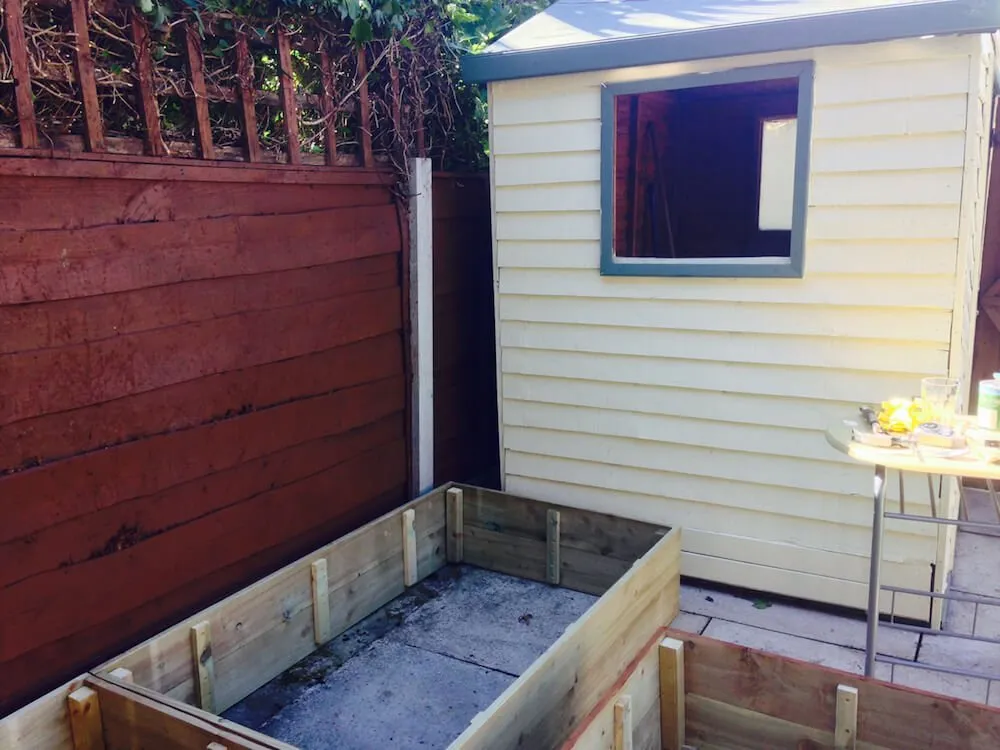
Step 5: Assemble the frame
Stand the four sides up and screw the front and back panels to the corner braces of the side panels. Drill pilot holes to prevent splitting. Use clamps or ask someone to hold the pieces steady while you work. Check for squareness as you go by measuring diagonally from corner to corner.
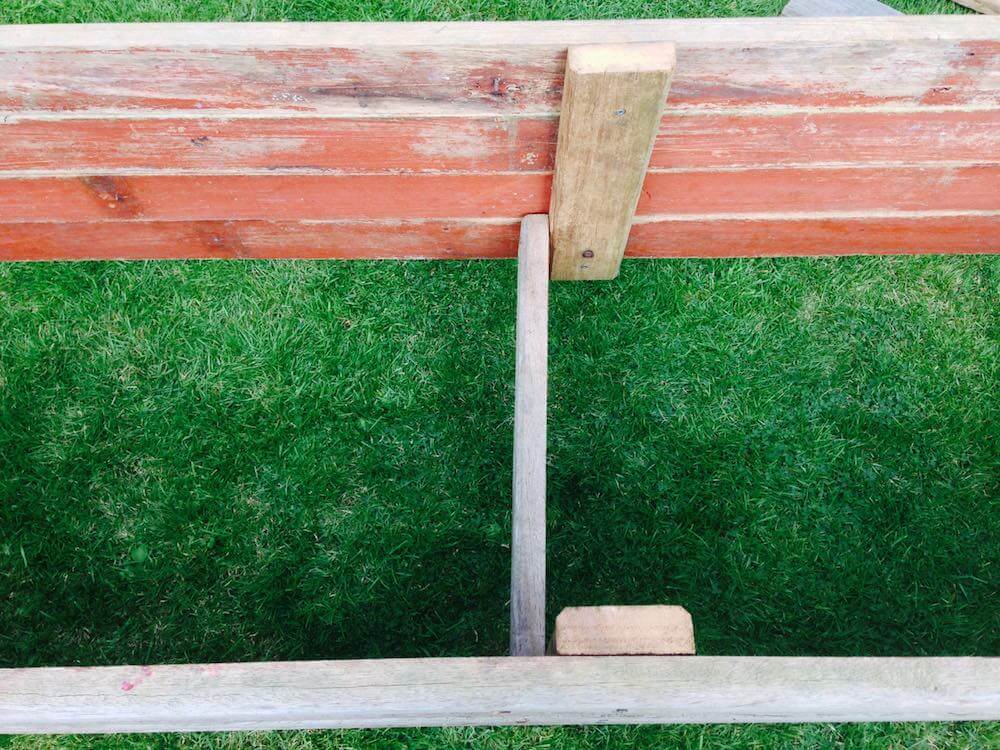
Step 6: Add the centre brace
Any bed over 1.5m in length needs an internal brace to prevent the sides bowing outwards under the weight of soil. Place this across the centre of the bed at the same height as the top board and screw it in from both sides. This simple addition makes a significant difference to how long your bed holds its shape.
Step 7: Tighten up and check
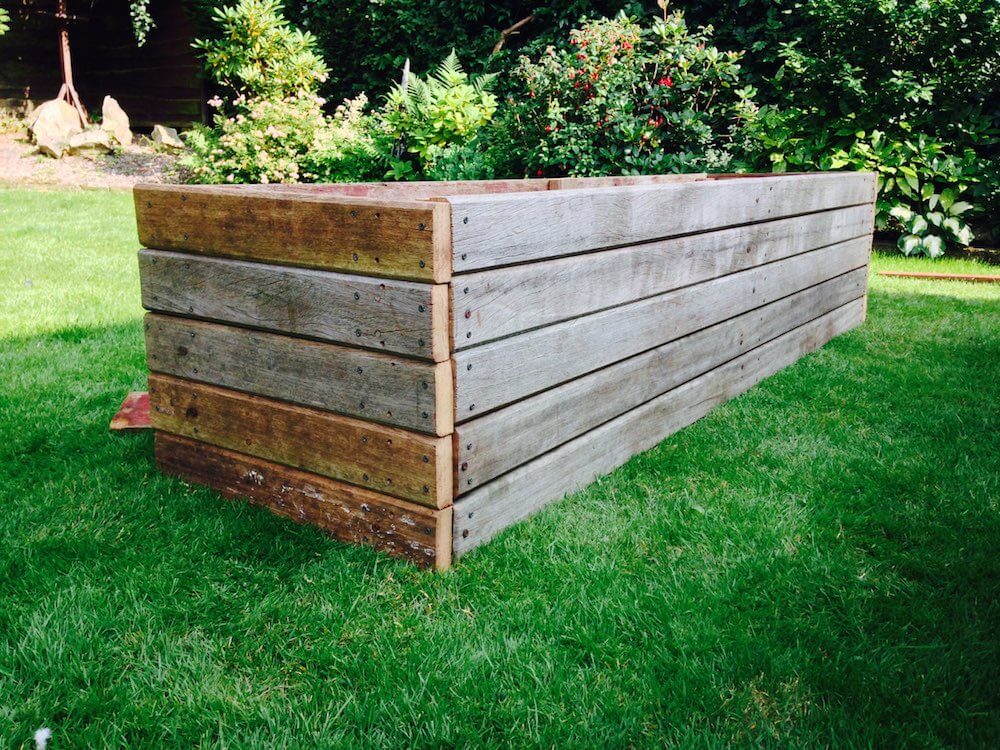
Go around every joint and tighten all screws. Check for any movement or joints that do not feel secure. The frame should feel completely rigid before you move it into position. At 8ft long and 40cm high, a completed bed is manageable for two people to carry.
Optional: add a mitred lip
Adding a capping board with 45-degree mitre cuts at each corner gives the raised bed a far more professional, finished appearance. It also provides a useful ledge for resting tools, plant pots, or indeed a mug of tea. Cut the capping boards using a mitre saw set to 45 degrees, flipping the angle at each end so the corners meet cleanly, then screw them down into the top of the frame.
Sizing and dimensions
Getting the dimensions right from the start will save you a lot of frustration later. The main measurements you need when planning a raised bed are length, width, and height. Take notes and always double-check your figures before cutting any timber.
How long should a raised bed be?
Keep beds under 2 metres in length. Beyond this, you will inevitably find yourself reaching too far or taking shortcuts across the bed, which compacts the soil and defeats the purpose of a raised bed. Any bed over 1.5m needs an internal centre brace to prevent bowing. If you want a longer growing run, build two beds side by side with a path between them. This also gives you more flexibility if you ever need to replace one section.
If you are going over 2.5m in a single piece, switch to railway sleepers with steel tie-rod fixings rather than screwed timber boards. The soil pressure when wet is enormous at that scale, and standard screwed joints will eventually fail.
How wide should a raised bed be?
The maximum recommended width is 1.2m (4ft) if accessible from both sides, or 60cm if against a wall or fence. The rule is simple: you should never need to step into the bed to reach any part of it. From my own experience of building hundreds of beds, the sweet spot that most gardeners are happiest with is 90cm to 121cm wide. It allows you to plant two generous rows without straining your back reaching over.
How high should a raised bed be?
The minimum depth for any raised bed is 15cm (6 inches). Below this you will need to work the ground underneath, which most people using raised beds are trying to avoid. For general planting, 30cm works well. My preferred height for kitchen garden beds is 40cm, which significantly reduces bending while keeping construction simple and cost-effective.
For accessibility, particularly for wheelchair users or gardeners with limited mobility, I recommend 60cm to 80cm. At 60cm you can also sit on the edge of the bed while working, which is much more comfortable for longer gardening sessions. For root vegetables like carrots and parsnips, aim for at least 40cm depth to give the roots adequate space to grow straight.
📐 Raised Bed Height Guide
Height
Best for
15cm (6in)
Minimum depth. Shallow-rooted salads and herbs on hard surfaces only.
30cm (12in)
Good for flowers, herbs, and most vegetables except deep-rooting root crops.
40cm (16in)
Recommended: reduces bending, suits all vegetables including carrots and parsnips.
60cm (24in)
Can sit on the edge to work. Good for elderly or mobility-restricted gardeners.
75 to 80cm
Wheelchair accessible. Build with sleepers and steel fixings for this height.
Path width between beds
Leave a minimum of 30cm between beds for walking access, and at least 45cm if you need to operate a wheelbarrow between them. In a kitchen garden layout where you will be carrying compost, harvesting regularly, and working with tools, 60cm paths make the whole space far more practical. It feels like a lot to give up on paths, but it pays dividends in day-to-day usability.
Weed suppression before filling
One of the most important steps that many beginners overlook is dealing with what is beneath the bed before you fill it. Spend a little time on this now, and you will save yourself hours of weeding later, particularly if your bed is going over grass or weedy ground.
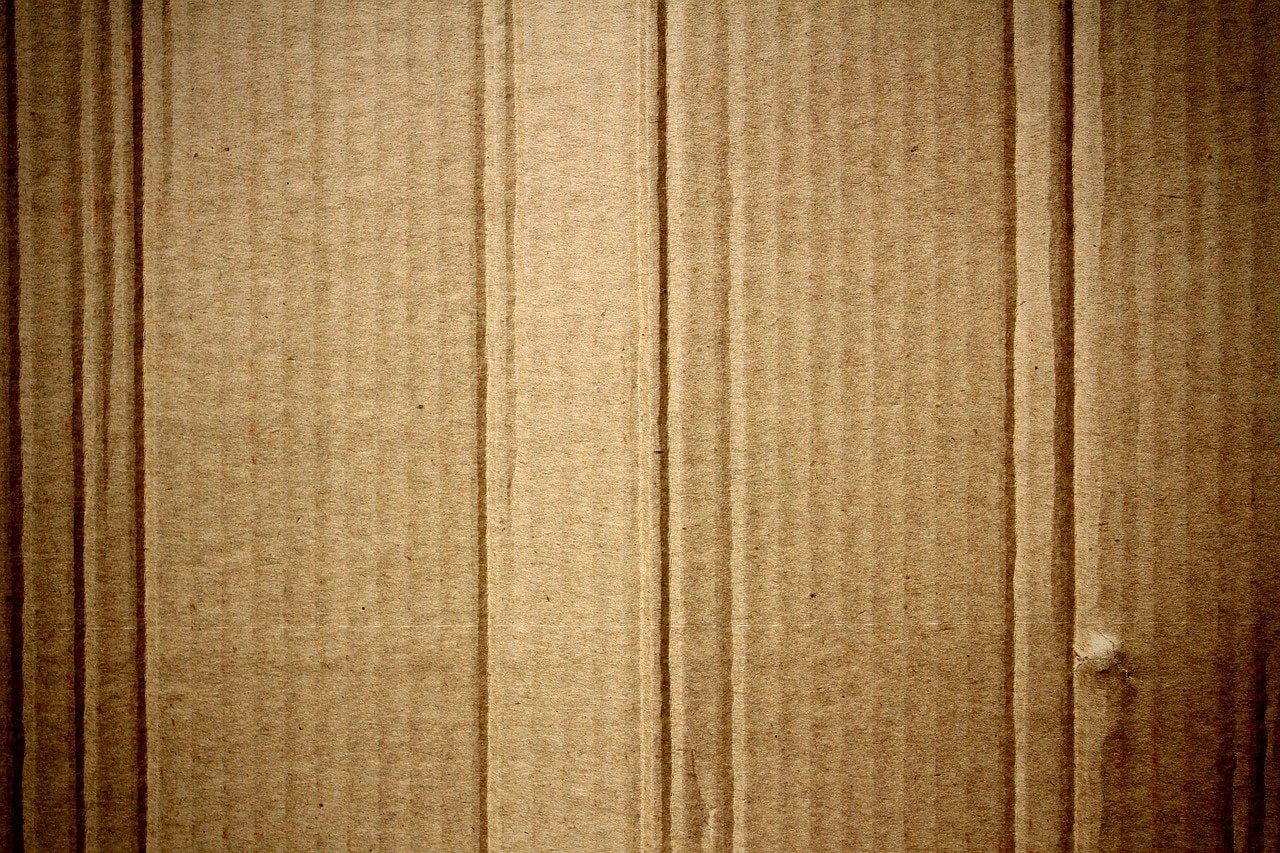
The cardboard method (recommended)
My preferred approach is the cardboard lining method, which is essentially the no-dig principle applied to a raised bed. Lay down a thick layer of unwaxed cardboard or flattened boxes over the ground inside the bed before filling. Overlap the edges by at least 10cm so there are no gaps. The cardboard suppresses weeds and grass for the first growing season, and by the time it breaks down, your soil community is established, and the weeds have had their opportunity to grow smothered rather than into your beds.
💡 Top Tip
Supermarkets and furniture shops are a brilliant source of free cardboard. Ask your local store if they have any large boxes available. Avoid any with glossy or waxed surfaces as these will not break down properly. Remove all tape and staples before laying.
Weed membrane: use with caution
Woven weed membrane is another option but I am more cautious about recommending it. While it does suppress weeds, it also impedes the movement of beneficial earthworms between your soil and the ground below, particularly over time as the membrane degrades into microplastic fragments. For a kitchen garden bed where soil biology matters, cardboard is the better long-term choice. If you are building a raised bed on tarmac or paving where worm access is not a factor, a single layer of landscape fabric over the base is a reasonable option.
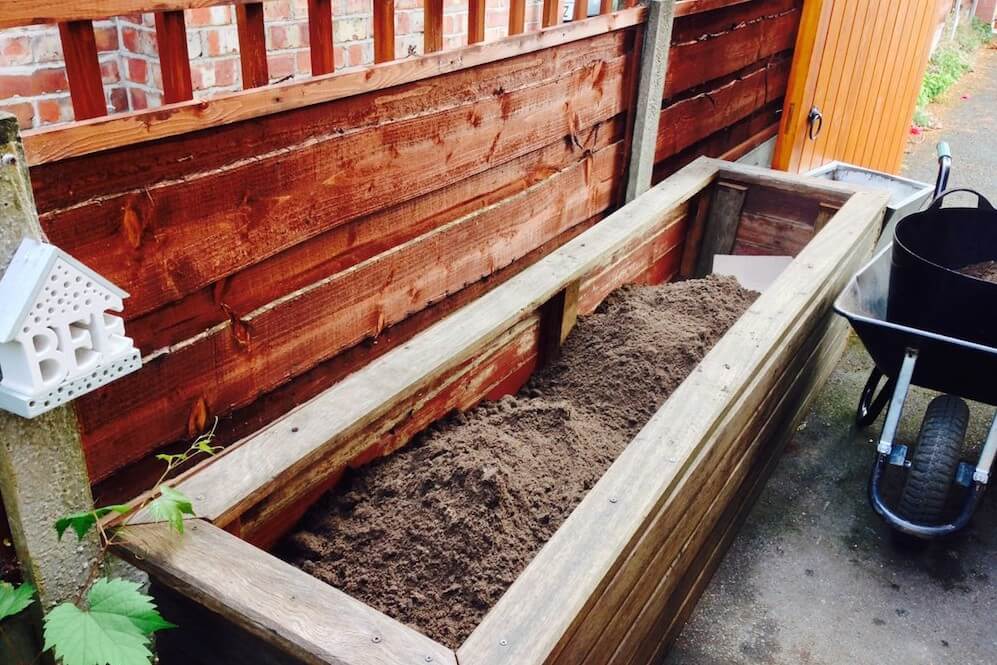
Filling your raised bed: soil mixes explained
Now that your raised bed is in position with the base prepared, you can start filling it with your chosen growing medium. The soil you put in is the single biggest factor in how well your plants will perform. Do not skimp on quality here. In my years of designing and planting raised beds for clients, I have seen the difference between a well-filled bed and a poorly filled one clearly reflected in the harvest.
The best soil mix for raised beds
For a general-purpose raised bed that will grow vegetables, herbs, and flowering plants well, aim for this blend. It will serve you brilliantly for most planting scenarios.
40% topsoil, 20% compost, 40% horticultural grit or coarse sand
Ericaceous plants (camellias, blueberries)
50% ericaceous compost, 30% topsoil, 20% composted pine bark
Root vegetables (carrots, parsnips)
50% topsoil, 30% compost, 20% sharp sand. Remove all stones.
Always opt for a free-draining mix rather than a heavy clay-based one. The sharp sand in these mixes refers to horticultural sharp sand or coarse grit, not builder’s sand, which is too fine and can actually impair drainage.
Test your soil pH before planting. Most vegetables prefer a neutral pH of around 6.5 to 7.0. Ericaceous plants like blueberries and camellias need a pH of 4.5 to 5.5. A simple soil pH tester costs very little and takes seconds to use. 🛒 Buy a soil pH tester on Amazon UK
Filling raised beds on turf or soil
If the bed is going onto lawn or soil, you do not need to remove the turf first. Lay your cardboard layer over the grass, then fill with your chosen mix. The turf will break down over the first season and actually enrich the soil below. If the ground beneath is heavy clay, fork it over before positioning the bed and add some organic matter to help drainage. A compacted, waterlogged base beneath a raised bed will cause a water table effect where the bed stays permanently wet at the bottom, which will rot roots and eventually your timber.
Building raised beds on tarmac or flags
If the bed sits on a non-porous surface such as tarmac or paving, drainage becomes critical. The RHS recommends a minimum soil depth of 45cm and ideally 60cm when building on a hard surface, to give roots enough depth and prevent waterlogging. If you are on paving, break one or two flags inside the bed footprint using a lump hammer and goggles. This creates drainage channels to prevent water pooling at the base. Do not skip this step or you will end up with a permanently wet bed that damages both your plants and the base of your timber.
Do not overfill your raised beds
Leave a 5 to 7cm gap between the top of the soil and the top of the bed frame. This gap prevents soil and water spilling over onto paths when you water or after heavy rain. It also provides a small amount of wind protection for young plants. When filling with dry soil, remember it will settle and compact slightly after the first watering, so add a little extra to account for this.
Enter your dimensions to calculate how much soil you need
Volume needed
20 kg bags
Bulk bags
Surface area
20 kg bags @ £4 each
Bulk bag @ £45 each
Recommended
What can you grow in a raised bed?
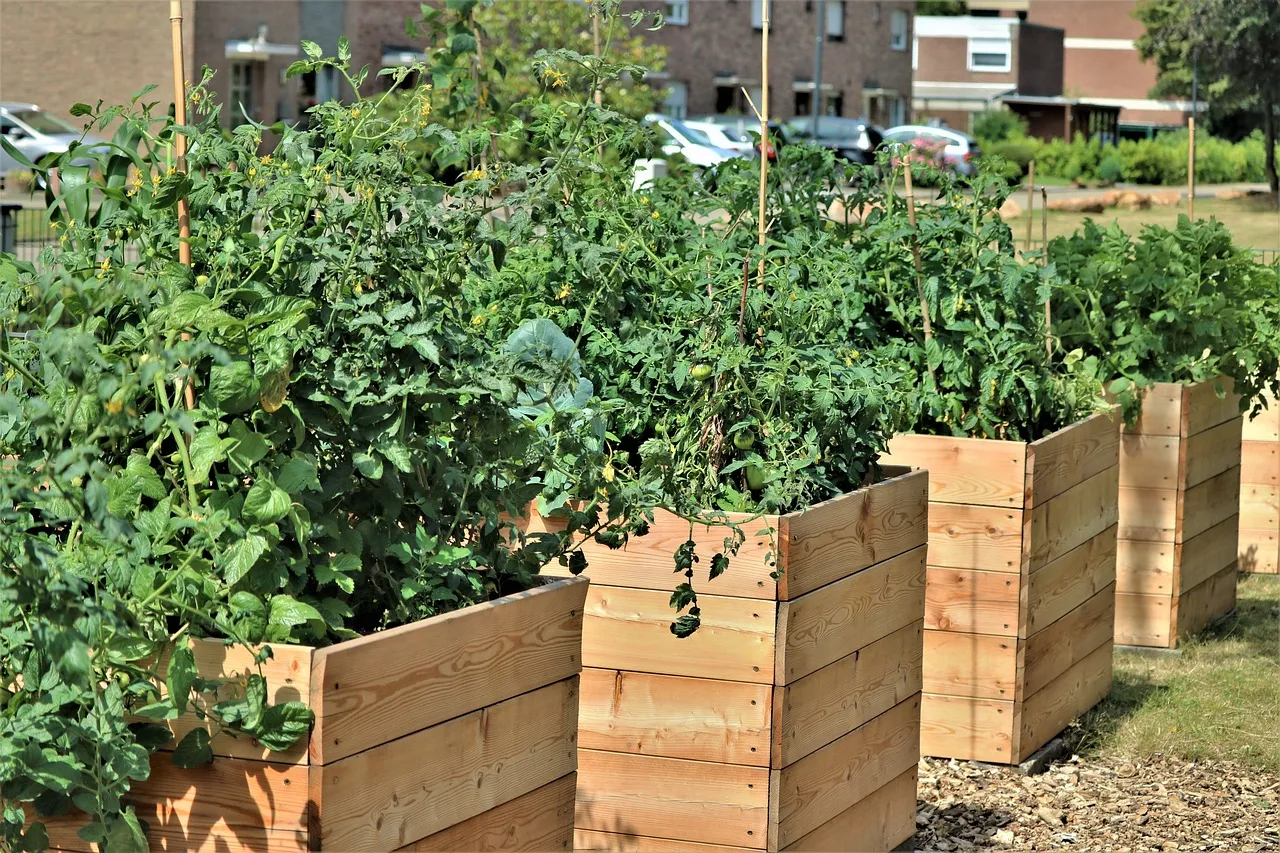
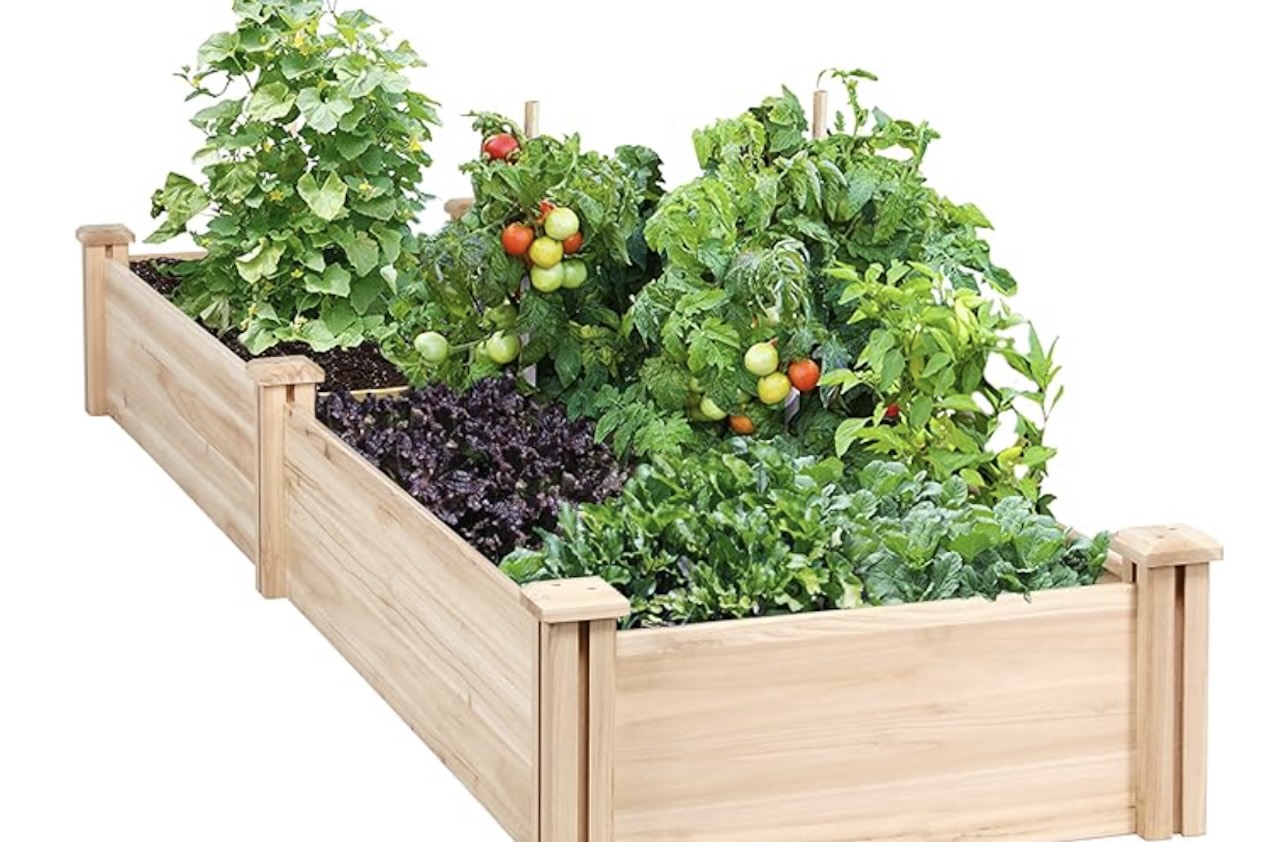
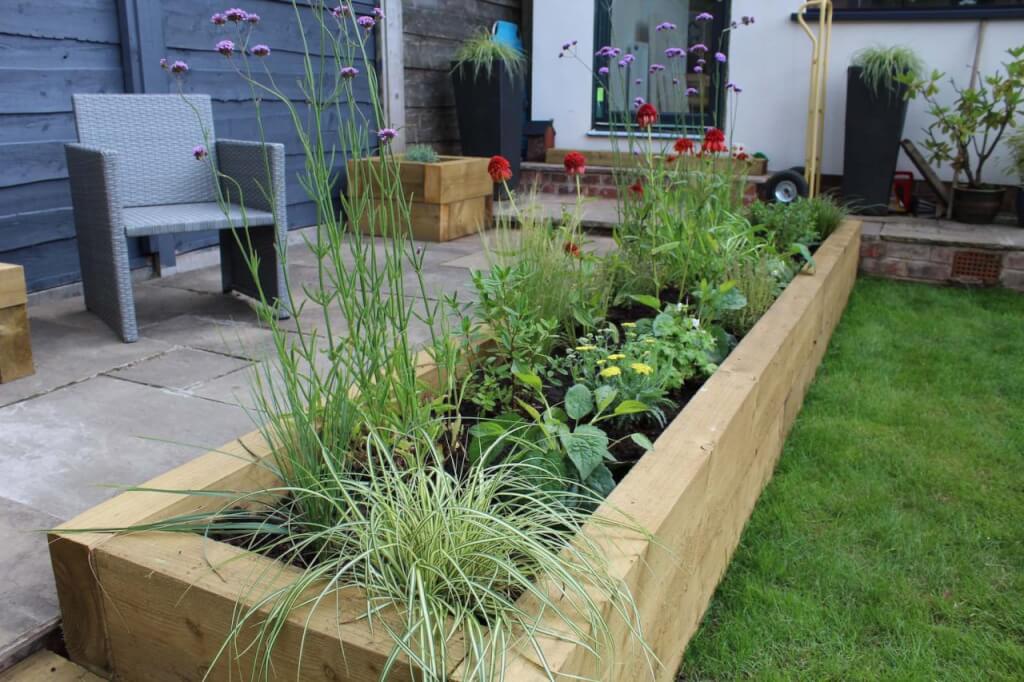
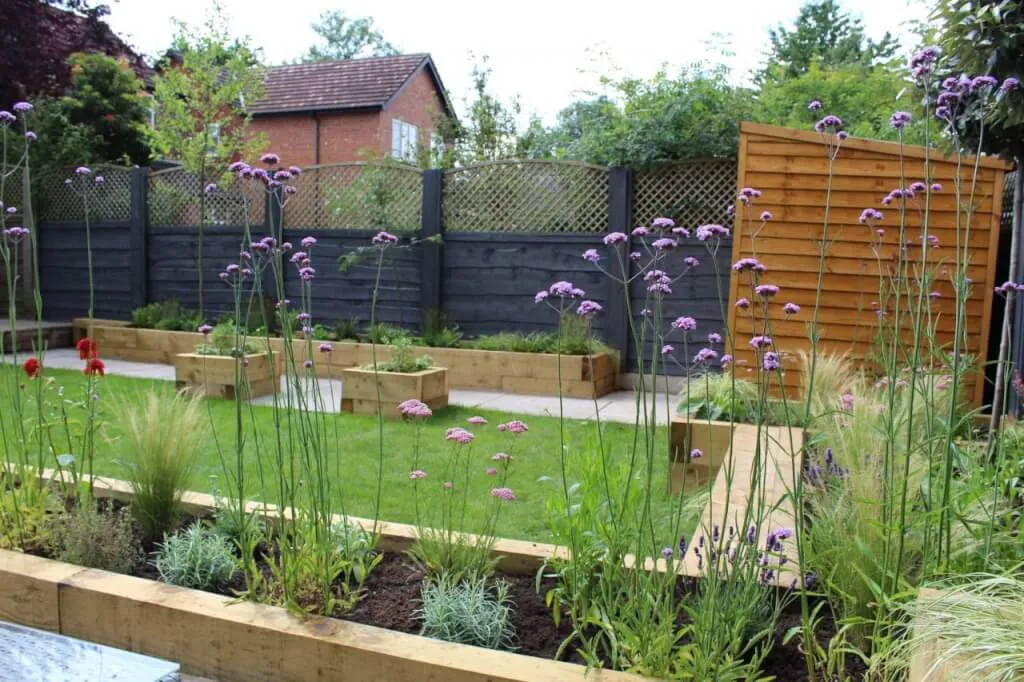
The beauty of raised beds is their incredible versatility. They are genuinely like blank canvases waiting for your planting ideas. Whether you are dreaming of home-grown tomatoes, fragrant herbs, or stunning cut flowers, raised beds can accommodate virtually any gardening ambition. Here are the most rewarding options.
Vegetables
Nearly all vegetables thrive in raised beds. The controlled soil conditions and excellent drainage create ideal growing environments for everything from delicate salad leaves to robust winter brassicas. Root vegetables especially benefit from the deep, loose, stone-free soil that raised beds allow you to create. A standard 4ft x 8ft bed can supply a family of four with salad crops throughout the growing season.
Soft fruits
Strawberries, raspberries, currants, gooseberries, and blueberries all perform beautifully in raised beds. The elevated growing environment makes picking easier and keeps berries away from slugs at ground level. Blueberries are an excellent choice for a dedicated ericaceous raised bed, where you can control the pH precisely. Rotate strawberry plants every three to four years to maintain strong yields.
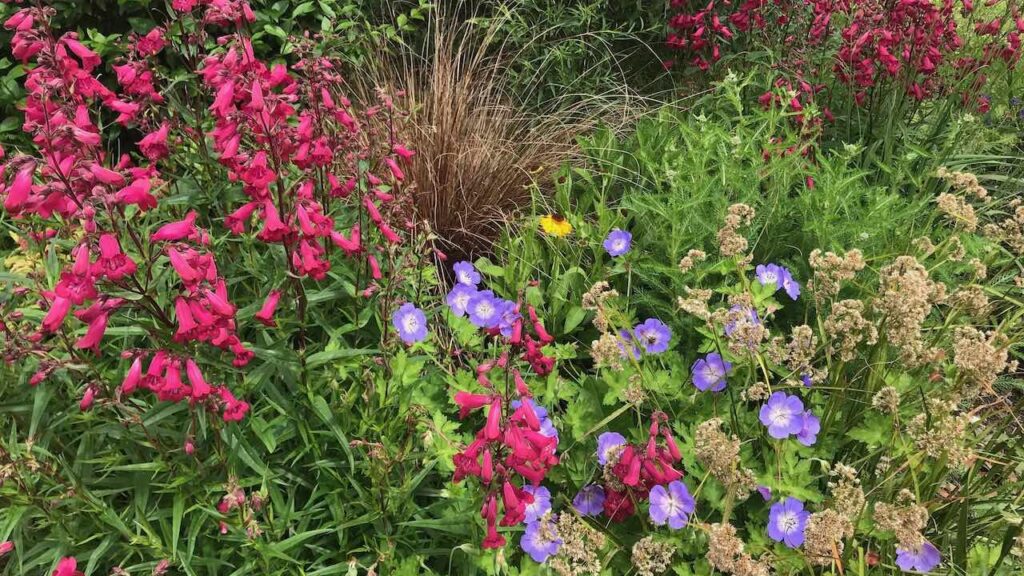
Herbaceous perennials and cut flowers
A raised bed dedicated to cut flowers is one of the most rewarding garden projects you can undertake. Delphiniums, lupins, dahlias, peonies, and asters all respond brilliantly to the improved drainage and soil quality a raised bed provides. Use the thriller, filler, spiller principle: tall dramatic plants at the back, medium plants in the middle, and trailing plants at the front edge.
Alpines
If you have ever struggled with alpines in heavy clay soil, raised beds are your solution. These jewel-like plants adore exceptional drainage. Add extra grit and gravel to your soil mix, aim for around 40 percent grit content, and you will be growing sedums, saxifrages, dianthus, and gentians that would otherwise be miserable at ground level in a typical UK garden.
Ericaceous plants
If your garden has chalky or alkaline soil, a dedicated ericaceous raised bed allows you to grow camellias, rhododendrons, azaleas, blueberries, pieris, and heathers that would otherwise struggle. Fill with an ericaceous compost mix, and top dress annually with pine needles or composted bark to maintain the acidity naturally. This is far more cost-effective long-term than buying ericaceous compost every year.
Crop rotation in raised beds
One of the great advantages of having multiple raised beds is the ability to rotate your crops easily each year. Growing the same vegetables in the same soil year after year depletes specific nutrients and can allow soil-borne diseases to build up. A simple three or four-bed rotation keeps things healthy and productive.
🔄 Simple 4-Bed Crop Rotation
Bed
Year 1
Year 2
Year 3
Year 4
Bed 1
Brassicas
Legumes
Roots
Alliums
Bed 2
Legumes
Roots
Alliums
Brassicas
Bed 3
Roots
Alliums
Brassicas
Legumes
Bed 4
Alliums
Brassicas
Legumes
Roots
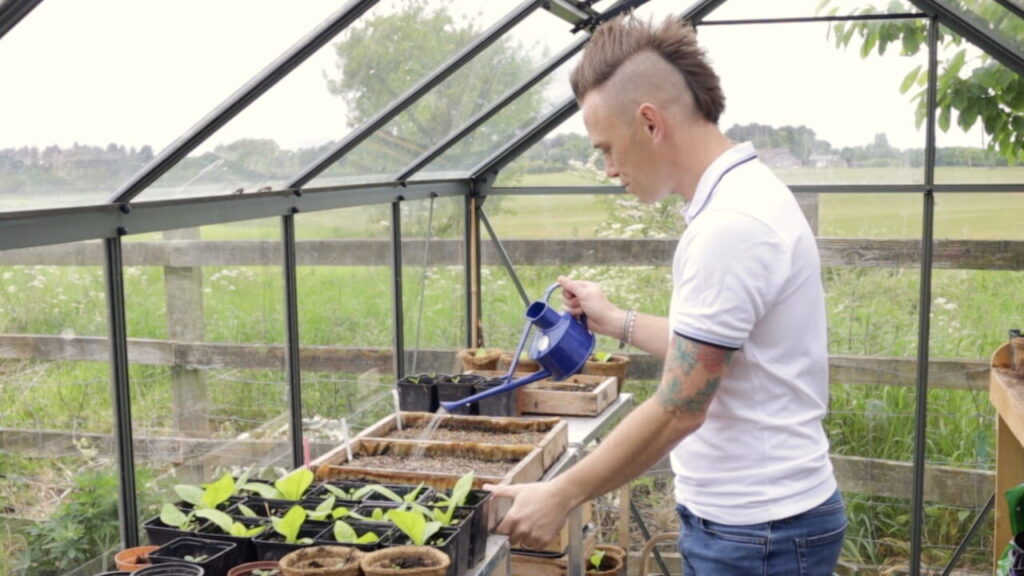
Watering and ongoing maintenance
Raised beds drain faster than in-ground soil, particularly in warm weather, so watering is one area that requires more attention than you might expect. From my own kitchen garden beds, I have found the following approach keeps plants consistently happy without wasting water.
Watering raised beds
Water deeply and less frequently rather than a little every day. Deep watering encourages roots to grow downward rather than staying near the surface, where they are vulnerable to drying out. In summer, most vegetable beds need a thorough soaking every two to three days, depending on conditions. A water butt positioned near your beds makes a significant difference to water bills and is always my first recommendation when setting up a kitchen garden.
Drip irrigation or a soaker hose laid along the base of each bed is by far the most efficient watering method for a productive kitchen garden. It delivers water directly to the root zone, reduces leaf wetness that encourages fungal disease, and can be connected to a simple timer.
Each spring, top dress your raised beds with a 5 to 7cm layer of good peat-free compost or well-rotted manure. This replenishes the organic matter that breaks down over winter and provides a slow-release fertility boost for the growing season. Do not dig it in. Simply spread it across the surface and let worms and rain do the work of incorporating it. This is the no-dig approach and it is significantly better for soil structure and biology than annual digging.
Check the timber every year or two for any signs of rot, soft spots, or screws working loose. Address any structural issues early. A small amount of preventative treatment is far less work than rebuilding a collapsed bed. 🛒 Buy food-safe wood preservative on Amazon UK
How much do raised beds cost?
Raised beds come in a wide range of budget options. Here are approximate costs for a 2000mm x 900mm x 400mm bed based on 2026 prices, without labour costs or sundries like screws, stains, or soil.
💰 2026 Raised Bed Cost Guide
Material
Typical Cost (frame only)
Lifespan
Gravel boards / softwood
£50 to £80
5 to 10 years
Pre-made wooden kit
£80 to £150
8 to 12 years
Prefabricated metal bed
£80 to £200
20 to 30 years
Timber sleepers
£100 to £250
20 to 40 years
Brick
£250 to £400
Permanent
Stone
£350 upwards
Permanent
Timber sleeper raised beds
Timber sleepers remain one of the most popular choices for a reason. They require little in the way of assembly, look fantastic, and with proper care will last decades. The standard dimension for a new oak or softwood sleeper is 250mm wide by 125mm thick by 2.4m long. In 2026, a new softwood treated sleeper costs around £25 to £35 each, while oak sleepers run from £45 to £70 depending on the supplier. A simple two-sleeper high bed at 240cm x 120cm therefore requires four sleepers plus end fixings, bringing the total material cost to roughly £100 to £150 before soil.
How long do timber raised beds last?
Timber raised beds last anywhere between 5 and 30 years depending on the species, thickness, and treatment. Pressure-treated softwood will give you 10 to 15 years in most UK conditions. Oak and hardwood sleepers last 25 to 40 years. Untreated pine screwed together will degrade in as few as 3 to 5 years in contact with moist soil. Always check what treatment the timber has received before building, particularly if growing edible crops.
Raised bed FAQ
Can I use treated timber for growing vegetables?
Yes. Modern pressure-treated timber uses copper-based preservatives (UC3 or UC4 rated) that are considered safe for contact with soil in food-growing situations. The old creosote and CCA treatments that caused concern are no longer used or sold in the UK for domestic garden applications. If you are using reclaimed timber, check it carefully for any old oily treatment residue before using it in a kitchen garden.
Do raised beds need drainage holes?
Timber raised beds built on soil or grass do not need drainage holes, as water drains through the base naturally. If building on a hard surface such as paving or tarmac, you will need to either break through the surface beneath the bed or, for very deep beds over 60cm, drill drainage holes through the lower boards at intervals to prevent waterlogging.
How often should I add compost to a raised bed?
Top dress with a 5cm layer of peat-free compost or well-rotted manure each spring before the growing season begins. Organic matter breaks down throughout the growing season and over winter, so annual replenishment keeps your soil structure open, your worm population happy, and your plants productive. Within three to five years a well-maintained bed builds an excellent, self-sustaining soil ecosystem.
Can I put a raised bed on concrete or tarmac?
Yes, but ensure the bed is at least 45cm deep, and ideally 60cm, to give roots enough depth to establish and to buffer against the faster drainage and heat fluctuation that comes with hard surface installation. Break through or drill the surface for drainage and consider a drip irrigation setup to compensate for the faster moisture loss on hot days.
What is the best width for a raised bed?
The standard recommendation is a maximum of 1.2m (4ft) if accessible from both sides, or 60cm if accessible from one side only. The key principle is that you should never need to step into the bed to reach the centre. The moment gardeners start stepping on their raised bed soil, it compacts and the benefits of the raised bed are reduced. 90cm to 121cm is the sweet spot for most kitchen gardens.
How deep should raised beds be for root vegetables?
Aim for a minimum of 40cm for root vegetables like carrots, parsnips, and beetroot. This gives enough loose, stone-free soil for roots to develop without forking or distortion. For very large varieties of parsnip or heritage carrot, 50 to 60cm is even better. Remove any stones or compacted layers before filling to ensure roots grow straight.
When is the best time to build a raised bed in the UK?
Raised beds can be built at any time of year, but most gardeners find late autumn or winter most convenient, when the garden is quieter and the bed can be filled and ready for an early spring start. If your garden has heavy clay or waterlogging issues, the RHS recommends building in late summer when the ground is drier and easier to cultivate. Avoid working soil when it is frozen or waterlogged.
Take your garden further
Enjoyed building your raised beds? My Garden Design for Beginners course will help you design the whole space around them. Step-by-step video lessons, real-world case studies, and a design certificate at the end — all taught by me, Lee Burkhill, award-winning designer and BBC1’s Garden Rescue presenter.
29
Garden Design Examples for Small Gardens: 30 Design Templates & Planting Plans
Garden Design Examples for Small Gardens: 30 Design Templates & Planting Plans: In this online gardening course, I’ll walk you through 30 fantastic garden designs, explaining the logic behind the layout, the plant choices, and take-home tips for applying them in your own garden.
Weekend Garden Makeover: A Crash Course in Design for Beginners
Learn how to transform and design your own garden with Lee Burkhills crash course in garden design. Over 5 hours Lee will teach you how to design your own dream garden. Featuring practical design examples, planting ideas and video guides. Learn how to design your garden in one weekend!
Garden Design for Beginners: Create Your Dream Garden in Just 4 Weeks
Garden Design for Beginners Online Course: If you want to make the career jump to becoming a garden designer or to learn how to design your own garden, this is the beginner course for you. Join me, Lee Burkhill, an award-winning garden designer, as I train you in the art of beautiful garden design.
Raised beds are one of the most versatile and rewarding investments you can make in your garden. They work on almost any surface, from lawn to tarmac, and give you complete control over your soil conditions. The standard 240cm x 121cm x 40cm wooden bed built from pressure-treated timber costs £80 to £150 in materials and lasts 10 to 15 years with basic maintenance.
Fill with a 60/30/10 blend of topsoil, peat-free compost, and sharp sand, line the base with cardboard to suppress weeds, and top dress with compost every spring. Whether you are growing vegetables, cut flowers, or ericaceous shrubs, a well-built raised bed will reward you with better crops and easier gardening for many years.
Your subscription could not be saved. Please try again.
Your subscription has been successful.
Lee Burkhill
Lee Burkhill, known as the Garden Ninja, is an award-winning garden designer and horticulturist with over 30 years of gardening experience and 15 years as a professional garden designer. A qualified RHS (Royal Horticultural Society) professional, Lee specialises in sustainable garden design and practical horticultural advice. He designs and presents on BBC1’s Garden Rescue and in leading gardening publications. Lee combines three decades of hands-on gardening knowledge with professional design qualifications to help gardeners create beautiful, functional outdoor spaces.
Great detailed guide on making raised beds. I’m looking to make a raised bed for my succulents and this guide is all I need. Thanks for the great article.
I have some raised beds that I established a couple of years ago; unfortunately they’re starting to suffer from soil sinkage. Any tips for how to refill around permanent plantings without digging them up? I have a mix of small fruit trees and bushes in there so would rather not disturb them if I can avoid it…
Hi Judith, Thanks for your comment. The issue you’re going to have with topping up soil is that if you cover the graft or bases of trees and shrubs you can kill them bu suffocating the main stem. Depending on how low the soil has shrunk you may need to lift them slightly and then back fill. Alternatively, you could mulch deeply towards the front of the beds but leave a ring around the shrubs and trees, which will give the illusion of depth but without suffocating them. Hope that helps. Happy Gardening. Lee
Hi Lee, we have the teeniest garden and have bought a couple of triangular raised beds to help draw the eye through the garden. You mention height at the back which makes sense. And a prairie planting scheme. What plants would that include. Recommendations would be great and then I can share what you suggest on Instagram. Thanks
Great article thank you . Can I ask if the timber reused beds you describe can be painted ? If I used a wood paint/preservative would this harm the plants? Thanks
Hi Emma. Yes of course you can stain your raised beds. Look for water based stain or paint. That’s the best. It won’t harm the plants. Hope that helps. Lee


Great detailed guide on making raised beds. I’m looking to make a raised bed for my succulents and this guide is all I need. Thanks for the great article.
I have some raised beds that I established a couple of years ago; unfortunately they’re starting to suffer from soil sinkage. Any tips for how to refill around permanent plantings without digging them up? I have a mix of small fruit trees and bushes in there so would rather not disturb them if I can avoid it…
Hi Judith, Thanks for your comment. The issue you’re going to have with topping up soil is that if you cover the graft or bases of trees and shrubs you can kill them bu suffocating the main stem. Depending on how low the soil has shrunk you may need to lift them slightly and then back fill. Alternatively, you could mulch deeply towards the front of the beds but leave a ring around the shrubs and trees, which will give the illusion of depth but without suffocating them. Hope that helps. Happy Gardening. Lee
Hi Lee, we have the teeniest garden and have bought a couple of triangular raised beds to help draw the eye through the garden. You mention height at the back which makes sense. And a prairie planting scheme. What plants would that include. Recommendations would be great and then I can share what you suggest on Instagram. Thanks
Hi Bev, Thanks for your comment. You can view my garden design services here if you’re looking for help with your specific garden. Many thanks. Lee https://www.gardenninja.co.uk/garden-design-services/
Great article thank you . Can I ask if the timber reused beds you describe can be painted ? If I used a wood paint/preservative would this harm the plants? Thanks
Hi Emma. Yes of course you can stain your raised beds. Look for water based stain or paint. That’s the best. It won’t harm the plants. Hope that helps. Lee