Sloped Garden Design: Terracing, Steps, and How to Design on a Gradient
Lee Burkhill: Award Winning Designer & BBC 1's Garden Rescue Presenters Official Blog
Intermediate level
Sloped or steep gardens strike fear into most gardeners and even some garden designers. The challenge is that most people's first instinct with a slope is to flatten it, which is almost always the wrong answer, and those who do terrace often make terraces too narrow and steps too steep, producing something that feels more like a fire escape than a garden. This guide is going to explain how as an award winning garden designer, I design amazing sloped gardens that function and look beautiful, so that you can too!
Quick Answer
A sloped garden is not a problem to solve but a design opportunity to embrace. The most successful approach is to work with the gradient by creating generous, deep terraces connected by wide shallow steps, using retaining walls of sleepers, stone, or brick to hold each level, and slowing the eye and the body down with arches, planting, and framing at key transition points. The result is a garden that feels more considered, more spatial, and more interesting than any flat garden of the same size.
Over twenty years of designing gardens professionally, I have found that sloped sites have given me some of my most rewarding projects. There is something inherently dramatic about a garden that changes level. Sloped gardens create anticipation whilst gradually revealing themselves, allowing you to design distinct spaces and create a garden ‘journey’ even in a modest plot.
This guide covers everything I consider when designing a sloped garden: how to assess your gradient, how to plan generous terraces that actually function as usable garden rooms, the right dimensions for steps that feel welcoming, how to choose and build retaining walls from sleepers or stone, how to use arches and height to slow the journey through the garden, drainage, planting, and the materials that work best in UK conditions. The goal throughout is a garden that uses its slope as a design asset rather than treating it as something to be flattened or shied away from!
Before drawing a single line or buying a single sleeper, you need to understand the gradient you are working with, because the right approach for a gentle 1:10 incline is entirely different from what a steep 1:3 bank requires.
A 1:10 gradient means one metre of height change for every ten metres of horizontal distance, which is a gentle slope you can often manage with subtle level changes and generous planting rather than full terracing. A 1:4 gradient or steeper is where proper structural terracing becomes necessary for the garden to be genuinely usable.
Measuring your gradient is straightforward. Place a long straight plank or spirit level at the top of the slope, level it, and measure the distance from the end of the plank down to the ground. Divide that measurement by the length of the plank to get your gradient ratio. A 30cm drop over 3 metres is a 1:10 slope. A 60cm drop over 2 metres is a more challenging 1:3, which will require retaining walls.
Knowing your gradient before you start means you can plan how many terraces you need, how high each retaining wall must be, and how many steps will connect the levels, none of which you can estimate accurately without this number.
Also note which direction your garden slopes in relation to the sun. A south-facing slope that falls away from the house receives excellent light on all levels and is ideal for growing, entertaining, and maximising borrowed views. A north-facing slope that rises away from the house is more challenging because the upper terraces cast shade down onto the lower ones. This does not make it unworkable, but it should inform which activities you place at which level and what plants you choose for the shadier zones.
💡 Top Tip
Mark out your proposed terrace positions on the slope with bamboo canes and string before committing to any groundwork. Walk the levels as they would be. Stand at the proposed step positions. Check sightlines from the house. It takes an hour and routinely reveals problems that would have been expensive to fix once materials were on site.
2. Terracing: The Deep Level Principle
The most common mistake in sloped garden design is making terraces too shallow. I have seen dozens of gardens where the terracing has been driven by the number of sleepers the owner bought rather than by the amount of space needed to actually use each level. A terrace 1.2 metres deep is barely enough to place a pot plant on. A terrace 2 metres deep can fit a bench, but little else. For a terrace to function as a usable garden room, it should be at least 3 metres deep; 4 to 5 metres is far better for anything involving seating or dining.
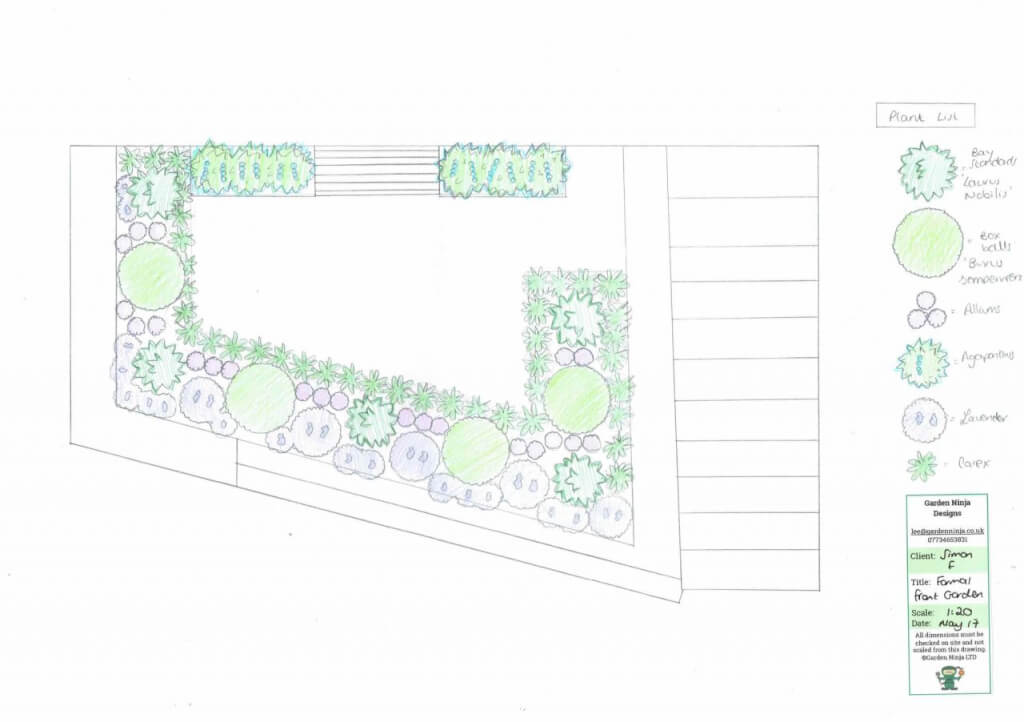
The principle I apply in all my sloped garden designs is to work backwards from how each level will be used. If the top terrace is to be a seating area with a table and chairs, it needs at least 3.5 metres of depth so chairs can be pushed back from the table without falling over the edge. If the middle terrace is a lawn, it needs to be wide enough to actually mow and for children or adults to use comfortably. Decide the function first, then calculate the depth needed, then work out how many levels your gradient can accommodate at those dimensions.
Where the gradient is very steep and creating three or four full terraces would require enormous retaining walls, consider reducing the number of levels and treating the slope between them as a planted bank rather than insisting everything be flat. A combination of two generous flat terraces connected by a planted or grass bank is often far more attractive and less expensive than four narrow terraces with high walls between them. The planted bank becomes part of the design rather than something to be engineered away.
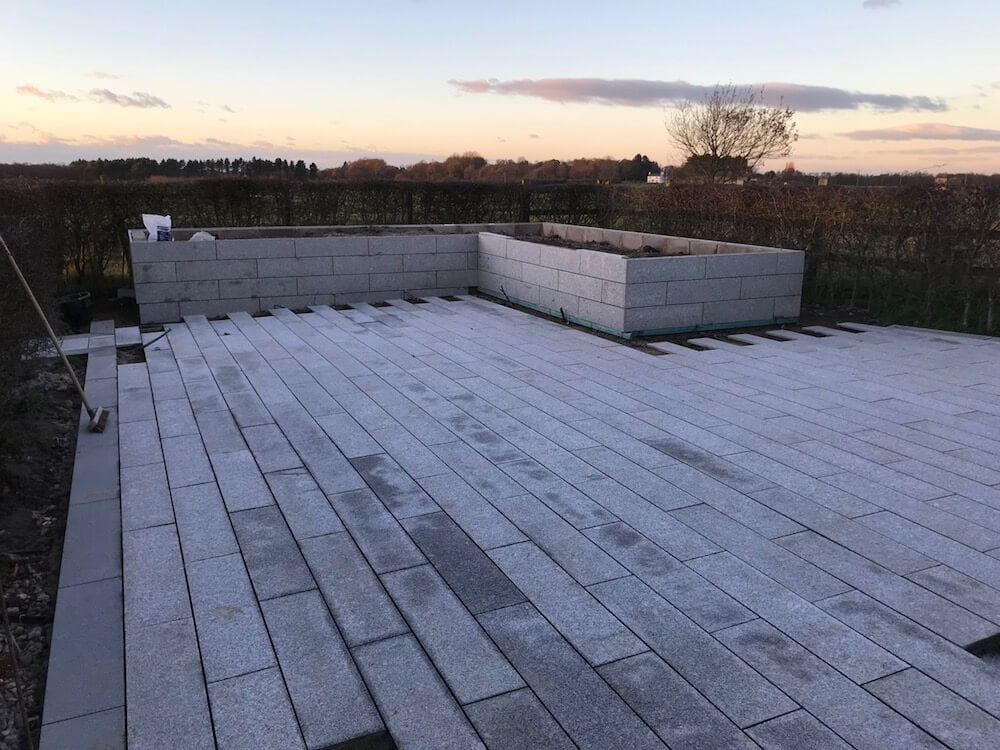
The cut-and-fill technique is the most practical method for creating terraces without removing large amounts of soil from the site. You excavate the upper part of each terrace to create the level, and use that excavated soil to build up the lower part of the same terrace. The retaining wall at the back of each terrace holds the cut face, while the wall at the front holds the filled section. Good cut-and-fill balances the soil volumes so that minimal material needs to be brought in or taken away, which significantly reduces costs and the disruption of multiple soil deliveries or skips.
3. Steps: Wide, Shallow, and Generous
Steps in a garden are not merely functional connectors between levels. They are the pace-setters of the journey through the space, and their proportions determine whether the garden feels welcoming or inhospitable. Steep, narrow steps make people hurry and keep their eyes on their feet. Wide, shallow steps invite people to slow down, pause, look around, and actually experience the change in level rather than simply get through it. Every garden I have designed with a significant slope has wide, shallow steps, and in every case, the clients comment that the steps themselves have become one of their favourite features.
The proportions I work to are a minimum tread depth of 40cm from front to back, with a riser height of no more than 15cm. Where the budget and space allow, I prefer 45 to 50cm treads with 12 to 13cm risers, which produces a step that feels almost like a gentle ramp and is comfortable for all ages. The traditional rule of thumb for outdoor steps is that twice the riser height plus the tread depth should equal roughly 65cm, but in garden design, I tend to work with shallower risers and deeper treads than this formula suggests, because the goal in a garden is a relaxed pace rather than efficient movement.
Width matters as much as depth. A step 600mm wide feels like a utility stair. A step 1.5 metres wide feels pleasant. A step 2 metres wide feels generous and allows two people to walk side by side. Where space permits, I always push for maximum step width, even if it means slightly compromising the terrace depth. Wide steps also allow pots and planting to sit at the sides without blocking the walking line, which is one of the most effective ways of bringing softness and seasonality to what would otherwise be a hard structural element.
💡 Top Tip
Always build an odd number of steps in each flight where the gradient allows. An odd number means you naturally lead with the same foot at the bottom and the top, which creates an unconscious rhythm that feels comfortable. It is a small detail that professional designers use consistently, and it makes a noticeable difference to how the steps feel in use.
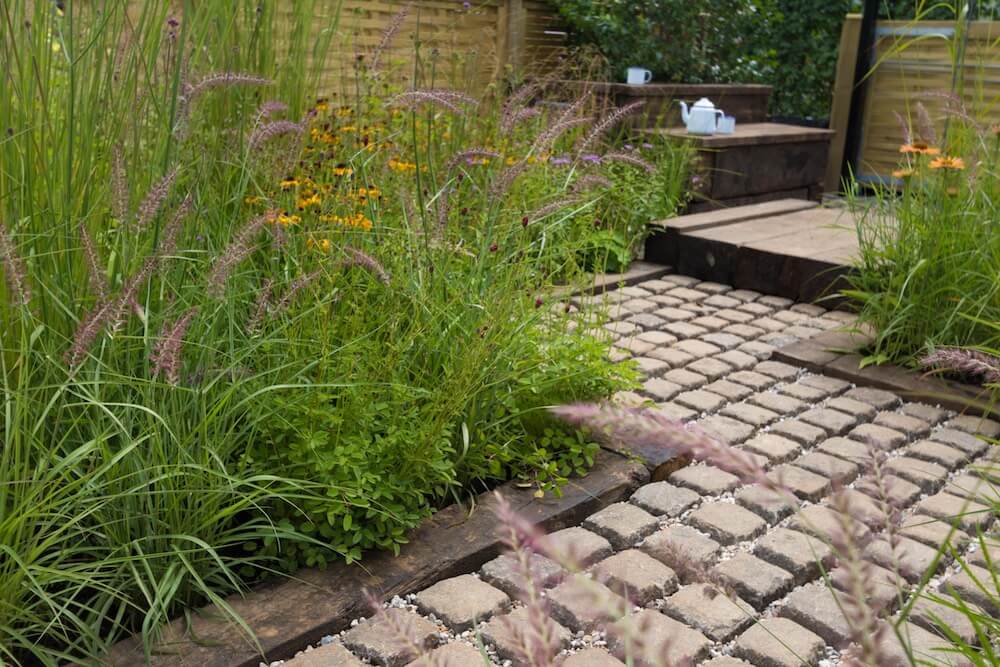
For materials, York stone is the traditional choice in northern England and looks magnificent on a wide, shallow step. It weathers beautifully, has excellent texture underfoot, and its warm honey tones work across both formal and informal garden styles. Sandstone is a more affordable alternative with similar warmth. For a more contemporary scheme, porcelain or sawn granite reads crisper and colder but suits modern architecture very well. Railway sleepers make excellent informal steps on a gentle slope, their horizontal mass looking entirely at home in a naturalistic or cottage garden setting.
The retaining wall is the structural backbone of a terraced garden. It holds back the upper-level soil, prevents erosion, and creates the vertical face that defines each tier. The choice of material is both a structural and an aesthetic decision, and getting it right means considering the style of the house, the formality of the design, the required wall height, and the available budget.
Railway sleepers are my most frequently used retaining wall material for domestic gardens in the UK, and for good reason. They are robust, relatively affordable, visually warm, and work beautifully across a wide range of garden styles from contemporary to cottage. New green oak sleepers are my preference over reclaimed or softwood: green oak is dense, resistant to moisture penetration, and weathers over time to a beautiful silver grey. It also does not contain the preservative chemicals that older reclaimed sleepers may carry. They just last far longher and are more predictable to work with.
For retaining walls up to about 60cm in height, two courses of 200mm by 100mm sleepers laid horizontally and pinned with steel rods or timber stakes give a wall that will last fifteen to twenty years in UK conditions with minimal maintenance.
For walls above 60cm, the loading from the retained soil increases significantly and the design needs more careful thought. At this height, I would normally specify either three courses of sleepers with substantial timber or steel backstays driven into the bank to prevent the wall tipping forward, or switch to a mortared stone or brick wall, which is inherently more stable. Any retaining wall over 1 metre high that supports significant soil volumes should be designed by or checked by a structural engineer, particularly on clay soils, where water pressure behind the wall can be considerable.
Dry stone walling is one of the most beautiful retaining wall solutions for country and cottage garden settings. Built without mortar, the wall breathes; water drains freely through the gaps, and the crevices provide habitats for ferns, sedums, and small alpines that colonise it over time and soften its face. A well-built dry stone wall is structurally sound for decades and improves aesthetically with age. The gaps between stones should be filled with a well-drained, gritty compost and planted with suitable species immediately after the wall is built, before the gaps close up as the wall settles.
Brick retaining walls suit period properties and formal designs exceptionally well. They create strong, clean horizontal lines and can be tied into the existing materials of the house or outbuildings for a coherent look. Use frost-resistant engineering bricks rather than standard house bricks for any wall in contact with soil, as standard bricks can saturate and spall in winter. All mortared retaining walls must have weep holes every 1.5 metres at the base to allow water to drain through from the retained soil rather than building up pressure behind the wall.
Gabion walls, which are steel mesh cages filled with stone or rubble, have become increasingly popular for contemporary sloped garden designs. They are visually striking, structurally very effective, drain freely by their nature, and can be filled with local stone to create something that feels rooted in the landscape. They suit bold, architectural planting schemes and modern house styles particularly well.
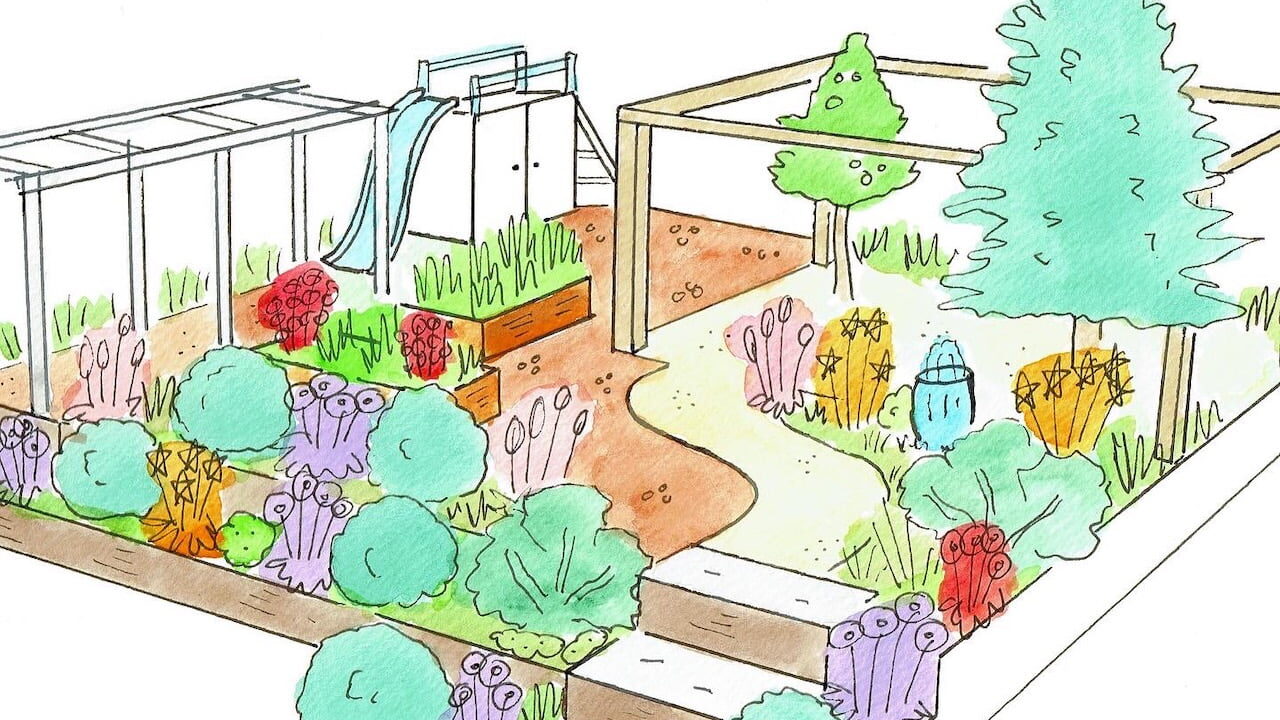
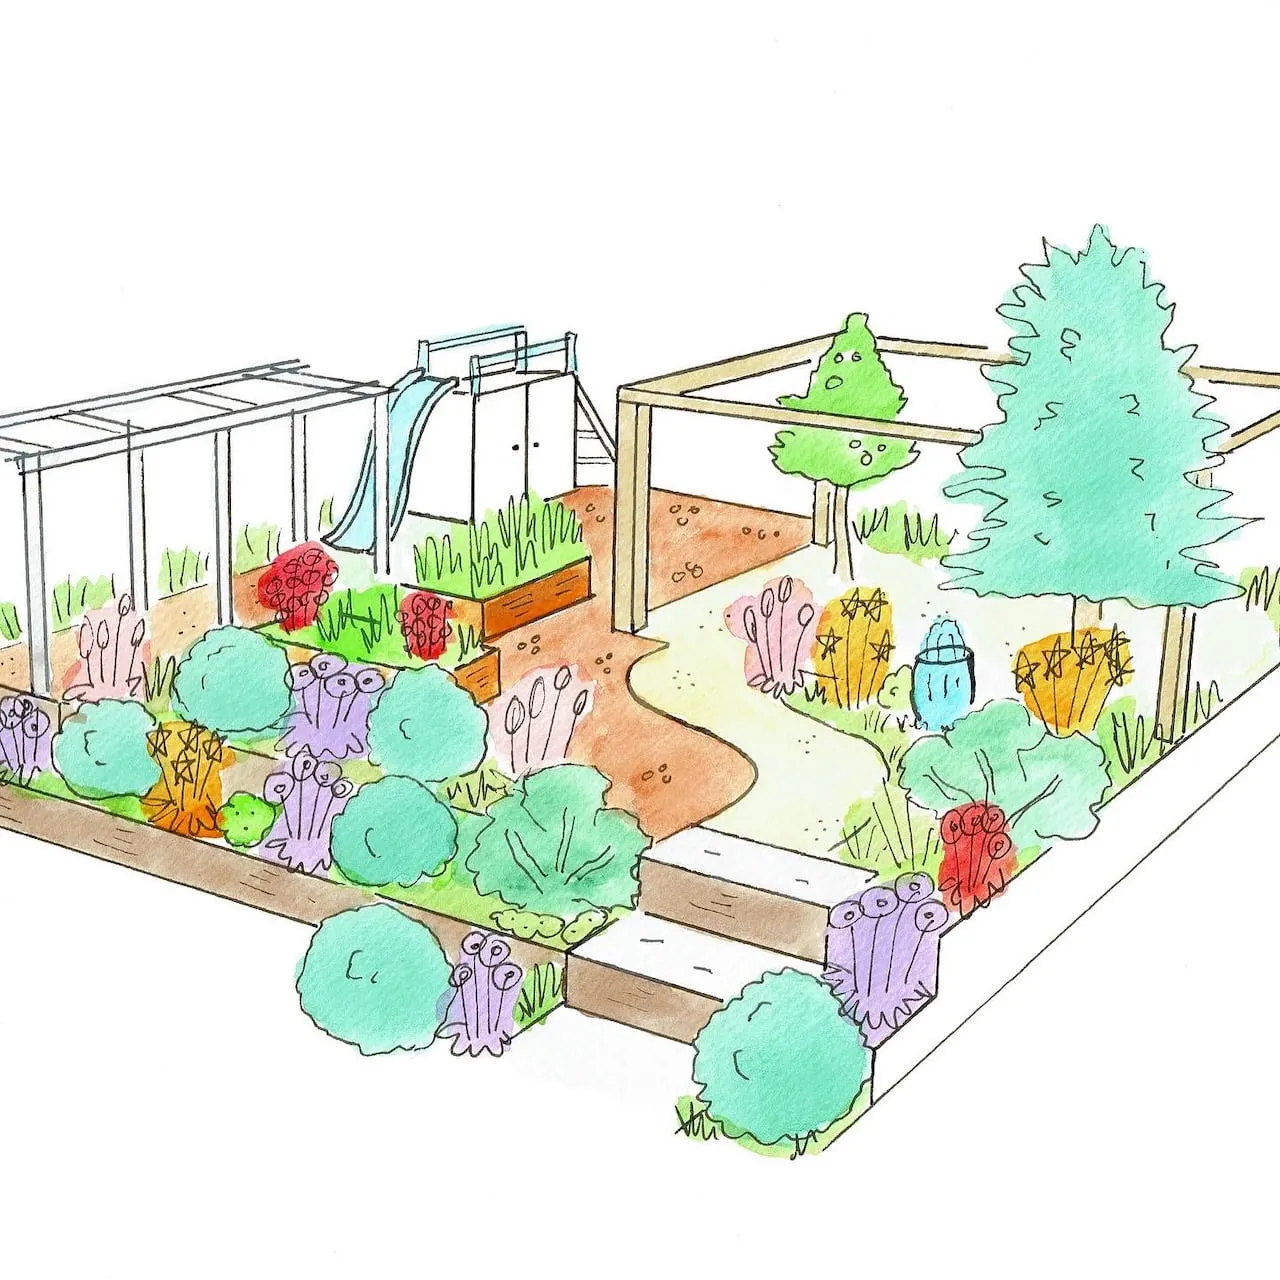
5. Arches, Framing, and Height: Slowing Down the Journey
This is the design principle that separates a well-designed sloped garden from a merely well-engineered one, and it is the aspect that most garden owners and even many contractors overlook entirely. A series of terraces connected by steps solves the practical problem of a slope, but it does not necessarily create a garden that feels interesting to move through. What makes a sloped garden truly special is the sequence of experiences it offers as you travel through it, deliberately created through arches, gateways, planting, and changes in width and height to control how you move and what you see.
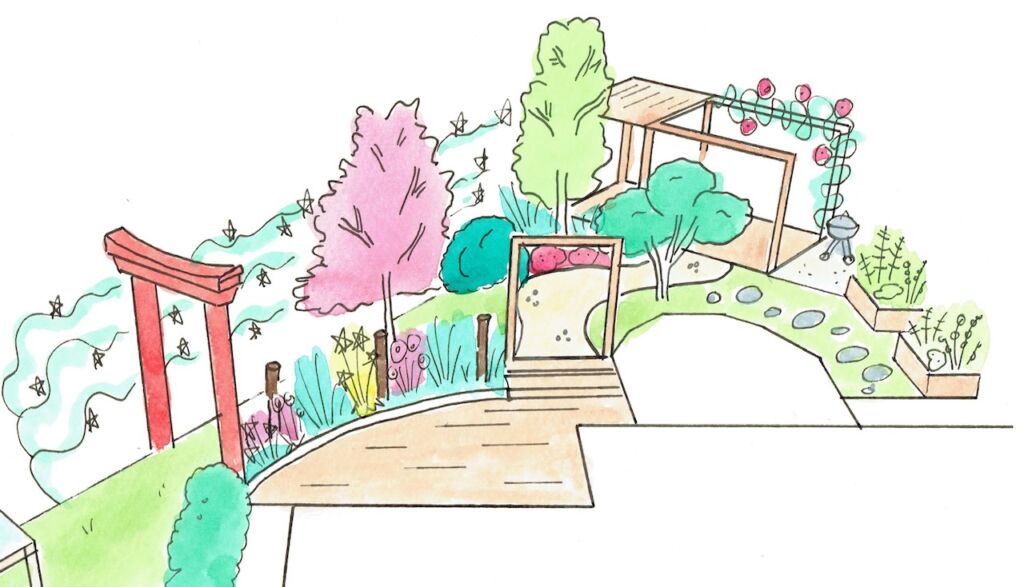
An arch placed at the top of a flight of steps does several things simultaneously. It frames the view through it and creates excitement about what lies beyond. It slows you down because you instinctively pause at a threshold before stepping through. It adds vertical height to a part of the garden that steps and retaining walls have made definitively horizontal. And it gives you an opportunity to introduce a plant with enormous impact, a climbing rose, a wisteria, a clematis, that would have no support in a flat garden. The arch is the single most cost-effective design element in a sloped garden, and placing one at each level transition transforms the whole experience of moving through the space.
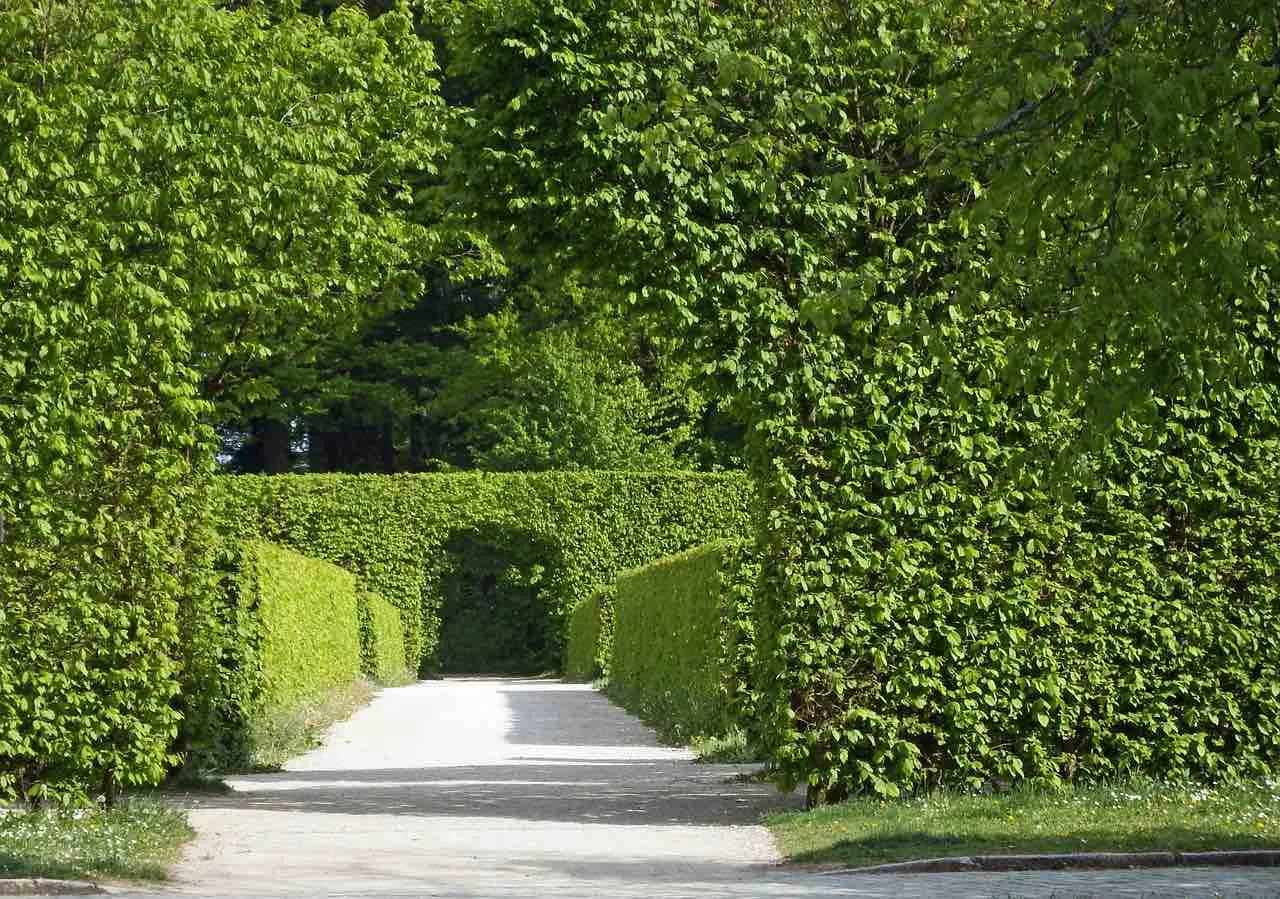
Hedged archways and clipped openings work on the same principle as a metal arch but with a softer, more permanent presence. Planting a hedge along the back of a terrace with an opening cut through it to reach the steps creates a living threshold that gains in impact every year. Box, yew, hornbeam, and beech all work well for this purpose. The visual effect is of a room with a door in it: the space feels enclosed and complete, and the step through the hedge opening into the next level feels genuinely significant. In a garden of three terraces, this approach, applied at each transition, creates what feels like three completely separate garden rooms despite the space being continuous.
Pergolas placed along the line of movement up a slope are another powerful device. A pergola spanning the full width of a terrace, positioned just before the steps to the level above, creates a sheltered transition zone that slows the pace, changes the light conditions, and gives the plants growing over it maximum impact at eye level. The classic placement is a pergola at the mid-point of the garden, creating a defined pause between the lower entertaining level and the upper productive or wilder level, framing the view back towards the house as you emerge from it.
Narrowing the path as you approach a threshold and widening it again on the other side is a subtle but effective technique for controlling pace. A path 1.2 metres wide that narrows to 80cm as it passes through an arch, then opens onto a 3-metre-wide terrace, creates a genuine sense of arrival. The narrowing builds anticipation, the threshold marks the transition, and the opening releases the eye into the wider space. This compression and release is a device used in the greatest garden designs in the world, and it works at any scale.
6. Drainage: The Foundation Everything Else Depends On
Water management is not a detail to consider after the terracing is designed; it is a foundational requirement that the terracing must be designed around. On a slope without proper drainage, water concentrates on the downhill side of each terrace, saturates the soil behind retaining walls, builds up hydrostatic pressure, and eventually causes walls to lean, crack, or fail. This is the most expensive problem in a sloped garden to fix retrospectively and one of the easiest to prevent at the design stage.
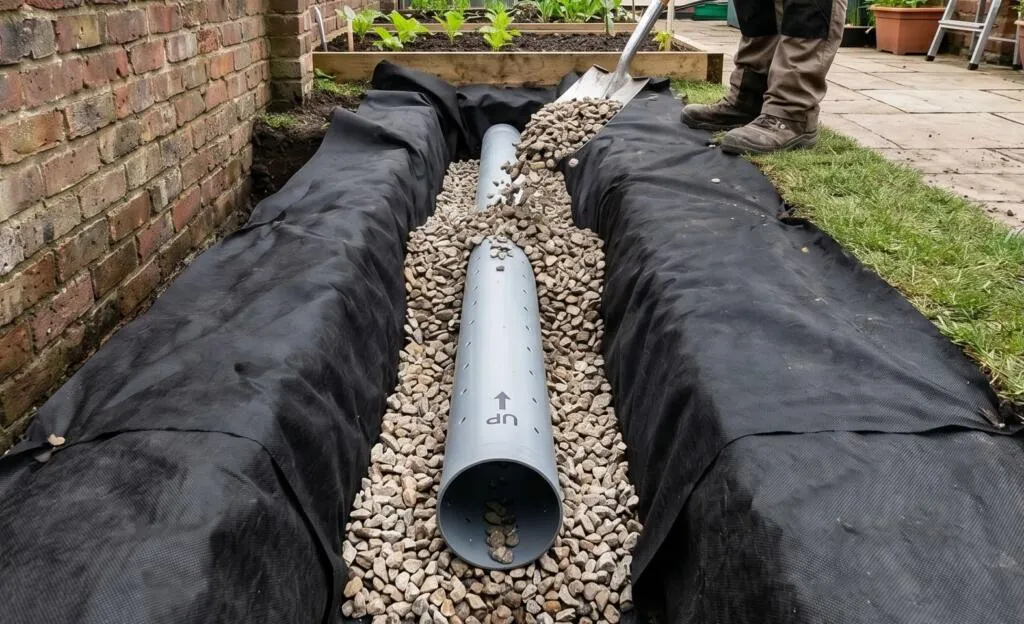
Every retaining wall needs a drainage provision. For sleeper walls, this means a layer of coarse gravel or stone behind the wall before the soil is backfilled, which creates a free-draining zone that prevents water pressure from building up against the timber. For mortared stone or brick walls, weep holes at the base are essential, and a French drain running behind the wall at its base connected to a soakaway or discharge point is best practice on any site with significant rainfall or clay soil. A French drain, which is a perforated pipe in a gravel-filled trench, costs relatively little to install during construction and can save thousands on wall repairs if omitted.
The terraces themselves should be graded very slightly, typically 1:60 or roughly 1.5cm fall per metre, towards a drainage channel or into the planting beds rather than back towards the retaining wall. On clay soils, incorporating grit and organic matter into the terrace soil before planting significantly improves drainage at the root level. On very poorly draining sites, a land drain running across each terrace to a soakaway at the lowest point of the garden is worth the additional cost.
7. Planting a Sloped Garden
Planting on a slope serves both aesthetic and structural purposes. The roots of plants stabilise the soil between terraces and on any retained banks, which is why leaving any sloped soil bare for any length of time is worth avoiding. Ground cover plants with vigorous, spreading root systems are particularly valuable on exposed banks between retaining structures, and the best of them are also genuinely beautiful.
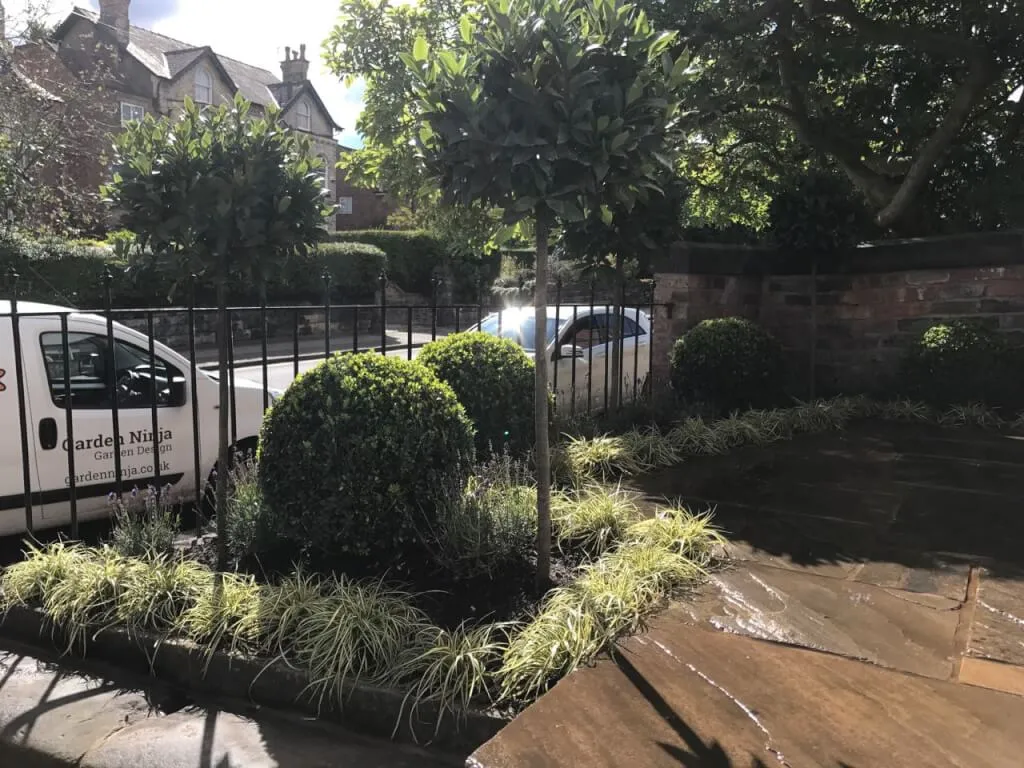
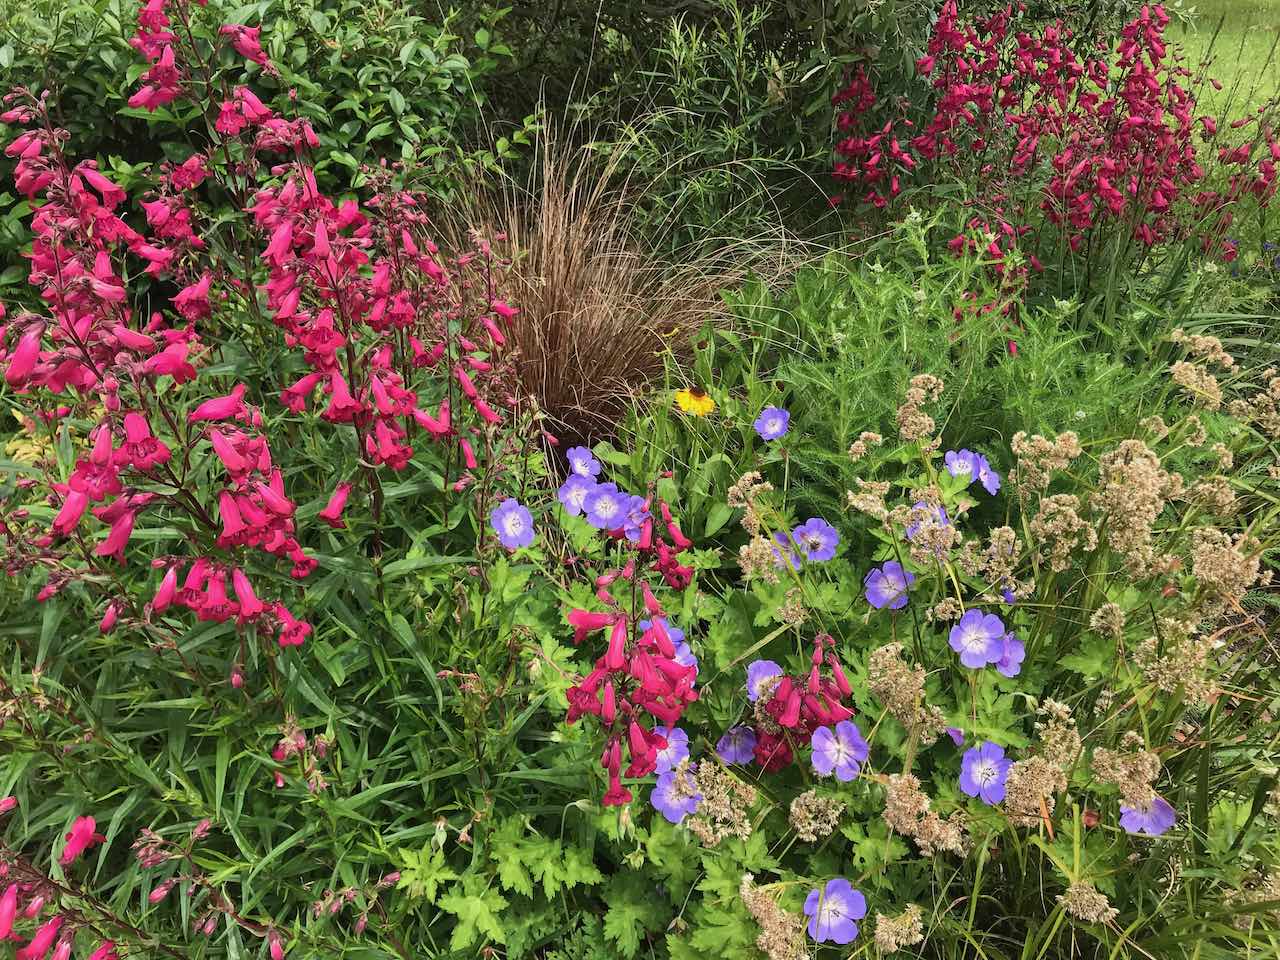
For banks and slopes between formal levels, Geranium macrorrhizum is one of the best ground cover plants available: it spreads quickly by rhizomes, smothers weeds, produces attractive pink flowers in early summer, has aromatic leaves, and turns red in autumn. Vinca minor and Vinca major stabilise banks effectively and flower reliably in shade, which matters on the shaded north-facing faces of retaining walls. Cotoneaster horizontalis is a wonderful choice for a sunny bank, its fishbone branching structure hugging the contours of the soil while its berries feed birds through winter. On steeper banks, a combination of these ground covers planted at high density, typically 5 to 7 plants per square metre, will close over and stabilise the slope within two seasons.
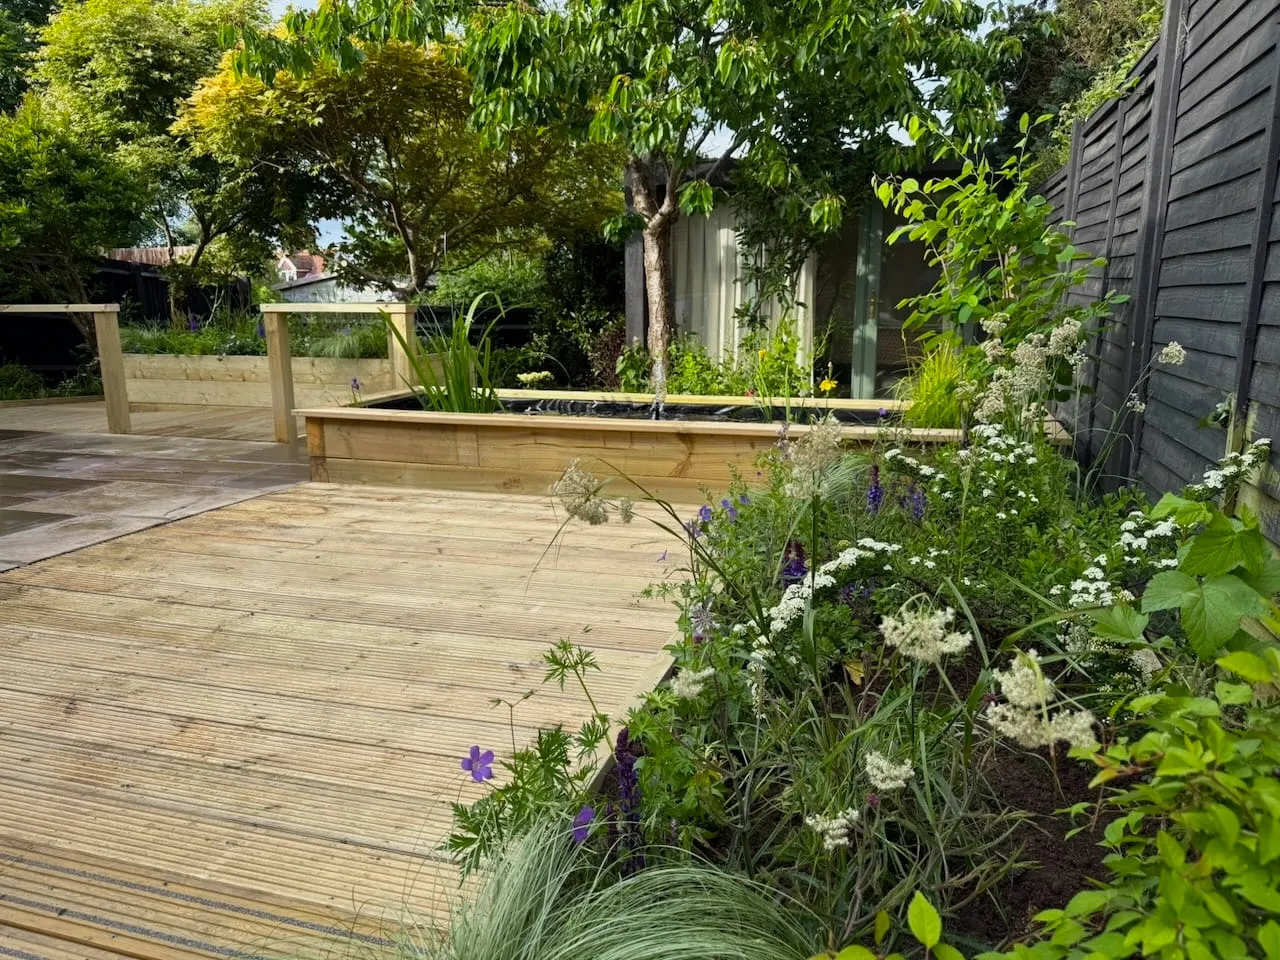
On the terraces themselves, the planting choices depend on the function of each level, but a sloped garden offers opportunities that a flat garden cannot. The retaining wall behind each terrace creates a warm, south-facing microclimate on a south-facing slope, extending the growing season and allowing slightly tender plants that would struggle in the open garden to thrive. The base of a sunny retaining wall is an ideal spot for lavender, rosemary, cistus, and other Mediterranean plants that relish reflected warmth and excellent drainage.
Vertical planting on retaining walls, arches, and pergolas is one of the great pleasures of a sloped garden. Climbing roses, wisteria, and clematis can all be trained along the top of a retaining wall to soften its face, and they will receive the excellent drainage they all prefer from the well-structured terrace soil behind the wall. On north-facing retaining walls, Hydrangea anomala subsp. petiolaris is exceptional, providing excellent coverage, creamy white flowers in summer, and attractive bark in winter without requiring any direct sun.
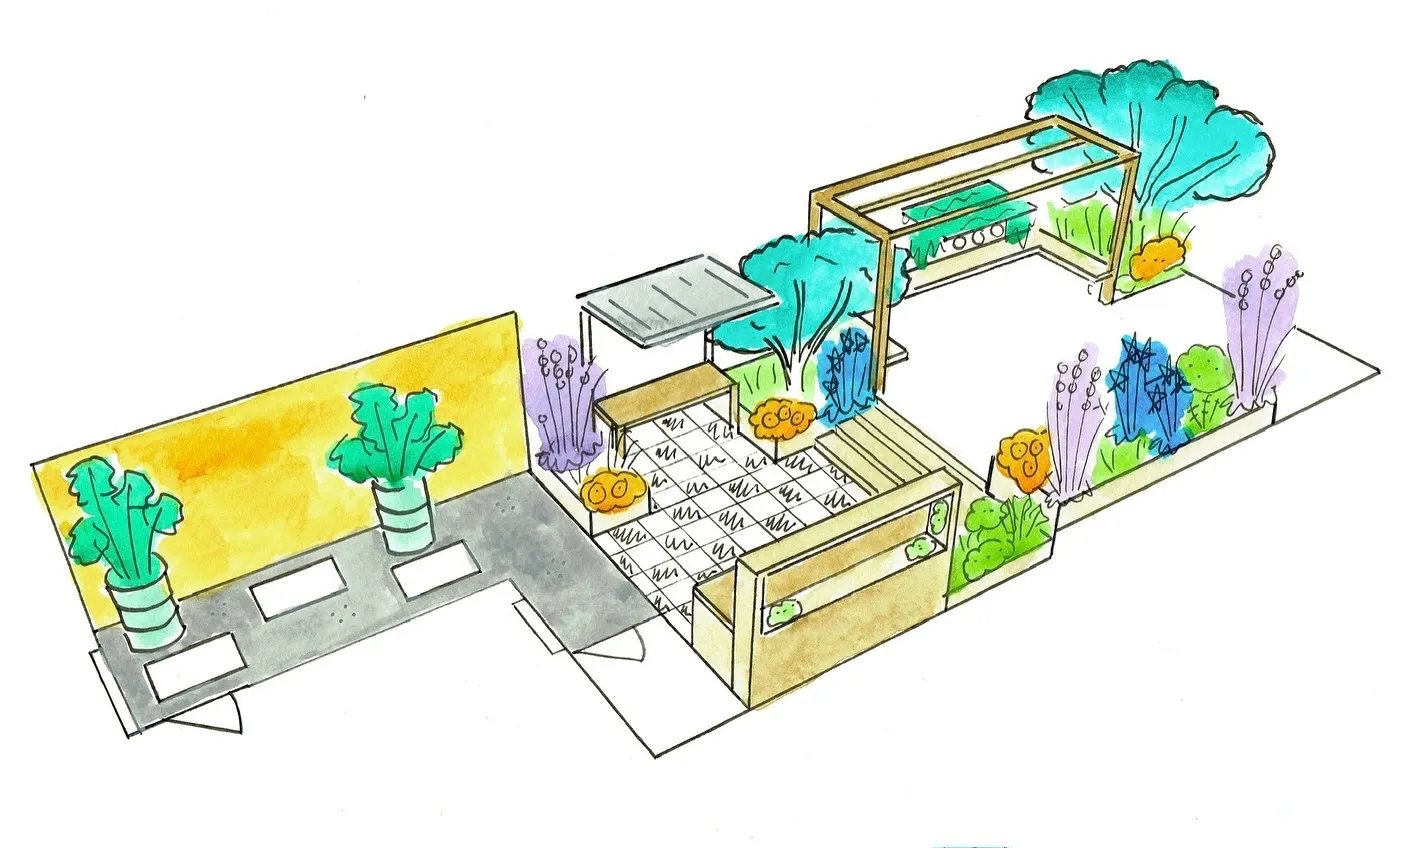
One of the great gifts of a sloped garden is that the terracing creates natural divisions that can each have a distinct purpose and character. In a flat garden, creating separate garden rooms requires deliberate planting or built structures to divide the space. In a sloped garden, the levels do this for you, and the design task is to lean into that division rather than fight it by trying to make all levels look the same.
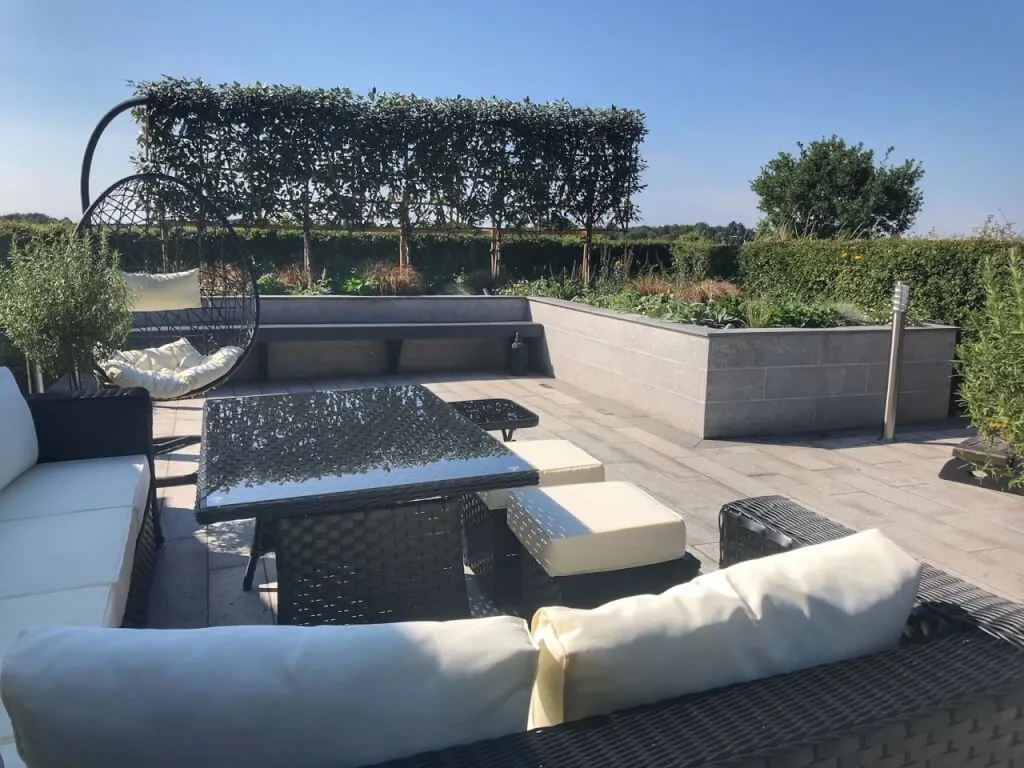
The terrace immediately adjacent to the house is almost always the entertaining level. It receives the most use, is most connected to the indoor space, and benefits from being the most generously proportioned. This is where you invest in quality paving, comfortable furniture, and the plants that perform at close range. For a south-facing garden, I generally position this terrace so it is sheltered from the prevailing wind by the rise of the garden above it, which creates a noticeably warmer microclimate and extends the outdoor season considerably.
The middle terrace is the most versatile level and the one where I most often place the main lawn area, a cutting garden, or the primary ornamental planting. It is far enough from the house to feel like a destination rather than an extension of the living room, but close enough to be easily maintained and frequently visited. On a steeply sloped site where the middle level is substantially higher than the house terrace, the view back towards the house and out over the boundary becomes a significant design asset that the planting and seating positions should be arranged to exploit.
The upper terrace, furthest from the house, is where I often encourage clients to place vegetable beds, fruit trees, a composting area, or a more naturalistic and wilder planting scheme. The extra effort of reaching it, going through an arch or up another flight of steps, makes it feel genuinely separate and gives it a sense of discovery. A garden that saves its most productive or most intimate space for the level that requires most effort to reach rewards every visit with a feeling of arrival that a flat garden can never quite replicate.
9. Costs and Budgeting for a Sloped Garden
Sloped garden design and construction costs more than flat garden work of equivalent footprint, and it is worth being realistic about this from the outset rather than discovering it when the quotes arrive. The additional costs come from the retaining wall materials and construction, the extra groundwork involved in cut-and-fill terracing, the steps themselves, and the drainage. As a rough guide, railway sleeper retaining walls typically cost between £80 and £120 per linear metre for materials, with professional installation adding £60 to £100 per metre on top. A mortared stone retaining wall runs from £150 to £300 per linear metre installed depending on stone type and wall height.
Wide shallow steps in natural stone typically cost between £200 and £400 per step installed, depending on stone type, step width, and the complexity of the setting. A flight of five wide York stone steps can therefore represent a significant investment, but they are one of those elements where the quality is highly visible and the long-term value is considerable. Steps made from sleepers cost substantially less and, while less formal, can look excellent in the right context.
The most cost-effective approach to a sloped garden is to do as much of the groundwork as possible yourself if you are physically able, particularly the initial cutting and filling, and to use professionals for the structural elements where precision and experience matter: retaining wall construction, step setting, and drainage installation. A contractor who specialises in sloped gardens will also have access to machinery that makes the earthmoving vastly faster than manual labour and may not cost as much more as you expect when the time saving is factored in.
Frequently Asked Questions: Sloped Garden Design
How do I design a garden on a steep slope?
Start by measuring the gradient so you know how much height you are working with. Plan generous terraces of at least 3 metres depth for each level, connected by wide shallow steps with treads of 40 to 50cm and risers no higher than 15cm. Choose retaining wall materials that suit the style of your house and garden, incorporate drainage behind every wall, and use arches or gateways at the transitions between levels to slow the journey and create a sense of arrival. Treat each level as a distinct garden room with its own character and purpose.
What is the best retaining wall for a garden slope?
For most UK domestic gardens, green oak railway sleepers offer the best combination of cost, appearance, and durability for walls up to 60cm high. For walls between 60cm and 1 metre, sleepers with proper backstays or mortared stone are both sound choices. Above 1 metre, mortared stone, brick, or reinforced concrete block are more appropriate, and a structural engineer should check the design. For contemporary gardens, gabion walls filled with local stone are visually striking and structurally excellent.
How wide should garden steps be on a slope?
A minimum of 1.2 metres wide for practical use, though 1.5 metres or more is much better and allows two people to walk side by side. For steps that will be a feature in themselves, 1.8 to 2 metres wide transforms them from a utility element into a genuinely welcoming part of the garden. Tread depth should be 40 to 50cm from front to back, and riser height should be no more than 15cm. Shallower risers with deeper treads feel far more generous and natural in pace than the standard dimensions used in house interiors.
Do I need planning permission to terrace my garden?
In most cases, terracing a domestic garden does not require planning permission as it falls within permitted development rights. However, there are exceptions: if you live in a conservation area or a listed building curtilage, if the works would significantly alter ground levels near a boundary, or if the retaining walls exceed certain heights. Always check with your local planning authority before starting any significant earthmoving or construction work, and if in doubt, seek a permitted development certificate for peace of mind before committing to major expenditure.
How do I stop soil erosion on a sloped garden?
The most effective long-term solution is dense ground cover planting that stabilises the soil with its root system. Geranium macrorrhizum, Vinca minor, Cotoneaster horizontalis, and ornamental grasses are all excellent for this purpose and establish within two seasons. For bare banks during the establishment period, a biodegradable erosion control matting pinned into the slope will hold the soil while the plants establish. Retaining walls and terracing provide structural erosion control for steeper sections where planting alone is not sufficient.
What plants work best on a sloped garden?
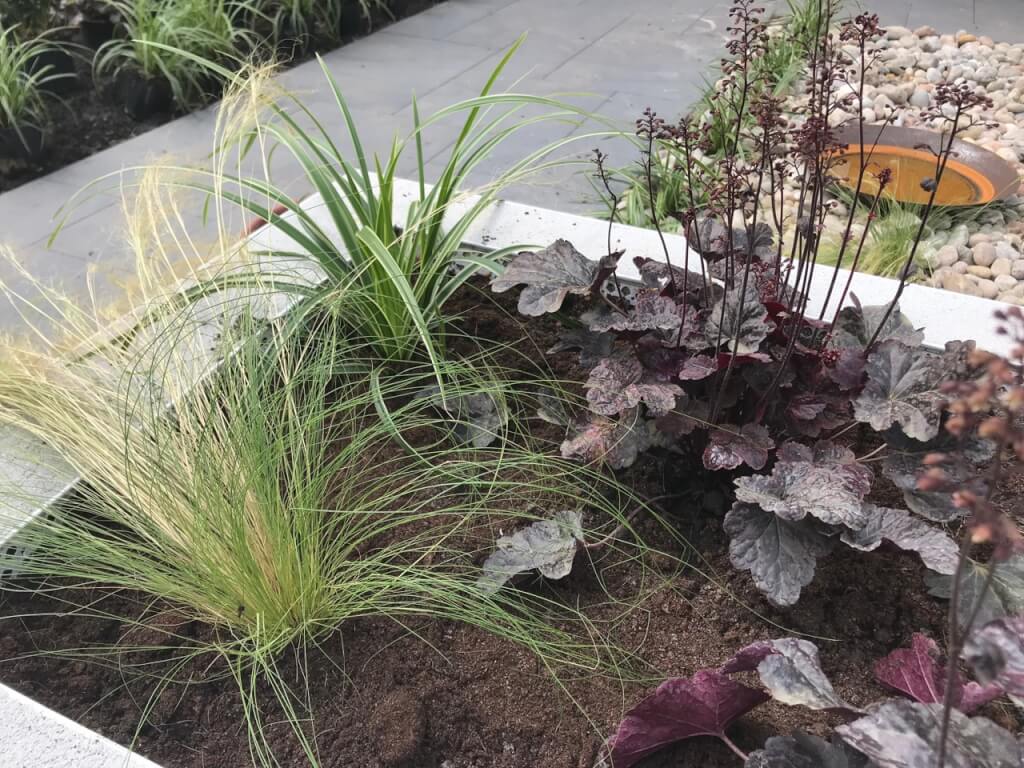
For bank stabilisation between retaining structures, ground covers with vigorous spreading roots are best: Geranium macrorrhizum, Vinca minor, Cotoneaster horizontalis, and Heuchera for shadier slopes. For planting against warm, south-facing retaining walls, Mediterranean plants such as lavender, rosemary, cistus, and salvias thrive in the excellent drainage and reflected warmth. For arches and pergolas at level transitions, climbing roses, wisteria, and clematis are the classic choices and all benefit from the good drainage that a well-built terrace provides.
If you want professional support designing a sloped garden or any other challenging outdoor space, take a look at my online garden design courses. Whether you are starting completely from scratch or trying to improve an existing layout, my courses from £29 to £199 give you the tools and confidence to design your own garden to a professional standard.
29
Garden Design Examples for Small Gardens: 30 Design Templates & Planting Plans
Garden Design Examples for Small Gardens: 30 Design Templates & Planting Plans: In this online gardening course, I’ll walk you through 30 fantastic garden designs, explaining the logic behind the layout, the plant choices, and take-home tips for applying them in your own garden.
Weekend Garden Makeover: A Crash Course in Design for Beginners
Learn how to transform and design your own garden with Lee Burkhills crash course in garden design. Over 5 hours Lee will teach you how to design your own dream garden. Featuring practical design examples, planting ideas and video guides. Learn how to design your garden in one weekend!
Garden Design for Beginners: Create Your Dream Garden in Just 4 Weeks
Garden Design for Beginners Online Course: If you want to make the career jump to becoming a garden designer or to learn how to design your own garden, this is the beginner course for you. Join me, Lee Burkhill, an award-winning garden designer, as I train you in the art of beautiful garden design.
A sloped garden is one of the most rewarding design challenges in UK horticulture. The key decisions are all about proportion and pace: terraces deep enough to actually use, steps wide and shallow enough to make the journey pleasurable, retaining walls that are structurally sound and visually considered, and arches or gateways at every level transition that slow you down and frame what lies ahead. Drainage underlies all of it and should never be an afterthought.
The gardens that make the most of a slope are the ones that treat the gradient as an opportunity for storytelling, revealing the space gradually rather than all at once, creating the sense of arrival that only comes when you have earned your way to the top through a sequence of distinct, beautiful places. Get the structure right, plant generously, and a sloped garden will give you more interest, more variety, and more pleasure than the equivalent flat plot every single time.
Your subscription could not be saved. Please try again.
Your subscription has been successful.
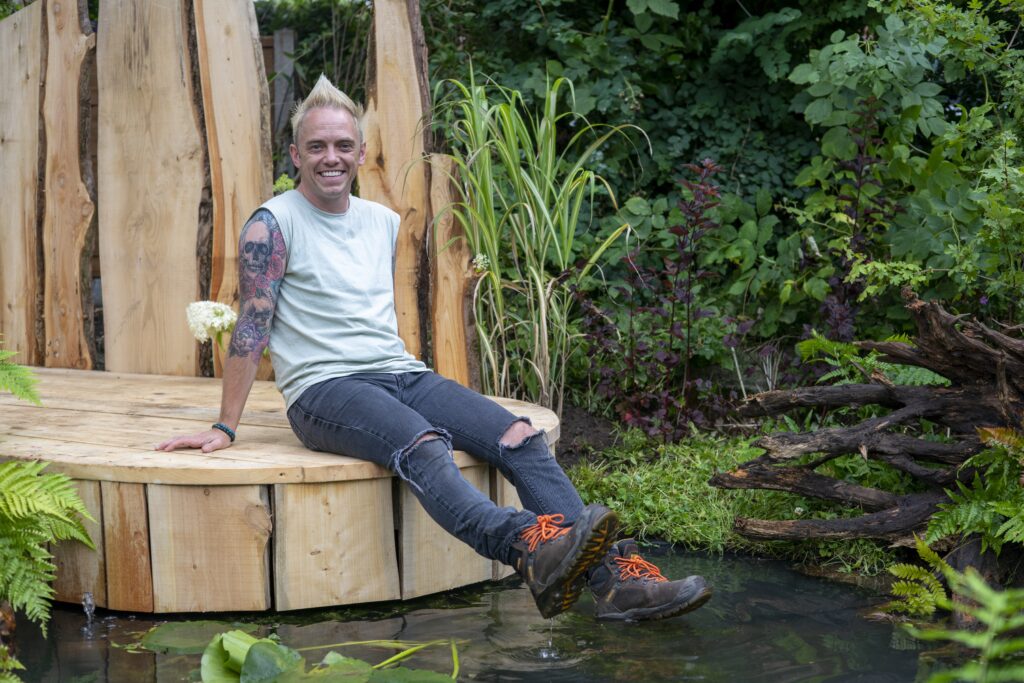
Lee Burkhill
Lee Burkhill, known as the Garden Ninja, is an award-winning garden designer and horticulturist with over 30 years of gardening experience and 15 years as a professional garden designer. A qualified RHS (Royal Horticultural Society) professional, Lee specialises in sustainable garden design and practical horticultural advice. He designs and presents on BBC1’s Garden Rescue and in leading gardening publications. Lee combines three decades of hands-on gardening knowledge with professional design qualifications to help gardeners create beautiful, functional outdoor spaces.