How to Aerate a Lawn: Hollow Tine vs Solid Tine UK Guide
Lee Burkhill: Award Winning Designer & BBC 1's Garden Rescue Presenters Official Blog
Intermediate level
Aeration is one of those lawn care tasks that almost every gardening guide mentions but very few explain properly. I have lost count of the number of times I have visited a garden where the lawn is struggling with compaction, poor drainage, and creeping moss, only to find that the owner has never aerated once in all the years they have owned the property. The connection between those problems and the lack of aeration is direct, immediate, and entirely fixable.
Compaction is the silent killer of UK lawns. It happens gradually, almost invisibly, through nothing more dramatic than regular foot traffic, the weight of a mower going back and forth, and the natural settling of soil over time. By the time you notice the symptoms, including waterlogging after rain, patchy moss colonies, and grass that looks permanently tired despite regular feeding and mowing, the compaction has usually been building for several years. Aeration is how you reverse it.
I have aerated my own garden lawn every Autumn for the past fifteen years, and the difference it makes to how the grass performs through winter and into spring is substantial. The lawn drains faster after heavy rain, holds its colour longer into the cold months, and recovers from the first spring mow noticeably more quickly than it did before I made aeration a regular part of my routine. It is not the most exciting afternoon you will ever spend in the garden, but the results speak for themselves.
This guide covers everything you need to know: why aeration matters and what compaction actually does to your grass, the real difference between hollow tine and solid tine aeration and which one your lawn actually needs, when to aerate for the best results through both spring and Autumn, how to do it properly step by step, and which tools I recommend for domestic lawns at different budget levels.
By the end, you will have everything you need to aerate your lawn confidently and integrate it into the rest of your annual lawn care programme.
This page contains affiliate links for products I use and trust. If you purchase after clicking a link, I may earn a small gardening commission at no extra cost to you, which helps keep the Garden Ninja blog free for everyone.
Quick Answer
Aerate your lawn in early autumn (September to October) or spring (March to May) when the soil is moist but not waterlogged. Use a hollow tine aerator for compacted, clay-heavy, or moss-prone lawns to remove cores of soil and create long-lasting drainage channels. Use a solid tine aerator or garden fork for general annual maintenance on lighter soils. Space holes 10 to 15cm apart and follow up with top dressing, overseeding, and feed for maximum benefit.
1. Why Lawns Need Aeration: What Compaction Actually Does
To understand why aeration matters so much, you need to know what healthy soil looks like at the microscopic level. Good lawn soil is roughly 50 per cent solid particles, 25 per cent water, and 25 per cent air. That air component is nty space. It is a network of pores and channels through which oxygen reaches the grass roots, carbon dioxide escapes, water drains freely, and the billions of soil microbes that support plant health go about their work.
When that air space is compressed out of existence by compaction, the whole system breaks down.
Compacted soil suffocates grass roots from below while looking perfectly normal from above. The grass may continue to look acceptable for a season or two as it draws on whatever reserves remain in the root zone, but the decline is already underway. Roots cannot penetrate compacted soil effectively, so they stay shallow. Shallow roots mean the grass is highly vulnerable to drought, frost, and disease. Water cannot drain through, so it sits on the surface, creating the ideal damp, oxygen-poor conditions that moss thrives in. Nutrients applied through lawn feed cannot reach the root zone, so feeding produces diminishing returns year after year.
UK soils are particularly prone to compaction for several reasons. Our clay-heavy soils compact more readily than sandy or loamy types. Our wet winters saturate the soil, making it vulnerable to compression even from light foot traffic. And the simple reality of domestic lawn use, whether that is children playing, dogs running the same circuit repeatedly, or the weight of a mower passing over the same lines week after week, steadily increases compaction over every growing season.
Aeration physically breaks up compaction by creating holes in the soil. These holes allow air back into the root zone, improve drainage, give roots space to grow deeper, and create channels through which water, nutrients, and oxygen can reach the grass plants that need them. When done at the right time of year and properly followed up, aeration is one of the most genuinely transformative things you can do for a struggling lawn.
🌿 Lawn Aeration: The Quick Version
Compacted soil? Check with the screwdriver test. If it barely penetrates 3cm, your lawn needs aerating.
Clay or persistent moss? Use hollow tine. It removes cores and keeps holes open for weeks.
Light soil, general maintenance? Solid tine or aerator shoes are adequate for annual upkeep.
Best time? September to October or March to May. Moist but not waterlogged soil.
Spacing? 10 to 15cm between holes. Two passes at right angles on badly compacted areas.
Always follow up with top dressing brushed into the holes, then overseeding, then feed two to four weeks later.
Scarify first if there is thatch present. Then aerate. Then overseed. That is the professional sequence.
2. Signs Your Lawn Needs Aerating
Compaction rarely announces itself dramatically. It accumulates gradually, and its symptoms can resemble those of many other lawn problems, which is why it is frequently misdiagnosed. Here are the specific signs that point clearly to compaction as the primary issue.
Water pooling on the surface after rain is the most reliable indicator of compacted soil. Healthy, well-aerated soil absorbs rainfall relatively quickly. If you watch puddles form on your lawn during a rain shower and persist for an hour or more after the rain stops, the soil beneath is compacted enough to have seriously compromised drainage. This is worth noting because many gardeners assume that surface pooling indicates a drainage problem requiring expensive remediation, when aeration alone often resolves it within one season.
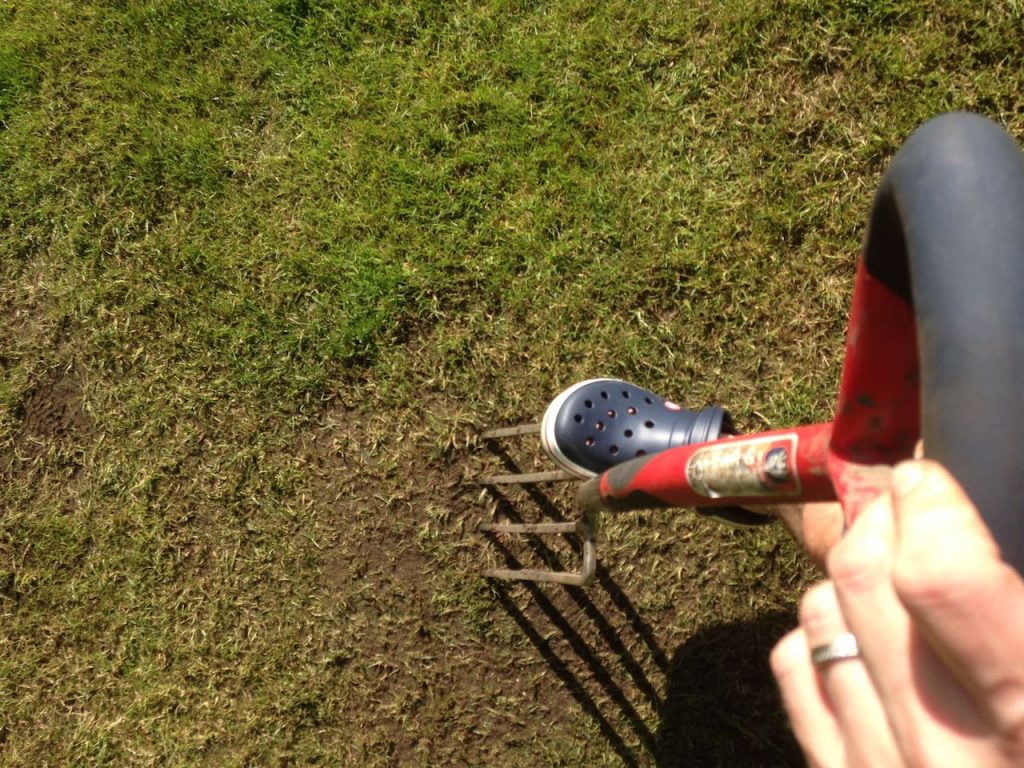
The screwdriver test is a quick and reliable way to assess compaction. Push a standard screwdriver or a pencil into the lawn with moderate hand pressure. In a well-aerated lawn with good soil structure, it should slide into a depth of 5-7cm without difficulty.
If you cannot push it deeper than 2-3cm without significant force, the soil is compacted enough to benefit from aeration. I use this test on every new client garden before making any lawn care recommendations.
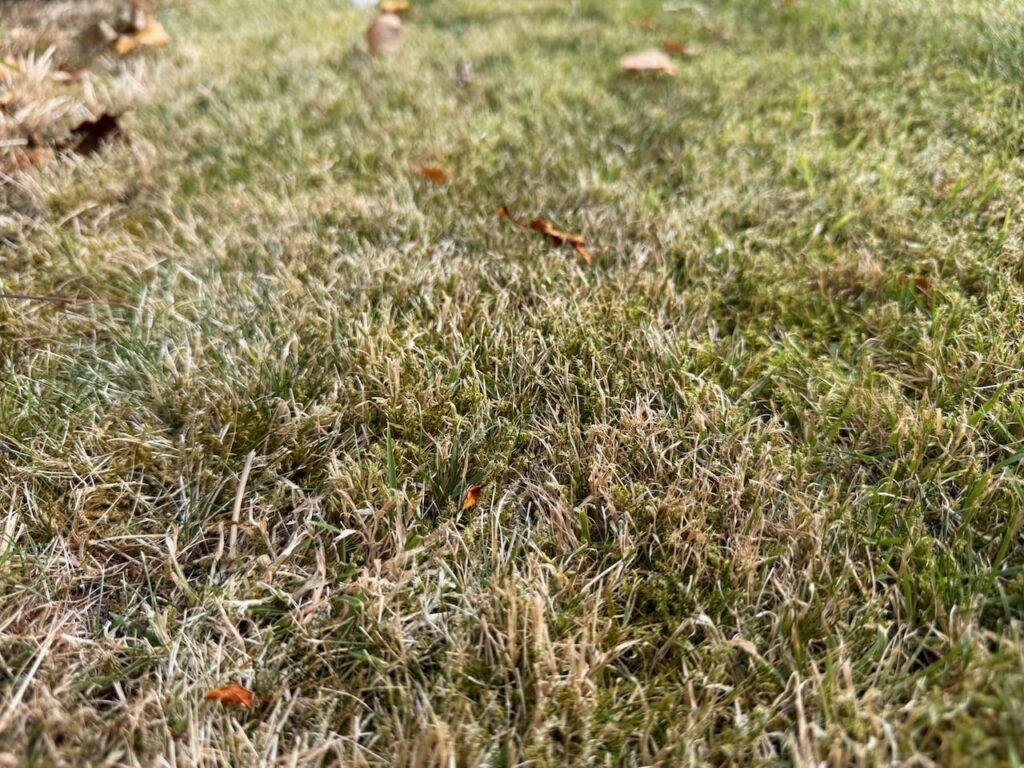
Persistent moss that returns every year despite regular treatment is almost always a compaction and drainage problem rather than a moss problem. Moss does not cause compaction. It colonises the thin, weak grass that compaction creates. Treating the moss without aerating the soil is the equivalent of painting over damp without fixing the leak. For a complete guide to understanding and eliminating moss at its source, see my complete guide to getting rid of moss in lawns.
Other signs worth noting include grass that feels unusually hard and unyielding underfoot, a lawn that dries out very quickly in warm weather despite adequate soil depth, and grass that consistently looks tired and yellow even after feeding. Any one of these, combined with a failed screwdriver test, is a strong indication that aeration should be your next lawn care task.
3. Hollow Tine vs Solid Tine: Which Does Your Lawn Actually Need?
This is the question I am asked most frequently about lawn aeration, and it matters because the two methods work differently, suit different soil types, and produce results that last for very different lengths of time. Understanding the distinction will save you from spending money on the wrong tool or, worse, making your lawn’s problems harder to solve.
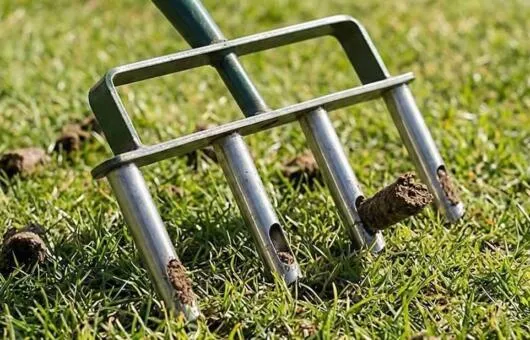
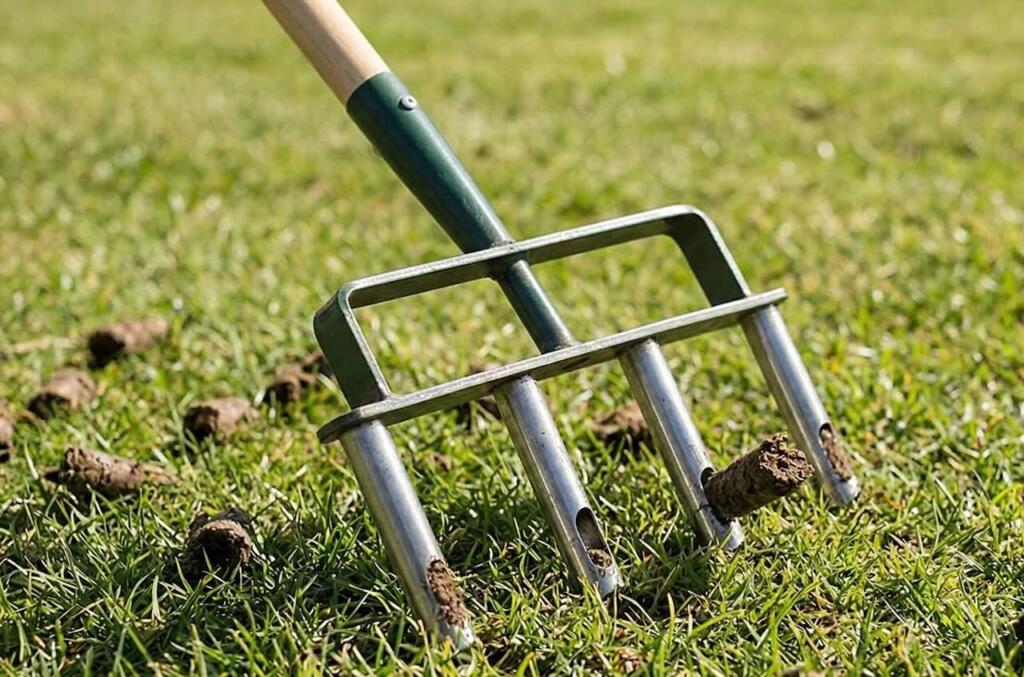
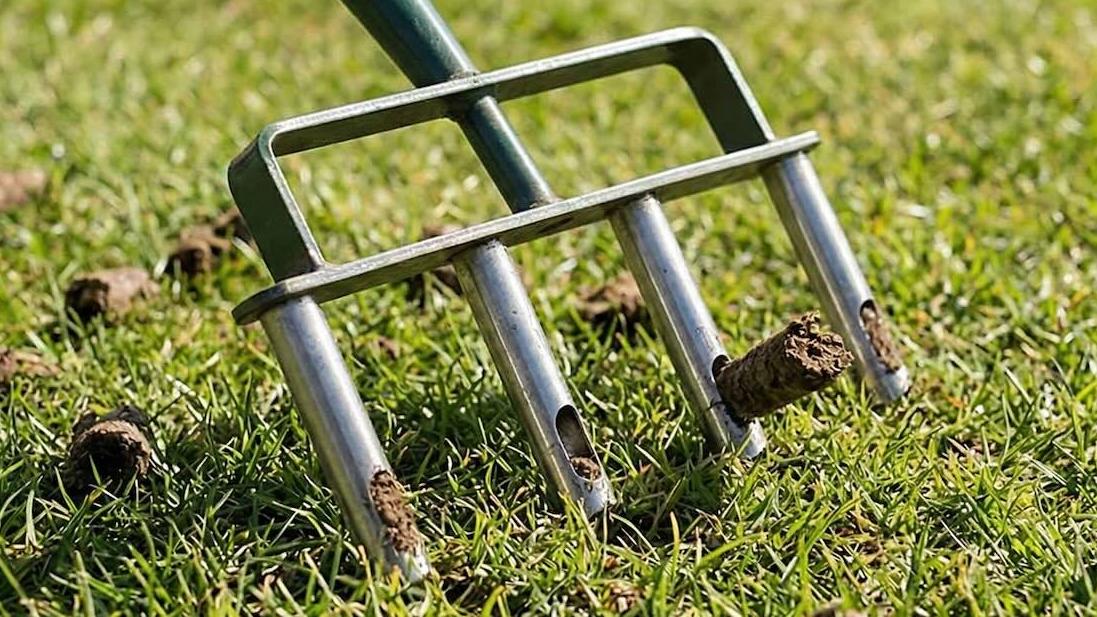
A hollow tine aerator has cylindrical, tube-shaped tines rather than solid spikes.When you push them into the soil, they extract a complete core of soil and thatch rather than simply displacing it. Those cores are deposited on the lawn surface as the aerator moves forward. The result is a hole that remains open for several weeks, giving the grass roots ample time to grow into the newly available space and allowing water, air, and nutrients to penetrate deeply and consistently.
Hollow tine aeration is the right choice for any lawn with significant compaction, clay-heavy soil, persistent moss, surface waterlogging, or a history of not being aerated. It is the more thorough treatment and produces results that last considerably longer than solid tine aeration. The trade-off is that it leaves soil cores on the lawn surface, which look untidy for a week or two until they break down or are dispersed. On sandy or lighter soils, those cores break down quickly. On heavy clay, they take longer and may need to be swept up and removed.
A solid tine aerator, which includes garden forks, aerator shoes, and rolling spike aerators, simply punches holes into the soil without removing any material. The soil is pushed sideways and downward rather than being extracted. Though, to be honest, aerator shoes or overshoes are uncomfortable, look ridiculous, and are a waste of time in my experience!
This relieves mild compaction and improves surface drainage, but the holes are smaller, have less effective impact, and close back up more quickly as the disturbed soil relaxes into position. On clay soils, solid-tine aeration can actually worsen compaction around the edges of each hole, as the clay is compressed sideways rather than removed.
🌿 Hollow Tine vs Solid Tine: At A Glance
Hollow Tine
Solid Tine
How it works
Removes a core of soil and thatch
Punches holes without removing soil
Best for
Compacted, clay, or moss-prone lawns. Any lawn that has not been aerated before.
General annual maintenance on lighter soils with mild compaction
How long results last
Several weeks. Holes stay open longer.
Days to a week or two. Holes close quickly.
Aftercare
Cores left on surface need time to break down or be swept up
No cores. Tidier immediately after.
On clay soil
Excellent. Removes the problem material.
Can worsen compaction around hole edges
Cost of tool
£18 to £40 for manual domestic tools
£0 (garden fork) to £30 for dedicated tools
Solid tine aeration is absolutely not without value. For a lawn on light, sandy soil that drains well and simply needs an annual refresh, a good session with a garden fork or rolling spike aerator is a perfectly adequate treatment. For lawns with established compaction problems, clay soil, or persistent moss, hollow tine is the tool that will actually move the dial.
If you are buying an aerator for the first time and your lawn shows any of the compaction symptoms described earlier in this guide, invest in a hollow-tine model. You can always use a solid-tine tool for lighter maintenance in subsequent years, once the serious compaction has been addressed. Going the other way, using a solid tine on a seriously compacted lawn and hoping it will solve the problem, rarely produces satisfying results.
4. Slit Tine Aeration: What It Is and When to Use It
There is a third type of aeration worth understanding, although it is less commonly used in domestic gardens. Slit tining involves thin blades or discs that slice vertically into the lawn surface rather than punching or coring. The slits create channels for water and air to move without removing or significantly displacing soil. It is particularly useful for improving surface drainage on established fine lawns where the compaction is more of a surface-level thatch problem than a deep soil structure issue.
For most domestic UK gardens, slit tine aeration is not the primary tool of choice. It works well as a complement to hollow-tine aeration on fine ornamental lawns that require frequent treatment without the disruption of full coring. For a standard family garden lawn, hollow or solid tine will serve you far better and is considerably easier to source and use. I mention it here for completeness rather than as a routine recommendation.
5. When to Aerate Your Lawn in the UK
Timing lawn aeration correctly makes a meaningful difference to how well the grass responds and how long the benefits last. The basic principle is straightforward: aerate when the grass is actively growing, and the soil is moist enough for the tines to penetrate properly, but not so waterlogged that the process damages the soil structure.
Early Autumn, from September to mid-October, is the best time to aerate a UK lawn. The soil retains summer warmth, the grass is still growing actively, and the timing aligns perfectly with overseeding and top dressing, which should always follow aeration in the same session. Aerating in Autumn also prepares the lawn for winter by improving drainage before the wettest months arrive, significantly reducing the waterlogging that encourages moss establishment.
Spring aeration, from March through to May, is the second window and is especially valuable if your lawn has come through a wet winter looking compacted and waterlogged. Improving soil temperatures and steady grass growth mean it recovers quickly from the process, and spring aeration pairs well with the spring overseeding and feeding programme that most lawns benefit from at this time of year.
Avoid aerating in the following conditions: when the soil is bone dry and rock hard in summer, as the tines cannot penetrate properly and the effort produces minimal benefit; when the soil is saturated and waterlogged after prolonged rain, as working compacted wet soil can worsen structure; and during deep winter when the grass is dormant and cannot recover from the treatment.
A lawn that is firm enough to walk on without leaving footprints, and moist enough to push a screwdriver in without extreme force, is in the right condition for aeration.
💡 Top Tip
Water the lawn thoroughly 24 hours before aerating if conditions are dry. Moist soil allows hollow tines to penetrate cleanly and extract complete cores rather than crumbling or jamming. This is especially important if you are working on heavy clay soil, where dry conditions make hollow tine aeration genuinely difficult and unrewarding. A well-watered clay lawn aerates dramatically more easily and produces far cleaner, more consistent results.
6. How to Aerate Your Lawn: Step by Step
The process is straightforward and requires no special skill, just a systematic approach and sufficient time to cover the lawn area properly. Set aside a clear afternoon rather than trying to rush it. On a typical domestic lawn of 50 to 80 square metres, a thorough hollow tine aeration session takes one to two hours.
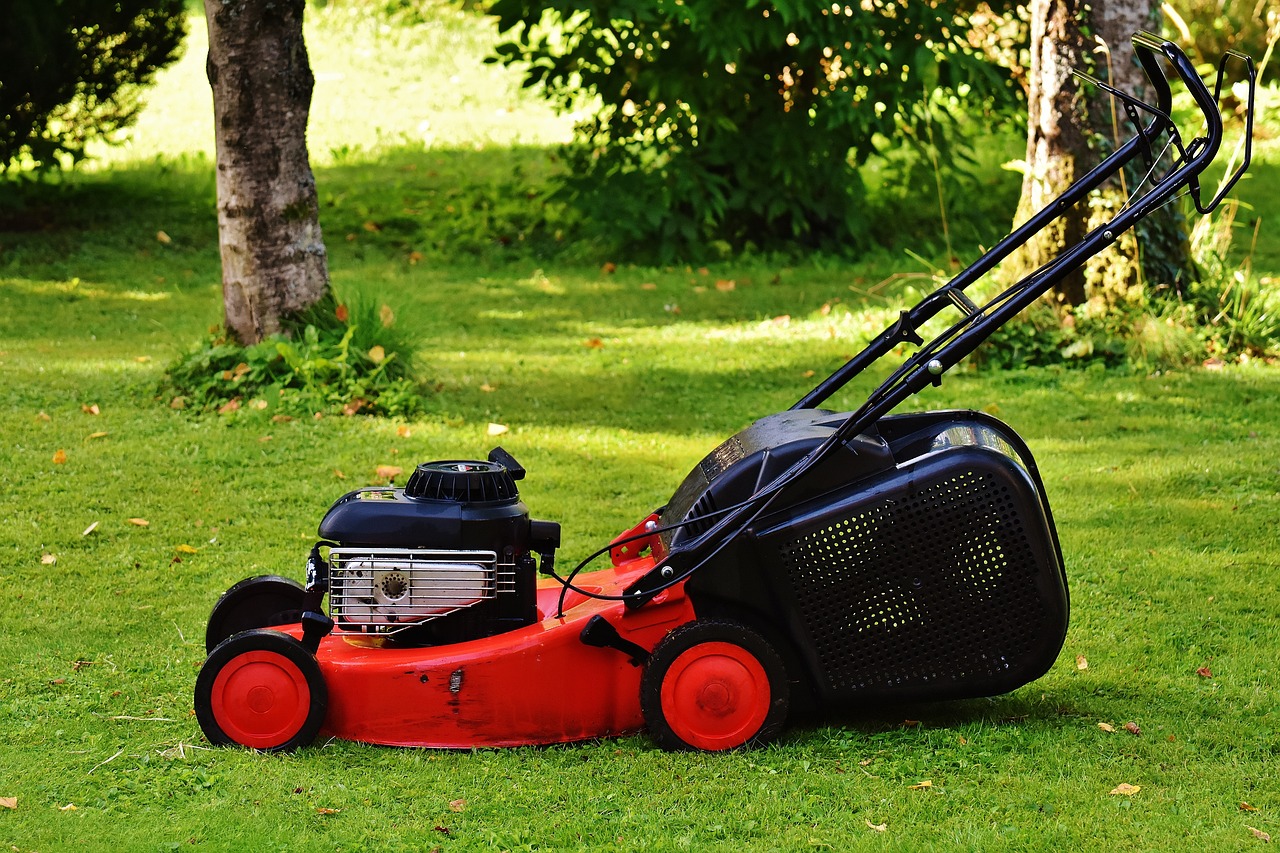
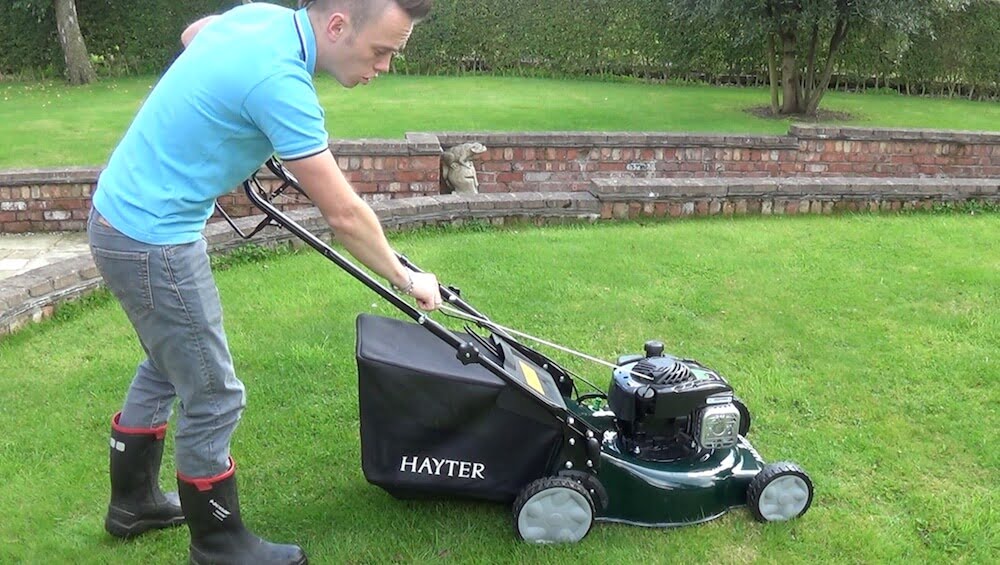
Step one is to mow the lawn one setting shorter than normal before you begin. Shorter grass makes it significantly easier to see the cores as they are deposited on the surface, simplifies the cleanup process, and gives you a clearer view of the coverage you are achieving as you work. Do not scalp the lawn, but take it down a notch from your usual cutting height.
Step two is to mark out any buried cables, irrigation pipes, or garden features that the tines could damage. Hollow tines typically penetrate to around 7-10cm with a manual tool. This is rarely deep enough to reach buried services. Still, it is worth being aware of anything shallow that might be at risk, particularly in newer gardens where utility routes may not be obvious.
Step three is to work systematically across the lawn in parallel rows, spacing each insertion approximately 10-15cm apart. Closer spacing, around 8 to 10cm, for heavily compacted areas where you are trying to achieve maximum coverage. Wider spacing, up to 20cm, for a lighter annual maintenance session on a lawn in reasonable condition. Overlap slightly at the edges of each row to avoid leaving unprocessed strips.
Make two passes at right angles to each other on very compacted lawns. Walking in one direction first, then repeating the process perpendicular to the first pass, doubles the number of holes and dramatically improves the overall compaction impact. For a lawn that has never been aerated, or has not been aerated in several years, this double-pass approach is strongly worth the extra time.
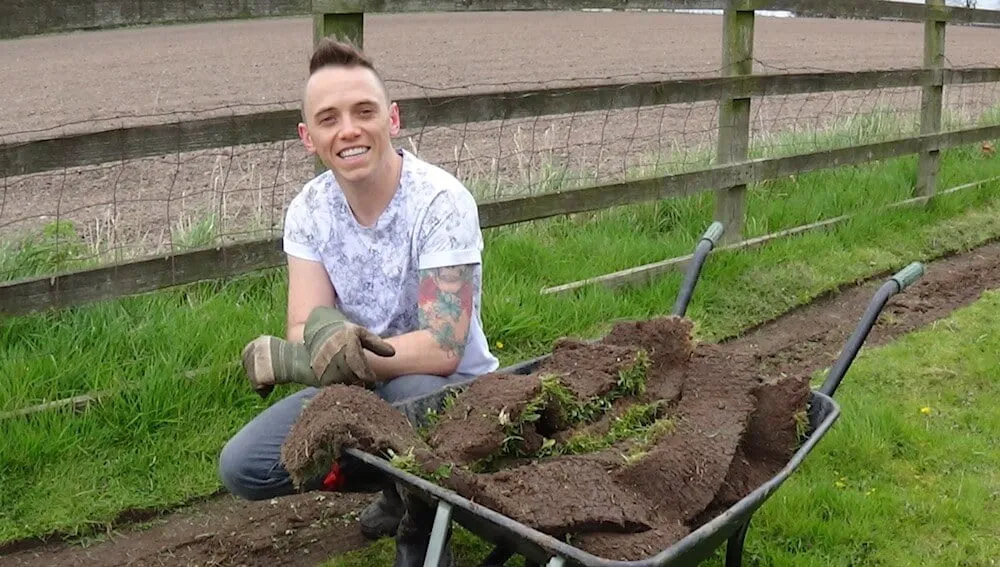
Step four is dealing with the cores. If your soil is light and sandy, leave the cores on the surface. Rain will break them down within a week or two, returning their organic matter to the sward. If your soil is clay-heavy, the cores may take considerably longer to break down and can look untidy for several weeks. In this case, run the lawn mower over them on a high setting to break them up, or sweep them off the lawn and compost them. Either approach is fine, though I usually leave them where the soil type allows, as they add organic matter back to the turf.
Once the cores are dealt with, brush a thin layer of top dressing into the holes. This is the step most home aerators skip, and it is well worth doing. Sharp sand or a sandy loam top dressing brushed into the aeration holes improves drainage long-term by preventing the holes from simply filling back with the same compacted material. Work it in with a stiff broom or the back of a rake until the surface is reasonably level.
7. What to Do After Aerating: The Follow-Up Programme
Aeration on its own delivers real benefits, but it achieves significantly more when combined with overseeding, top dressing, and feeding in the same session. The freshly aerated lawn is in the best possible condition to receive all three, and combining them in a single afternoon yields greater improvement for the same amount of effort than doing any of them separately.
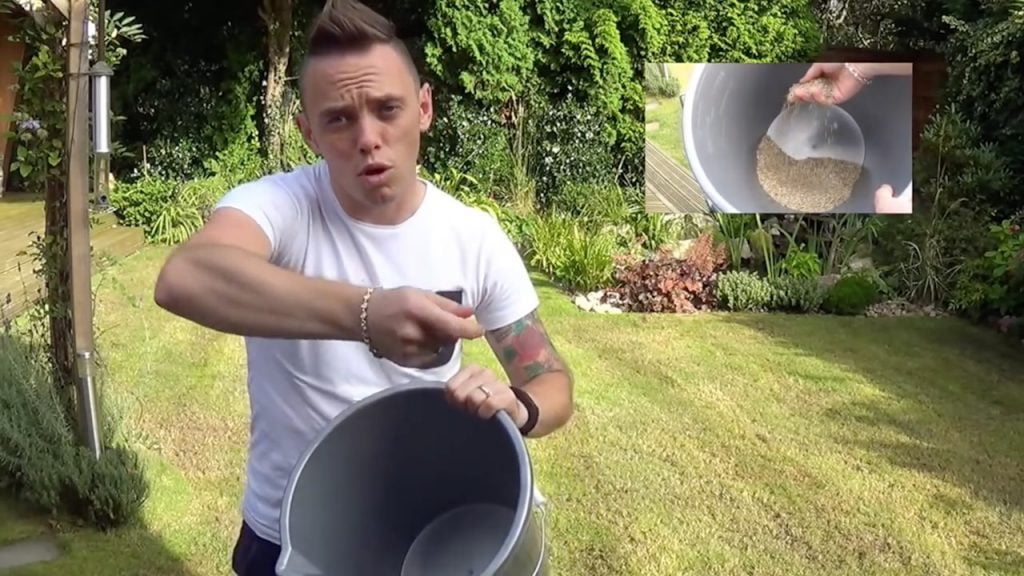
Overseed immediately after aerating. The aeration holes provide perfect seed-to-soil contact, and the disturbed surface gives fresh seed a receptive seedbed far better than that of an intact, unaerated lawn. Sow at 35 grams per square metre for general overseeding or 50 grams per square metre for thinner areas. For a full guide to the overseeding process, including timing, seed choice, and aftercare, see my complete guide to overseeding and repairing bare patches.
Apply a top dressing after overseeding to lock in the seed and improve seedbed quality across the entire lawn. A 2- to 3-mm layer of sandy loam brushed into the surface improves soil structure, helps level minor bumps, and provides the ideal germination environment for the new seed. Do not apply top dressing so thickly that it buries the existing grass. The green tips of the established turf should still be visible through the dressing when you are done.
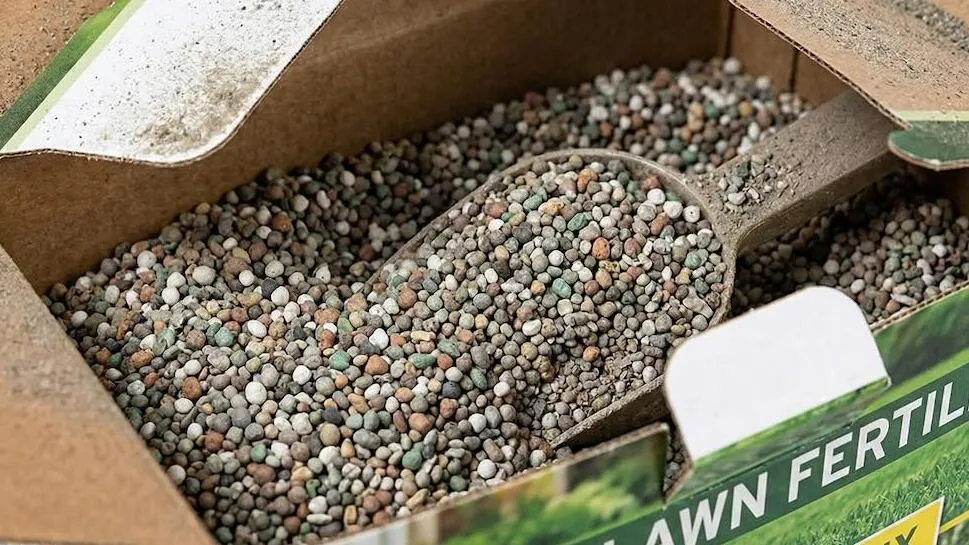
Feed the lawn two to four weeks after aerating and overseeding, once the new grass has clearly germinated and is showing healthy growth. In Autumn, use a dedicated Autumn lawn feed with low nitrogen and elevated potassium to harden the grass for winter. In spring, use a high-nitrogen spring feed to support the growth surge.
Avoid applying high-nitrogen feeds immediately after aeration, as they can push too much soft, vulnerable top growth before the roots have had time to develop into the newly opened soil. For a full guide to seasonal lawn feeding, see my complete UK lawn feeding guide.
💡 Top Tip
Plan your autumn lawn renovation as a single session: scarify first to remove thatch, aerate immediately after to open the soil, overseed into the prepared surface, top dress over the seed, and then water in thoroughly. This sequence mirrors exactly the workflow professional lawn care companies follow, and doing it all in one go in September or early October gives the grass the maximum possible time to establish before winter. My month-by-month lawn planner covers the full September programme in detail.
8. Lawn Aeration Tools: What I Recommend for UK Gardens
The domestic aeration tool market is straightforward once you understand what you are looking for. You do not need professional-grade equipment or expensive machinery to aerate a domestic lawn effectively. The right manual tool, used methodically, achieves excellent results on any garden lawn up to about 150 square metres.
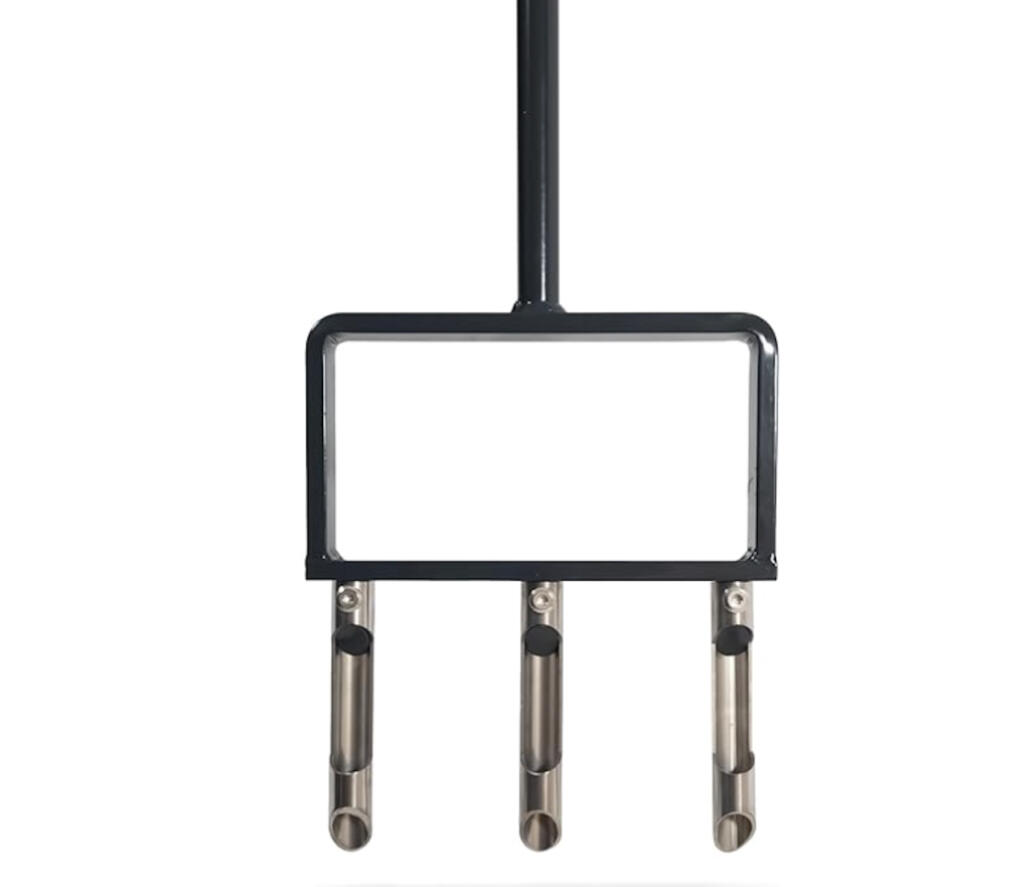
Best for Most Lawns: Manual Hollow Tine Aerator
A manual hollow tine aerator is the tool I recommend first to any gardener with a compacted, clay-heavy, or moss-prone lawn. You step on the foot bar to drive the tines into the soil, pull them back out with the extracted cores, and move forward to the next position.
The technique takes about five minutes to get used to and becomes genuinely efficient once you have found your rhythm. Look for a model with tines that penetrate to at least 7cm and a sturdy foot bar that will take your full weight without bending. The Oypla and Dolibest models available on Amazon UK in the £18-£25 range perform reliably on most domestic lawns. For a slightly more robust build, the Handy THHTA at around £30 is well regarded and comes with replacement tines.
For lawns larger than about 80 square metres, a rolling hollow tine aerator saves a significant amount of time and physical effort. These walk-behind tools use the weight of a water-filled drum to drive the tines into the soil as you push them across the lawn.
Coverage is faster and more consistent than the step-and-lift motion of a manual tool, making them well-suited to larger garden lawns where the prospect of manual aeration is somewhat daunting. Prices range from around £30 to £60 for domestic rolling aerators on Amazon UK, and the results are very good on lawns with moderate compaction.
Aerator shoes are strapped to the soles of your boots and have solid spike tines that puncture the soil as you walk across the lawn. They are a solid tine tool, so they are best suited to lawns in reasonable condition that simply need an annual maintenance aeration rather than a serious compaction intervention.
The appeal is obvious: you can aerate while doing other garden tasks, and the cost is minimal, at around £10-£15. The results are significantly less thorough than those of hollow tine aeration, but for a well-maintained lawn on lighter soil,l they provide a worthwhile annual boost. Avoid using them on clay soils, where the solid tines will compress the soil around each hole rather than create lasting drainage channels.
A garden fork is often suggested as a budget aeration solution, and for light soils, it does a reasonable job of the solid-tine role. However, on heavy clay, using a garden fork and levering it backwards, as many guides recommend, can damage grass roots and worsen compaction around the edges of the hole by pressing the clay sideways under pressure.
On clay soils specifically, a purpose-built hollow-tine aerator will always outperform a garden fork and is worth the modest investment. If you do use a garden fork, push it straight down and withdraw it straight up without levering, and keep spacings close at 8 to 10cm.
9. Should I Buy or Hire a Lawn Aerator?
This is a question I genuinely understand the appeal of. Hiring a powered lawn aerator sounds sensible in principle: you get professional-grade machinery for a fraction of the purchase price, use it once, and hand it back without storage or maintenance concerns. The hire companies make it sound like the obvious choice, and for certain situations it can be. But for the vast majority of UK domestic gardens, buying a decent manual hollow tine aerator is the better decision financially, practically, and in terms of the results you actually achieve.
Let us look at the numbers honestly. Hiring a powered lawn aerator from a local tool hire company typically costs between £50 and £80 for a half-day. Do that twice a year, in spring and Autumn as recommended, and you are spending £100-£160 annually. Over three years, that is £300 to £480. A quality manual hollow-tine aerator costs between £18 and £40 and will last 10 years or more with basic care. Even if you add the occasional replacement tine set, the purchase pays for itself within a year and saves you a significant sum over the tool’s lifetime.
The other thing hiring companies do not mention is the inconvenience. You need to book in advance, collect the machine, load it into your car, use it within the hire window, clean it down, and return it before the deadline. For a domestic garden of 50 to 100 square metres, a manual hollow tine aerator covers the whole lawn in under two hours. The hired machine saves you perhaps 45 minutes of physical effort for a garden of that size. That is not a meaningful time-saving relative to the cost and inconvenience of the hiring process.
Powered aerators also have a practical downside that is rarely discussed: they are heavy, bulky machines designed for large commercial or sports turf areas. Running a 130kg petrol aerator across a small domestic lawn risks damaging the turf surface and creates more disruption than the job warrants. I have seen small gardens left looking genuinely churned up after an over-enthusiastic session with a hire machine that was simply too aggressive for the scale of the task. A manual hollow tine tool gives you precise control over depth, spacing, and pressure that no powered hire machine can match on a domestic plot.
💡 Top Tip
Think of a manual hollow tine aerator the same way you think of a decent pair of secateurs or a good spade. It is a core lawn care tool that earns its place in the shed through regular use year after year. Buy once, store it dry, rinse the tines after use, and it will still be doing its job a decade from now. The upfront cost is genuinely modest compared to almost any other gardening equipment purchase, and the return in lawn quality is immediate and visible.
The one situation where hiring makes clear sense is if you have a very large lawn, over 200 square metres, and you want to do a one-off renovation before establishing a regular manual routine. A powered scarifier-aerator combination hired for a full day can cover large areas quickly and is worth the cost for that initial heavy intervention. After that first session, a manual hollow-tine aerator handles ongoing annual maintenance perfectly well, and you will never need to hire again.
For any domestic lawn under 150 square metres, buying a manual hollow-tine aerator is the straightforward right choice. It costs less than one hire session, stores easily in a shed or garage, is ready to use whenever conditions are right, with no booking or collection required, and gives you full control over how thoroughly you treat different areas of the lawn. The products I recommend below all fall within the £18 to £40 range and have strong reviews from UK buyers who have used them under exactly the conditions your lawn presents.
Aerating when the soil is too wet is the most common and damaging mistake. Saturated clay soil pushed sideways by tines creates compacted ridges around each hole, which can further restrict drainage. If you press your foot into the lawn and it sinks noticeably, or if footprints remain clearly visible after you step off, the soil is too wet to aerate productively. Wait for drier conditions or water lightly the day before rather than working on rain-soaked ground.
Aerating when the soil is rock-hard and bone-dry produces equally poor results, for the opposite reason. In very dry conditions, hollow tines cannot extract clean cores and tend to pull up crumbled, fragmented material that does not leave a usable hole.
If summer drought has baked your lawn solid, water it the day before and wait for the surface to take up that moisture before aerating. The difference in how easily the tines penetrate and how cleanly they extract cores is remarkable.
Aerating without following up is perhaps the most widespread missed opportunity in domestic lawn care. I have spoken to many gardeners who aerate diligently every Autumn, tick it off the list, and then do nothing else. No top dressing brushed into the holes, no overseeding, no feed.
The aeration still provides some benefit, but combining it with those follow-up steps multiplies the results severalfold. The holes you have just created are an invitation for fresh seed and good soil material. Declining that invitation is a significant missed opportunity.
Using the wrong tool for the soil type produces disappointing results that put people off aeration entirely. I have heard from gardeners who tried solid tine aeration on clay soil, saw no meaningful improvement, and concluded that aeration does not work.
Solid tine aeration on clay soil compresses the material sideways rather than opening it up. The correct tool in that situation is a hollow tine, and the results are dramatically different. If you have tried aeration before and found it underwhelming, it is worth revisiting whether you used the right type of tool for your soil.
Your subscription could not be saved. Please try again.
Your subscription has been successful.
11. Frequently Asked Questions About Lawn Aeration
How often should I aerate my lawn in the UK?
Most domestic lawns benefit from hollow tine aeration once a year, ideally in early Autumn. Lawns on heavy clay soil or subject to heavy use from children and dogs may benefit from two sessions per year, one in spring and one in Autumn. For well-maintained lawns on lighter soils, an annual solid tine treatment or aerator shoe session is usually sufficient to maintain good soil structure between more thorough hollow tine treatments every two to three years.
Should I aerate before or after scarifying?
Scarify first, then aerate. Scarification removes the thatch layer that would otherwise obstruct the tines, allowing them to penetrate more cleanly and deeply into the soil. Aerating into a thatchy lawn means the tines spend some of their penetration depth fighting through organic debris rather than reaching the compacted mineral soil where the real work needs to happen. Follow the sequence: scarify, aerate, overseed, top dress. For full guidance on the scarification process, see my complete scarifying guide.
Will aerating damage my lawn?
Aeration done at the right time of year, in the right soil conditions, causes no lasting damage to a healthy lawn. The holes left by hollow tine aeration look alarming for a few days, but the grass fills them in naturally within two to three weeks during the growing season. The lawn will look slightly holey and rough immediately after treatment, but this is temporary and entirely normal. Avoid aerating during prolonged drought or when the lawn is dormant in deep winter, as the grass cannot recover from the process in those conditions.
Can I aerate a new lawn?
Wait at least six months before aerating a newly laid turf lawn, and until the grass is growing strongly before aerating a newly seeded lawn. New roots need time to establish and knit into the soil before being subjected to aeration. Aerating too early can pull up poorly rooted turf or disturb newly germinated seedlings before they are anchored. Once the lawn is clearly established and growing well, aeration is beneficial and can be incorporated into the regular annual programme.
What should I do with the soil cores left after hollow-tine aeration?
On sandy or loamy soils, leave the cores on the surface. They will break down naturally over one to two weeks with rainfall, returning their organic matter to the lawn. Running the lawnmower over them speeds this process. On clay soils, the cores take considerably longer to break down and can look untidy. In this case, sweep them up and add them to the compost heap, or break them up by running a mower over them, then rake the fragments off the surface before top dressing.
Do not leave clay cores sitting on the lawn for long, as they can create an uneven surface once they dry and crumble.
Is aeration worth doing on a small lawn?
Absolutely, and small lawns often need it most. Small garden lawns typically receive concentrated foot traffic on a limited area, causing compaction to develop faster than on larger lawns, where use is spread across a greater surface. A modest lawn of 20 to 30 square metres can be thoroughly hollow-tine aerated in under 30 minutes, and the benefit is just as significant as on a larger area. The time investment is minimal relative to the improvement it produces.
Learn How to Design Your Own Garden
Now that you know how to keep your lawn looking green and healthy, why not take your skills to the next level with some online design training? My Garden Design for Beginners Course is here to help take your garden from average to extraordinary with an affordable online course, no matter how little your experience with plants.
This course offers step-by-step guidance from me, Lee Burkhill, award-winning garden designer and presenter on BBC1’s Garden Rescue. In this course, you’ll go from a garden design novice to a confident designer equipped to tackle any green space.
Planting Techniques – Select and arrange plants like a pro.
Design Styles & Layout Options – Explore a range of styles to suit every garden.
Course Features:
20 Hours of Study Time
Flexible Online Learning
Engaging Video Lessons & Quizzes
Real-World Case Studies
Certification upon Completion
Taught by Award-Winning Designer Lee Burkhill
Enrol now for just £199 and start your journey toward garden design mastery!
29
Garden Design Examples for Small Gardens: 30 Design Templates & Planting Plans
Garden Design Examples for Small Gardens: 30 Design Templates & Planting Plans: In this online gardening course, I’ll walk you through 30 fantastic garden designs, explaining the logic behind the layout, the plant choices, and take-home tips for applying them in your own garden.
Weekend Garden Makeover: A Crash Course in Design for Beginners
Learn how to transform and design your own garden with Lee Burkhills crash course in garden design. Over 5 hours Lee will teach you how to design your own dream garden. Featuring practical design examples, planting ideas and video guides. Learn how to design your garden in one weekend!
Garden Design for Beginners: Create Your Dream Garden in Just 4 Weeks
Garden Design for Beginners Online Course: If you want to make the career jump to becoming a garden designer or to learn how to design your own garden, this is the beginner course for you. Join me, Lee Burkhill, an award-winning garden designer, as I train you in the art of beautiful garden design.
Aeration is not complicated, but it does need to be done with the right tool for your soil type, at the right time of year, and followed up properly to get the full benefit. Choose a hollow tine for any lawn with compaction, clay soil, or persistent moss. Use solid tines or aerator shoes for lighter annual maintenance on turf that is already well-managed. Aerate in September or March when the grass is growing, and the soil is workable, not waterlogged and not baked dry.
The session that makes the biggest difference is the one you combine with scarifying, overseeding, and top dressing in September. That single afternoon of work in early Autumn sets your lawn up for a visibly better spring, a stronger recovery from winter, and a measurably thicker, more weed and moss-resistant sward through the following growing season. Plan it, schedule it, and do all four tasks together. The effort is the same as doing them separately, and the results are substantially better.
For the complete lawn renovation programme, take a look at these related guides:
Your subscription could not be saved. Please try again.
Your subscription has been successful.
Lee Burkhill
Lee Burkhill, known as the Garden Ninja, is an award-winning garden designer and horticulturist with over 30 years of gardening experience and 15 years as a professional garden designer. A qualified RHS (Royal Horticultural Society) professional, Lee specialises in sustainable garden design and practical horticultural advice. He designs and presents on BBC1’s Garden Rescue and in leading gardening publications. Lee combines three decades of hands-on gardening knowledge with professional design qualifications to help gardeners create beautiful, functional outdoor spaces.