Lee Burkhill: Award Winning Designer & BBC 1's Garden Rescue Presenters Official Blog
Beginner level
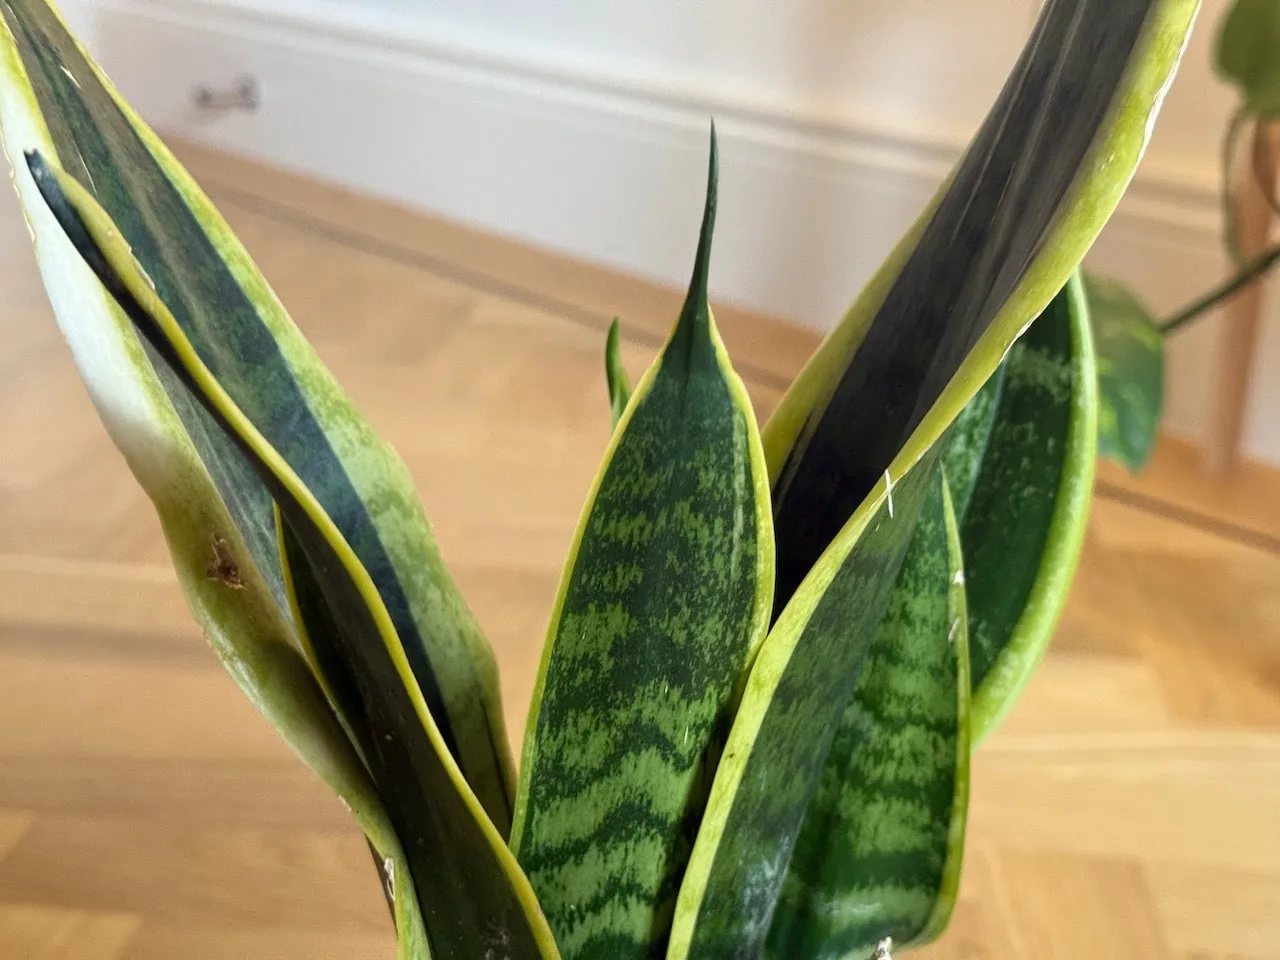
If your houseplants are looking tired, dropping leaves, or refusing to grow despite your best efforts, there's a good chance they're crying out for a repot. It's the most overlooked job in the houseplant calendar and, in my experience as an RHS-qualified horticulturalist, the one that makes the biggest difference fastest. This guide covers everything: when to do it, what compost to use, how to choose the right pot size, and the mistakes that catch most people out. Let's get into it.
Quick Answer
Repot houseplants in spring when roots are growing out of drainage holes, water runs straight through the pot, or growth has noticeably stalled. Move up only one pot size at a time, use the right compost for your plant type, and water thoroughly afterwards. Most houseplants need repotting every two to three years, not every year.
If you’ve followed my guide to the best easy houseplants for beginners and your collection is starting to grow, at some point, you’re going to need to know how to repot them properly. This is the bit most people either rush, get completely wrong, or put off until their plant is practically strangling itself. I’ve been repotting houseplants for over 35 years and the good news is that once you understand what you’re actually trying to achieve, it becomes one of the most satisfying jobs in the houseplant calendar. 🌿
Getting this right is the difference between a houseplant that thrives for years and one that slowly declines despite your best efforts. The wrong pot, the wrong compost, or the wrong time of year can undo months of good care. This guide covers all of it: when to repot, which growing media to use, how to choose a pot, step-by-step techniques, and the mistakes I see most often in the Garden Ninja forum that are entirely avoidable.
This page contains affiliate links for products I use and love. If you take action (e.g., subscribe or make a purchase) after clicking a link, I may earn a gardening commission, which helps me keep the Garden Ninja Blog free for all.
Why Repotting Matters More Than Most People Realise
In nature, plant roots expand indefinitely through soil, constantly accessing fresh nutrients, oxygen, and space. Your houseplants are confined to a finite container where roots eventually fill every available gap, the compost nutrients get exhausted, and drainage starts to fail. Without periodic repotting, several problems develop simultaneously and compound each other.
Most potting composts exhaust their nutrients within six to twelve months. Regular feeding helps, but it doesn’t replace the structural benefits of fresh compost, such as improved drainage and aeration. When roots fill the pot and start circling inside, they form a dense mat that restricts water and nutrient absorption, even when you’re doing everything else right. Old, compacted compost stops draining properly and increases the risk of root rot, which is one of the most common ways houseplants slowly and seemingly inexplicably decline.
Repotting fixes all of this in one go. It gives the roots room to grow, provides a fresh nutrient source, restores drainage, and lets you check the roots for any problems that aren’t visible on the surface. Done at the right time and in the right way, it’s one of the most effective things you can do for your houseplant collection.
Signs Your Houseplant Needs Repotting
The most important skill here is learning to read your plants rather than repotting on a fixed schedule. Most houseplants don’t need repotting every year, and moving a plant that’s perfectly happy in its current pot can cause unnecessary stress. Here are the signs that actually mean it’s time.
🌿 Signs Your Houseplant Needs Repotting
Sign
What It Means
Urgency
Roots growing out of drainage holes
Plant has filled the pot and is searching for more space
High
Water runs straight through without absorbing
Root mass has displaced most of the compost
High
Roots visibly circling the top of the compost
Plant is root bound and running out of room
High
Growth has stalled despite good care and feeding
Nutrients exhausted or roots too cramped to function
Medium
Plant is top-heavy and falling over
Root to foliage ratio is out of balance
Medium
Compost smells musty or sour
Compacted old compost is harbouring fungal problems
Medium
Two to three years have passed since last repot
Worth checking even if no obvious signs
Low
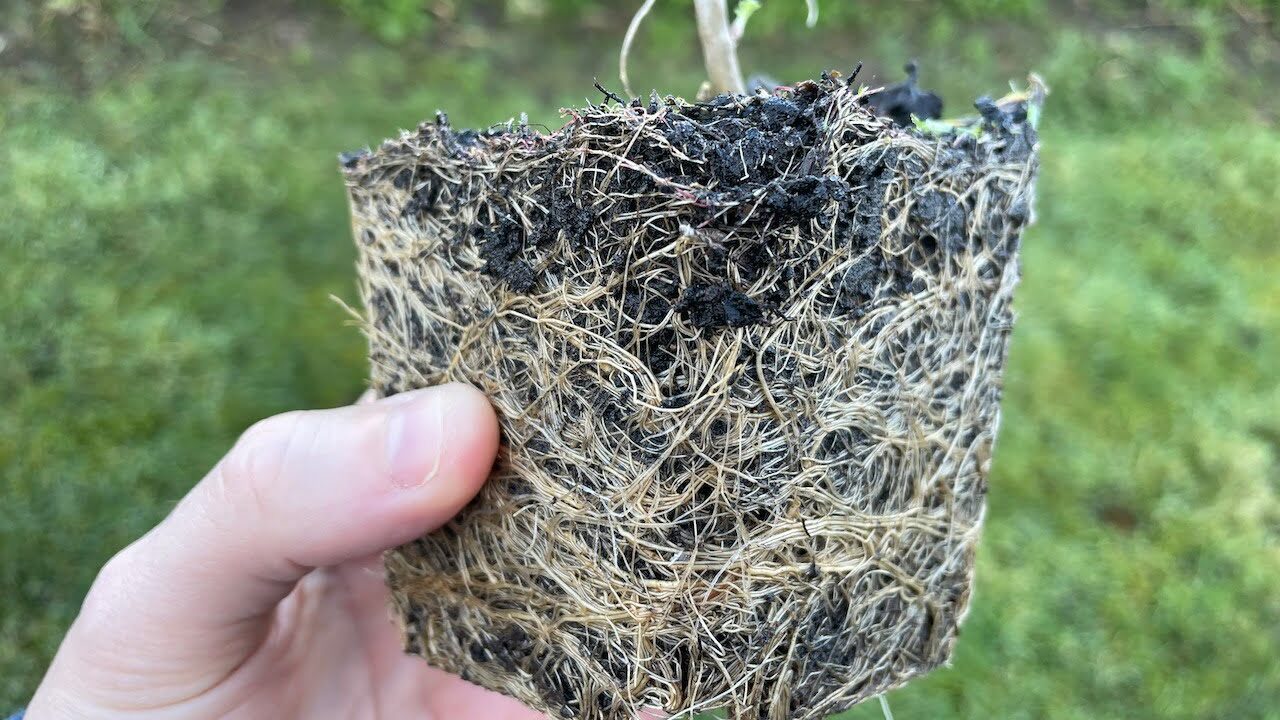
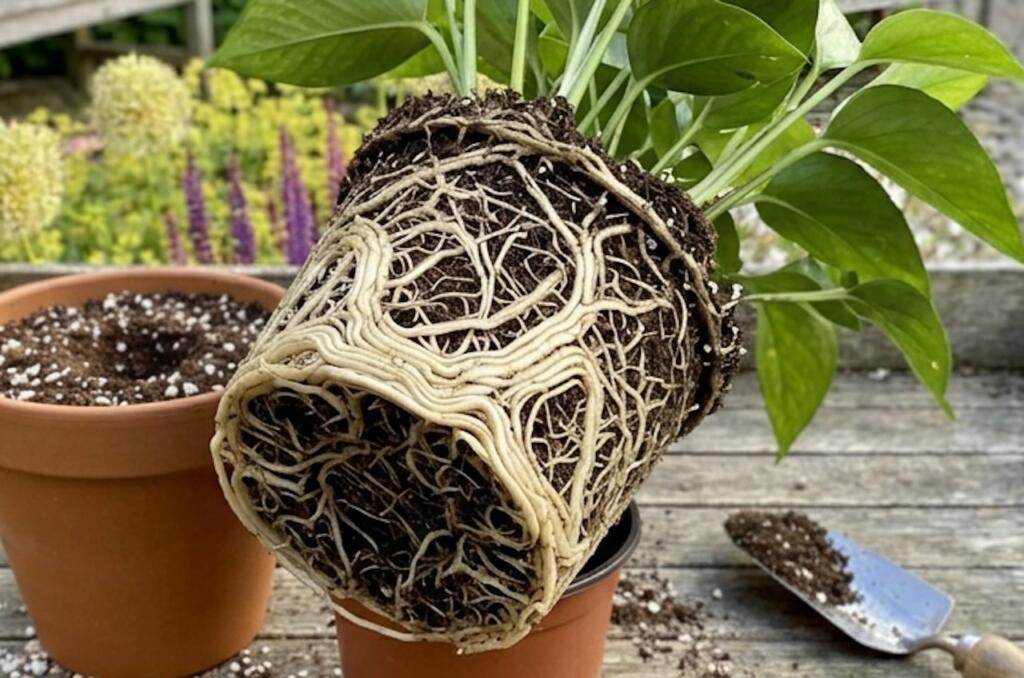
The simplest check of all is to slide the plant gently out of its pot and look at the root ball. If you can see plenty of dark compost with roots distributed through it, the plant is fine. If you see a dense, pale mass of roots with almost no compost visible, it’s time to repot. This takes thirty seconds and gives you a definitive answer without any guesswork.
The Best Time of Year to Repot Houseplants in the UK
Spring, specifically March to May, is the optimal repotting window for the vast majority of houseplants in the UK. As daylight hours increase and temperatures rise, most houseplants emerge from their winter dormancy and enter active growth. This matters enormously because a plant that’s actively growing can recover from the disturbance of repotting within a week or two, quickly throwing out new roots into the fresh compost. The same plant repotted in November is sitting in expanded compost with no growth energy to establish itself, and the risk of root rot is significantly higher.
💡 Top Tip
If you miss the spring window, early summer is still fine for most tropical houseplants. The one situation where timing matters less is if a plant is clearly suffering and in urgent need: a severely root-bound plant or one sitting in rotten compost is better off repotted at the wrong time of year than left to deteriorate further.
What Kit You’ll Need Before You Start
Before you get your hands dirty, it’s worth having everything laid out and ready to go. Repotting with one hand while rummaging for a trowel with the other and a root ball balanced on your knee is not the calm, controlled experience you want. The good news is that you don’t need a huge amount of specialist kit. Here’s what I always have on the potting bench before I start.
🌿 Repotting Kit Checklist
Item
What It’s For
Essential?
Watering can with a fine spout
Precise watering before and after repotting without disturbing fresh compost
Yes
Hand trowel
Working compost into gaps between the root ball and pot walls
Trimming damaged, rotten, or circling roots before repotting
Yes
Old newspaper or a potting mat
Catching spilt compost and protecting your work surface
Yes
Perlite
Mixing into compost to improve drainage and aeration
Yes
Misting bottle
Settling compost dust and providing humidity for tropical plants after repotting
Helpful
Rubbing alcohol or garden disinfectant
Wiping blades between cuts when removing rotten roots to prevent spreading fungal problems
Helpful
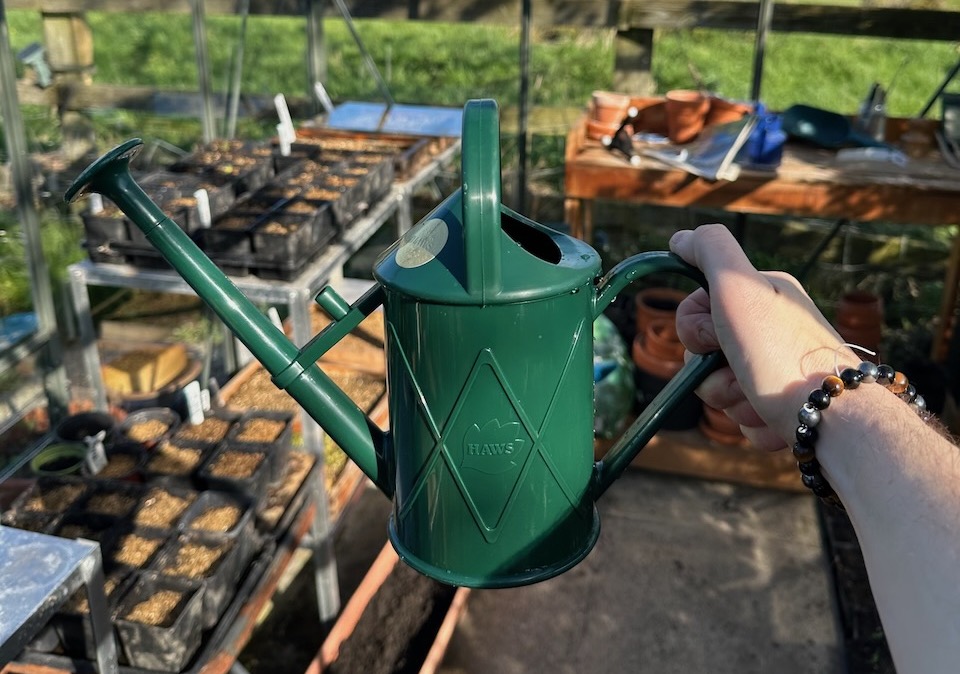
🛒 Haws Handy Watering Can 1.5L
The long, narrow spout gives you precise, gentle control when watering in newly repotted plants without blasting compost out of the pot. Made in Britain and built to last decades. I’ve recommended this can on BBC Garden Rescue more times than I can count and it’s the one I use myself every single day.
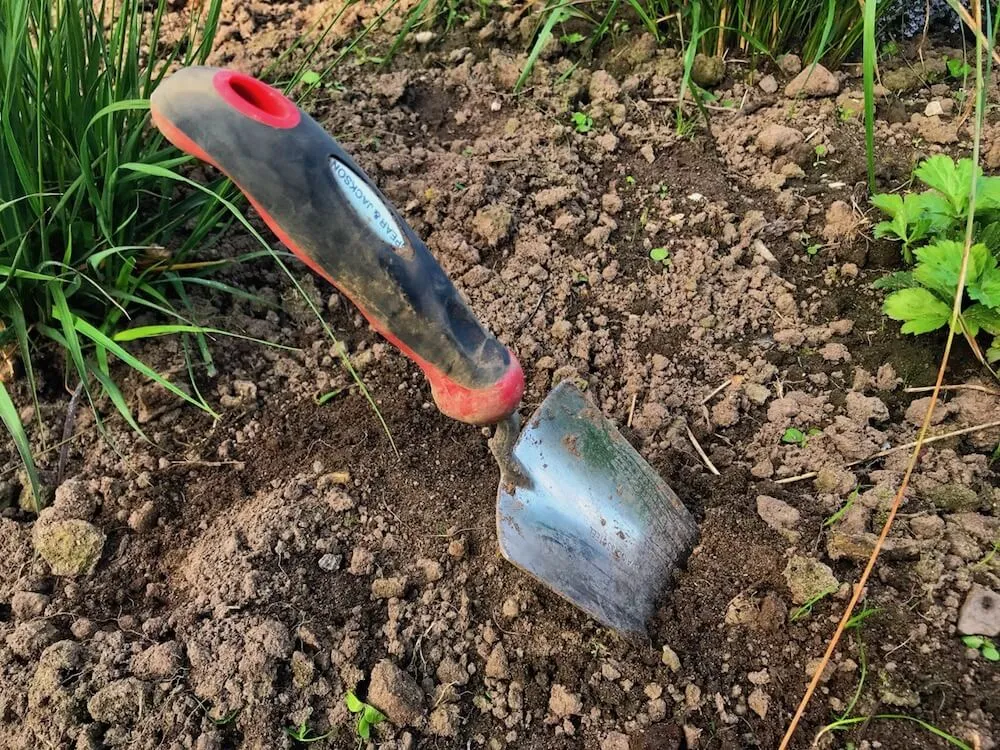
A narrow-bladed hand trowel is the most useful tool in any repotting session. You need it for working compost down the sides of the pot and around the root ball without leaving air pockets. Stainless steel is worth the small extra investment because it wipes clean easily and won’t rust if you forget to dry it. Spear & Jackson have been making reliable British garden tools for over 250 years and this one will see you through hundreds of repotting sessions.
Clean cuts on roots matter as much as clean cuts on stems. Crushing or tearing a root rather than cutting it cleanly creates entry points for rot and fungal infections. The Felco 2 is the secateur I reach for on every repotting job where there are damaged or circling roots to remove. The blades are replaceable, the spring is replaceable, and with a bit of basic maintenance these will outlast anything else in your toolkit. I’ve been using mine for over fifteen years.
Wipe your secateur blades with rubbing alcohol before you start and between cuts if you’re removing rotten roots. Fungal root rot spreads easily from blade to healthy tissue. This takes five seconds and can save a plant that’s already in trouble from developing a secondary infection during the repotting process.
Growing Mediums Explained: Choosing the Right Compost
This is where more beginner repotting goes wrong than anywhere else. Most garden centres sell one type of compost, leave it on a shelf next to everything else, and let you figure it out. The reality is that different houseplants come from completely different environments and need quite different growing mediums to reflect those origins. Using standard garden compost for houseplants, or general houseplant compost for orchids, will cause problems regardless of how carefully you do everything else. Not only that but general compost tends to lead to annoying fungus gnats, those tiny flies will drive you mad!
General Houseplant Compost
For the majority of common tropical houseplants, including pothos, spider plants, peace lilies, rubber plants, monstera, and philodendrons, a good-quality houseplant potting compost is your starting point. You want something that holds a reasonable amount of moisture but still drains freely rather than sitting waterlogged. Houseplant-specific composts are better than ordinary multipurpose garden compost because garden compost is formulated for outdoor conditions and is typically too dense and water-retentive for containers indoors, where there’s no sun or wind to help dry it out.
Westland’s Houseplant Potting Mix with Seramis granules is one I’ve recommended consistently. The Seramis granules absorb water and release it slowly, which buffers against the feast-or-famine watering that most of us practice, especially when starting out. It also contains added perlite for drainage, which makes a real difference to root health.
🛒 Westland Houseplant Potting Mix with Seramis
A well-balanced houseplant compost with added Seramis granules for moisture regulation and perlite for drainage. Suitable for the majority of tropical houseplants and widely available. A 4L bag will fill a 14cm pot.
For a peat-free professional grade option with excellent drainage, the Houseplant Focus Repotting Mix is worth having a bag of ready. It’s the kind of thing I’d use on a client’s plants without hesitation.
🛒 Houseplant Focus Repotting Mix
Peat-free professional grade repotting compost suitable for most indoor houseplants. Excellent drainage and aeration with a balanced nutrient profile to support root establishment after repotting.
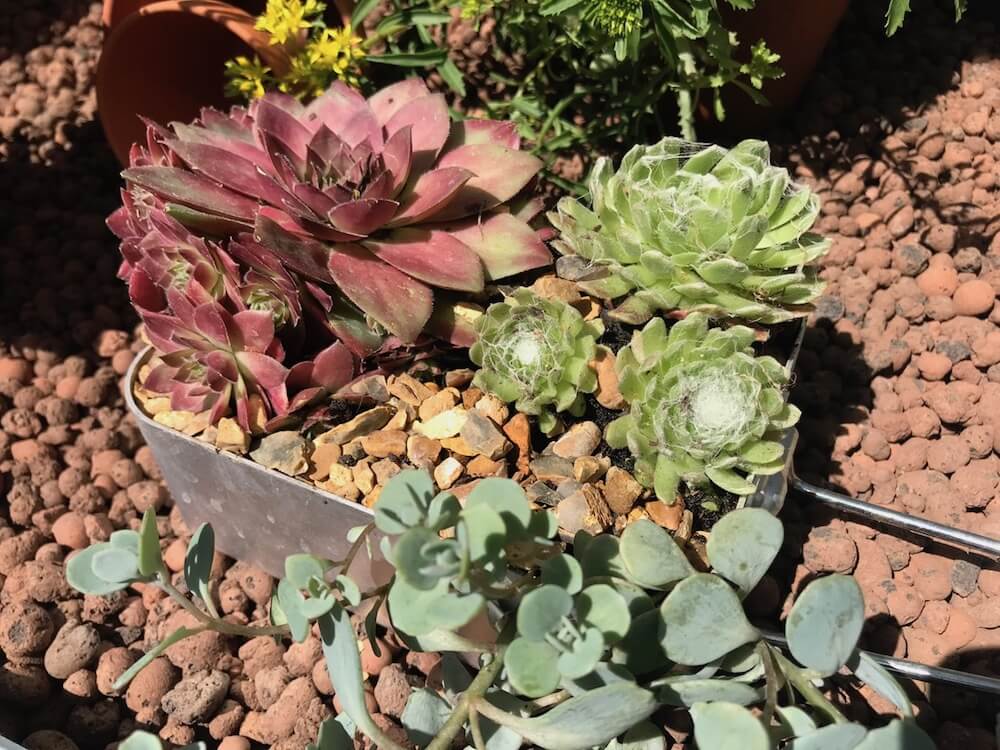
Cacti, succulents, aloe vera, and anything from a naturally arid environment needs a completely different growing medium. They need something that drains almost immediately after watering and holds very little residual moisture. Standard houseplant compost stays too wet for too long and will rot their roots within months, often without any visible warning until the plant suddenly collapses. A dedicated cactus and succulent compost contains grit, sand, and perlite in proportions that mimic the fast-draining desert soils these plants evolved in.
🛒 UK Grow Cactus and Succulent Potting Mix
Specialist mix containing coarse sand, perlite, and grit for the fast drainage that cacti and succulents need. Suitable for echeveria, aloe, haworthia, jade plants, and all cactus varieties.
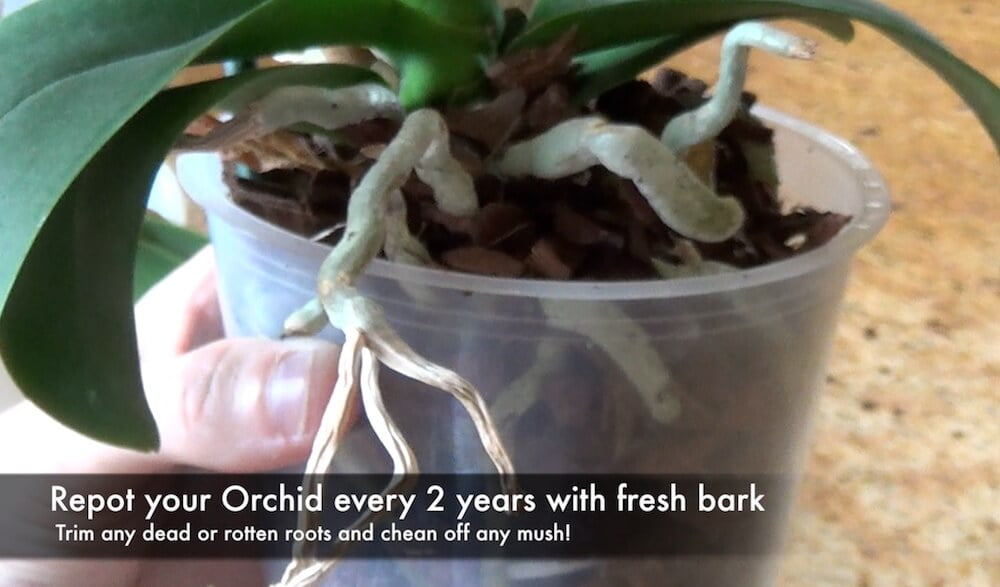
Orchids are a special case that deserve their own mention because potting them into ordinary compost is one of the most common houseplant mistakes I see. In the wild, most orchids grow on tree bark and branches rather than in soil, meaning their roots are adapted to dry out almost completely between rains and to have air moving around them constantly. Orchid bark compost is a chunky, open mix of bark chips and sometimes perlite that allows airflow around the roots and drains very quickly. It looks almost nothing like normal compost, which surprises a lot of people the first time they use it, but it reflects the natural environment these plants come from.
🛒 Orchid Focus Repotting Mix
Peat-free professional grade orchid bark compost with excellent airflow and drainage. Suitable for phalaenopsis and most other commonly grown orchid varieties. Thousands of positive reviews and a reliable choice.
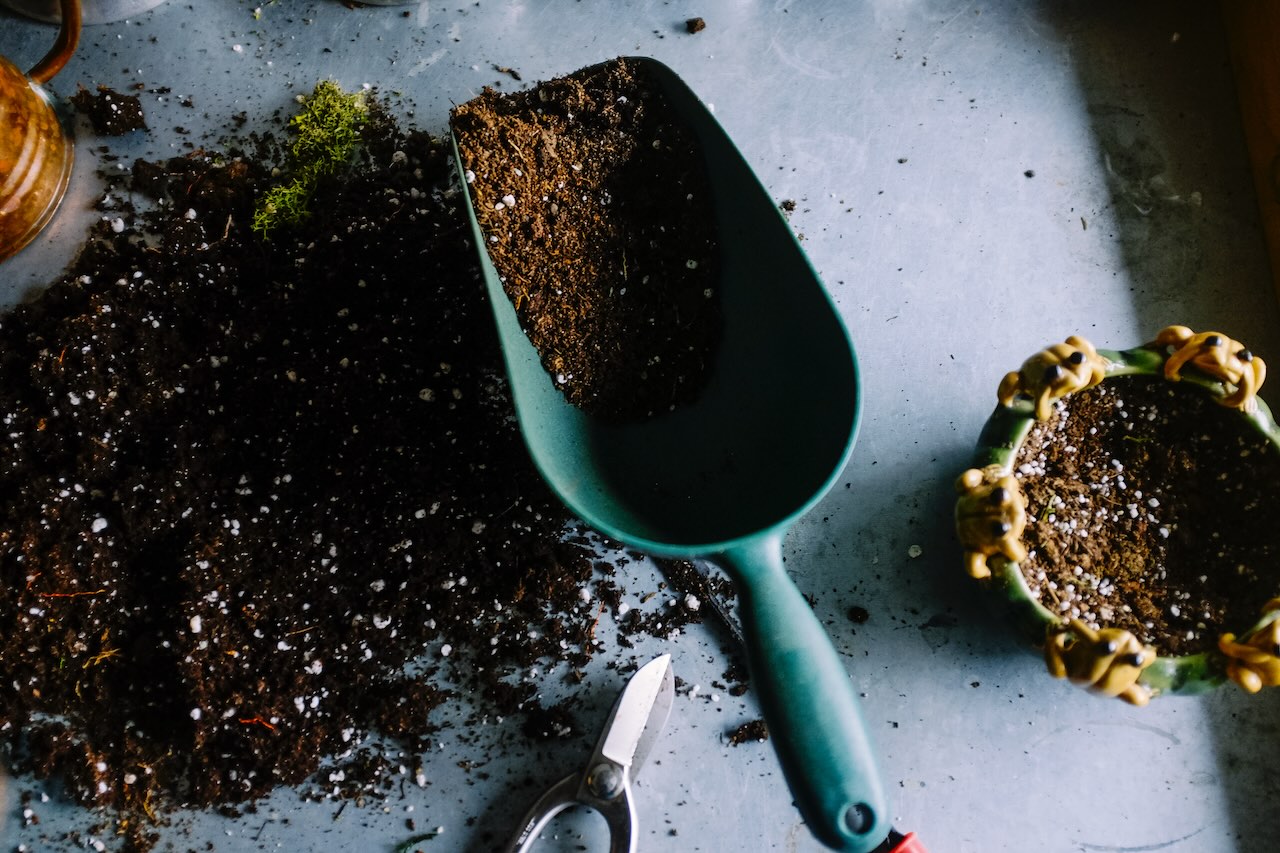
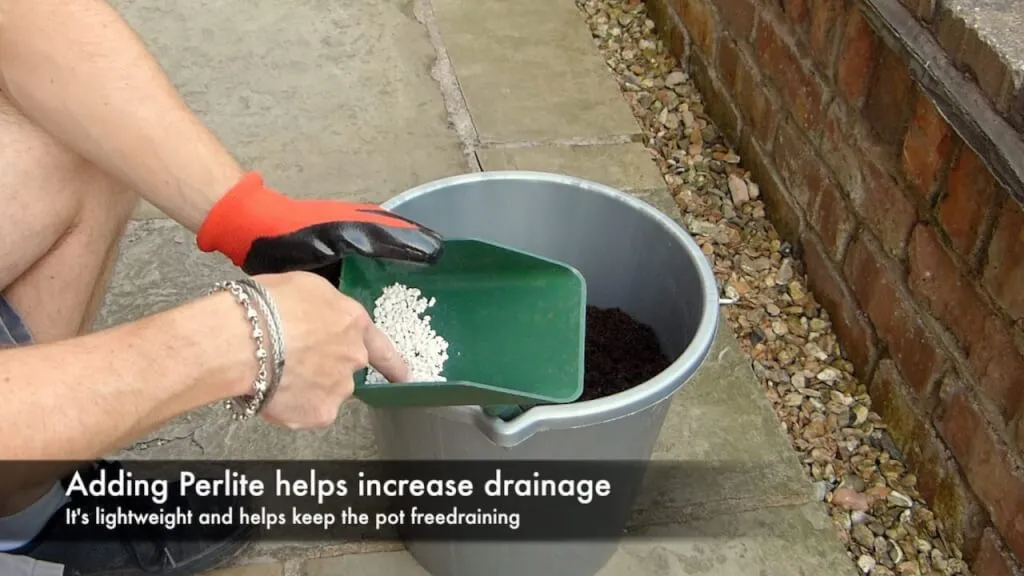
Perlite: The One Additive Every Houseplant Grower Should Know About
If there’s one thing I wish more beginner houseplant growers knew about, it’s perlite. Those small white particles that look a bit like polystyrene balls are actually a volcanic mineral that’s been heated until it expands, and adding them to your compost improves drainage and aeration dramatically. I add perlite to almost everything I pot indoors. The white colour can catch people off guard the first time they see it but there’s a good reason it’s used by professional growers across the world.
A rough ratio of around 20% perlite to 80% compost works well for most tropical houseplants. For anything that prefers drier conditions, like snake plants, ZZ plants, aloe vera, or any succulent, you can push that up to 30 or even 40%. For ferns and calatheas that like consistent moisture, 10 to 15% is sufficient. The perlite keeps the air spaces in the compost open even after repeated watering, which prevents the compaction that kills root health over time.
🛒 Gro-Sure Perlite 10L
Horticultural grade perlite for mixing into houseplant compost to improve drainage and aeration. A 10L bag will last through multiple repotting sessions and is one of the best value purchases you can make for your houseplant collection.
I’m going to say this plainly because it matters more than almost anything else in this guide: every pot you grow a houseplant in needs drainage holes at the bottom. No exceptions. Houseplants sitting in sealed pots without drainage will eventually develop root rot regardless of how carefully you water them, because water collects at the base with nowhere to go and the roots sit in it. If you have a beautiful decorative ceramic pot you want to display your plant in and it has no holes, use it as an outer sleeve and keep the plant in a plastic nursery pot inside it. That’s not a compromise; it’s actually the better setup because you can lift the plant out to check it and water it properly.
How Much Bigger Should the New Pot Be?
This is the question I get asked most often in the forum and the answer is simpler than most people expect. Go up by just 2 to 5cm in diameter, which is roughly one pot size. Moving a plant from a 12cm pot into a 25cm pot feels generous, but it leaves a large volume of wet compost that the roots can’t reach. That soggy zone breeds fungal problems and root rot faster than almost anything else. The roots need to be able to explore through the new compost within a few weeks, which only happens when the extra space is proportionate.
⚠️ Watch Out
Never add gravel or broken crockery to the bottom of a pot as a drainage layer. This is old advice that’s been thoroughly debunked. It actually creates a perched water table where moisture accumulates just above the gravel, increasing root rot risk. Start directly with compost.
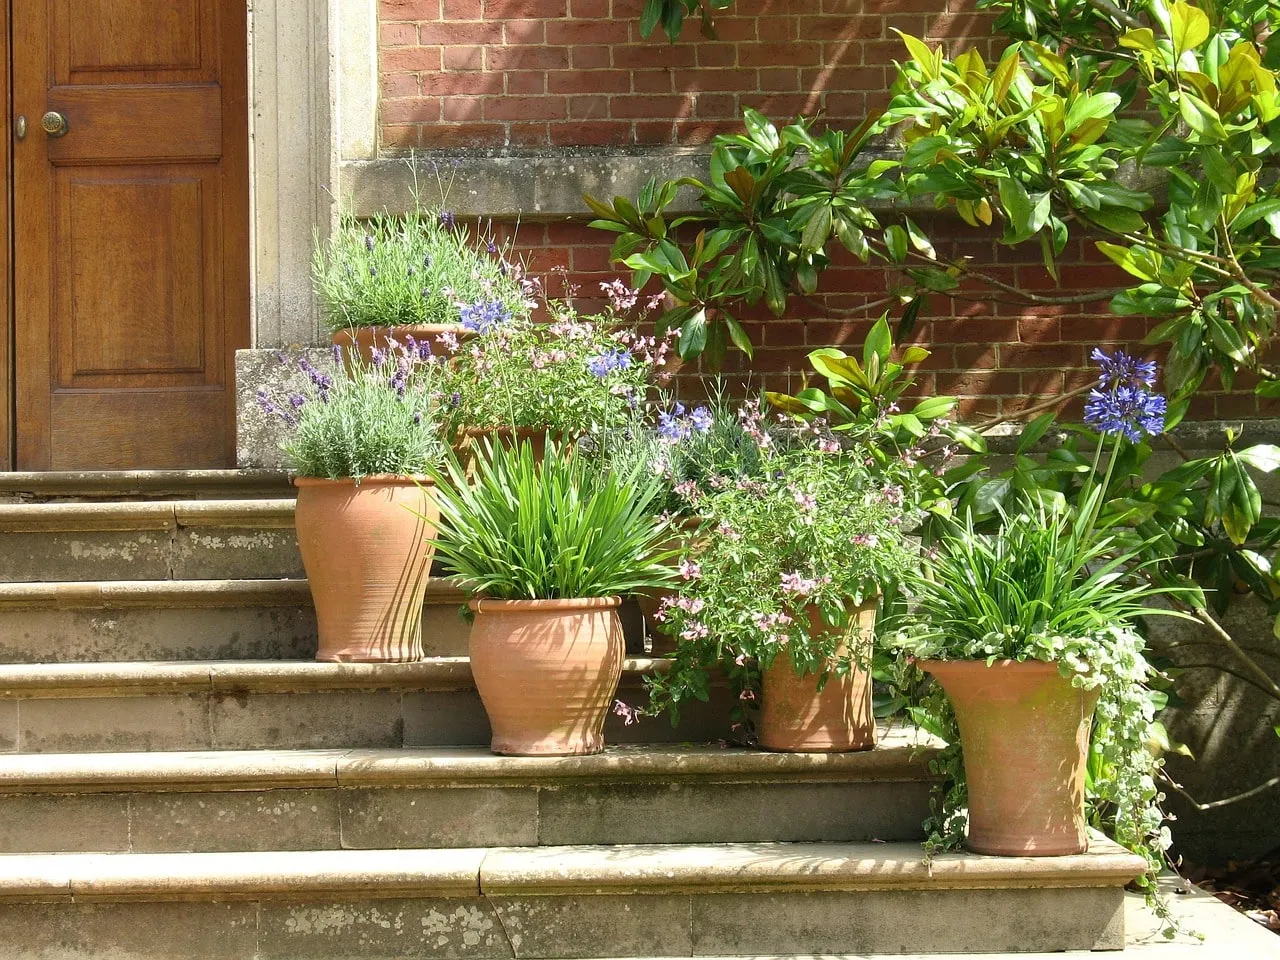
Terracotta vs Plastic vs Ceramic
The pot material makes a real difference to how you’ll need to manage watering, so it’s worth understanding the trade-offs rather than just choosing on aesthetics or whatever’s lying around, Ninjas!
🌿 Pot Material Comparison
Material
Moisture Retention
Best For
Watch Out For
Terracotta
Low — dries quickly
Cacti, succulents, snake plants, ZZ plants, aloe
Needs more frequent watering; heavy and fragile
Plastic nursery pot
Medium — retains well
Most tropical houseplants; moisture lovers
Can stay wet too long for drought-tolerant plants
Glazed ceramic
Medium to high
Ferns, calatheas, peace lilies, moisture lovers
Heavy; check drainage holes carefully
If you’re using terracotta, soak it in water for 30 minutes before potting. Dry terracotta wicks moisture away from fresh compost at an alarming rate, which can stress newly repotted plants before their roots have had a chance to establish. A soaked terracotta pot starts from a neutral position and lets the compost do its job.
How to Repot a Houseplant: Step by Step
Step 1: Water the Plant an Hour or Two Before You Start
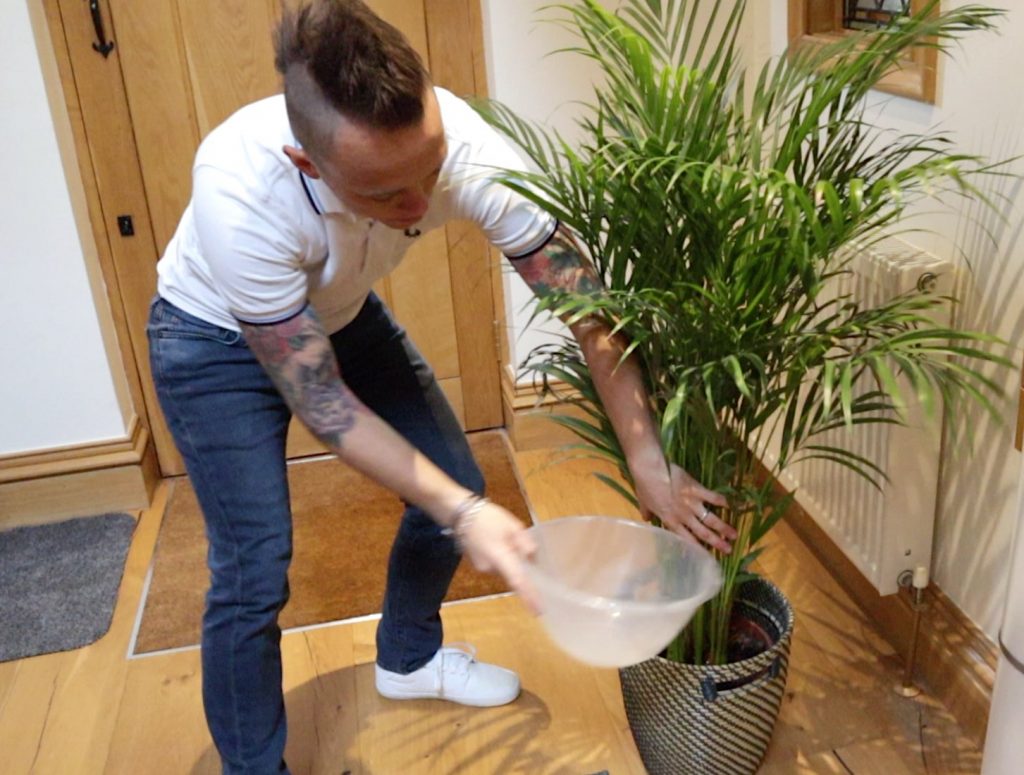
A hydrated plant is less stressed by the repotting process and the moist root ball holds together much better when you’re handling it. Trying to work with a bone-dry root ball often causes it to crumble, damaging the fine root hairs that do most of the work of absorbing water and nutrients. Water thoroughly, let it drain, and then leave it for an hour before you begin.
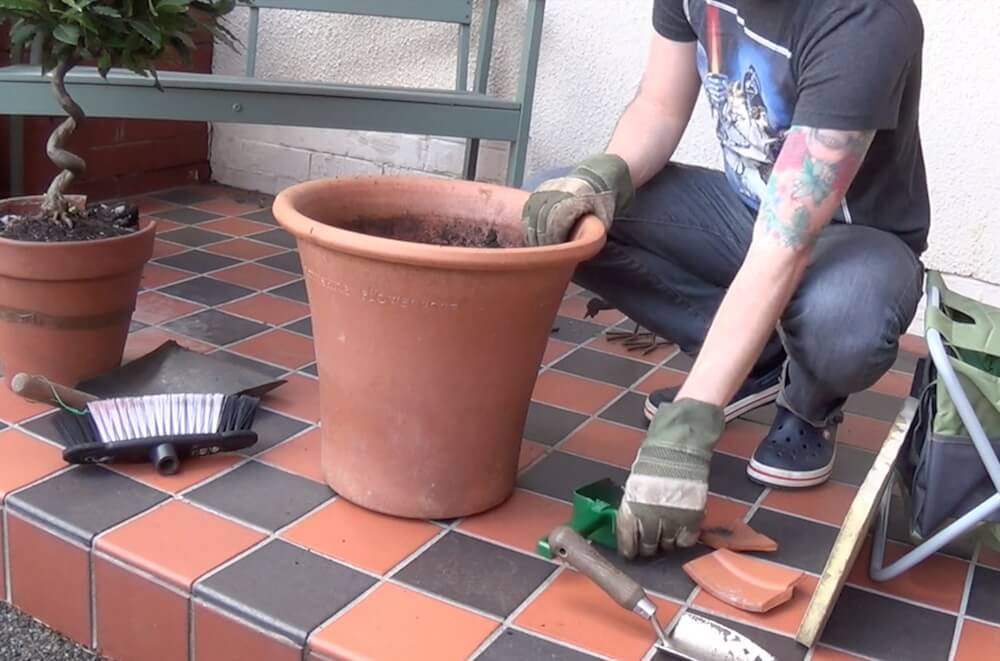
Step 2: Prepare Your New Pot
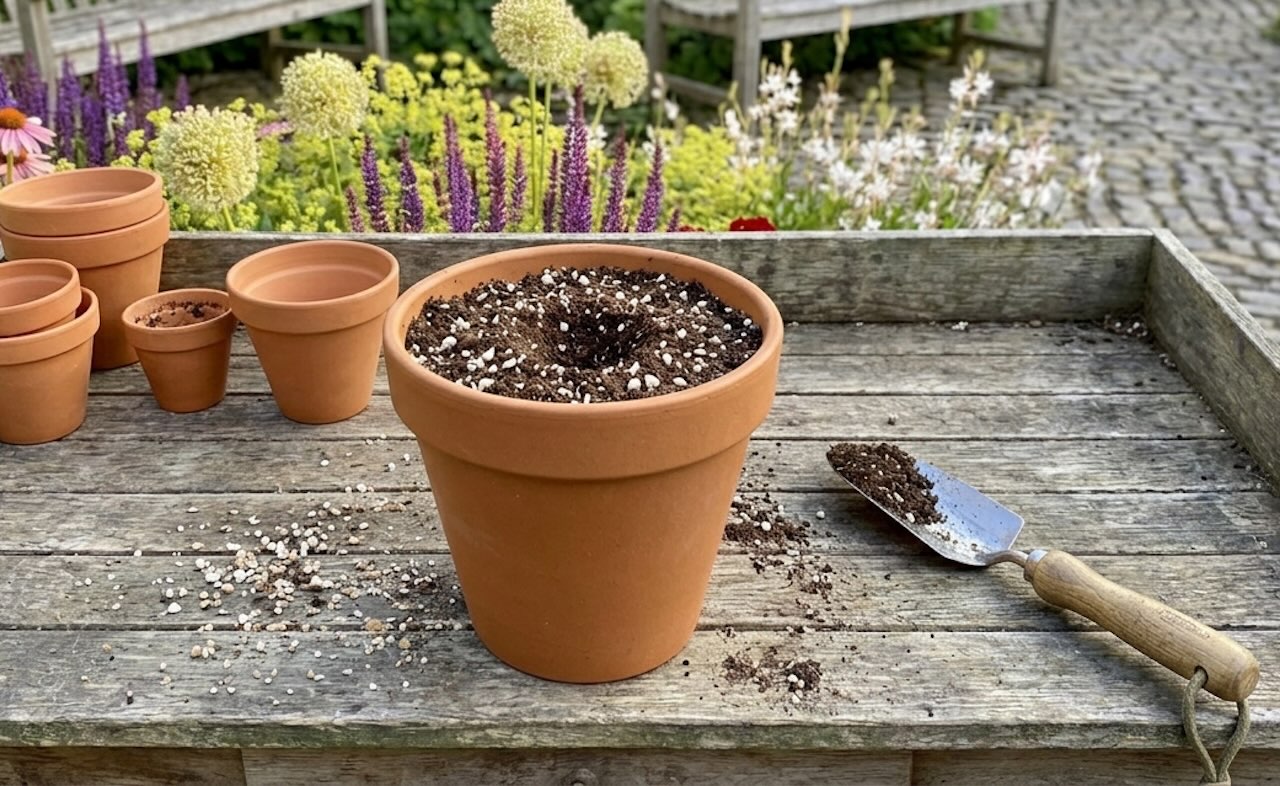
Add a 2 to 5cm layer of fresh compost to the bottom of the new pot before you put the plant in. You want the plant to sit at roughly the same depth as it did in its old pot, with around 1 to 2cm of clearance between the top of the compost and the rim of the pot. This gap is important: it’s what allows you to water without the water immediately running off the edge. Hold the plant over the new pot to check the depth before you commit.
Step 3: Remove the Plant From Its Current Pot
For small pots, place your hand over the compost surface with the plant stems between your fingers, invert the pot, and tap the rim gently against the edge of a table. The plant should slide out cleanly. For larger pots, lay the pot on its side and tap around the outside while gently supporting the plant. If it’s really stuck, run a thin trowel or knife around the inside edge of the pot to break the seal. Never pull the plant out by its stems as this can separate the stem from the roots, which is very difficult to recover from.
Step 4: Inspect and Prepare the Root Ball
This is the most important step and the one most people skip. Have a proper look at the roots. Healthy roots are white or pale tan and firm to the touch. Brown, black, or mushy roots indicate rot and should be trimmed away with clean scissors or secateurs before repotting. If you’re cutting away rotten roots, wipe your blades with rubbing alcohol between cuts to avoid spreading any fungal issues.
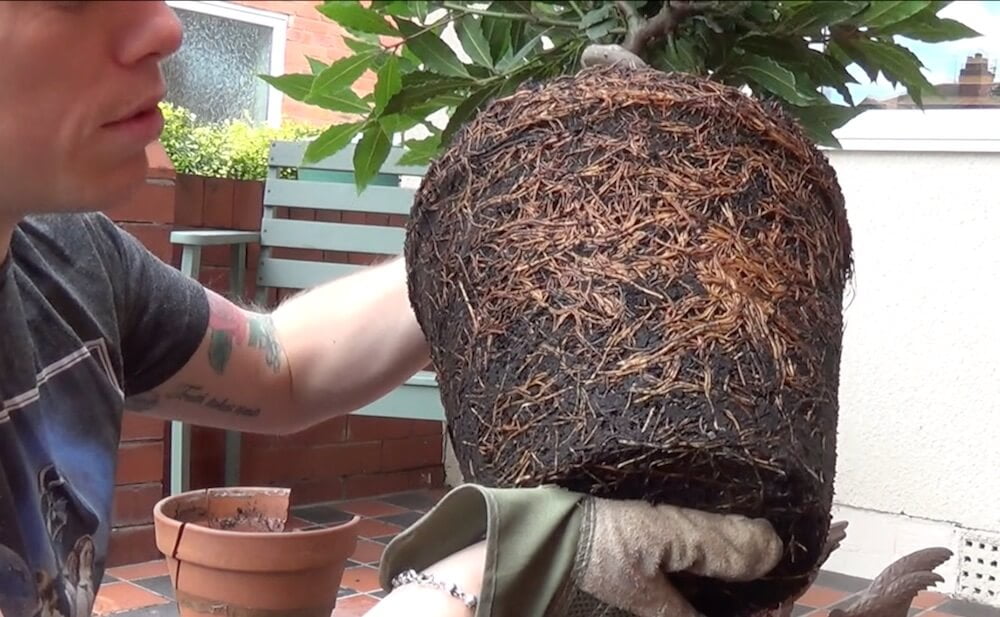
If the roots are tightly wound in circles at the bottom of the ball (a plant that’s been seriously root-bound for some time), gently tease the bottom of the root ball loose with your fingers to encourage the roots to grow outward into the new compost rather than continuing to circle. You don’t need to be aggressive about this; just loosen the outer layer enough to break the circular pattern.
💡 Top Tip
One thing several repotting guides get wrong is telling you to loosen and separate roots aggressively. The fine root hairs are where nutrient and water absorption actually happens, and damaging them causes wilting and yellowing in the first weeks after repotting. Be gentle. The goal is to break circular growth patterns, not to untangle the entire root system.
Step 5: Position and Fill
Place the plant in the centre of the new pot and begin filling in around the sides with fresh compost, working it down between the root ball and the pot walls with your fingers or a trowel. The key thing here is to avoid leaving large air pockets, as dry air gaps around roots will damage them. Work the compost in gradually rather than dumping it all in at once.
Once filled, do not pack or compact the compost by pressing it down firmly. Compacting the compost forces air out and creates a dense structure that restricts drainage and root growth. Instead, gently tap the pot on a hard surface a few times to allow the compost to settle naturally into the spaces around the roots. If it sinks significantly, top up with a little more compost.
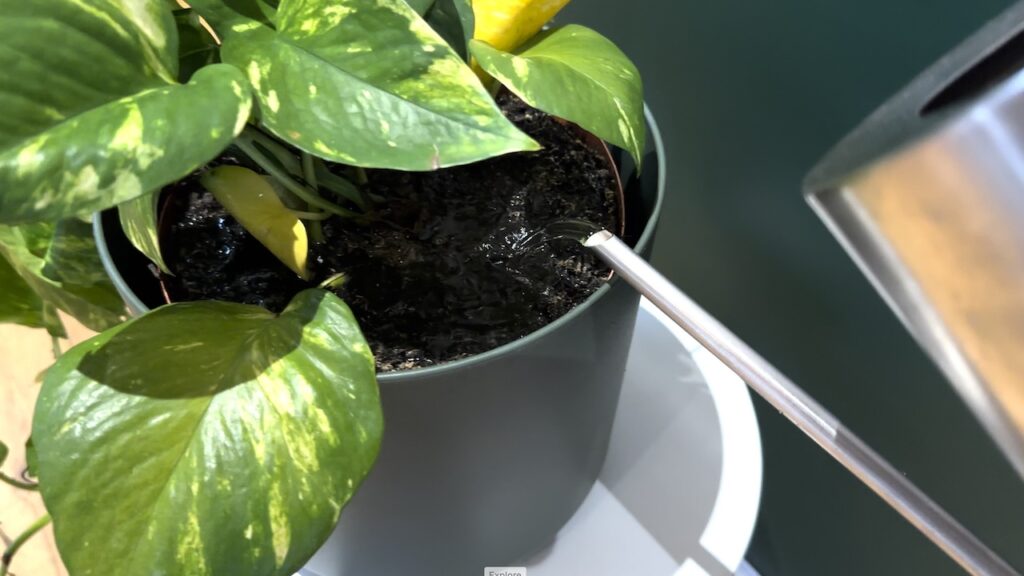
Step 6: Water In Thoroughly
Water the plant thoroughly after repotting until water runs freely from the drainage holes, then let it drain completely. This first watering settles the compost around the roots and eliminates any remaining air pockets. After this initial watering, hold off for a week or so before watering again. Fresh compost holds moisture differently from old compacted compost, and a plant that used to need watering every four days may now stay moist for ten. Check by feeling the compost rather than watering on your previous schedule.
Plants That Actually Prefer to Stay Root Bound
One thing that surprises a lot of Ninjas is that some houseplants perform better when they’re slightly root-bound. This isn’t a myth or an excuse to avoid repotting; for certain species it reflects a biological preference. The important distinction is between a plant that’s comfortable in a snug pot and one that’s been neglected into a crisis. Here are the main ones to know about.
🌿 Plants That Prefer Snug Pots
Plant
Why It Prefers Snug Pots
When to Finally Repot
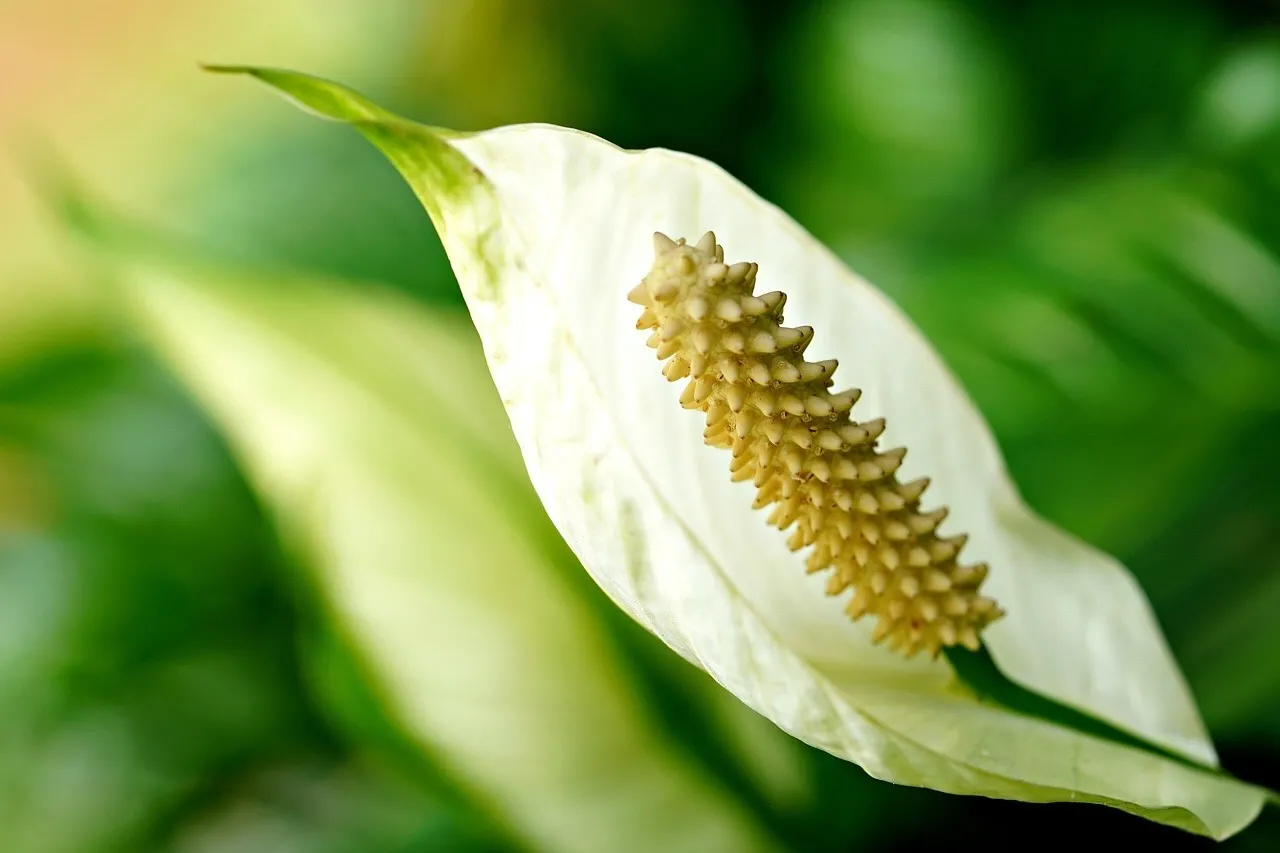
Peace Lily
Slightly root bound encourages flowering
Every 2-3 years or when roots are clearly out of room
Snake Plant
Too much compost stays wet and causes rot
Every 2-3 years or when roots crack the pot
Hoya
Dense roots dry out faster, preventing rot
When roots are escaping drainage holes
ZZ Plant
Rhizomes store water; excess compost stays wet
Every 2-3 years maximum
Aloe Vera
Smaller pot reduces overwatering risk significantly
When it becomes physically unstable
Orchid
Roots need to dry quickly; small bark-filled pot works best
Every 1-2 years as bark breaks down
It’s worth noting that the idea of plants craving tight pots is sometimes overstated. What these plants are really after is appropriate drainage and aeration rather than constriction for its own sake. A hoya, for example, does well in a snug pot because the dense root mass dries out faster between waterings, reducing rot risk. It doesn’t actually want to be squeezed; it wants oxygen at its roots. The practical upshot is the same: don’t rush to upsize these plants just because they look full in their pots.
Aftercare and Feeding After Repotting
The weeks immediately after repotting are when your plant is most vulnerable and least in need of additional intervention. Fresh compost contains nutrients that will feed your plants for around six to eight weeks, so there’s no benefit in adding fertiliser during this settling-in period. In fact, applying feed to a root system that’s still recovering from the disturbance of repotting can cause fertiliser burn, which shows up as brown leaf tips and edges.
Keep the newly repotted plant out of direct harsh sun for the first week or two and avoid moving it around. Give it a stable, appropriate position and leave it to settle. It’s completely normal for a plant to look slightly droopy or to drop a leaf or two in the first week after repotting; this is transplant shock rather than a sign that something has gone wrong. As long as the compost isn’t waterlogged and the plant is in reasonable light, it will recover.
Once the plant is visibly producing new growth, which usually happens within three to four weeks of a spring repot, you can begin a regular feeding programme. Baby Bio Houseplant Food diluted to half strength every fortnight through the growing season is a straightforward regime that works well for most tropical houseplants.
🛒 Baby Bio Houseplant Food
A reliable, widely available liquid feed for most tropical houseplants. Use at half the recommended strength every fortnight from April to September once your plant is settled after repotting. Do not use in winter.
The Most Common Repotting Mistakes (And How to Avoid Them)
After years of answering questions on the Garden Ninja forum and seeing the same issues come up repeatedly, here are the mistakes that account for the vast majority of repotting failures.
Choosing a Pot That’s Far Too Large
This is by far the most common mistake, and it feels counterintuitive to avoid it because going up a size feels generous and kind to your plant. The problem is that a small root system surrounded by a large volume of fresh compost can’t absorb water fast enough to prevent the outer areas staying permanently wet. Root rot develops in those wet zones and spreads inward before you see any surface signs of trouble. One size up is always the right call.
Using the Wrong Compost
Garden compost or multipurpose compost straight from the bag is formulated for outdoor conditions where rain, sun, wind, and soil organisms all work together to manage moisture. In an indoor pot, none of those factors apply. It compacts quickly, stays too wet, and provides the wrong nutrient balance for houseplants. Always use a compost appropriate to the plant type.
Repotting at the Wrong Time of Year
Autumn and winter repotting puts a plant in its resting phase into a large volume of fresh compost it has no energy to explore. The roots sit in moist compost without absorbing it, drainage slows, and rot risk increases significantly. Spring is when your plant has the growth energy to make the most of the fresh conditions you’re providing.
Compacting the Compost
Firmly pressing down the compost around a newly repotted plant feels like you’re helping it settle, but it destroys the air pockets that roots need for oxygen. Always tap the pot on a surface to settle the compost rather than pressing it with your hands, and top up with additional compost if needed rather than compressing what’s already there.
Feeding Immediately After Repotting
Fresh compost feeds the plant for six to eight weeks. Adding fertiliser on top of that gives the roots more soluble salts than they can process, which causes fertiliser burn. Wait until you see new growth before starting any feeding programme.
Quick Reference: Which Compost for Which Houseplant
Frequently Asked Questions About Repotting Houseplants
How often should I repot my houseplants?
Most houseplants need repotting every two to three years rather than every year. Fast growers like pothos, tradescantia, and spider plants may need it more frequently. Slow growers like ZZ plants, snake plants, and cast iron plants can often go three to four years. The signs of needing repotting are a much more reliable guide than any fixed schedule.
Can I repot a houseplant in winter?
It’s not ideal, but if a plant is clearly suffering, either severely root bound or sitting in rotten compost, repotting in winter is better than leaving it in distress. For healthy plants that are simply due a routine repot, always wait until spring. The plant has no growth energy in winter to establish itself in fresh compost.
My plant looks droopy after repotting. Is this normal?
Yes, transplant shock is completely normal and usually temporary. The plant is adjusting to its new environment and may have had some fine root hairs disturbed during the move. As long as the compost isn’t waterlogged and the plant is in appropriate light, it should recover within one to two weeks. Resist the urge to water more frequently or move it around; stability is what it needs.
Should I water before or after repotting?
Both. Water an hour or two before repotting to hydrate the root ball and make it easier to handle. Water thoroughly immediately after repotting to settle the compost around the roots. Then wait a week or so before watering again, checking the compost moisture rather than following your previous schedule.
Do I need to remove all the old compost when repotting?
In most cases, no. Removing all old compost causes significant root disturbance and is only necessary if the old compost is rotten, heavily infested with pests, or completely hydrophobic (repelling water rather than absorbing it). For a routine repot, simply place the root ball with its existing compost into the new pot and fill the gaps around it with fresh compost.
Can I reuse old compost for other plants?
Old houseplant compost from a healthy plant can be used in outdoor borders where it will benefit from natural soil ecosystems. Don’t reuse it in other pots, as the nutrients are exhausted, the structure is broken down, and it may harbour fungal spores or pests that aren’t visible but could cause problems in a new container. It’s not worth the risk.
Enjoyed reading my guide on how to repot house plants? Well, my Garden Design for Beginners course will help you design the whole space around them. Step-by-step video lessons, real-world case studies, and a design certificate at the end — all taught by me, Lee Burkhill, award-winning designer and BBC1’s Garden Rescue presenter.
29
Garden Design Examples for Small Gardens: 30 Design Templates & Planting Plans
Garden Design Examples for Small Gardens: 30 Design Templates & Planting Plans: In this online gardening course, I’ll walk you through 30 fantastic garden designs, explaining the logic behind the layout, the plant choices, and take-home tips for applying them in your own garden.
Weekend Garden Makeover: A Crash Course in Design for Beginners
Learn how to transform and design your own garden with Lee Burkhills crash course in garden design. Over 5 hours Lee will teach you how to design your own dream garden. Featuring practical design examples, planting ideas and video guides. Learn how to design your garden in one weekend!
Garden Design for Beginners: Create Your Dream Garden in Just 4 Weeks
Garden Design for Beginners Online Course: If you want to make the career jump to becoming a garden designer or to learn how to design your own garden, this is the beginner course for you. Join me, Lee Burkhill, an award-winning garden designer, as I train you in the art of beautiful garden design.
Repot in spring when you see roots escaping drainage holes, water running straight through, or growth stalling despite good care. Move up only one pot size at a time, use the right compost for your plant type, add perlite to improve drainage, and never compact the compost. Water thoroughly before and after, then leave the plant alone to settle. Wait for new growth before you begin feeding. Most houseplants need repotting every two to three years, and reading the signs your plant gives you is always more reliable than following a fixed schedule.
Get this bit right and your houseplant collection will reward you with stronger growth, better colour, and far fewer of the slow, mysterious declines that leave beginners scratching their heads. Happy Gardening Ninjas! 🌱If you haven’t yet chosen your houseplants, head over to my guide to the best low maintenance indoor plants for beginners where I walk you through 20 brilliant varieties perfect for UK homes. Once you’ve got the potting side cracked, keeping them happy is straightforward.
Got a repotting question or a plant that’s not looking quite right after a repot? Drop it in the comments below or head over to the Garden Ninja forum where the Ninja community will help you get to the bottom of it. 🌿
Your subscription could not be saved. Please try again.
Your subscription has been successful.
Lee Burkhill
Lee Burkhill, known as the Garden Ninja, is an award-winning garden designer and horticulturist with over 20 years of professional experience. A qualified RHS horticulturist, Lee specialises in sustainable garden design and has designed hundreds of small urban gardens across the UK. He designs and presents on BBC1’s Garden Rescue and writes for leading gardening publications.
Thank you, Lee. I’m sure many of us think we already knew how to repot a house plant. But reading all info has given me so much more knowledge, and confidence. Thank you!! Jo 🥷
Thanks Jo Ninja! The big ones avoiding regular compost, given the fungus gnat issue and the fact many people are terrified of slicing through roots to create healthier plants! Lee Garden Ninja