Lee Burkhill: Award Winning Designer & BBC 1's Garden Rescue Presenters Official Blog
Beginner level
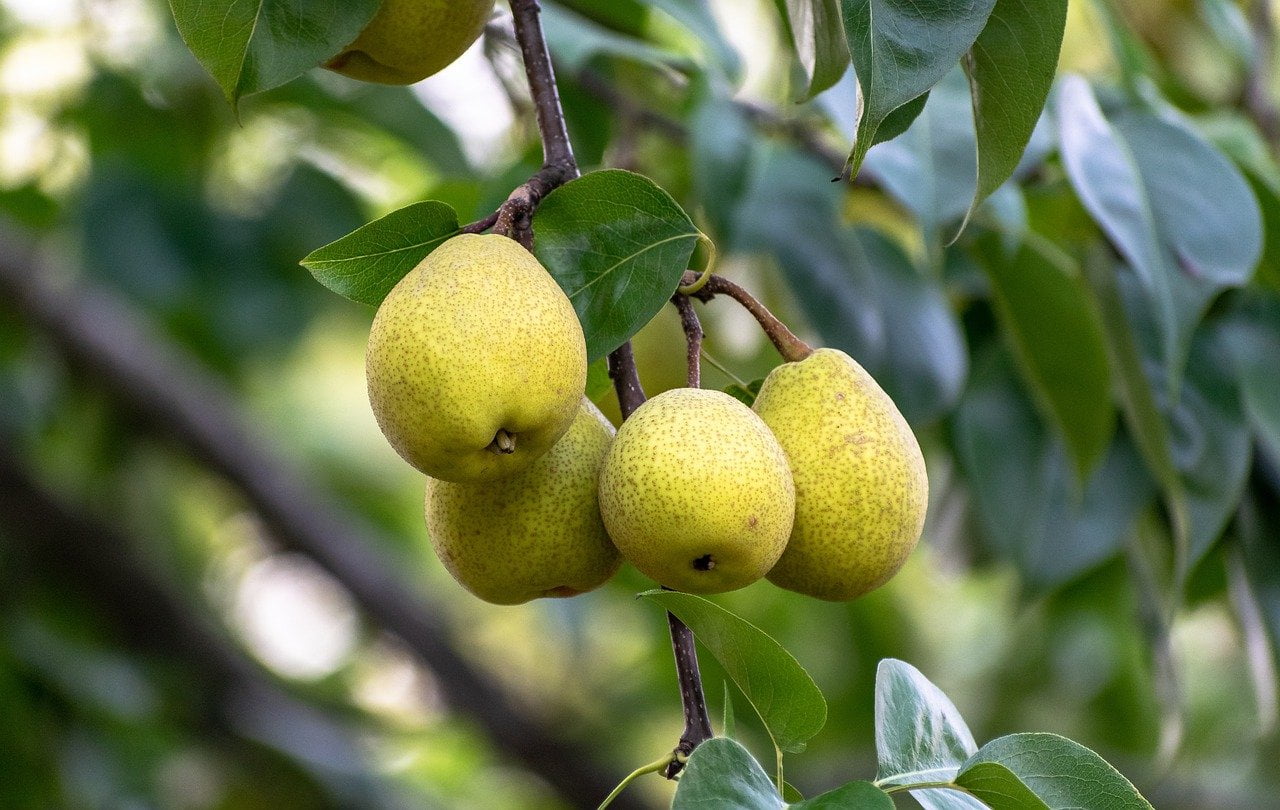
Pear trees make a great addition to any sized garden. Given their neat vertical growth they can easily fit into the smallest of spaces. With their glossy green leaves provide a light airy canopy for some summer shade. However, pear trees do require yearly pruning. Don't fear, Garden Ninja is going to show you just how easy it is to prune pear trees!
Quick Answer
Prune pear trees in late winter between January and March when the tree is fully dormant. Remove all dead, diseased and damaged wood first, then cut out any crossing branches. Finally, shorten the remaining laterals by up to one quarter, cutting to an outward-facing bud at 45 degrees. Never remove more than 25% of the canopy in a single season.
Pear trees are one of the least fussy small garden fruit trees. By their very nature, they tend to grow more vertically than horizontally, lending themselves to both formative pruning and small gardens where space is at a premium. With the correct care, your pear tree will reward you with delicious organic autumn fruit year after year.
The key to successfully growing pears and encouraging yearly crops of fruit is winter pruning. By pruning the pear each year, we keep it healthy, maintain a neat, productive shape, and remove any damaged wood from the year before. I’ve been pruning pear trees in client gardens for over twenty years, and the process is straightforward once you understand the logic behind each cut.
This page contains affiliate links for products I use and love. If you take action (i.e. subscribe, make a purchase) after clicking a link, I may earn some gardening commission, which helps me keep the Garden Ninja Blog free for all.
Pears are super neat and relatively low-maintenance small garden trees. However, they can become congested quickly because their growth tends to reach vertically toward the light. Left unpruned, this creates a dense, crowded canopy with a higher chance of fruit spoiling or fungal infections taking hold due to poor airflow through the branches.
We also prune pear trees to prevent them from putting all their energy into producing branches rather than fruit. A well-pruned pear directs that energy instead into the fruiting spurs, which is where your crop comes from. In simple terms, less branch means more fruit.
There are three main reasons to prune a pear tree every year.
Fruit production. Annual pruning redirects the tree’s energy from producing long whippy growth into developing and maintaining fruiting spurs. A pear tree that has not been pruned for several years will still fruit, but the crop will be smaller, more prone to disease, and harder to harvest safely because the fruit develops higher up on increasingly congested branches.
Tree health. Removing dead, diseased, and crossing wood each winter keeps the canopy open to light and air. Canker, the most serious fungal disease to affect UK pear trees, spreads most aggressively through dense, humid canopies with poor airflow. Opening the tree up is one of the most effective preventative measures available.
Shape and manageability. A pear tree managed into an open goblet shape is simply easier to live with. You can harvest without a ladder, assess it for disease quickly, and net it against wasps and birds in late summer if needed.
🌿 Pear Tree At A Glance
Botanical Name
Pyrus communis
Plant Type
Deciduous fruiting tree
UK Hardiness
H6 (hardy to -20°C)
Mature Height
3.5–4m on Quince A rootstock; up to 12m on standard
Pruning Time
January to March (winter); light tidy in September
Harvesting
August to October depending on variety
Key Difference vs Apple
More upright growth habit; spur systems more freely produced
2. When to Prune Pear Trees in the UK
In the UK, the best time to prune a pear tree is late winter, from January through to March. The tree is fully dormant at this point, which means you can see the branch structure clearly without any foliage getting in the way. More importantly, pruning during dormancy encourages vigorous spring regrowth from the buds just below each cut, which is exactly what you want to push the tree into producing healthy new wood and productive fruiting spurs.
January is ideal for most UK pear trees. Avoid pruning during periods of hard frost or wet, humid weather because both create conditions where canker spores can spread easily into fresh cuts. If there is a hard frost overnight, wait until the temperature rises above -5°C before pruning. A dry, crisp January morning is perfect.
If you want to maintenance-prune your pear to restrict its growth or remove specific branches without stimulating lots of new growth, the best time is just after fruiting in late summer, around September. Summer pruning is covered separately later in this guide.
💡 Top Tip
Never prune pear trees from April onwards when bud break has begun. Pruning after the tree breaks dormancy causes heavy sap bleeding and removes developing flower buds, reducing that year’s fruit crop significantly. If you missed the winter window, wait until September for light maintenance work.
3. Spur-Bearing vs Tip-Bearing Pear Trees
This is the single most important thing to understand before you make your first cut, and it is the question I get asked most often on the forum. Getting this wrong is the most common reason a well-pruned-looking pear tree produces almost no fruit the following year.
Spur-bearing pears produce fruit on short, stubby clusters of growth called spurs that develop along the older branches. Conference, Concorde, Williams, and Doyenne du Comice are all spur-bearing varieties. The pruning approach described in this guide, shortening laterals by up to one quarter, works perfectly for spur-bearers because it encourages more spurs to form along the remaining branch framework.
Tip-bearing pears produce fruit at the tips of the previous year’s growth rather than on spurs. If you shorten those shoots, you remove every fruit bud and get no crop. Tip-bearing pears are far less common than tip-bearing apples, but they do exist. If you have an older or unnamed variety and are not sure which type you have, leave the side shoots intact and watch where fruit forms over one season. If pears appear at the ends of young shoots, you have a tip-bearer and need to adjust your pruning approach to thinning whole branches rather than shortening individual laterals.
The vast majority of pear trees sold in UK garden centres are spur-bearers, so unless you know otherwise, the standard pruning approach below will apply.
🔍 Spur-Bearing vs Tip-Bearing: Key Differences
Feature
Spur-Bearing
Tip-Bearing
Where fruit forms
On short spurs along older wood
At tips of previous year’s growth
UK examples
Conference, Concorde, Williams
Much less common in pears
Pruning approach
Shorten laterals by up to one quarter
Thin whole branches; do not shorten shoots
Most common in UK gardens?
Yes, the vast majority
Rare
4. Equipment Needed for Pruning a Pear Tree
To successfully prune a pear tree, you need a small set of clean, sharp tools. As with any pruning job, the quality of your cuts depends entirely on the sharpness of your blades. A blunt secateur tears rather than cuts cleanly, leaving ragged wounds that take much longer to callus over and are more vulnerable to canker and other fungal infections entering the tree. Sharp tools are not a luxury here, but essential, Ninjas!
The basic kit for most pear trees is as follows.
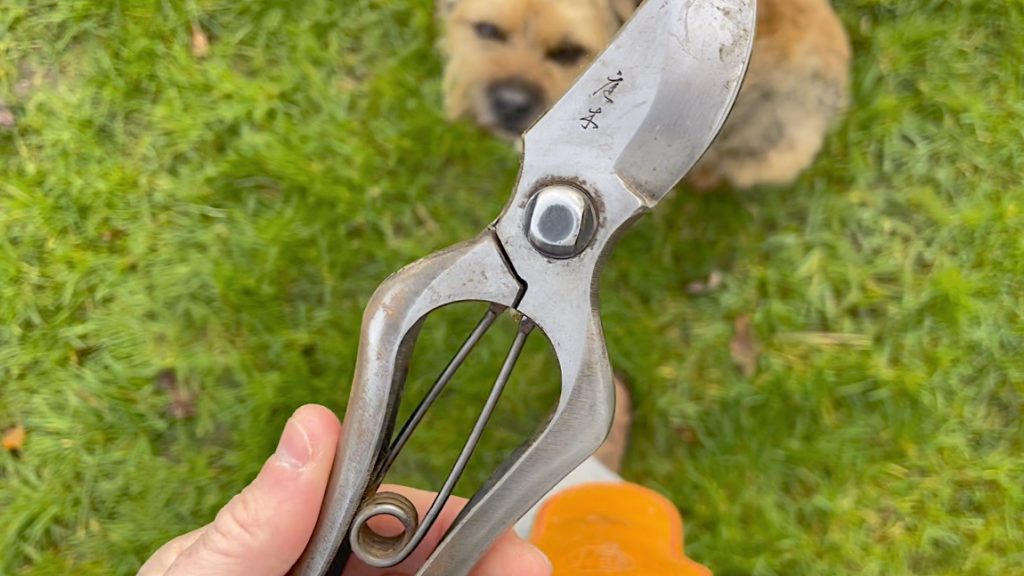
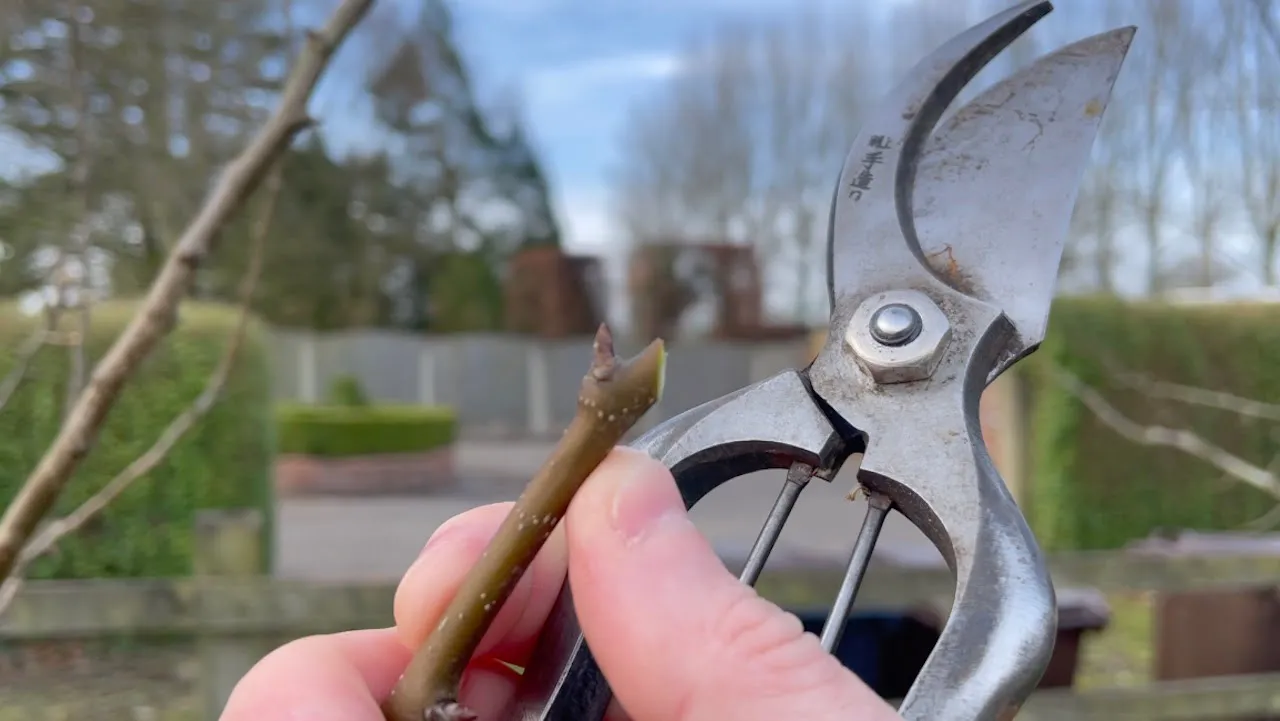
Bypass secateurs are your primary tool for everything up to roughly pencil thickness. Bypass secateurs use a scissor action to make a clean slicing cut, which is far preferable to anvil secateurs, which crush the stem slightly as they pass through. I use Felco secateurs, which I’ve had for years and keep razor sharp with a whetstone. They represent the best long-term investment for a serious fruit tree gardener. The Okatsune 103 is another excellent bypass option at a slightly lower price point.
Long-handled loppers handle branches up to around 4cm in diameter. The extra leverage means you can make clean cuts through thicker wood without straining, and without resorting to multiple hacking cuts that damage the tree. A good pair of loppers with bypass heads is worth every penny on an established pear.
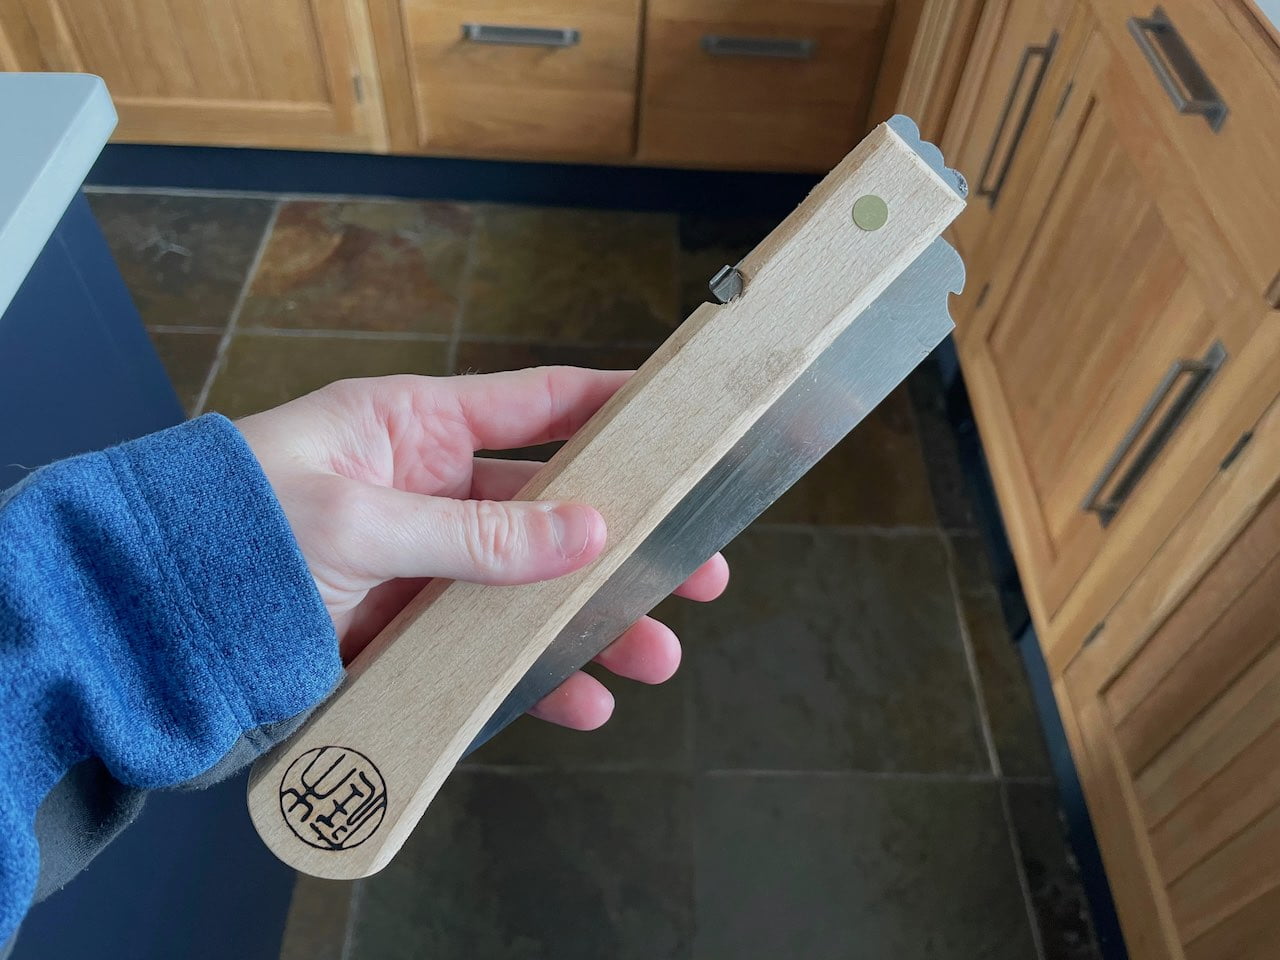
A pruning saw is needed for anything that loppers cannot handle. A folding Japanese-style pruning saw cuts on the pull stroke and produces an incredibly clean cut on larger branches. I keep one in my kit on every fruit tree job. If you are renovating an older pear that has not been pruned for several years, a pruning saw becomes essential rather than optional.
Tool steriliser or disinfectant solution is often skipped but it matters. Canker and other fungal diseases spread easily on unsterilised blades, particularly if you are moving between multiple trees. I keep a small trug with diluted disinfectant solution nearby and wipe my secateur blades between trees. This takes seconds and can prevent you from spreading infection across your whole orchard or a neighbour’s trees.
A sturdy stepladder or tripod ladder if you need to reach higher branches on an established tree. Never perch on a fence or overstretch from a standard household ladder when pruning. A tripod orchard ladder is designed for uneven ground around trees and is far more stable.
Do not use wound paint or sealant on pruning cuts. Research carried out at East Malling Research Station demonstrated that unpainted wounds callus over faster and develop fewer fungal infections. Make a clean, angled cut and let the tree seal itself naturally.
5. How to Prune a Pear Tree: Step-by-Step
Pruning a pear tree can feel daunting the first time, but once you understand what each step is actually achieving it becomes a logical and satisfying process. Work through these steps in order and you will not go wrong.
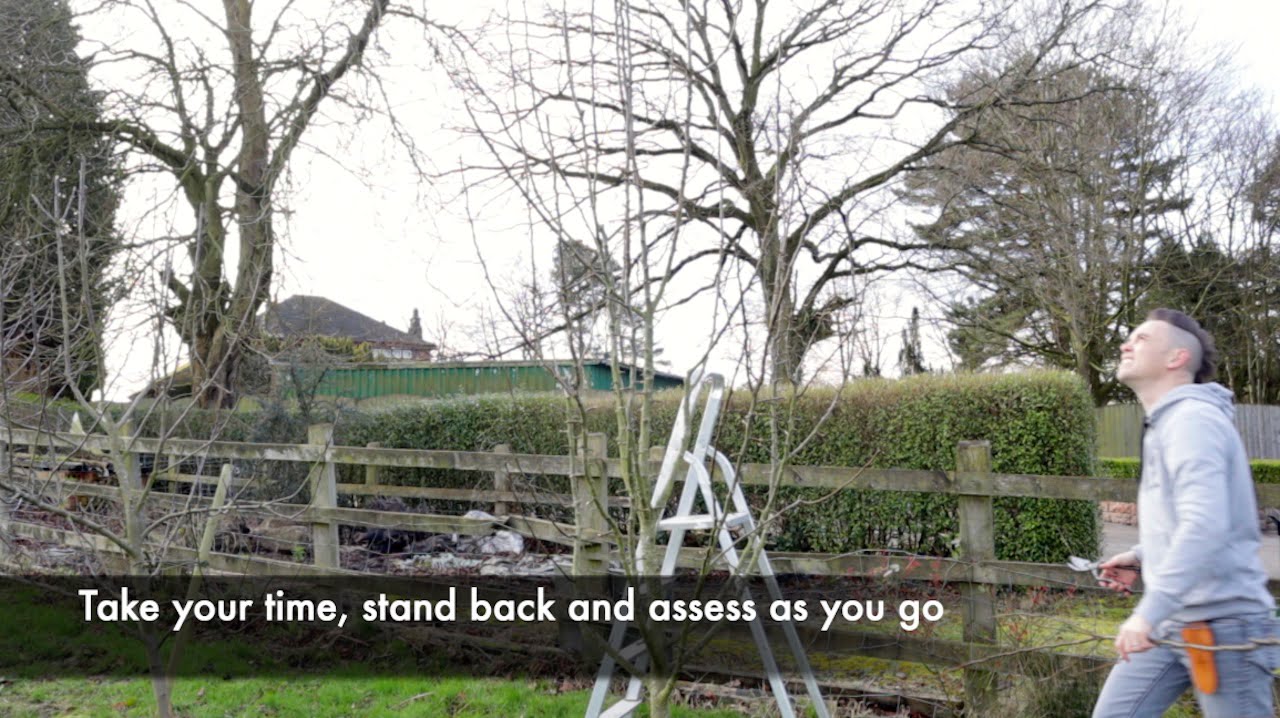
Step 1: Stand Back and Assess the Shape
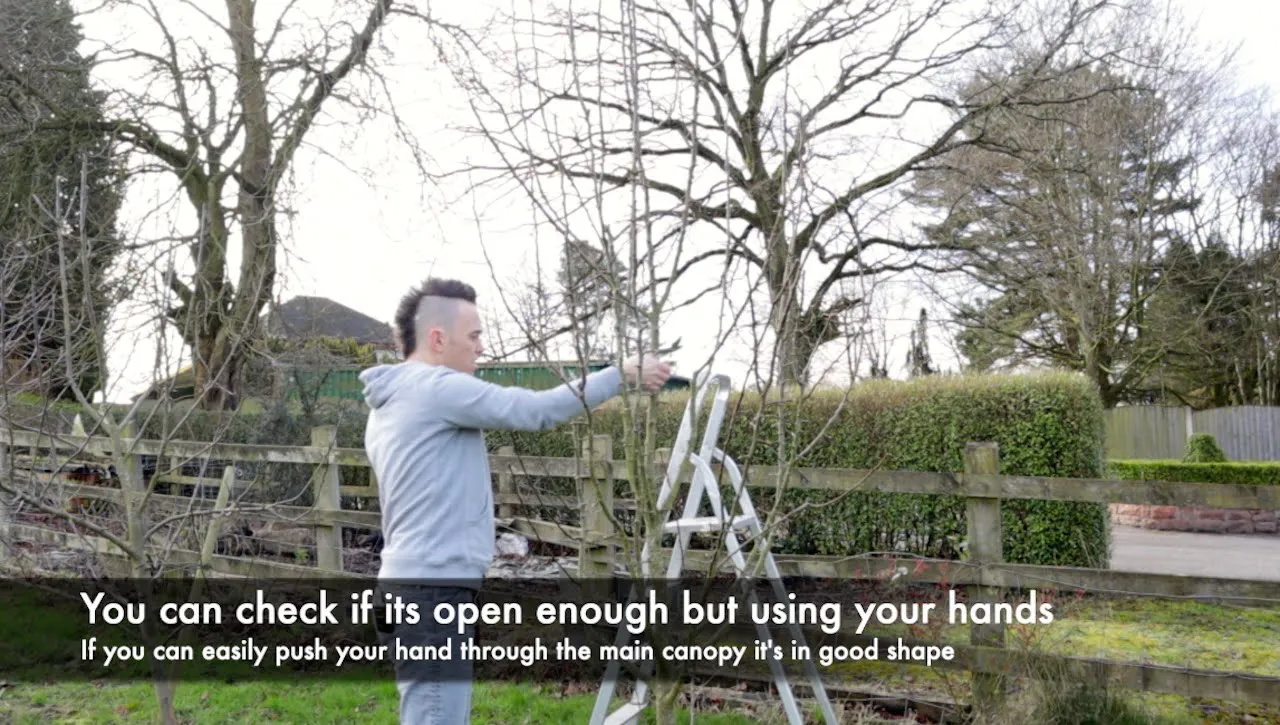
Before you make a single cut, stand back and spend a minute looking at the overall structure of the tree. You are aiming to finish with an open goblet shape, sometimes called an open centre. This means a clear, balanced framework of main branches with an open middle that light and air can move through freely. Think of it as an outstretched upturned palm with the fingers as the main branches, each evenly spaced with room between them.
A useful test is to try pushing your hand through the centre of the canopy. If you keep hitting branches, the tree is too congested and needs more thinning than you might have anticipated.
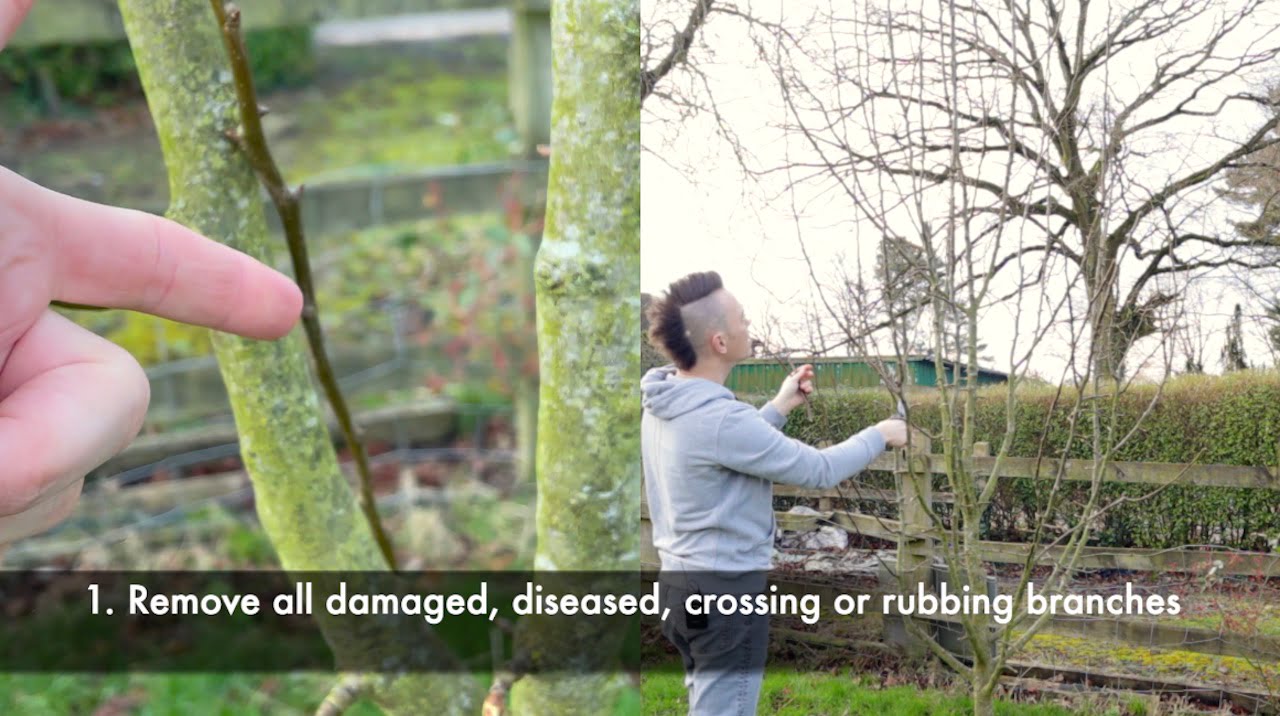
Step 2: Remove All Dead, Diseased and Damaged Wood
Always start here. Work your way around the tree systematically, removing any branch that is dead (no living buds, dry and brittle), diseased (showing canker, silvery discolouration, or fungal growth), or damaged (torn in wind, with significant wounds from rubbing against other branches). Cut cleanly back to healthy wood and dispose of any diseased material in your general waste bin rather than composting it.
If you come across any wood showing signs of canker (sunken, discoloured patches on the bark, sometimes with orange-red pustules), cut well back into clean, healthy wood and sterilise your tools immediately before continuing.
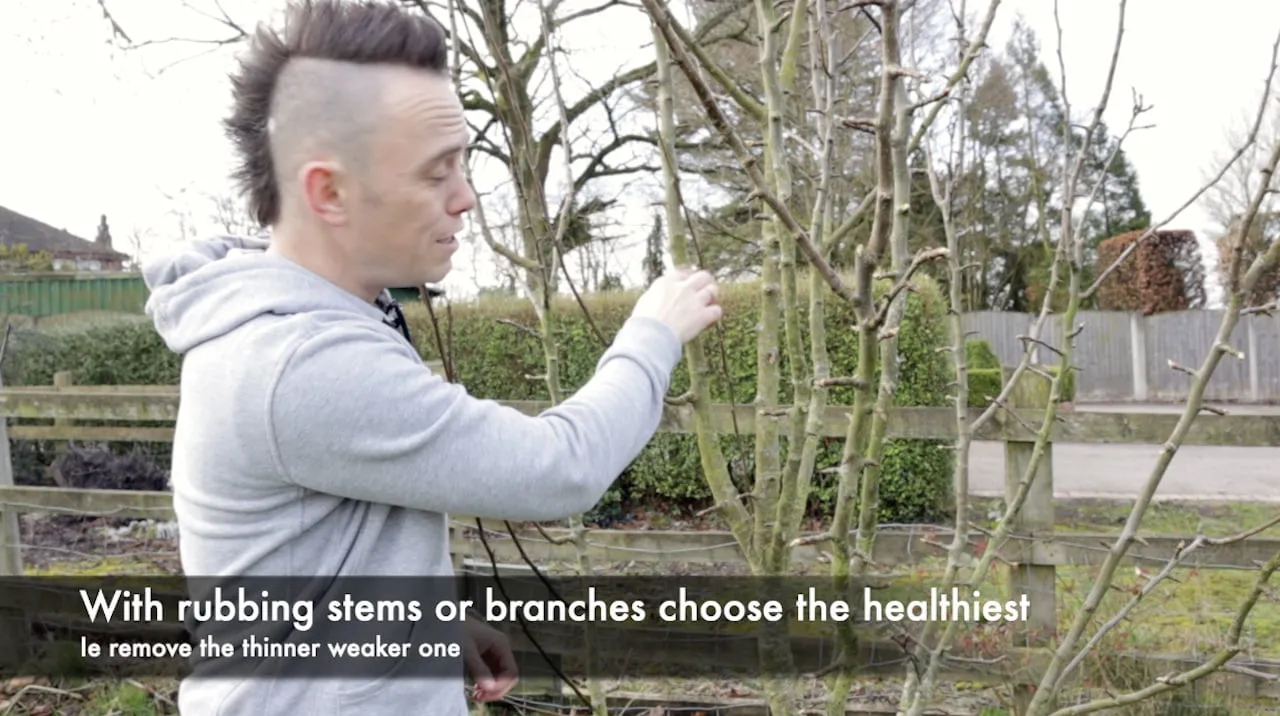
Step 3: Remove Any Crossing or Rubbing Branches
Step back again and look for any branches that cross over each other or are likely to rub as they thicken. Crossing branches cause all sorts of trouble in fruit trees. In high winds or as the branches grow and thicken, they start to chafe and wound each other, weakening the bark and creating entry points for disease. Remove the weaker or more poorly positioned of the two crossing branches, cutting back to the main stem or to a well-placed lateral.
Also remove at this stage any strong upright shoots growing towards the centre of the tree, sometimes called water shoots or watershoots. These vigorous vertical shoots rarely fruit and simply contribute to canopy congestion.
Step 4: Understand Fruiting Spurs Before You Shorten Laterals
Before shortening any of the remaining growth, take a moment to identify the fruiting spurs on your tree. These are the short, stubby clusters of buds that appear on older wood, typically on stems that are two years old or more. Fruiting spurs look noticeably different from the smooth, single-budded tips of the current year’s extension growth. They are where your fruit will form, so you must not prune them off.
On established pears of six years or more, the spur systems can become very congested themselves. At this point you may need to thin out some of the oldest spurs by removing whole clusters to allow the remaining ones more space and light. This is called spur thinning and is a normal part of managing an older tree.
Step 5: Shorten Laterals by Up to One Quarter
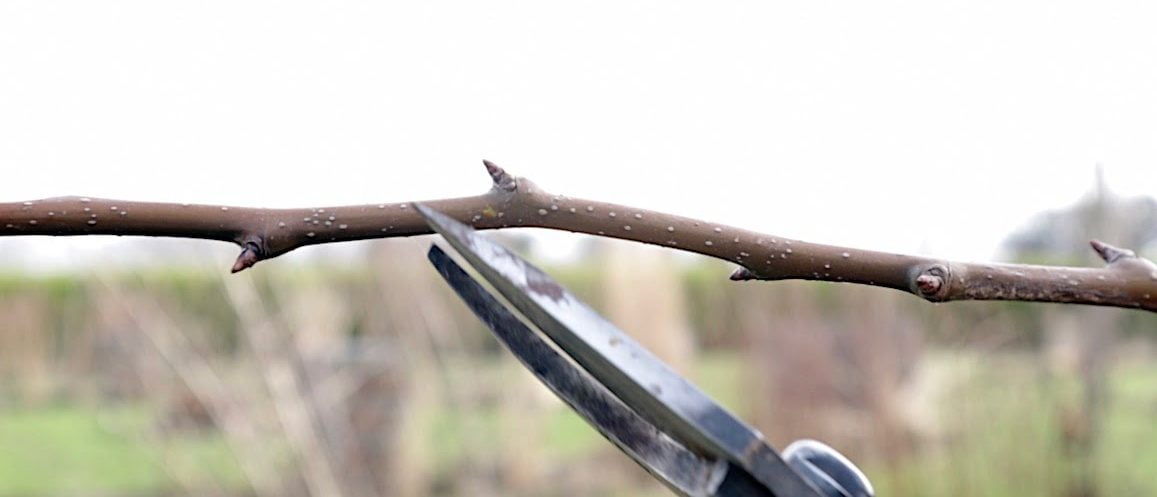
Now shorten the remaining branch growth. Pears are not as vigorous as apples, so we only remove up to one quarter of the current season’s growth, not the one third you would take from an apple. Find an outward-facing bud on each lateral, then cut just above it at 45 degrees, angling the cut away from the bud so water runs away from it. This outward-facing bud will break in spring and grow outward and upward, building your goblet shape naturally over successive seasons.
Never remove more than 25% of the total canopy in a single winter. Heavy pruning triggers an aggressive growth response in pears, producing masses of unproductive vertical watershoots the following spring rather than fruiting spurs.
Step 6: Check for the Open Goblet Shape
Step back regularly as you work and check the overall balance and shape. The finished tree should have an open centre with evenly spaced main branches radiating outward and upward, each with its growth shortened by roughly a quarter. The hand-through-the-canopy test is useful here: if you can pass your hand through the centre without difficulty, the airflow is good.
Step 7: Recycle or Compost Your Prunings
When you have finished and are happy with the result, gather up your prunings. Healthy wood from a disease-free tree can be chipped and composted, dried for use as aromatic kindling (pear wood smells wonderful when burned), or used in a bug hotel. Any diseased material must go in your general waste bin and never on the compost heap.
6. Pear Tree Pruning: Before and After
If you are new to pruning fruit trees it helps enormously to see a real before and after. The two examples below show a pear tree before and after its winter prune. The changes may look subtle from a distance but the differences matter greatly to the health and productivity of the tree.
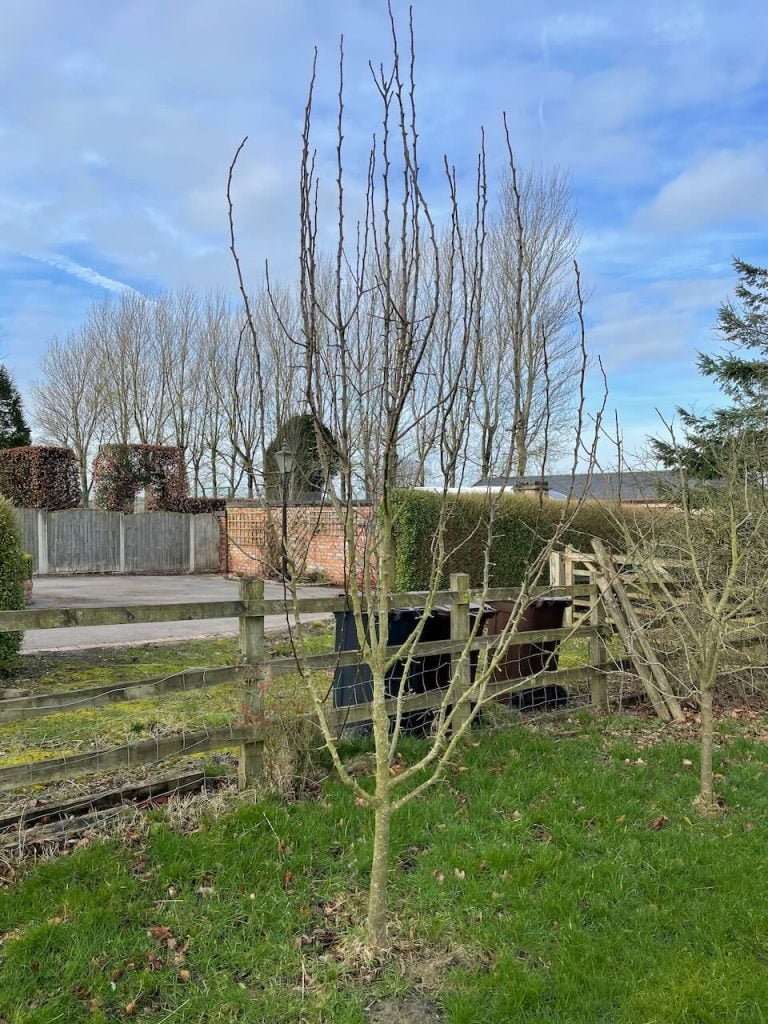
Pear Tree Before Pruning
You can see how all the growth has been reaching vertically, creating congestion in the upper canopy. There are some crossing branches and the fruiting spurs are beginning to crowd on older wood. Left for another season this tree would be producing smaller fruit on increasingly difficult-to-harvest branches.
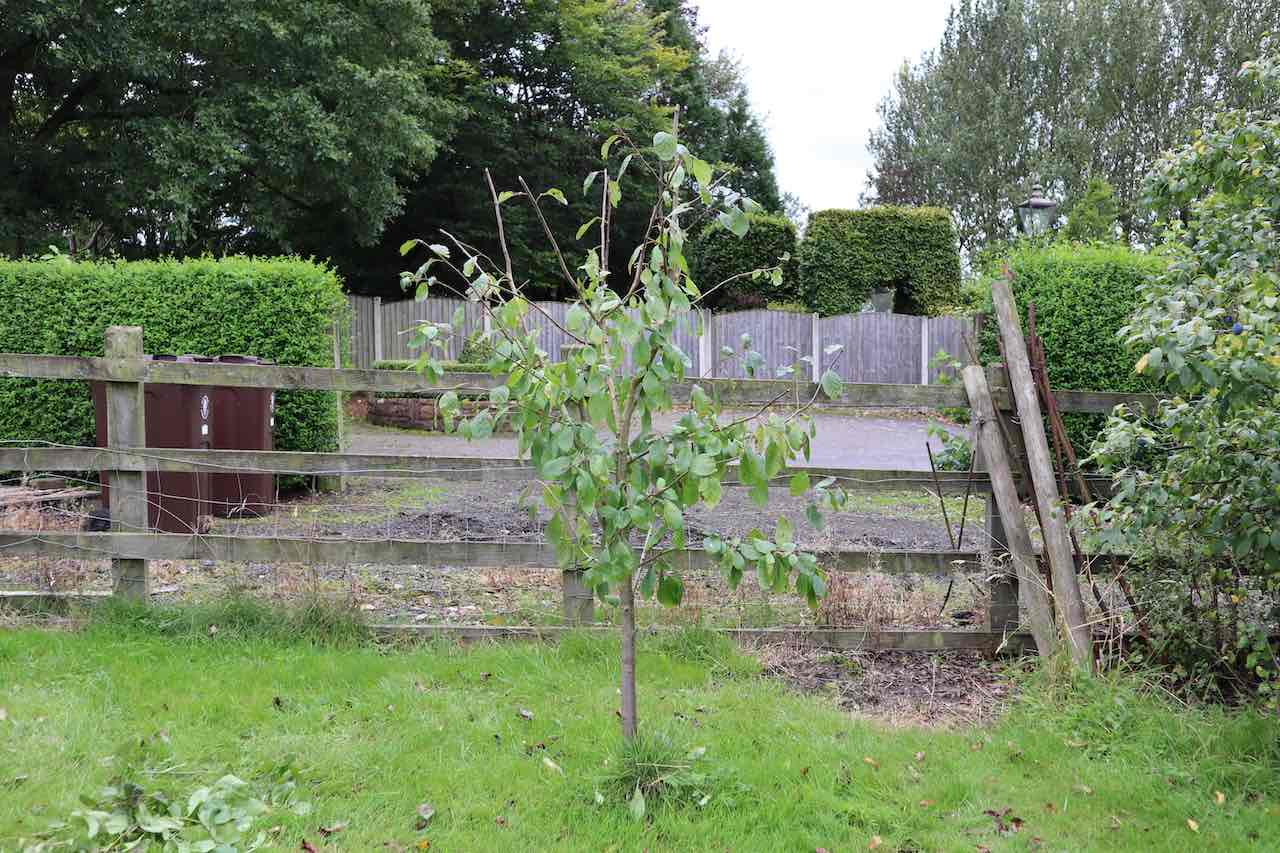
Pear Tree After Pruning
After the prune, all the vertical growth has been shortened back to outward-facing buds. The crossing stems have been removed and the centre of the canopy is now noticeably more open. The result is a balanced, open goblet-shaped pear tree that will channel its energy into fruiting spurs rather than long, whippy, unproductive growth.
7. How to Renovate a Neglected Pear Tree
If you have moved into a property with an old, unpruned pear tree, or inherited one that has simply been left for several years, do not attempt to restore it in a single winter. A renovation prune over three years is far safer and produces better results than a single drastic cutback.
Year one focuses entirely on removing the obvious problems: all dead, diseased, and damaged wood, the worst crossing branches, and any major branches that are growing directly inward. Do not attempt to reshape the tree in year one. Just remove the problems.
Year two addresses the remaining crossing and crowding branches, begins the process of opening up the canopy centre, and starts shortening the laterals on the remaining framework branches by a quarter.
Year three completes the renovation, addressing any remaining congestion in the spur systems and finishing the open goblet shape. By this point you should be seeing noticeably improved fruit quality and a much more manageable tree.
⚠️ Important Note
Removing more than 25% of the canopy in a single winter on a neglected pear will trigger a mass of unproductive vertical watershoots in the spring, making the problem considerably worse. Be patient with the three-year approach.
8. Summer Pruning Pear Trees
Summer pruning is different in purpose and timing to winter pruning, and the two should not be confused. While winter pruning stimulates growth, summer pruning restricts it. This makes summer pruning particularly useful for trained forms such as espaliers and cordons, where controlling the size and directing energy into fruiting spurs rather than extension growth is the primary goal.
For a free-standing pear tree, a light summer prune can also be used to encourage a reluctant cropper into fruiting. If your pear is growing in ideal conditions, it can sometimes put so much energy into producing long, lush growth that fruiting is delayed. Summer pruning interrupts this cycle.
The summer pruning process for pears involves two stages. The first, in early June, removes the tips of the strongly growing shoots to interrupt their extension. The second, in early September after fruiting, shortens the current year’s new growth by no more than a third of each stem. Leave all the older wood alone at this stage; that is a job for the following winter.
9. Pear Tree Pollination Explained
One thing to understand, particularly if you are a newer gardener or working in a smaller space, is pear tree pollination. Most fruit trees require a partner tree nearby to cross-pollinate their flowers in spring, which then produces the fruit in late summer and autumn.
Pear trees are grouped into pollination groups numbered 1 through 5. Trees in the same group, or adjacent groups, will cross-pollinate each other. Without a compatible partner, or without pollinating insects bringing pollen from a compatible tree in a neighbouring garden, you may get blossom every spring but very little fruit. The bees and other insects do the work, so the trees just need to be within flying distance of each other, typically within about 30 metres.
If this sounds complex, the simple solution is to choose a self-fertile pear variety. These varieties do not require any pollination partner and are ideal for smaller gardens or where space is limited. In practice though, if there are several trees in your neighbourhood, pollinating insects will very often do the cross-pollination work for you without any intervention needed on your part.
10. Best Self-Fertile Pear Trees for UK Gardens
All of the varieties listed below are self-fertile and will produce a crop without a pollination partner. They are also among the most widely available and reliably productive varieties for UK conditions. Pears are known by the Latin genus Pyrus, followed by the species communis and then the cultivar name in single quotation marks.
Pyrus communis ‘Conference’ is the most widely grown pear in UK gardens and supermarkets. It is reliably self-fertile, produces good crops of long, green-brown fruits with sweet, juicy flesh, and performs well across most UK regions. Pollination group 3.
Pyrus communis ‘Concorde’ is a cross between Conference and Doyenne du Comice, combining the reliability and productivity of Conference with the exceptional flavour of Comice. It is compact enough for smaller gardens and produces good crops over a long season. Pollination group 4.
Pyrus communis ‘Williams Bon Chretien’, usually just called Williams, is one of the oldest and most celebrated dessert pears in cultivation. The yellow-green fruit has a distinctive musky, aromatic flavour and ripens in August, earlier than most other varieties. It is partially self-fertile and benefits from a compatible pollinator nearby, but will produce a modest crop on its own. Pollination group 3.
Pyrus communis ‘Doyenne du Comice’ is widely regarded as producing the finest-flavoured fruit of any pear. The large, round, russet-yellow fruits have an extraordinarily rich, buttery flesh. It is partially self-fertile but crops far better with a Conference or Concorde nearby for pollination. Pollination group 4.
11. Frequently Asked Questions About Pruning Pear Trees
How much should I cut off a pear tree each year?
Remove up to one quarter of the current season’s growth by shortening laterals, plus any dead, diseased, damaged, or crossing material. Never remove more than 25% of the total canopy in a single winter. Pears are less vigorous than apples and respond better to more conservative pruning.
Can I prune a pear tree in autumn?
Light maintenance pruning to remove specific branches or restrict height can be done in early autumn after fruiting, typically September. For the main annual prune, wait until the tree is fully dormant between January and March. Autumn pruning before the tree is dormant can stimulate soft new growth that is vulnerable to frost damage.
Why is my pear tree not producing fruit?
The most common causes are lack of a compatible pollination partner, pruning at the wrong time of year (which removes developing flower buds), frost damage to blossom in spring, or a tree that is growing in such ideal conditions that it is directing all its energy into growth rather than fruit. A summer prune in early June can help break this cycle by interrupting the extension growth. Also check that you are not shortening the wrong parts of the tree if you have a spur-bearing variety.
Should I use wound paint on pruning cuts?
No. Research at East Malling Research Station demonstrated that wound sealants slow the natural callus formation process and can trap moisture against the cut, increasing the risk of fungal infection. Make a clean cut with sharp tools and let the tree heal itself naturally.
What is the difference between pruning a pear tree and pruning an apple tree?
The principles are very similar, but there are a couple of key differences. Pear trees grow more upright than apple trees and have a stronger tendency to send growth vertically, so managing that upright habit is more important. Pears also produce spur systems more freely than most apples and those spur systems become congested more quickly, so spur thinning becomes a regular part of managing an established pear from about year six or seven onwards. The pruning cut amount is also slightly more conservative: one quarter for pears versus one third for apples.
Can I hard prune an overgrown pear tree?
Yes, but spread the renovation over three years rather than attempting it in a single season. Removing more than 25% of the canopy in one go triggers an aggressive watershoot response that makes the congestion worse. A three-year programme produces far better results and does not stress the tree.
Enjoyed learning how to prune your pear tree? My Garden Design for Beginners course will help you design the whole space around them. Step-by-step video lessons, real-world case studies, and a design certificate at the end — all taught by me, Lee Burkhill, award-winning designer and BBC1’s Garden Rescue presenter.
29
Garden Design Examples for Small Gardens: 30 Design Templates & Planting Plans
Garden Design Examples for Small Gardens: 30 Design Templates & Planting Plans: In this online gardening course, I’ll walk you through 30 fantastic garden designs, explaining the logic behind the layout, the plant choices, and take-home tips for applying them in your own garden.
Weekend Garden Makeover: A Crash Course in Design for Beginners
Learn how to transform and design your own garden with Lee Burkhills crash course in garden design. Over 5 hours Lee will teach you how to design your own dream garden. Featuring practical design examples, planting ideas and video guides. Learn how to design your garden in one weekend!
Garden Design for Beginners: Create Your Dream Garden in Just 4 Weeks
Garden Design for Beginners Online Course: If you want to make the career jump to becoming a garden designer or to learn how to design your own garden, this is the beginner course for you. Join me, Lee Burkhill, an award-winning garden designer, as I train you in the art of beautiful garden design.
Pruning pear trees is really straightforward once you understand the logic behind each step. Work through the process in the right order: assess the shape, remove the dead and diseased, cut out the crossing branches, shorten the laterals by up to one quarter to outward-facing buds, then step back and check the result. Do this each winter between January and March, and your pear tree will reward you with healthier growth, better airflow, and more consistent cropping year after year.
Try not to panic if you cut off too much or the wrong branch. Your fruit tree will soon grow back, and each of those small mistakes makes you a more confident and capable pruner. The pear is a forgiving tree.
Want to learn more about pruning? Take a look at my other guides:
Your subscription could not be saved. Please try again.
Your subscription has been successful.
Lee Burkhill
Lee Burkhill, known as the Garden Ninja, is an award-winning garden designer and horticulturist with over 30 years of gardening experience and 15 years as a professional garden designer. A qualified RHS (Royal Horticultural Society) professional, Lee specialises in sustainable garden design and practical horticultural advice. He designs and presents on BBC1’s Garden Rescue and in leading gardening publications.
Great tips! I really loved reading this blog! Very useful and eye-opening tips. Thanks for writing this down and sharing it! I am gonna write these tips down and use them when the time comes. Thanks!
Great tips! I’ve always been intimidated by pruning, but your step-by-step guide makes it seem much more manageable. I can’t wait to try these techniques on my pear trees this spring. Thanks for sharing!


Hi, thanks for the fab pruning guide. Can I ask, how do I go about pruning a ‘middel’ age pear. It dosent need to be any higher.
Great tips! I really loved reading this blog! Very useful and eye-opening tips. Thanks for writing this down and sharing it! I am gonna write these tips down and use them when the time comes. Thanks!
Timing: Prune pear trees during late winter or early spring while they are still dormant, before new growth begins.
Great tips! I’ve always been intimidated by pruning, but your step-by-step guide makes it seem much more manageable. I can’t wait to try these techniques on my pear trees this spring. Thanks for sharing!