-
How to Protect Container Plants from Winter Frost UK
 Lee Burkhill: Award Winning Designer & BBC 1's Garden Rescue Presenters Official Blog

Winter doesn't have to mean death row for your pots. With the right protection techniques, your containers can sail through the coldest months looking absolutely brilliant. Here's everything you need to know about keeping your plants and pots alive when temperatures plummet!
Every single winter, I get messages from panicked gardeners who’ve woken up to find their gorgeous pots cracked like eggshells and their prize plants looking like they’ve made a break for it! It’s absolutely gutting, especially when you’ve spent good money on both the plants and the containers. However, most of this carnage is completely avoidable if you know what equipment and steps you need to keep your plants and containers frost-proof!
This isn’t your bog standard “wrap everything in fleece and hope for the best” advice. We’re talking specifically about containers here, because protecting plants in pots is an entirely different kettle of fish from protecting plants in the ground. Those roots are sitting there completely exposed to every temperature swing, frost pocket and icy blast that our wonderful British weather can throw at them. But I have a few tricks to make those super fristy nights far easier to survive without breaking the bank!
Let me walk you through exactly what you need to do to keep your containers and plants alive this winter.
Why Container Plants Struggle During Frosts
Before we get stuck into the solutions, you need to understand why containers are so vulnerable in the first place. When plants are in the ground, the soil acts like a massive thermal blanket. It stays warmer than the air temperature and provides proper insulation for the root system. But stick that same plant in a pot and suddenly those roots are only protected by a thin layer of compost and the pot walls. The whole thing freezes and thaws rapidly, which is absolutely brutal for plants.

What Frost & Freezing Does to Plants in Containers
Here’s what actually happens during a frost. Water in the plant cells freezes and expands, which in tender plants is a bit like bursting the cell walls like tiny water bombs going off throughout the plant tissue. The damage shows up as blackened leaves, mushy stems and that distinctive frost-burned look that makes your heart sink when you see it.
Which is why it’s key to choose winter-suitable plant species which have waxy leaves or are able to cope with frost due to their leaf adaptations.
Container plants also face another absolute nightmare that ground-dwelling plants don’t have to worry about: the pot itself can crack or shatter, unless you use plastic or resin pots.
When wet compost freezes, it expands with serious force. I’ve seen terracotta pots that looked bombproof split right down the middle after one hard frost because they were waterlogged. It’s not just the cheap ones either, even expensive hand-thrown pots will fail if they’re not properly frost-resistant and the drainage is poor.
Frost Proof vs Frost Resistant Pots
This is where people get properly confused and end up wasting money. Garden centres love throwing around terms like “frost proof” and “frost resistant” as if they mean the same thing. They absolutely do not, and understanding the difference will save you a fortune in replaced pots.
Frost Resistant Pots
Frost resistant pots are basically the middle ground. They’re fired at higher temperatures than your cheap mass produced terracotta, making them less porous and better able to handle light frosts.
They might last a few winters in a sheltered spot but eventually you’ll start seeing rim damage, fine cracks appearing and that telltale flaking where water has got in and frozen. These pots work fine in mild areas or if you’re willing to give them extra protection when temperatures really plummet.
Frost Proof Pots
Frost proof pots on the other hand are the absolute best winter choice when it comes to containers. These beauties are fired to very high temperatures, often for 12 to 18 hours, which vitrifies the clay.
That’s a fancy way of saying the clay particles bond so tightly together that water molecules are literally too big to penetrate. However, they do come at a cost: a higher price point. You’ll pay at least double, given the extra manufacturing effort.
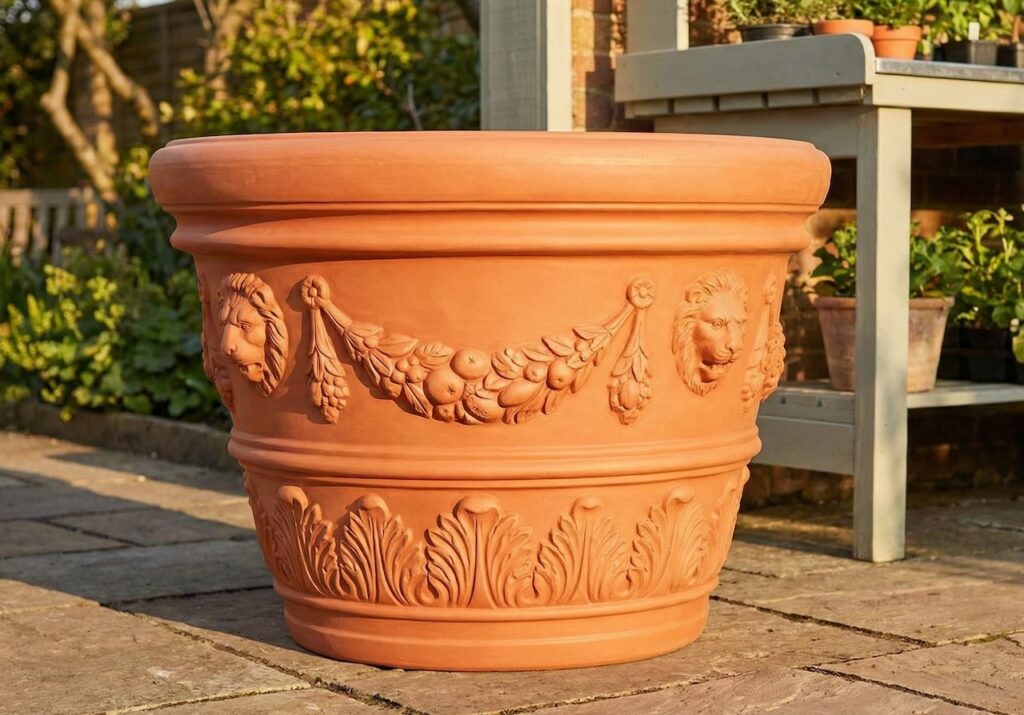
The result is a pot that won’t absorb water and therefore can’t be damaged by freeze-thaw cycles. Most quality manufacturers offer a 10-year guarantee on properly frost-proof terracotta. Salt-glazed pots from Asia are also brilliant for this; they’ve got that lovely sheen, and they’re tough as old boots.
Key differences at a glance:
| Feature | Frost Resistant | Frost Proof |
|---|---|---|
| Firing temperature | Medium to high | Very high (12-18 hours) |
| Water absorption | Some porosity remains | Vitrified, non-porous |
| Winter durability | Light frosts only | Handles hard freezes |
| Guarantee | Usually none | Often 10+ years |
| Price point | Mid range | Premium |
| Best for | Sheltered spots, mild areas | Exposed positions, cold regions |
However, even the most frost-proof pot in the world will crack if you let the compost inside become waterlogged. When that wet compost freezes and expands, it doesn’t matter how good your pot is; the expansion has to go somewhere, which is why most pots crack. So I always buy regular quality terracotta (rather than expensive ‘Frost proof’) and then take a few steps to significantly reduce the potential for frost cracking, and that starts with increasing drainage.
Drainage is absolutely crucial, which brings me nicely to something that a lot og even expert gardeners forget about.
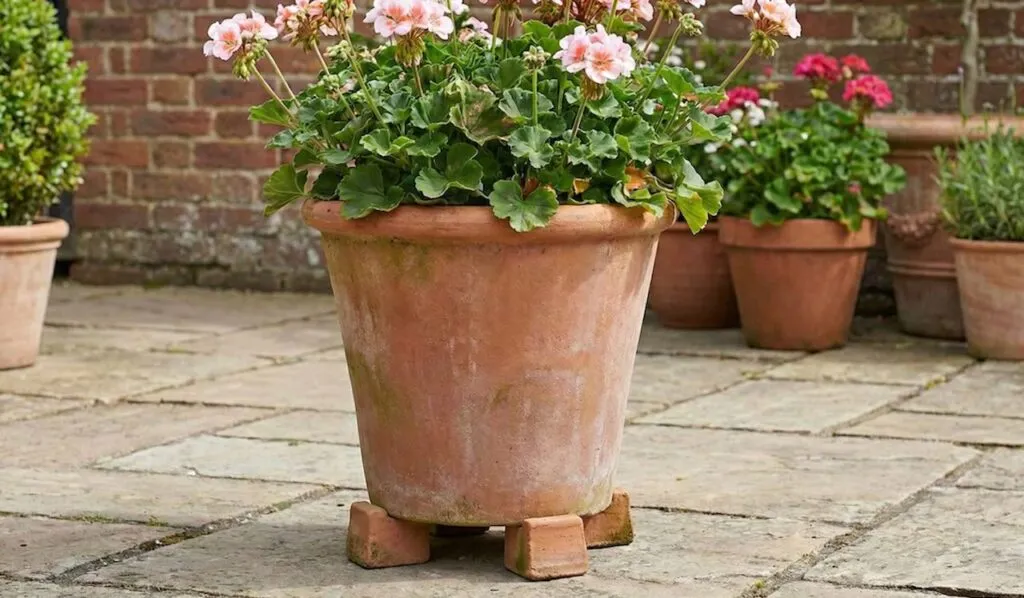
Pot feet.
Pot Feet Are Essential
Honestly, if I had a pound for every time someone told me their pots don’t need raising off the ground, I could retire tomorrow. However, Pot feet are among the simplest and most effective ways to protect both your pots and your plants. They are cost-effective at just a few pounds for a set, they’re dead easy to use, and they solve multiple problems at once.
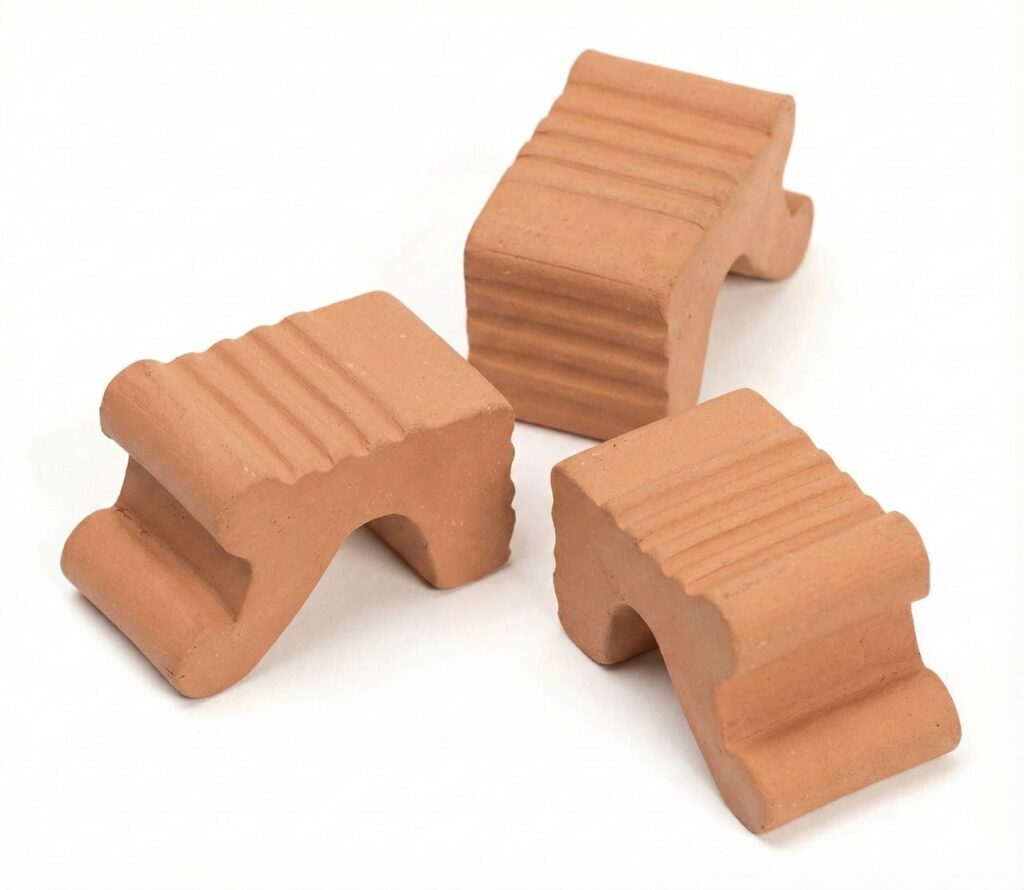
Why Pot Feet Matter
When you raise pots off the ground, water can actually drain out of those holes in the bottom instead of sitting there, creating a soggy mess. This prevents waterlogging, which, as we’ve covered, is the number one reason pots crack in winter. It also stops the drainage holes from getting blocked by sitting flush against paving or decking, and it improves air circulation around the base of the pot, which helps prevent rot and fungal problems.
What to Use for Pot Feet
You don’t need fancy pot feet either. Purpose-made ones are great, but you can also use:
- Terracotta pot feet (classic and blend in beautifully)
- Bricks or bits of slate
- Wine corks grouped together
- Thick ceramic tiles from the DIY store
- Composite hidden feet like these
- Decorative stone pot risers
Just get about an inch of clearance under there, and you instantly help reduce the chances of your terracotta pots from cracking. In really exposed spots, I’ll sometimes use slightly taller pot feet or bricks to get even better drainage and air flow.
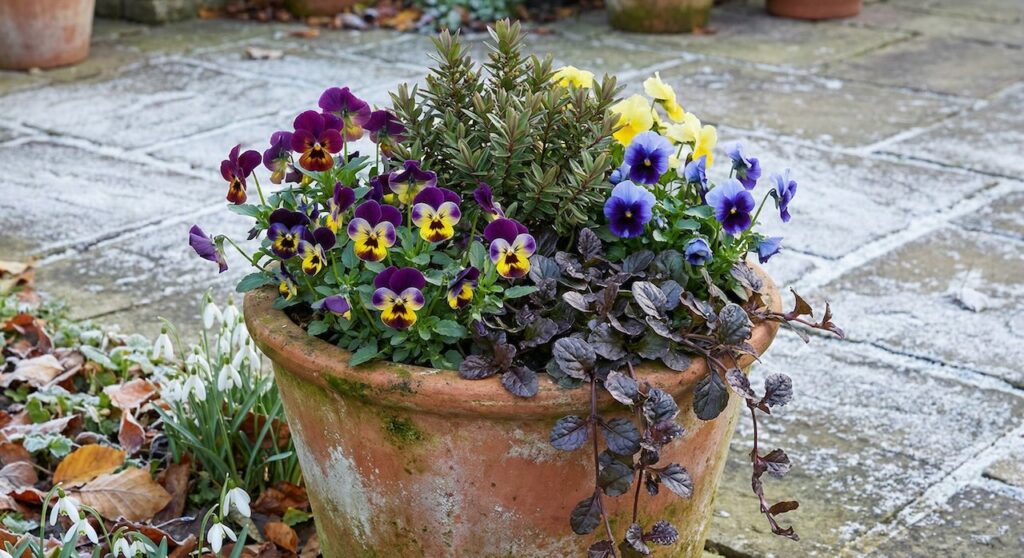
Wrapping Pots: The Bubble Wrap Method
Now we’re getting to the practical stuff that actually makes a difference. Wrapping pots with bubble wrap is an absolute game-changer for protecting both the container and the plant roots from freezing temperatures. The bubble wrap traps air, creating an insulating layer that significantly reduces temperature fluctuations. This is particularly important for tender plants that you want to keep outside but need that extra protection.
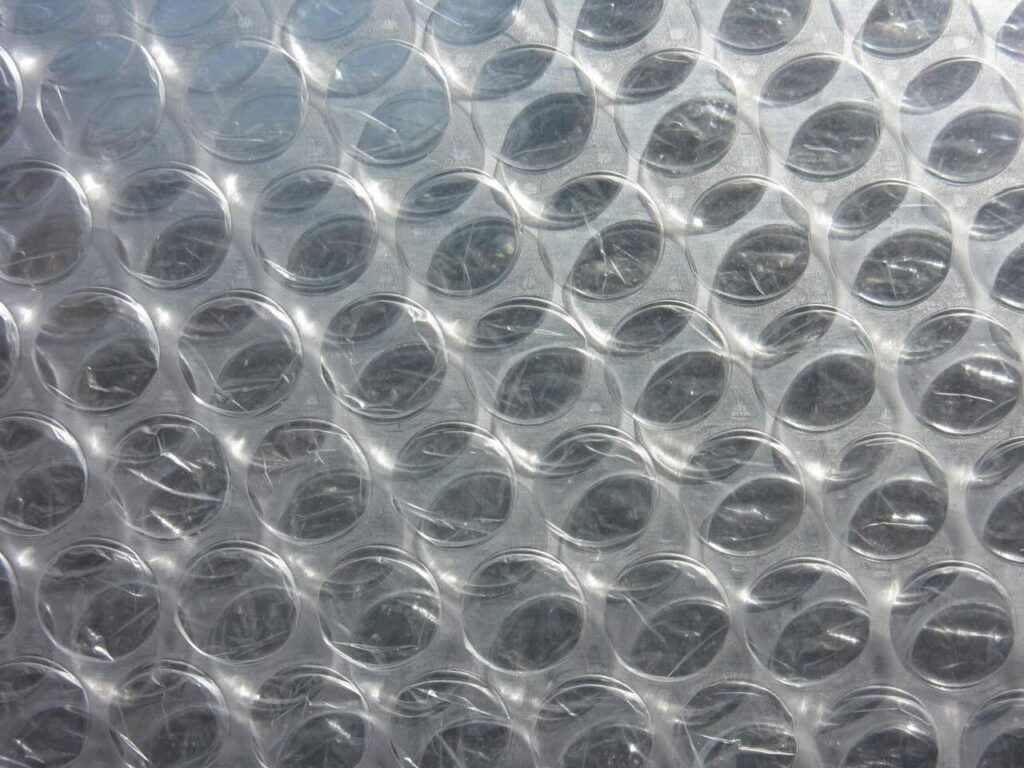
How to Wrap Pots Properly
The technique is dead simple:
- Get proper horticultural bubble wrap – This kind with larger bubbles works better for insulation than small bubble stuff. Horticultural grade is UV stabilised and lasts multiple seasons.
- Wrap the sides only – Cover from the rim down to the base with at least two layers, three if you’re in a really exposed spot or dealing with particularly tender plants.
- Secure with string or twine – Not tape, because tape can damage pot surfaces and looks rubbish.
- Never cover the compost surface – You still need to be able to water when necessary, and covering the soil surface can trap moisture and cause rot.
You can also use the same technique above with horticultural fleece if you also need to protect more tender plants, such as Musa basjoo (Hardy Banana) or tree ferns. Just make sure it’s breathable.
Advanced Insulation for Tender Plants
For really valuable pots or particularly tender specimens, you can create what I call pot duvets. Take a black plastic bin bag, stuff it with straw or shredded paper, and wrap that around your bubble-wrapped pot. It looks a bit odd, admittedly, but it provides seriously good insulation. Just remember to remove all this lot when temperatures warm up, or you’ll end up cooking your plants instead.
Moving Plants: When to Bring Them In
This is where you need to use your noggin and be realistic about what your plants can actually tolerate. Some plants simply aren’t going to survive a British winter outdoors no matter how much bubble wrap you chuck at them. Knowing when to admit defeat and move them inside is crucial.
Plants That Must Come Inside
Tender perennials like these absolutely need to come inside before the first proper frost:
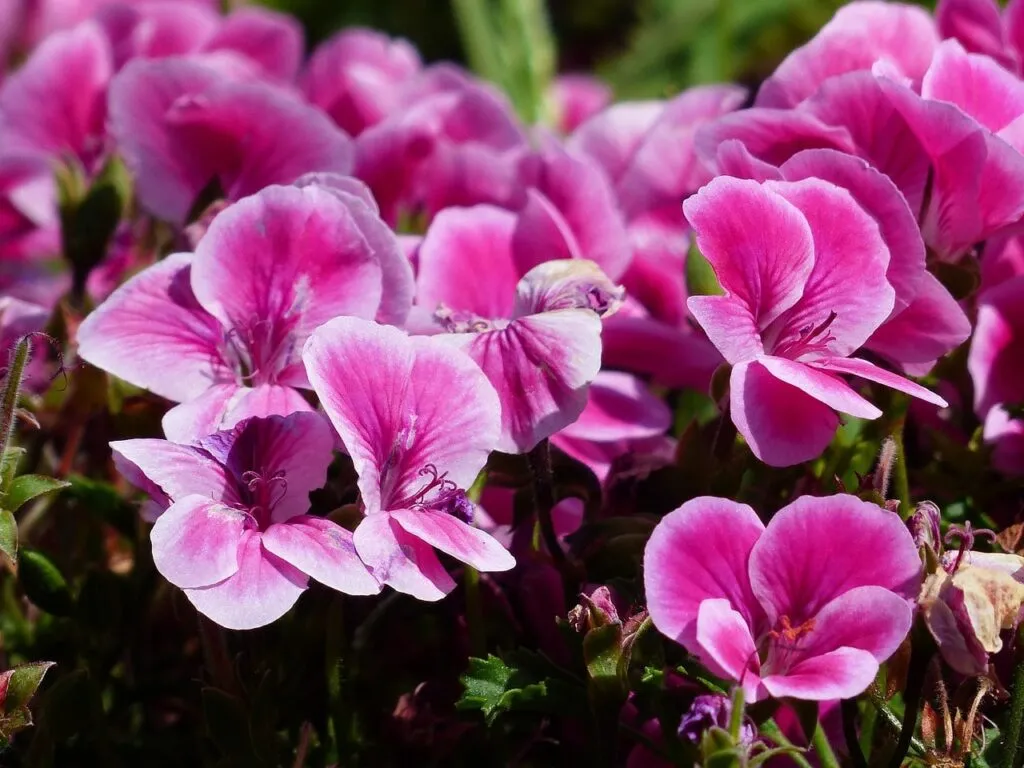
- Pelargoniums (geraniums) – Will turn to mush in frost
- Fuchsias – Tender varieties need protection
- Citrus trees – Lemons, oranges, and kumquats all need frost-free conditions
- Olive trees – Young ones are especially vulnerable
- Exotic specimens – Bananas, cannas, gingers, tree ferns, unless wrapped in fleece
- Succulents – Most won’t tolerate freezing
Where to Overwinter Tender Plants
A frost-free greenhouse is ideal, but if you don’t have one, an unheated garage, porch, conservatory or even a bright, cool room indoors will do the job. The key word here is frost-free; they don’t need tropical heat, just protection from freezing and some form of cover from the frost as it settles. Cold frames are a great space saving solution for this.
Timing and Preparation
Move plants to their winter quarters before the first forecast frost. I usually start shifting tender stuff in early November, depending on what the weather’s doing. Check your plants for pests before bringing them inside, because greenfly and other nasties love hitching a ride indoors, where it’s warmer. A quick spray with organic pest control, or even just a good blast with the hose, will sort most problems.
Creating Microclimates
For plants that are borderline hardy, like some salvias, agapanthus and cordylines, moving them to a more sheltered spot can be enough. Tuck them up against a south-facing wall where they’ll benefit from residual heat from the building and protection from the worst of the wind and rain. These microclimates around buildings can be several degrees warmer than open garden spaces, which is often the difference between survival and death for marginal plants.
Group containers together when you move them because this creates an even better microclimate. The plants protect each other from wind, the mass of pots provides more thermal mass, and it makes your life easier for watering and checking on them. I usually create a little container huddle in the most sheltered corner I’ve got, often under the eaves of the house or in a corner formed by two walls.
Protecting Roots vs Protecting Foliage
This is something that trips people up constantly because you actually need different strategies for protecting the roots versus the top growth. They’re facing different challenges and need different solutions.
Root Protection Strategy
Root protection is all about preventing the compost from freezing solid. The roots are the life support system of the plant. If they freeze and die, the plant is toast, no matter how pretty the foliage still looks.
Key methods for root protection:
- Bubble wrap around pot sides
- Pot feet for proper drainage
- Moving containers to sheltered spots
- Grouping pots together for thermal mass
Foliage Protection Strategy
Foliage protection is a different beast entirely. Evergreens in particular suffer in winter not from cold but from desiccation. When the ground or compost is frozen, roots can’t take up water. But those evergreen leaves are still losing moisture to cold dry winds, and when they can’t replace that moisture, they turn brown and crispy.
This is why you’ll often see browning on the tips and edges of evergreen leaves after cold windy spells, it’s not frost damage, it’s essentially drought stress.
Horticultural fleece grades and protection levels:
| Fleece Weight | Protection Temperature | Best Use |
|---|---|---|
| 17-20gsm | Down to -2°C | Light frost, birds/insects |
| 30gsm | Down to -5/-6°C | Standard winter protection |
| 40-50gsm | Down to -7°C | Heavy duty winter |
| 70-80gsm | Down to -8°C | Ultimate frost protection |
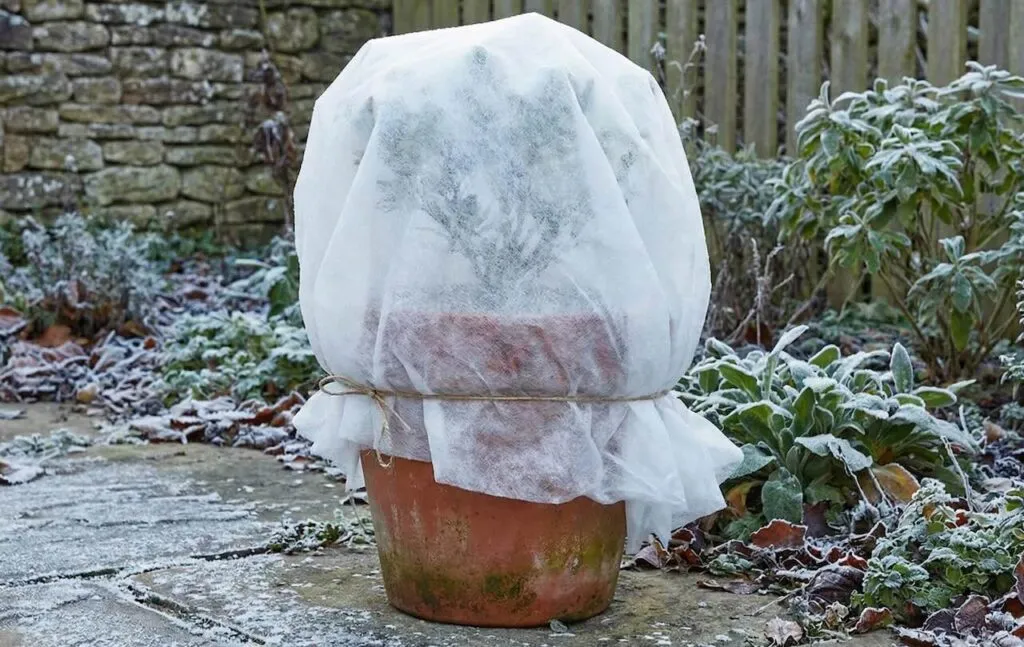
Using Horticultural Fleece
For protecting foliage, horticultural fleece is your friend. You can drape it over the plant to provide a few degrees of frost protection while still allowing light, air and moisture through. The standard grade gives you about 2 to 3 degrees of protection, heavier grades can protect down to minus 6 degrees. For ultimate protection, those zip up fleece covers that completely envelop both pot and plant are absolutely brilliant, protecting everything down to minus 8 degrees while still being breathable.
The Winter Watering Conundrum
Something that catches people out every single time is that container plants still need watering in winter. Dormant does not mean dead. The roots are still alive down there and still need moisture to survive. However, and this is crucial, winter watering is completely different to summer watering.
Check your containers regularly by sticking your finger into the compost. If it feels completely dry an inch or so down, the plant needs water. But here’s the thing, you want the compost moist, not sodden.
Winter Watering Rules
- Water on milder days, preferably in the morning
- This allows excess to drain before temperatures drop at night
- Never water when frost is forecast (wet compost will freeze solid)
Group your containers together, not just for warmth but also for easier watering. You can check and water them all in one go rather than traipsing around the garden in the rain. I usually do a container check every week or two in winter, more often if we have a mild dry spell, less often if it’s bucketing down constantly.
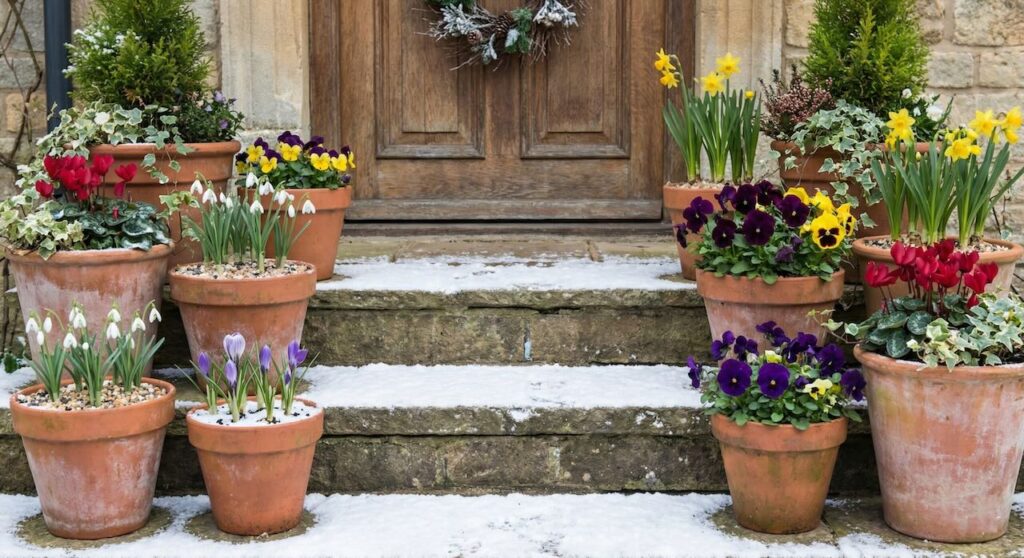
My Top Plant Recommendations for Winter Containers
After 35 years mucking about with containers in all sorts of conditions, these are the absolute go-to plants that never let me down over winter. If you want to see the complete list, check out my winter plant recommendations for containers.
Skimmia japonica ‘Rubella’
An absolute tough as old boot but still gorgeous, glossy evergreen. It holds its leaves even in the harshest frost, fragrant flowers come spring, and those red buds provide interest all winter. It’s bombproof in containers and needs virtually no maintenance. Stick it in ericaceous compost if your water’s hard and it’ll thrive for years.
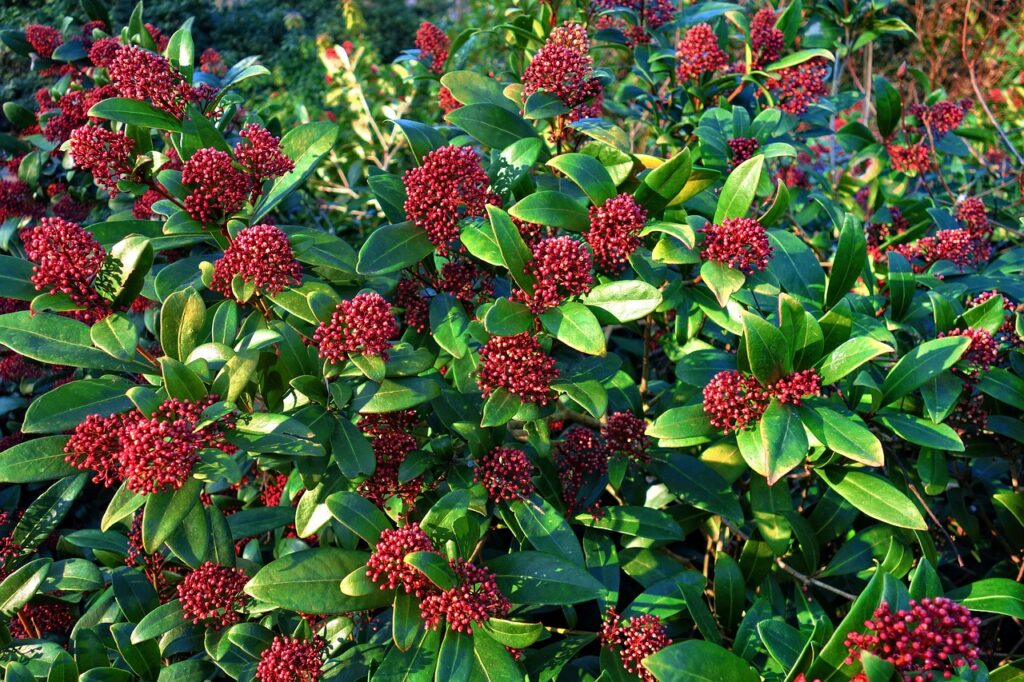
Why it works:
- Evergreen structure year round
- Red buds from autumn through winter
- Fragrant spring flowers
- Completely hardy
- Perfect for shade or partial shade
Winter Flowering Heathers (Erica carnea)
Winter heathers are proper workhorses. They flower their socks off from autumn through to spring, provide nectar for early pollinators, and stay looking good even when covered in frost. The low-growing habit works brilliantly for the front of containers or filling gaps between taller plants.

Popular varieties:
- ‘Springwood White’ – Pure white flowers
- ‘Myretoun Ruby’ – Deep pink/red blooms
- ‘Pink Spangles’ – Shell pink flowers
Hellebores
For actual wow factor, hellebores are stunning. Yes, they’re more expensive than pansies, but one plant will give you years of gorgeous flowers from January onwards in shades from white through pink to deep purple. Their evergreen foliage looks good year-round, and they’re tough as old boots once established.
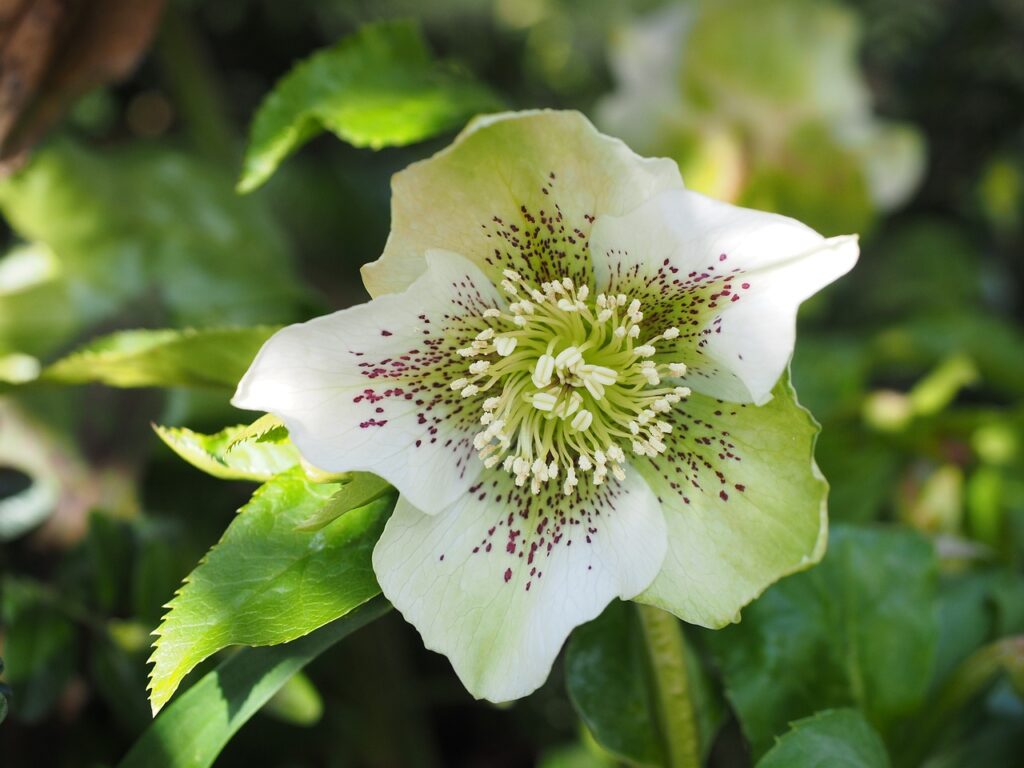
Container tips:
- Choose Helleborus × hybridus for best container performance
- Plant in John Innes based compost
- Position in partial shade
- Keep relatively moist through winter
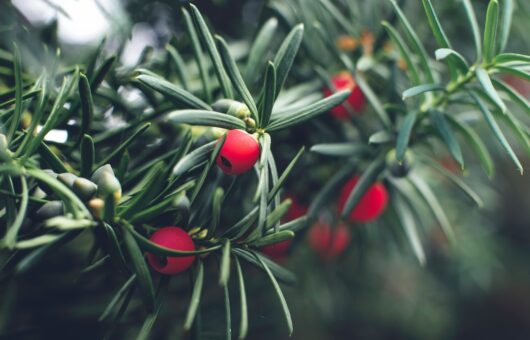
Gaultheria procumbens (Checkerberry)
Checkerberries are brilliant for adding that festive touch with their bright red berries and reddish-tinted leaves. Low growing, evergreen, and those berries last for ages. Chuck some trailing ivy in with it and you’ve got instant Christmas display vibes.
What makes it special:
- Bright red berries all winter
- Leaves turn reddish in cold
- Low maintenance
- Prefers acidic soil
Heuchera
For foliage that really pops, you cannot beat Heuchera. I’m particularly fond of the purple and bronze varieties, which get even more vibrant in cold weather. They’re evergreen, utterly reliable, and bring a jewel-toned colour that lifts a whole display. Combine with lime green varieties for proper contrast.
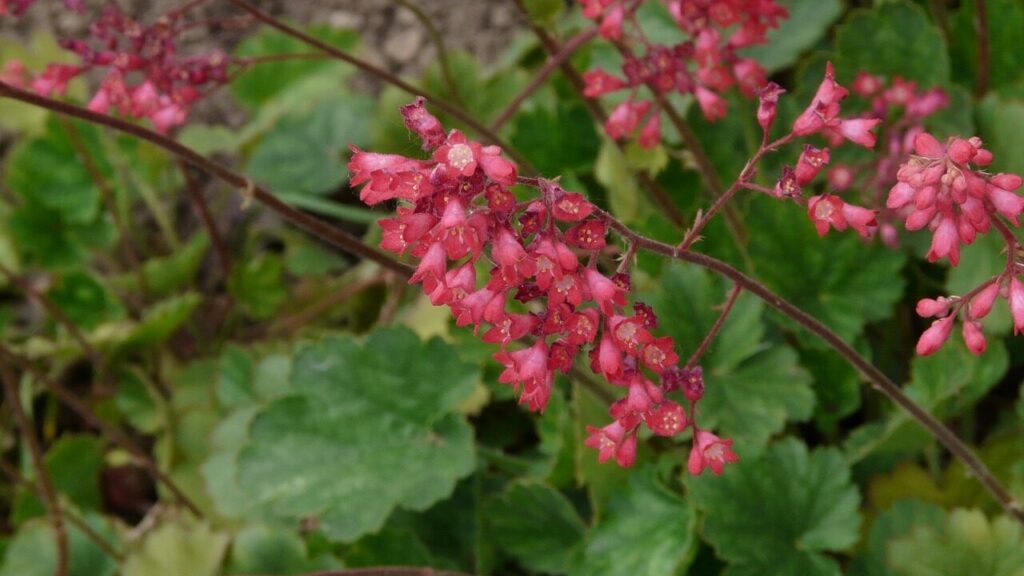
Top performers:
- ‘Palace Purple’ – Deep burgundy leaves
- ‘Lime Rickey’ – Bright lime green
- ‘Obsidian’ – Almost black foliage
- Caramel’ – Peachy orange tones
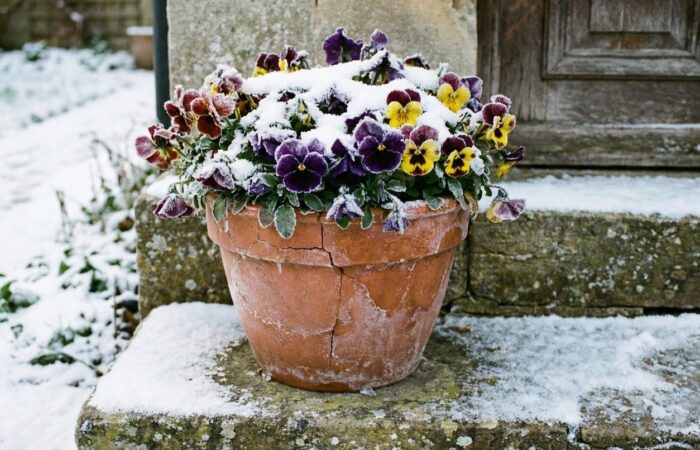
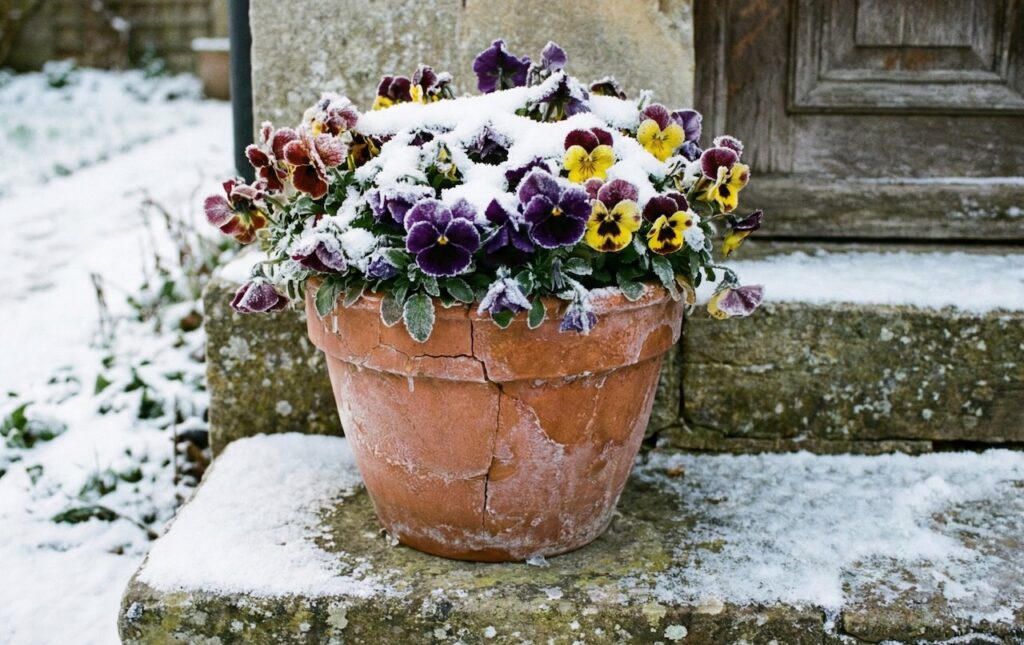
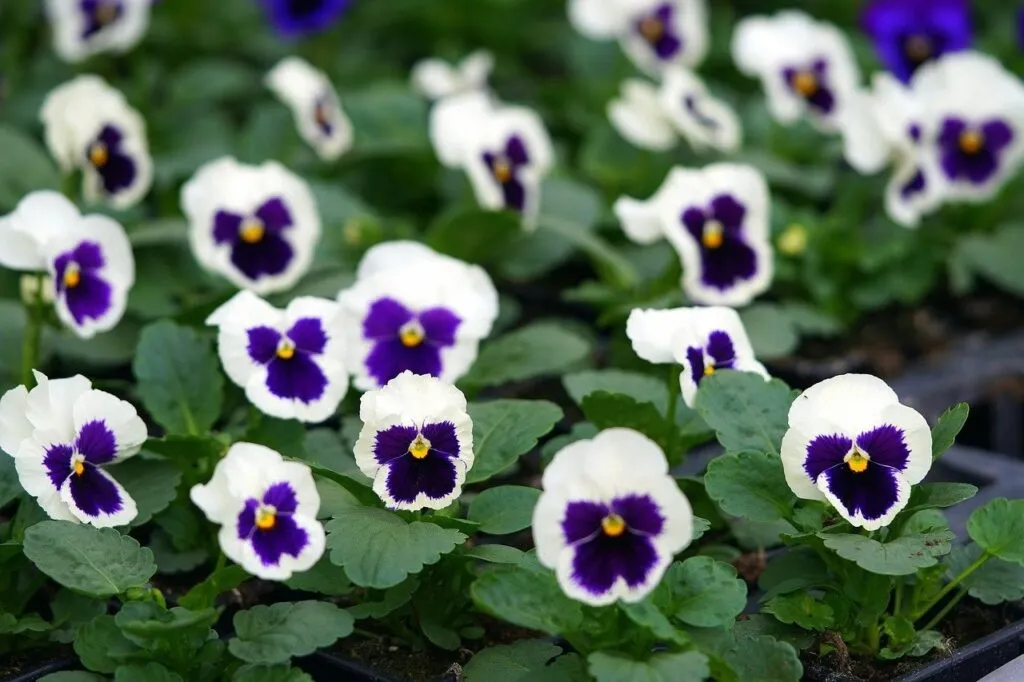
Winter Pansies
Don’t underestimate winter pansies. I know they’re t,en a penny but there’s a reason they’re everywhere in winter as they absolutely deliver. Modern varieties will flower for months on end, they come in every colour combination you can think of, and they’re cheap as chips. Deadhead them regularly, and they’ll just keep going!
Common Mistakes That Will Kill Your Containers
Let’s talk about what not to do because I see these mistakes constantly, and they’re absolute display killers.
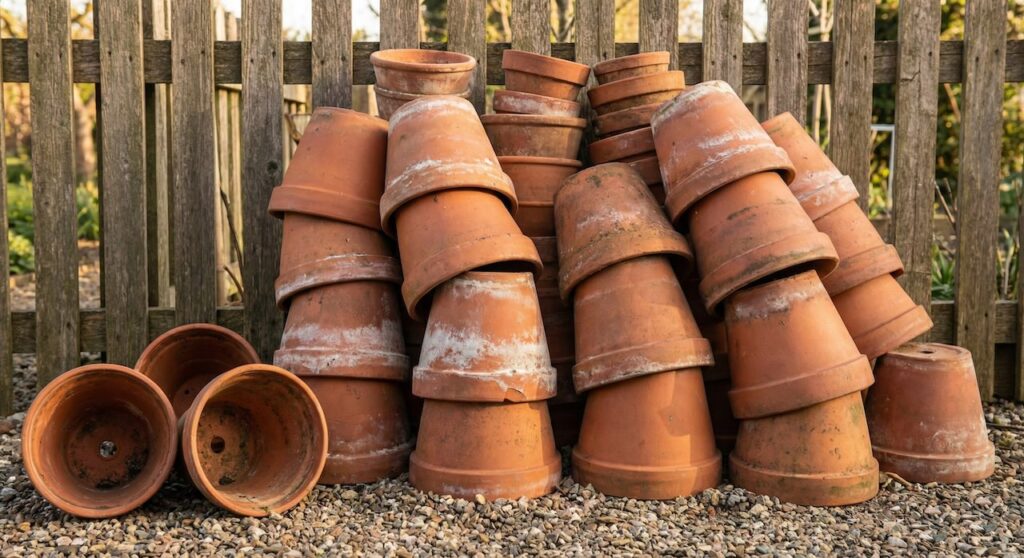
Mistake 1: Cheap Non Frost Resistant Pots
Using cheap non frost resistant terracotta without any protection. Those bright orange machine made pots from the garden centre bargain bin will not survive a British winter without fleece or bubblewrap. The rims will crack and flake, then the whole pot will start to delaminate. Either invest in proper frost proof pots, seal cheap terracotta with PVA solution, or wrap them up properly Ninjas!
Mistake 2: Poor Drainage Setup
Leaving containers sitting directly on the ground with blocked drainage holes is another classic error. I cannot emphasise enough how important drainage is. Waterlogged compost will freeze, expand and crack even the best pots. Get them up on feet or bricks and make sure water can drain freely.
Mistake 3: Moving Tender Plants Too Late
Bringing tender plants inside too late is heartbreaking when it happens. That first unexpected frost in October catches people out every year. Keep an eye on weather forecasts and move tender stuff before temperatures drop below 4 degrees. It’s easier to bring plants in a week early than trying to revive frost damaged specimens.
Mistake 4: Using Non Breathable Wrapping
Over wrapping with plastic that doesn’t breathe is surprisingly common. People panic and wrap everything in plastic sheeting, then wonder why everything rotted. Use proper horticultural fleece or bubble wrap, and never wrap so tightly that air can’t circulate. Plants still need to breathe.
Mistake 5: Forgetting Winter Watering
Forgetting to water in winter kills more container plants than actual frost. Check those pots regularly, especially anything under cover that’s not getting natural rainfall. Dried out compost freezes even more readily than moist compost, and dead roots can’t recover in spring.
Quick reminder checklist
- ✓ Use frost proof or properly protected pots
- ✓ Ensure excellent drainage with pot feet
- ✓ Move tender plants before first forecast frost
- ✓ Use breathable protective materials
- ✓ Check and water containers regularly
- ✓ Group pots together for protection
- ✓ Monitor weather forecasts throughout winter
Summary
I’m not going to pretend that protecting container plants through winter is zero work. It takes some effort, some planning and a bit of investment in proper materials. But the alternative is replacing everything every spring, which gets expensive fast and is frankly depressing.
My approach after all these years is a mix of being realistic and being prepared. I grow plants that can actually handle British winters in containers, I invest in decent pots that will last, and I give tender stuff proper protection or move it under cover. It’s not complicated, but it does require you to think ahead rather than panicking when the forecast suddenly shows frost symbols.
Start preparing in October, not November, when the first frost has already mullered half your display. Check your pots, sort your drainage, get your bubble wrap ready, and move tender plants before they need moving. Prevention is always easier than cure, and a bit of preparation now saves a massive amount of heartache and expense later.
That’s everything you need to know about protecting container plants from winter frost. Get cracking with those preparations, and if you’ve got questions, drop them in the comments below.
Happy Gardening!


Lee Burkhill
Lee Burkhill, known as the Garden Ninja, is an award-winning garden designer and horticulturist with over 30 years of gardening experience and 15 years as a professional garden designer. A qualified RHS (Royal Horticultural Society) professional, Lee specialises in sustainable garden design and practical horticultural advice. He designs and presents on BBC1’s Garden Rescue and in leading gardening publications. Lee combines three decades of hands-on gardening knowledge with professional design qualifications to help gardeners create beautiful, functional outdoor spaces.
View all posts by Lee Burkhill


Categories
Other posts
-

Start here: to begin your gardening journey! Read more
-
How to Create a Balcony Garden: The Complete Guide for UK Gardeners Read more
-
Lawn Weeds Identification Guide: Common UK Lawn Weeds and How to Remove Them Read more
-
Dioecious vs. Monoecious Plants: Understanding the Differences Read more
-
How to Grow Pumpkins: Even in Small Gardens – Your Complete UK Growing Guide Read more
-

Best Ground Cover Plants UK: Stop Weeds and Fill Your Flower Beds Read more