How to Move an Established Acer Tree Without Killing It
Lee Burkhill: Award Winning Designer & BBC 1's Garden Rescue Presenters Official Blog
Beginner level
Acers are fantastic small garden trees which usually require very little maintenance or pruning. You just position, plant and then enjoy those beautiful autumnal leaf shades! But what if you need to move an acer? You maybe moving house or planting out a container acer that's grown too big. Well this guide is going to show you exactly how!
Quick Answer: Moving Established Acer Trees Successfully
The best time to move an established Acer is November through February, whilst the tree is dormant. Prune the root ball 6-8 weeks before moving by cutting around the tree with a spade to encourage fibrous root growth. Dig a root ball at least 40cm wide for every 2.5cm of trunk diameter. Keep the root ball intact, water thoroughly before and after transplanting, and stake securely. Success rates exceed 80% when moved during dormancy with proper preparation.
Why Moving Acers Requires Special Care
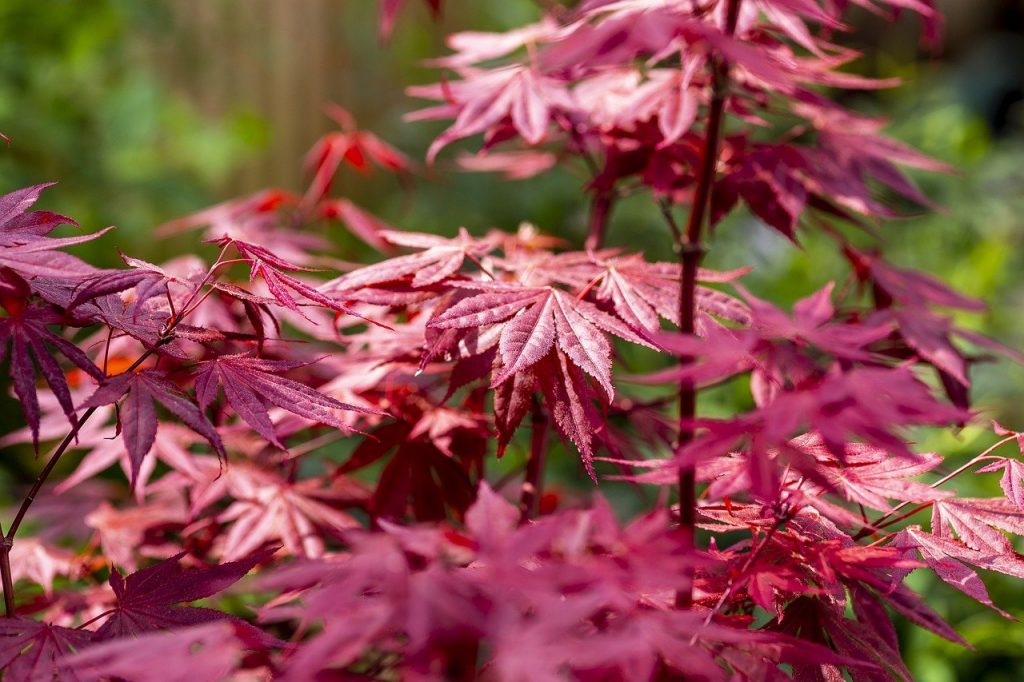
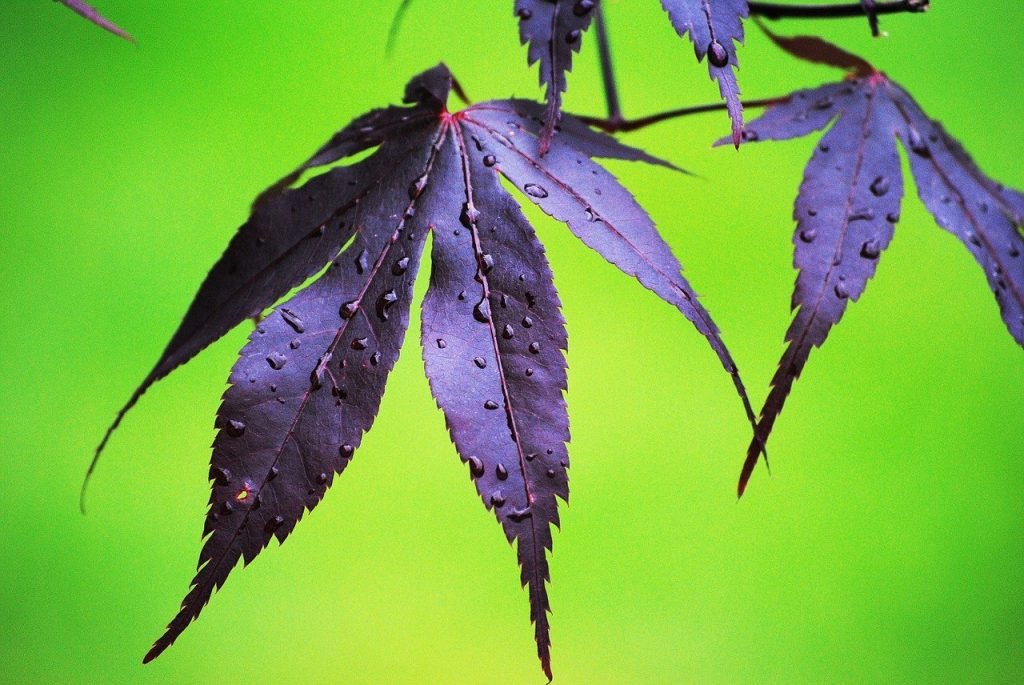
Japanese maples (Acer palmatum) and other ornamental acers are among the most exquisite trees you can grow in British gardens, offering spectacular foliage colour, elegant branching structure, and genuine year-round interest. I love using them in my small urban garden designs, or especially in classic Japanese garden design. The beauty of Acers is that they will survive for a fair while in containers, and they are super slow-growing, which is why so many of us Brits love to include them in our gardens. Not to mention the autumn leaf change colour, which is simply spectacular!
However, after answering literally hundreds of questions about moving established Acers through my Garden Ninja forum and encountering numerous transplant disasters during BBC Garden Rescue site visits, I can tell you that these beautiful trees require far more careful handling during relocation than most gardeners realise.
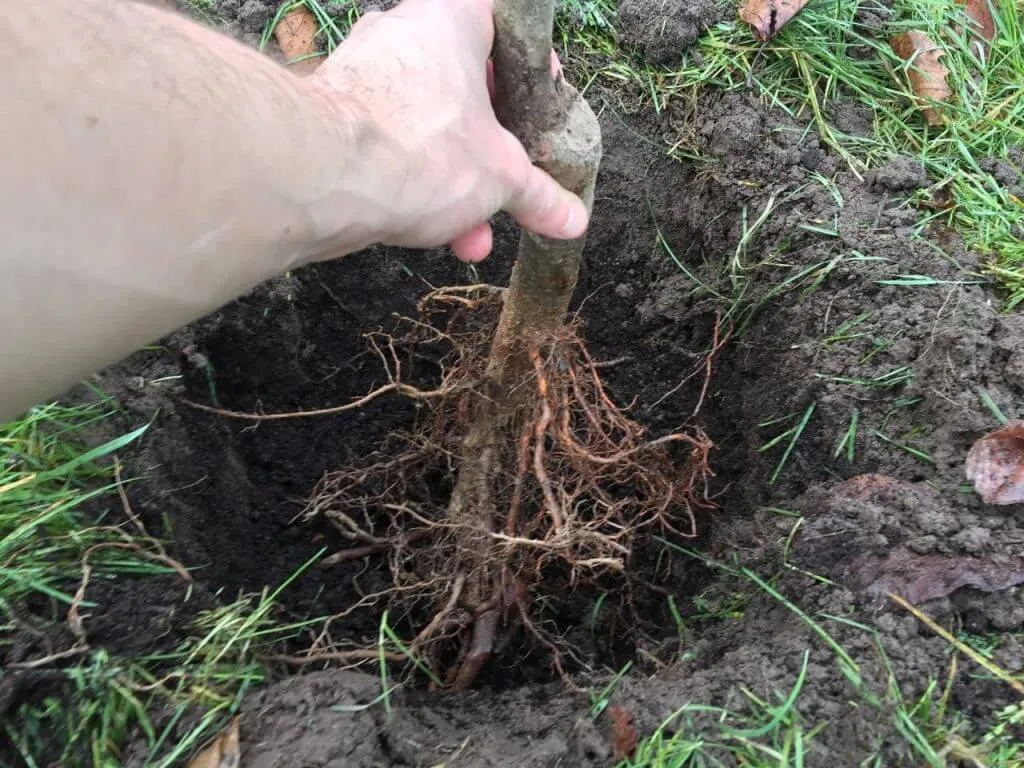
The fundamental challenge with moving acers is their fine, fibrous root system. Unlike trees with deep tap roots that anchor themselves firmly, Acers develop shallow, spreading root systems that extend well beyond the canopy drip line. These delicate roots are easily damaged during transplanting, and because acers are relatively slow-growing, they take considerably longer to recover from root damage than more vigorous trees. A poorly executed move can set an Acer back several years or kill it entirely, particularly if the tree is moved during active growth or without adequate root ball preparation.
The size of your Acer dramatically affects transplant success. Trees with trunk diameters under 5cm (roughly pencil to broom handle thickness) transplant relatively easily with basic precautions. Once you’re dealing with trunks thicker than 8cm, you’re moving significant root mass that requires professional preparation techniques.
Trees over 15 cm in diameter really should be moved by a suitable heavy-duty spade or with the help of another gardener, unless you have serious landscaping experience and equipment.
Understanding Acer Root Systems
Before you even consider moAcer your Acer, understanding how the form trees will transform your approach and dramatically increase rates. Unlike many trees that send roots straight downward, acers develop plate-like root systems that spread horizontally in the top 30-45cm of soil. This adaptation evolved in their native mountain habitats, where soil depth varies dramatically, but it creates challenges for gardeners attempting to dig up established specimens.
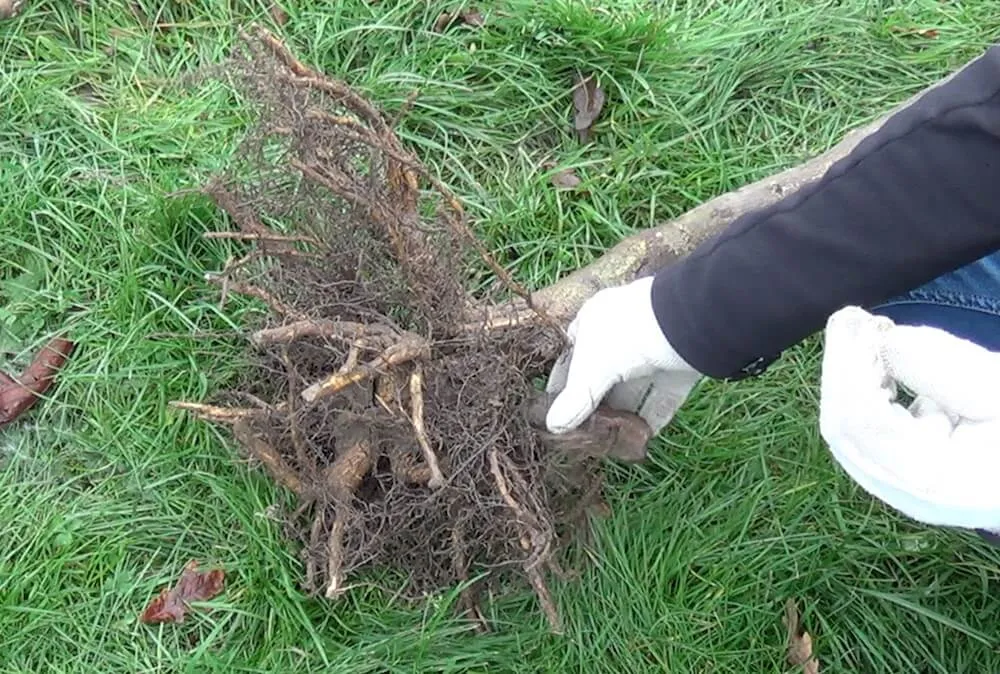
The critical roots for tree survival aren’t the thick structural roots you can see when digging. The real heroes are microscopic root hairs that exist by the millions on the finest roots, absorbing water and nutrients with remarkable efficiency. These root hairs are incredibly fragile, dying within minutes of exposure to air and drying conditions. A successful Acer move is essentially about preserving as many of these microscopic root hairs as possible, whilst creating a root ball that can be physically moved.
Root distribution extends much further than most gardeners expect. As a rough guide, Acer roots typically spread 1.5 to 2 times beyond the outer edge of the canopy. A tree with a 2 metre canopy spread might have roots extending 3-4 metres from the trunk in all directions. Obviously, you cannot dig up the entire root zone, which is why preparation techniques that encourage roots to concentrate near the edge are essential for larger specimens.
The Essential Root Pruning Preparation Technique
This preparation step separates amateur attempts from professional results, yet most gardeners skip it entirely, which explains why so many moved acers struggle or die. Root pruning performed 6-8 weeks before the actual move tricks the tree into developing a compact, fibrous root system within the intended root ball, dramatically improving transplant survival.
The Process Step by Step
Calculate your intended root ball size first. The formula I use after 20 years of professional work is 40cm root ball diameter for every 2.5cm of trunk diameter, measured at chest height. A tree with a 5cm trunk needs an 80cm root ball, whilst a 10cm trunk requires 160cm. Ma the ground around your tree with spray paint or tie a rope to the trunk as a compass.
Another speedy tip is to dig the hole 2x the size of the Acer’s expected root ball. I can do this by eye as I’ve been doing it for years, but you may not know how big the root ball is before you start digging. Ideally, you should always dig the new hole before removing the tree to reduce the time the roots are out in the air, drying out.
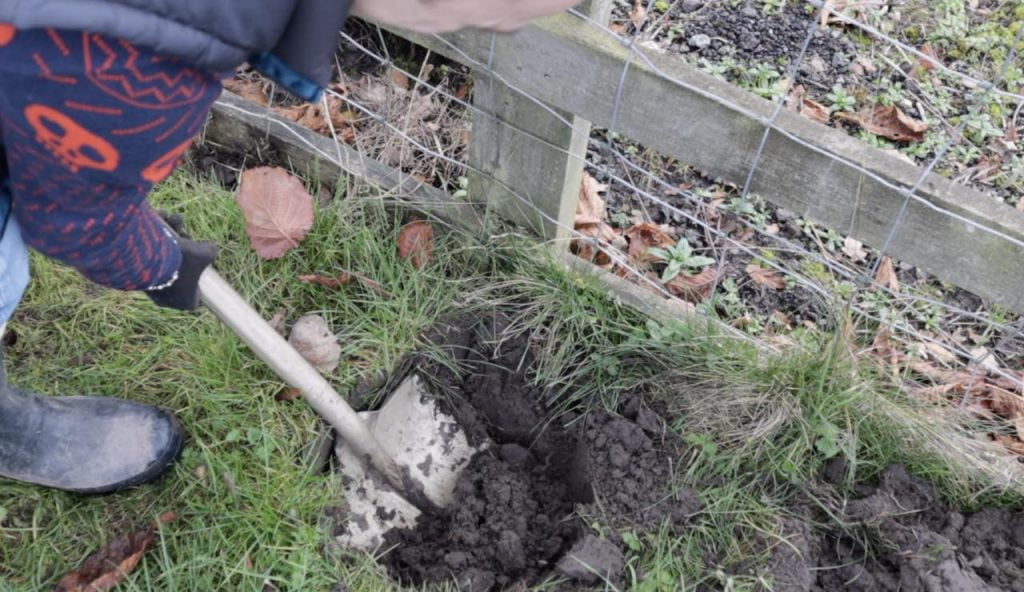
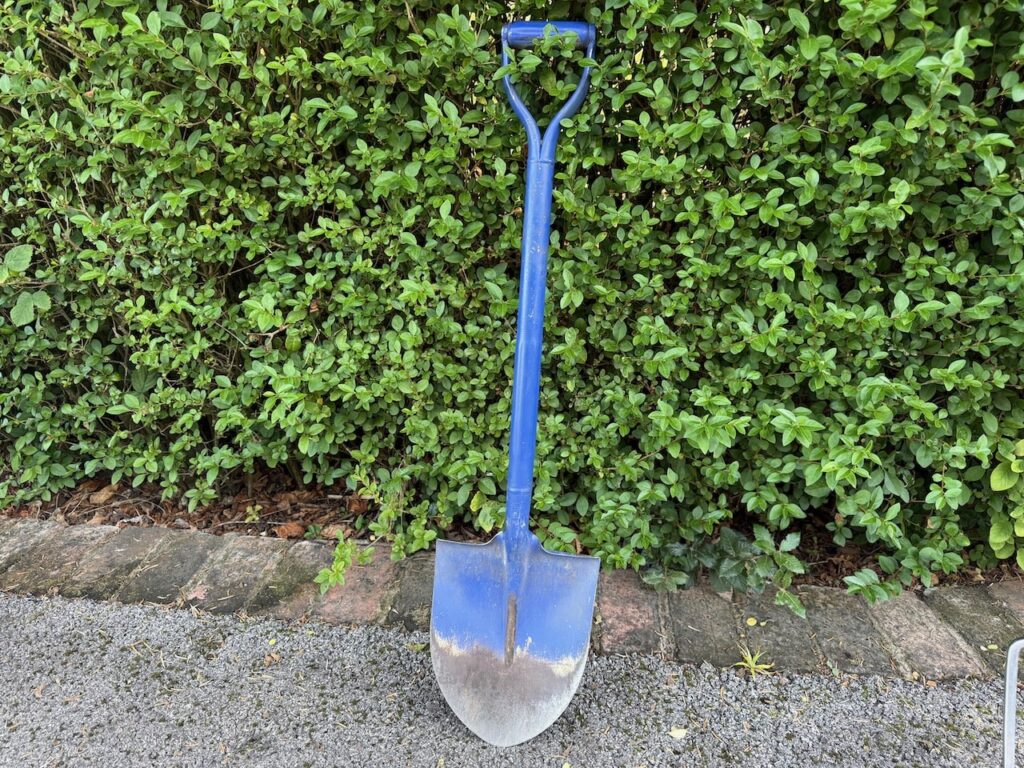
Use a sharp spade to cut vertically around this marked circle, pushing the spade to its full depth (roughly 30cm on most spades). Make these cuts clean and decisive rather than scratching tentatively. You’re deliberately severing roots, which sounds brutal but actually stimulates the tree to produce dense, fibrous roots within the root ball over the following 6-8 weeks. Think of it like pruning roots rather than damaging them.
Water the root pruning circle thoroughly after cutting. This encourages immediate root regeneration and helps the tree cope with the stress of root pruning. Apply a 5cm mulch layer over the root pruning circle, keeping it 15cm away from the trunk. This mulch conserves moisture and moderates soil temperature, creating ideal conditions for new root development.
Slicing Fibrous Roots Encourages Growth
When you sever roots, the tree responds by producing multiple new roots from the cut ends, similar to how pruning branches encourages bushy growth. These new roots develop within the root ball you’ve defined, creating a dense network of feeding roots. When you eventually dig up the tree, you’re taking this prepared root system rather than hacking through unprepared roots that haven’t compensated for the damage.
The 6-8 week timing allows sufficient root regeneration without leaving so long that the new roots extend beyond your intended root ball. Trees root pruned in late September for a November move, or October for a December transplant, show dramatically better establishment rates than those moved without preparation.
Optimal Moving Times for Acers
Moving acers during full dormancy represents the best possible timing for several compelling reasons. The tree isn’t actively growing, so it’s not demanding large amounts of water and nutrients that damaged roots cannot supply.
Winter Dormancy: The Gold Standard (November – February)
Deciduous acers have dropped their leaves, reducing water loss through transpiration to virtually zero. Soil remains workable in most UK regions, though you should avoid periods when the ground is frozen solid or waterlogged.
Temperature moderation during winter months means newly transplanted roots aren’t stressed by heat or drought. The tree has several months to establish new roots before facing the demands of spring growth and leaf production. Success rates for November through February moves, when done properly, typically exceed 80% even for substantial specimens.
Early Spring as Second Choice (March – Early April)
If winter moving proves impossible, early spring before bud break offers a reasonable alternative, though success rates drop to 60-70% even with perfect technique. The tree begins drawing on root resources as buds swell, so root damage causes more stress than during full dormancy. However, the approaching growing season means new roots develop quickly, and you have the entire season to establish them.
Move in early March rather than waiting until April. The moment you see leaf buds beginning to swell and show colour, you’ve missed the optimal window and should wait until next winter rather than moving a tree on the verge of active growth.
Seasons to Absolutely Avoid
Never move acers during late spring through summer (May – September). These months represent active growth when the tree is fully leafed and demanding maximum water and nutrients. Moving during this period almost guarantees severe stress, with success rates plummeting below 30% even for small specimens. The combination of root damage and high transpiration rates through the leaves creates conditions that cannot be sustained.
Early autumn (September – October) seems tempting because temperatures moderate and rainfall increases, but I don’t recommend it. The tree is preparing for dormancy and storing energy reserves rather than producing new roots. You’re better off root-pruning in September for a December move than attempting to transplant during the preparation phase.
Preparation Day (Day Before Moving Acer)
Water the entire root zone thoroughly the day before moving. This achieves several critical objectives. Moist soil holds together far better than dry soil, helping preserve the root ball intact. The tree enters transplant stress fully hydrated, giving it maximum reserves for the challenging period ahead. Moist soil weighs more, which sounds counterproductive, but the structural integrity of a moist root ball outweighs the inconvenience of extra weight.
Prepare the new planting hole before digging up the tree. This hole should be twice as wide as your intended root ball, but no deeper. Acers planted too deeply suffer significantly, so getting the hole depth correct matters enormously. Test depth by laying a straight board across the hole and measuring down to ensure the root ball will sit at exactly ground level.
Gather all necessary equipment and helpers. Moving established acers is definitely not a solo job. You’ll need a sturdy tarpaulin or burlap to wrap the root ball, a strong rope for securing and lifting, two solid spades, possibly a mattock for severing tough roots, and at least one strong helper for trees over 3 metres tall.
Acer Excavation Technique
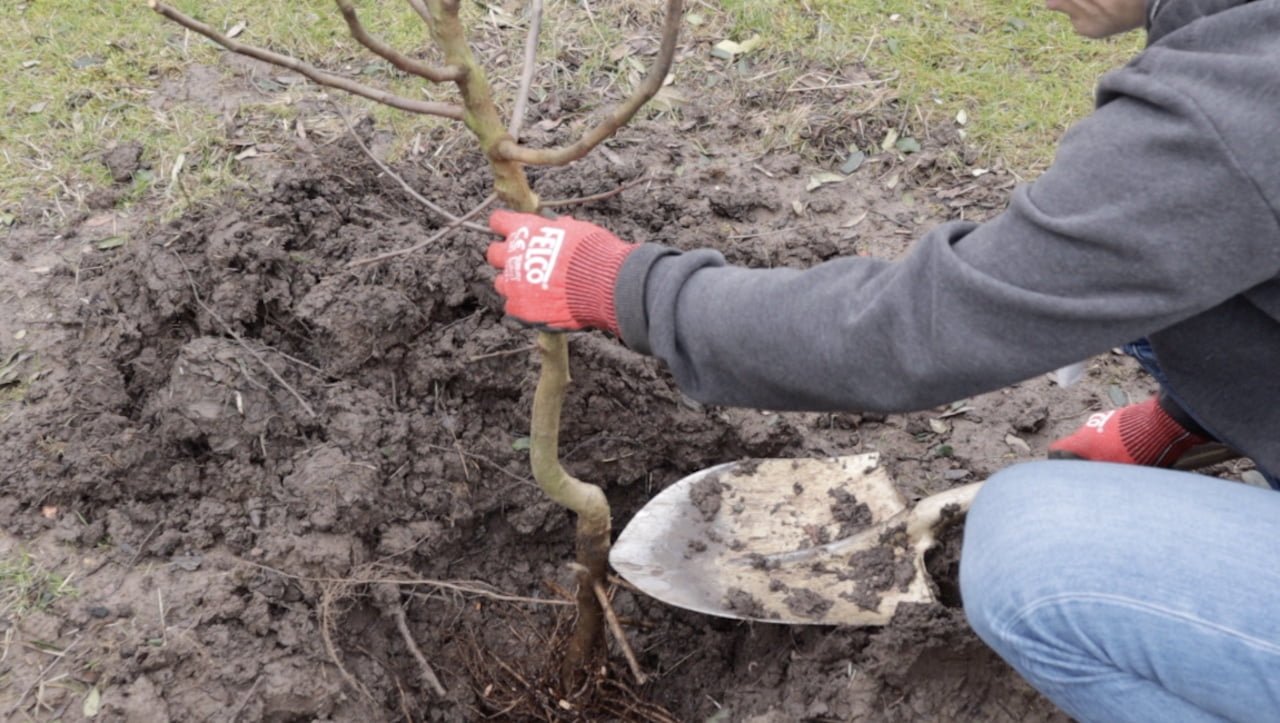
Begin digging 10cm outside your root-pruned circle, creating a trench around the tree. Work methodically around the entire circumference rather than completing one side at a time. This balanced approach prevents the tree from becoming unstable and toppling whilst you’re working. Dig down to 45-50cm for most acers, though larger specimens may require 60cm.
As you dig deeper, begin undercutting beneath the root ball, working from multiple sides towards the centre. This creates a mushroom-shaped root ball with a narrower base. Use loppers or a pruning saw for roots thicker than 2cm rather than hacking with the spade, making clean cuts that heal better than ragged tears.
When you can rock the tree gently, and it moves freely, the root ball is adequately undercut. Tip the tree carefully to one side and slide the burlap or your tarpaulin underneath as far as possible. Tip the other side and pull the material through. Wrap the root ball completely, gathering the material at the trunk and tying securely. This wrapping prevents the root ball from crumbling during the move, which would destroy all the delicate roots you’ve worked so hard to preserve.
The Critical Transportation Phase
Lift the wrapped root ball using your tarpaulin, not by grabbing the trunk. Tree trunks seem sturdy, but they’re not designed to withstand lifting. Fossils can separate froms internally if used as lifting handles. Two people can handle trees up to 2 metres tall, but larger specimens need three or four people to lift safely.
Transport over the shortest possible distance, keeping the root ball upright and stable. If you must transport by vehicle, secure the root ball so it cannot shift or tip. Cover the foliage to prevent wind damage and desiccation. Even a short car journey creates damaging wind forces on foliage that stressed roots cannot compensate for with water uptake.
Replanting for Success
Place the wrapped root ball into your prepared hole, adjusting the depth so the root flare (where the trunk meets the roots) sits exactly at ground level. This positioning is absolutely critical. Trees planted too deeply suffocate and decline gradually over several years. Too shallow and roots dry out or suffer frost damage.
Unwrap the root ball only once it’s positioned correctly, leaving the material on the root ball rather than trying to pull it out. Backfill with the soil you removed, not imported topsoil or compost. Acers prefer establishing in the same soil conditions they’ll be growing in long term. Break up large clods, but don’t add amendments. Fill the hole in stages, firming gently as you go to eliminate air pockets without compacting excessively.
Create a water-retaining basin by mounding soil in a circular berm around the planting hole, about 15cm high. This basin collects water and directs it into the root zone rather than allowing it to run off. Water thoroughly immediately after planting, applying at least 40 litres slowly so it penetrates deeply. This settling-in water eliminates air pockets and ensures root-to-soil contact throughout the root ball.
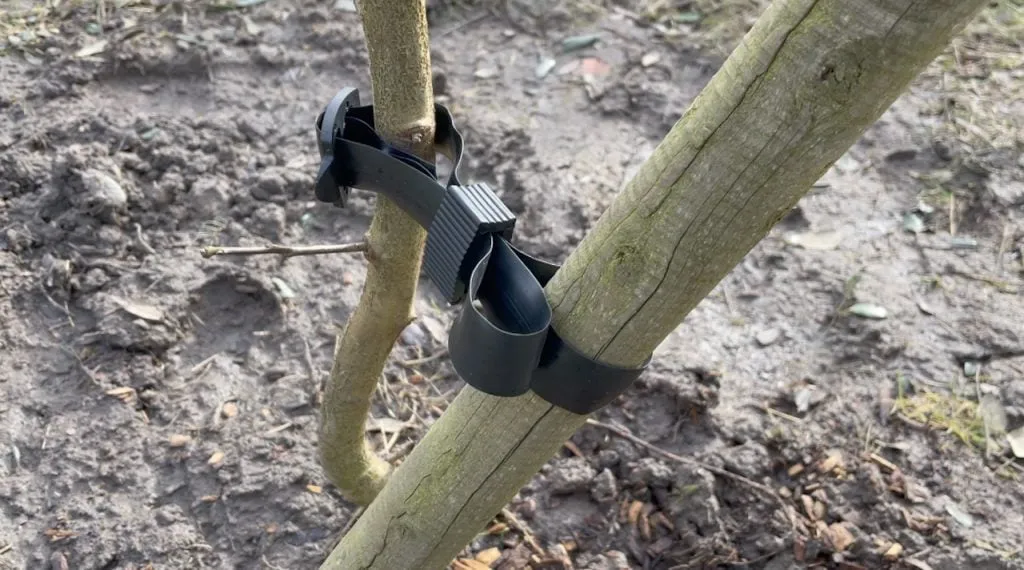
Staking, Supporting and Aftercare
Most acers need temporary staking after transplanting, particularly specimens over 2 metres tall. However, the staking technique matters enormously. The goal is to prevent the root ball from rocking in the ground (which tears developing roots) whilst allowing the trunk some movement (which promotes stronger wood development).
Use two stakes placed outside the root ball on opposite sides, driven 60cm into undisturbed soil beyond the planting hole. Attach the tree to stakes using broad, soft ties positioned about one-third of the way up the trunk. Never attach ties at the top of the trunk, as this creates a fulcrum that actually increases movement at the critical root ball level. Check ties every few months and loosen as the trunk expands, removing them entirely after 12-18 months.
Alternatively, use one stake at a 45-degree angle away from the tree if two stakes seem overkill. It all depends on the size of the tree!
The Critical First Year
Watering during the first growing season determines whether your moved Acer thrives or merely survives. The reduced root system cannot access water from the surrounding soil effectively, so you must supply consistent moisture directly to the root ball. Water deeply twice weekly during dry weather, applying 20-30 litres each time for larger specimens.
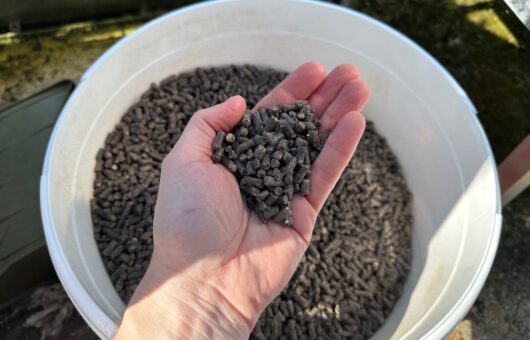
Apply a 5-8cm mulch layer over the entire root zone, keeping it 15cm away from the trunk. This mulch conserves moisture, moderates soil temperature, suppresses competing weeds, and gradually improves soil structure as it decomposes. Refresh the mulch layer each spring for at least three years after transplanting.
Resist the temptation to fertilise during the first growing season. The tree needs to focus energy on root regeneration, not lush top growth. Fertiliser encourages rapid shoot growth that the compromised root system cannot support, often resulting in dieback and setback. Begin gentle feeding in the second spring after moving, using a balanced, slow-release fertiliser.
Pruning Considerations
Some transplant stress and leaf scorch during the first normal expected. Resist aggressive pruning in response to this stress. Light removal of obviously dead material is fine, but wait until the second winter after moving for any significant pruning. The tree needs every leaf it can maintain to produce the energy required for root regeneration.
If your Acer shows severe dieback after moving, wait until the second spring before removing dead wood. What appears completely dead in the first summer often produces new shoots from dormant buds the following spring. Premature pruning removes this regenerative potential.
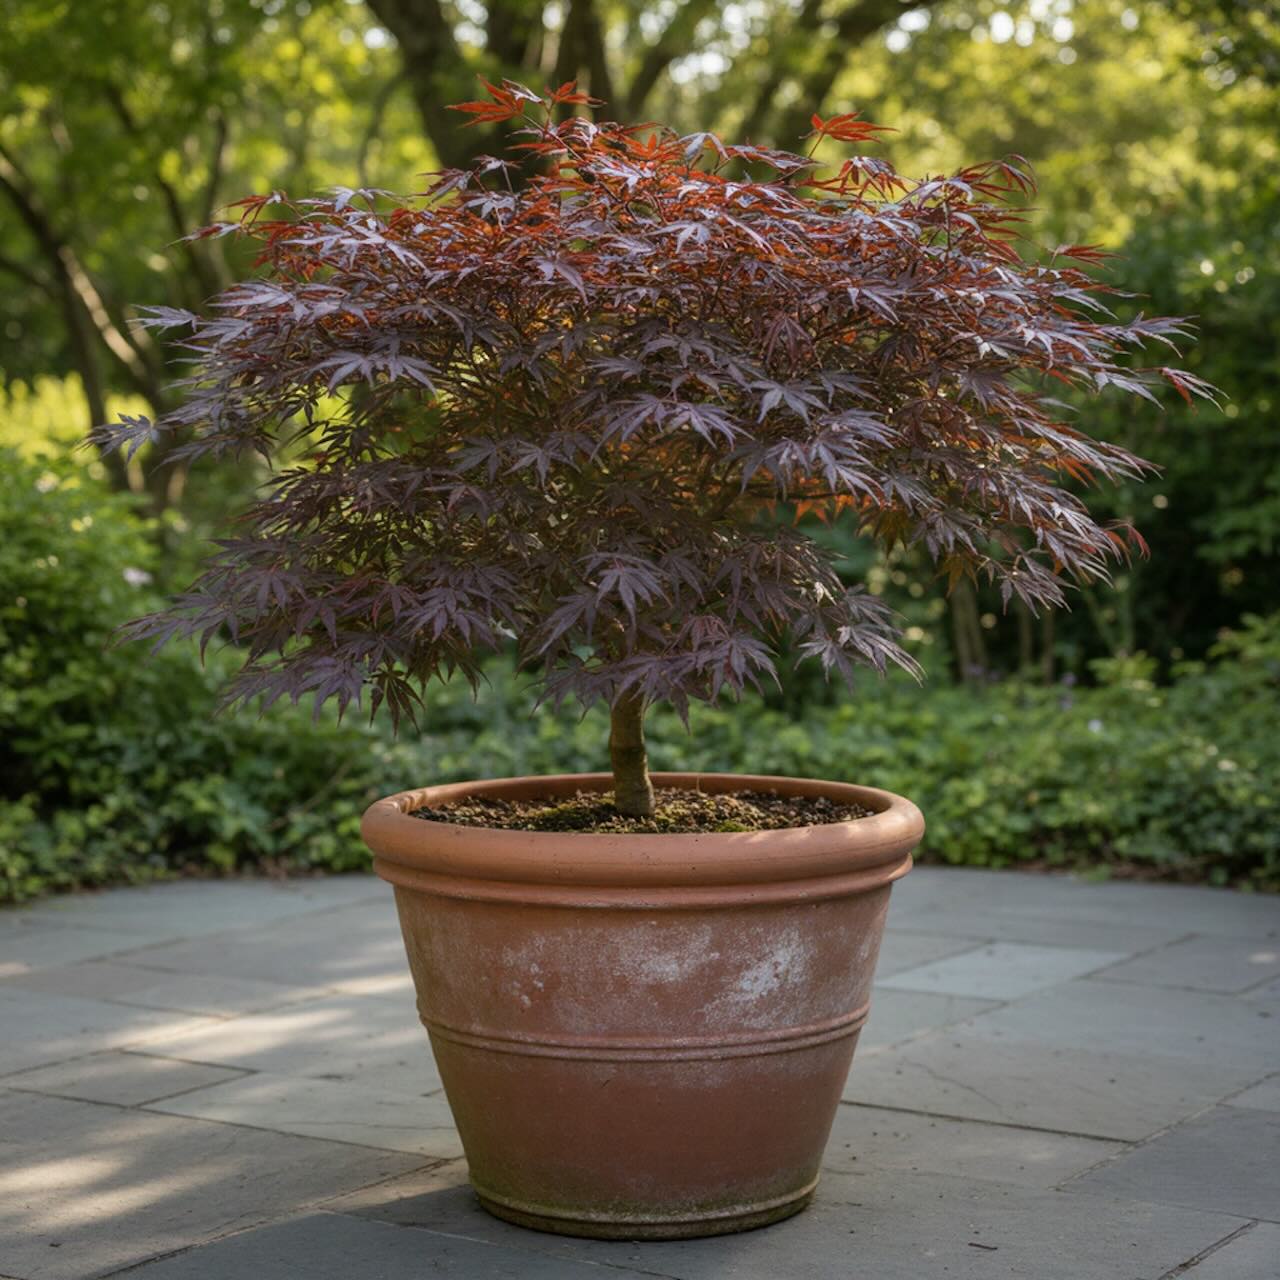
Transplanting Container-Grown Acers: The Root-Bound Solution
Container-grown acers present a completely different challenge from their ground-planted cousins, and understanding how to handle pot-bound specimens properly makes the difference between successful establishment and years of disappointing growth. Through decades of working with containerised ornamental trees, I’ve learned that root-bound acers actually benefit from what initially seems like aggressive treatment.
Treat them mean and keep them keen, especially by giving them a good root prune when you lift them out. However, the key is recognising when you need to pot on or plant out an Acer and having the confidence to act decisively. If not, it will become overly rootbound and start to suffer or shed its leaves in protest!
Identifying Root-Bound Acers
Before you begin transplanting, assess whether your Acer is genuinely root-bound. The telltale signs are unmistakable: roots circling the bottom of the pot in thick spirals, roots emerging from drainage holes, or a solid mass of roots when you attempt to slide the plant from its container.
Water running straight through without being absorbed indicates severe compaction, whilst stunted growth despite adequate feeding suggests the roots have nowhere left to expand. Many gardeners panic when they discover this condition, but the solution is to simply pot the Acer onto either a bigger pot or even better, plant it in the ground!
The Root Slicing Technique: Why It Works
Here’s something that sounds counterintuitive but works brilliantly: deliberately cutting through congested roots stimulates vigorous new root production rather than damaging the plant. When Acer roots circle endlessly in containers, they essentially forget how to grow outwards. Slicing through this tangled mass sends a signal to the plant that space is now available, triggering the production of fresh feeder roots that will actually explore the new soil rather than continuing their circular pattern.
This form of root pruning has been used professionally for centuries to control growth and improve establishment. When you transplant a severely root-bound Acer without addressing the congestion, those circling roots simply continue their spiral pattern in the new location, eventually girdling and potentially killing the tree. Breaking this pattern through strategic cutting gives your Acer the fresh start it desperately needs!
The Transplanting Process
Begin by thoroughly watering the containerised Acer the day before transplanting. This ensures the root ball holds together during handling whilst reducing transplant shock. Choose your new location carefully, whether that’s a larger container or a prepared planting ground. The new site should offer good drainage, protection from strong winds, and appropriate light levels for your particular Acer variety. Remember that most ornamental acers prefer dappled shade rather than full sun, with exposure being a far greater killer than light levels.
Removing the Acer from its container requires a systematic approach rather than brute force. Tap the container sides firmly to loosen the root ball, then tip the pot and support the trunk whilst sliding the entire root mass free. If the Acer absolutely refuses to budge despite your best efforts, you may need to cut the container away using a saw or strong secateurs. Don’t feel guilty about destroying the pot – saving the tree takes absolute priority over preserving a container.
The Root Surgery Process
Once you’ve extracted the Acer, examine the root ball closely. If roots are circling but not severely congested, use your fingersgently to tease them apart, pulling them outwards and downwards to break the circular pattern. This gentle approach works well for moderately pot-bound specimens and causes minimal stress. However, severely root-bound acers demand more decisive action.
For heavily congested root balls, take a sharp knife or pruning saw and make three or four vertical cuts from top to bottom, each about 2-3 inches deep through the outer root mass. Space these cuts evenly around the lyarball’s circumference. The cuts should penetrate through the dense root spiral into fresher growth beneath. hsoundsque, sound is brutal but works remarkably well. You’re essentially performing surgery to allow the Acer to function properly rather than slowly strangling it.
Don’t stop at vertical cuts alone. Slice horizontally across the bottom of the root ball, removing the bottom inch or two of the most severely circled roots. This congested base section will never grow properly, and removing it forces the plant to produce new roots from the cuts you’ve made. The combination of vertical and horizontal cuts transforms a dysfunctional root system into one primed for vigorous establishment.
Common Moving Mistakes That Kill Acers
A) Moving During Active Growth
The single biggest mistake I encounter is attempting to move acers that are in full leaf and active growth. Gardeners see their Acer in summer splendour and decide they want it moved to a more prominent position immediately. This impatience costs them the tree. No amount of care and watering can compensate for the fundamental problem of damaged roots supporting full foliage. Wait until dormancy, even if that means living with the tree in the wrong position for several more months.
B) Root Ball Too Small
Attempting to minimise digging effort by taking a smaller root ball than required dooms larger acers. The formula of 40cm diameter per 2.5cm trunk diameter exists because smaller root bark cannot support the tree’s water and nutrient demands. I’ve seen gardeners attempt to move 3 metre acers with 50cm root balls, which is hopelessly inadequate. If the required root ball size makes moving impractical, seriously consider leaving the tree in place rather than killing it through inadequate preparation.
C) Planting Too Deeply
Even gardeners who successfully dig and transport their Acer often plant it too deeply, creating a slow death sentence. The root flare must be visible at ground level. If you cannot see where the trunk meets the roots, your tree is too deep. This error is particularly common when generous gardeners pile mulch against the trunk or when settling after planting buries the root flare. Check levels carefully before backfilling and again after the first winter’s settling.
D)Inadequate Post-Move Watering
Successfully moving an Acer, only to fail to provide adequate water during the critical first growing season, wastes all your careful work. The reduced root system absolutely cannot forage for water like an established tree. You must bring water to the tree through deep, regular watering for at least the entire first growing season, and preferably through the second summer as well.
Frequently Asked Questions
What size Acer can I realistically move myself?
DIY moving works well for acers up to 2 metres tall with trunk diameters under 8cm. Larger specimens need professional equipment and expertise. Attempting to move trees beyond this size without proper equipment almost always results in inadequate root ball size or damage during transportation.
Can I move an Acer that’s been in place for 10+ years?
Yes, but success rates decline as trees age in place. The root system becomes increasingly extensive and woody, making it harder to capture adequate roots. Very old acers (20+ years) should generally be left in place unless professional tree spades are used.
My Acer moved lost all its leaves after transplanting – is it dead?
Not necessarily. Acers often drop leaves when stressed, even during the growing season. Scratch the bark on young shoots. If you see green beneath, the tree is alive. Keep watering and wait until the following spring before making any decisions. Many acers that appear dead after moving produce new growth the following season.
When will my moved Acer look normal again?
Expect a full recovery in 2-3 years. The first year focuses on survival and root development, often with reduced or smaller leaves. The second year shows improvement, but still not full vigour. By the third year, most well-moved acers return to normal growth and appearance.
Can I move an Acer in a container?
Container-grown acers transplant far more successfully than ground-grown specimens because the entire root system moves with the plant. The best time remains winter dormancy, but pot-to-ground planting in early spring or autumn can succeed reliably with proper watering aftercare.
Further Reading: Acer Forum Discussions
Looking for answers to Acer-specific problems? The Garden Ninja forum community has tackled dozens of Acer challenges. Browse these related discussions where I’ve personally answered members’ questions:
Got your own Acer question? Join the forum community, and I’ll personally help you troubleshoot your specific situation.
Learn more about growing & Garden Design.
Why not consider expanding your plant and garden design knowledge with one of my online gardening courses? My Garden Design for Beginners Course is here to help you transform your garden from average to exceptional with an affordable online course, no matter how little your experience with plants.
This course offers step-by-step guidance from me, Lee Burkhill, award-winning garden designer and presenter on BBC1’s Garden Rescue. In this course, you’ll go from a garden design novice to a confident designer equipped to tackle any green space.
Planting Techniques – Select and arrange plants like a pro.
Design Styles & Layout: Optia offers a range of styles to suit every garden.
Course Features:
20 Hours of Study Time
Flexible Online Learning
Engaging Video Lessons & Quizzes
Real-World Case Studies
Certification upon Completion
Taught by Award-Winning Designer Lee Burkhill
Enrol now for just £199 and start your journey toward garden design mastery!
29
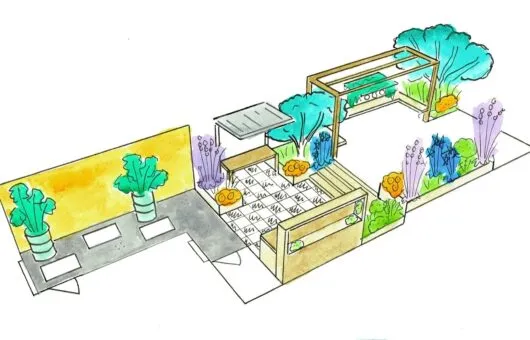
Garden Design Examples for Small Gardens: 30 Design Templates & Planting Plans
Garden Design Examples for Small Gardens: 30 Design Templates & Planting Plans: In this online gardening course, I’ll walk you through 30 fantastic garden designs, explaining the logic behind the layout, the plant choices, and take-home tips for applying them in your own garden.
Weekend Garden Makeover: A Crash Course in Design for Beginners
Learn how to transform and design your own garden with Lee Burkhills crash course in garden design. Over 5 hours Lee will teach you how to design your own dream garden. Featuring practical design examples, planting ideas and video guides. Learn how to design your garden in one weekend!
Garden Design for Beginners: Create Your Dream Garden in Just 4 Weeks
Garden Design for Beginners Online Course: If you want to make the career jump to becoming a garden designer or to learn how to design your own garden, this is the beginner course for you. Join me, Lee Burkhill, an award-winning garden designer, as I train you in the art of beautiful garden design.
Lee Burkhill, known as the Garden Ninja, is an award-winning garden designer and horticulturist with over 30 years of gardening experience and 15 years as a professional garden designer. A qualified RHS (Royal Horticultural Society) professional, Lee specialises in sustainable garden design and practical horticultural advice. He designs and presents on BBC1’s Garden Rescue and in leading gardening publications. Lee combines three decades of hands-on gardening knowledge with professional design qualifications to help gardeners create beautiful, functional outdoor spaces.