-
How to fit tree rings: planting trees in lawns
 Lee Burkhill: Award Winning Designer & BBC 1's Garden Rescue Presenters Official Blog
Planting trees into an existing lawn is an intelligent way to maximise your garden's growing potential. It also allows you to add much-needed height and biodiversity to any sized garden. This guide will show you how to fit a tree ring into a lawn to enable you to grow more, even in a small garden space.
Quick Answer
A tree ring is a circular metal, plastic, or stone edging that creates a clear, grass-free zone around a tree planted in a lawn. It takes around 30 minutes to install, prevents grass from competing with the tree for water and nutrients, and makes mowing much easier. Choose a ring sized to match the tree’s eventual spread, hammer it 3–6cm into the ground, then top dress inside with compost or chipped bark.
Jump To
Trees are one of the most transformative things you can add to any garden. In my twenty years as a professional garden designer and from my work on BBC’s Garden Rescue, I have planted hundreds of trees in every kind of space imaginable, from tiny urban courtyards to sweeping country gardens. Even the most modest garden can accommodate a well-chosen tree, and the rewards in terms of height, structure, wildlife habitat, and sheer beauty are enormous.
The challenge comes when a tree is planted directly into a lawn. Grass is surprisingly competitive. It will race to claim every drop of moisture and every scrap of nutrition that was meant for your newly planted tree, and it creates a real headache when mowing season arrives. That is where a tree ring comes in. A simple, affordable, and extremely effective solution, a tree ring takes around 30 minutes to install and makes a significant difference to how well your tree establishes itself.
This page contains affiliate links for products I use and love. If you take action (i.e. subscribe, make a purchase) after clicking a link, I may earn some gardening commission, which helps me keep the Garden Ninja Blog free for all.
1. What is a tree ring?
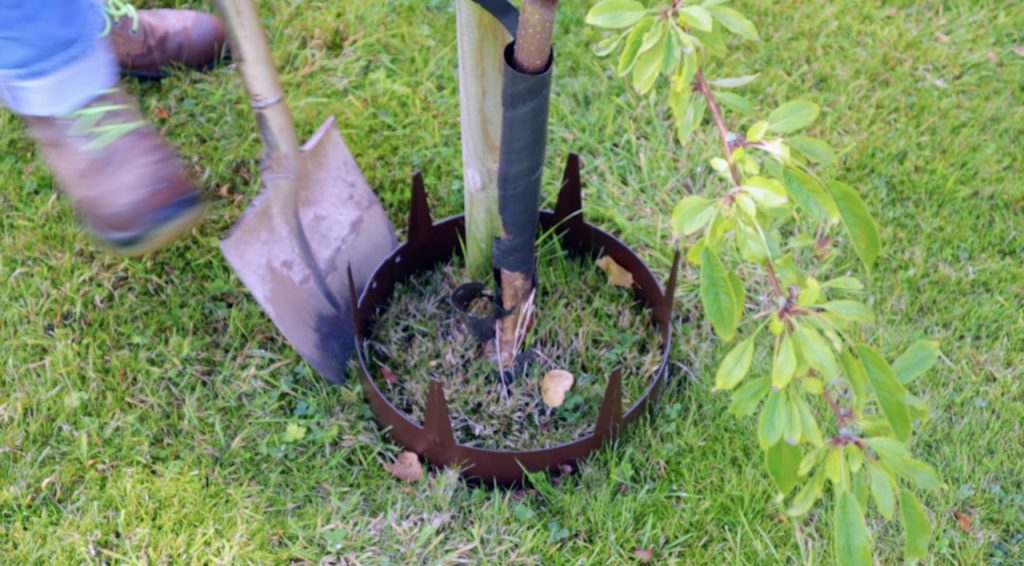
A tree ring is a circular band of metal, plastic, or stone that encircles the base of a tree planted in a lawn or on paving. It sits flush with or just proud of the turf surface, creating a clean, defined circle of open ground around the trunk. Inside this circle, grass cannot grow, which means the tree has unimpeded access to moisture, feeding, and air at its roots.

Most tree rings are made from galvanised or powder-coated steel, which is both durable and attractive. Plastic versions are more affordable but tend to fade and become brittle over time. Stone or composite edging rings also exist and can look stunning in formal garden settings. For the vast majority of gardens, I recommend a good-quality steel ring.
Tree rings come in two halves that bolt together around the trunk, which means you can fit them either before planting or retrospectively around an established tree. The halved design is one of those brilliantly practical innovations that makes the whole job much more straightforward than you might expect.
2. Benefits of using a tree ring
There are more good reasons to fit a tree ring than most people realise when they first encounter the idea. Over the years of designing gardens professionally and advising clients through my online consultations, I have found that tree rings consistently improve tree establishment and make long-term maintenance considerably simpler.
Grass is far more competitive than it looks. Research consistently shows that turf growing right up to a tree trunk can reduce establishment growth by up to 60% compared to trees with a cleared root zone. That is not a small difference. Removing that competition in the first three to five years of a tree’s life is one of the most effective things you can do to give it the best possible start.
Beyond establishment, tree rings make mowing infinitely more practical. Without a ring, you have to strim around every tree individually, which is time-consuming and carries a real risk of damaging the bark with the strimmer line. Bark damage at the base of a tree is a common cause of disease and even tree death in garden settings. A tree ring, sitting just 3–5mm proud of the lawn surface, allows a mower to pass straight over the edge without any need for strimming.
Here is a summary of the key benefits:
Reduces grass competition
Keeps moisture and nutrients available to the tree rather than the surrounding turf
Eliminates strimming
Mow straight over the ring with no risk of bark damage from strimmer line
Easier watering and feeding
Water and feed go directly to the root zone rather than disappearing into the turf
Cleaner garden aesthetic
A defined circle around the trunk looks intentional and well-maintained
Protects bark from damage
Strimmer damage to bark is a leading cause of tree decline in garden settings
Works with mulch
Holds bark or compost mulch in place, retaining moisture and suppressing weeds
3. Equipment you will need
You do not need a great deal of kit to fit a tree ring, but having the right tools makes the job considerably cleaner and quicker. I have fitted enough of these over the years to know which corners are worth cutting and which absolutely are not. A blunt spade, for instance, produces a ragged cut that the turf will quickly grow back through. A sharp one gives you a clean edge that holds.

Here is everything you will need, with links to buy from Amazon UK where relevant.
4. How to choose the right size tree ring
Choosing the right size is probably the single most important decision you will make, and it is one that many gardeners get wrong by defaulting to whatever is available rather than considering what the tree actually needs.
Tree rings generally come in 30cm increments, starting at 30cm and going up to 120cm in diameter. The right size depends on two things: the tree’s current spread and the spread it will reach at maturity.
Always size for the future rather than the present. A 30cm ring around a young standard tree will look absurdly small within two or three growing seasons and will need replacing, which means doing the job twice.
As a rule of thumb from my design work, I use a rough guide based on the RHS Plant Finder’s mature spread data. Before buying, look up the expected spread of your specific tree at ten years rather than at maturity, and use that as your guide. This gives you a ring that looks proportionate while the tree is young, but will still work well as it grows.
💡 Top Tip
When in doubt, go one size larger than you think you need. A slightly oversized ring gives you more mulching space, more room for roots to breathe, and will age well as the tree grows. A ring that is too small creates the same grass competition problem you were trying to solve in the first place.
5. How to fit a tree ring before planting
This is the ideal situation because you can work cleanly without risking disturbance to established roots. If you are planting a new tree into a lawn, follow these steps in sequence, and the whole job should take you well under an hour. I always recommend doing this before planting rather than after, simply because it is more precise and considerably less fiddly.
Step 1: Find and mark the right position for your tree
Before you start digging anything, spend proper time on positioning. Walk around the space, look at it from the house, consider how the tree will read against the sky at eye level and from upstairs windows. Think about mature size, the direction of prevailing wind, proximity to boundaries, and whether the tree will cast problematic shade over the lawn or the neighbours.
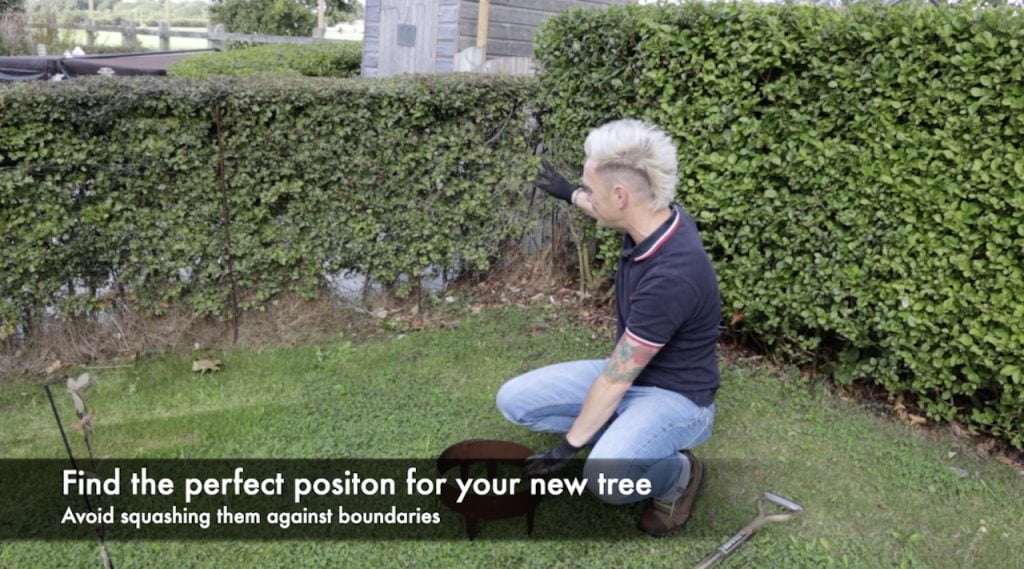
Mark the spot with a cane and then step back to view it from several angles. This is the step that most people rush, and it is the one that matters most. A tree planted in the wrong spot is difficult and expensive to move once it is established. Once you are happy with the position, place the tree ring flat on the turf centred on your cane, and use a can of line spray or a trail of sand to mark the circumference.
Step 2: Cut around the tree ring with a sharp spade
Using a sharp-bladed spade, cut cleanly around the marked circumference to a depth of 3–6cm below the turf surface. You need to get below the grass roots so that the turf cannot simply regrow once you have removed it. Work your way steadily around the circle, angling the spade slightly outward to give yourself a clean, vertical edge.
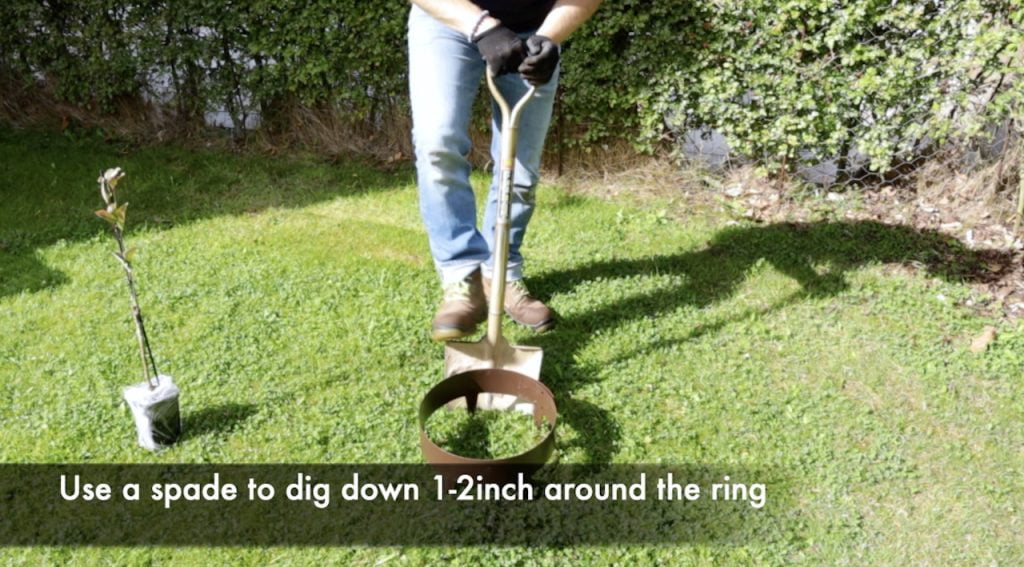
A clean cut is important here. If the spade tears rather than slices, you will end up with a ragged edge that the turf grows back through far more quickly. Keep the blade sharp with a file before you start if it needs it. The entire circle needs to be cut before you attempt to remove any turf, so work methodically all the way around before moving to the next step.
Step 3: Slice and remove the circle of turf
With the circle fully cut, use your spade held horizontally to slice under the turf, working from the edge inward. Lift the cut sections and set them aside for composting. Do not throw them in the bin. Stacked upside-down grass turf breaks down beautifully into loam within a year and makes wonderful soil amendment.
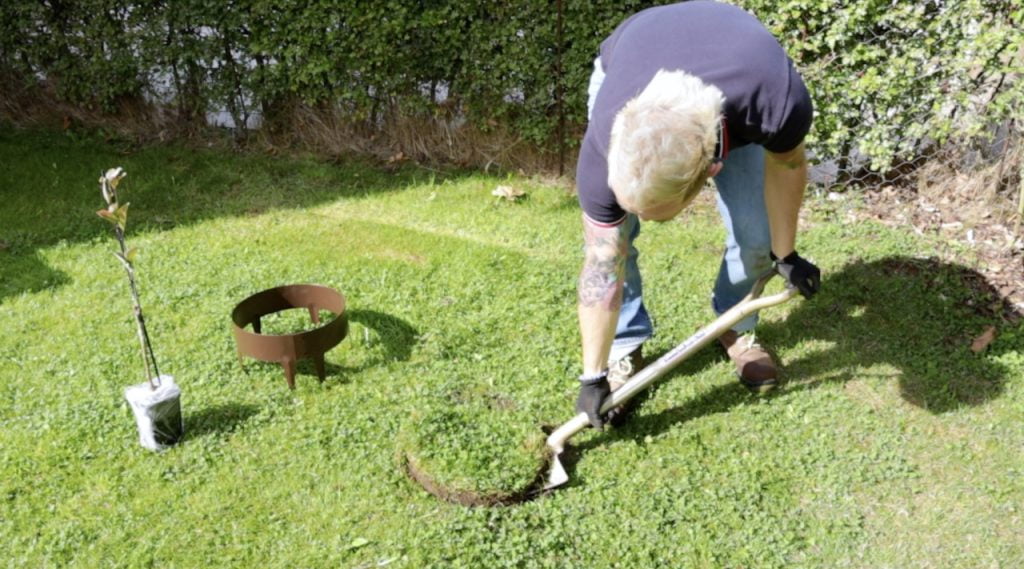
Once the turf is removed, gently loosen the exposed soil with a fork or trowel to break up any compaction. Do not dig deeply at this point, as you do not want to disturb the structure too much before planting. A light loosening is all that is needed to create a receptive surface for the tree roots and any mulch you will add later.
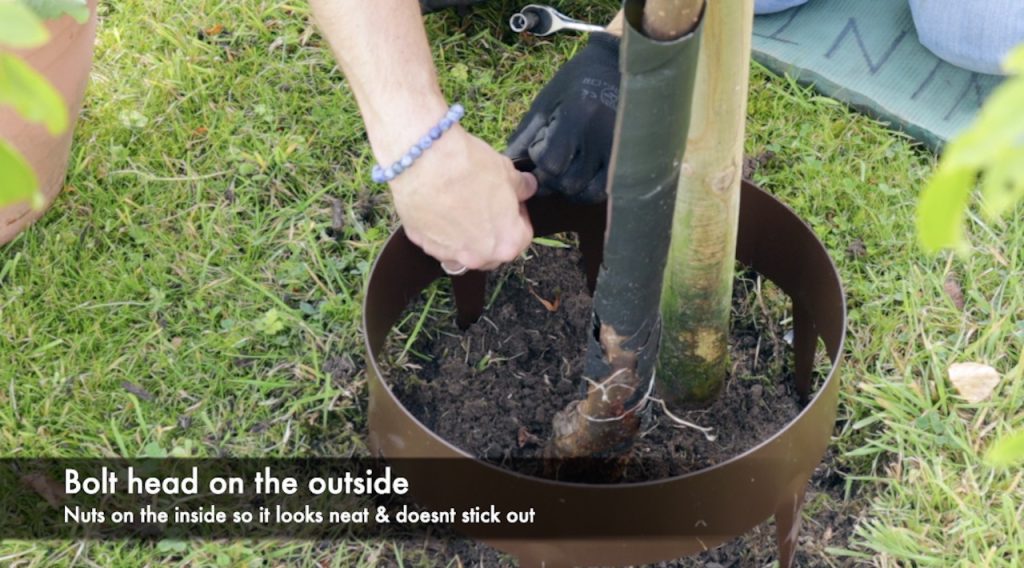
Step 4: Bolt the two halves of the tree ring together
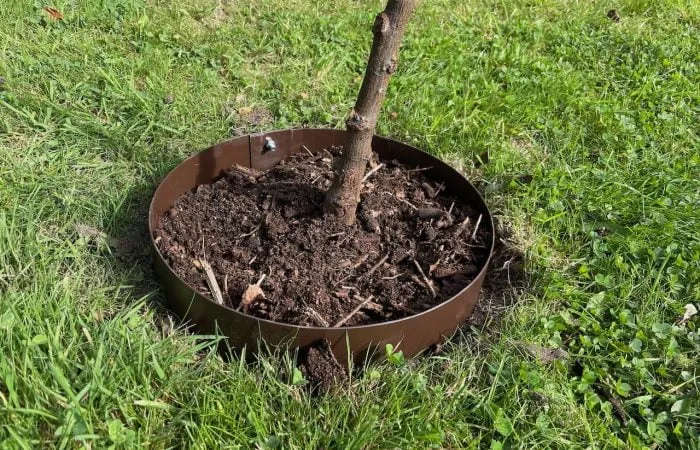
Tree rings come in two semicircular halves that connect using bolts, nuts, and washers. Before placing the ring into position, assemble both halves loosely, so you understand how they fit together. When tightening, make sure the bolt heads sit on the outside of the ring, and the nuts and washers are on the inside. This keeps the outer face flush and prevents you from snagging on protruding bolt heads when mowing.
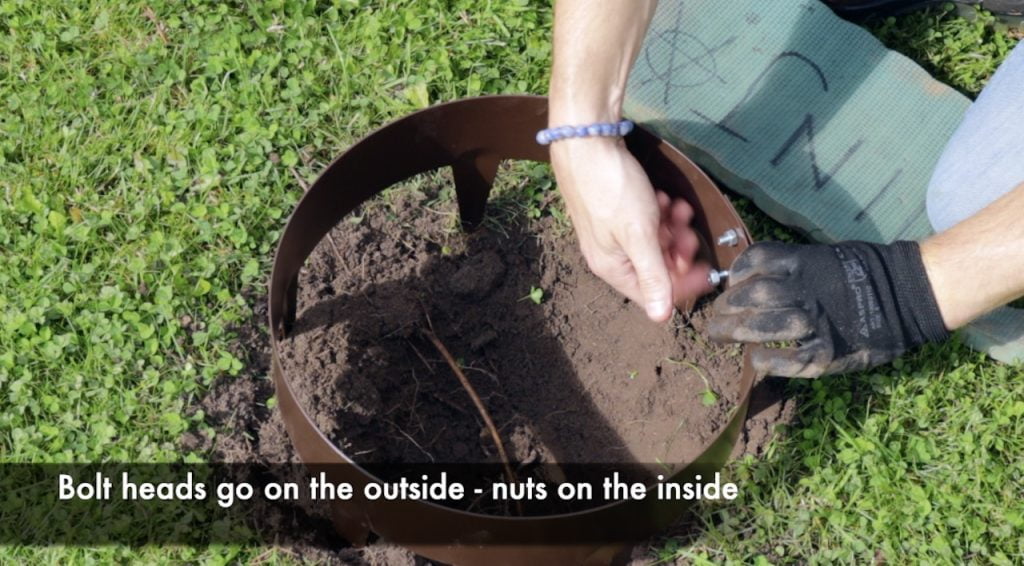
Tighten the bolts firmly but not excessively. You want the ring to hold its circular shape without any flex at the joints. A loose joint will allow turf to creep through the gap, which rather defeats the purpose. Check that the ring sits as a true circle once assembled, rather than slightly oval, as this affects both appearance and the evenness of the mowing edge.
Step 5: Hammer the ring into position
Place the assembled ring centrally in your cleared circle. Position a scrap piece of wood against the upper edge of the ring, then use a rubber mallet to tap it evenly down into the ground. Work your way around the ring in stages rather than hammering one section all the way down first, as this keeps the ring level and prevents distortion.
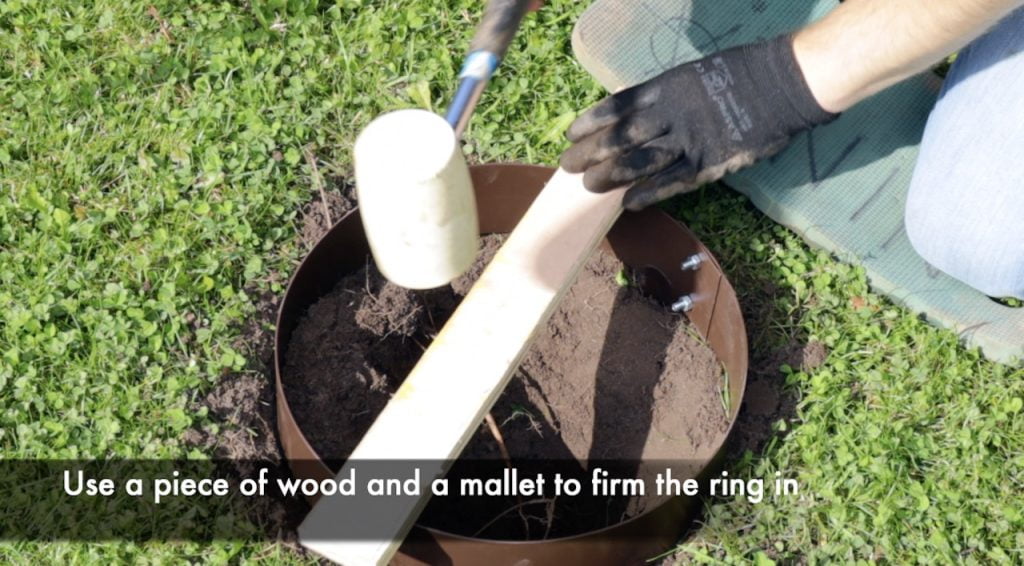
The ring should sit 3–5mm proud of the surrounding turf surface when fully installed. This is just enough for the edge to act as a visual border and contain mulch inside the ring, but low enough that a mower deck will pass over it cleanly without catching. Check the height all the way around with a spirit level or straight edge before moving on.
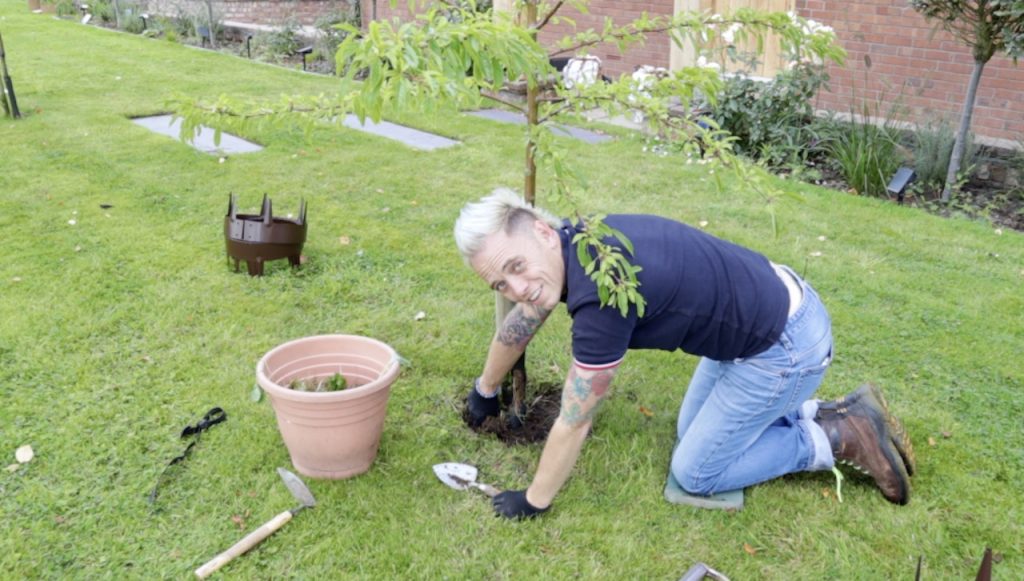
Step 6: Plant your tree
With the ring in place, you can now plant your tree in the centre. Dig a planting hole 1.5 times the diameter and the same depth as the root ball or pot. For container-grown trees, tease out any circling roots before placing them in the hole. For bare-root trees, soak the roots in water for at least 2 hours before planting, and ensure the graft union is 5–8cm above the final soil level.
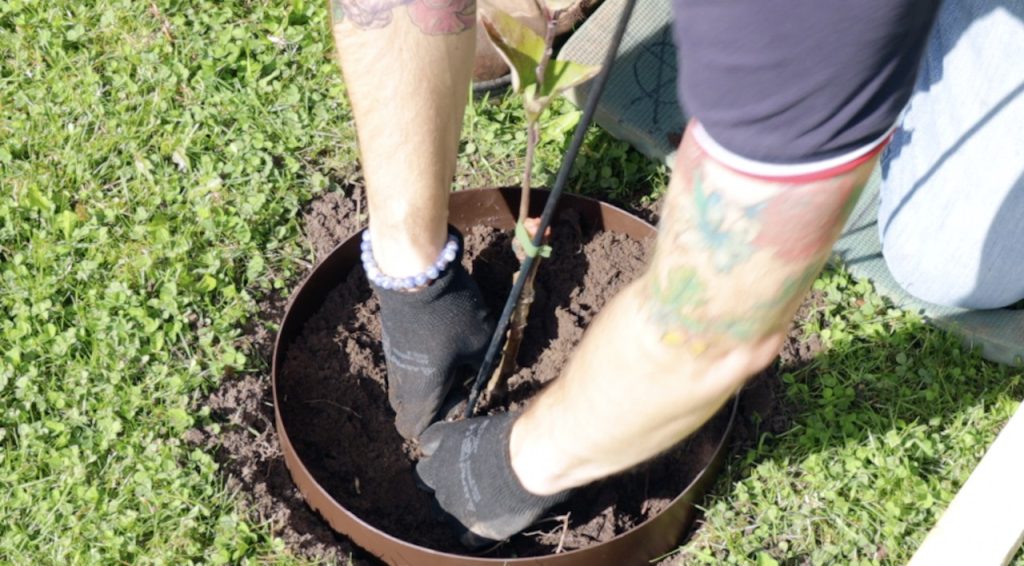
Backfill with the excavated soil mixed with a handful of mycorrhizal fungi granules applied directly to the root ball. I use RHS Rootgrow on virtually every tree I plant professionally, and the difference in establishment speed is consistently noticeable. Firm in gently with your heel to remove air pockets, then water thoroughly, even if rain is forecast. Stake if necessary, using a low stake at 45 degrees, secured with a proper rubber tree tie rather than string or wire, which can cut into the bark.
🛒 RHS Rootgrow mycorrhizal fungi on Amazon UK
🛒 Rubber tree ties on Amazon UK
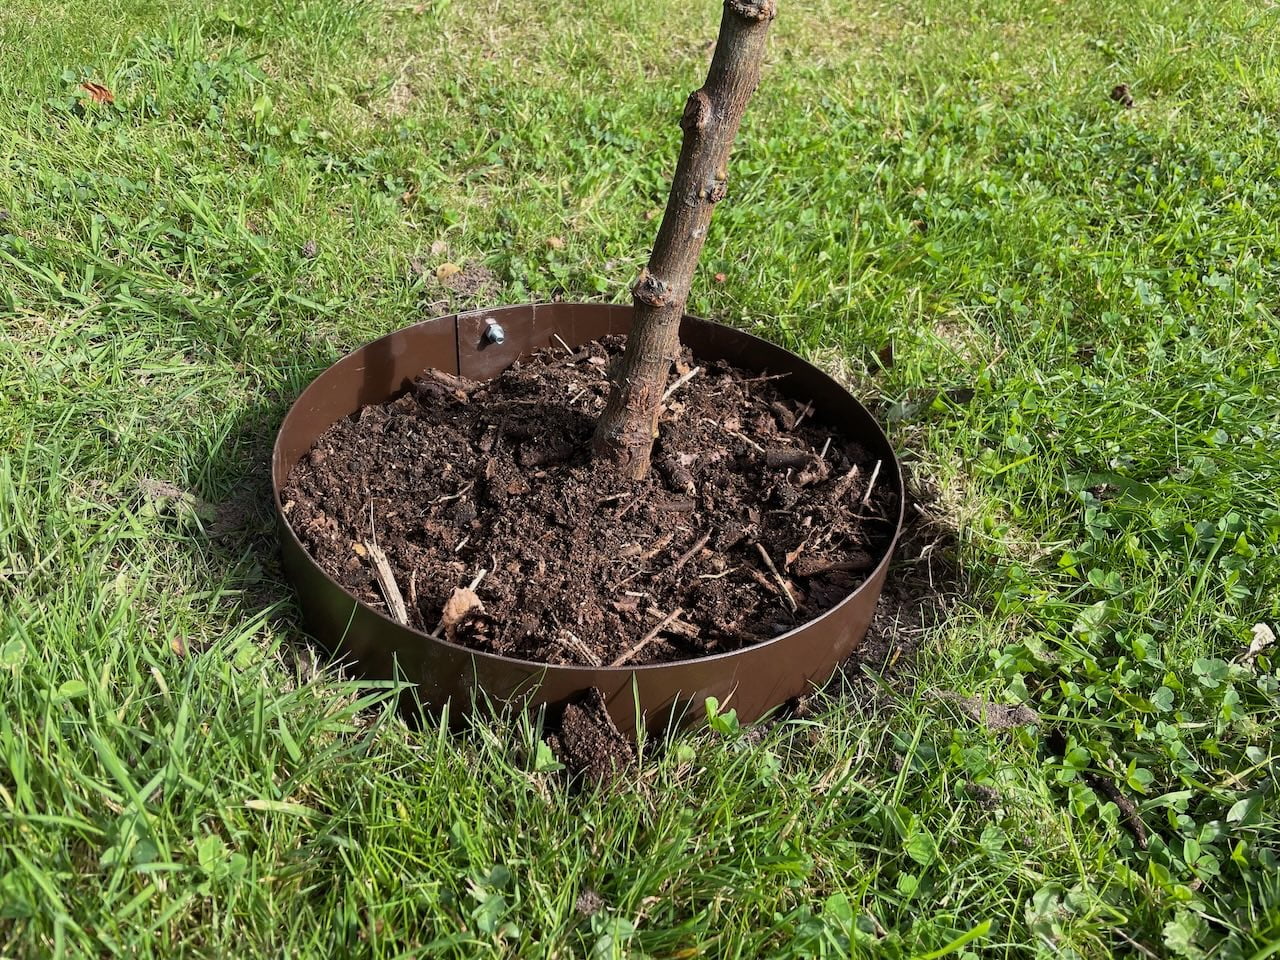
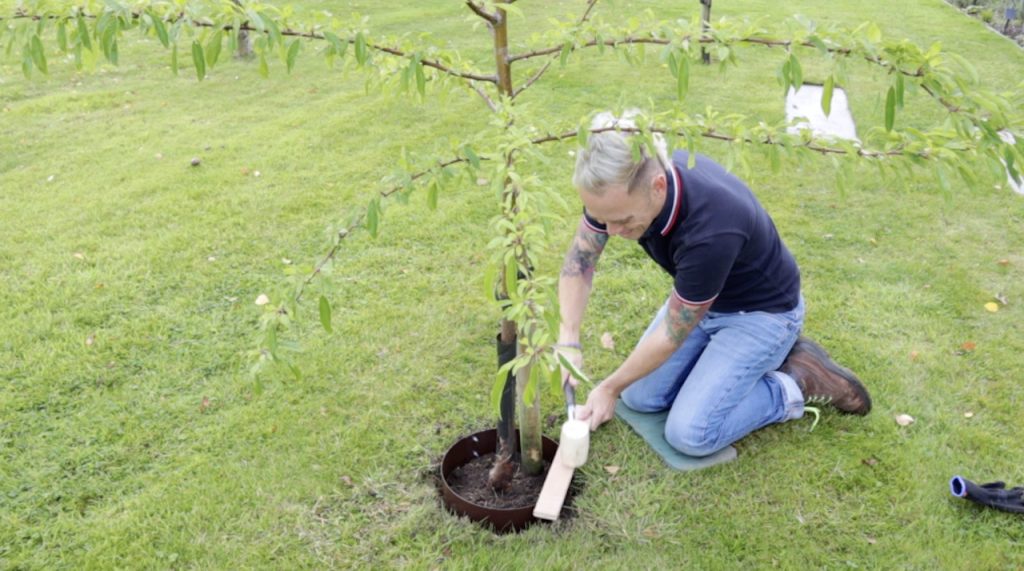
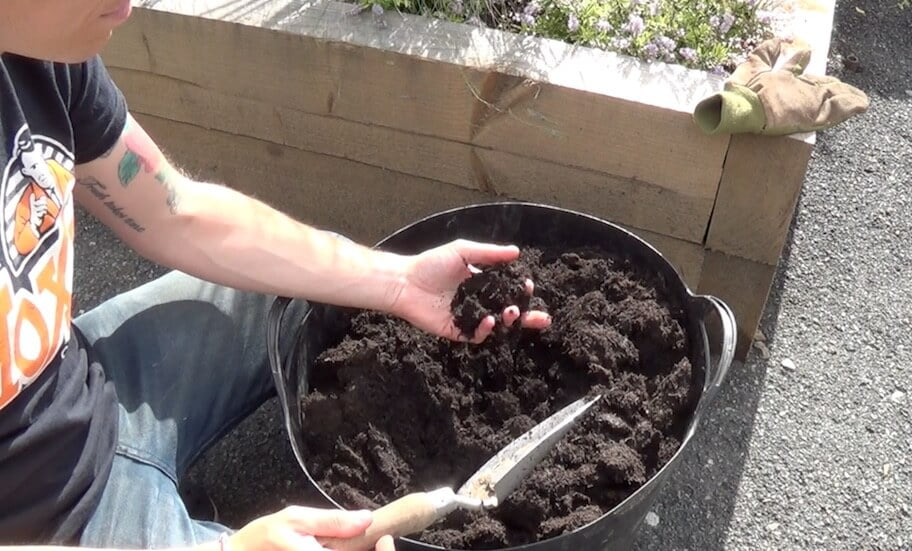
Step 7: Top dress the ring with mulch
The final step is to fill inside the ring with a layer of mulch. Chipped bark or composted wood chip works beautifully here, applied to a depth of 5–8cm. This suppresses any weed seeds that might germinate, retains moisture during dry spells, moderates soil temperature, and breaks down slowly over time to improve soil structure.
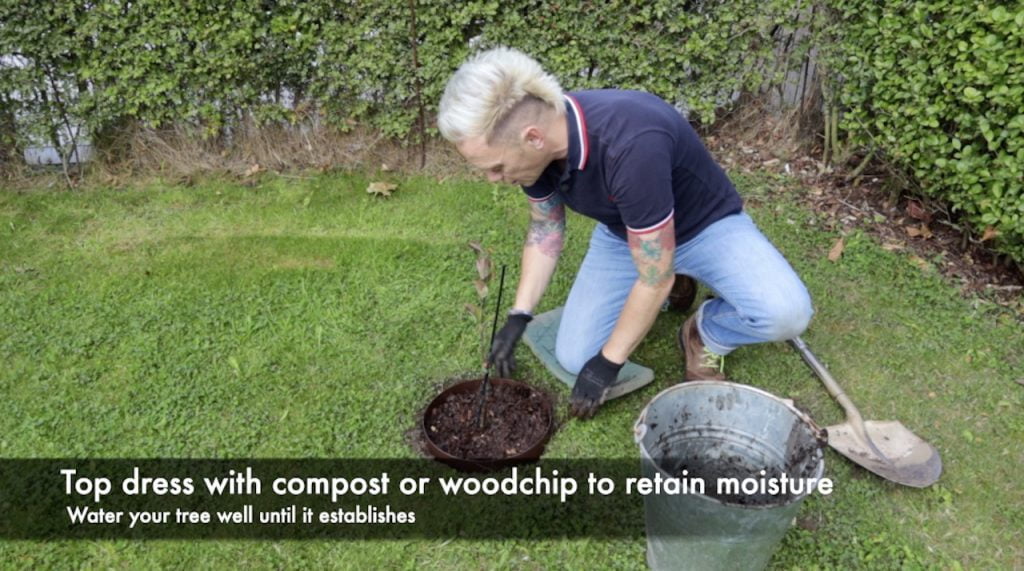
Keep the mulch away from direct contact with the trunk itself. Leave a clear 5–10cm gap between the mulch and the bark at the base of the tree. Mulch piled against a trunk traps moisture against the bark, which encourages rot and disease. A ring of bare soil immediately around the trunk, with mulch filling the rest of the ring, is the ideal arrangement. Top up annually in autumn or early spring as the previous year’s layer breaks down.
6. Fitting a tree ring around an existing tree
If you already have a tree planted in your lawn that is not performing as well as it should, adding a tree ring afterwards is one of the most practical remedies available. It will not undo any previous setbacks, but it will immediately improve the tree’s growing conditions and give it a much better chance going forward. The process requires a bit more care than a fresh installation because you cannot risk damaging established roots.
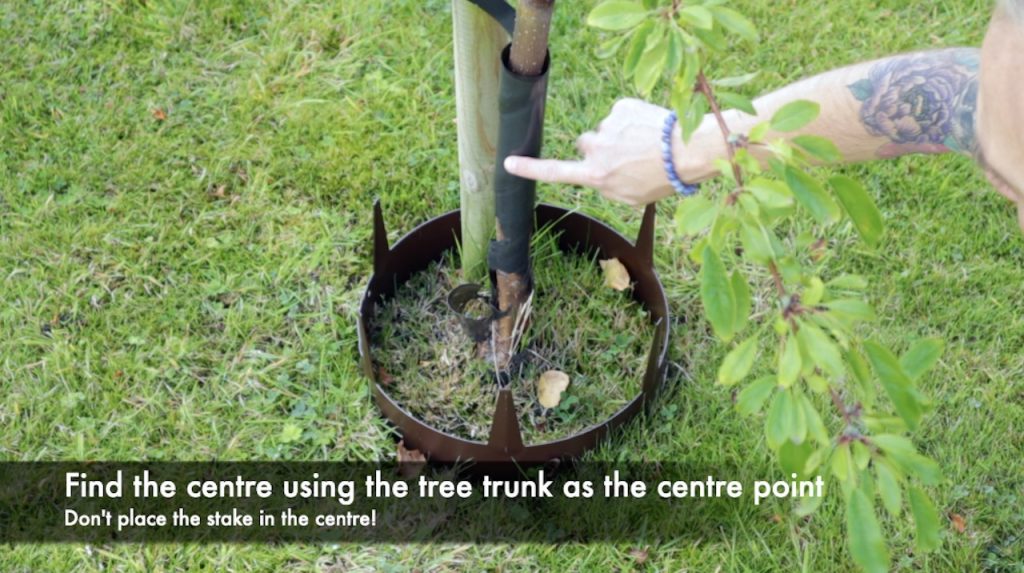
Step 1: Place the ring around the tree trunk
Open the ring at the bolted joint and position both halves around the trunk, using the trunk itself as your centre point. Do not centre the ring on the tree stake if one is present, as this will offset it visually and functionally. The trunk is your true reference point. Once both halves are in position, bolt them together loosely before marking the turf.
Mark the turf all the way around the outside edge of the ring with a can of line spray, a trickle of sand, or a series of small cane marks before removing the ring. This gives you a clear guide for cutting, which is much easier to follow than trying to cut around the ring while it is in place.
Step 2: Cut around the marked line with a spade
Using a sharp spade, cut cleanly around the marked circumference to a depth of 3–6cm. Work carefully and methodically. At this stage, you should be aware that there may be surface roots running outward from the trunk, particularly in older, well-established trees. If you encounter a root while cutting, use your trowel to work around it rather than cutting through it.
Severing major roots can cause real problems for established trees. If the tree is relatively young, say under five years, the risks are lower. If it is older and well-established, take particular care to disturb as little of the root system as possible, and consider using a smaller ring size to reduce the area of soil disturbance if there are many surface roots.
Step 3: Remove the turf with a trowel
Rather than using a spade to lift turf in large sections as you would when starting fresh, use a sharp hand trowel to work carefully around the base of the tree. This gives you far more control and significantly reduces the risk of damaging roots. Work outward from the trunk in sections, loosening and lifting the turf in manageable pieces.
Take your time with this step. It is the one that is easiest to rush and carries the greatest risk. Any cut roots should be treated with a clean cut from sharp secateurs rather than left torn, as clean cuts heal far more readily than ragged ones. Compost all the removed turf and, if you can avoid it, never put it in the green bin, as stacked turf is one of the best free soil improvers available.
Step 4: Refit the ring and tighten the bolts
With the turf removed, reposition both halves of the ring around the trunk. Check it is centred, then tighten the bolts firmly. As before, bolt heads to the outside, nuts and washers to the inside. The ring should sit comfortably in the cleared groove, with no significant gaps between the ring base and the soil.
If there are slight gaps between the ring and the soil due to surface roots or uneven ground, pack them with a little compost or bark. Gaps at the base allow grass to creep back inside the ring, which will undo your work within a single growing season. A tight fit between the ring and the soil is what you are aiming for.
Step 5: Hammer the ring into position
Using the same technique as before, place a scrap piece of timber against the upper edge of the ring and use a rubber mallet to gently but firmly drive the ring into the ground. Go slowly around the full circumference in stages rather than driving one section deep before moving to the next. The ring should finish 3–5mm above turf level.
Check the level as you go. An uneven ring looks untidy and creates low spots where mulch escapes onto the lawn. Take an extra five minutes to get it right at this stage, and you will not need to think about it again for several years.
Step 6: Top dress inside the ring
Fill the ring with 5–8cm of chipped bark or compost, keeping it clear of the trunk. Water the tree thoroughly, even if it is well established, as any root disturbance during the installation will have been mildly stressful for the tree. A good soaking helps it settle quickly and begin benefiting from its improved growing environment.

Within one growing season, you should see a noticeable improvement in the tree’s vigour and canopy density, particularly if it had previously been competing heavily with surrounding turf. Retrofitting a tree ring is one of the most cost-effective interventions you can make for a struggling lawn tree.
7. How deep should a tree ring be fitted?
The depth question is common, and the answer is more nuanced than it might appear. The ring itself needs to be set deep enough into the ground to remain firmly in place through soil movement, frost heave, and the general disturbance of gardening activity. But it also needs to protrude enough above the turf to serve as lawn edging and mulch retainer.
The standard guidance I follow is to drive the ring down so that it sits 3–5mm proud of the surrounding turf level. This is just enough to create a visible, defined edge and to hold mulch inside the ring without it spilling onto the lawn. It is also shallow enough that a standard mower deck will glide straight over it without catching. If the ring sits higher than 5mm, you will catch it every time you mow, which is both frustrating and progressively damaging to the ring itself.
In terms of how far below ground the base of the ring sits, aim for 3–6cm of penetration below the turf surface. This ensures the ring cannot be easily knocked or dislodged. On firmer ground, you may need to pre-cut a groove with the spade before driving the ring to prevent the spike from bending if the soil is particularly compacted or stony.
8. Are tree rings better than mulch alone?
This is a question worth addressing properly, because mulch on its own is genuinely excellent for trees and some gardeners wonder whether the ring is necessary if they are already planning to mulch. The honest answer is that the two work in combination rather than as alternatives.
Mulch on its own, without a ring, will suppress grass and weeds initially, but it quickly becomes incorporated into the turf edge. Grass creeps in from all sides, and within a season or two, you are back to square one. The ring holds the mulch in place, gives it a defined boundary, and prevents that gradual turf encroachment.
A tree ring without mulch is also only doing half its job. The ring defines the space and keeps grass out, but the bare soil inside will still get baked hard in summer, compacted by foot traffic, and colonised by weeds. Adding 5–8cm of chipped bark or compost inside the ring completes the picture, locking in moisture, moderating soil temperature, and providing a slow-release improvement to soil structure as it breaks down.
Use them together, and you have a low-maintenance, high-performing system that trees genuinely benefit from. Mulch alone, or ring alone, is a compromise. Both together are the complete solution.
9. What to fill your tree ring with
Not all mulches are equal, and the choice of what goes inside your tree ring is worth thinking about rather than just reaching for whatever happens to be in the garage.
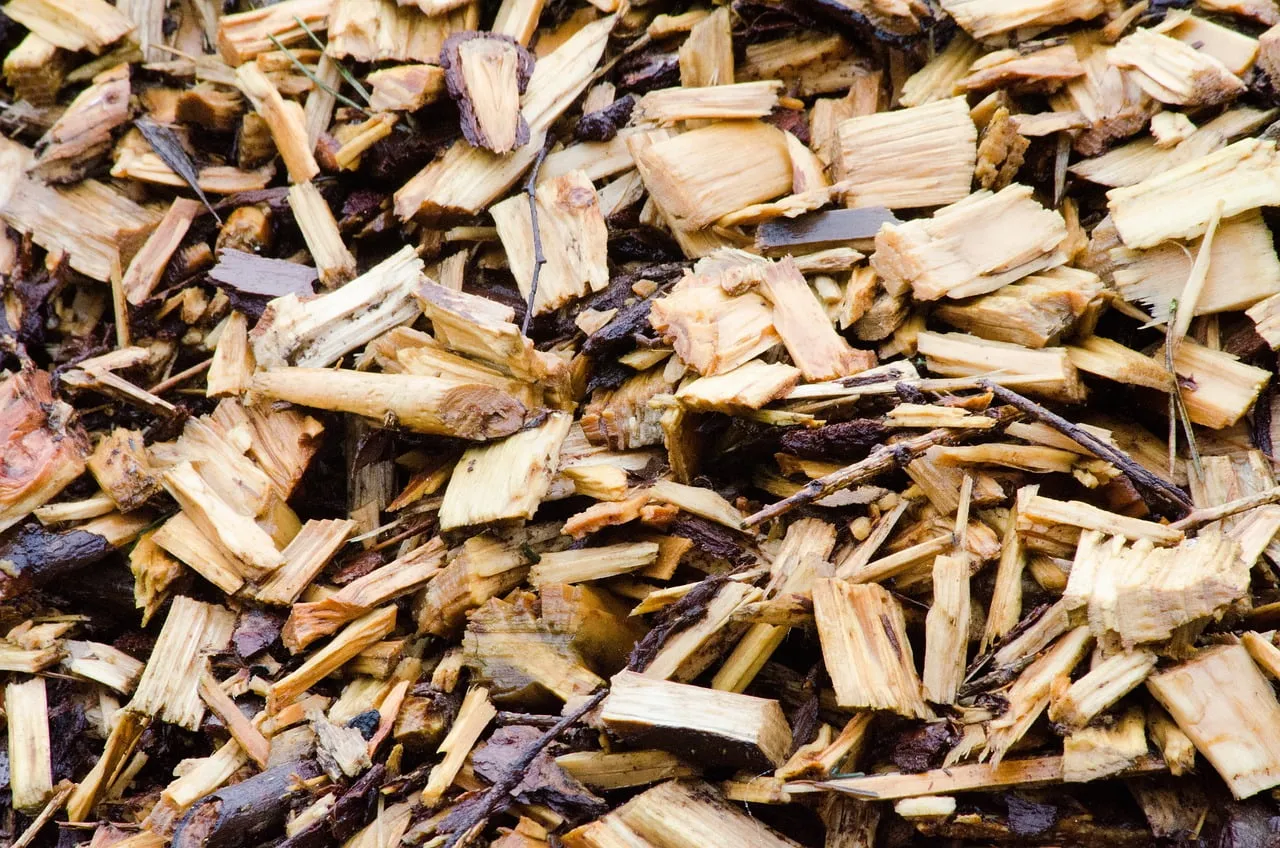
Chipped or composted bark is my first recommendation for most situations. It looks good, breaks down slowly enough to last a full season before needing topping up, suppresses weeds effectively, and improves soil structure as it decomposes. A 5–8cm layer is the target depth. 🛒 Buy chipped bark mulch on Amazon UK
Garden compost or well-rotted manure is a more nutritious choice that actively feeds the tree as it breaks down. This is particularly useful in the first two to three years of establishment when the tree most needs support. Apply in the same 5–8cm layer. 🛒 Dalefoot Wool Compost on Amazon UK
Gravel or slate chippings work well in formal or Mediterranean-style garden settings and have the advantage of lasting indefinitely without breaking down. They do not improve the soil in the way organic mulches do, but they suppress weeds effectively and look very smart. Best suited to ornamental trees in paved or gravel-garden contexts rather than lawn settings. 🛒 Buy decorative slate chippings on Amazon UK
Whatever you choose, always keep mulch away from direct contact with the trunk. This cannot be overstated. The single most common mulching mistake is heaping material up against the bark in what is sometimes called a “mulch volcano.” It looks tidy but it is actively harmful. It traps moisture against the bark, encourages fungal disease, and can cause the tree to produce girdling roots that strangle it over time.
10. Can I plant a tree directly in my lawn?
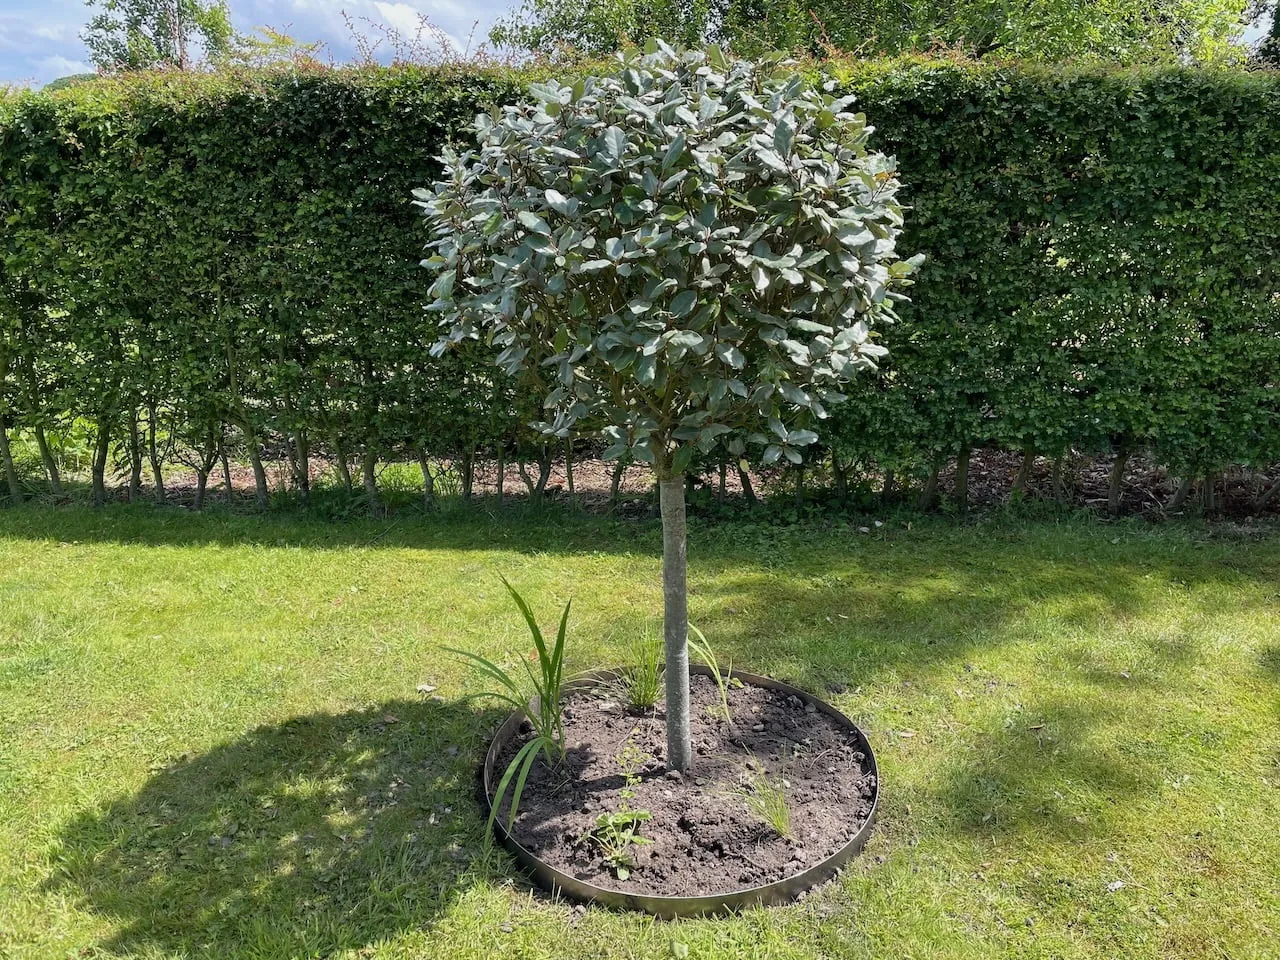
Absolutely, and I would actively encourage it for most UK gardens. A tree planted in a lawn creates a completely different quality of space to one planted in a border. It reads beautifully as a focal point, casts dappled shade across the grass, and creates a far more natural, relaxed atmosphere than the same tree would if hemmed in by planting on all sides.

Trees in lawns also deliver significant practical benefits beyond aesthetics. They slow surface water run-off and help reduce localised flooding during heavy rainfall, which is increasingly relevant in UK gardens. They provide habitat for birds, insects, and other wildlife. They increase privacy by adding height without the intrusion of solid fencing. And in a small garden, a single well-chosen tree can create a sense of scale and maturity that no amount of planting at ground level can replicate.
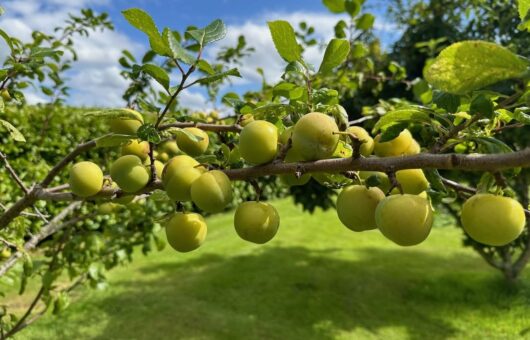
The key is choosing the right tree for the space. A weeping willow in a small suburban lawn will be disastrous in twenty years. A Malus ‘Evereste’ or Prunus ‘Autumnalis Rosea’ in the same space will look magnificent. Always check the mature height and spread before buying, and look for trees specifically described as suitable for small gardens if your space is limited. My guide to the best small and medium garden trees for UK gardens is a good place to start.
11. Common tree ring mistakes to avoid
Over the years of designing and planting gardens professionally, I have seen the same mistakes made repeatedly with tree rings. They are all entirely avoidable, and knowing about them in advance will save you time and frustration.
⚠ Mistake 1: Choosing a ring that is too small
A 30cm ring around a tree destined to have a 3m spread is functionally useless within a few years. Size up generously from the start.
⚠ Mistake 2: Piling mulch against the trunk
The “mulch volcano” looks tidy but actively causes bark rot, disease, and girdling roots. Always leave 5–10cm clear around the base of the trunk.
⚠ Mistake 3: Setting the ring too high above the turf
More than 5mm above turf level and you will be catching the ring every time you mow. Aim for 3–5mm proud of the surface, enough to hold mulch but not enough to obstruct a mower.
⚠ Mistake 4: Centring on the tree stake rather than the trunk
Stakes are rarely central. Always use the trunk as your reference point or the ring will be visually offset and will not protect the correct root zone.
⚠ Mistake 5: Not topping up the mulch annually
Bark and compost break down over the course of a year. By the following spring, a 7cm layer may have reduced to 2–3cm, which is no longer enough to suppress weeds effectively. Make topping up part of your early spring routine.
12. Frequently asked questions
How long does a steel tree ring last?
A good-quality galvanised steel tree ring should last ten to fifteen years in a garden setting without any significant deterioration. Powder-coated steel can last even longer if the coating remains intact. Plastic rings are considerably shorter-lived, typically five to seven years before they become brittle and discoloured. If longevity matters to you, invest in steel from the outset.
Can I plant other things inside the tree ring?
Yes, and this can look wonderful. Low-growing, shade-tolerant bulbs such as snowdrops, bluebells, or cyclamen work beautifully beneath a deciduous tree. Avoid anything that will compete significantly with the tree’s roots, and steer clear of vigorous ground cover plants that might eventually spread beyond the ring into the lawn.
Will a tree ring stop grass growing back?
The ring itself prevents grass from spreading into the cleared area from the sides. The mulch inside suppresses seeds that might germinate from above. Together they are highly effective, but neither is completely infallible. Some grass seeds will always find their way in through the air, so a light weeding once or twice a year is still sensible. With good mulch depth and an annual top-up, this should be a matter of minutes rather than anything more demanding.
Do tree rings come in different shapes?
Circular is by far the most common and practical option for a lawn setting. Square or rectangular edging sections can be used in more formal contexts or around multi-stem trees where a circle does not work well aesthetically. The installation principles are the same regardless of shape.
When is the best time to install a tree ring?
Any time the ground is not frozen. If you are planting a new tree, fit the ring at the same time as the tree, which typically means autumn through early spring for bare-root trees, or spring and early summer for container-grown specimens. Retrofitting around established trees can be done at any point during the growing season, though spring or autumn are slightly preferable as the soil is typically in good working condition at those times.
🌳 Further Reading: More Tree Guides
25 Best Small to Medium Garden Trees UK: my pick of the finest trees for smaller gardens
How to Plant a Tree: The Complete UK Guide: step-by-step tree planting from bare root to container-grown
How to Prune Apple Trees: the complete guide to getting the best from your fruit trees
How to Prune Cherry Trees: timing, technique, and tools for ornamental and fruiting cherries
How to Mulch Your Garden: everything you need to know about mulching materials and technique
Summary
A tree ring is one of the simplest and most effective investments you can make for any tree in a lawn. It takes around 30 minutes to fit, prevents grass from competing with your tree, eliminates the need to strim around the trunk, and makes watering and feeding far more straightforward. Pair it with a 5–8cm layer of chipped bark or compost and you have a low-maintenance system that actively supports the tree’s growth for years.
Key things to remember: size generously, keep mulch away from the trunk, drive the ring 3–5mm above turf level, and top up the mulch every spring. Get those four things right, and your trees will reward you with vigorous, healthy growth.
Happy Gardening Ninjas!


Lee Burkhill
Lee Burkhill, known as the Garden Ninja, is an award-winning garden designer and horticulturist with over 30 years of gardening experience and 15 years as a professional garden designer. A qualified RHS (Royal Horticultural Society) professional, Lee specialises in sustainable garden design and practical horticultural advice. He designs and presents on BBC1’s Garden Rescue and in leading gardening publications. Lee combines three decades of hands-on gardening knowledge with professional design qualifications to help gardeners create beautiful, functional outdoor spaces.
View all posts by Lee Burkhill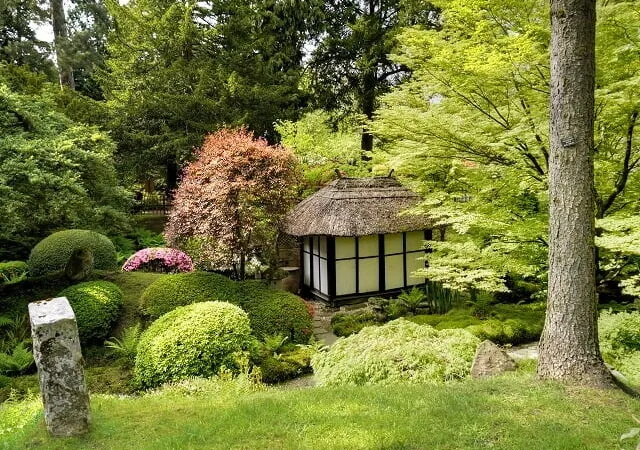


Categories
One thought on “How to fit tree rings: planting trees in lawns”
Leave a Reply
You must be logged in to post a comment.
Other posts
-

Start here: to begin your gardening journey! Read more
-
What is Silverleaf Disease? How to Prevent and Treat It: A Beginner’s Guide Read more
-
16 Essential Evergreen Shrubs: for time poor low maintenance gardeners Read more
-
How to Feed Your Lawn: The Complete UK Guide (When, What & How Much) Read more
-
How to design a garden on a budget: 10 discount garden hacks! Read more
-
Hardening Off Plants: Why and How to Do It Properly Read more


Research is a good thing in every major step you want to take. Your blog did a good job indicating some of the things we should be on the lookout for when taking care of trees overall. I will use the things I learned here for an easier life when deciding what to do next time. You answered some important questions for me. Thanks!