New build gardens design guide
 Lee Burkhill: Award Winning Designer & BBC 1's Garden Rescue Presenters Official Blog

Updated 2024: You're ready to get stuck in to create your dream new build garden oasis. You have this brand-new green space that could become something amazing. It may look very similar to the new build example below. Then it hits you. You have no idea where to start, and every idea you have doesn't quite work or leaves you scratching your head about what to do with this space.

This guide to new build gardens will help get you started. By planning your garden on paper first you can save yourself endless drama and mistakes. So let's get cracking!
Before you go into meltdown at all the things you don't know and decide to just pave over your entire garden instead, why not read this handy guide to help navigate you towards that dream garden. All you need is a pen and paper, and maybe a brew or two.
You first need to sit down and plan. Yes, it sounds very boring when you're super enthusiastic and ready to get started, but I can guarantee that a garden that starts without a plan will end up looking way off plan.
The dreaded blank canvas can be really off-putting when starting to design a garden. This is why planning can help you avoid mistakes and work out what you want in a new garden.
There are a number of considerations that any decent garden designer will take you through that needs some careful thought. If you follow this guide, you can help avoid pitfalls with new garden design, such as areas that don't work as intended or plants that fail to thrive.
Subscribe to my Youtube channel for more garden design hints, tips and hacks!
Drawing up a scaled plan for your garden helps you plan and work out the proportions or plant choices you have at your disposal. It's far better to trial these spaces on paper than on the ground.
Undertaking a scaled garden survey is essential. If not, you will end up guessing, overspending, making shortcuts as you run out of materials and become increasingly stressed. This is where a garden designer becomes a money and time-saving option.
An experienced garden designer can take the above and then map out the blueprint based on your needs. If you are doing it yourself, though, have a look below at the kind of detail you will need with your design.
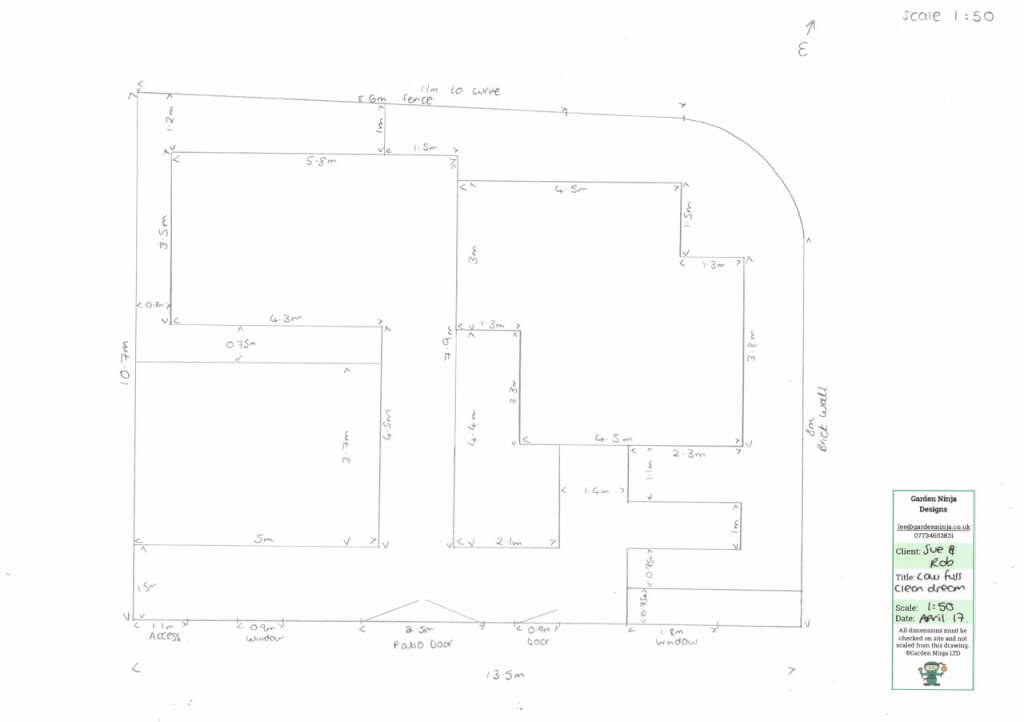
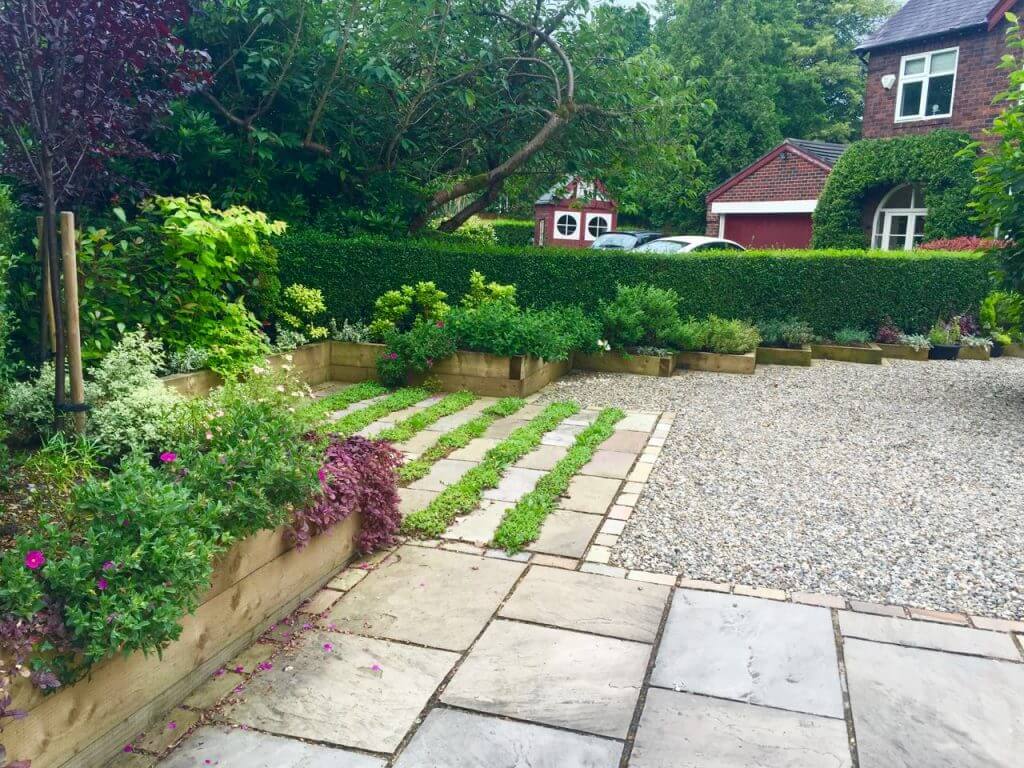
Take note that all the proportions, path widths required, plant groupings, aspect and access have all been carefully considered. The below is a finished outline design after numerous consultations and discussions over the functions, features and planting required. This should never be a 5-minute job!
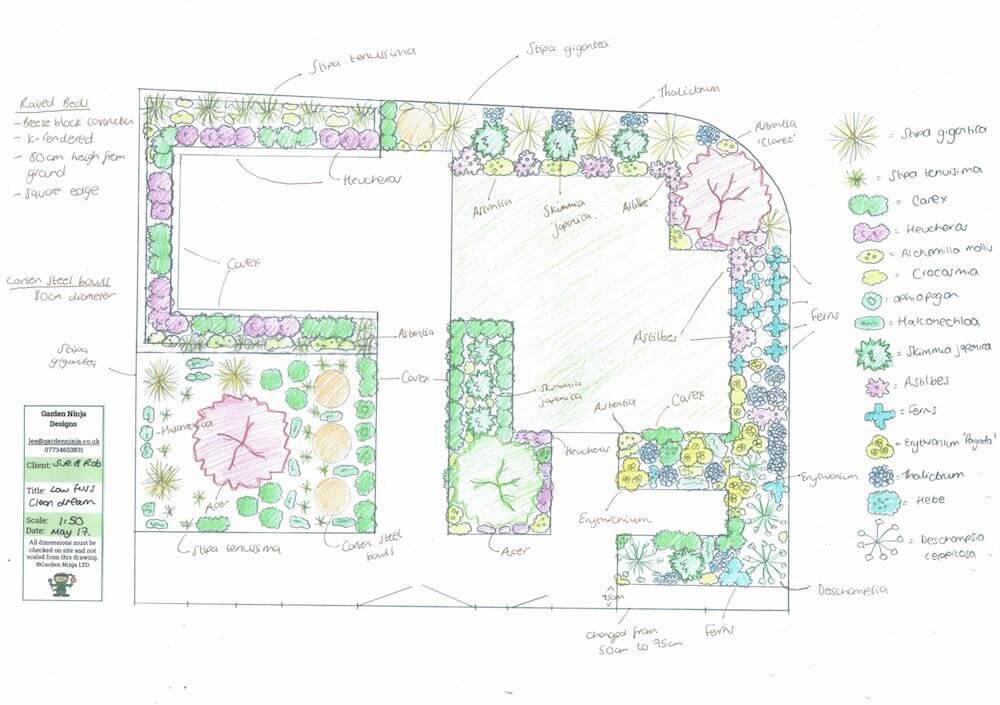
The end game is to get to a design with planting plans as seen below, which will then act as the blueprint for your amazing new build garden. But there is more to consider before diving into garden design.
Keep reading Ninja!
Using a pencil and paper or tablet, start to make a note of the following considerations, which will inform and develop your new build garden plan. It's going to be a cyclical process as you develop ideas, refine or even reject them. Don't get disheartened; after all, gardening is meant to be fun and planning ahead makes sure you're starting off with the best chance of success!
It's now time to review the position and characteristics of your garden so we know what you're dealing with. It will help identify the gardens limitations, benefits and features.
Did you know that you can take my course and learn how to become a Garden Ninja yourself? Click here for details
Before you decide which gorgeous plants to use, the specimen tree, the raised beds or the lovely real stone you will use for the hard landscaping you need to work out the function of the garden. Without this, then, any design you work on will struggle to be functional, let alone cohesive.
With new build gardens, the likelihood is you're going to have a limited garden, given the trend for squeezing as much house onto new build plots at the expense of the garden.
My advice is to pick a preferable function, i.e. entertaining, and focus on that function, rather than an entertaining horticulture good life eco family garden mash-up. They never work on a small scale.
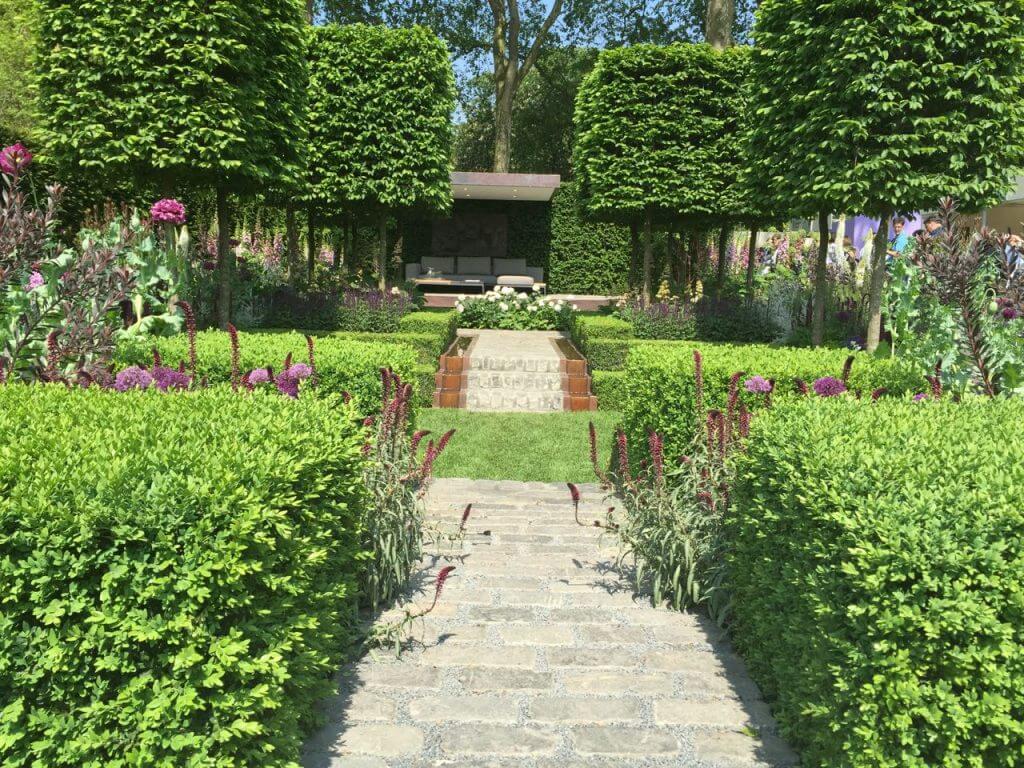
The example above of a Chelsea award-winning garden, the Husqvarna Garden by Charlie Albone, has a strong function of an adult space. It's a formal adult garden with a sheltered seating area. It's a very grown-up contemporary garden, pure and simple. Clean lines and mixed heights, with some clipped Hornbeam standards, make this one a real beauty. Its simplicity, especially in the use of clipped box and hornbeam, is key to this design's success.
It's wise to remember that it's best to do one thing well than three things badly.
The aspect of your garden will inform you of the types of plating that will best suit the plot. It shows you where the light will sit during the day. Understanding this along with the soil type, which I discuss in my soil type post are the two requirements for planting success.
Take some notes of the sun during the day in your back garden. Ideally, taking these points at 9 am, 12 pm, and sunset will give you a general idea of where your sunny spots, shady spots, and maybe awkward spots are!

If you don't consider the aspect that beautiful terrace you've just spent thousands on may end up as a wet shady nomads land which never gets used. Aspect is also the driving force for plant selection.
So grab yourself a brew and a book and relax in your current garden making notes on the sun, shade spots, warm spots and general day to daylight levels in different parts of the garden. This will save costly garden design mistakes down the line.
In giddy excitement, many of us eager gardeners have decided that we want a mass of summer flowers, exotic plants and miles of wooden Scandinavian decking in our garden. This is great if you're prepared for the maintenance and husbandry that they require.
It may be more realistic to start off with a lower maintenance garden then build up to a garden that may well take up to 2 hours a day to water and prune in the height of summer.
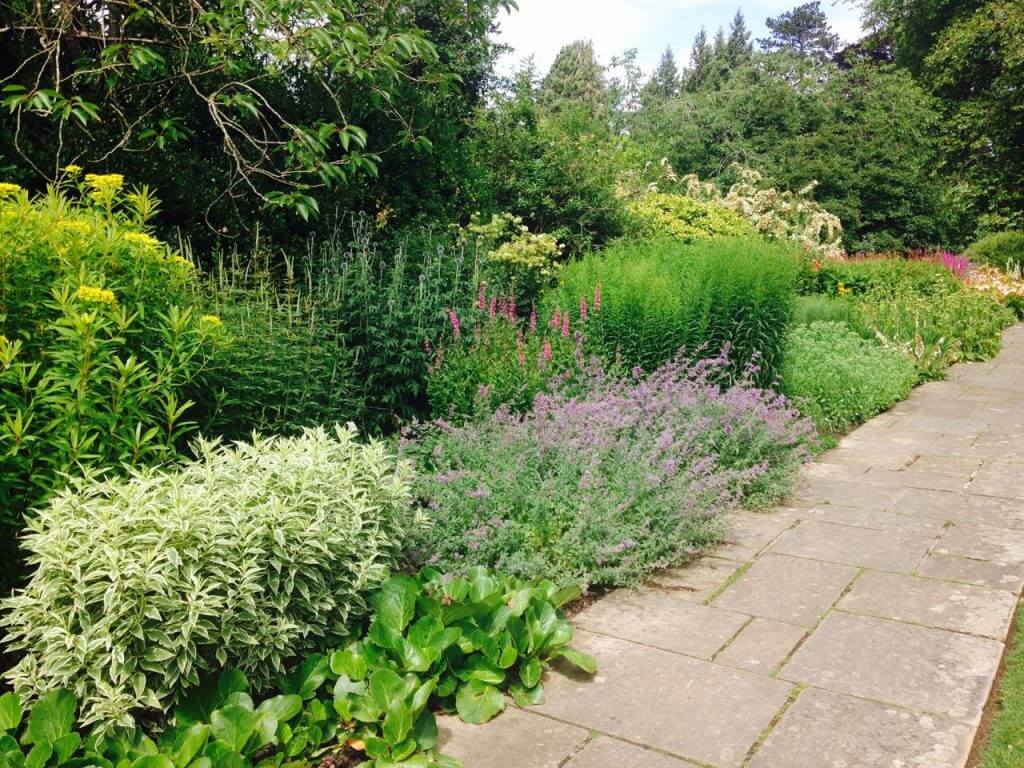
Lower maintenance gardens include using slower-growing shrubs and planting that's less vigorous or needs less pruning or deadheading. Sometimes, a useful tool is to create a planting plan, that shows the plants that suit your aspect and soil with their flowering and pruning month.
It's often best with a new build garden to start small and build up. So rather than trying to plant the entire garden in one weekend, spread it out and enjoy the process of allowing the garden to evolve.

The trickiest part of any new build garden design is grids. It would seem that all the house developers go a bit crazy when it comes to planning the utility grids and pipelines. I have yet to see a grid that wasn't positioned in an unavoidable place and at the most bonkers angle.
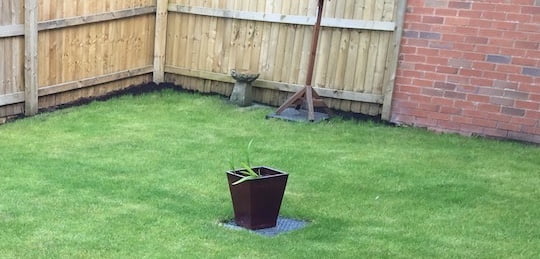
Exhibit A- The awkward grid pot is no disguise!
There is no getting away with the grids. You can't just pave over them as you or a utility company may need access in the future. This means you have to temporarily but realistically hide/disguise them. This isn't an easy proposition, but garden ninja has done this many times with raised beds, with inserts that can be removed and planting schemes that plant around the grids.
Some paving schemes can allow for grids to be inset with the same stone to help them blend in. These are really quite effective also. There are a number of options for disguising grids and building removable structures that can help remove them from the conundrum.
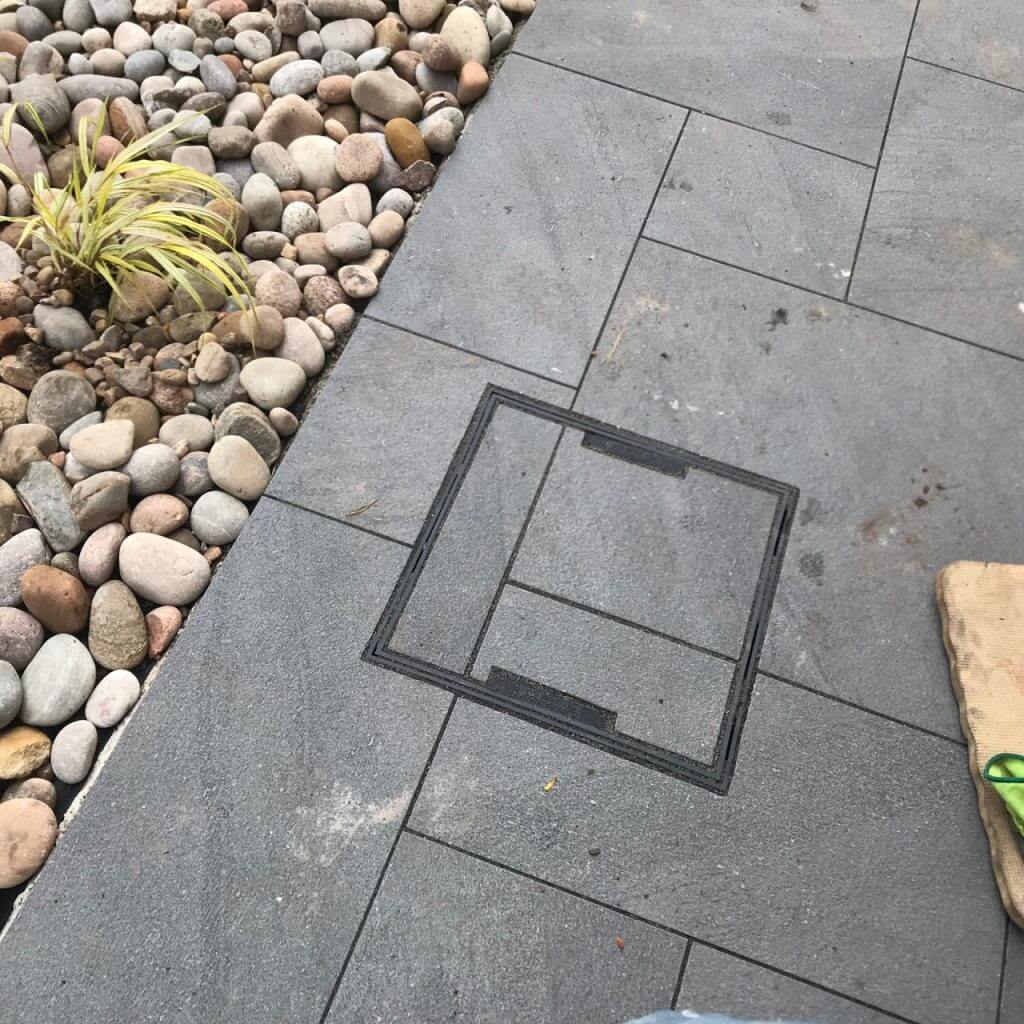
Simply placing a begonia in a terracotta pot on them is usually the least favourable disguise, especially when it's in the centre of a lawn! Look how sorry and obvious the grid looks above. Grid covers help disguise grids and using a paving tray helps blend them into a garden design.
One of the drawbacks of new build gardens is that they are overlooked, sometimes from every conceivable angle. It's like the world's watching you, and instantly, new gardeners head off to B&Q to buy trellis, reed screening or bigger fence panels.
However, bigger walls and screens can actually be counter-productive, making a garden feel smaller and more awkward. It can also cause problems with neighbours and regulations on the height you can extend up to. It is also a really ugly way to gain privacy.
Screening should be subtle and use broken views to give a feeling of privacy without the feeling of a prison. When I say broken views have a look at the neighbouring properties to see which are the most obvious viewpoints.
Now, a broken view would incorporate either a plant or subtle structure that diverts this view or provides a form of protection from it. This is not the same as blocking it out completely.
It may be a set of tall grasses that sway and filter the view; it could be a set of pleached trees that give some screening but let light and wind through, it may mean having a seating area enclosed by tall flowering borders.
Using height in a garden with some carefully chosen trees or shrubs can help break these view lines, making you feel less exposed and more nested. It's a distraction technique that, if done well, can give a sense of privacy without feeling like the fence panels are imprisoning you!
Noise can be diffused slightly by planting and some living screens as can using a water feature such as a blade or moving water. Again, it is the balance between Niagara falls and a weak trickle that simply makes you need the loo. A water feature won't remove the noise of a screaming toddler but will help mask conversation and other light noise.
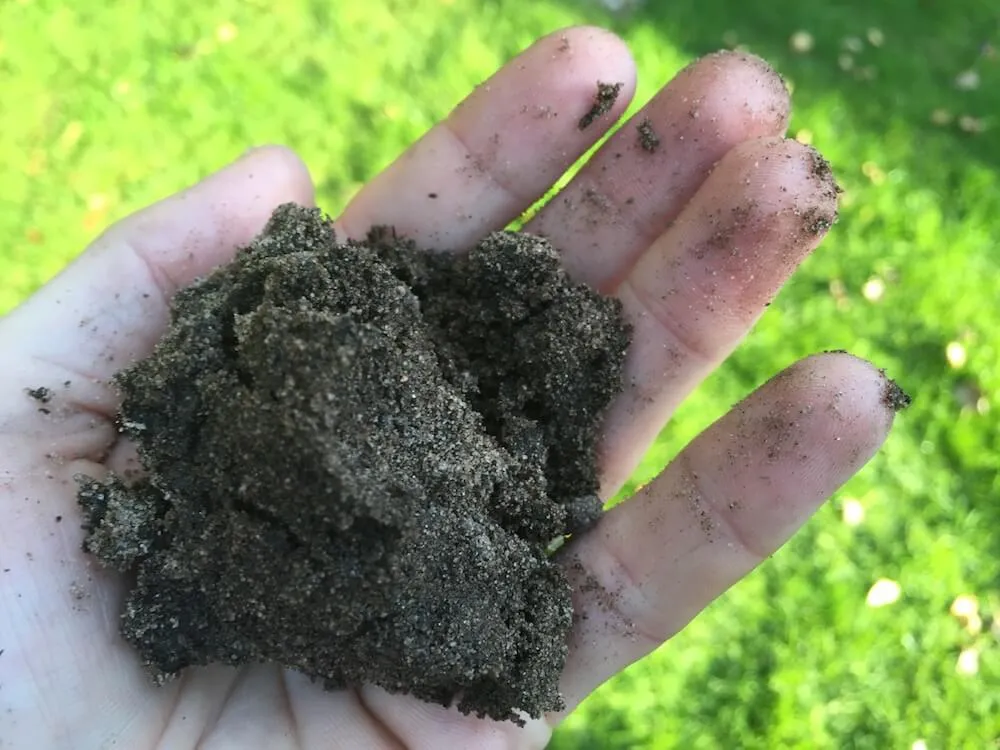
The plants you choose will heavily depend on the site's aspect and the soil type. Unfortunately, many new-build houses' gardens don't offer the pristine topsoil that you may need.
In fact, in every new build garden I've worked on, once your spade or fork goes in past 2 inches, you're bound to hit some rubble, hardcore or debris left from building the house.
You're going to have two options:
Raised beds are probably the easiest in terms of effort but will restrict your design somewhat to linear shapes and forms. Don't be disheartened, the hard work put in here to remove as much debris as possible will be well worth it when you are relaxing in your new garden admiring all your handy work.
If your soil is acidic then you need to choose plants that can tolerate or thrive in acidic conditions. This soil is usually referred to as ericaceous. Camellia, Skimmia, Rhododendron and Trilliums all love ericaceous soil.
Ph 7 is usually considered neutral and will house a much broader sweep of plants. Most alkaline plants are okay at this pH, too, and are less fussy than the acidic varieties if the pH is a bit lower than they are used to.
If you have really bad compacted soil a good idea is to add organic matter and cultivate the ground. Whilst it takes some effort to break it all up it will be worth it in the long run. In new build houses often the garden was used as the storage and access area for builders so if you're not building raised beds you will need to cultivate the ground. Here is my easy and cheap guide to improving soil texture.
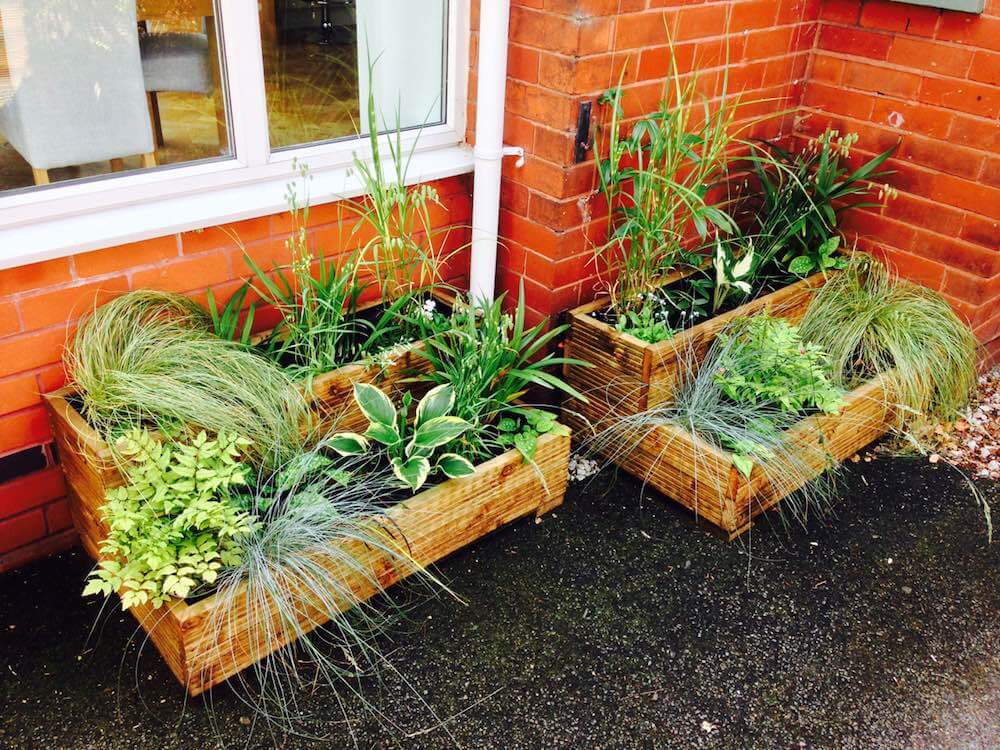
If you want a good year-round structure you are going to need a mix of evergreen, deciduous, herbaceous perennials and annuals in your garden. Don't forget that even tiny gardens nearly always benefit from height, which small trees bring to a garden. You want different layers in your planting heights to give interest.
To briefly explain the difference in the plant types you will need, here's a handy set of definitions.

It would take a number of detailed blog posts on planting to advise on every planting scheme for your new garden. In fact, it's an impossible task given the variables of aspect, water retention, soil PH, theme, function etc.
However, there are some general rules to make it easier to help group plants. If you follow these planting guidelines, you should be on your way to a planting scheme that hangs together well.
Always group plants in conditions where they would be in nature, so sun-loving should be grouped in a sunny spot, shady plants under trees or against walls that cast shade, moisture-loving in the damp area etc. If you try and grow a Rudbeckia (from the Asteraceae family) in the wet shade, at best, it will grow leggy and not flower or, at worst, die. All Asteraceae (daisy family) need near full sun, so work with this, not against it if you can.
It's also a good idea to work with the rule of 3.
Make sure you have the 3 different plant heights accounted for in a flower bed.
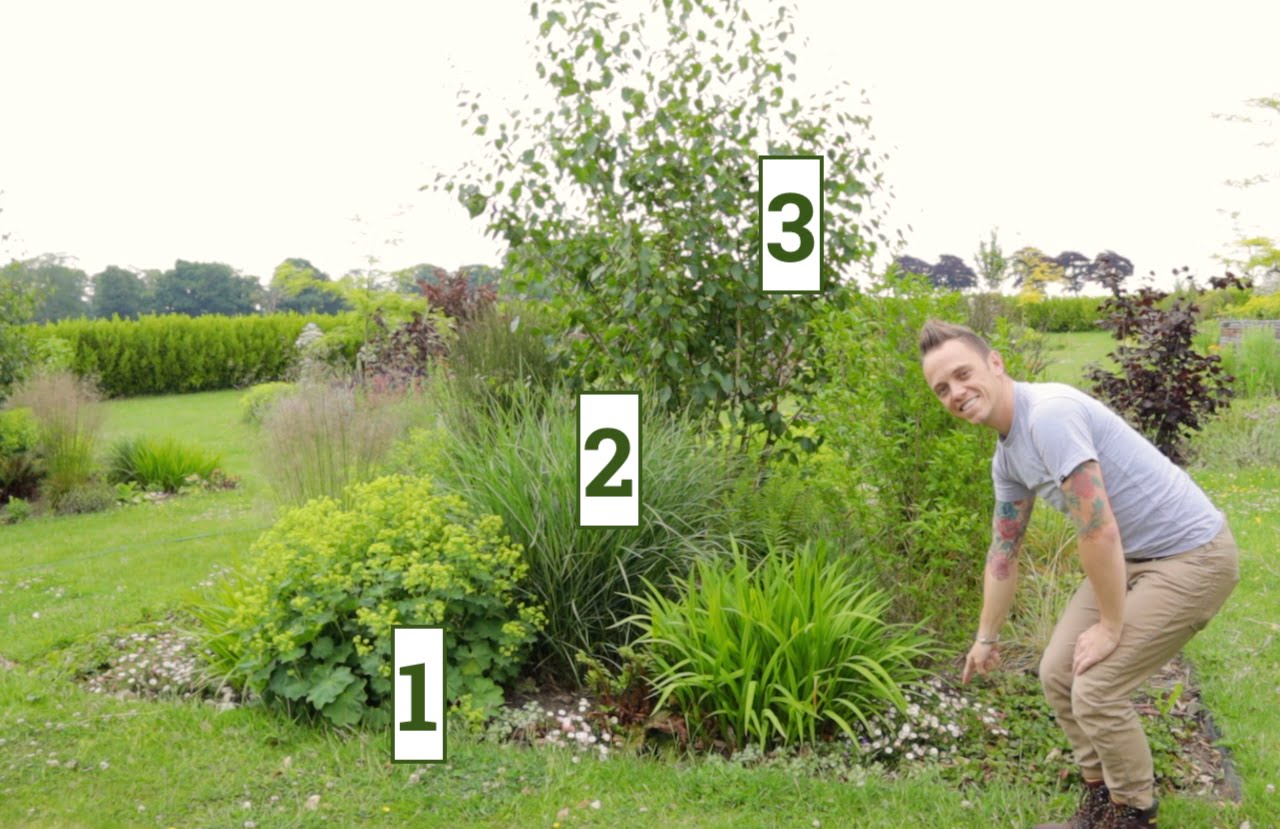
By using various increments in heights of planting, getting higher the further back you go, you can create depth and drama. It's also a good idea to use ground cover or plants that spill out of borders near the front of the border to soften the hard edges.

Try and limit your choices to a group of plants, say 7-10 types of plant in a small garden, rather than pick and mix plants. This will give you the biggest impact. Keeping them in groups will give your new build garden definition and cohesion. One of these and one of them will look piecemeal and weaken your design and theme. If in doubt, why not get in touch to commission a planting plan? It takes a lot of guesswork out, which means more time to relax!
Last but not least, don't be put off by the numerous things you need to consider. If you start with the garden's function, aspect and soil type and then plan around that, you can't go far wrong in creating something that will suit your needs. If plants don't quite work where you have placed them, lift them and move them about.
As the garden develops it will evolve, what you thought would work may not. The beauty of gardens is planning, researching and then playing around with it. Sometimes, looking around at neighbours and seeing what has worked and what hasn't will also help steer your choices.
Following this guide will at least set you on the right path and hopefully prevent some easy-to-avoid mistakes. If you need some guides to the basics of a new garden why not subscribe to my youtube channel where you can watch demonstrations?
Happy Gardening!


JOIN THE NINJAS
Join our Ninja community for extra guides & Discount Codes for Online Garden Courses!


 To my YouTube channel
Hi, I saw your work n my friends new build garden which you designed. I’ve always struggled with being over looked at think those square trees are a great idea! What advice would you give with fences? My neighbour has a tiny fence and I was wondering if I spoke to them about increasing the height of it as they do tend to look over when I’m in the garden! Thanks. Anna
Hi Anna, Thanks for getting in touch. Fencing is a tricky one. You need a certain amount of fencing for boundary protection and privacy, but sometimes building up can then lead to a reduction in light and a feeling that the garden is becoming more enclosed. What maybe a good idea is to consider adding trellis to the top of the fence. It doesn’t block as much light and baffles wind better whilst also giving some privacy. It also means you can grow some lovely climbers up there over time too! All the best. Garden Ninja
Hi Lee, I’m currently in the process of pleaching my own photinia marble standards for this very reason. I’ve put up a trellis behind them to protect from harsher winds and as it’s a north facing wall, they reach the sun nicely, leaving room for some clever underplanting. Although I appreciate these are going to take a long time to establish, they are a much more cost effective way of screening. Iw ondered if you had any tips on training them and tying them in to get a nice shape.