Tree grafting of fruit trees; a beginners guide
 Lee Burkhill: Award Winning Designer & BBC 1's Garden Rescue Presenters Official Blog

The fruit tree grafting course was run at Ordsall Hall in Salford, a Tudor hall and knot garden here in Manchester. Peter Nicols from the Northern Fruit Group led the grafting workshop in showing us how to successfully graft some apple trees.
The session was aimed at getting us from grafting zero to heroes! We used Scions, which are stems taken from an existing apple tree that are then attached to rootstocks, a bare root with a stem. Pen knives were at the ready, sharp and disinfected along with sharp secateurs and plenty of enthusiasm to get grafting. You may be asking why on earth you would need to graft a tree rather than just plant a seed. So let's have a quick look at the benefits of tree grafting.
Now tree grafting is a relatively straightforward science. You take a rootstock which will determine the eventual tree's height, spread and girth and then graft on a 'scion', a young shoot or stem, from a chosen fruit tree. This results in an exact copy of the original apple tree on a new root system. Meaning you don't need to faff about propagating seeds which can take years and you know you're getting a true-to-type copy of the original apple tree.
It enables you to control both the growth and guarantee the origin of your apple tree. If you were to sow a seed you would need to make sure that the apple tree had been pollinated by the same species or you would end up with a cross. So grafting is a much more exacting method of propagation.
The real skill lies in getting your cuts as uniform as possible and reducing the chance of external factors, such as bacteria or foreign bodies then getting into the wound. Sounds simple eh! Well, let us dig a little deeper and show the step-by-step process.
A grafted tree is when a cutting from a tree is then sliced, adhered and grafted onto a different rootstock. I.e. Root system. Grafted trees are used to control the growth of a tree, especially for urban gardens. Grafted trees are also used to control the growth and shape of a tree.
You can find the graft by looking up from the base of the tree and looking for the bump or bulge where the tree has been grafted. In the example below of grafted Quince trees look at the base, if you spot that small bump then that's the graft!
During the grafting session, I chose the following Apple (Malus domestica) tree species and cultivars.
We collected a number of samples from existing apple trees at Ordsall hall, some of which are heritage varieties. You want to choose healthy living specimens and not trees with disease or damage. We took growth that was a year old and removed any green flexible growth.
The flexible growth was found at the very end of each stem, we removed this as it's not as successful as the year-old growth. You can tell the year-old growth as it should be a darker brown colour compared to soft green wood as it's hardened slightly over the year.
You ideally want a Scion that has no more than 3 healthy buds on it. If you graft more than three then you are putting ever greater stress on the rootstock to provide water and nutrients for these buds. We found that a 4-6 inch scion was the ideal length.
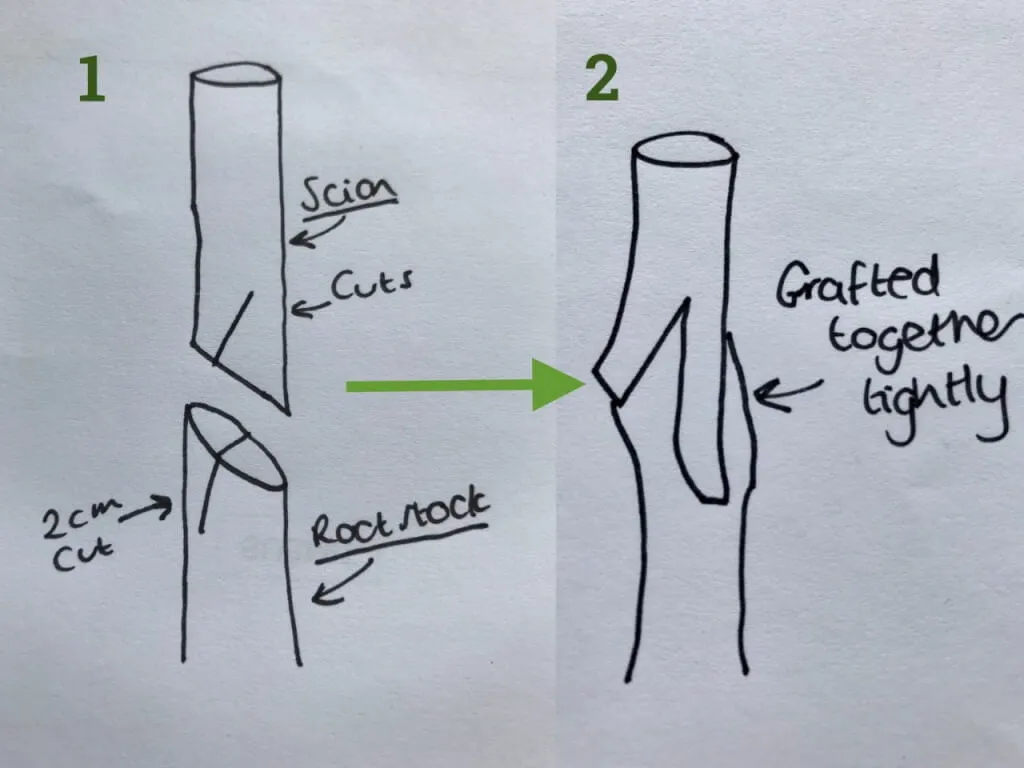
Peter taught us that we need to cut as straight a line as possible from our scion stock. The image below is my hand-drawn explanation of the two parts, where the cuts are needed and how they are combined. You're basically slotting the two parts together so the cuts marry up.
Here are some sample grafts that I undertook on some stems. It's really important to practice before you commit to the real thing. It's a definite knack that you need to acquire but not as difficult as you would think! It's all about straight angle cuts so that when they are bound together there is as much of the fleshy tissue joining, as this is where the graft will bond. The less contact the less chance you have of success. So practice makes perfect! Again sharp tools are vital for clean neat cuts.
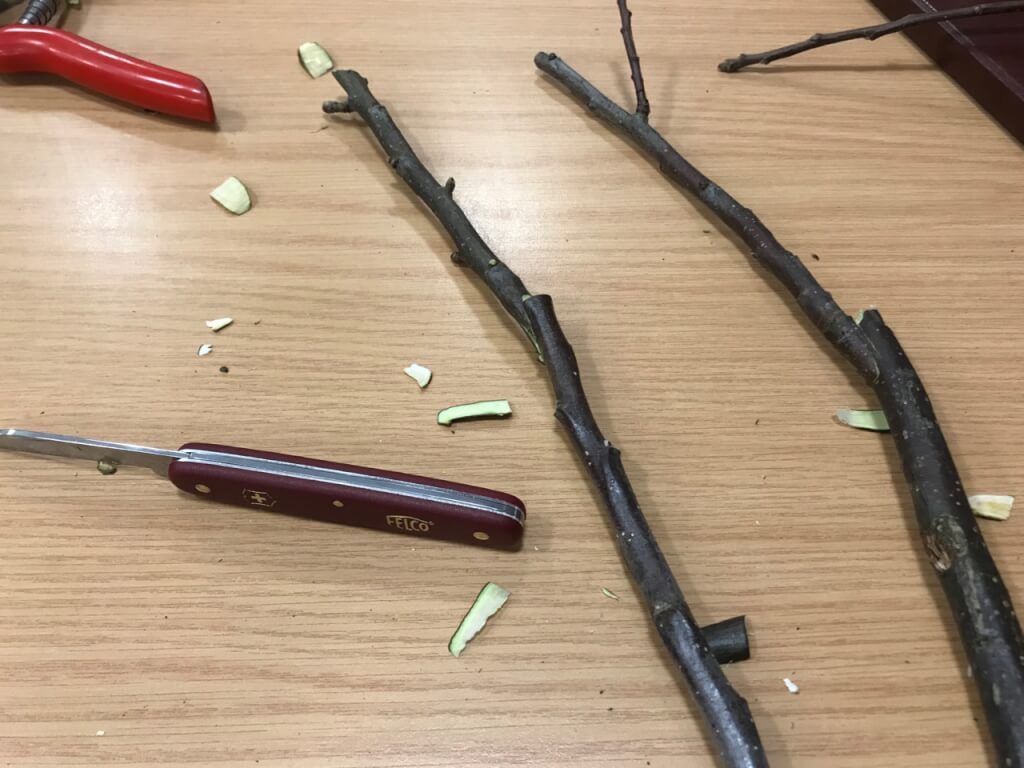
The scion is on the left, with the rootstock the right. You can see the neat join required from both parts.
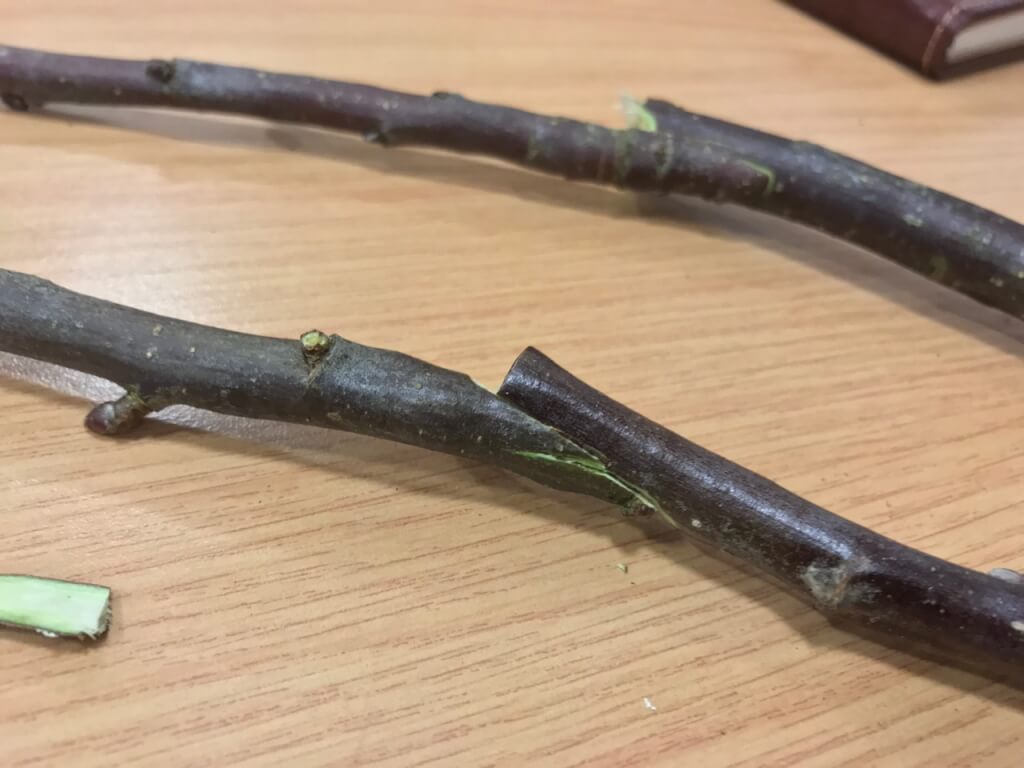
It goes without saying that care and caution are required when handling sharp knives. The technique involves making a small slice onto the wood and then pulling in a quick slick motion downwards to create a clean sharp cut. It does take a few goes to get the knack! Once you've joined the two parts you need to quickly bind the graft to ensure that no nasties get into the join such as bacteria or fungus.
We used clear plastic tape to bind the two parts of the graft together. Using a bandaging technique of wrapping the stretchy tape around and around until a tight union was achieved. Then tying a double knot to both ends of the tape to secure it.
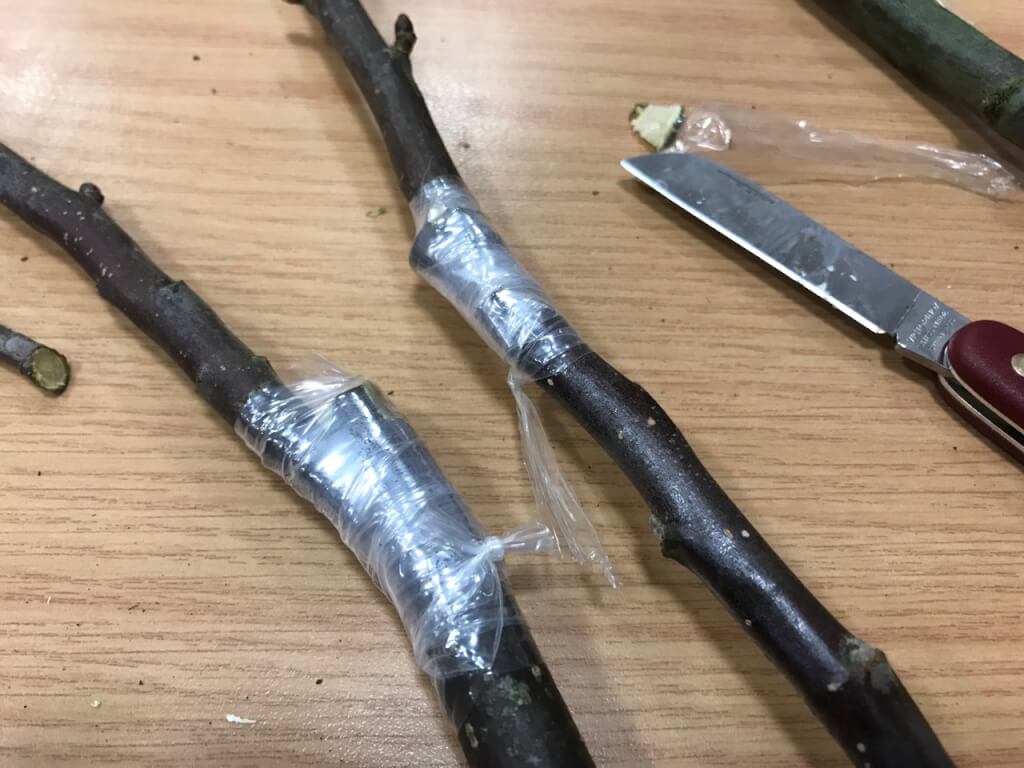
These were then coated with a molten green wax to completely seal the join and the graft. Peter reassured us that although the Scion was now entirely coated in wax, as soon as the plant grows and the buds swell they will break through the wax no problem.
We made sure we had tagged our grafts with the species and cultivar to ensure we knew which was which. Then our grafts were complete and ready for planting. Make sure you keep your bare roots moist, if they dry out completely they will die. If you want to know more about bare roots why not watch my guide below to get the basics.
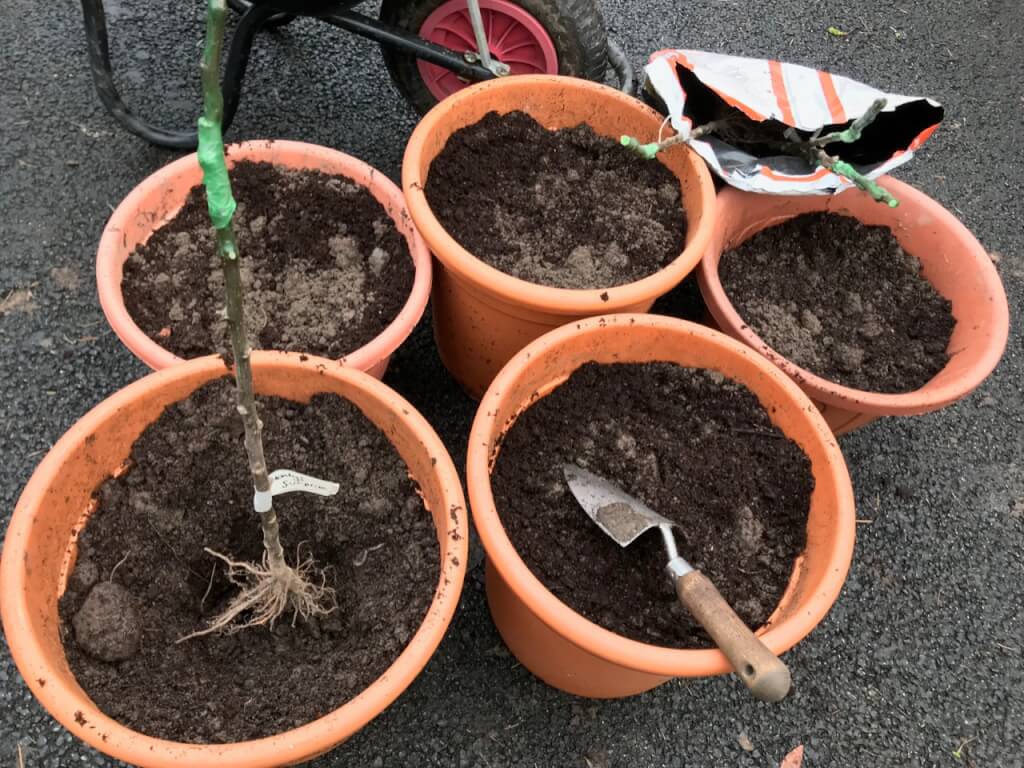
You are always going to be rolling the dice a bit with tree graft success rates. Some will take others simply won't. The best means of giving them a good start is to plant them as soon as possible so the rootstock doesn't dry out. Ideally planting them in the ground gives them the room they need to really start sending out roots. However, planting them in a medium-sized container is also ideal. Especially given some may not take it stops you having to dig up your garden before seeing if they have grafted. The video below shows me potting on the tree grafts and explains a bit more about them.
I prefer to pot them into medium 15-litre pots or equivalent. That way I can carefully control their water levels and position them somewhere out of exposure to give them the best start. I use a mix of 50% compost 50% topsoil. The compost is not there for nutrients but for water retention. The main killer of bare root stock is dehydration.
So you need to make sure it is well watered, by adding compost it helps retain more moisture whilst the grafts are taking. You know it has taken when buds or apical growth at the very top starts to show. If so, congratulations your graft has worked!
Once you have about 18 inch or 46cm of new growth at the top of the graft you can then untie and carefully release the tape around the Scion. This will then prevent any abnormalities in the overall stem growth such as thin growth around the graft. You will need to stake the new tree and be careful as the graft site will always be the point of weakness. Which is why a solid clean graft is always required.
Another top tip is to stake it with a cane higher than the top growth. The reason for this is birds have a habit of perching on grafted trees and their weight can snap and damage the graft. If you use a taller cane the likelihood is they will perch on this instead!
Here's a very quick guide to apple tree rootstocks and the eventual height of the tree once grafted.
M27 - V. Small 1-2m eventual height - Great for pots or patios, always keep staked
M9 - Small 1.8-2.5m eventual height -Very productive, always keep staked
M26 /MM11 / M9- Medium 2-3mt eventual height - Good for bushes or cordons, can be trained as a medium-sized tree
MM106 - Large 2.5-4.5m eventual height - Good sizes tree apple, more drought tolerant due to larger rootstock, fruiting after 3-4 years
MM111 / M25- Large full sized 5m eventual height - Full sized apple tree, drought tolerant and fruits after 4-5 years. Maximum yield.
So it's now May, a mere 4 months since I first grafted these trees back in early February. The buds on the scion started to swell a few weeks back and now we have some leaves starting to emerge! This really is the most exciting part of tree grafting and plant propagation; seeing the fruits of your labour!
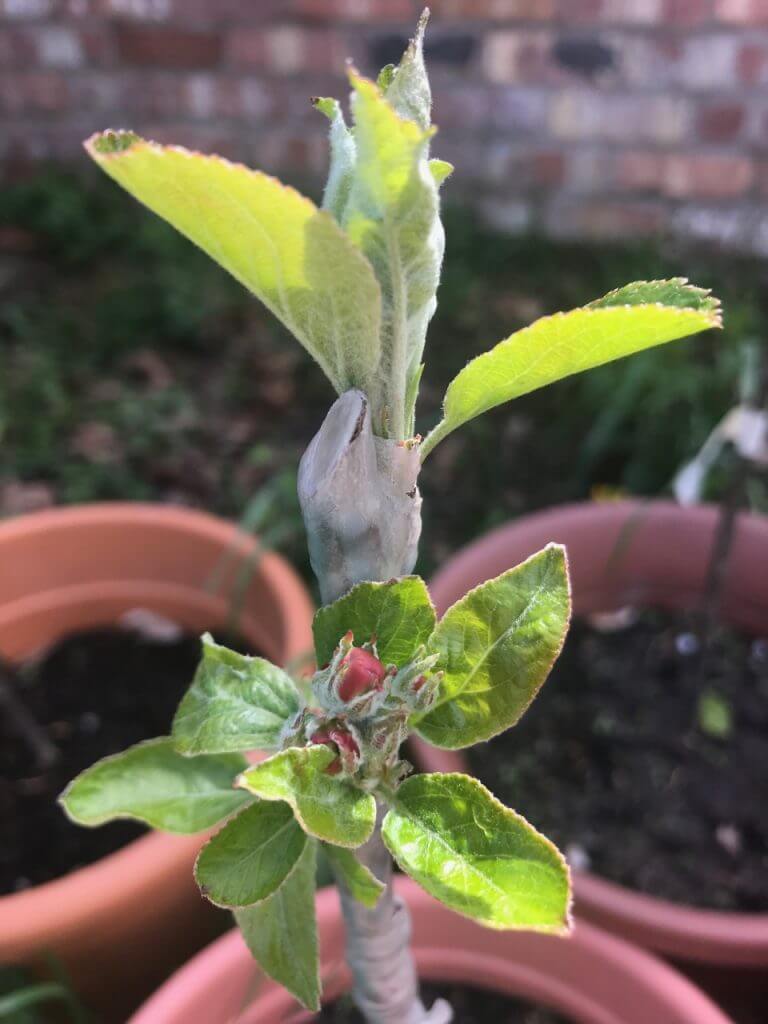
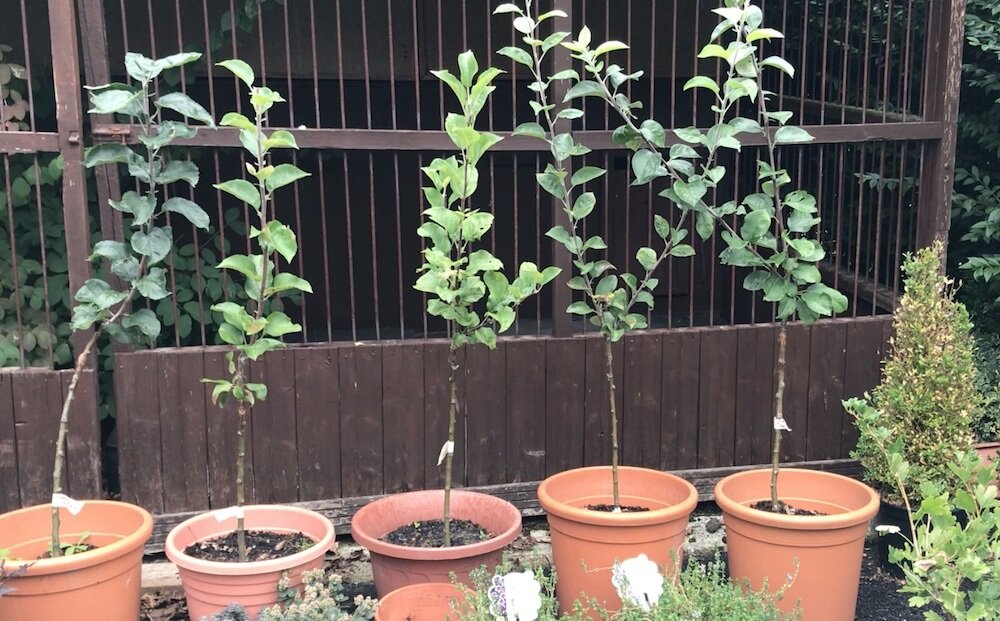
My mini Orchard starts to take shape above!
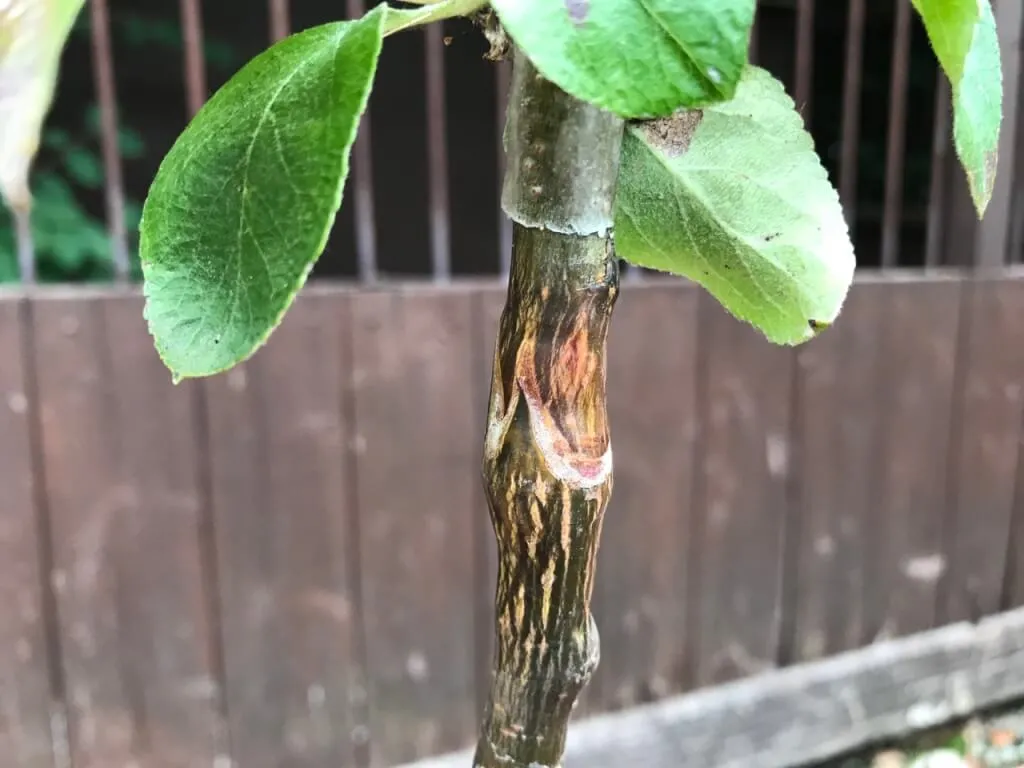
Once they were unwrapped the scars from the joins can be seen and are super clean. This goes to show how careful preparation can result in a neat uniform graft of the tree.
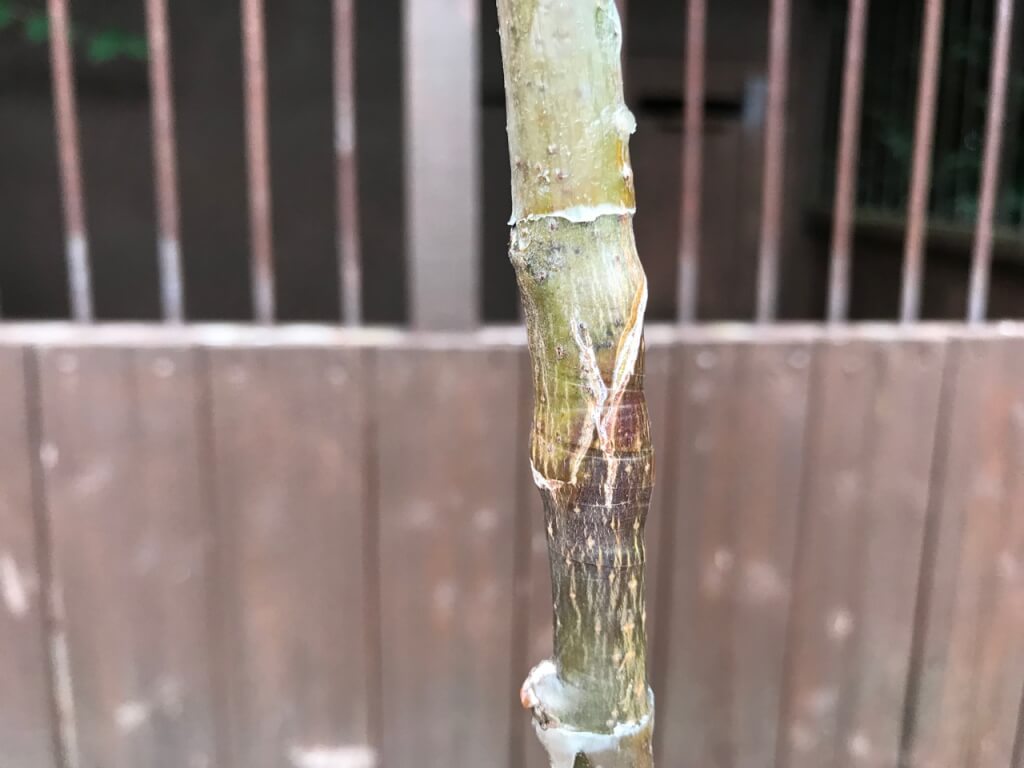
Over time this will fade and become near invisible.
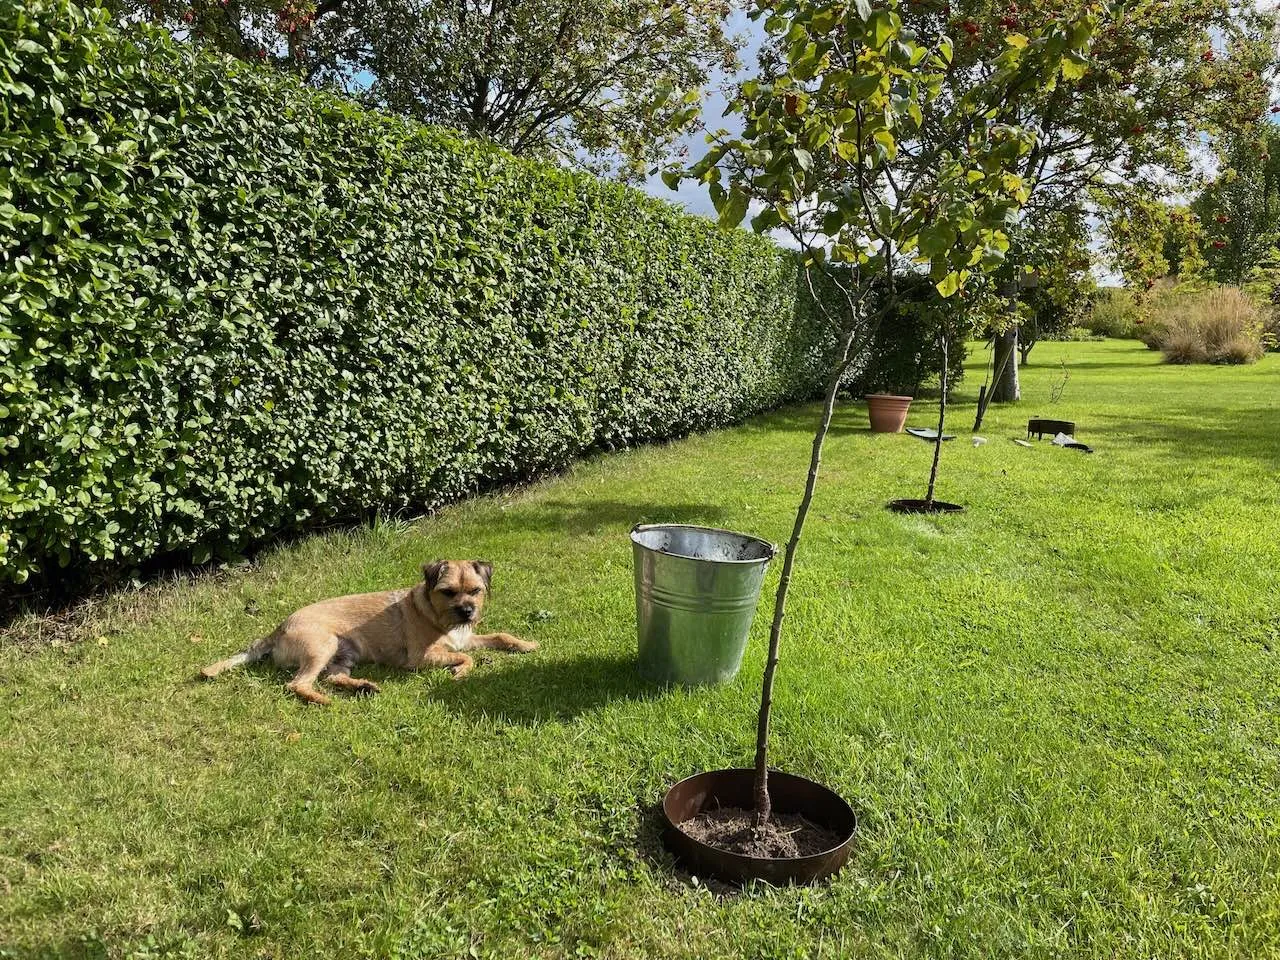
In March 2019 I finally planted out my grafted fruit trees in the orchard next to the Exploding Atom Garden. With all 5 taking quite happily. You can see below them in situ. I have however had to use an innovative foil wrap to prevent rabbits from nibbling the bark! I've also staked the fruit trees to protect them from the exposure.
I'll be posting more about the grafted fruit trees so make sure you check back on my blog and Youtube Vlog for more updates on Garden Ninjas Apple grafting!
Happy Grafting!


JOIN THE NINJAS
Join our Ninja community for extra guides & Discount Codes for Online Garden Courses!

 To my YouTube channel
Apparently, grafting pliers can make the cutting much easier — someone recommended an Italian make which I can’t remember but a search on Amazon brings up quite a few choices.
Apparently, grafting pliers can make the cutting much easier — someone recommended an Italian make which I can’t remember but a search on Amazon brings up quite a few choices.
Hey Jake. I’ve seen those grafting pliers. They look really innovative. However I really wanted to learn the old fashioned way. Fingers crossed my grafted trees take! Have you grafted anything? Lee