Pleached Trees; planting and support guide
 Lee Burkhill: Award Winning Designer & BBC 1's Garden Rescue Presenters Official Blog

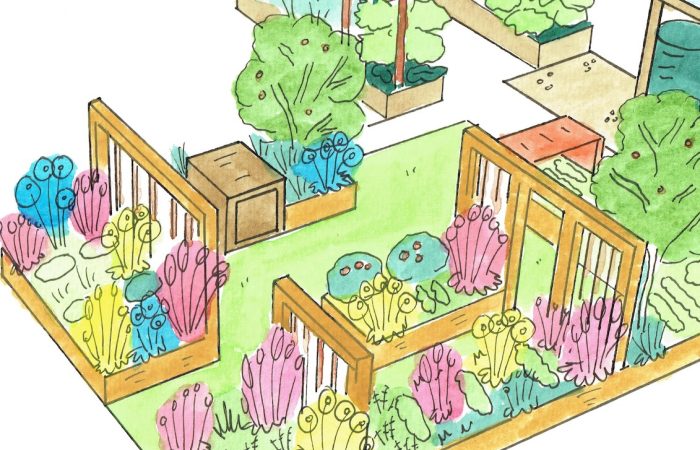
As a garden designer, who specialises in awkward and overlooked gardens, I use pleached trees a lot in my designs. This is not because I'm lazy with my tree choice but because they really do offer a host of benefits to a small garden. Whether it's politely blocking out nosey neighbours, adding some contemporary drama or making the most of the space underneath them, pleached trees can bring the wow factor to any garden.
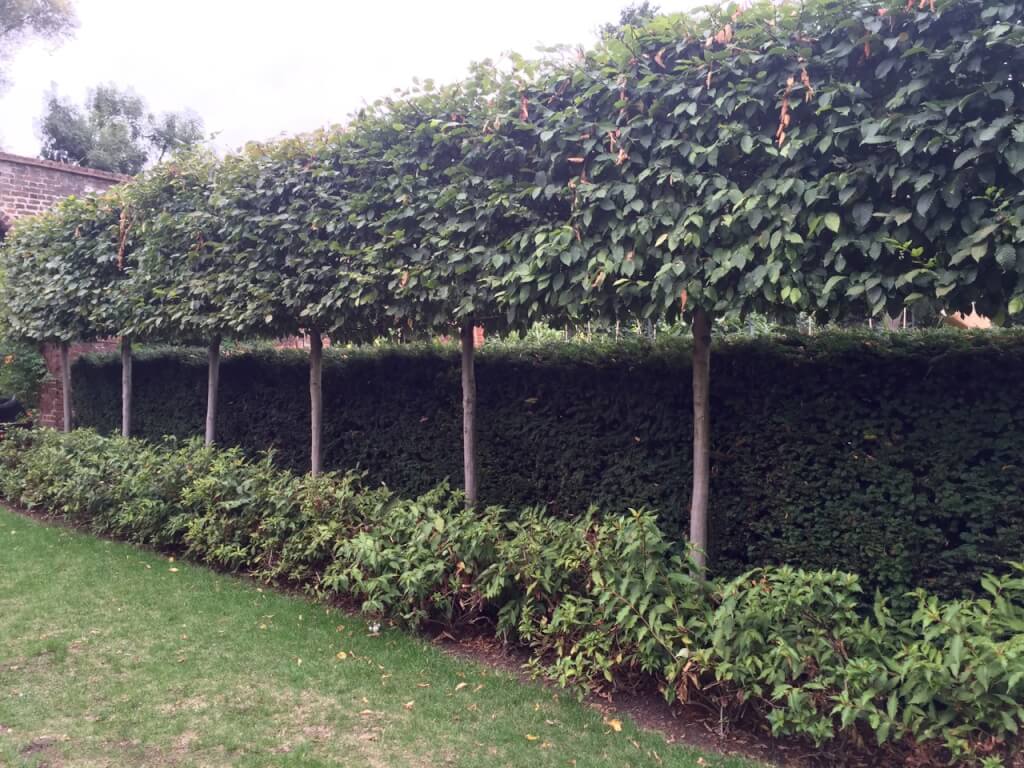
Pleached trees offer privacy and year-round interest in a garden, leaving space underneath for planting. Great for small gardens!
However, they are a bit of a diva when it comes to planting and staking. I think this is where most people get out of pleached trees and topiary. If you don't take the time to prepare them correctly your design concept will fall short. Badly supported or incorrectly planted trees mean you could be left with wonky donkey leaning trees. Don't be put off, a small amount of time in the preparation of your pleached tree planting will ensure years of beautiful symmetrical planting.
A pleached tree is achieved by training a tree to a specific, usually rectangular or square, shape. Think of a cartoon or Lego square tree! The tree is allowed to grow on a main stem or trunk, with any lateral (side shoots) branches being removed before it reaches its ultimate height. Then, the laterals are allowed to grow out. The branches and subsequent laterals are tied onto a stable framework. Any branches that grow outside of this or contrary to the shape are pruned out before they turn woody. Keeping a really neat shape or habit. After a couple of years, you end up with a beautiful formal shape, a bit like a screen on a stem.
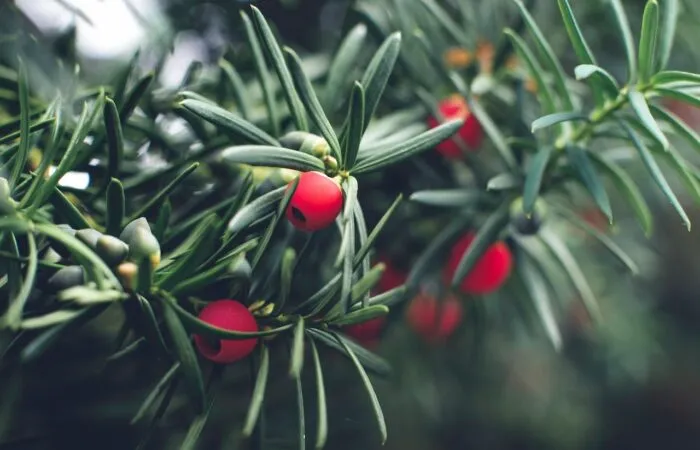
Pleached trees come in a number of species, and there's plenty of variety to choose from. The most common varieties are:

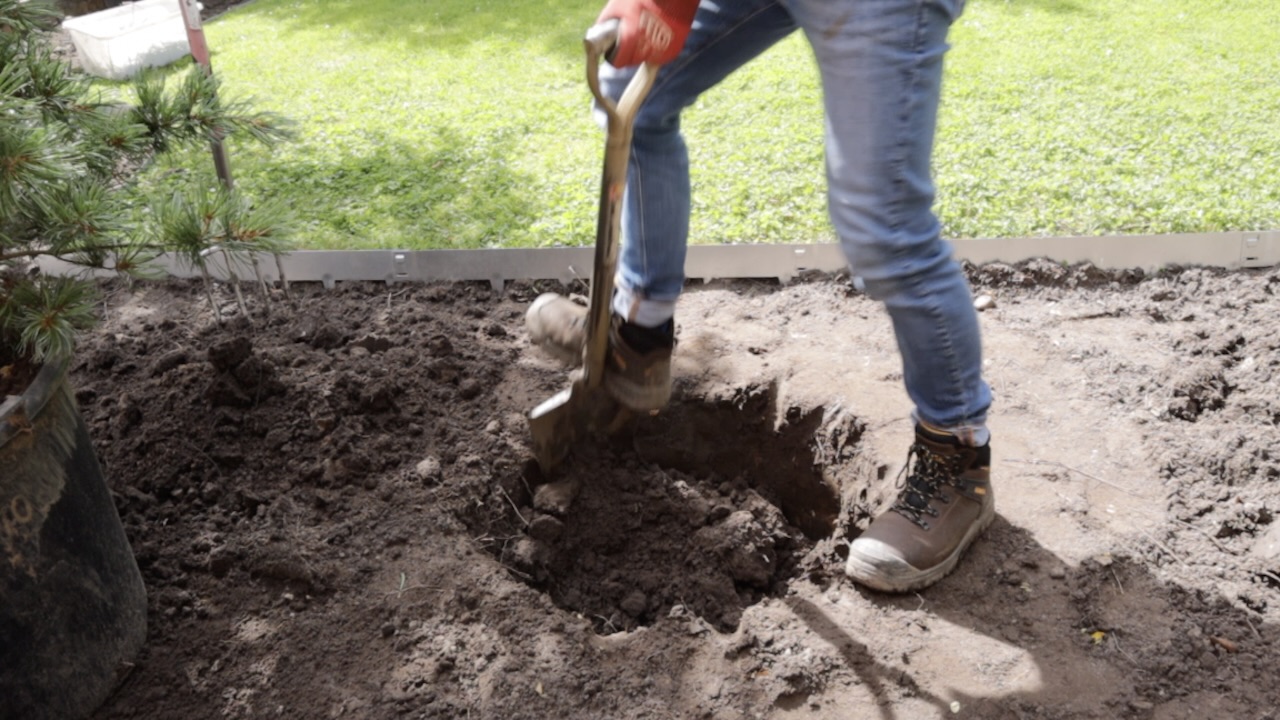
Pleached trees are planted in the same fashion as any container-grown plant, and the staking differs significantly. First things first, though!
Loosen the soil in the base and around the sides of the dug hole and remove any debris from it. Work over the ground so it is broken up and will allow water to drain from it. Avoid adding compost or plant feed at this stage as it will simply slow down the rooting of the tree. If need be you can add mycorrhizal fungi to help root development.
Carefully lean the pleached tree on the inside, taking care that the frame is not damaged or bearing all of the weight on the ground. If need be, get a friend or partner to hold the canopy while you loosen the pot. Sometimes pleached trees are braced and stapled into the pot which needs removing first, this can sometimes be really delicate work!
Make adjustments by adding/removing soil until the tree is level and true - sometimes, it's easier to have a friend help with the viewpoint when you adjust it. Keep standing back to make sure the top and sides of the frame are level. Nobody wants wonky pleached tree frames!
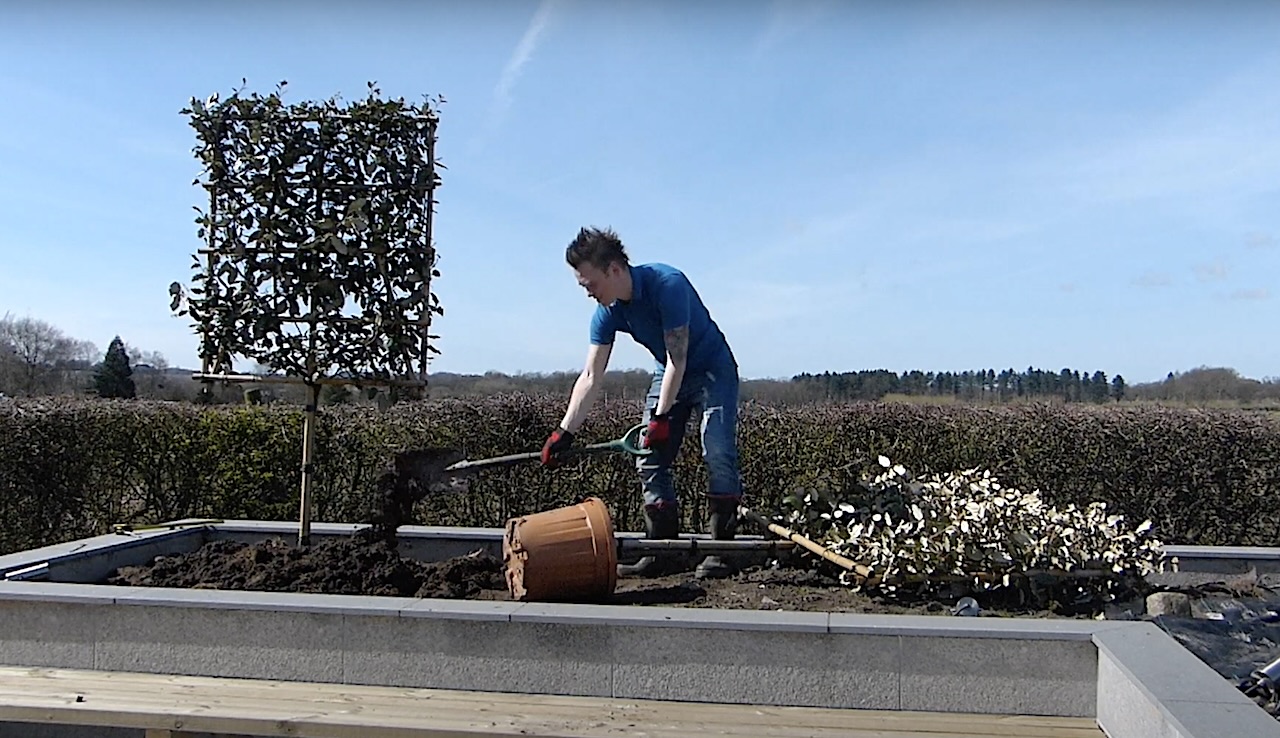
Backfill with the same soil - there is no need to add fertiliser or compost as this will just stunt initial root growth, which is needed for the tree to anchor itself over the next few years
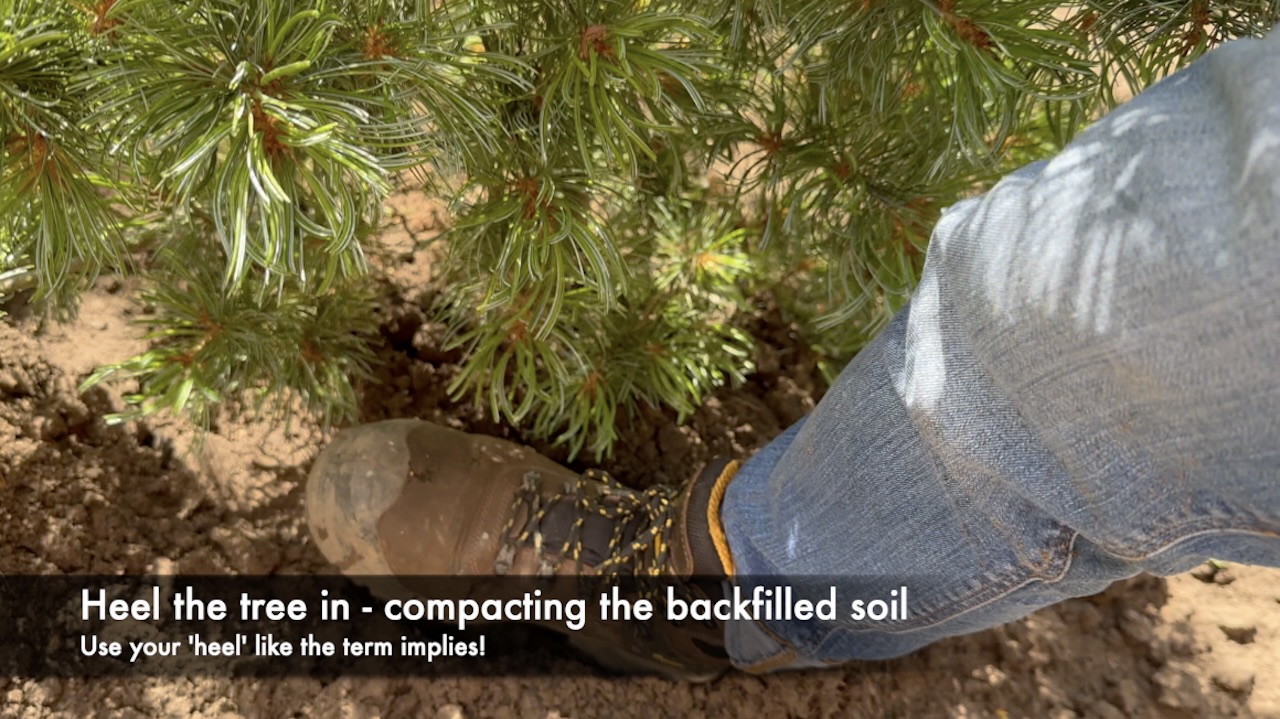
Press down around the base of the tree and surrounding soil using your heel. This is known as heeling in. It helps to ensure the tree is firmly planted and won't blow over. Heel towards the trunk, pushing away from the tree. If you fail to backfill and compress properly, the tree will suffer from settlement, wind rock or failure to establish its root system.
See below for detailed instructions on how to brace and support your pleached trees.
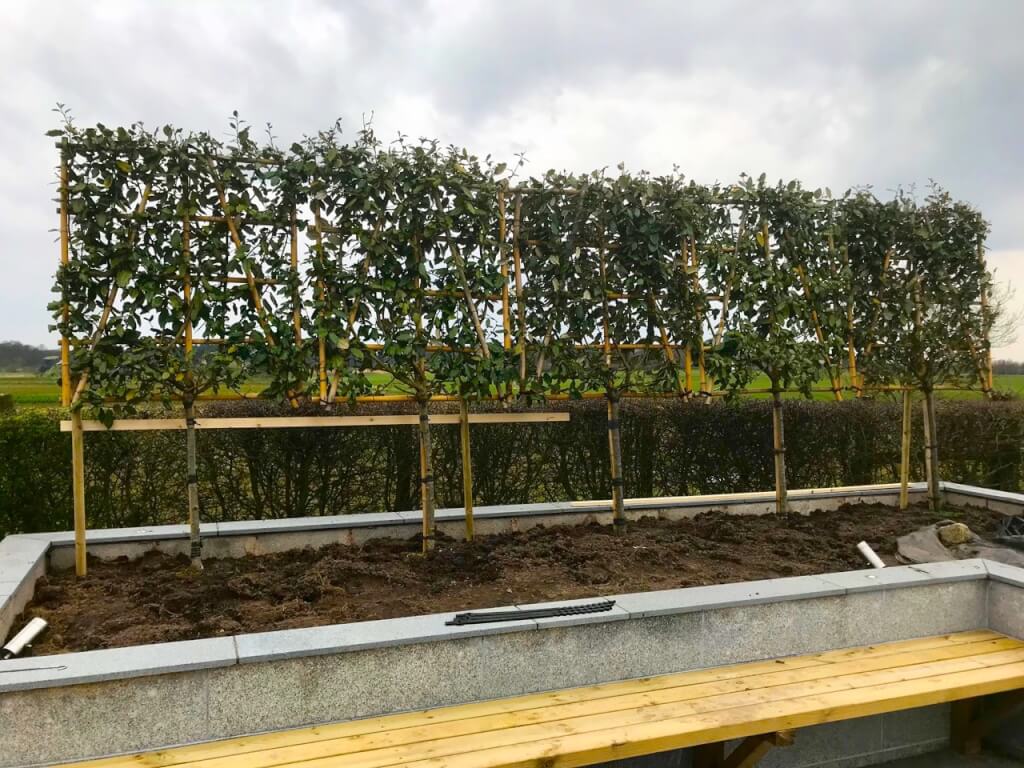
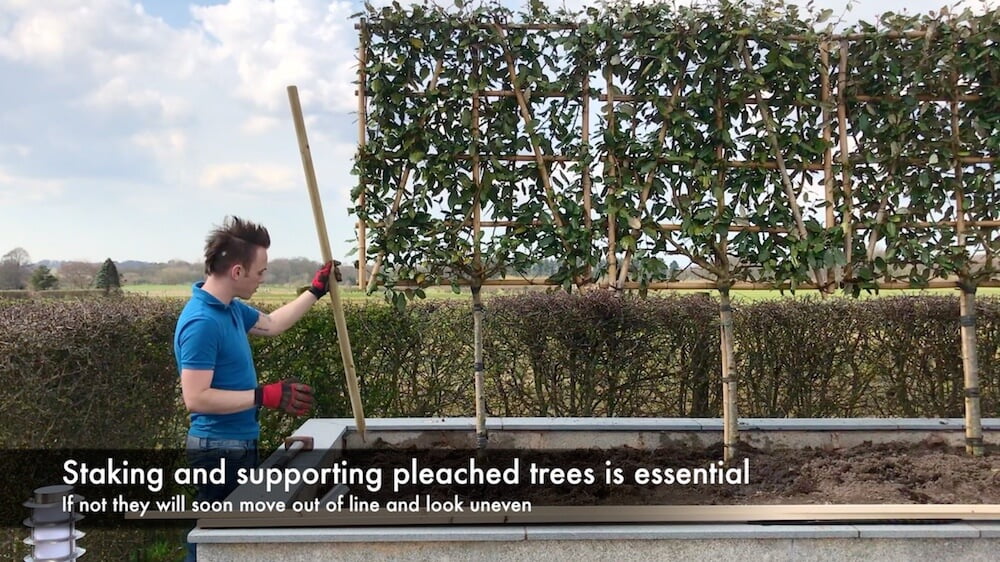
Making a frame for the pleached trees is necessary to ensure that they don't move or migrate over time. This happens particularly in exposed sites or where the soil may settle if air pockets give way. This is usually, if not completely, backfilled.
By creating a frame, you can ensure that the trees stay true to their clean lines and are stable as they are established in your garden or flower beds.
A solid framework for Pleached trees is essential to keep their uniformity.
The best method I have found over the years is to use a mix of fence post stakes and pressure-treated timber batons. I try to design my frame to be of minimal visual impact and try and mirror the positions of the tree trunks so it doesn't distract from the beauty of the trees. Obviously, it depends on the site, whether stakes can be placed where you want them, etc.! So don't beat yourself up if it's not perfectly symmetrical.
The key here is to make sure the support is solid and can hold the trees in their desired position.
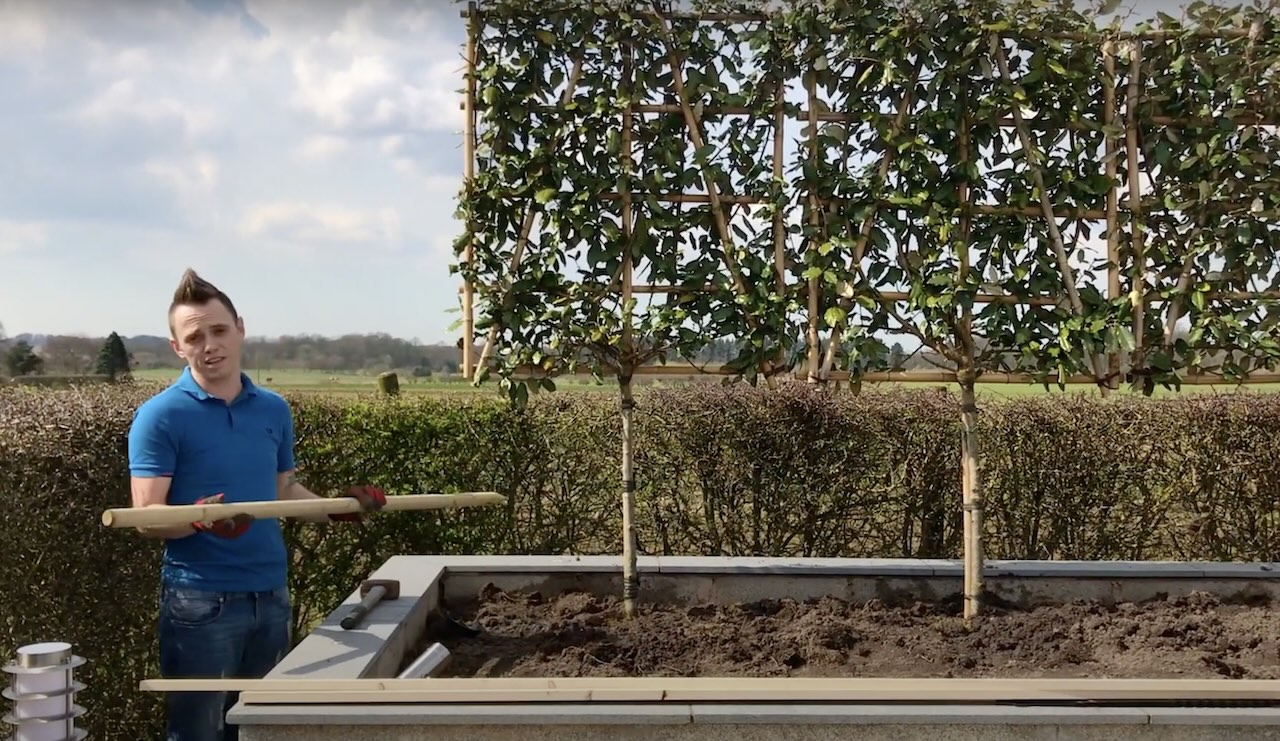
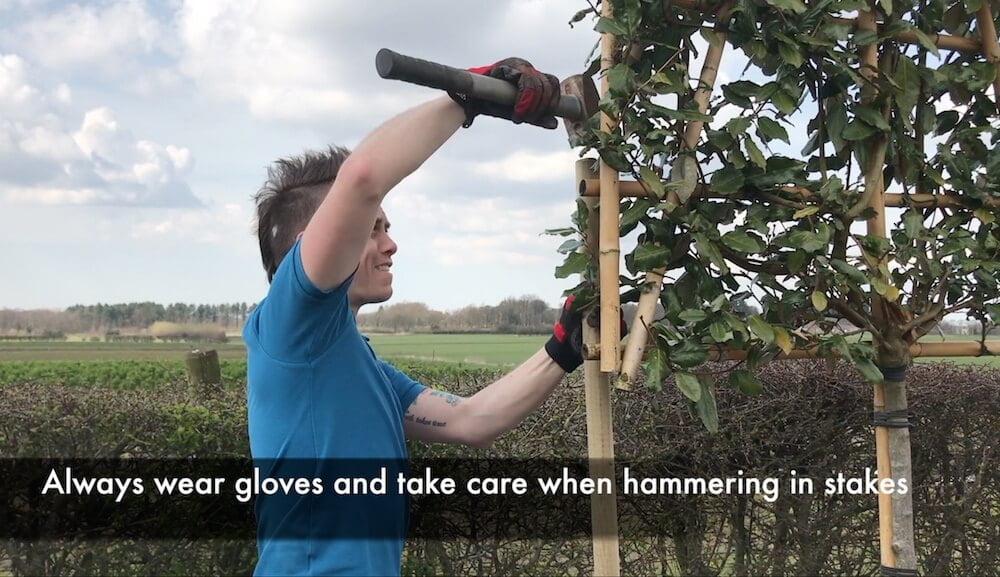
Here, I'm using 2.4m stakes. You want to make sure they are in deep enough, so they don't wobble or move easily. There is no need to concrete them in or anything more drastic. A simple lump hammer should do the trick. I am using 5, given there are 5 pleached trees to support.
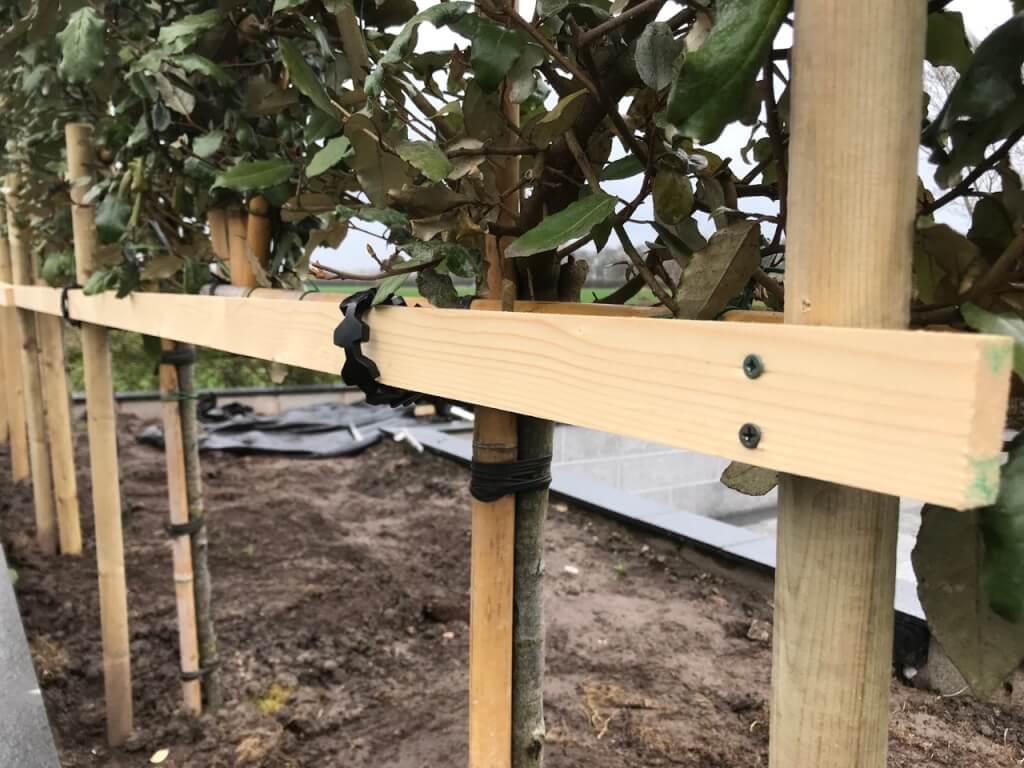
You need to brace the stakes horizontally using a piece of pressure-treated timber. You will need a spirit level, pencil, drill and suitable screws (such as decking screws).
For neatness, you want the brace just below the frame's bottom. This brace holds the stakes together as one unit, meaning that they completely support the trees, giving you a really stable, level frame.
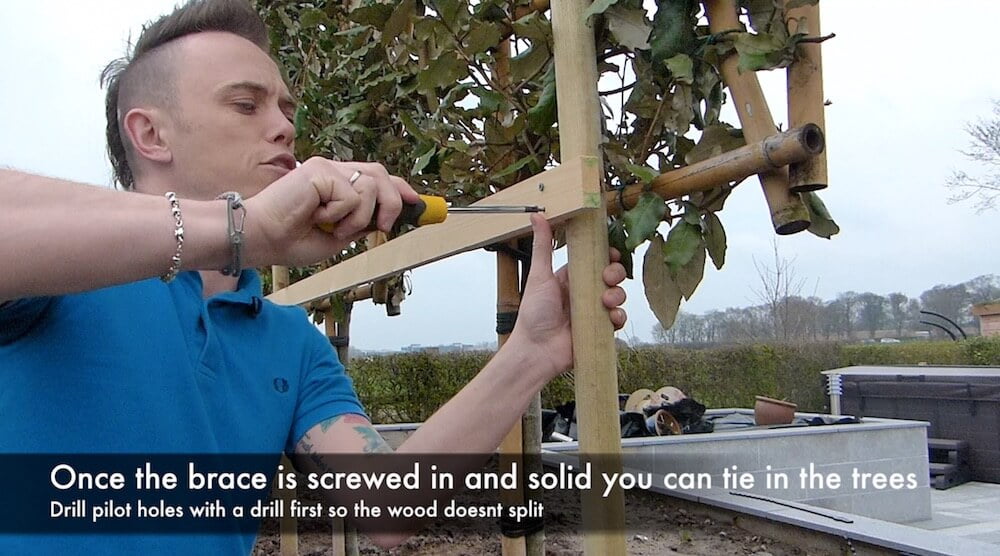
Drill two pilot holes for two screws and then attach the first end of the brace. Then, use the spirit level mark on the other posts at the top of the brace. Drill pilot holes and screw each one in as you have the first. By the end, you will have a horizontal (hence the spirit level) brace across the back of your pleached trees.
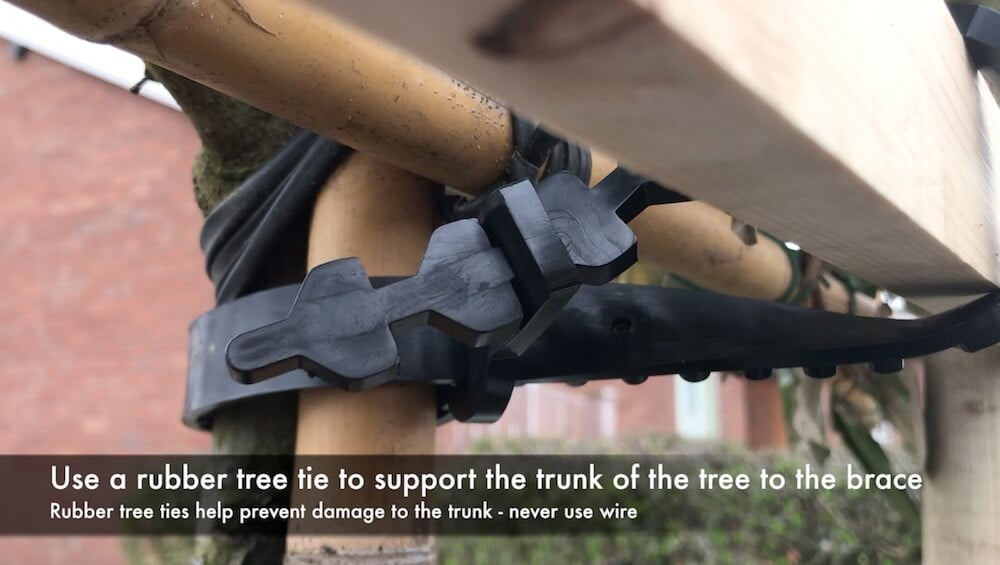
Now, here is the most important tip with any tree supports. You need to use a rubber or flexible tree tie. If you use string, wire or those cable ties you found in the garage, you're going to damage the tree. Potentially killing it over time.
If you look at quality pleached trees, the branches and supports will be tied with rubber strips. This allows movement, flexibility, and growth without cutting into the tree. If the tie cuts into the tree, it can cause irreparable damage to the water and food transport system, the lifeblood of the tree, causing it to die of thirst!
Well, rubber tree ties are great as they allow you to tie the tree, leaving enough flexibility for it to move slightly. You never want a tree to be entirely fixed; any severe wind will certainly damage it. Rubber tree ties also allow you to adjust them over time, usually to loosen them as the tree grows.
There are two parts to a rubber tree tie. The first is the solid loop that goes around the stake or support. Then, at the other length, the one with the slots in. This slotted length goes around the trunk of the tree, and the arrowhead fits back through the slots. You want it tight enough to hold it in place but not so it's strangled. Think as you would if you were tying a formal suit tie.
Once you have tied and supported the pleached trees, you need to give them a really good watering. Ensuring that over the next few weeks, you give them a good soaking at least twice a week, more frequently if the weather is warm and dry. This will help establish them in the ground. Keep checking the trees for any initial movement and tweak the ties if necessary.
With most pleached trees, you're required to prune them twice a year, usually in early spring and then late autumn when they are dormant. As a rule of thumb, I tend to trim off any shoots that grow past the frame or tie them into the frame to cover any gaps that may be there. It's really quite simple! If you need help with pruning I have a really speedy guide below to help.
Pruning or clipping pleached trees is essential to maintain their desired shape and encourage healthy growth. New gardeners can be a bit confused as to how to prune, and clip pleached trees. They need to be cut and maintained just like hedges to keep things simple. So, it usually requires cutting at least twice a year, in spring and autumn, or sometimes a third time if the season's growth is particularly vigorous!
Here's a guide on how and when to prune them:
Prune pleached trees during early spring before the birds nest and then again in autumn time. Which keeps them neat and tidy throughout the year. Avoid pruning during periods of active growth or hot, dry weather, as this can increase the risk of stress and disease.
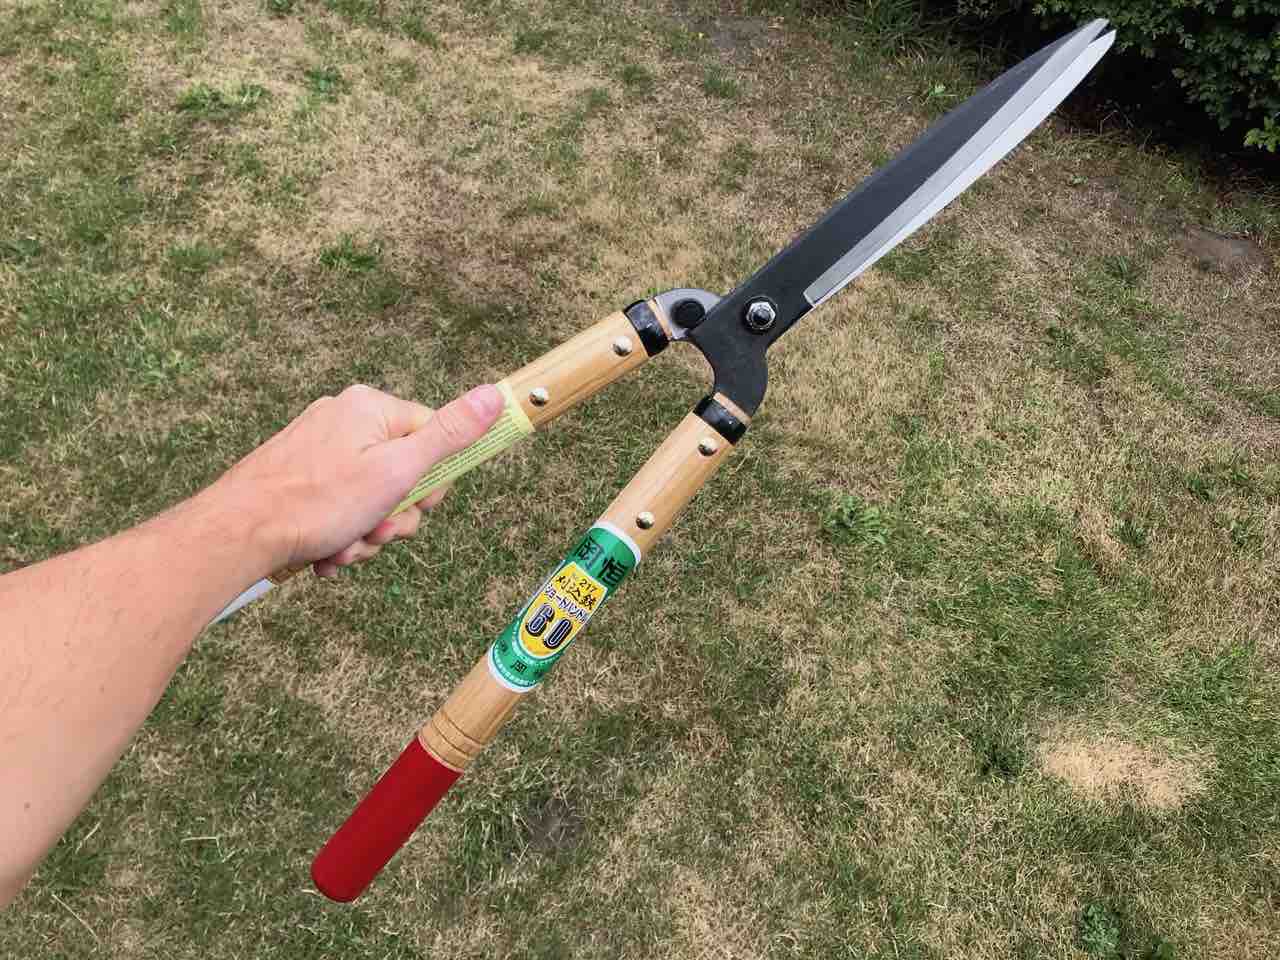
Use sharp, clean pruning tools such as hand pruners, loppers, and pruning saws to make clean cuts and minimize damage to the tree. Always ensure the tools are sterilised before use. Disinfect tools between cuts, especially when pruning multiple trees, to prevent the spread of diseases.
First, remove any dead, damaged, or diseased branches. Cut back to healthy tissue or the nearest lateral branch. Thin out overcrowded or crossing branches to improve air circulation and light penetration throughout the canopy. This helps prevent disease and encourages even growth. Trim back new growth to maintain the desired shape and size of the pleached frame. Focus on removing any vertical shoots that disrupt the horizontal structure.
If necessary, lightly trim the sides and top of the pleached frame to maintain a tidy appearance and encourage lateral branching. This keeps the pleached tree square. Avoid cutting into too much old wood or removing too much foliage at once, as this can weaken the tree and compromise its health.
Regularly inspect pleached trees throughout the growing season for any signs of damage, disease, or unwanted growth. Perform light pruning as needed to maintain the shape and size of the pleached frame. This may include removing stray shoots or correcting minor asymmetries, especially if water shoots or shoots further down the clear stem emerge. Nip these off with secateurs.
Monitor the trees for pests such as aphids, scale insects, or caterpillars and take appropriate measures to control infestations if necessary. Consider fertilizing pleached trees in spring or early summer to promote healthy growth and vigour. The best homemade organic plant feed is comfrey tea or peat-free compost.
Sometimes, no matter how diligent you are, your pleached trees may suffer from some problems or pests. If caught quickly, most of them can be rectified. Let me detail the common problems you may face with pleached trees. Problems with pleached trees can include pests, diseases, and environmental stressors. Here's a list of some common issues and their treatments:
Aphids: These small insects feed on sap, causing leaves to curl and distort. Treat with insecticidal soap or horticultural oil.
Scale Insects: Scale insects can infest branches and leaves, sucking sap and causing yellowing or wilting. Apply insecticidal oil or systemic insecticides.
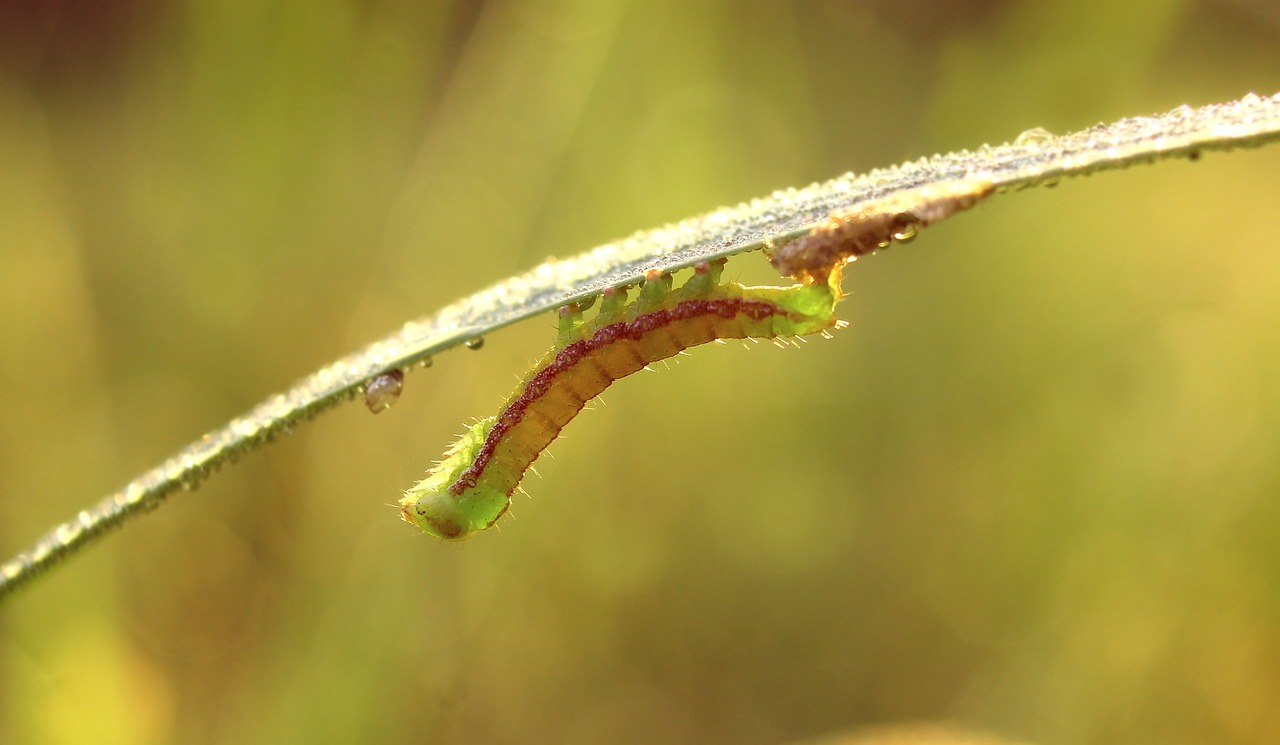
Caterpillars: Caterpillars may chew on leaves, leading to defoliation. Handpick caterpillars when feasible or use Bacillus thuringiensis (Bt) insecticide.
Powdery Mildew: Powdery mildew appears as a white, powdery coating on leaves and stems. Improve air circulation and apply fungicidal sprays containing sulfur or potassium bicarbonate.
Leaf Spot: Leaf spot diseases cause dark spots or lesions on leaves. Prune and dispose of infected foliage, and apply fungicidal sprays if necessary.
Anthracnose: Anthracnose can cause dieback and leaf blight. Prune affected branches and improve air circulation to reduce humidity levels.
Drought Stress: Adequately water pleached trees during dry periods to prevent drought stress. Apply mulch around the base of the trees to retain soil moisture.
Frost Damage: Protect pleached trees from frost damage by covering them with frost cloth or burlap during cold snaps.
Root Compaction: Avoid compacting the soil around pleached trees, as this can restrict root growth and lead to nutrient deficiencies. Use mulch and avoid heavy foot traffic around the root zone.
Wind rock or root lift: Usually when a tree hasn't been heeled in or braced correctly. Reheel it in and provide support if the tree becomes unrooted ASAP.
Nitrogen Deficiency: Symptoms include yellowing leaves and stunted growth. Apply a balanced fertilizer containing nitrogen to correct deficiencies.
Iron Deficiency (Chlorosis): Leaves may turn yellow or pale due to iron deficiency. Treat with iron chelate or iron sulfate, applied as a foliar spray or soil drench.
So there you have it, a comprehensive guide to planting and supporting pleached trees. Pleached trees are a versatile and space-efficient addition to any garden, offering both practical and aesthetic benefits. Their vertical growth habit makes them ideal for small or urban gardens where ground space is limited while also providing effective privacy screening and noise reduction from neighbouring properties or roads.
With their formal and elegant appearance, pleached trees add structure and sophistication to garden borders giving a super modern look to your design. They offer year-round interest, from lush foliage in spring and summer to colourful autumn displays and architectural winter silhouettes.
Pleached trees can also be tailored to suit different design styles and preferences, making them a versatile choice for various garden settings. Additionally, when strategically positioned, they can provide shade during hot summer months while allowing sunlight to filter through in winter, optimizing garden microclimates.
Please comment below if you have any questions or on my YouTube channel for more help. I'd also love to see pictures where you have used pleached trees in your own gardening!
If you're a fan of pleached trees then why not Tweet, Facebook or Instagram me with your pictures? You can also follow me on Youtube where I’ve got plenty of garden guide vlogs.
Happy Gardening.


JOIN THE NINJAS
Join our Ninja community for extra guides & Discount Codes for Online Garden Courses!

 To my YouTube channel
We are buying 6 pleached beach trees for screening cover in our garden. We have our house on the market at present to sell. So we will be putting them for now into large pots. What will be the best way of securing /staking them until we move?
Hi Robert, Great to hear from you. I would still stake them with a brace of some description or they will blow over. If you can fix this brace to a fence or wall that would be best if you’re then going to move them again. Failing that I’ve used elasticated strapping (the ones with hooks on the end) to keep them tied to a fence before I’ve moved them. Hope that helps! Happy Gardening.
Hi there, we are thinking of getting some pleached trees for our back garden as it is very overlooked by our neighbors. I think we will need about 12.
Please can you advise how far out from a fence pleached trees should be planted? Thank you
Hi Christine. Great to hear from you. I’d always advise that a foot or 50cm is about right. This means you can trim the back and there’s some airflow. Too close and you can’t clip and you may end up with issues as airflow helps keep plants healthy. If they’re too crammed things like fungus or pests can take over for example. Hope that helps!
Hi,
My pleache’d trees have been in the ground three years now and have good growth but at what point ,if any, do I loosen or remove the trunk ties for the supporting canes?
Hi
We are looking at 6 pleached evergreen for privacy at the side where we border neighbours but the wind can be quite strong as it whips between the houses. 1.8m stem and 1m frame can you please advise which would be most suitable.
Thank you
Hello,
We have removed 2 large llalandii from our back garden and now need to replant with something to hide the overlook from neighbours. I love the look of pleached trees but with the previous stumps we can’t plant new trees closer than 2m, preventing the pleached frame from meeting and leaving a gap. Will the pleached trees ever grow across the gap or is it better to plant a traditional tree instead and just wait for it grow tall enough?
Thanks
Hi – I’m considering using pleached trees in my front garden to screen people looking into our house. I have a 4.4m fence that the trees would screen above, so don’t know if I’d need 3 or 4 trees. What would you advise? The trees I’ve seen have 1.2m screens, so how close do you plant them to each other? Is it OK to overlap them? And how far do the grow sideways? Or is the idea to always keep them the same width as the screen? Great advice about framing them too – I will definitely do this!
Hi
Would you use an electric or battery operated hedge trimmer to prune pleached trees or prune by hand using shears?
Is there plant food I can buy to help growth?
Hi Michelle, The best way you can help plants and trees grow strong is by using a decent compost mulch placed directly on the soil. I have an article on that here. Hope that helps. Lee https://www.gardenninja.co.uk/mulching-your-garden/
Hi
We’ve moved into a new house and the developer planted red robin pleached trees but some have died is there any way I can encourage some branches to go across further to the next wooden support. As I think then I’d only need to replace two
Hi Alison, Great to hear from you. To encourage bushy lateral growth you pruning back to the next stet of buds this will encourage more bushy growth. There’s no easy way to make a stem or branch grow longer without some skill and patience. Cutting back to the next set of buds is the easiest way to encourage further growth. Checkout my pruning guide series on Youtube here.Happy Gardening. Lee https://www.youtube.com/playlist?list=PL7HK5RsLCR9crgatYb4LcwE34Om3cKsIO
I am planting hornbeam footballs and want them to grow into a pleached hedge. Any tips.
Hi Katy, Thanks for your comment on pleached trees. If you’re planting root balls you need to make sure that your planting hornbeam standards and not hedging plants. A standard has one main stem. It’s then a case of over years training each shoot at the top into a frame that you would need to build. In all honesty, it would be quicker to buy the pleached trees already established as it is a real skill to achieve. All the best. Lee
Hi Lee
I’d like a pleached hedge but the plants are very expensive. I’ve found some nice pleached apple tress which are about 5 foot high. Will they grow taller over time, or stay the same height.
Thanks for advice. Iris
Hi Iris, It depends on the rootstock. In my experience they won’t grow too vigorously, obviously, it depends on the rootstock they are grafted onto. They are probably pleached more for produce than height or vigour. Happy Gardening. Lee
I’d love to plant some pleached hornbeam or crabapple trees along my back fence. Sadly I don’t have the budget to buy mature pleached trees. Can I buy young trees and train them once they’re in position or do they need to be grafted on smaller rooting stock?
Hi Phillipa, Most pleached trees are grafts to speed up the framing of the pleached tree. Training can take considerable time but if you pick a fast growing tree like beech it can be made simpler! Hope that helps. Happy pleaching. Lee
Hi, we have built a raised bed (2.3m long, 50cm deep and 60cm high) infront of an oil tank which faces lengthways towards our patio. Behind the oil tank there is our side path and then a fence separating us from our neighbours. Unfortunately our neighbours have a bedroom window which looks directly down onto our patio (over the top pf the tank). Given that there is an entrance door into our house by the oil tank, I thought adding pleached trees into the raised bed would be neat and effective for screening. However I am wondering if it is too small an area? The height we need to achieve is 2.7m max. Any larger than that and we will be coming into our bedroom! I have thought of a tree but don’t want one that will cover the path into our door (infront of the raised bed), or interfere with the porch over the door.
If you think pleached would work in that space, can you make any suggestions on which type of pleached trees would suit that size please?
Many thanks 🙂
I have planted some new cherry laurel pleached trees this month (November) and apart from mulching, is there anything I should do to protect the branches from hard frosts or snow?
Hi Lee, This is such a fantastic guide, it’s so useful to have both the video and the step-by-step instructions. Thank you so much for sharing! It’s really great. xx
Thanks Rachel I’m glad my tree guides are so useful! Happy Gardening. Lee