Exploding Atom Garden Part 5: Herbaceous Planting Guide
 Lee Burkhill: Award Winning Designer & BBC 1's Garden Rescue Presenters Official Blog

Now I would usually argue against planting in the middle of a 30-year record heatwave. However, when you've got a hundred or so plants sat waiting to go in, you can't really hold off as they frazzle in the 32-degree heat. So I'm caveating this article that where possible avoid planting in the middle of the scorching midday sun. Though the exception is when that scorching sun lasts for 3 whole weeks!
The Outer rim of the Exploding Atom garden is probably one of my favourite parts of the design. Not because it has the most ridiculous name but it has allowed me to blend wild planting with an opposing design style. Formal and informal design at the same time.
Now I'm about to go all conceptual so get your rose-tinted glasses, incense lit and some Sigur Ros on full blast. Are you ready? Ok, let us conceptualise!
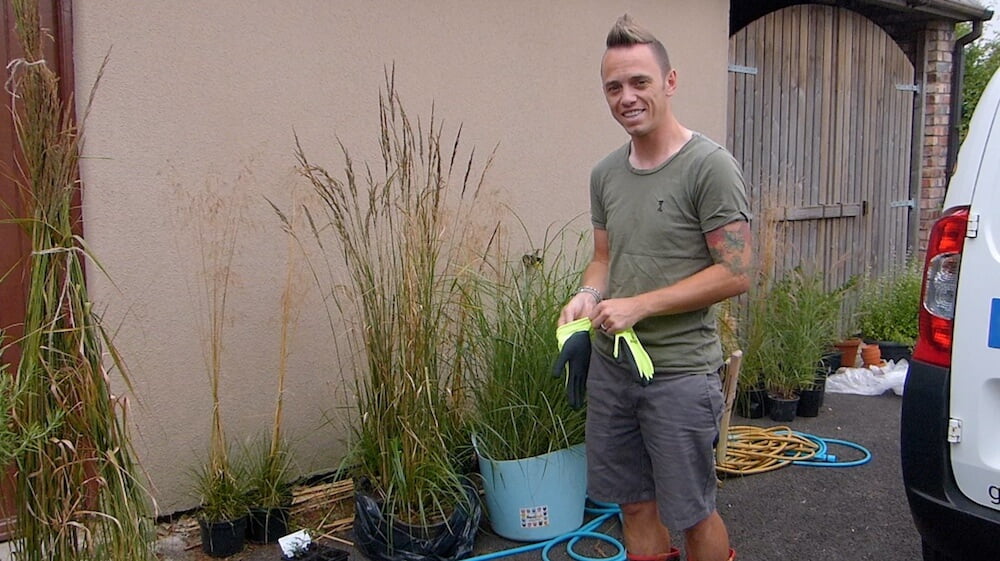
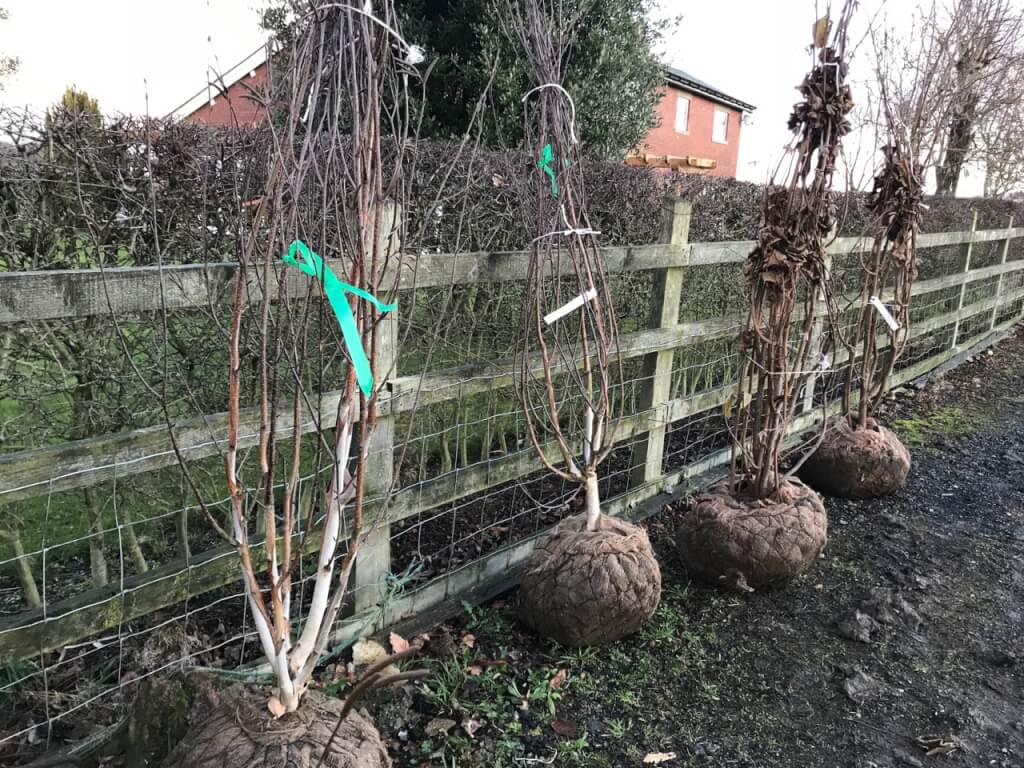
The Outer rim signifies the shards of the Exploding atom. The debris that has been blasted out randomly from its red-hot core. I've interpreted this by using a really loose, wild and slightly chaotic planting palette. Using grasses amongst some shrubs and a stunning multi-stem Betula (White Birch). I want texture, height, drama and most of all winter interest as the plants in the outer rim die back leaving skeleton plant structures.
However, because the layout of the garden is symmetrical and a mirror image, the outer rim beds will mirror each other as you walk between them. Still with me? Brilliant.
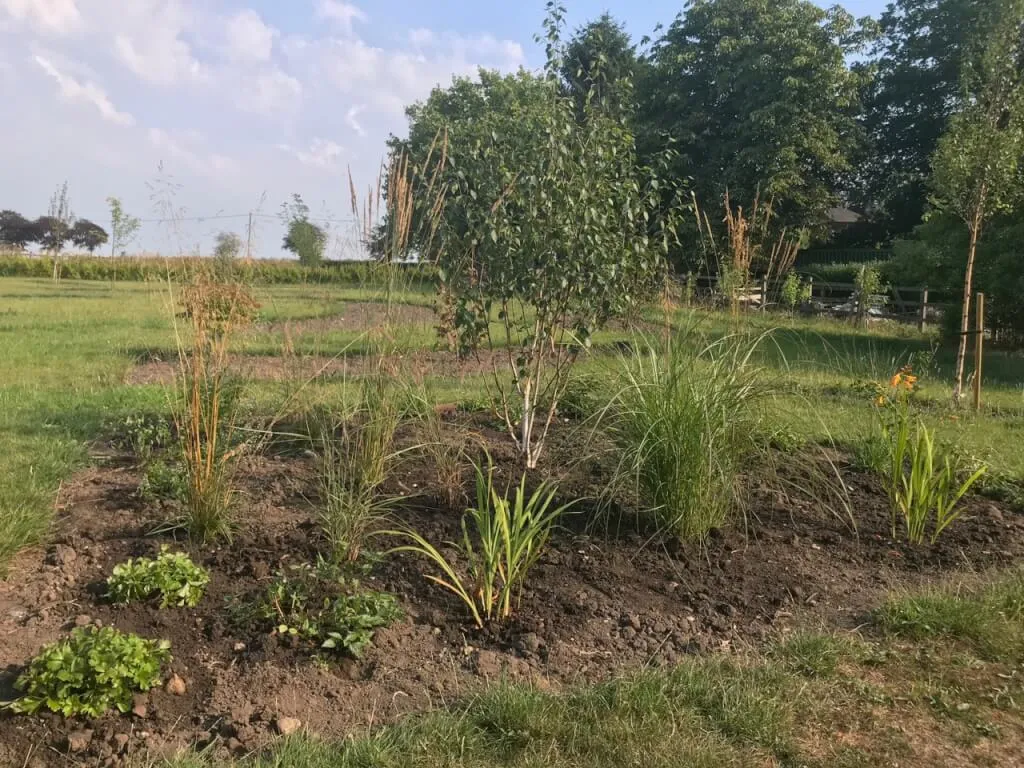
Over time the plants will mesh together forming a mix of heights and textures.
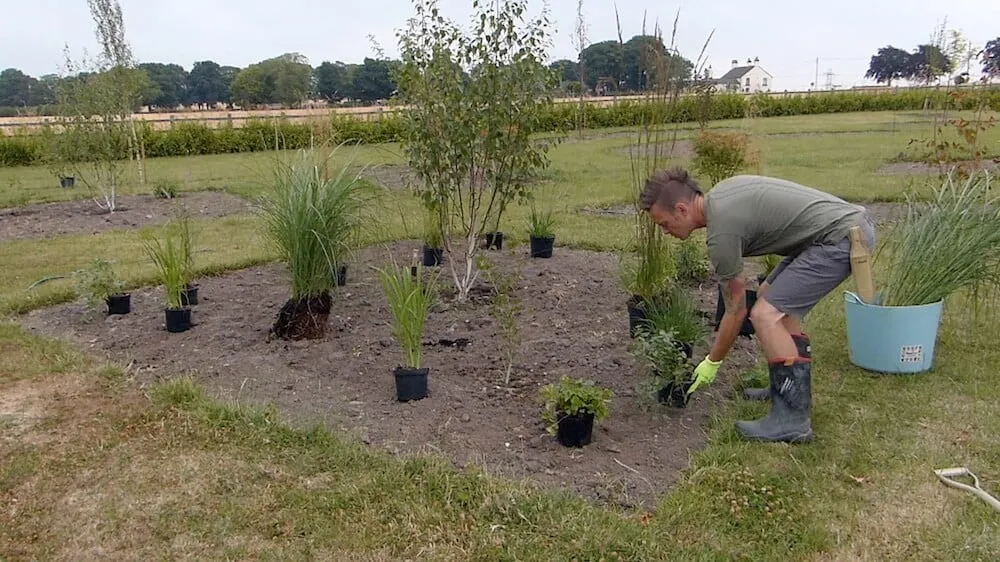
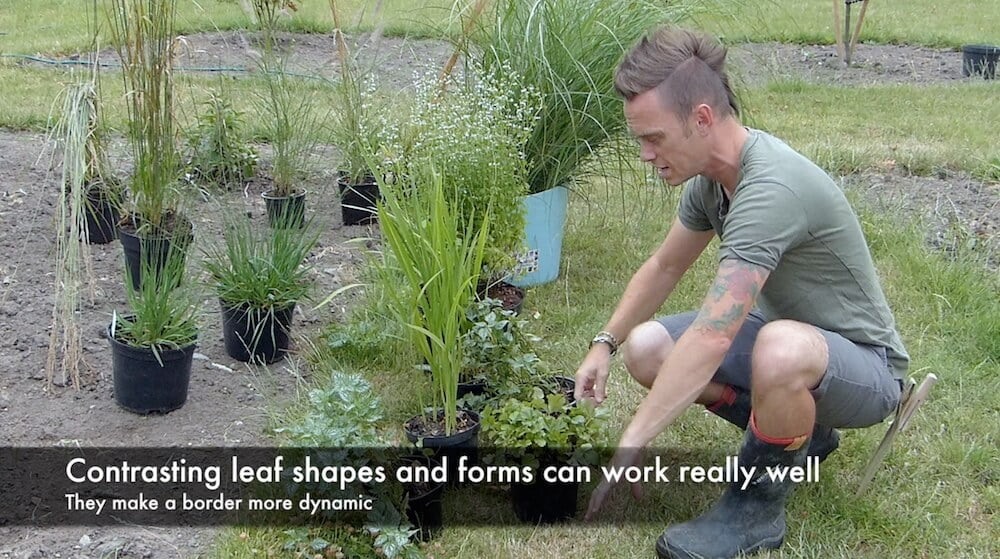
Now you may be looking at the Exploding Atom Garden and thinking that you wouldn't even know where the start with a planting a herbaceous border. So I thought it would be a good time to give you some tips if you're starting a new garden on how to lay out plants for the best result.
See how laying out your plants beforehand above allows you to check and make tweaks?
So no matter what styles of plants and species you are into there are a few universal rules that will get you the best overall look for a border.
I usually go with a smaller ratio of evergreen to herbaceous, such as 1:10. This gives some colour and structure during the winter months and is a food source for birds throughout the year. This means you'll have a garden flower bed that provides much more interest rather than a few months in the summer of flowers.
By layering varied heights in the border in graduation you can slow a visitor down to the garden. This also extends the interest. You don't want a sore next from looking at ground cover one minute and then a 4m high tree the next!
Whilst it may look great at first filling every space, the next year you're going to be thinning and removing plants like nobody's business. So pay close attention to the ultimate plant size. Working out how big, tall and wide your plant specimens will grow in the garden.
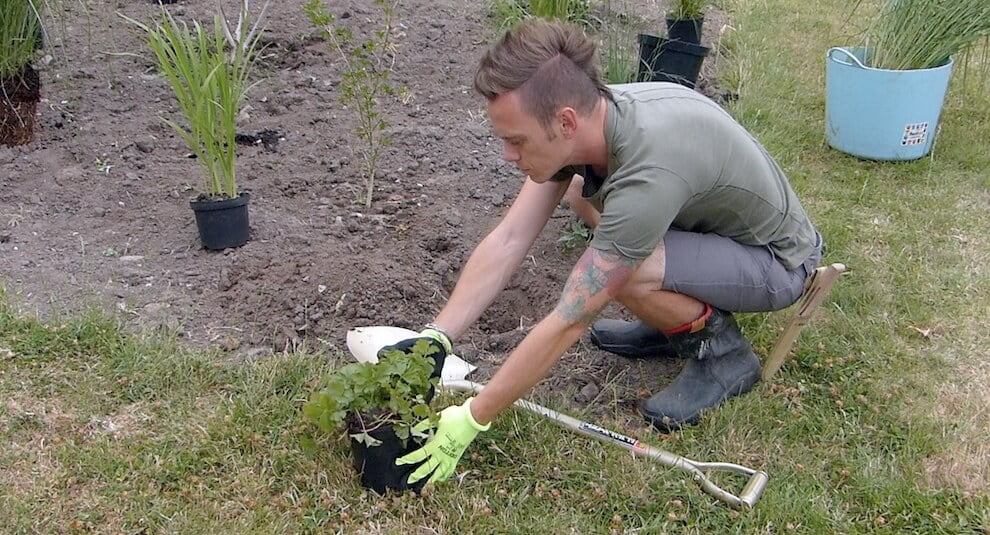
Stand back. Check. Tweak. Make sure the plants look comfortable and you're happy with their positions before digging them in. It's far easier to move them when they're still in pots. You may even want to leave them a few days to check at different times of the day.
Once you're happy with your plant's layout then get planting.
I say this all the time, but it's far easier to do your research on paper before you hit the garden centre. By using a planting plan you can work out what's going where and visualise it beforehand, saving time and money with wasted plants.

Now it may sound obvious to explain plant spacing. However, in the giddiness of getting new plants home, many a gardener will have succumbed to planting with free abandon! Plant spacing is incredibly important for your garden.
By checking the ultimate height and spread (the width) of a plant you can work out how many you will need for your flower beds. Now sometimes I will move plants ever so slightly closer together when I know that certain species will respond well to this, Agapanthus a clear choice for a crushed squeezed environment.
By giving your plants time to breath you can also tweak and prune them as they grow into a shape of your choosing. It also means that watering is easier as you can see where you have or haven't watered.
I also advocate that border plants, the ones that grow or spill near the edges of borders or paths, are placed away from the edge of a border. This again gives the plants time to grow, makes it easier to mow up to the edge and makes for a more relaxed look in the garden. Ignore show gardens and makeover shows where every inch is covered. Gardening is for the long-term and part of the fun is watching plants develop and grow!
Placing border plants away from the edge is a better solution than cramming them in!
So there it is, the outer rim of the Exploding Atom Garden planted and ready to grow. The next stage will be the dark and moody 'Purple Belt' of the garden. Got a question on the Exploding Atom Garden or design in general? Why not Tweet, Facebook or Instagram me! Or you can check out the hashtag #Explodingatomgarden for more.
Catch up by going back to the beginning or other design diaries you may have missed!


JOIN THE NINJAS
Join our Ninja community for extra guides & Discount Codes for Online Garden Courses!


 To my YouTube channel